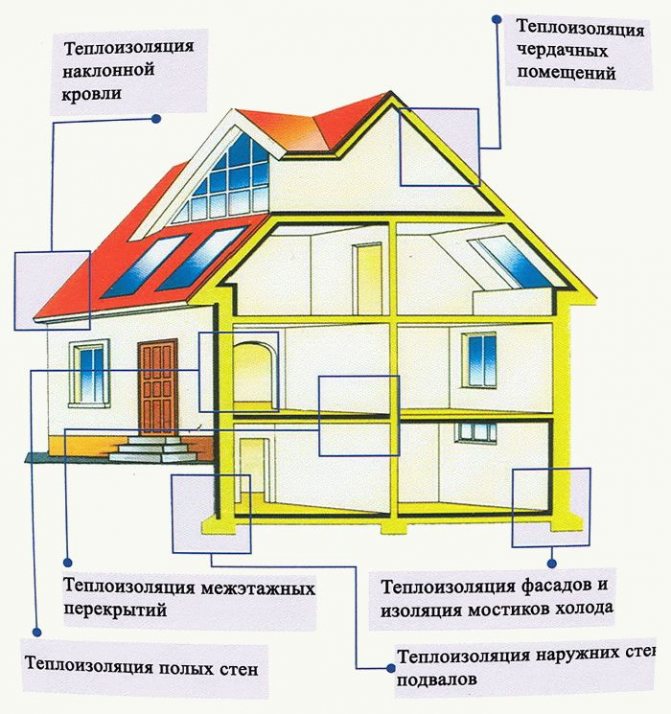
Why thermal insulation is needed and why you shouldn't neglect it
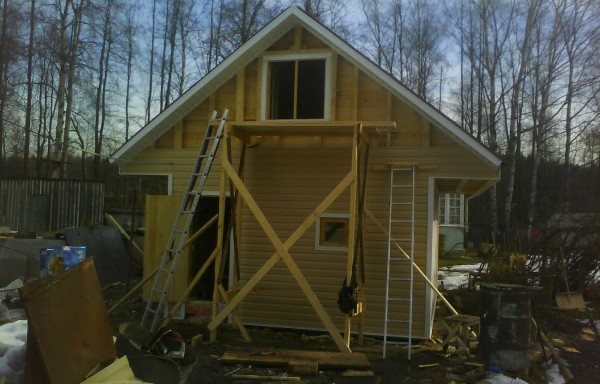
If you have already decided to break away from the bustle of the city and spend the winter time in your own country house, you need to thoroughly prepare it. Installing a heating system should not be the only activity. Good thermal insulation of a country house will help to significantly increase energy efficiency and significantly save on heating. In addition, living in a properly insulated house will be much more comfortable. The absence of drafts and cold walls is also more beneficial to health.

What is better to choose
Basically, the choice comes between two main methods of insulation: external and internal. Ideally, the building should be processed both outside and inside, but in order to save money, you can limit yourself to one thing. The choice largely depends on climatic conditions, existing finishes, the chosen method and structure of heating, and available funds. So, if the internal premises are already fully decorated and there is still no possibility and desire to do new repairs, it is better to insulate the house from the outside. Correspondingly, you should act in the opposite case.
However, external finishing is more difficult to install, often more expensive and the possibility of installation is highly dependent on weather conditions. This makes it less suitable for cases where work needs to be done on a tight schedule. It is possible to insulate the dacha from the inside, even if the cold has already come.
How we insulate our houses
There are two main options for insulating a house: external and internal.
The external method is considered technically more correct. The general procedure is as follows:
- External walls are cleaned, treated with antiseptic compounds in two layers.
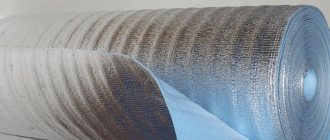
- After drying, a vapor barrier film is applied. The material is fastened with a construction stapler with a 10 cm overlap with the porous side inward and the smooth side outward. Then the steam coming out of the walls will freely escape, but will not be able to absorb back. The joints are glued with construction tape.
- A wooden vertical crate is mounted on top of the vapor barrier. The thickness of the beams should be equal to the thickness of the insulation material.
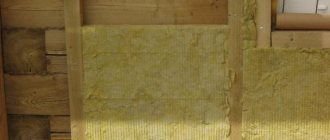
- Insulation is inserted between the bars. If the insulation of the walls of the house is in two layers, the upper level is positioned so that it covers the joints of the first level.
- A windproof waterproofing membrane is stretched over the insulation. The staples and stapler are used again. The waterproofing side of the material must be on the outside. The film is attached with an overlap, the joints are glued with tape.
- A second frame is arranged on top of the film - for the ventilated facade. Equipped with the same beams as the first crate. The main thing is to leave a small gap between the frame and the insulation (up to 50 mm). The tree is fixed with self-tapping screws. The gap is needed to circulate air and dry the moisture that comes out in the form of steam from the walls.
- On the second frame, sheathing is hung - siding, corrugated board, block house, porcelain stoneware, etc.
Insulation of the house from the inside is carried out less often. The main disadvantage of internal thermal insulation is that the external walls can freeze; on the inside, due to the temperature difference, condensation will constantly form, increasing dampness and destroying building materials. Another disadvantage is that the insulation will reduce the area of \ u200b \ u200bthe premises.This method is advisable only if work is carried out in winter, if the facade finish cannot be disturbed, or if it is impossible to insulate the building from the outside due to its high height.
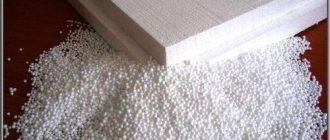
You can avoid troubles by choosing a heater with minimal vapor permeability. Another requirement is environmental safety. The parameters correspond to extruded polystyrene foam - an improved type of foam.
Insulation of the walls of a frame house from the inside is carried out in the following order:
- The room is freed from furniture and things.
- The walls are cleared of dirt and dust.
- The surface is pasted over with insulation plates from the bottom up. The material is evenly coated with special glue. Additional fasteners are not needed, the main thing is that the insulation fits snugly.
- The joints are treated with a sealant or sealed with reinforcing tape. Vapor barrier is not necessary in the case of expanded polystyrene.
- On top of the insulation, a crate is arranged for the installation of finishing material.
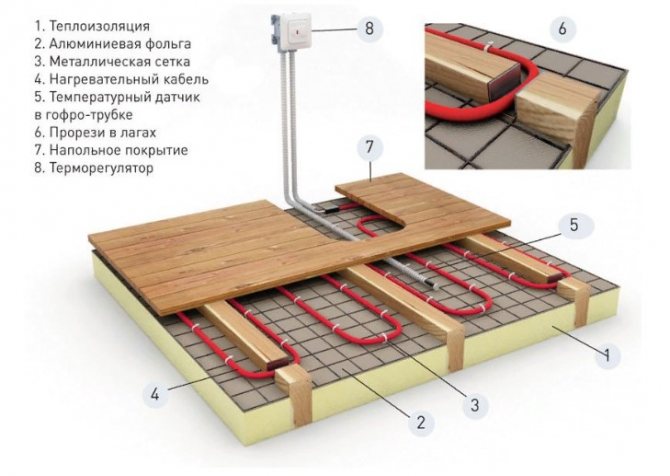
The floor is insulated by laying insulation between the logs or under the screed. In the first case, it is enough to lay the expanded polystyrene plates between the boards. In the second case, the work goes in steps:
- The waterproofing film is laid with a 100 mm overlap.
- Insulation plates are being laid.
- A reinforcing mesh is placed on them, fixed with a solution.
- A screed with a thickness of 6-8 cm is performed.
- After the mortar has dried, a finishing material is placed - tiles, boards, linoleum, etc.
Insulation of country houses from the inside is also carried out on the ceiling. The procedure is similar to the treatment of walls. The ceiling is cleaned, leveled, primed. Insulation is laid on top. After the glue dries, the insulation boards are additionally fixed with umbrella dowels. Then the ceiling is covered with a putty mesh, putty and covered with a finishing finish.
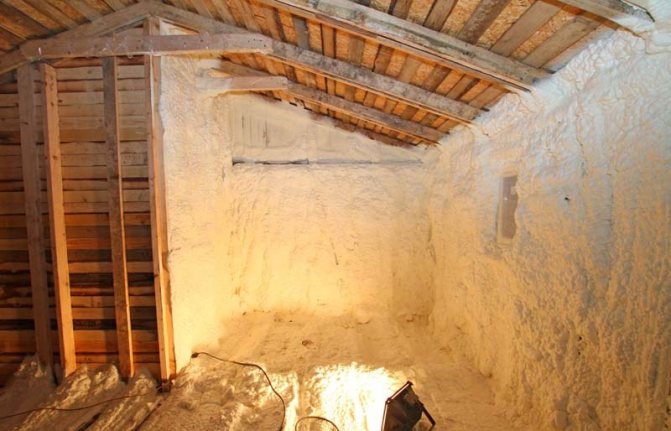
The last stage is roof insulation:
- A wooden frame is being built, similar to the crate for the walls. Bars and self-tapping screws or metal profiles are used.
- Insulation material is laid between the bars. The mineral wool is additionally fixed with anchors, there is enough glue for expanded polystyrene. A combination of two materials is ideal.
- Insulation is sheathed with chipboard sheets.
For greater efficiency, you can apply vapor barrier and wind protection - as when working with walls.
You can avoid mistakes when insulating a summer house by contacting. Experts will fully comply with the technology, providing comfort with a minimum of hassle for the owners.
External thermal insulation
First of all, when deciding how to insulate a country house, you should think about insulating the walls from the outside. The most common insulation materials for outdoor use are foam or expanded polystyrene boards and basalt wool. Today the building materials market offers a lot of other materials, but these are the easiest to work with, available and time-tested. Mineral wool is usually laid under siding, polystyrene panels can also be covered with siding, or covered with plaster and various decorative coatings. Today, these exterior decoration methods are the most popular.
If the house itself is wooden, then before starting any work it must be treated with special compounds that increase the moisture resistance of wood and reduce the fire hazard, as well as an antiseptic!
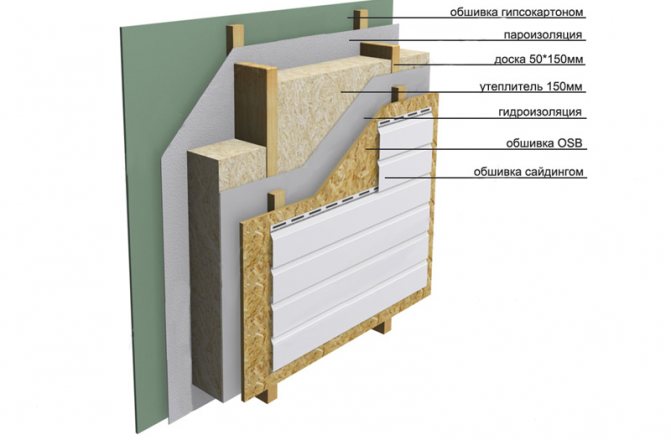
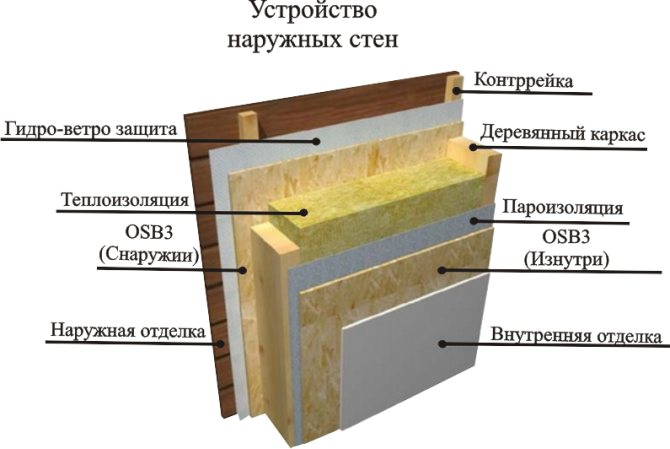
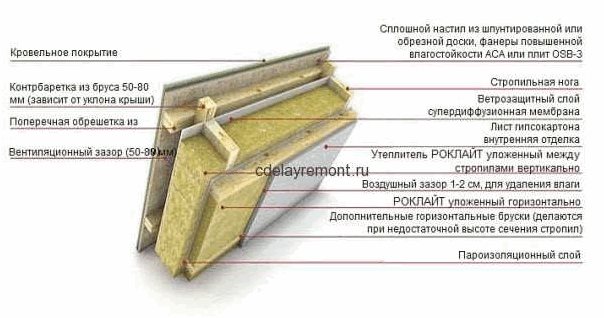
To compare these materials, consider an approximate installation scheme for both:

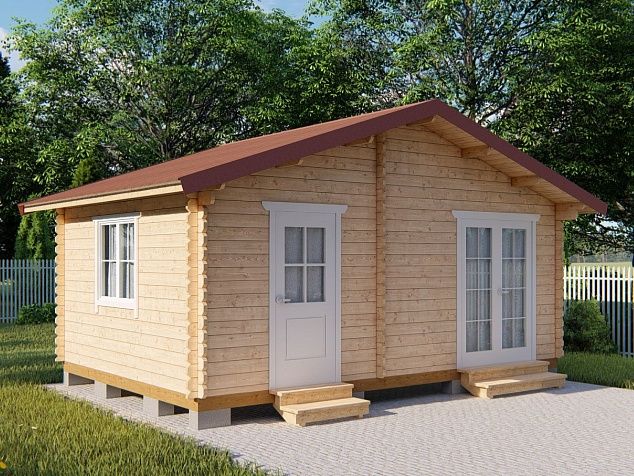
Insulation of a garden house for living in winter
Floor insulation
First, you should insulate the basement with foam and the floor on the first floor.
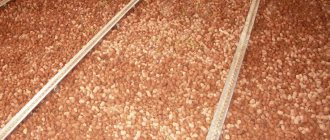
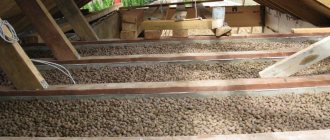
Most often, in summer cottages, the floor is made of wood, so we will consider this particular structure. If you want to save money, you can use traditional materials - sawdust or expanded clay.If you take your work more seriously, then floor insulation can be carried out with mineral wool on wooden logs.
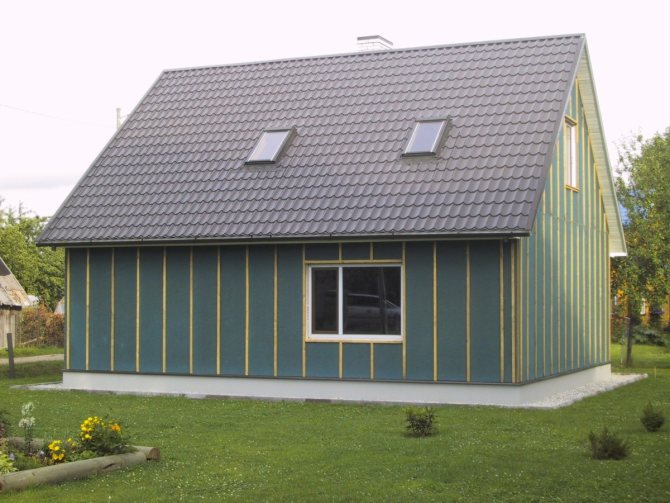
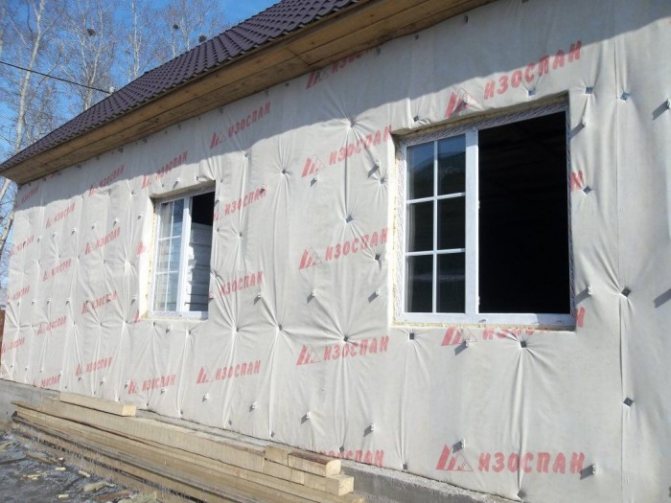
Thermal insulation of walls
If the house in the garden is built of sand-lime brick or timber, then the insulation must be carried out outside.
In this case, you will save space in the living space, protect the walls of the building from freezing and the possible appearance of mold. It is best to insulate the facade with mineral wool, followed by finishing with vinyl siding. How to choose the right mineral wool read on our website here.
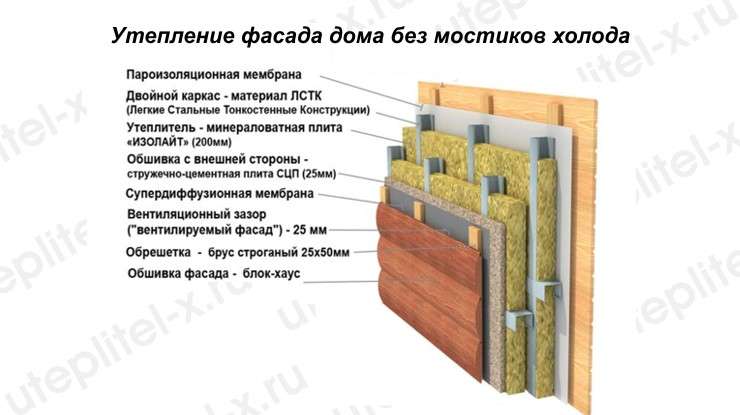
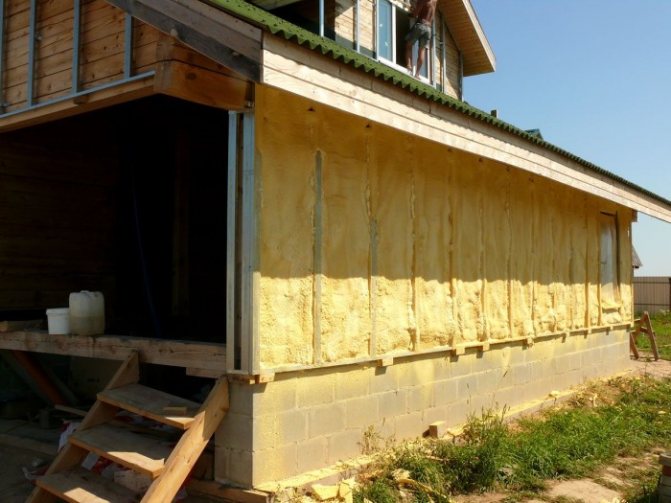
Insulation of the facade of the house without cold bridges
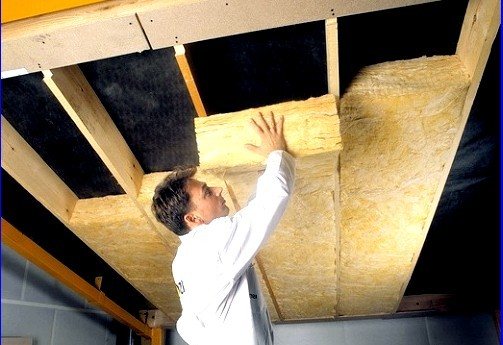
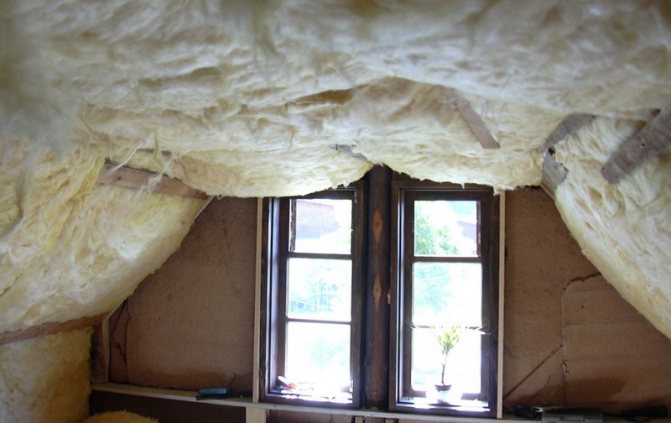
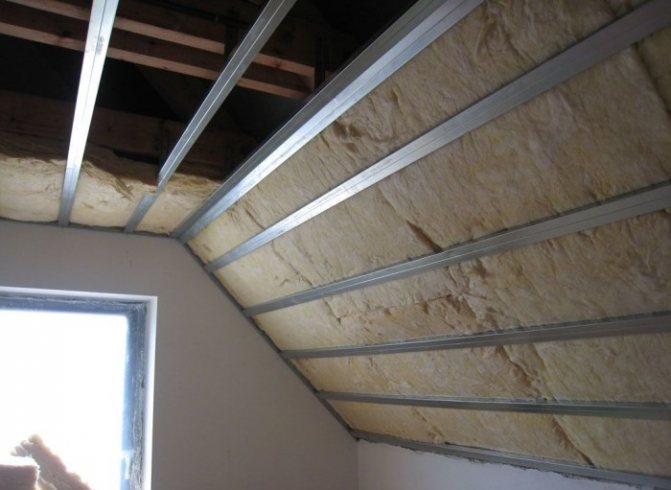
Thermal insulation of the attic
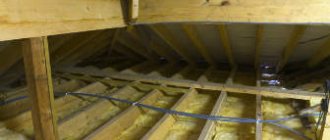
A private house loses the most heat through the ceiling, since warm air always rises.
It is better to do insulation from the side of the cold attic. On horizontal surfaces, you can use traditional and inexpensive bulk materials - sawdust mixed with the ground or expanded clay. If mineral wool is used, then a roll vapor barrier is first laid on the surface.
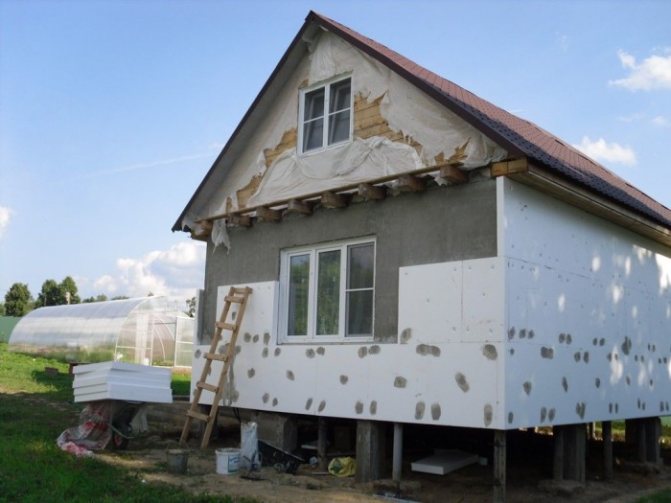
Installation of polystyrene plates
For insulation with polystyrene panels, it is necessary to prepare the walls. They should be fairly even, without large distortions that can provoke breaks on the canvas. Also, the walls must be treated with a primer. The panels are glued and fixed on special dowels with wide plastic caps. You can also use special adhesives or those recommended for tiles. Then the resulting surface can be plastered and applied with a reinforcing mesh and a finishing decorative coating.
Read also: How to properly insulate a brick house from the outside?
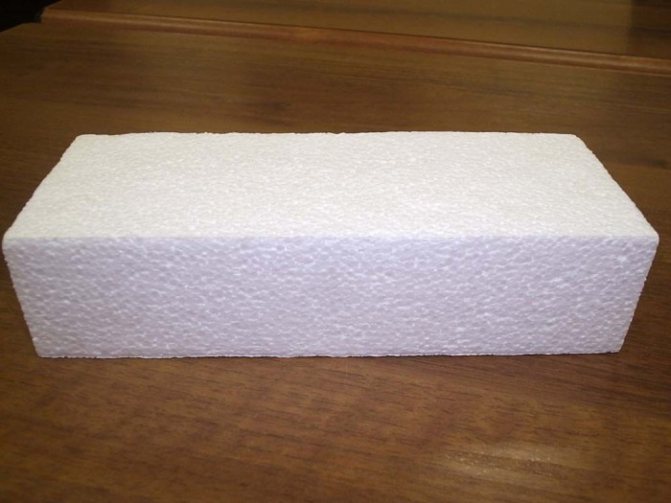
Styrofoam
This material is a sheet with a smooth surface. It has high strength rates. At the same time, the foam is quite light, which means that the installation can be easily carried out on your own, without additional help.
However, the foam has a significant drawback. Due to the fact that the insulation is represented by rectangular layers, seams are formed during installation.
Through them, heat can subsequently escape from the house.
In order to minimize these losses, the following measures were invented:
- The sheets must be fitted as tightly as possible to each other, this should be given special attention. Therefore, during work, one should not rush;
- If necessary, it is better to use special sealants;
- In addition to using a sealant, the seams are sealed from above.
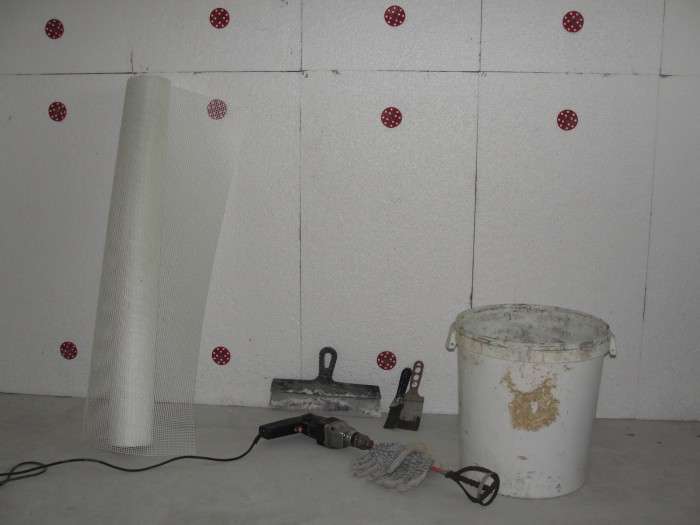
Installation of foam sheets is carried out in a specific sequence.
Foam sheets are glued onto the cleaned and pre-prepared surface, which are pre-coated with an adhesive over the entire surface.
The formed seams are sealed with a sealant. If necessary, the seams are closed over. Then you can start fixing work.
Internal thermal insulation
Internal insulation of the premises is also carried out by laying heat-insulating materials under the decorative coating. Due to the fact that indoor conditions are much milder, the choice of materials and finishing methods is much greater. As well as for external thermal insulation, in order to insulate the dacha from the inside, the same insulating materials are suitable: mineral wool, foam or expanded polystyrene panels, and others. You can also use blown insulation.
The installation of the frame structure also begins with the processing of the walls themselves, depending on what they are made of. Be sure to treat the walls with a special compound against mold. When erecting such structures, it is not necessary to level the walls, this will significantly save time and materials. After erecting the frame, a layer of foamed foil vapor barrier film should be laid. It also has heat reflecting properties.If the wall is wooden, then you can fix the film with ordinary nails, but a construction or furniture stapler will help save a lot of time and effort. Then the heat-shielding material itself is laid directly, which is sewn up from above with sheets of fiberboard, chipboard, OSB panels, sheets of drywall, MDF panels or other materials. This kind of multi-layer sandwich helps to keep the warmth in the room.
It is imperative to first of all insulate those walls that are in contact with the street. It is permissible not to provide unheated rooms, such as balconies or verandas, with such thermal insulation if they will not be used in winter, but you should pay attention to the walls adjacent to such rooms. You can choose a thinner layer of insulating material for them if the veranda is warm enough. There is no point in insulating partitions and walls inside the house itself, except to increase sound insulation. Insulation of the outer premises adjacent to the house themselves will allow them to be used in the cold season and will increase the efficiency of heating the entire house.
How to choose the right insulation
It is known that a great deal of heat loss from a home occurs through walls.
In numerical terms, this is somewhere around 40% of all heat lost. Therefore, it is very important to qualitatively insulate this particular structure.
The amount of material must be taken depending on the parameters of the wall: height and width. You should also take into account the thickness of the insulation used.
When choosing an insulation material, you need to look so that it satisfies the following qualities:
- Environmental friendliness.
Means that the insulation material should not harm human health and have toxic properties; - Safety (non-combustible). In other words, the ability to resist fire;
- Low thermal conductivity is an indicator of the ability to retain heat;
- Durability. So that the performed repairs and insulation works serve for a long time and keep the house warm;
- Water and steam retention ability, that is, the ability of the insulation to repel water and steam;
- Profitability, that is, an acceptable price for consumers.
The most popular materials for wall insulation are polystyrene and mineral wool.
Each of them has its own pros and cons.
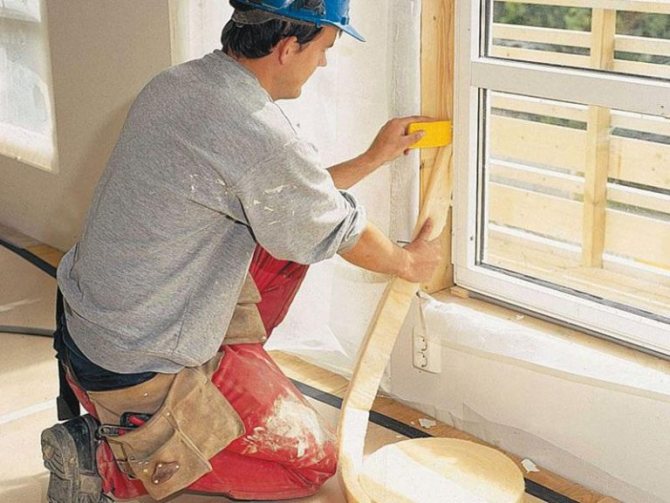
Insulation of windows
When figuring out how to insulate a country house, in no case should you forget about the windows. Slots, improper installation, poor sealing can also cause heat loss. Of course, modern plastic windows with multi-chamber double-glazed windows filled with inert gases are the most effective. But it is not always possible to spend a decent amount of money to replace them. And sometimes some "upgrade" will not hurt new ones.

Do-it-yourself warming of a country house
Many people associate a garden house with an inexpensive summer building, which is built from scrap materials. With the advent of modern inexpensive building materials, summer residents have the opportunity to build inexpensive holiday homes in the summer away from the city. But in order to keep warm in the country house in winter, you should think about high-quality insulation of the garden house.
Insulation of the floor and foundation
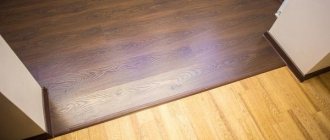
The comfort of the house will depend to a large extent on the construction of the floor. More often it is one row of boards, laid on logs, linoleum, chipboard or fiberboard are laid on the floorboards. Cold penetrates from the ground through such floors, and even the high temperature in the room will not help protect the feet from freezing when the floor is not insulated.
Warming the floor of the garden house
If the house is built on a strip foundation, then there are usually vents in the basement - holes for ventilation of the underground. For the winter, the vents should be closed without fail with a piece of insulation or an unnecessary rag. With the arrival of heat, the air vents should be opened. Read more about the insulation of different types of foundations and basements here.
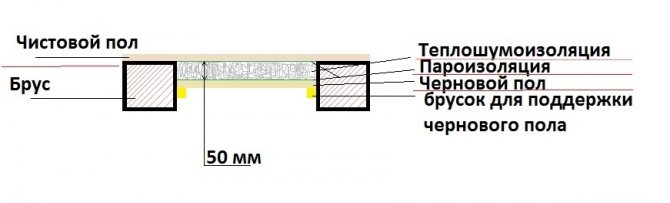
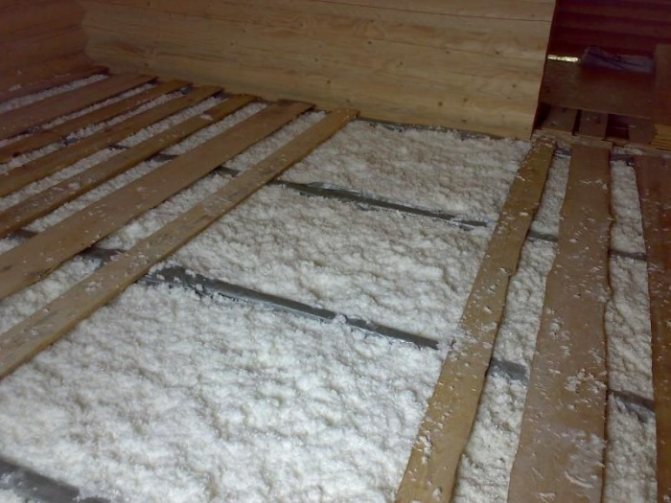
If everything is clear with how to insulate the foundation of a garden house, then we will deal with the floor. To insulate it, remove the floor covering. Warming of a wooden floor in a country house should be done using a lag device and a heater between them. After that, the entire structure is sewn up with a rough floor - plywood or OSB.
Do not forget that mineral insulation should be protected with a vapor barrier on both sides. Roll insulation should be laid close to the logs; for this, the distance between the bars is made 1-1.5 cm less than the width of the insulation. When laying slab insulation, all cracks must be treated with foam.
Insulation of the ceiling, attic
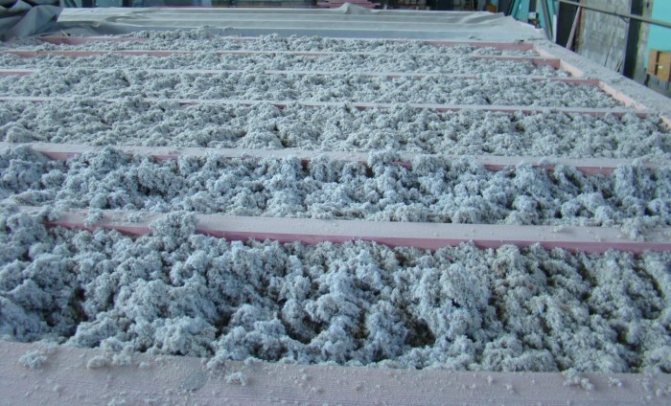
Roof insulation is important, because about 10% of the heat goes through the ceiling. When choosing a heater, you need to take into account the climatic features, the materials must be durable, fire-resistant and non-toxic. It is advisable to use stone wool or bulk insulation to insulate the attic of a garden house.
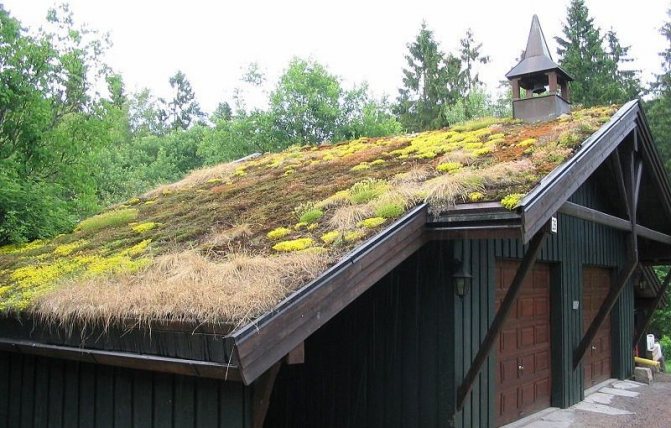
Insulation of the attic of a garden house with minvata
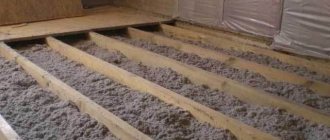
We have already written how to insulate an attic with our own hands with modern materials. In a country house, you can use an inexpensive but effective insulation, which our ancestors have used since ancient times for living in winter. As a cheap material, you can use sawdust mixed with earth, expanded clay or moss - natural environmentally friendly materials.
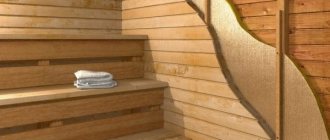
Moss is resistant to decay, absorbs steam and dries out instantly, thanks to these properties it is still used to insulate walls in baths and saunas. Moss does not cake and does not lose its thermal insulation properties over time. In buildings independently insulated with moss, it is always dry and there is no musty smell.
All heaters should be laid on the side of the attic on a vapor barrier layer so that they do not absorb moisture from the warm air. On top of the insulation, you can independently lay a sub-floor in order to walk in the attic if necessary, as well as protect the material from blowing, rodents or birds.
Insulation of the facade and walls
The first method, the so-called "wet facade" - the insulation is attached to the facade with glue, a reinforcing mesh is glued to it and two layers of plaster are applied, followed by painting. The second method, "insulation under siding" - the thermal insulation is attached with a frame and guides, then sheathed with vinyl siding or pvc panels.
These two methods are well known to us. If the "wet facade" is suitable only for block and brick walls, then you can insulate the walls of the garden house with your own hands for siding from any material. The choice of insulation in this case depends only on your financial capabilities or personal preferences.
Insulation of windows and doors
After self-insulating a country house, many forget to insulate the front door and windows through which the most heat is emitted. The windows in the houses are often wooden, they require careful insulation for the winter - drafts from the cracks in the windows take away heat. Be sure to inspect the places where the windows meet the slopes.
Insulation of windows and doors of a country house
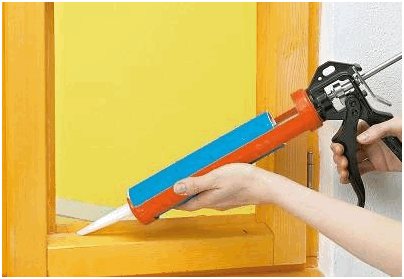
Check for gaps between the frame and the glass, coat with silicone sealant and replace the glazing beads if necessary. If there are gaps between the frame, it is better to foam them. But in order to minimize heat loss, it is recommended to install plastic windows with two- or three-chamber double-glazed windows.
It is good if there is a vestibule, then there will be no strong drafts from the street, but nevertheless it is recommended to insulate the street door in the house and sheathe it with insulation.
To insulate the door of the garden house, you can use dermantin, foam rubber and furniture nails. Warming the door with dermantine is the most inexpensive way that everyone can do.
Wooden windows
For a high-quality repair of wooden windows you will need:
- Silicone sealant (if you take it in a special tube, you will need a glue gun);
- Polyurethane foam;
- Small spatula;
- Masking tape;
- Sealant;
- Unnecessary newspapers, magazines or film;
- Plaster;
- Nails (small, you can take furniture) and a hammer.
If there are broken or cracked glass, it is best to replace them. This also applies to glazing beads. First, remove any old sealant, loose pieces of plaster and cement from the cracks between the frame and the wall and from the ebb and sill.
Before filling the holes with mounting foam, it is necessary to protect the glass and the surfaces surrounding the window opening with paper or film, securing it with molar tape. It does not leave marks on various surfaces and can be easily removed even from wallpaper. Carefully place a small amount of polyurethane foam in the gaps. Keep in mind that its volume will increase several times during the day, so do not lay too much of it. After about a day, when the foam has completely hardened, you can remove the protective tape and paper. Now you can trim the excess. The most convenient way to do this is with a clerical knife. After that, you can level the surface with plaster.
Be careful when working with polyurethane foam! It is hardly removed from various surfaces and skin. Do not touch uncured foam with your hands! Avoid getting it on clothing, floor coverings, glass, frames, and other surfaces.
If it is not possible to dismantle the corners, glazing beads from window frames, then simply glue the cracks with silicone sealant. You need to plant the sealant as deep as possible in the holes. You can push it in there and smooth it with your fingers soaked in water. Thanks to this, the glass will not rattle and there will be no draft.
A special sealing tape must be glued to the joints of the sashes and frames. Self-adhesive are the most convenient. Before gluing, the surface must be cleaned and degreased. It is best to try to glue with a solid line without joints around the entire perimeter.
Construction of houses
56 votes
+
Voice for!
—
Against!
For many years, the townspeople have associated a garden house with a small summer building, which is assembled from scrap materials. With the advent of inexpensive building materials on the market, developers have the opportunity to quickly build inexpensive housing, which is suitable for recreation in the summer. And so that in a small country house it was warm even in the winter cold, you should think about decent insulation and heating of the garden house.
- Insulation of the floor and foundation
The need to insulate a garden house
As you know, the main purpose of a garden house lies in the formation of a recreational environment, that is, the creation of life support conditions in nature, which are close to home ones, for the effective implementation of the plans built. Many gardeners extend the gardening season until late autumn, and in winter they willingly come to ski and relax.
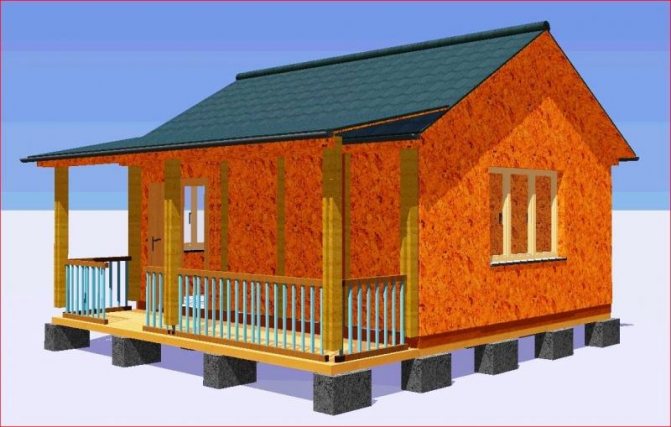
But such a pastime will often be impossible, and here's why. Country garden houses, as a rule, have a very simple structure - a frame made of wooden beams, which is sheathed with clapboard. The inside of the house is finished with plywood, which, in turn, is pasted over with wallpaper. If you have not created the proper thermal insulation in your summer garden house, it will be very difficult to keep warm in such a structure in winter, since the inner space between the casing is not filled with anything.
You can disagree and choose the option of heating with a temporary stove. However, in this case, you should remember that this is not for long. Fans of open fire need to know that the efficiency of fireplaces is low, it is only 10%, so it will not be possible to warm up like that. The heat will be temporary, and a brick house will have to be heated for a day or two even for a short time.Therefore, you still have to think about thermal insulation. And meanwhile, it is not particularly difficult to insulate the garden house on your own.
Since the need for living quarters in winter will be less than in summer, in order to economically use thermal insulation and building materials, as well as to save fuel for heating, not the whole house can be insulated. In a garden house, it is enough to insulate one or two rooms, depending on the building area and the composition of the family. It is good if there is also a brick stove in the garden house.
Only in this case it is possible to spend weekends in early spring, late autumn and in winter and slowly redo all the upcoming work, for which it was not possible to carve out time during the summer period saturated with gardening concerns. Before moving on to practice, remember that it is recommended to carry out all thermal insulation work when it is summer outside. If the cottage is two-story, or the living area of one floor is too large, you should also think about water heating.
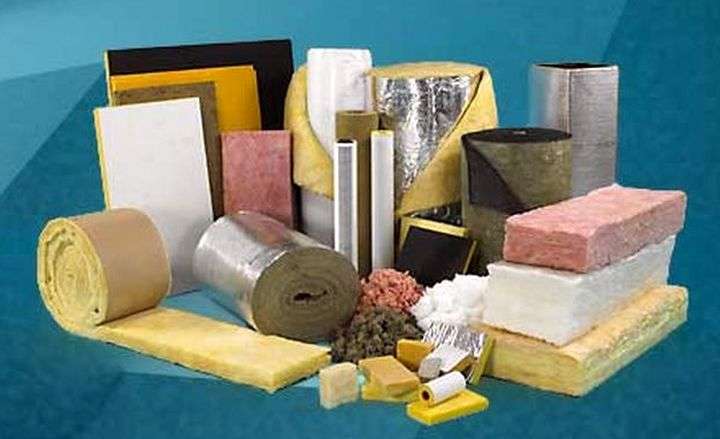
Choice of materials
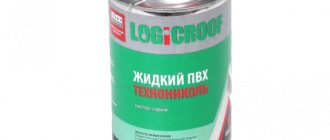
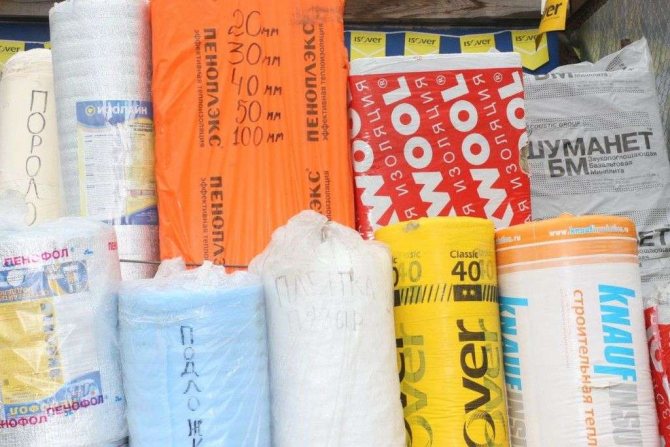
The most practical insulation materials are glass wool, polystyrene foam, foam rubber, foam insulation and fiberboards. It is possible to insulate the walls of stone or brick houses with the help of bulk materials that are placed between the double walls or use the latest liquid heat-insulating material for the walls. However, the materials used by our grandparents do not lag behind them.
Industrial heaters
For thermal insulation of a garden house, industrial heaters are most often used. Mineral insulation needs to be insulated from moisture. These include mineral wool and fiberglass. Mainly mineral insulation is used to protect floors and facades from the cold.
Mineral wool has been used in construction for many years in a row, it has proven itself in the best way, since it does not shrink, keeping its own technical parameters at a high level for decades. This material has gained its popularity due to the ease of installation and low price.
Cellulose insulation is mainly represented by ecowool, which is used to insulate facades, roofs and floors of country houses. Polystyrene materials or expanded polystyrene are needed when insulating roofs and facades, and they are also necessary when insulating foundations. You can insulate a garden house with such materials from the outside and from the inside.
Materials at hand
You can prepare some materials yourself. They are not inferior to mineral ones and are widely used in individual construction of organic insulation, such as sawdust, reeds, moss, sedge. You can add to them a whole list of insulating materials: chaff, straw, hay, small wood shavings, peat chips and others. In different regions of our country, there is still a lot of "foot" insulation. Coarse material must first be crushed, for example, chopped with an ax.
You can make the material for insulation yourself from improvised means that gardeners always have. This is plastic wrap and old newspapers. To insulate the garden house in this way, a film is placed between the sheets of newspapers and ironed with an iron. The resulting heat-insulating material is usually glued to the walls under the wallpaper.
Insulation requirements
For mineral insulation (mineral wool, glass wool, polystyrene), as well as small wood shavings, sawdust and moss, the thickness of the backfill should be at least 10 centimeters, and you can count on the outside air temperature to minus 20 degrees, if one sine qua non is fulfilled - a windproof outer cladding ... For more porous organic insulation, the thickness of the backfill should increase to 13-15 centimeters.
Mineral insulation must be compacted so that, after pressing on them by hand, the material returns to its original position. If the heat insulator is in mats, then it should not be loosened. Small shavings and sawdust are compacted to a dense state. It is customary to grind hay, straw, sedge, reeds, large wood chips for a start, chop with an ax, and the smaller the components, the better.
If you are interested in how to properly insulate a garden house and spend a minimum of money, then pay attention to the following information. To save expensive thermal insulation material and money, you can simultaneously use mineral and organic insulation, laying them like a layer cake, this is especially useful in those structures where you need to fill them in full thickness, for example, when insulating the floor or in the interfloor. It is recommended to lay a layer of the best insulation from the side of the cold source.
Remember that before use, any material must be completely dry, otherwise it will lose its thermal insulation properties, and organic insulation will also rot with all the ensuing inconveniences and troubles.
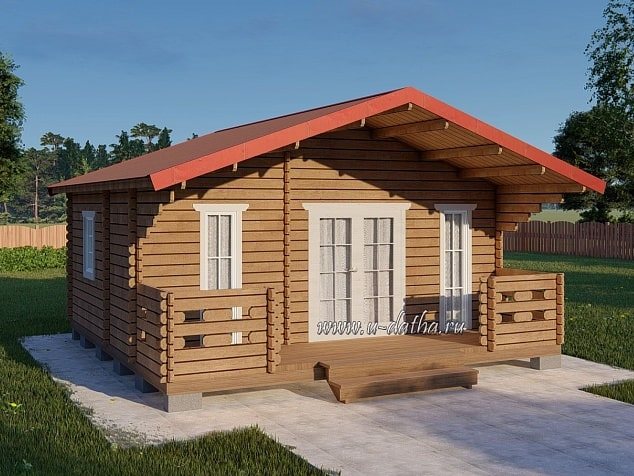
Warming a garden house
The pressure of warm indoor air in a garden house is always higher than that of cold outside air, so warm air strives to escape into the street. As you know, heat loss in any building, in particular in a garden house, occurs through the floor, ceiling and walls. Uncomfortable conditions occur if the difference between the temperature in the building and the temperature of the surface of the walls is more than 6 degrees, and the difference between the temperature of the air and the floors is 4 degrees. The best thermal comfort will be obtained with a temperature difference of 3 degrees. We figured out the reasons for heat loss, now it's worth figuring out how to insulate a garden house.
Insulation of the floor and foundation
The thermal comfort of a garden house will largely depend on the construction of the floor. More often they represent one row of boards that are laid on logs, linoleum, chipboard, fiberboard are laid on the boards. Such floors are a common furniture base, but not an element of thermal insulation. From the ground, intense cold penetrates through these floors. Feet freeze from the cold floor, and even the high air temperature cannot save from this, since the temperature below is always lower than at the ceiling level.
If the house is built on a strip foundation, which is solid, then in the basement, most likely, there are air vents - special holes that are made to ventilate the space under the building. Such vents should be closed without fail. You can cover them with a piece of insulation, styrofoam, or an unnecessary rag. It is important to open such vents in the spring.
Nowadays, summer residents often buy garden houses ready-made. They bring a similar structure to the site, place it on pillars that act as the foundation, conduct electricity - and you can safely celebrate a housewarming. But it is worth noting that the under-house space in this case remains completely open. Therefore, it must be closed. And this can be done by making a filling.
Nail iron, rubber sheets or planks to the bottom of the house around the perimeter. Then cover it all with earth. As a result, an air cushion forms under the building, which will prevent the penetration of cold through the floors. In the spring, it is customary to clean up the earth or blow through, using, for example, pieces of plastic pipes that have a large diameter. Suitable are those that are used for domestic sewer systems.
To insulate the floor in a self-built garden house, the floor should be disassembled. You can use any available materials. Floor insulation is most often done in layers.To make the floor warm and dry, it must be torn from the underground without fail. For dry soil and low groundwater levels, limit yourself to boardwalks that are laid on logs. Supports will be low brick pillars, which are waterproofed with two layers of roofing material on bitumen mastic.
The brick pillars should be supported on a skinny concrete preparation layer. Under it must be a waterproofing layer of clay, which is pre-crushed with water, which will protect the structures of the floor and underground from soil moisture. Below is the compacted soil. A floor of such a construction serves for a long time without being affected by fungus and moisture.
Often, summer residents recommend insulating a garden house on the ground like this. Pour a layer of rubble, sand on top and compact this mass tightly. Place a layer of thermal insulator on top. Then it is customary to place the material for waterproofing and a mesh for thermal insulation, after which you can safely pour the concrete screed.
With a high level of groundwater, when insulating the floor in a garden house, it is customary to raise it above the ground by at least half a meter. In this case, the floor should be made double, with a heat insulator. As part of this option, summer residents do this: a rough floor (the old finishing floor is perfect for this purpose), a layer of heat insulator (expanded polystyrene or mineral wool) and a new finishing floor. The space between the rough and clean floor must be ventilated; for this, ventilation holes are made in the clean floor - in the corners of the rooms.
An important step in warming up a garden house is to protect the basement, if any, and the foundation. The choice of thermal insulation material for the foundation should be approached more carefully, you need to buy high-quality material, because it will affect both the thermal insulation of the building and the safety and durability of the supporting structures. Insulate all sections of the foundation, not sparing the material, because this way you can save up to 40% of the leaving heat.
Insulation of floors
Carrying out roof insulation is of great importance, because almost 10% of the heat leaves through the roof. When choosing a roof insulation, you need to be guided by climatic features, the presence of snow and wind loads. Remember that the materials must be durable, moisture resistant, fire resistant, non-toxic, it is important that the heat insulator does not shrink.
The use of polymer materials for warming the roof of the summer residence will not be the most rational solution, because they differ in the properties of increased flammability, and you will need to take serious measures to increase the fire safety of the building. Following from all of the above, it is advisable to use stone wool for roof insulation.
In attic ceilings, it is usually customary to limit yourself to a vapor barrier layer, because the roof is most exposed to moisture in the form of precipitation. When the insulation is moistened, air is displaced from its pores and replaced by water. An increase in the moisture content of the heat insulator by at least 10% provokes a twofold decrease in the heat-shielding performance!
Frozen water worsens the properties of the insulation. That is why, when insulating a garden house, you need to pay attention to a reliable vapor barrier. The cheapest and easiest way is to make a vapor barrier layer from soaked clay in water. The clay-straw grease, which has a thickness of 20-25 millimeters, is applied directly over the ceiling boards.
Moss can be used as an insulating material for the floors of garden houses. It is resistant to decay, perfectly absorbs water vapor and dries instantly. Moss, unlike other materials, does not cake over time and does not lose its own thermal insulation properties. In buildings that are insulated with moss, it will always be dry, and there is no musty smell.In order not to damage the thermal insulation material, running boards are nailed from above along the ceiling beams, which have a width of about 40-50 centimeters.
Wall insulation
Insulation methods for garden houses differ depending on the design. The very first method is external insulation, the so-called "pie" includes several layers: insulation, which is attached to the supporting structure, a reinforcing mesh based on an adhesive, and actually two layers of plaster. The second option: the thermal insulation material is attached using anchors with a hinge, then a welded stainless steel mesh is placed, and a thick layer of plaster is placed on the reconciliation.
You can also insulate the walls of a garden house with the help of hinged facades. The idea of such a design is very simple - there is an air gap between the heat-insulating material and the rain screen (the outer side of the facade), which allows moisture and water vapor to freely go out into the street, preventing the appearance of mold and mildew. Stone wool insulation is best suited for this purpose.
The greatest effect of the cottage warming procedure will be obtained when the walls are clad on the inside with sheet material - hardboard or plywood, laid on a crate made of wooden slats. Pave the space between the "new" and the brick wall with glass wool, or fill it up with tightly rammed sawdust, nailing boards horizontally. It is recommended to wrap a log house with mineral wool and sheathe it with siding or clapboard.
You can use the insulation material in any combination. For example, the lower part of the walls, where the boards are located vertically, is conveniently insulated with non-loose materials that lend themselves well to compaction in any direction (glass wool, mineral wool, moss, sedge, reeds, hay, straw, hay), and the upper part, where the boards are placed horizontally , can be protected from cold and bulk materials (small shavings, sawdust).
Such a wall will quickly warm up due to its low mass, while too thick boards, with all the seeming advantages at first glance, have the worst thermal properties. Heating them to a comfortable temperature in cold weather will require a lot of heat. And one more prerequisite for warming a garden house - the outer walls must be windproof.
To ensure that the walls are not blown out, it is enough to put some dense material under the outer cladding, be it thick paper, cardboard, roofing felt, roofing felt, glassine or plastic wrap. Facing from boards into a tongue or a quarter cannot be considered as windproof, even if it is tightly fitted, cracks will still appear, because the boards have defects, are subject to warping and shrinkage.
And so that rodents do not start in your garden house, which like to settle in any insulation, without disdaining glass wool, the work should be done carefully, without cracks. A ruberoid lining is a reliable protection from uninvited guests. After that, think about arranging a stove in a garden house with your own hands or installing a compact gas boiler.
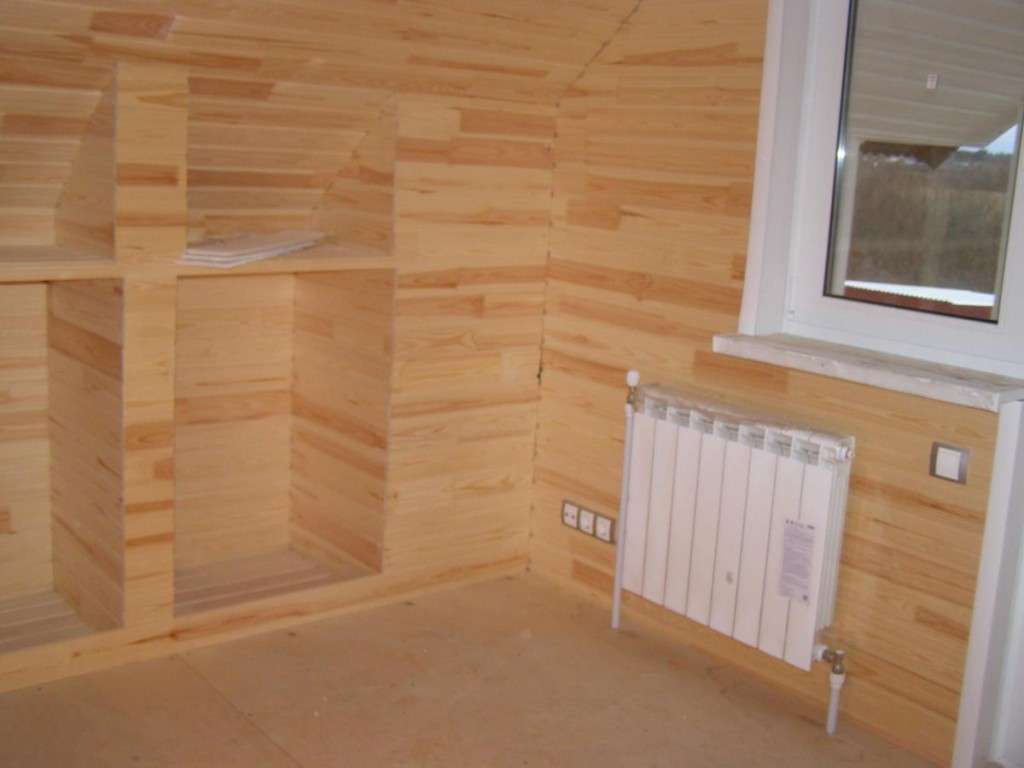
Insulation of windows and doors
Do not forget to finally insulate the entrance door and windows through which the most heat is lost. The windows in the garden houses are mostly wooden, which require some preparation before the cold weather. Wood is an excellent material, but over time it warps, jars, it dries up, paint peels off. As a result, cracks appear, and cold penetrates through them.
A summer cottage with non-insulated wood windows can be heated for a long time, and it will still be cold. The house, in the end, will warm up, but if the power of the heater decreases, or if you do not put wood in the stove, it will instantly become cold again in it. And the reason for this is the drafts that penetrate from these cracks in the windows and take away heat. Therefore, the issue of thermal insulation of windows begins with a tight fit of the frames.Be sure to inspect the places where the windows meet the walls.
Check if it comes out from the gap between the frame and the glass, and if you notice a "leak", then just replace the glazing beads. It is also recommended to glue the windows in the autumn. You can follow grandmother's advice and do the old-fashioned way: with paper that is glued to the paste - a solution of flour and water. You can purchase duct tape from hardware stores, which works well as well.
If there are large gaps between the frame and the window sashes, it is better to pierce them with cotton wool before pasting. And in order to minimize window heat loss, it is recommended to install reinforced-plastic windows with two- or three-layer glazing, as well as use glass with energy spraying and putty all the gaps.
It is good if the garden house has a vestibule, in other words, the front door is separated from the living quarters by another door. In this case, there should be no strong drafts and cold bridges from the street. And yet, the front door to the cottage, regardless of whether there is a vestibule in front of it or not, is recommended to be sheathed with insulation. To insulate the door between its walls, place an insulating material, as well as glue the jambs and the joint of the door with insulation.
The simplest insulation material is suitable, the one sold as a set of dermantine, foam rubber and decorative nails. The cost of such a set is not too high. Everything will cost you a couple of hundred rubles. But the insulated door will help the owners save more than one kilowatt of electricity on heating.
Insulation of doors
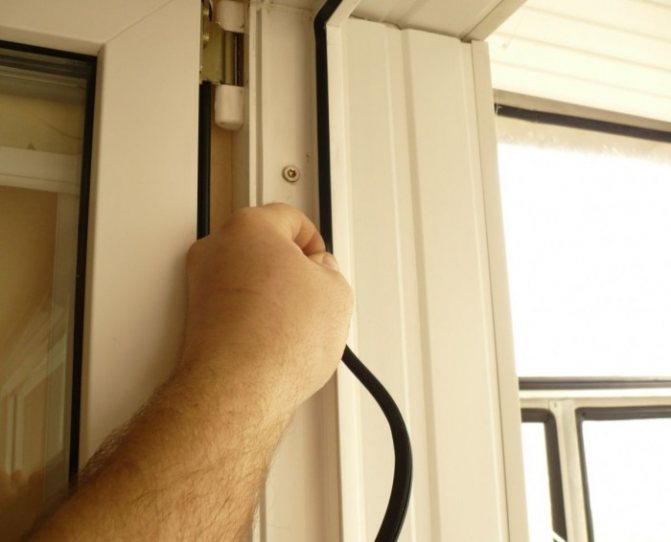
For maximum efficiency, doors should also be insulated, especially entrance and balcony doors. If there is a strong blowing from the door, then it is better to separate the platbands and fill the gap between the door frame and the walls with polyurethane foam. A special seal can be glued to the block along the perimeter of the door leaf. Now it is quite often found on sale. It is usually sold in rolls. For doors, it is best to use an adhesive-based rubber seal. Some of them provide for the possibility of fastening to nails. Silicone or foam rubber are not very suitable for entrance doors, as they are less durable and wear-resistant, in addition, they do not tolerate frost well.
You can also insulate the door leaf itself, if necessary. If the door is wooden and too thin or a simple metal single layer, it will give significant heat loss. You can insulate the door by attaching a crate to it, in the niches of which heat-insulating panels are placed. Also, the door can be sheathed with special materials, this will also increase the thermal protection of the door.
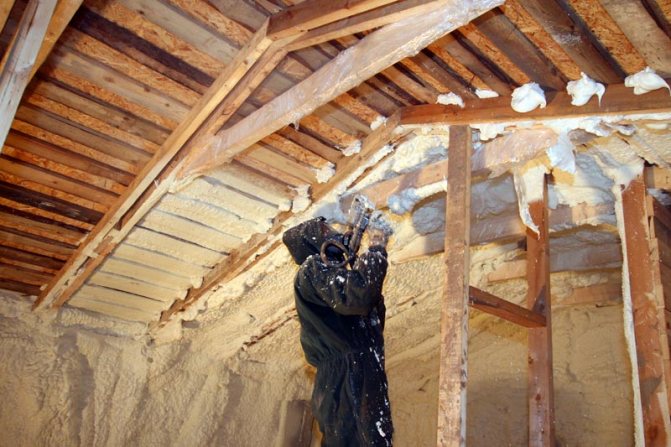
Roof insulation
Roof insulation is in many ways similar to wall insulation. For this, as a rule, the same materials and technologies are used, but there are also some nuances. The correct installation sequence is important here. Of course, a high-quality and properly installed roof is of paramount importance. A waterproofing vapor-permeable film must be laid, in addition, it has windproof properties. Then a layer of insulation is laid, followed by another vapor-tight membrane. There should also be a small space for ventilation, which helps to avoid excessive humidity in the room. After that, all this is covered with plywood, drywall or any other suitable material.
Insulation technology
Regardless of what type of insulation material you choose, they all have approximately the same insulation technology:
- Preparing the wall for construction work: cleaning from dirt, leveling with a primer;
- Apply glue over the entire surface of the insulation material, glue it to the base;
- Performs such a manipulation with each sheet;
- After fixing with glue, the material can be additionally fixed with self-tapping screws or dowels.
However, this is not necessary, it all depends on the desire; - If joints or seams are formed during installation, then they must be repaired;
- We fix the material with a mesh and putty;
- We carry out finishing of thermal insulation;
- At this stage, finishing and decorative work can be carried out. That is, work on the design of the wall itself from the inside.
Sometimes, when installing insulation, special frames are used.
Then the fixation of the material occurs directly on it. Then it will be easy to fill drywall or plastic panels on this frame on top.
Insulating the walls of a country house can cost a lot, even if you use budget heaters like mineral wool.
However, no matter how big a cost they may seem now, remember that it will definitely pay off.
In addition, it should be remembered that when carrying out internal insulation of a house or summer cottage, it is better to combine it with external insulation. Only then will you get the best quality insulation and the minimum amount of heat loss.
Help on the topic:
At the same time, pay attention to the fact that internal insulation will significantly reduce the space of the rooms.
Therefore, this type of insulation is not recommended for small rooms.
In recent years, homeowners have increasingly raised the question of how to save energy spent on heating a home.
In fact, there are many ways to keep warm and provide people with a comfortable microclimate. On the example of old Soviet buildings, we see that the heat loss is up to 40%.
To fix the problem, you have to survive once and the house heats up on its own.
However, in the future, heating costs will be significantly reduced.
Warming of floors
Floor insulation is one of the most time consuming processes. First you need to dismantle the finished flooring Then, if the logs and the subfloor are in a suitable condition, then insulation is laid and the final floor is laid. One of the best and most modern methods is the underfloor heating system. But due to the rather high price and complexity of the installation, it is not always applicable for a country house. In addition, it significantly increases the load on the power grid, which is not always designed for such systems. Therefore, the floor, insulated in traditional ways, is more common in summer cottages.
Comprehensive insulation of the building will help keep warm. The elimination of freezing of the room, in turn, significantly increases its service life, and also helps to better preserve the interior decoration for a longer period. And furniture, appliances and other utensils will remain useful much longer. This will make your stay at your favorite summer cottage even more pleasant and comfortable.