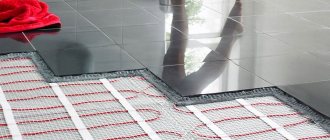
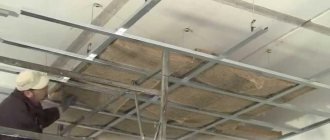
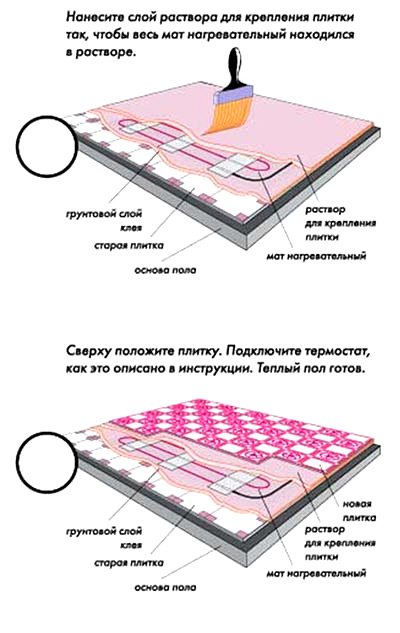
Increasingly, warm floors have been installed in apartments and private houses. It makes it possible to evenly heat the room over the entire area, making the microclimate as comfortable as possible for residents. During the installation of such a system, waterproofing of the warm floor will be mandatory. The need for this measure is explained by the following reasons.
- Waterproofing under a warm water floor is a prerequisite for installing such a heating system, since if the pipes with a coolant are not tight, the base will begin to collapse. This is especially true for an apartment that is not on the ground floor, since there is a high risk of flooding of neighbors.
- Waterproofing a warm water or electric floor is needed to separate the insulation and the concrete base, since due to changes in low and high temperatures, condensation will occur, which negatively affects building materials.
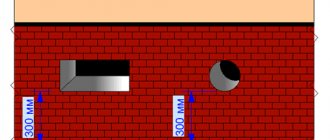
- Waterproofing the floor in a private house on the ground floor, between the soil and the screed, in order to create a protective layer that prevents capillary moisture from penetrating upwards.
The need for waterproofing
Everything is quite obvious here. Such a measure will allow heat to be directed upward, preventing it from passing through the floors. Quite often, many forget about waterproofing under a warm water floor, but its need is explained by several reasons at once:
- it is imperative to arrange waterproofing under a warm water floor, since violations of the tightness of the pipes in which the heat carrier moves can cause damage to the base. And if the apartment is not on the first floor, the neighbors living below you will suffer from the flood;
- under the water and electric floor, a waterproofing layer is necessary to separate the insulation material from the concrete floor. From changes in temperature and cold emanating from the base, condensation will appear, negatively affecting the layer of insulation material;
- in the premises of the first floor or located on the ground, it is recommended to install waterproofing between the ground and the screed to create protection from capillary moisture. The second option for solving the problem is laying waterproofing between the insulation layer and the rough screed.
When using an insulation material that is vulnerable to water from either side, experts advise placing it between two waterproofing layers in the following situations:
- the underfloor heating system is being installed, but there is a possibility of leaks;
- the device of the floor is carried out with a wet method, and the insulation must be protected from the water that is in the solution;
- the floor is installed in a bathroom or other room with a high moisture content, and there is a possibility of water penetration through the floor coverings.
As a rule, in underfloor heating systems, the underlay acts as a waterproofing layer for insulation from above. For example, foamed polyethylene with a foil surface is responsible for reducing heat loss, uniformity of its distribution, and protects the insulation layer against moisture.
Many are interested in whether waterproofing is needed under a warm floor in principle, and whether there is a need to lay waterproofing on top of a warm floor in wet rooms - corrosion can begin from water leaks, and in the case of an electrical system, there is a possibility of a short circuit.
Such excitements are groundless, since heating elements and coolant pipes are created in such a way that they can be easily mounted under a screed, which creates an aggressive environment before final drying.
Cable and electrical systems of underfloor heating, like water systems, have their own waterproofing, so that moisture penetration from above does not pose a threat to them.
Laying and installation of infrared underfloor heating
Make a quality renovation and lay the laminate floor as the final touch. So why not really want to walk on it, and there is a desire to spend the evening on the couch under a blanket. Low temperature may be the reason. Radiator heating does not always cope with heating the whole house. The infrared warm floor under the laminate will solve the problem, the installation and installation of which will become more accessible when you perform several step-by-step actions.
Features of infrared underfloor heating under laminate
Why is this heating method recognized as the most optimal? The choice was made based on the properties of the laminate and the characteristics of the apartments in which the installation is taking place. With a water heating system, an additional layer is required before laying the final coat. It does not steal precious centimeters from already low apartments. Uneven heating of electric underfloor heating and instability of the water system can ruin the laminate.
Some properties of this heating system will help to determine the advantages:
- Heating function - due to heating elements fixed on a thin film. With infrared radiation, heat enters all household items and furniture in the apartment, which play the role of a heater in the future.
- Differs in high compatibility with all possible flooring options.
- There is no need to apply an additional insulating layer.
- The system itself does not take up much space during installation, less than 1 cm. The height of the room is not concealed by additional ties and adhesives, as when installing a warm electric floor.
- Budget - when connecting a film underfloor heating, very low power consumption.
- High heat performance.
- The only drawback is the high price. Sold and priced in running meters.
How to put a film warm floor under the laminate on your own?
This heating system got its name due to its design. Heat-resistant film in two layers, between them a heating element made of carbon or bimetal is hidden. In the first case, it is attached to lavsan - the material is wear-resistant, elastic and has a high dielectric index. In the second, everything rests on the polymer. This option of infrared underfloor heating is not suitable for tiles. It's all the fault of the grounding wire, which can damage the structure of the tile over time.
Any installation of an infrared warm floor will be perfect, with high-quality preparation of the base for it. In old rooms, boards should be knocked down or hardboard removed. In panel houses, preliminary preparation is not limited to sweeping and stripping. It is often necessary to fill in several bags of leveling compound in order to remove the floor drop and smooth out roughness.
Each left unevenness can cause the failure of the entire heating system. The element can tear if it falls into the recess or rub against the bumps with the laminate.
Next, we lay the thermal insulation. Each sheet is fitted closely and tape is glued to the seam. The plated layer must remain on the visible side. As a result, the entire room from wall to wall should become shiny and not have visible gaps and crevices. It is important to remember that thermal insulation with aluminum foil when laying an infrared warm floor is unacceptable.
The next step is to install the heating system. Laying the film also in rows.The knowledge of physics obtained in the seventh grade is used, everything is connected in parallel. Each heating element in the form of a copper strip is fixed to the contact with bitumen insulation.
Read on to learn how to make a DIY shoe dryer. And also about the features of the plinth heating system.
For the correct operation of an infrared heated floor, you need to install a temperature sensor. In order not to spoil the ideal surface for a high-quality fit of the laminate, it is hidden in an insulating layer.
Watch a video on how to choose an infrared film for a warm floor.
The next step is to connect a film underfloor heating. When buying a heating system, a thermostat remains an obligatory component. Instructions are attached to it. It is not applied in vain, it is responsible for the operation of the entire system as a whole, it is better to follow its instructions exactly. connecting the thermostat to the wire of the outer cell. It remains only to test the installation result. Heating is on, then everything is done correctly. Cover with plastic and backing and start assembling the laminate.
The step-by-step execution of the instructions will allow you to install an infrared warm floor under the linoleum. A perfectly flat floor will not allow a thin and elastic coating to deform. The absence of temperature fluctuations will not harm its structure.
Is it possible to install a film underfloor heating on wooden floors?
The advantage of a wooden house is the use of a natural ecological material with good heat-saving characteristics.
The tree burns well. A logical question is, is it safe to install this film floor heating system on a wooden floor? According to manufacturers and from the established practice, it is enough only to correctly install such a heating system. Fire will not occur if all the necessary safety standards are taken into account when wiring the system.
Previously, during construction, only two floor heating systems were used: electric or water. But the union of electricity and wood is fire hazardous. The moisture content of the second system often adversely affected the appearance of this finishing material. These characteristics are absent in infrared heating.
The first step in installing the floor is thermal insulation, which coating it will be applied to is not essential. The functionalism of the heating system does not depend on what the system is located on. Wooden floors, concrete walkways, metal garage or stone gazebo can all be protected from icing.
Do not be afraid to use this floor heating system in every room with any coating, feel its advantage. Let the house be warm and cozy.
Is there an underfloor heating system installed in your premises? Leave your message in the comments, as well as watch the video on the installation of an infrared heated floor.
www.rutvet.ru
Criteria for the selection of waterproofing materials
According to the specifics of the application, such materials are divided into different types, but the same requirements are imposed on their choice:
- atomic resistance - protection from moisture should be distinguished by the ability to maintain its original properties and quality characteristics for the longest possible period;
- moisture resistance and resistance to water is a very important criterion that determines the ability to not pass or absorb water;
- chemical resistance - this parameter is important in order to avoid destruction from the effects of chemical elements during operation;
- resistance to temperature extremes - this property helps to maintain the original performance at certain temperatures;
- biological stability - this characteristic allows you to prevent the penetration and effects of bacteria and microorganisms on the structure of the waterproofing material.
When deciding which waterproofing material to use for floor heating, it is recommended to pay attention to the following important aspects:
- cost. As a rule, roll materials are cheaper. Mastic materials and primers are more expensive, but better protect against moisture;
- features of the premises - for rooms with a small area it is better to use mastic, but it is easier to cover large rooms with roll materials;
- the possibility of waterproofing on our own - it is easiest to work with impregnating compositions, but difficulties may arise with the deposited layer.
In most cases, manufacturers of underfloor heating systems recommend the types of waterproofing materials as recommendations. These include:
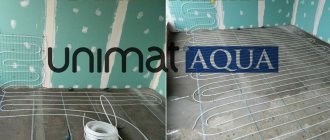
- polyethylene and polyvinyl chloride film materials. They are equipped with thermo-reflective layers. For the convenience of laying, the edges are warmed up and joined, insulation is performed with adhesive tape;
- cement-polymer - a freshly prepared elastic composition is applied to the surface with a roller or spatula, a special tape is laid at the joints. The result is a durable and waterproof coating that is excellent for concrete surfaces. Many people note its elasticity, which is very important with changes in temperature and shrinkage of buildings that have recently been commissioned;
- cast - the most reliable option. Today, for this purpose, liquid silicone membranes are used, which create good adhesion and are distinguished by elasticity.
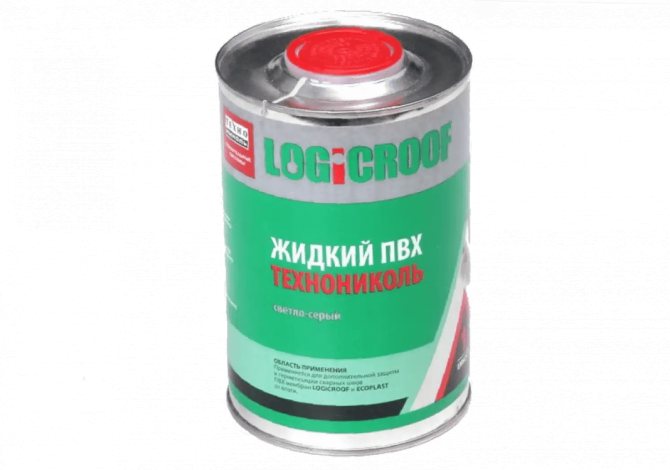
Liquid silicone membranes - a type of waterproofing for underfloor heating
Do-it-yourself infrared floor heating
Publication date: 06-03-2015
Infrared underfloor heating is gaining more and more popularity every day as not only an additional, but also the main heating system for heating rooms.
Infrared floor heating installation
This is facilitated by its numerous advantages, among which one can especially highlight such as environmental friendliness, ease of installation and operation, cost-effectiveness. Such a floor does not dry out the air, which noticeably distinguishes it from other analogues.
In addition, when laying, such a floor does not “eat up” the height in the room, which is so important for apartments in multi-storey buildings. It also does not create loads on the floors.
An infrared floor is a very light and flexible system that consists of thermal foil and contacts and is laid on the sub floor. Heat waves begin to enter the room when a special material is heated; it is possible to regulate the temperature in the room.
Among the advantages, one can single out the fact that various floor coverings can be laid on the surface of such an extraordinary system, practically without additional surface preparation. Often these are just sheets of plywood on which linoleum, laminate, carpet can be mounted.
The characteristics of this option
The system of such heating is a polymer ultrathin film with a thickness of one fifth of a millimeter, which emits infrared rays with a wavelength of 5-20 microns over its entire surface.
Laying laminate flooring
The heating elements are graphite black stripes, which are powered by copper-silver alloy conductors. When an electric current is applied, such floors begin to emit infrared waves, or in other words, the heat of sunlight.
The characteristics of such a system are:
- power source - from a conventional power supply;
- web dimensions - thickness - 0.4 millimeters, film width - 0.5-0.8 running meters;
- working power - 140-150 watts per square meter of canvas;
- heating elements - graphite strips in a special transparent shell;
- working temperature of the film surface - up to 55 degrees;
- melting point - from 210 degrees.
Back to the table of contents
So, you have chosen this system for styling. Before you start preparing the base, it is recommended to immediately prepare all the materials and tools that will be required during work.
Underfloor heating installation
For styling you will need:
- thermal film of the warm floor system,
- special contact clamps made of copper and silver alloy,
- connecting clips, thermal insulation material (in no case should you use aluminum foil as such),
- electrical wires in the required quantity,
- vinyl-mastic (bituminous) insulation,
- temperature sensors and thermostat,
- ordinary construction tape for fastening the edges of the film.
Also required additionally:
- Reinforcing mesh, in the case when ceramic tiles will be laid.
- Particleboard, fiberboard, plywood for laying linoleum, carpet and other soft flooring. The thickness of the sheet should be at least five millimeters.
During the work, you will also need such tools: scissors, pliers, wire cutters, a screwdriver, an assembly knife, a crimp for wires.
Back to the table of contents
The infrared floor system is installed only on a level, perfectly clean and dry base. In the event that there is a floor covering, it must be completely removed and the floor prepared for work.
Installed thermal film
The largest value that is permissible for a deviation from horizontal is three millimeters. If this indicator is much higher, work should be carried out to level the floor: cycle it (for wooden floors), grind it or use leveling mixtures (for a concrete base).
After all the work, construction debris, dust, stains are carefully removed, the floor surface is dedusted with an industrial vacuum cleaner.
Now you can lay a waterproofing layer, which is a special polyethylene film or membrane with a thickness of 50 microns or more.
Such a layer is laid on the base, straightened. The edges are secured with tape. Do not allow holes or other defects in the film.
Back to the table of contents
An infrared heat-insulated floor also requires a special heat-insulating layer or substrate, which is covered with polypropylene or lavsan metallized film. In the event that the floor covering is linoleum or carpet, then it is necessary to use a heat insulator with a soft layer for the purpose of shock absorption.
When laying on top of ceramic tiles and laminates, it is recommended to use heat-insulating materials with hard layers, for example, technical cork, which has a thickness of two millimeters or more.
Such a layer is laid throughout the room, the joints between the individual elements should be fastened with construction tape.
Before starting the installation of the thermal film and connecting the contacts, it is necessary to mark the floor surface, strictly following the proposed recommendations. Also, immediately it is necessary to clearly determine the place where the floor temperature sensor and the thermostat will be placed.
Connecting terminal clamps
- The thermal film should be laid on a free surface that will not be occupied by furniture and household appliances, as they can damage the contacts. That is, you first need to determine exactly where the furniture will stand, stir the stove, refrigerator, etc.
- In order to ensure efficient heating of the room, cover about 75-80 percent of the floor area. If the infrared floor is an additional and not the main system, then forty percent is quite enough.
- Installation calculations are based on the peak power consumption, at the time of connection it is usually 210 W per square meter.
- All heating sections must be separated by lines so that the film can be cut accurately without damaging individual elements. It is recommended to place such lines in length - up to 17.4 centimeters, in width - up to 50-80 centimeters.
- If core floors are used, then they can be cut only on the basis of the instructions supplied by the manufacturer.
Back to the table of contents
Infrared film floor
We are starting the installation of the system. We put a thermal film on the surface of the base, while it is advisable to use as few connections as possible, that is, use solid strips, which are best laid along the length of the room.
Installation of the film is carried out with a copper current-carrying strip only downwards; the distance between individual strips should be at least five centimeters. An exception is possible only if laminate or linoleum will be used as flooring.
The film is attached to the thermal insulation with construction tape, which ensures its immobility and reliability. Cut lines in the areas of passage of current-carrying copper conductors must be insulated with a special bitumen mixture, which at the same time also serves as a reliable protection against excess moisture.
After that, you can mount the contact clamps, half of which will be inside the thermal film, the other outside, on the current-carrying strips. They are fixed using ordinary pliers.
Back to the table of contents
After installing the system, it must be connected correctly and the heating operation must be checked.
If the total power is more than 22 kilowatts, then it is necessary to provide special separate wiring to the thermostat. In addition, furniture, flooring and other elements should not interfere with the installation of wiring, contribute to damage to the cable.
When connected, the system temperature sensor is installed under the foil near the thermostat.
You can attach it with tape. After that, all the contact clamps are installed on the thermal film, the supply wires are connected, their ends and connection points should be insulated with a special bitumen insulator.
Now you need to perform a number of such mandatory checks as:
- correct wiring;
- heating of each individual graphite strip;
- the condition of the insulation along the cut lines.
Back to the table of contents
Before installing the selected floor covering on the system, it should first be checked for functionality. It should also be noted that some types of coatings require preparatory work.
Ceramic tiles, linoleum, carpet are suitable as floor coverings. Before laying soft materials, sheets of plywood or fiberboard with a thickness of five millimeters or more should be reinforced on the floor.
If a tile is to be mounted, then you should first install a reinforcing mesh with cells of two millimeters in diameter or a special fiberglass mesh, the cells of which have sizes from 5 to 20 millimeters.
Such a mesh is attached to the base with dowels, after which a cement screed can be applied to the surface. That's all the basic work that a novice master can handle.
Share a useful article:
Rate the article:
40
polexpert.ru
Types of waterproofing under the water floor
There are several types of waterproofing materials that differ in composition, principle of operation, efficiency.
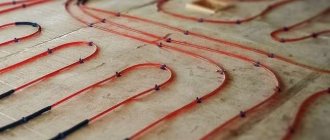
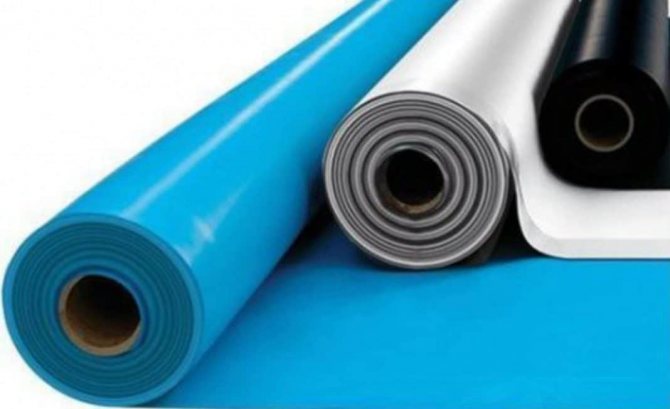
Roll
Inexpensive and most common insulation option. For this type of protection, roofing material is used, a dense plastic film. Bonded waterproofing materials are applied by gluing with preheating with a gas burner or a construction hairdryer.
Water based mastic
Creates maximum surface protection against moisture penetration.Recommended for use in multi-storey buildings, for maximum protection against water leakage if the water circuit has lost its integrity. In order to prevent leaks, the water circuits of heating systems, as an additional measure, are laid in special corrugations. This measure ensures that if the integrity of the pipes is broken, then the water will not flood the lower floor.
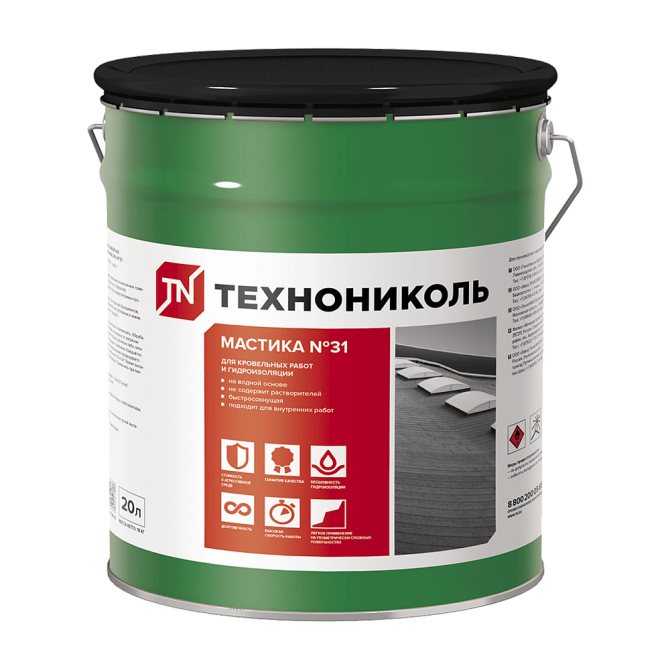
Water-based mastic is one of the waterproofing options for underfloor heating
Floor waterproofing materials
No, you should not despair, because it is very simple to carry out the waterproofing work, and the materials used for this are sold in any hardware store. The most affordable of them is ordinary polyethylene film, but it meets the main requirements for a waterproofer:
- does not let water through;
- elastic so as not to tear during temperature fluctuations;
- not afraid of mold.
Underfloor heating insulation can be done using cement-polymer mixtures. They combine:
Underfloor heating installation scheme.
- absolute moisture resistance;
- "Stone" strength;
- elasticity.
They are applied either with a trowel or roller and have a high coefficient of adhesion to the concrete surface. Waterproofing a warm floor with a cement-polymer composition will be appropriate in new buildings where the process of subsidence has not yet been completed, and the properties of this coating are such that it will withstand compression and tension without collapsing.
Perhaps it is worth mentioning the waterproofing of the warm floor using bitumen and bitumen-roll materials (roofing material), as well as the so-called cast waterproofing, when the screed is poured with several layers of mortars and mastics. The last two methods of moisture protection are more laborious, and the technology for carrying out these works requires certain skills and increased attention to safety measures.
But no matter what material the underfloor heating waterproofing is made of, it is necessary to prepare the surface before laying it. The screed must be free of debris, dust, chips, sand, etc. You may need to prepare a grout to repair bumps or cracks. Waterproofing a warm floor will lose its meaning if the surface under it is not thoroughly dried, so you should not lay the insulator on a newly poured screed or damp floor. If necessary, you can dry the surface with a construction hairdryer.
https://kuhnyamoya.ru/youtu.be/owBi9stXkIE
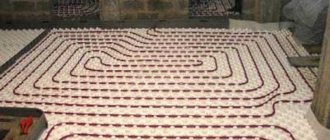
Laying principle
The laying technique and preliminary surface preparation will be determined by the selected material. There are simple application options that are performed independently, in other cases special skills and appropriate tools are required.
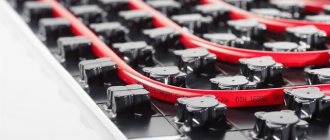
Roll materials
Such waterproofing under the warm floor is laid along the rough screed. The materials are spread over the surface in such a way that the joining areas form an overlap of several centimeters.
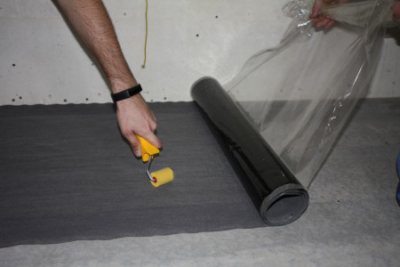
If bituminous covering materials are used, then the waterproofing is arranged as follows. The base must first be leveled and treated with a primer. The roll of waterproofing material is gradually rolled out, while its lower surface warms up. The seams are processed especially carefully. Bituminous materials are glued to the base, creating a high-quality protection against water penetration and condensation formation.
Roll materials for waterproofing under floor heating
Liquid mastic
It is quite simple to work with such material on your own. The mastic is applied with a brush or spray gun in several layers. Impregnations penetrate deeply into the surface, creating a moisture protective layer. Ultimately, reliable protection against leaks is provided if the water circuit breaks through. It is worth noting that this type of waterproofing under a warm floor is recommended for a device in the bathroom.
The technological process of working with mastic implies a thorough surface treatment, applying the next layer perpendicular to the previous one.
Waterproofing prevents the formation of condensation, provides high-quality protection against leaks if damage occurs in the water circuit. If there is no such layer, it means that the installation work was performed with a gross violation of technology.
The technology of applying waterproofing under the warm floor
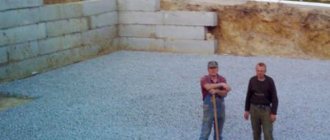
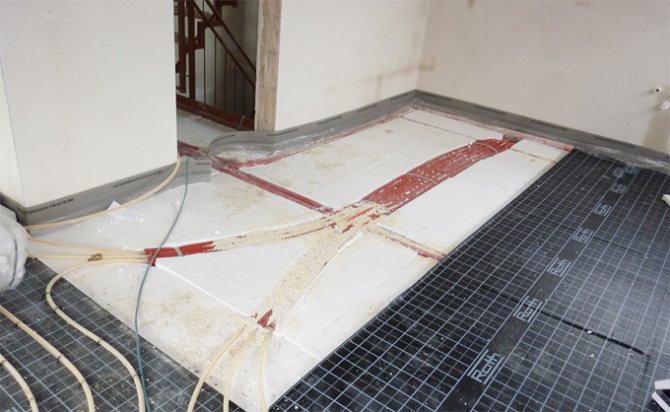
If you need waterproofing of a room located above the ground, then a protective layer is initially laid under the screed, so to speak, preliminary insulation. As a rule, roll materials are used for this (roofing material, glass insulation, etc.).
The next stage - the screed is poured, after which it is completely dry, the waterproofing of the warm floor can be performed directly. If we are talking about an already existing screed, then it is first necessary to remove the remnants of the old insulation from it, to clean it from contamination.
Roll insulation is rolled out over the floor surface, pressed against the base as much as possible. In this case, the approach to the walls of the waterproofing material of about 20 centimeters is mandatory. The sheets are fixed with an overlap, the joints are carefully glued or welded.
If the waterproofing of the floor is carried out with the use of coating compounds, then during the work you must strictly follow the manufacturer's instructions. Mastics are applied in several layers, while after each treatment you need to wait for the composition to dry completely.
Underfloor heating is installed only after the last layer of insulation dries out. If necessary, you can waterproof the insulation from above, for example, using a waterproof underlay.
Whichever waterproofing under the water floor or electric heating is chosen, it is very important to follow all the steps in order to achieve the desired result. Of course, you can do everything with your own hands, but each material and technology has its own nuances that need to be taken into account. There is another option for solving this problem - to entrust the arrangement process to specialists who have experience in such work.
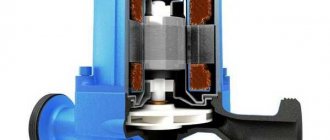
Thermal insulation for water floor
Thermal insulation for a warm water floor
To prevent the heat from going down from the system, the floor is insulated. To do this, you can use inexpensive mineral wool, glass wool, spend money on foam concrete, technical cork, or purchase other material for a similar purpose. You can also purchase special thermal insulation for a water-heated floor, which greatly simplifies the installation process. The cost of the material is high, but in many cases the design saves from painstaking and complex work.
The thickness of the insulating layer depends on the location of the apartment. If it is located above another, heated apartment, then about 5 cm will be enough.In private houses and rooms above a cold basement, a layer of 25 cm will be required.
Why do you need to isolate the system?
And really .. why? Let's figure it out:
- The natural heat loss through the coldest surface in the room to the outside or into the ground is reduced. Under normal conditions, the amount of heat loss reaches 20% of their total volume.
- The radiated energy is evenly and efficiently distributed along the perimeter of the heating. At the same time, it is not spent on heating floors and structural elements below the heated area.
- Energy is saved for additional heating, the cost of heating is reduced.
- Additional sound insulation is created.
- Prevents moisture from the ground or basement from entering the room through the floor covering.
Preparation of the base
Installation begins with cleaning the subfloor from dirt and dust, which will reveal its unevenness. In accordance with existing standards, the difference in the level of the "rough" floor should not exceed 5 mm.To level the surface, you can use one of these methods:
- Make a rough screed for the underfloor heating system - a layer that will reduce all unevenness. Usually it is made of sand concrete or just concrete;
- In the case where the surface has many small irregularities, to level it, you can scatter a couple of buckets of sand and level it using a rule.
If you do not take this into account, then during the operation of the heating system, problems may arise with the airing of the system, an increase in hydraulic resistance and heat transfer, which will deteriorate.
How to do it yourself?
The type of waterproofing material depends on how it will be laid and the base will be prepared. Sometimes you can mount the waterproofing layer yourself, in others you will need the help of a master with special tools.
Roll materials
Such waterproofing is laid on a rough screed. The roll is rolled out over the entire area with an overlap of the joining sections of 2-3 centimeters. The use of bituminous materials requires preliminary leveling of the rough surface and its priming.
- The roll is gradually rolled out along the base, warming up its lower surface.
- The seams are carefully processed.
When glued to the base of such insulation, a reliable protection against moisture and condensation is formed.
About the installation of roll waterproofing in the video: