
When the wind turbine is done properly, it will function without any errors. With a 75A battery and a good 1000 W inverter, the wind turbine will easily provide light to the street, the area of the house, power the security alarms, video surveillance, etc.
Wind turbines of this type have the following advantages:
- ease of installation;
- low cost;
- profitability;
- malleability to repair;
- not picky about the conditions of functioning;
- reliability and noiselessness of work.
There are several disadvantages of the wind generator:
- small productivity of the wind generator;
- complete dependence of the windmill on the wind;
- blades can disrupt the air flow.
Preparation of materials for a wind turbine
The first step is to collect all the consumables and parts for the windmill. The wind generator you made will produce a power of no more than 1.5 kW. To make an aggregate you need to have:
- 12V car alternator.
- 12 volt helium or acid battery.
- Special converter from 12V to 220V and from 700W to 1500W.
- A large stainless steel or aluminum container: a bucket or saucepan.
- A simple voltmeter.
- Bolts, washers and nuts.
- Relay for charging the battery from the car and a charge indicator lamp.
- Wires with different cross-sections (2.5 mm2 and 4 mm2).
- Clamps fixing the wind generator.
- The switch "button" is semi-hermetic, 12 V.
- grinder or metal scissors;
- tape measure;
- construction pencil or marker;
- screwdriver, drill, pliers and drill.
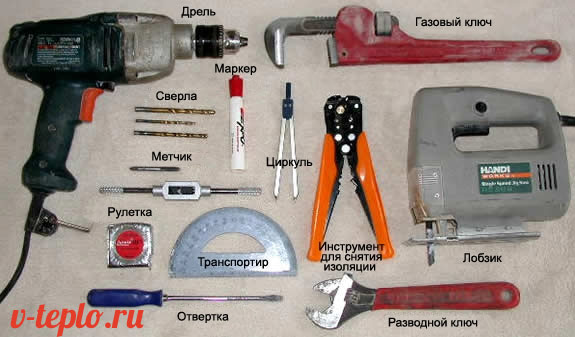
Also, stock up on the following tools:
Wind turbine design work
The work consists in the manufacture of the rotor and the alteration of the generator pulley. The stages are as follows:
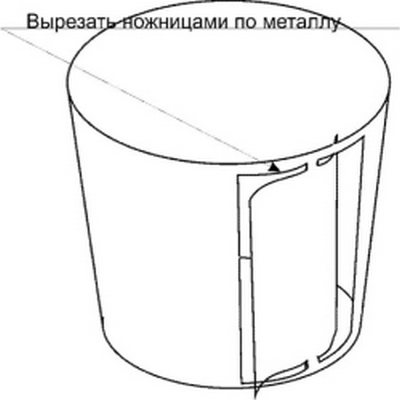
Note! When working with metal scissors, you need to cut a hole for them. If the bucket is not made of painted tin or galvanized steel, then you can use a grinder.
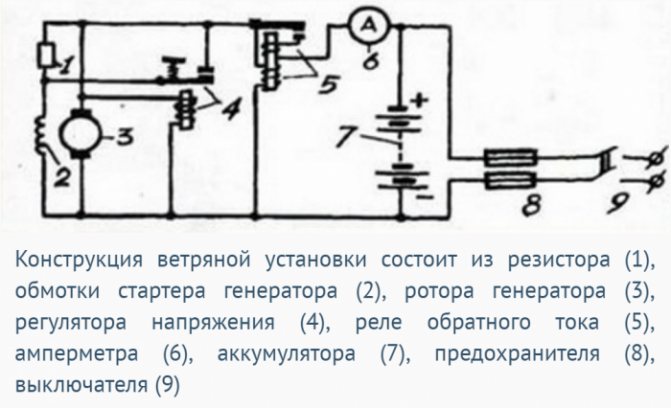
To connect the battery, take wires with a cross section of 4 mm2. The recommended size is no more than 1 m. And thanks to wires with 2.5 mm2, connect lights and devices. Do not forget to install an inverter (converter). Connect the device to the mains to pins # 7 and # 8 shown in the diagram below. Use 4 mm2 wires.
That's it, your wind turbine is now ready to go. It can not but rejoice that it is made with your own hands.
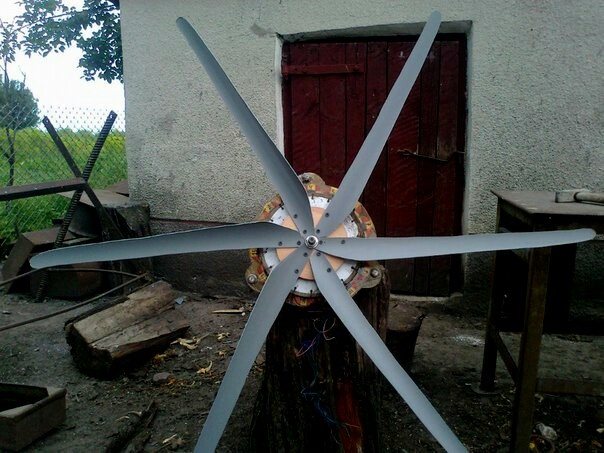
General working principle
The main working body of the wind generator is the blades, which are rotated by the wind. Depending on the location of the axis of rotation, wind turbines are divided into horizontal and vertical:
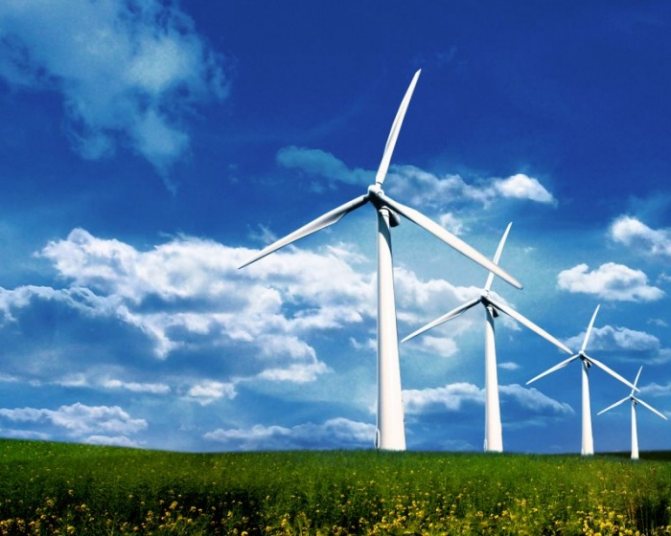
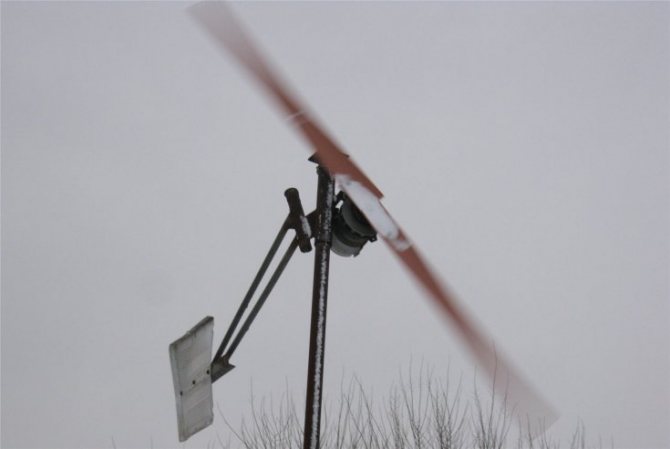
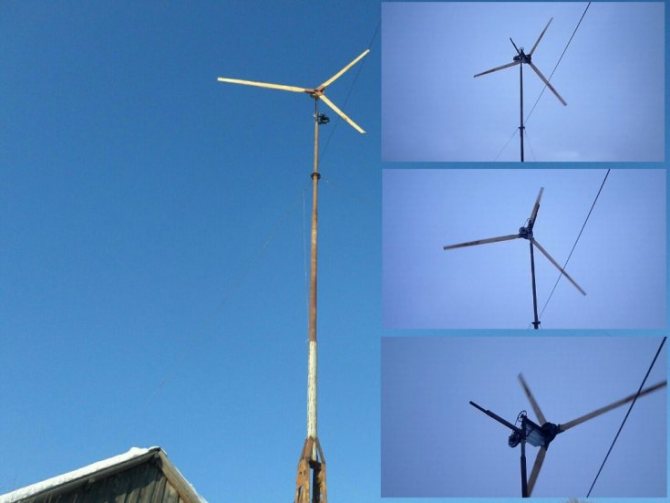
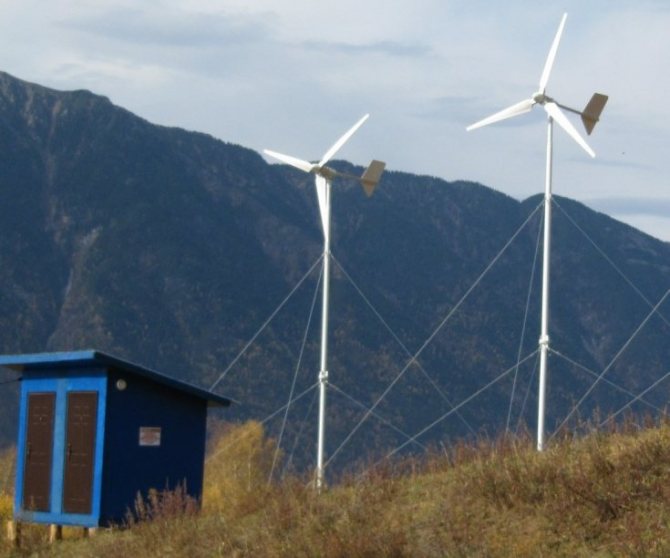
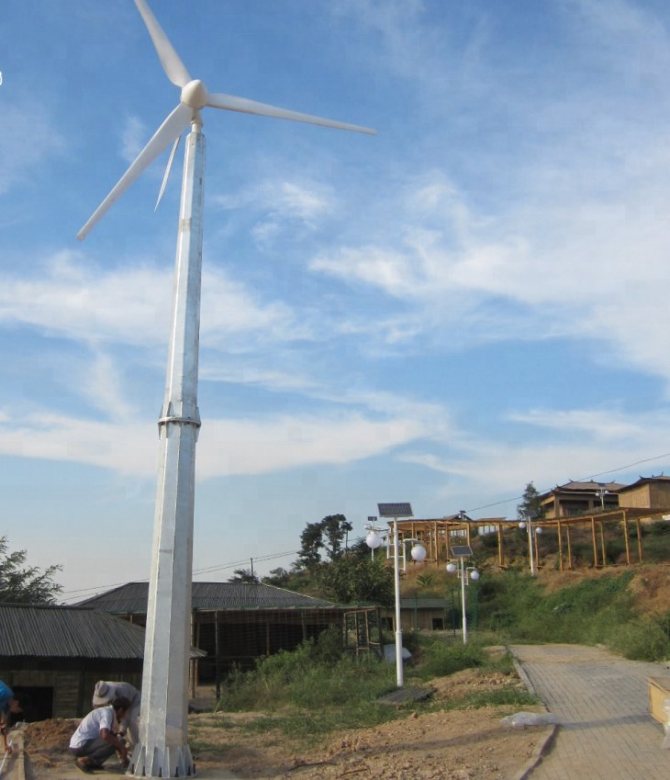
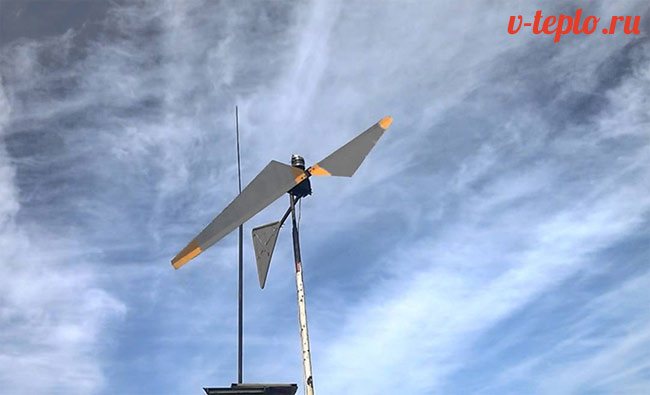
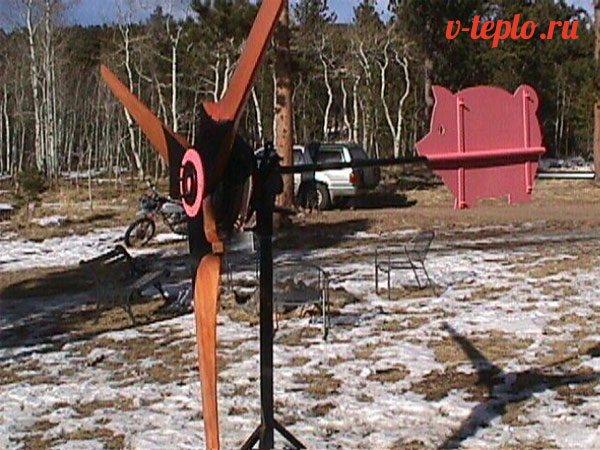
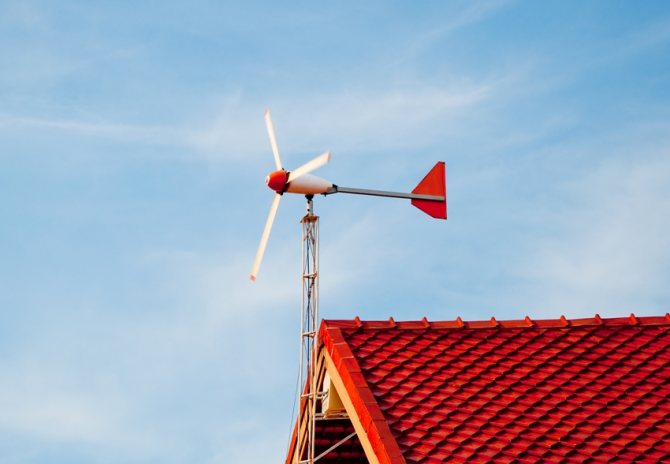
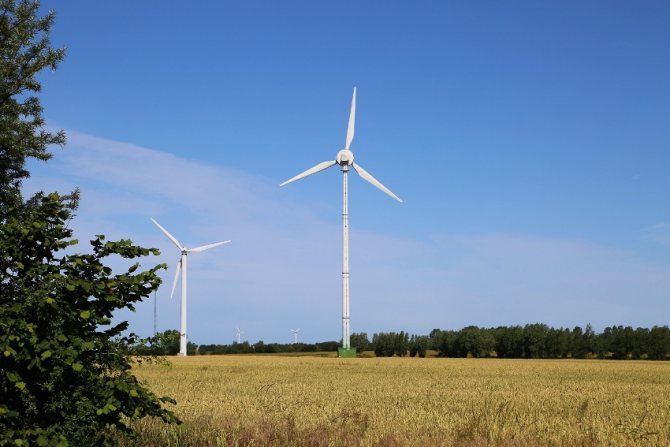
- Horizontal wind turbines most widespread. Their blades have a design similar to an airplane propeller: in the first approximation, these are plates inclined relative to the plane of rotation, which convert part of the load from wind pressure into rotation. An important feature of a horizontal wind generator is the need to ensure the rotation of the blade assembly in accordance with the direction of the wind, since the maximum efficiency is ensured when the direction of the wind is perpendicular to the plane of rotation.
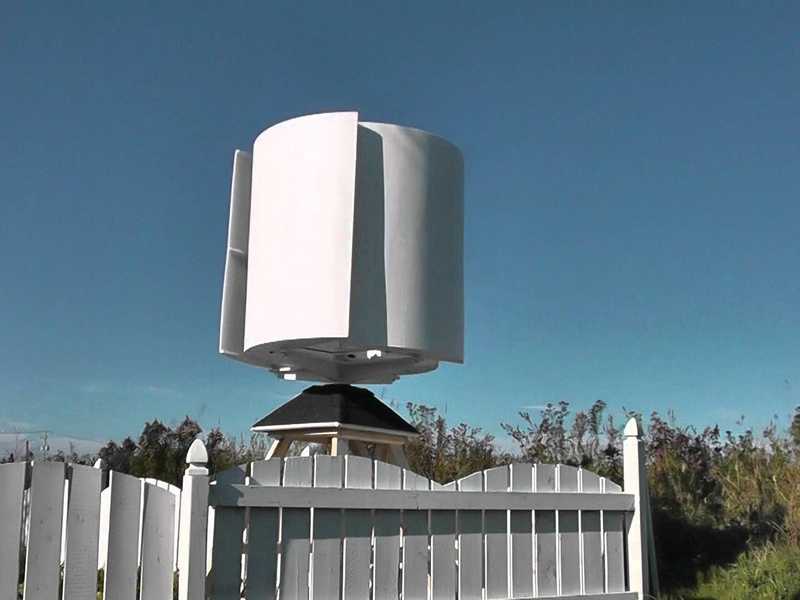
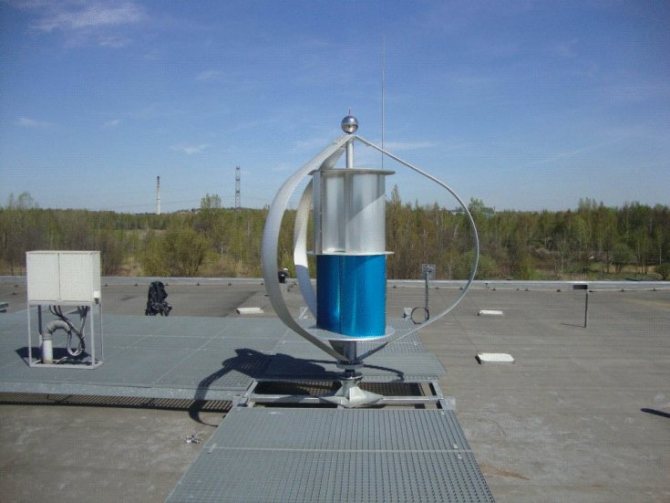
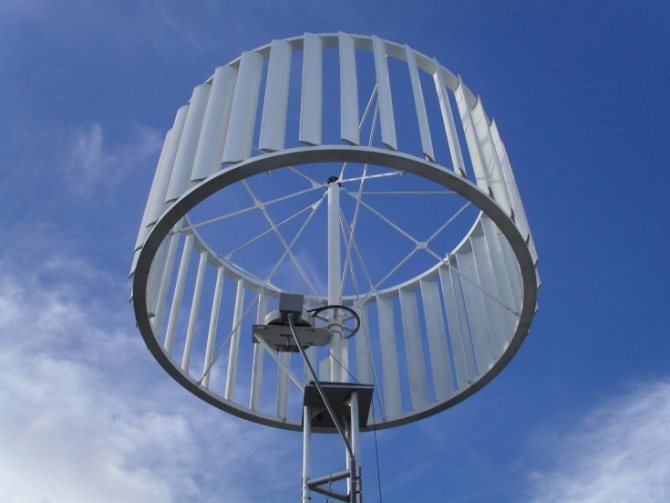
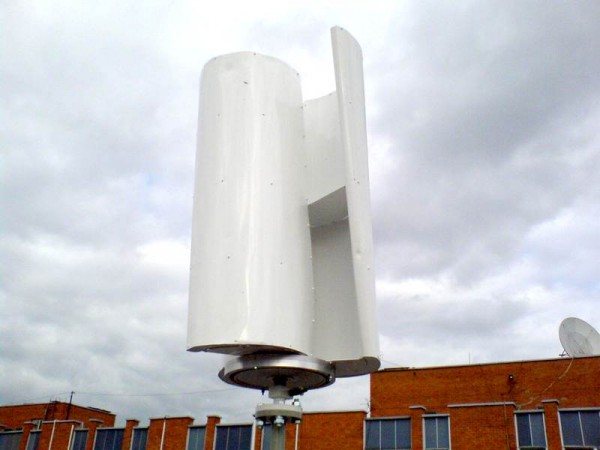
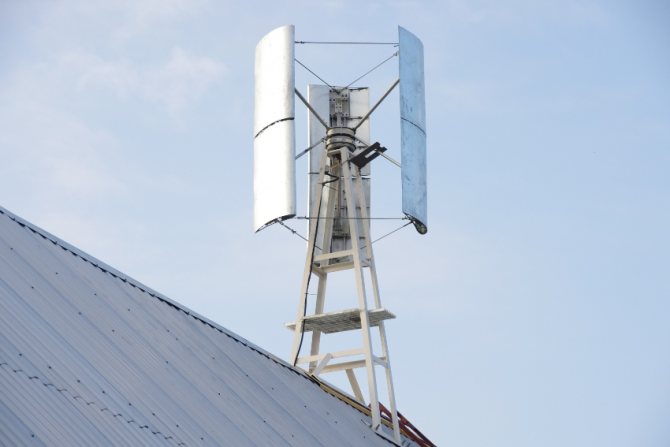
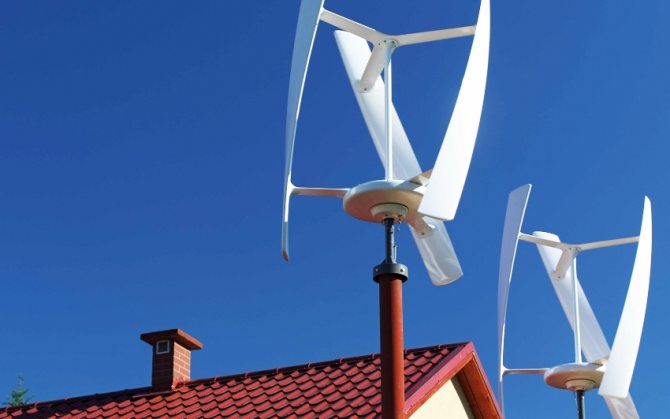
- Blades vertical wind turbine have a convex-concave shape.Since the streamlining of the convex side is greater than the concave side, such a wind turbine always rotates in one direction, regardless of the direction of the wind, which makes the turning mechanism unnecessary, unlike horizontal wind turbines. At the same time, due to the fact that at any given time, only a part of the blades performs useful work, and the rest only oppose rotation, The efficiency of a vertical windmill is much lower than that of a horizontal: if for a three-blade horizontal wind generator this figure reaches 45%, then for a vertical one it will not exceed 25%.
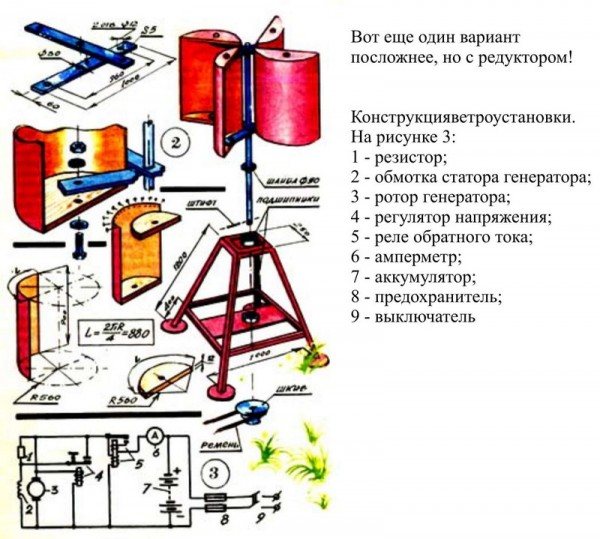
Since the average wind speed in Russia is not high, even a large wind turbine will rotate rather slowly most of the time. To provide sufficient power, the power supply must be connected to the generator through a step-up reducer, belt or gear. In a horizontal windmill, the blade-reducer-generator unit is mounted on a swivel head, which enables them to follow the direction of the wind. It is important to take into account that the swivel head must have a limiter that prevents it from making a full turn, since otherwise the wiring from the generator will be cut off (the option using contact washers that allow the head to rotate freely is more complicated). To ensure rotation, the wind generator is supplemented with a working weather vane directed along the axis of rotation.
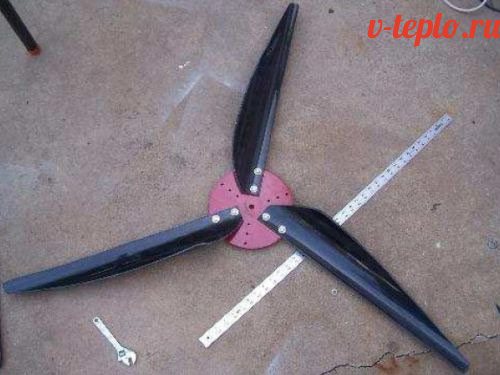
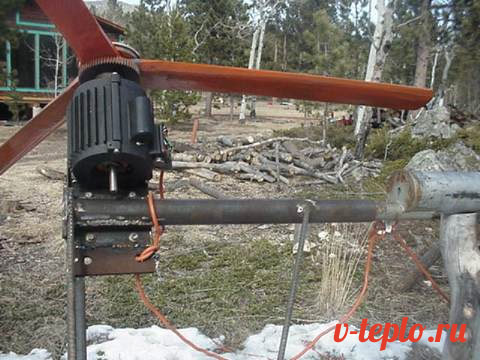
The most common blade material is large diameter PVC pipes cut lengthwise. Along the edge, metal plates are riveted to them, welded to the hub of the blade assembly. Drawings of this kind of blades are the most widespread on the Internet.
The video tells about a self-made wind generator
Making a vertical wind generator at home
And now let's find out how, in fact, a wind generator is made with our own hands. The procedure consists of several stages, let's get acquainted with the features of each of them.
Stage one. We prepare tools and materials
There are no requirements regarding the size of the turbine - the larger it is, the better for the system itself. And in the example given in this article, the diameter of the turbine is 60 centimeters.
To make a vertical turbine yourself, prepare in advance:
- a pipe with a diameter of 60 centimeters, made of stainless steel;
- screws, nuts and other fasteners;
- a pair of plastic discs with a diameter of 60 centimeters (it is important that the plastic is strong);
- car hub for base;
- corners with which the blades will be attached (for each element - six pieces; that is, 36 copies in total).
In addition, take care of the following tools in advance:
- keys;
- jigsaw;
- mask;
- protective gloves;
- Bulgarian;
- screwdriver;
- electric drill.
Magnets or small metal plates can be used to balance the blades. If the imbalance is minor, you can simply drill holes in the appropriate places.
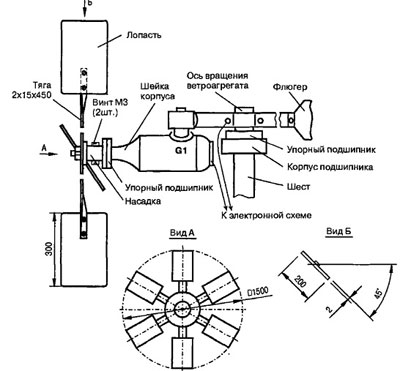
Stage two. Draws up a drawing
It is definitely impossible to do without a drawing here. You can use the one below or create your own.
Stage three. Making a vertical windmill
Step 1.
First, take a metal pipe and cut it lengthwise so that you end up with six blades of the same size.
Step 2.
Cut out a pair of identical circles with a diameter of 60 centimeters from the plastic. They will serve as supports for the bottom and top of the turbine.
Step 3.
In the upper support, you can cut a small hole (about 30 centimeters in diameter), which will make the structure somewhat lighter.
Step 4.
Mark the holes on the car hub for the same holes in the lower plastic support required for the mountings.Use a drill to punch holes.
Step 5.
Mark the location of the blades in accordance with the template (you should get a pair of triangles, which, as it were, form a star). Mark the places where the corners are fastened. Everything should be the same on both supports.
Step 6.
Cut the blades. You can cut them several at once using a grinder.
Step 7.
Mark the attachment points on the blades and corners. Punch all these holes.
Step 8.
Connect the blades to the bases using angles, bolts and nuts.
Note! The power of the device largely depends on the length of the blades, but if the latter are large, it will be much more difficult to balance them. Moreover, the structure can become loose under the influence of strong winds.
Stage four. We make a generator
The generator in this case must be self-excited, and always with permanent magnets. If you take a conventional generator from a car, then the voltage winding here functions from the battery, in other words - in the absence of voltage there will be no excitation. Therefore, if you use a simple generator in tandem with a battery, and the wind is relatively weak for a long time, then the battery will soon simply be discharged, and later, when the wind resumes, the wind generator will not start again with your own hands.
You can also make a system with neodymium magnets. This kind of device will produce between 1.5 kilowatts (if the wind is weak) to 3.5 kilowatts (if the wind is strong). The step-by-step instructions for creating such a generator are as follows.
Step 1.
Make a pair of metal pancakes, each about 50 centimeters long.
Step 2.
Using superglue, glue neodymium magnets with dimensions of 2.5x5.0.12 centimeters (twelve pieces for each) to the pancakes around the entire perimeter.
Step 3.
Place the pancakes opposite each other, remembering the polarity.
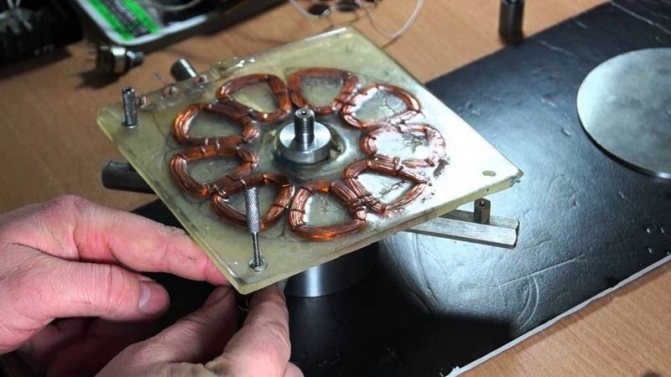
Step 4.
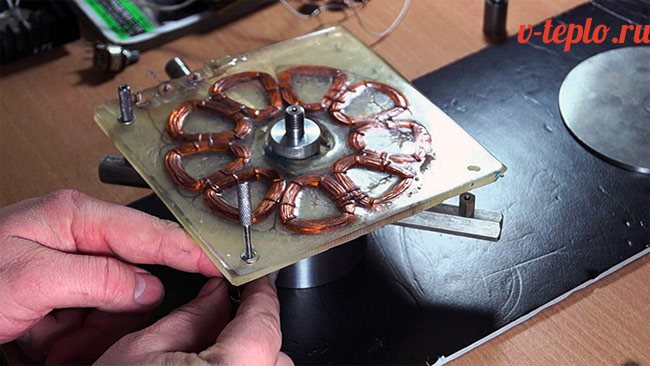
Place a self-made stator between them (make 9 coils from a wire with a cross section of 0.3 centimeters, each with 70 turns). Connect the coils with an “asterisk” (as shown in the image), then fill with resin. In this case, it is important that the coils are wound in one direction, you can mark the end / beginning of the winding with a colored insulating tape - this will be more convenient.
Step 5.
The stator should be about 2 centimeters thick. The winding must come out by means of bolts and nuts. The distance between the rotor and the stator must be 2 millimeters.
The magnets will attract quite strongly, and for a smooth connection it is necessary to make holes in them and cut the threads for the studs. Align the rotors immediately, then use the keys to lower the upper to the lower. Then you can remove the temporary studs.
Note! The generator described above can be used not only for vertical, but also for horizontal wind turbines.
Stage five. We collect the entire structure
First, install a special bracket on the mast, by means of which the stator (which, in turn, can have either three or six blades), will be attached. Fix the hub over the bracket using all the same nuts. Screw the finished generator onto the four studs that are located at the hub. Then connect the stator with the bracket, which is fixedly fixed on the mast. Attach the turbine to the second rotor plate. Connect the stator wires to the voltage regulator using the terminals.
Stage six. We install a unit that can turn wind into electricity
To install the entire wind generator with your own hands, you need to follow the steps that are given below in the form of step-by-step instructions.
Step 1.
Concrete a solid and solid foundation in the ground.
Step 2.
Pouring concrete mortar there, add the studs necessary to secure the massive hinge (all this is easily done with your own hands).
Step 3.
When the concrete is completely cured, slide the hinge over the studs and secure with nuts.
Step 4.
Install the mast into the movable part of the hinge.
Step 5.
Attach 3 or 4 braces to the top of the mast (you can use a flange or weld). You will also need a steel cable.
Step 6.
Raise the mast on the hinge using one of the prepared cables (you can pull with a car).
Step 7.
The verticality of the entire mast is strictly fixed with guy wires.
Where can such a wind generator be installed?
The efficiency of its functioning largely depends on how correctly you choose the place for installing the wind generator. The location should be such that the blades of the system get as much wind as possible. The site should be open and elevated (for example, the roof of a house, but as far away from trees and other buildings as possible). Tellingly, the reason for this lies not only in interference, but also in the production of some noise by the device during operation, which may not please the neighbors or the owners themselves.
For a more detailed study of the problem, we recommend that you familiarize yourself with the thematic video below.
Video - How to make a wind generator using a household fan
Calculation of a bladed wind turbine
Since we have already found out that a horizontal wind turbine is much more efficient, we will consider the calculation of its design.
Wind energy can be determined by the formula P = 0.6 * S * V³, where S is the area of the circle described by the tips of the rotor blades (throwing area), expressed in square meters, and V is the calculated wind speed in meters per second. You also need to take into account the efficiency of the windmill itself, which for a three-blade horizontal circuit will average 40%, as well as the efficiency of the generator set, which at the peak of the current-speed characteristic is 80% for a generator with permanent magnet excitation and 60% for a generator with an excitation winding. On average, another 20% of the power will be consumed by the overdrive (multiplier). Thus, the final calculation of the radius of the wind turbine (that is, the length of its blade) for a given power of the permanent magnet generator looks like this: R = √ (P / (0.483 * V³))
Example: Let's assume the required power of the wind farm is 500 W, and the average wind speed is 2 m / s. Then, according to our formula, we will have to use blades with a length of at least 11 meters. As you can see, even such a small power will require the creation of a wind generator of colossal dimensions. For more or less rational structures with a blade length of no more than one and a half meters in the conditions of do-it-yourself manufacturing, the wind generator will be able to produce only 80-90 watts of power even in strong winds.
Not enough power? In fact, everything is somewhat different, since in fact the load of the wind generator is fed by the batteries, the wind turbine only charges them to the best of its capabilities. Consequently, the power of a wind turbine determines the frequency with which it can supply energy.
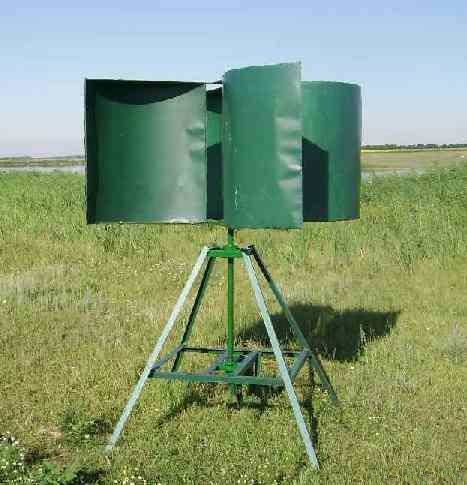
Rotary wind turbine
To begin with, we will consider how to make a simple design of a rotary helicopter. It's easier to start simple and you will understand how it works. This type of wind turbine is suitable for owners of a small garden house. It will not work to use a wind turbine made for a large cottage, due to the low power of the wind generator.
But the windmill is easy to cope with in order to provide the utility rooms with light in the evening, illuminate the garden path, the porch, etc. Let's take a closer look at how to make such a wind generator with our own hands.
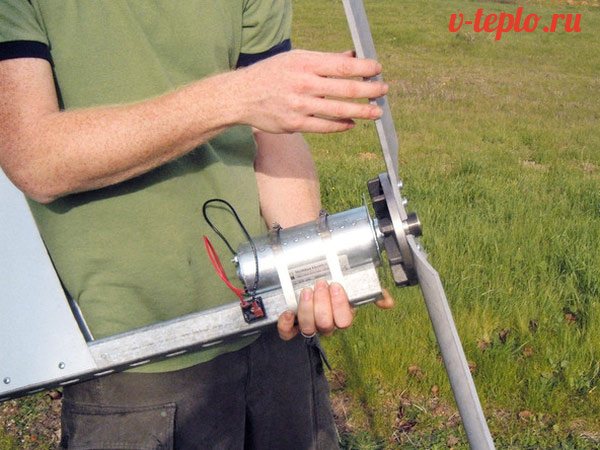
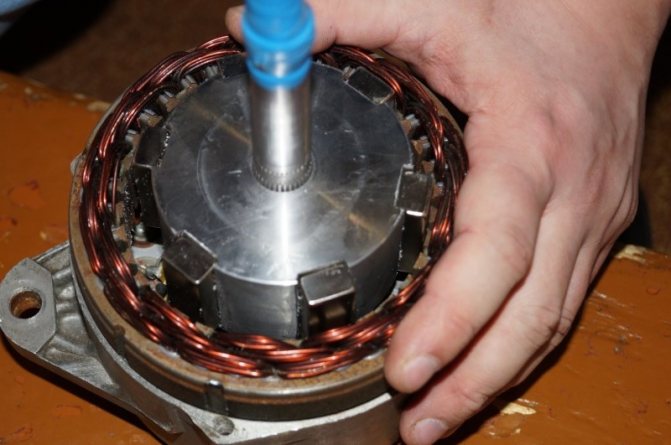
Generator selection
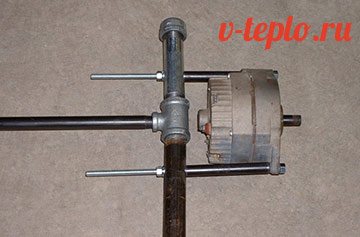
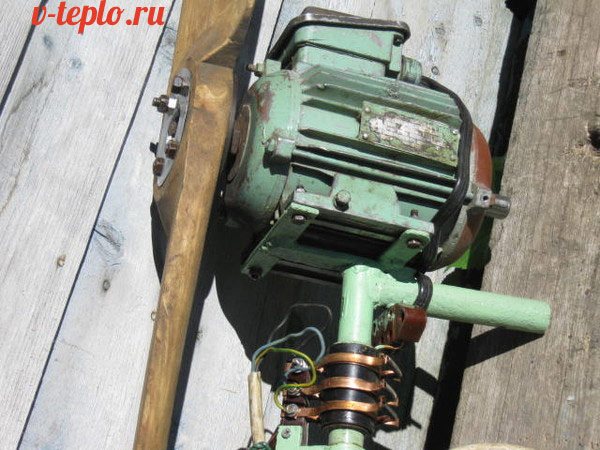
The most logical option for a generator set for a homemade wind turbine seems to be a car generator. This solution makes it easy to assemble the set, since the generator already has both the fixing points and the pulley for the belt multiplier. It is not difficult to buy both the generator itself and spare parts for it. In addition, the built-in relay-regulator allows you to directly connect it to a 12-volt storage battery, and to it, in turn, an inverter for converting direct current to alternating voltage 220V.
But, as mentioned above, the efficiency of generators with an excitation winding is quite low, which is very sensitive for an already low-power wind generator. The second disadvantage is that when the battery is discharged, the car generator cannot be excited.
In a number of home-made designs, you can find the G-700 and G-1000 tractor generators. Their efficiency is no more, a useful difference is only the magnetization of the rotor, which makes it possible to excite the generator even without a storage battery, and a low price.
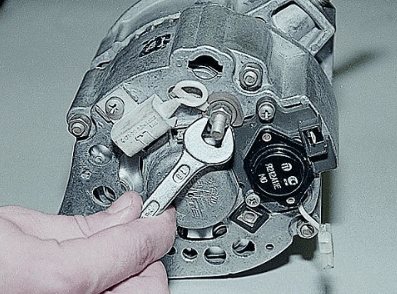
Some authors, when building wind generators, use the property of reversibility of collector electric motors - by forcibly rotating their rotor, direct current can be removed from it. The stator of this type of motors either consists of permanent magnets, which is more preferable for our purposes, or has a winding. To use the engine in generator mode, it is connected to the vehicle's relay regulator to provide the desired voltage. Consider the connection of a relay-regulator using the example of a node from the VAZ classics (it is convenient because it is not combined into one block with a brush assembly):
- Connect one of the motor brushes to the body - this will be the negative pole of the generator. Here, securely connect the metal case of the relay-regulator and the “-” terminal of the battery.
- Connect terminal 67 of the relay to one of the terminals of the stator winding, the second temporarily to the case.
- Connect terminal 15 through a switch with the positive pole of the battery (this will supply the field current to the winding). Give the rotor rotation in the same direction that the wind turbine screw will provide, and connect a voltmeter between the free brush and the housing. If a negative potential is found on the brush, swap the connections of the stator with the relay-regulator and ground.
The main feature of connecting a DC generator to a battery is the need to separate them with a semiconductor diode, which prevents the battery from discharging onto the rotor winding when the generator stops. In modern car generators, this function is performed by a three-phase diode bridge, and we can also use it by connecting its phases in parallel to reduce the voltage drop across it.
The greatest power can be removed from the generator, the rotor of which consists of neodymium magnets. Constructions based on an automobile hub with a brake disc are widespread, along the edge of which powerful magnets are fixed. A stator with a single-phase or three-phase winding is located at a minimum distance from them.
Types of wind turbines
Wind turbines can differ in the following parameters:
- number of blades
- materials of manufacture
- orientation of the axis of rotation relative to the ground
- pitch screw
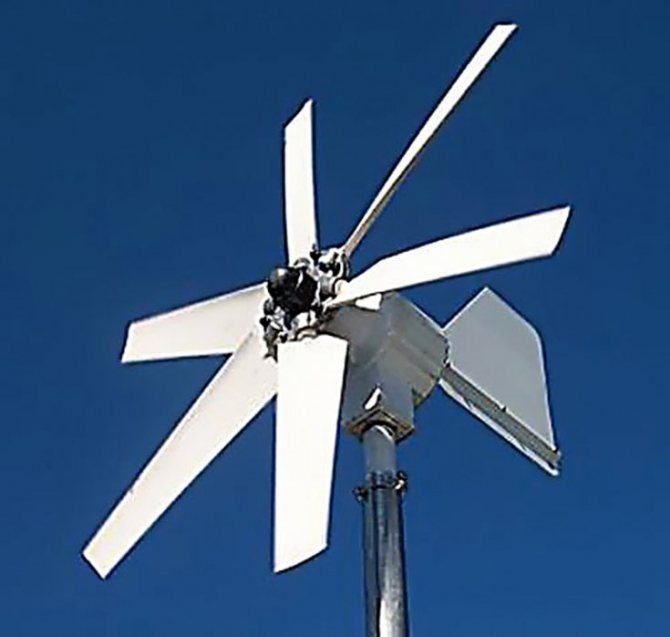
Multi-bladed models are more efficient than two- or three-bladed models, since they are driven in motion at the smallest manifestations of air currents. The blades can be rigid or sail. Rigid ones are usually made of metal or fiberglass. There are vertical and horizontal modifications in the direction of the axis of rotation.
Wind generators with a horizontal rotor axis of rotation are more widely used. Such units are distinguished by high efficiency, improved protection against hurricane gusts of wind and simple power regulation.Vertical models are easy to install, quiet and can work even with weak gusts of wind.
Neodymium magnet model
Homemade wind turbine with neodymium magnets is becoming more and more popular in many Russian regions. As the basis for such a device, it is necessary to use a hub from a car with brake discs. It is better to disassemble the part and check for serviceability by lubricating the bearings and removing rust.
Neodymium magnets are glued to the rotor discs. For example, you can take twenty small magnets. When choosing the number of magnets, remember that in a single-phase generator, the number of poles must match the number of magnetic elements. For a three-phase model, this ratio can be 2 to 3 or 4 to 3. During the installation of the magnets, you need to alternate their poles. In order not to be mistaken, it is advisable to use rectangular magnets. Use the most reliable adhesive to attach the magnets.
A video on assembling such a generator can be viewed here:
A magnet generator will work efficiently if the stator coils are correctly sized. It is known from experience that to charge a 12 V battery, about 1000 turns must be equally distributed in the coils. The coils are wound with thick wires to reduce resistance. The wind turbine mast should be six or more meters high. Under the mast, you need to dig a hole with further concrete pouring. The blades for the device are made of PVC pipes.
Car generator model
A homemade wind generator from a car generator must be made from components (battery, relay, etc.) from one machine. At the same time, to create a wind turbine, it is better to use an automobile generator from powerful equipment (for example, from a tractor).
Since consumers require alternating current, an inverter or converter must be provided. In regions with high wind speeds, wind generators can be installed to generate high power.
To assemble such a model, you will need the following:
- 12V car generator
- battery
- voltmeter
- battery charging relay
- blades
- fastening material
At the beginning, a rotor is made. The optimal solution would be to create a rotor wheel with four blades. This element is made from sheet iron. If possible, you can use an iron barrel.
The finished wind turbine is connected to the generator axis. For this, a hole is drilled, the connection is fixed with bolts. After that, the electrical circuit is assembled and the mast is installed. Then you need to fix the car generator with wires that are connected to the battery and voltage converter. For correct assembly, it is better to use prepared drawings.
Such an installation is mounted quickly enough without any particular difficulties. Such a wind generator is good for its simplicity, reliability and quiet operation.
A video with the assembly of such a wind generator can be viewed here:
Multiplier calculation
The generating set has an inclined current-speed characteristic: with an increase in the rotor speed, the maximum power delivered to it increases. Therefore, in order to ensure the highest efficiency of a low-speed wind turbine, we need a multiplier with a large increase factor.
For a homemade design, the most optimal solution is a belt multiplier: it is easy to manufacture and requires a minimum of machine work. The ratio of the increase in revolutions will be equal to the ratio of the diameter of the drive pulley connected to the axis of the screw to the diameter of the driven pulley of the generator. If necessary, the gear ratio can be easily adjusted by replacing one of the pulleys.
When designing the multiplier, it is necessary to take into account both the average revolutions of the blade assembly and the current-speed characteristic of the generator. If we use a serial car generator, then it can be easily found on the Internet, with homemade designs, most likely, we will have to go through trial and error.
For example, let's take a common tractor generator, which was already mentioned above.
Taking the calculated power of our wind turbine at 90 watts, we find a point on the graph corresponding to the generator's output to this power. At a nominal voltage of 14 V, we need a current output of at least 6.5 A - according to the graph, this will happen at a speed slightly above 1000 rpm. Let the propeller of our design rotate with the wind at a speed of 60 rpm (medium wind). This means that we need at least a twenty-fold ratio of the diameters of the pulleys - for a 70-mm generator pulley, the wind turbine pulley will have to have a diameter of almost one and a half meters, which is unacceptable. This unequivocally hints at how low the efficiency of wind generators of this type is - without a complex multistage gearbox, which in itself will lead to large power losses, it is almost impossible to bring a car generator to operating mode.
The principle of operation and types of wind generator
It is possible to make a windmill on your own only if you understand its device. The prototype of this unit is an old windmill. With the pressure of air streams on its wings, a shaft came into motion, which transmitted the torque to the mill equipment.
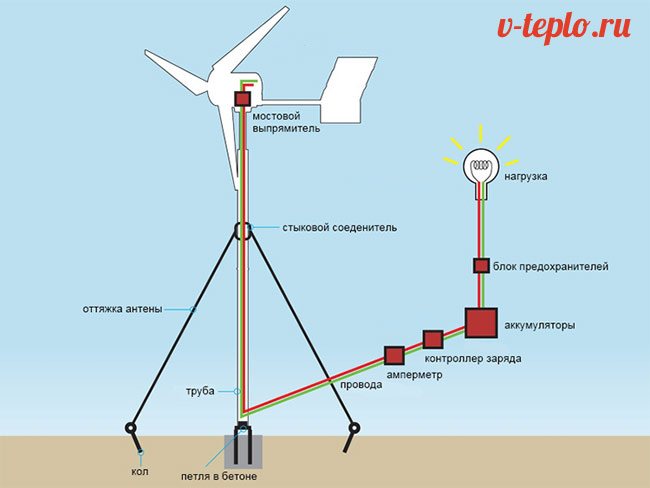
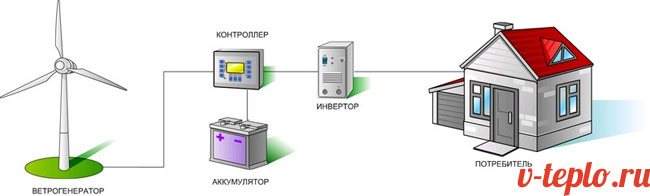
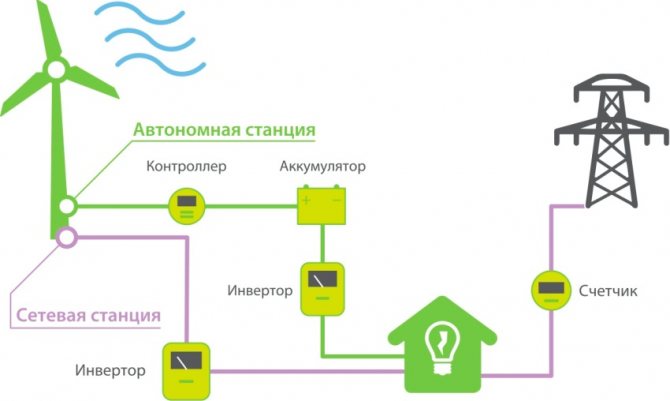
Wind turbines to generate electricity use the same principle of using wind energy to rotate the rotor:
- The movement of the blades under the influence of the wind forces the input shaft with the gearbox to rotate. The torque is transmitted to the secondary shaft (rotor) of the generator, equipped with 12 magnets. As a result of its rotation, an alternating current is generated in the stator ring.
- This type of electricity cannot charge batteries without a special device - a controller (rectifier). The device converts alternating current into direct current, allowing it to accumulate so that household appliances can work without interruption. The controller also performs another function: it stops charging the battery in time, and transfers the excess energy generated by the wind turbine to units that consume a large amount of it (for example, to heating elements for heating a house)
- To ensure the supply of voltage of 220 V, the current is supplied from the batteries to the inverter, and then it goes to the points of electricity consumption.
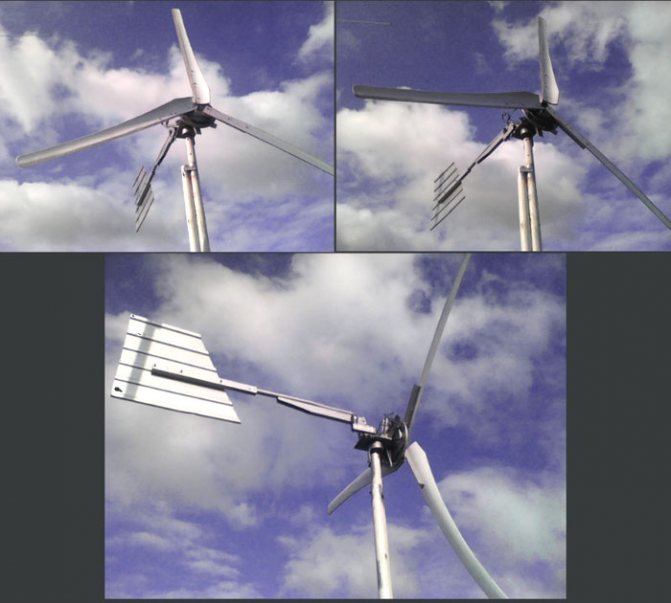
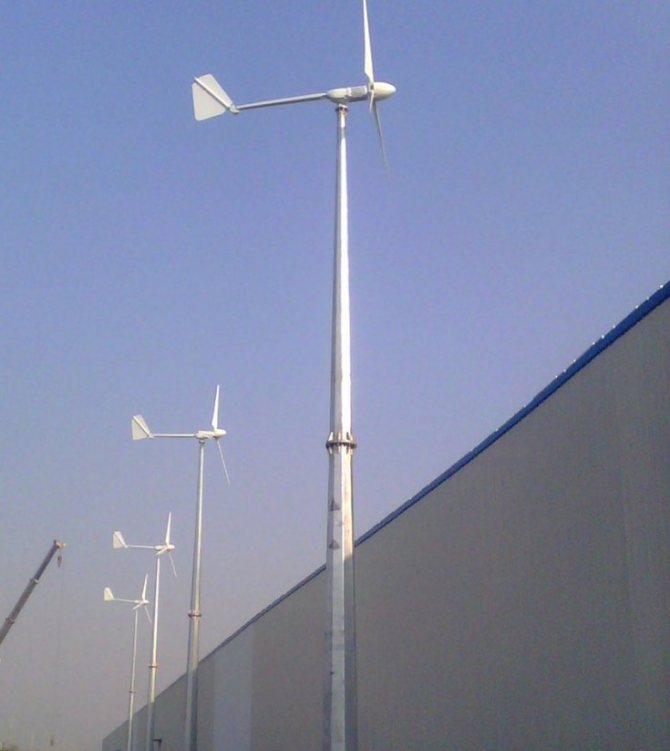
To ensure that the blades are always in the best position for interacting with the wind, a tail is installed on the vane devices, which allows the propeller to turn towards the wind. Factory models of wind turbines have braking devices or additional circuits for folding the tail or removing the blades from wind blows in adverse weather.
There are several types of wind generators, classifying them by the number and material of the blades or the pitch of the propeller. But the main division occurs according to the location of the axis or input shaft:
- The horizontal type implies the location of the shaft parallel to the earth's surface. Such generators are called vane generators.
- In vertical wind turbines, the axis is perpendicular to the horizon, and the planes are located around it. Vertical generators can be called orthogonal or carousel.
Regardless of the position of the axis of rotation, the principle of operation of the unit remains the same.
Models of wind turbines can have a propeller or a wind wheel of 2, 3 or several blades. It is believed that multi-blade devices are capable of generating current in low winds, while propellers with 2-3 wings require a greater air flow.When choosing a model, it is also necessary to take into account the important rule that each blade creates resistance to the wind flow and reduces the rotation speed, therefore it is quite difficult to spin a multi-blade wheel to the operating speed.
Among the varieties of wind turbines, there are sailing and rigid ones. These names indicate the material from which the wings are made. When self-assembled, the sailing type will be simpler and more economical, but the blades made of plastic material (fabric, film, etc.) do not differ in strength and wear resistance.
Mast
The mast on which the wind turbine is mounted - this is one of its most important nodes.
It not only ensures the safe operation of the windmill (the lower point of the circle described by the blades should be no closer than 2 meters to the ground), but also allows it to use the wind energy as efficiently as possible, the flow of which becomes more turbulent near the ground.
A high height leads to a low rigidity of the wind turbine mast and makes its strength calculation quite difficult not only for an amateur, but also for an engineer. You can list only the main points:
- Place the mast as far as possible from the house and trees shading the air flow. In addition, in case of strong wind, the wind generator may fall on the building or be damaged by trees;
- An optimal mast design is openwork welded truss similar to power transmission towers, but it is difficult and expensive to manufacture. The simplest, but quite effective option is several parallel pipes with a diameter of 80-100 mm, welded with short seams to each other and concreted to a depth of at least one meter in the ground. It is highly desirable to strengthen the structure of one pipe with cable ties, which are also attached to the supports poured into concrete.
- To simplify the maintenance of the windmill, its mast can be made a turning point: in this case, when the stretch line going in the direction of the fracture is weakened, the mast can be tilted to the ground.
A story about a very simple wind generator from a home fan
Wind turbine recommendations
There are general guidelines for making the most of wind turbines.
First of all, you need to determine in advance the required power and functionality of the device. To properly manufacture a wind generator, you need to study the possible designs, as well as the climatic conditions in which it will be operated.
In addition to the total power, it is recommended to determine the value of the output power, also known as peak load. It represents the total number of instruments and equipment that will be turned on simultaneously with the operation of the wind generator. If it is necessary to increase this indicator, it is recommended to use several inverters at once.
Additional electrical equipment
As mentioned above, an integral part of a wind farm is a battery that takes over the power of consumers. when choosing it, you need to remember that the larger its capacity, the longer it will be able to maintain the voltage in the network, but at the same time it will take longer to charge. The approximate operating time can be defined as the time during which half of the battery capacity is exhausted (after that, the voltage drop will already become noticeable, in addition, deep discharge reduces the life of lead-acid batteries).
Example: So, a battery with a capacity of 65 A * h will conditionally be able to give 30-35 Amp-hours of energy to the load. Is it a lot or a little? A conventional 60-watt lighting lamp will require, taking into account the presence of an inverter that converts 12 V DC to 220 V AC and having its own efficiency within 70%, a current of 7 amperes is a little more than four hours of operation. Our windmill with a nominal power of 90 watts, even in the best case, with a constant strong wind, will take at least five hours to recover the wasted energy.As you can see, when using a wind turbine solely as an autonomous source of energy, electricity in your home will be available only for a few hours a day.
The second node of the power supply system is the inverter. In our case, you can use both a ready-made automobile and one extracted from an uninterruptible power supply. In any case, it is important not to overload it with current consumption, given that its real operating power is 1.2-1.5 times less than the indicated maximum power.
As you can see, the attractiveness of using free energy rests on numerous restrictions, and even the only efficient option in central Russia - a wind generator - is unable to provide long-term autonomy.
But at the same time, this idea is not bad both as a source of emergency power supply and, especially, as a design task - the pleasure of creating a wind turbine with your own hands can significantly exceed its power.
Wind generator for a private house: purpose and design features
Private house wind farms are widely used as alternative sources of electrical energy to achieve savings. Often, such devices are installed in summer cottages.
Wind turbines are used as alternative sources of electrical energy
Most often they are used in areas remote from the main power grids. However, this is far from the only reason in favor of buying a wind turbine for a private house. Most land owners use these designs to achieve autonomy and savings.
Not every site is suitable for the installation of such devices, since not all conditions meet the requirements of this equipment. This primarily concerns the wind speed. For a wind farm to function normally, the average wind speed must be at least 4-4.5 m / s. Only in this case the installation of the structure will be economically justified.
You can use the wind map to find out the average annual wind speed. It reflects rough data by region. More accurate indicators can be obtained using a special device - an anemometer, as well as a device for reading its signals.
Note! The measuring device must be installed very high, otherwise trees and buildings will distort the result.
For the efficient operation of the wind turbine, the area of its installation must be wind turbine
The principle of operation and structure of a wind generator
A wind generator is a special type of equipment that converts the kinetic energy of the wind into mechanical energy. It drives the rotor blades mounted on the generator. As a result, an alternating current is generated in its windings. The generated electrical energy is stored in storage batteries, from where it is fed to household appliances.
The described scheme of work is simplified. Of course, the construction of a wind generator is much more complicated. There is also a controller in the energy chain. Its function is to convert three-phase alternating current to direct current. Then it goes to charge the batteries.
Most household appliances are not capable of being powered by DC power. Therefore, an inverter is installed in the chain behind the battery. It converts direct current into alternating current, the voltage of which is 220V. All these operations take away part of the initial energy - about 15-20%.
The building can be recharged not only from a wind farm, but also from solar panels, as well as from a gasoline or diesel generator. If these elements are present in the chain, then the circuit is supplemented by another component - a circuit breaker.When the main power supply is turned off, it starts the backup ones.
The principle of operation of the wind generator
A wind farm consists of the following components:
- a rotor with blades (depending on the features of the model, there can be several blades for a wind generator, as a rule, there are 2 or 3 of them, although there are also multi-blade options);
- a gearbox or gearbox that controls the speed between the generator and the rotor;
- a protective casing that protects structural parts from the negative influence of external factors;
- "Tail", which ensures the rotation of the structure following the direction of the wind;
- a storage battery that stores a certain amount of energy;
- an inverter installation that converts one type of current into another.
What kind of wind farm can you buy: equipment classification
There are several classifications according to which wind power plants are divided into groups:
- In the direction of the rotational motion of the blades - horizontal and vertical windmills.
- By the number of blades - two-, three- and multi-blade devices.
- By the type of material used to manufacture the blades - sail and rigid blade designs.
- By control method - windmills with fixed or adjustable blade pitch.
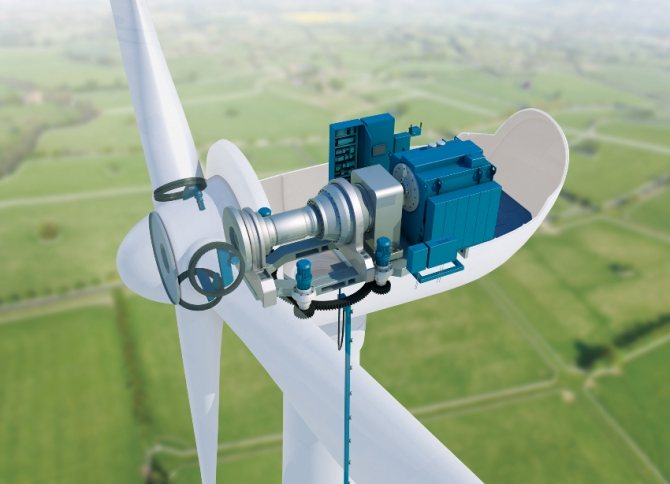
The internal structure of the wind generator
Helpful advice! In most cases, experts recommend that owners of suburban housing buy a wind turbine with a fixed blade pitch, since the adjustable devices are too difficult to operate.
A wind farm with a horizontal axis is positioned perpendicular to the air flow. The design has a similar structure and functions on the same principle as a conventional weather vane. Windmills with a rotary generator have a high efficiency, while they are affordable. The operation of these devices is based on the resistance of the air flow.
Vertical axis wind turbines, or orthogonal wind turbines, have a compact design, but their price is much higher. Due to its special structure, this type of equipment is completely independent of the wind direction. The blades are in the form of turbines, due to which the load on the axial part is significantly reduced. It will be advisable to buy a vertical wind generator in cases where the wind on the site is constantly changing its direction.
Advantages and Disadvantages of Wind Power Plants for Home
Like any other type of equipment, wind farms have both advantages and disadvantages. To decide on the purchase of this device, it is advisable to weigh its strengths and weaknesses.
The popularity of the use of wind farms is due to the large number of advantages
Why is it profitable to buy a wind generator (220V) for a private house:
- No additional costs as the device does not require fuel to operate.
- There is no need for constant monitoring. The structure generates electricity on its own every time the wind blows.
- A relatively quiet and completely environmentally friendly method of generating electricity.
- The device can be used in almost any climatic conditions.
- Wear of parts is minimal.
Installing a wind generator for a home is accompanied by the following disadvantages:
- equipment purchase costs pay off in 5-6 years;
- a relatively small indicator of efficiency, which is reflected in power;
- high price of wind turbines;
- to compensate for the inactivity of the device on windless days, additional equipment is required: a generator and a storage battery (the cost of these elements is very high);
- in some modes, wind turbines for the house emit infrasounds (the same happens if the installation of the equipment is completed with errors);
- regular preventive maintenance is required;
- a hurricane can seriously damage the equipment.
Depending on the power of the device and the wind map of the area, a windmill can provide electricity to both a small country house and a large country cottage.
Helpful advice! It is imperative to calculate the profitability before buying a wind generator for your home, the price of the equipment may be too high, and the cost of purchasing it will not pay off. To do this, you need to calculate the average power indicator of the house (the power of all electrical appliances is taken into account), assess the area where the equipment will be installed, and find out what is the number of windy days per year.