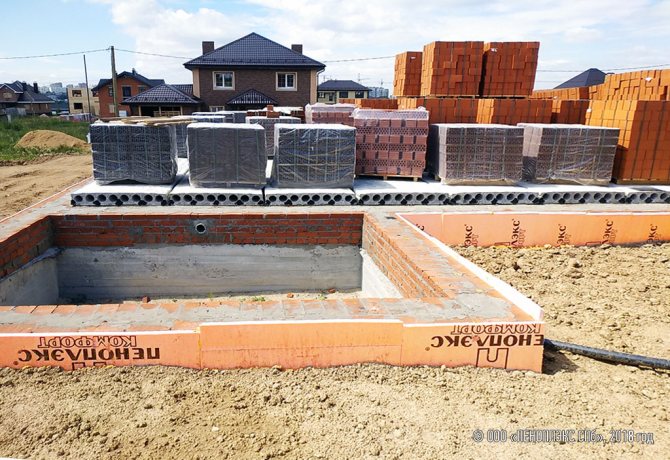
The basement is a transition from the foundation directly to the structure itself. Its correct construction plays a key role in the quality of the future home. For this reason, it is very important to draw up a competent project and strictly follow it. When building a basement, it is worth considering in advance what material you will use. Brick plinth is the preferred choice because it can be laid on a foundation of any material. From the article you will learn everything about the features of this type of masonry, as well as how to do it yourself.
Features of a brick base
The basement is the above-ground part of the building and is located above the foundation. Usually its top mark is the beginning of the first floor. A reliable base / plinth arrangement is a difficult task, but with a little experience, you can do it yourself if you carefully study the instructions.
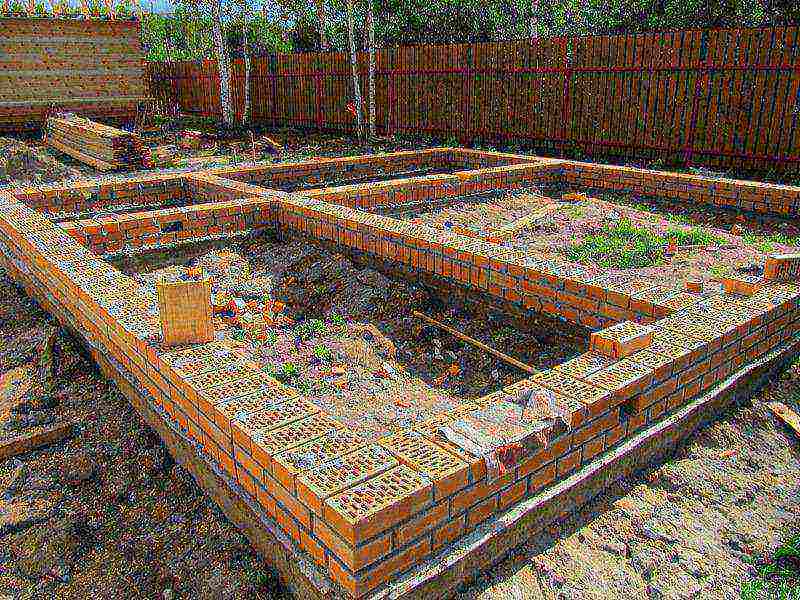
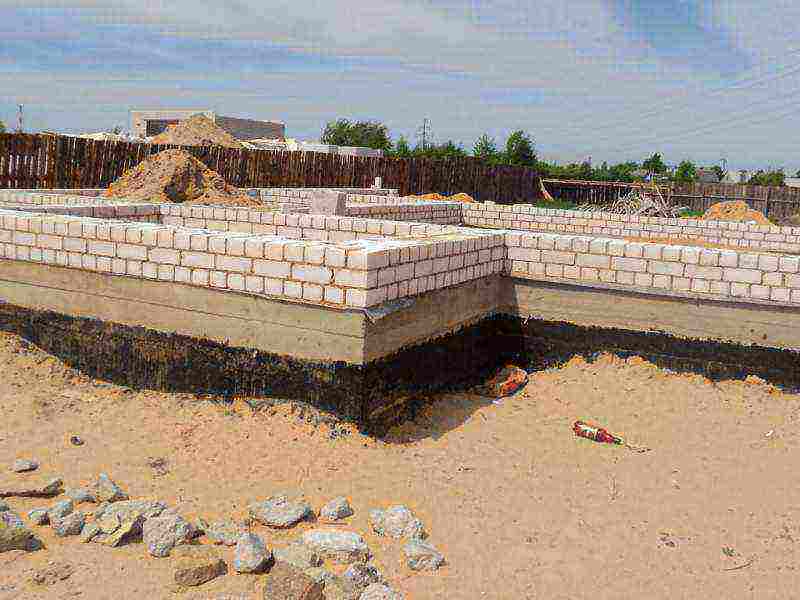
Brick plinth is used for strip foundations.
First, you need to take into account the weight of the future building in order to correctly calculate the load on the basement. It is important that it is not excessive. Unlike decorative elements, a supporting structure such as a plinth can only be built once. Take the time to do the calculations to avoid many problems later.
Usually the foundation rises above the ground level by 30-90 cm, and the recommended basement height is at least 50 cm. In some cases, for example, if a building is being built on hilly terrain, the height can be much higher. If the building has a basement, its height can be up to 2 m.
The laying of a brick basement has a number of features due to the properties of the material. The main distinguishing feature of a brick in this case is that it cannot be called absolutely moisture resistant. This fact can affect the durability of the foundation, therefore it is necessary to take it into account in work. One of the tasks is to improve the water repellency of the plinth.
However, this disadvantage does not detract from the merits of brickwork. The advantages of using bricks include:
- ease of installation;
- low price;
- heat;
- no need for time-consuming finishing.
Laying a brick plinth on a strip-type foundation is the most practical and therefore the most common option. This is due to the fact that the plinth becomes practically part of the foundation.
Features of thermal insulation of the base with mineral wool
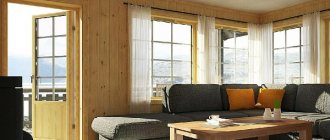
The plinth is the upper part of the foundation and is located above the soil surface. It is in contact with the support of the house, walls and floors. Therefore, the reliability and temperature regime of the house largely depends on the correct arrangement of this structural element.
Up to 15-20% of the heat can go out through the walls of the basement, and freezing of the building support threatens with the appearance of dampness, mold and an increase in the cost of heating the premises. To prevent this from happening, thermal insulation of the above-ground zone of the foundation is required.
Warming the basement of the house solves the following tasks:
- Promotes the improvement of the home microclimate;
- Protects the base from sedimentary moisture;
- Eliminates the possibility of condensation on the surface of the base, thereby protecting the construction materials from destruction.
Insulation for the basement must meet the following requirements:
- Have low thermal conductivity. The efficiency of keeping heat in the house directly depends on this indicator.
- Have minimal hydrophilicity.If the insulation gets wet, its performance will become much worse. Saturation of the insulation with moisture is especially dangerous during frosts - with an increase in volume, water destroys the insulation, which leads to a decrease in its service life and deterioration of its characteristics.
These requirements are met by modern board and sprayed insulating materials. When using mineral wool as a heater, it is necessary to take into account its ability to absorb water. Therefore, such a coating needs waterproofing protection, especially when insulated from the outside.
The technology provides for internal or external insulation of the basement. The system of thermal insulation protection of this element of the house is approximately the same for both external and internal insulation. The difference between them may lie in the design of the thermal insulation and the materials used. It is not necessary to carry out both types of insulation at the same time.
One of the differences is the location of the waterproofing and vapor barrier layers. When insulating from the outside, first a vapor barrier layer is fixed on the basement wall, then a heater, and on top of it - a layer of waterproofing. When insulating from the inside, the wall is first covered with a waterproofing material, then with a heater, and on top with a vapor barrier.
Another difference lies in the materials used to finish the surface of the base / plinth. For example, from the inside you can work with plasterboard sheets, and from the outside - with moisture-resistant tiles or porcelain stoneware.
When insulating a basement with mineral wool, it is important to choose it correctly. For external insulation, the material must have good moisture resistance and a vapor permeability index of at least 0.5 mg / mh Pa.
If the insulating coating will carry any load, for example, a layer of plaster, then it is recommended to choose a mineral wool with a density equal to or more than 150 kg / m3. In this case, the minimum vapor permeability indicator of the insulation should be 0.35 mg / mh Pa.
The most important manufacturers of insulation wool on the construction market are Knauf, Isover and Rockwool. They always provide their products with certificates and hygienic assessments.
Calculation of the required amount of material
How to calculate a brick for a basement?
- At the stage when laying is planned, its volume is calculated. For this, the perimeter of the foundation is multiplied by its height and width.
- Average consumption of bricks per 1 m³ is 400 pcs. Multiply the resulting masonry volume by 400 and get an approximate value.
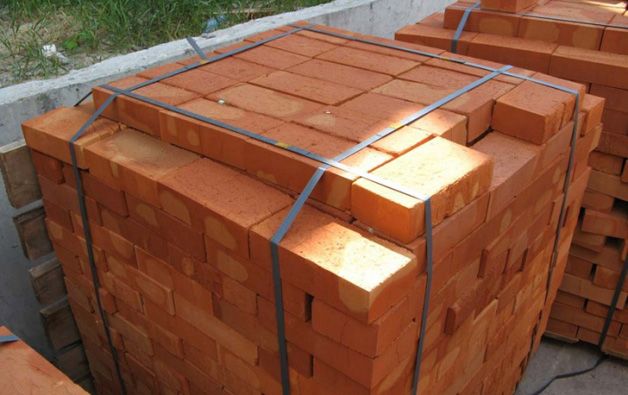
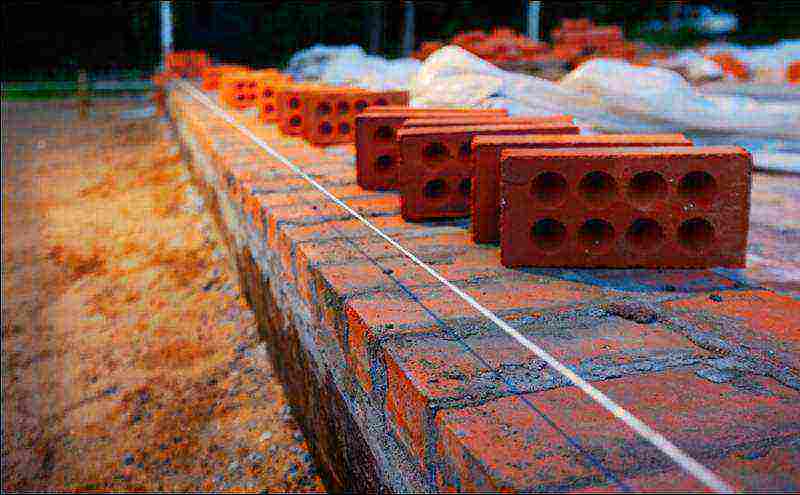
For construction, solid brick should be used.
One pallet contains 300-330 pcs. bricks (depending on the manufacturer). Always buy bricks with a margin. As a last resort, you can always use it in other stages of construction.
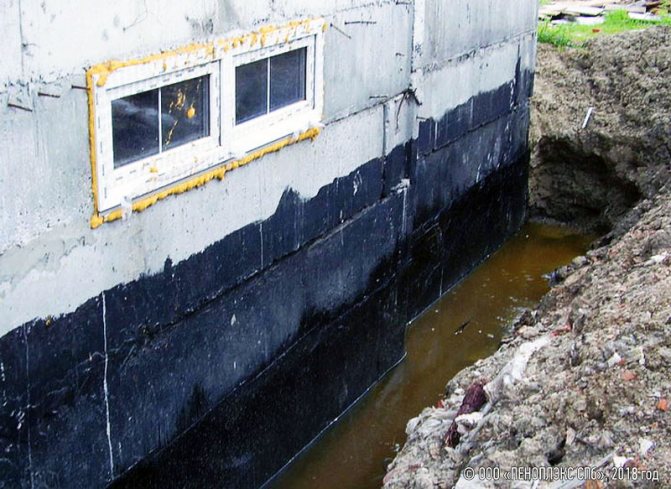
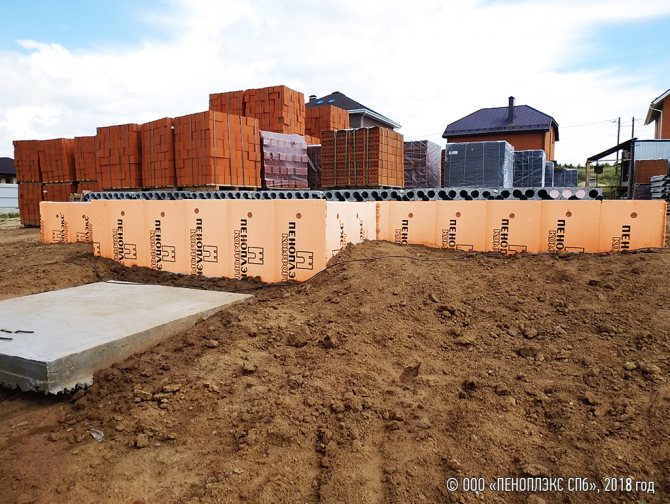
Insulation outside
Let us analyze how to properly insulate a house from the outside:
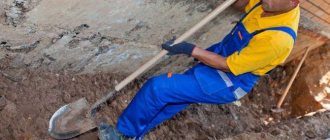
- If the insulation is carried out after the completion of the construction of the house, then it is necessary to dig a trench up to 80 cm deep and about 1 meter wide around the building. This will allow you to insulate the base without any problems.
- To reduce the effect of groundwater on the base of the building, drainage pipes are laid at the bottom of the ditch.
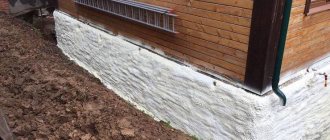
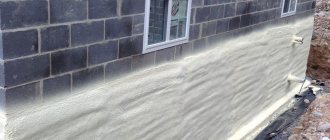
- The outer surface of the plinth is cleaned of dirt and all cracks are plastered.
- A layer of liquid waterproofing is applied to the walls, for which bituminous mastics or liquid polymers are used. In the warm season, penetrating waterproofing is used, which gets inside the capillaries of concrete and clogs all holes and pores. The strength of the foundation and resistance to chemical attack increases.
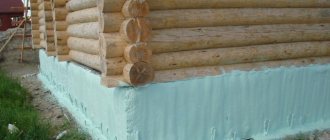
- After the insulation has dried, the insulation sheets are glued directly onto it. The optimal material for creating reliable insulation is extruded polystyrene foam, which has a closed cellular structure, is distinguished by moisture resistance, strength and unique indicators of thermal conductivity.Its slabs are easy to cut, and professional skills and tools are not required to complete the installation. The material is glued to a special compound applied around the perimeter and in the center. The adhesive for extruded polystyrene foam has excellent adhesion to the board and surface. The slabs are tightly pressed against the surface of the basement and are joined together. Seams are sealed with foam. In the ground part of the basement, the slabs are additionally fixed with plastic dowels in four corners. A site buried underground is not reinforced with dowels, it is held by the soil.
- If the installation of two layers of insulation is provided, the seams of the plates should not coincide.
- The finished surface is reinforced with a fiberglass mesh and plastered.
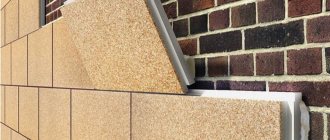
- The finishing can be artificial stone slabs or basement siding.
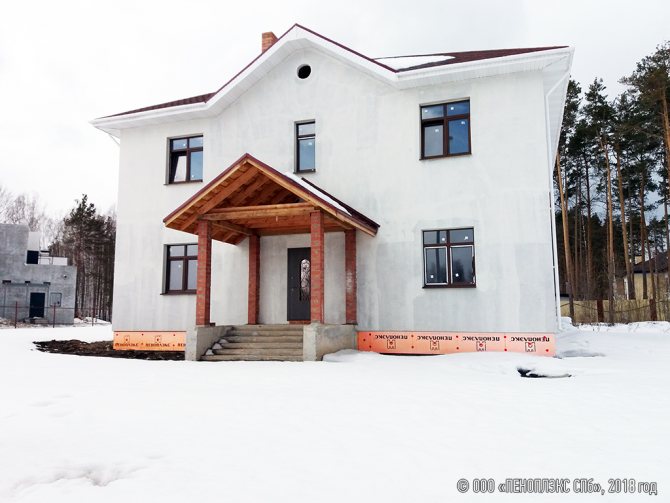
Insulation of the basement will significantly reduce heating costs and extend the life of the walls of the house.
We recommend:
- how to choose the front door to a private house;
- a gate with a gate with your own hands;
- DIY installation of basement siding.
www.stroitelstvosovety.ru
Choosing and buying bricks
The result of construction directly depends on the choice of bricks. The basement device is best carried out using solid clay bricks. Unlike hollow bricks, it resists moisture penetration better. Eventually, the hollow brick fills with condensate and begins to deteriorate. This usually occurs within 3-4 years. The destruction of the brickwork can deform the entire building, making major renovations inevitable. Therefore, you should not buy hollow bricks, even if they have a high grade.
It is better to purchase the material with a small margin.
When buying a material, you should pay attention to its technical characteristics. Compression stability and resistance, as well as frost resistance are of paramount importance. The basement walls should be laid from bricks of the M-200 grade and higher. Its frost resistance level must be at least F50.
In order for the brickwork to turn out to be durable, better withstand bad weather and last as long as possible, you need to provide it with a system of hydro and thermal insulation. This will not only prevent excessive moisture ingress, but also protect the brick from changes associated with a sharp temperature drop. The isolation device does not present serious difficulties, you can do everything yourself.
The basement or basement can be warm or cold. When it comes to the construction of a bathhouse or a country house, a decision is often made in favor of a cold base. In this case, its insulation is not carried out. This does not change the masonry and its construction, but only skips the stage of creating thermal insulation.
Advantages and disadvantages of mineral wool basement insulation
Thermal insulation of the basement with mineral wool in relation to other types of insulation has certain advantages due to the properties of this material:
- It keeps its constant shape regardless of seasonal temperature changes and has an enviable durability when properly installed.
- Mineral wool is inert and therefore chemically resistant.
- It is easy to handle, it is sawn with a hacksaw and even cut with a knife. Thanks to this, the installation of this insulation is greatly simplified.
- Due to the low thermal conductivity, mineral wool insulation is quite effective and therefore helps to reduce the cost of heating the house.
- The material is fire safe. This is especially true when the base is internally insulated.
There are much fewer drawbacks to thermal insulation with cotton wool. The main one is the need to use hydro and vapor barrier to protect the insulation from moisture. When wet, its insulating performance decreases markedly.
Another disadvantage is the need for protective equipment when working with this insulation.This is especially true for glass-based mineral wool. Dust and fine fibers of the material can get into the eyes, skin and respiratory tract of the performer during work. Therefore, a respirator, goggles and gloves are essential here. After installation, the coating does not pose a hazard, since it is located under the insulating membrane and outer cladding.
Waterproofing and insulation
The waterproofing issue needs to be addressed before you start laying bricks. The first horizontal layer of insulation must be laid directly on the foundation. As a budget option, 2 layers of roofing material or other roll material are suitable. The layers must be glued together. This can be done using bituminous mastic.
When the installation is complete, you need to make another horizontal layer of waterproofing. It is placed at the height of the lower floor.
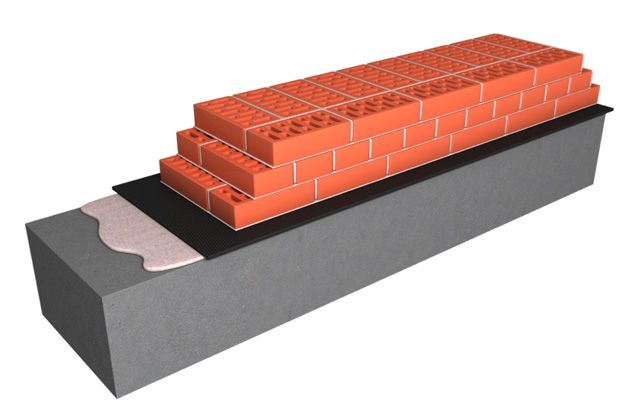
Diagram of a horizontal waterproofing device.
It should also be said that the vertical insulation of the foundation walls and the lower part of the basement is carried out using mastics, special polymer compounds or roll materials.
With regard to insulation, the best material that can be used to protect the base from temperature extremes is polystyrene foam. Thermal insulation must be done after the work on the construction of the basement has been completed. Insulation is attached to the outside of the walls. It is very important to choose the right adhesive. Usually, mastic or glue is used, which do not contain acetone, solvent or other solvents. If you opt for mastic, get cold.
If you are limited in finances, you can make insulation from ordinary plaster. So you can do without special insulation material.
Alternative methods of erecting a base
Sometimes craftsmen use non-standard designs for the construction of a bath basement, for example, from silicate bricks, ordinary ordinary bricks, wall stones, slate, etc. It is worth noting that any wall materials as basements are undesirable, since they are not designed for direct contact with the ground ...
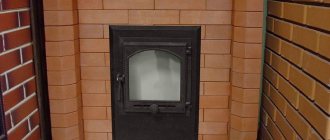
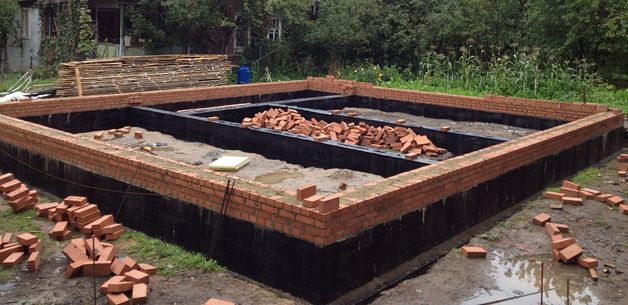
If the foundation ends at a mark equal to the ground level, for the construction of the wooden walls of the bath, additional brickwork can be made as a basement. It is better to use a silicate type brick, as it interacts well with a humid environment. It is necessary to raise the level by 500-600 mm from the ground surface (but not less than 250 mm). The thickness of such a wall will be 400 mm for a large bath and 250 mm for a one-room small building.
It is imperative to make ventilation outlets. For this, air vents are left approximately in the middle of the masonry in height. It is advisable to make a reinforcing belt of reinforcement and concrete on top of the masonry. Waterproofing is laid under a brick and under a wall, since in this case we use three types of materials for the foundation, basement and walls.
Further instructions are intended for construction on a ready-made base.
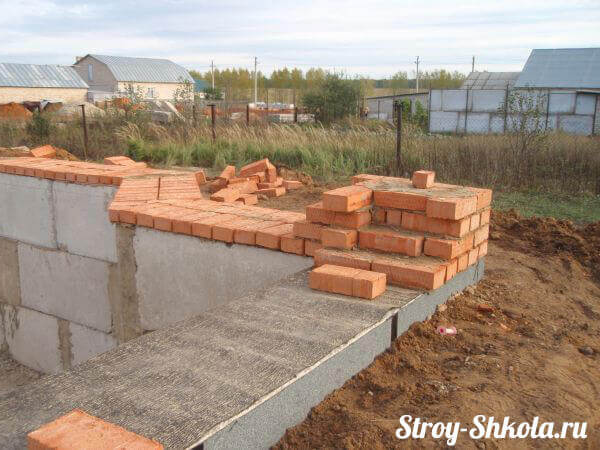
One of the most important rules for laying a basement is the correct setting of the corners, because incorrectly set corners will lead to further curvature of the walls and, accordingly, a marriage in the construction of the building.
In all corners, put a number of bricks on a dry place, determining the width of the planned basement. The corners are level.
Measure the lengths of all sides and both diagonals with a tape measure or twine - the dimensions must coincide up to centimeters and be respectively equal.
It is also worth checking the future walls for possible curvature, using the same twine along the inner side of the line from corner to corner.
Insulation is necessary for additional protection of the basement from groundwater.
Two layers of roofing material are laid on the foundation in the following ways:
- for bituminous mastic or heated bitumen;
- joining with a burner, treating the surfaces of roofing material.
You can use rubemast, glass-roofing material (glass-fiber insulation), euroruberoid
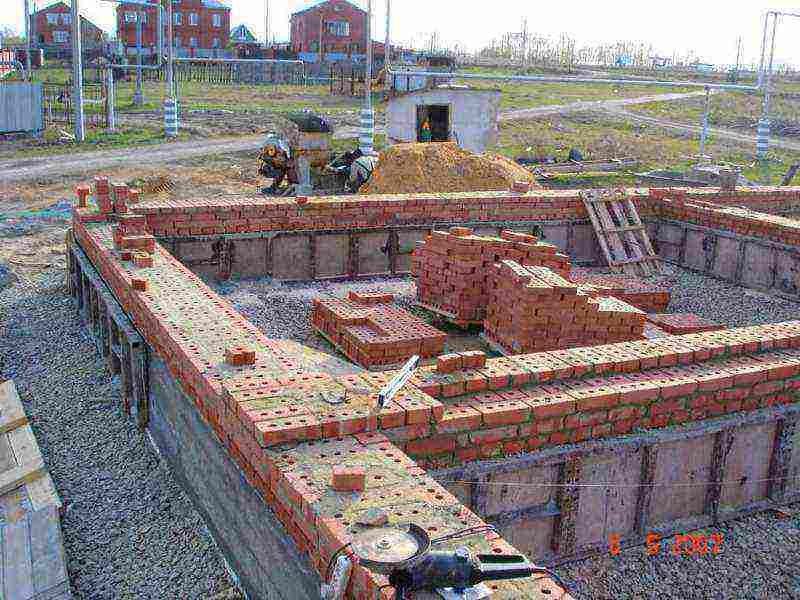
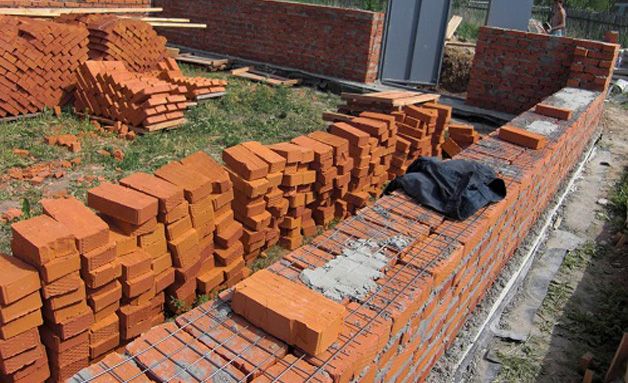
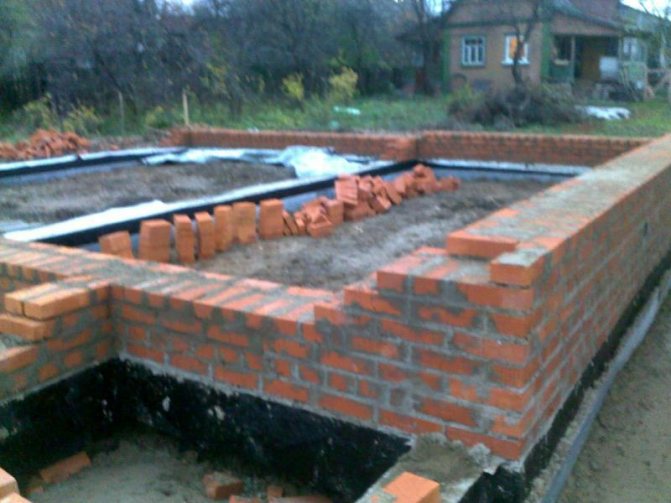
After setting the corners, it's time to start laying the basement. To create it, a brick is usually used, fastened with a cement-sand mortar. For construction, only solid red brick is used.
It is advisable to start the masonry from the corners, then lay the rows opposite each other on one side with the thickness of the applied solution somewhere around 20-25 mm.
The plumb line checks the accuracy of laying the vertical surface after 3-4 rows of bricks.
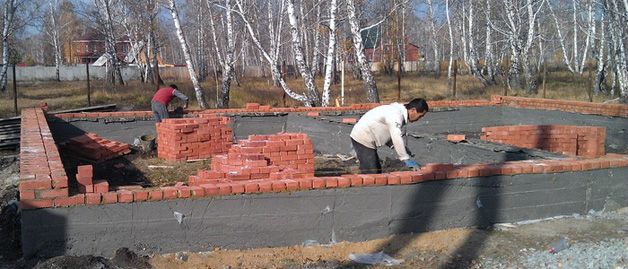
After the final check of the corners, laying the wall begins. To make the row even, a thick fishing line is stretched between two corners.
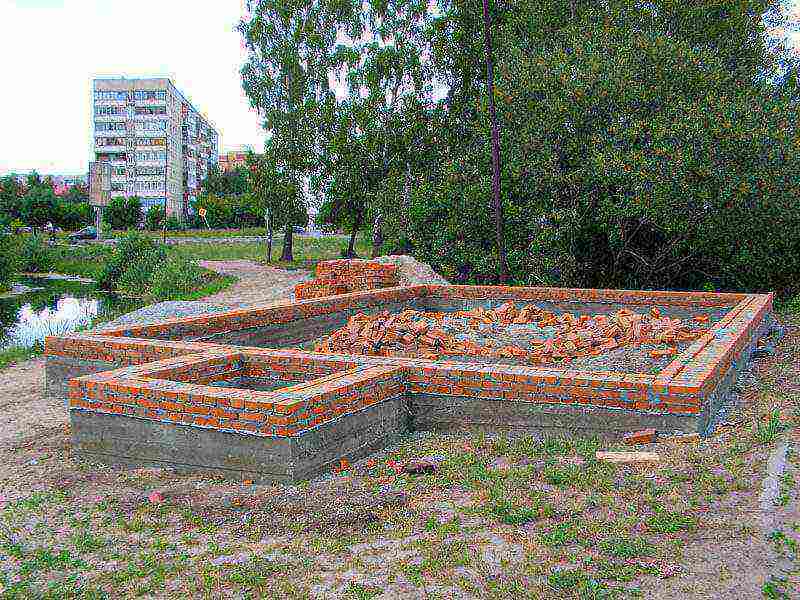
The minimum height is at least 4 stacked rows, and can be finished with natural stone, tiles or siding.
If the house has basements, ventilation holes are left on each side of the basement at a height of 10-15 cm from the soil, measuring from 7 x 25 to 15 x 25 cm.In case of exceeding the building length of 3 meters, vents go with a step of 2.5 meters and closed with nets or fine gratings.
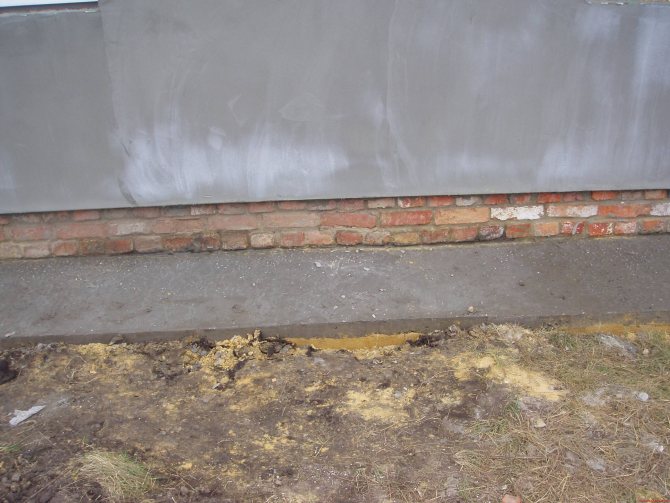
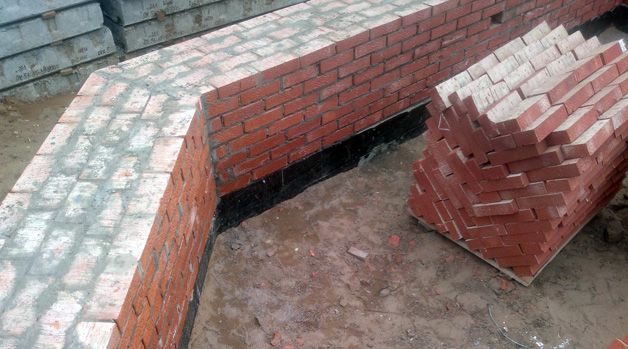
To protect against moisture penetration, it is necessary to lay waterproofing materials, making a distinction between the basement and the brick wall; for cheap construction, you can use, for example, roofing material folded in half. Of course, it is not necessary to do only with them, the choice of materials for insulation is now quite extensive. Double waterproofing is necessary in order to protect the house not only from the external effects of the elements, but also from the influence of groundwater on the foundation.
Algorithm for masonry work
After all the materials are purchased, the preparatory stage ends. You can proceed to construction. How to lay out the base correctly?
Preparation
You need to pre-purchase a cement mortar, which will hold the brickwork together. The most suitable option was recognized as a solution of the M-75 brand.
The selected solution must be laid out and slightly leveled. It is necessary to strive to ensure that the layer thickness does not exceed 2 cm. Reinforcement mesh must be placed in this layer. Make sure the mesh is made of 4mm BP-1 wire. Mesh cells should not be large, ideally 50 by 50 mm.
Masonry erection
After placing the mesh, brick laying begins. It is necessary to lay out 4 rows of the base, and then lay the net again. This will firmly strengthen the masonry.
Brick laying is carried out in horizontal rows. If you do everything yourself, you can simplify the task a little and lay out the brick in one row. At the same time, alternate the bonded and spoon layers. That is, lay one layer across the walls, and the other along.
The direction of laying bricks should be alternated from row to row.
In order for the masonry to turn out to be of high quality and durable, check the following points:
- make sure the seams of adjacent rows fit well together;
- check the angle between the bricks lying in opposite rows - it should be right;
- organize a ventilation system around the entire perimeter of the basement - their size should be from 15 to 25 cm and they should be located every 3 m at a level of 15 cm from the ground.
In addition, you need to pay attention to the wall thickness of the basement. It must follow a certain pattern. It is necessary that the thickness value be a multiple of the size of the brick: 1 brick - 25 cm, 2 - 51 cm, 1.5 - 51 cm, and the height should not be less than 35 cm. This is the last stage of construction - the laying of the brick basement is completed. Now you can proceed to the installation of the blind area and finishing work.
Laying bricks with your own hands is not easy. If you are not confident in your abilities and want everything to be done correctly, contact a professional builder.They will do all the work quickly and efficiently.
Outdoor insulation technology
Surface treatment
If you decide to perform the thermal insulation procedure with your own hands, then you need to start with careful preparation:
- First of all, we thoroughly clean the basement to the very blind area. We need to fix the insulation on the entire surface, otherwise the so-called "cold bridge" will form and the effectiveness of the protective layer will decrease many times over.
- Then we begin to process the surface: we remove all the irregularities, clean off the old paint, replace or strengthen the fragments of crumbled bricks.
- We treat the masonry with antiseptics, which will prevent the development of fungal diseases under a layer of insulation.
Only after all these work have been completed, you can begin to mount the protective sheathing.
Thermal insulation with polymer plates
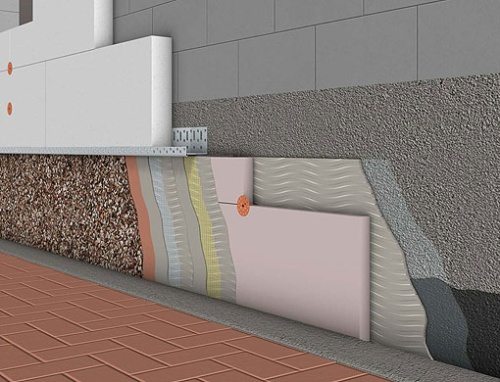
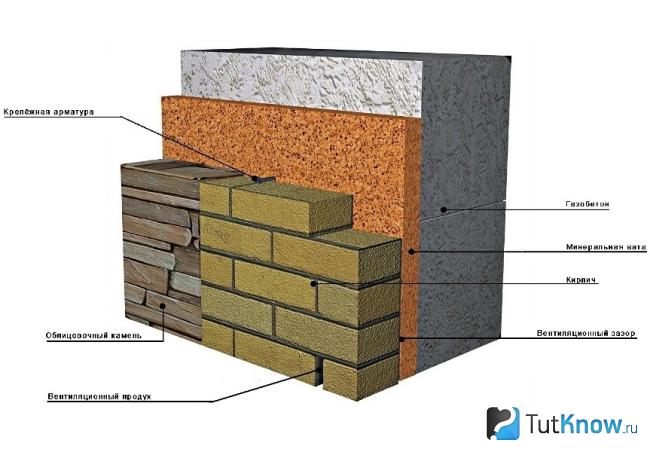
Polystyrene insulation scheme
Today, two main technologies are used to finish the basement part. We describe both of them below, starting with the simplest one:
To protect a building from heat loss, it is cheapest to use architectural foam or expanded polystyrene.
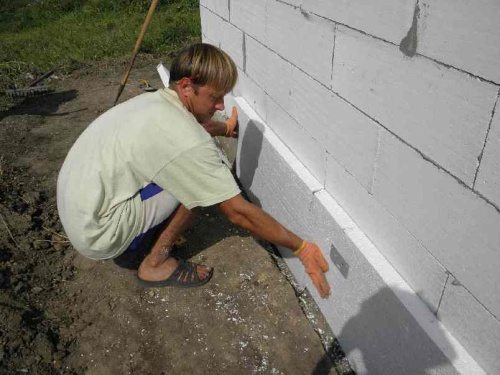
Pasting the surface with insulation
- We cut the material to the size of the processed surface.
- We apply cement-based foam glue to the wall and embed the polymer plaster mesh into it. The width of the mesh should allow the insulation panel to be wrapped.
Note! In order to save money, the mesh can only be laid on top of the foam, but the low price allows you to work, as they say, "with a margin of safety."
- We put a pile of glue on a sheet of insulation, after which we press it against the wall.
- We fill all the gaps between the polystyrene sheets with self-expanding polyurethane foam from a cylinder.
- We wrap the mesh from above and below and fix it with a dowel with a disc sleeve. To do this, using a perforator, we drill a hole in the wall so that the fastening element sinks into the supporting structure by at least 40 mm.
You can plaster!
After the entire surface is insulated according to this scheme, we plaster with facade compounds. On top of the plaster layer, you can apply either exterior paint or a decorative finishing mixture.
Using mineral wool
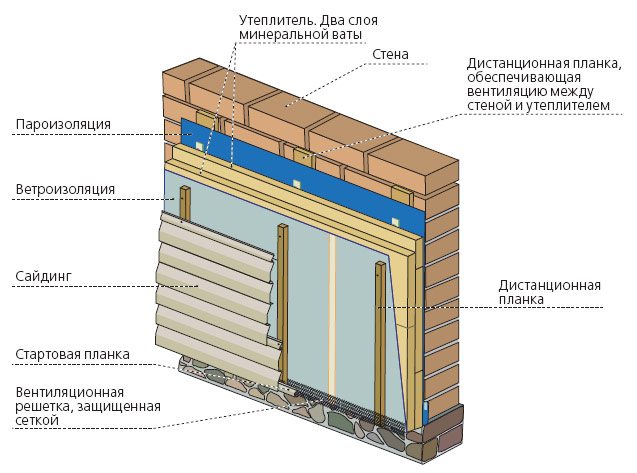
Layer Layout Option
Thermal insulation using mineral wool and similar materials is carried out according to a different scheme.
Since it is undesirable to subject mineral wool to prolonged compression loads (this significantly increases thermal conductivity), it is imperative to use a lathing:
- We install steel brackets on the prepared wall surface. To reduce heat loss at metal-to-wall contact, you can place a spacer made of paronite or similar material under the base of each bracket.
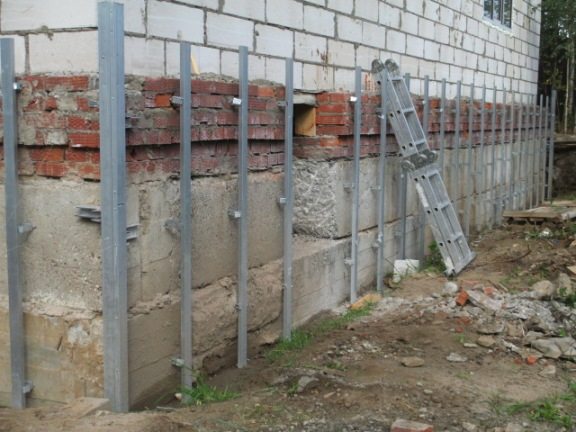
Installation of vertical battens
- We attach elements of the crate to the brackets - wooden beams impregnated with an antiseptic or steel U-shaped profiles. We use stainless steel screws for fastening.
Advice! Most often, insulated basement panels used for finishing are intended for horizontal installation. For this reason, the sheathing beams must be positioned vertically. However, there are exceptions, so it is worth paying attention to the type of cladding in advance.
- Mineral wool slabs (it is advisable to purchase dense models specially designed for facade work) are laid between the lathing segments. We fix each slab with disc dowels at least at four points.
- As in the previous case, fill the gaps between the pits with self-expanding foam.
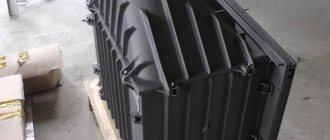
Next, we need to mount the cladding layer. Most often, the so-called basement siding is used for this, which is insulated plastic panels on a steel base.
Advice! If you are using siding with a thickness of 20 mm or more, you can save money by installing thinner mineral wool under the sheathing.
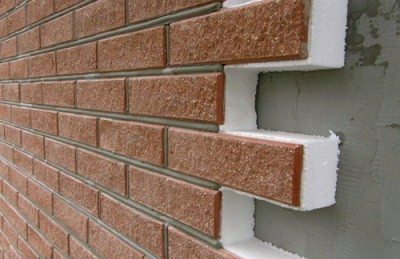
Photo of the finishing panel
The finishing instructions are pretty simple:
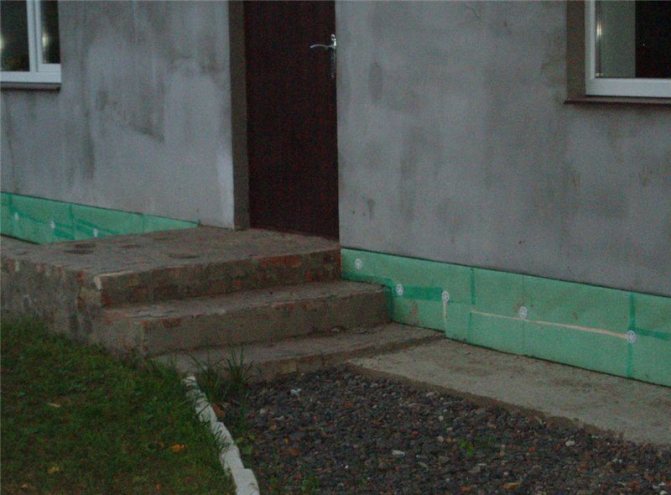
- In the lower part of the base, we attach the starting bar to the crate. It must be installed strictly according to the level.
- At the corners, we install special elements designed to fix the finishing panels.
- We insert the insulated basement siding into the starting guide and snap onto the fasteners. We fasten the panel to the crate through the technological holes using self-tapping screws.
- We connect the next panel to the previous one, fixing the butt fasteners. We continue to assemble the cladding until we finish the first row.
- We lay the second row with an offset to ensure the alternation of the decorative pattern. To do this, using a metal saw or a hydraulic cutter, we cut off a part of the panel.
- To protect the mineral wool from moisture, we install a galvanized or plastic-coated drain on the top row of siding.
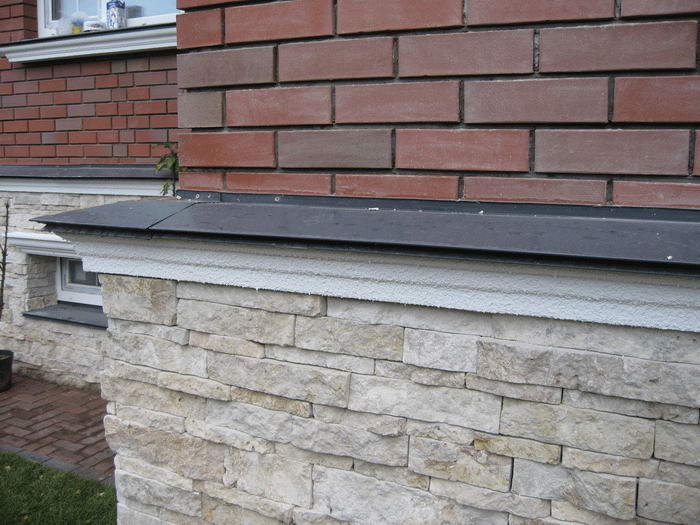
Result of work
Construction of the blind area
The creation of a blind area is a mandatory step in the construction of a basement. The fact is that it protects it from moisture penetration, namely melt water and precipitation. Its maximum width should be no more than 60 cm, but at the same time it should be at least 20 cm higher than the roof overhang.
Construction of the blind area.
Excellent materials for the blind area can be stone, asphalt and concrete. If you are installing it yourself, start at the corners. Treat them with sealant and start installation.
Base types
There are various ways of laying a basement. Let's consider the most popular types:
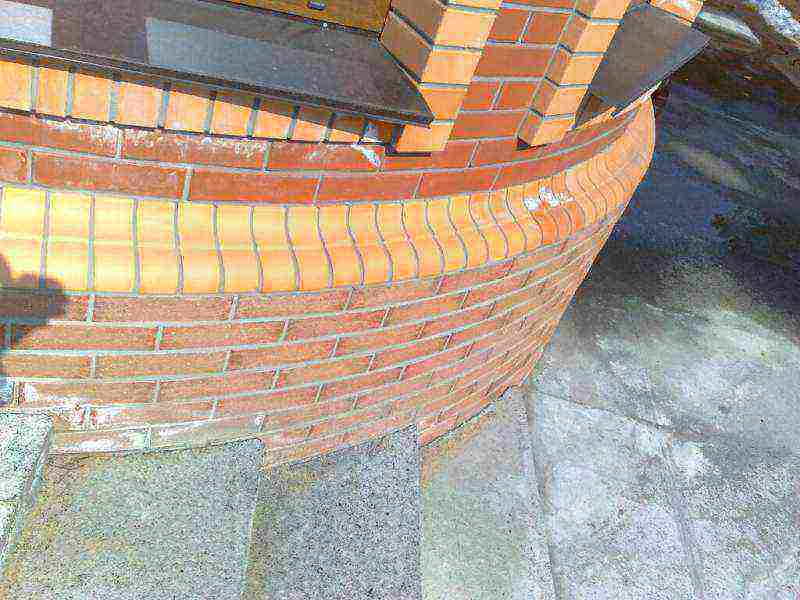
- Smooth base. The thickness of the structure and the base are the same. For the beauty of the appearance and separation of the walls from the base, borders, decorative cornices are used.
- Protruding base. The emphasis is on the base or walls. The use of this type implies the presence of ebb tides.
- Westerly plinth. The view is popular in places where heavy rainfall often falls, as it protects the structure. The main wall is thicker from the base.
At all stages, it is important that the step-by-step instructions for laying a 1-brick basement are strictly followed.
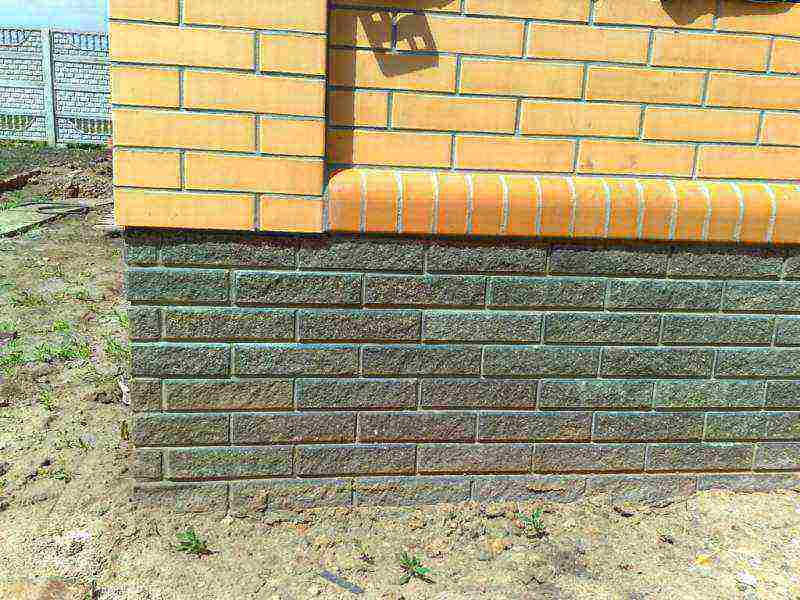
Finish plinth
Many refuse to lining the basement, considering this stage optional. In fact, the cladding serves as another layer of waterproofing, so don't underestimate its importance. Brickwork is constantly exposed to an aggressive environment and does not resist moisture well, so it will not be damaged by an additional protective layer.
For greater efficiency, you should choose moisture-resistant and durable materials. Natural or artificial stones, as well as ceramic tiles, work well. The use of plaster is allowed. Remember to consider the overall style of your home. Any finishing materials should fit well into the intended look.
Now you know how to lay out the base with your own hands. Brick laying requires certain skills and knowledge, so it should be done strictly following the instructions. If you do not have experience in construction, most likely, the work will take a lot of time. Try to consider these costs as an investment, because the basement protects your home from negative external influences. Moreover, correctly selected materials will give it a complete and well-groomed look.
Insulation materials
When choosing a suitable option among insulation materials, it is necessary to take into account the effect of moisture on the basement of the house. Its lower part is in direct contact with the ground and water. Not every insulation will retain its qualities in such conditions. Preference is given to durable, inexpensive and moisture resistant materials:
- expanded clay;
- Styrofoam;
- extruded polystyrene foam;
- basalt wool (for internal insulation).
Expanded clay
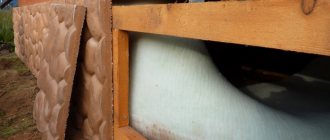
Expanded clay is a durable, fire-resistant, safe and inexpensive insulation that can be used inside and outside the building. When placed from the inside, it is poured into the sinuses of the foundation before installing the basement floor slab. Outside, the fired clay granules are placed in the cavities left by the brick laying. The thickness of the layer of natural insulation is at least 50 cm - only under this condition will it provide sufficient thermal insulation at home. High hygroscopicity of expanded clay requires high-quality waterproofing of the foundation and masonry before filling the granules.
Styrofoam
Cheap foam is moisture resistant and has good thermal insulation properties. The thickness of the cladding depends on climatic conditions, in cold regions the layer of material reaches 100–150 mm. Foam plates are attached to the waterproofing layer with special glue. You can use special dowels, but they will break the tightness of the waterproofing. Insulation requires finishing, such as plastering on a reinforcing mesh.
When choosing foam as an insulating material, one should remember its disadvantages: flammability, fragility, attractiveness to rodents.
Mineral wool has many advantages over other insulation materials, the main one being its resistance to open fire. This is an important quality for finishing a residential building. Low thermal conductivity, affordable cost, resistance to biological and chemical attack allow the use of insulation to isolate any part of the building. The material is effective for interior work, basalt slabs are placed in a frame made of wooden or metal slats. The finish is made from OSB boards or lining.
The disadvantage of the material is hygroscopicity, leading to an increase in thermal conductivity. Wet cotton wool becomes useless for insulation.
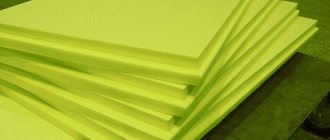
One of the popular thermal insulation materials used for finishing the basement is expanded polystyrene. Due to its structure, consisting of gas-filled granules, expanded polystyrene has a low thermal conductivity. In terms of the degree of insulation, it surpasses mineral wool, so its use reduces the cost of heating a private house. Among other advantages of the material:
- low water absorption;
- light weight simplifies transportation and installation;
- service life is 60–80 years;
- the material is easy to cut and process;
- resistance to the action of microorganisms and mold.