Share on social media networks:
Given the current cost of utilities, many homeowners are considering making their home as warm as possible. The first thing to start with is the floors, because how warm can it be if they are cold? In order to eliminate this problem, you do not have to do them with heating or look for the reason in poor planning. It could be much easier. We will tell you about the main reasons why cold floors in a private house, what to do in order to solve this problem without drastic solutions.
What materials are needed to insulate a cold floor in a private house
Consider the most popular heaters:
Mineral wool. The most common material for home insulation. In addition to low cost, it has ease of installation, good sound insulation, low thermal conductivity. Disadvantages can scare off a potential buyer. High vapor permeability without installing waterproofing calls into question the advisability of using mineral wool for house insulation. In addition, rodents liked it.
Ecowool
Low cost, environmentally friendly material, good thermal insulation attracts the attention of buyers. But the disadvantages are the same: moisture permeability, a delicacy for rodents and flammability.
Expanded polystyrene
Good heat insulator, highly resistant, does not allow moisture to pass through. The disadvantage is the same flammability. When burned, it emits many harmful substances, therefore it should not be installed in a residential area.
Plywood, sawdust, chipboard. Quite popular heaters. They are harmless to the premises, since they do not emit poisons during combustion. There are flaws in thermal insulation and flammability, but otherwise acceptable for installation. The least popular: glass wool (inconvenient to work, harms the body), expanded clay (has too thin a layer for thermal insulation), polystyrene (high fire hazard).
When choosing a heater, each owner should focus on many indicators: what is your area of the room, are the windows insulated, the interior of the house, the material component, etc.
But the most important thing is that the insulation must qualitatively fulfill its characteristics declared by the manufacturer and warm the residents of the room with warmth and coziness, give comfort and serve for a long time.
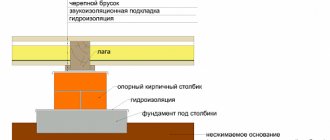
Do-it-yourself floor insulation
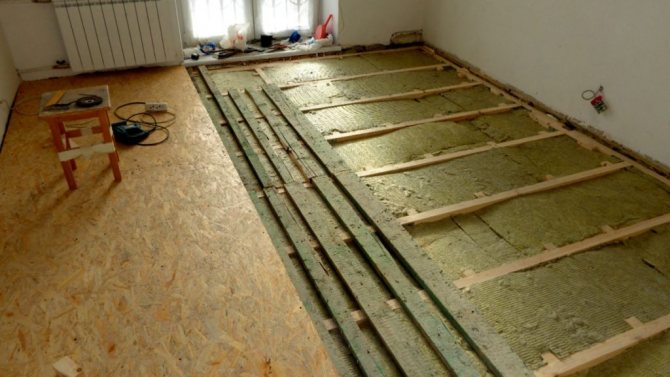
It is quite simple to make a wooden frame from logs (wooden slats). Their size is chosen based on the thickness of the insulation.
In addition to a heat insulator, a log will be needed:
- fasteners for a wooden frame (dowels, screws, anchors);
- mortar glue, mastic;
- waterproofing layer (in the simplest version - dense polyethylene);
- construction foam (if necessary, to fill gaps in hard-to-reach places).
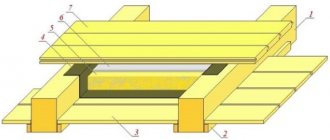
The bottom layer of waterproofing is laid on the concrete base, after which the logs are attached to the concrete.
The step between the lags may depend on the cutting of the heat insulator; the optimal distance between the bars is 60 centimeters. Logs in apartments above damp basements can be additionally treated with water-repellent impregnations.
A heat insulator is placed in the intervals, which is covered from above with an outer layer of polyethylene.
A wooden base of the floor (final floor covering) is attached to the logs. Ventilation gaps are left near the walls.
Floor insulation in an apartment on the ground floor
Cold floors are typical when living on the ground floor in an old housing estate.This is due to insufficient thermal insulation of the basements.
In such houses, no measures were taken to improve waterproofing, therefore, it pulls from below and dampness.
Floors in apartments (linoleum, laminate) are laid directly on the concrete floor, without an air gap.
Ground floor apartments suffer the most from the cold, giving off heat to the upper rooms and not receiving heat from the bottom. The best methods of insulation are active (using heat, electricity, water) warm floors. In many cases, it is sufficient to improve the floor by installing an insulating layer.
How to tell if the floor is the source of the cold
The question is by no means idle, and before making a final decision, it is necessary to carry out a comprehensive check of the apartment to determine the sources of heat loss. One of the properties of cold air is its ability to go down.
If the housing has weak thermal protection, then the floors will be cold in any case and floor insulation in the apartment will not give the desired result. It is necessary to solve this problem in a comprehensive manner. When there are no serious questions about the reliability of walls, the tightness of windows, doors, then heat protection of the floor is a necessary operation.
One of the indirect signs of the problem is a sharp boundary between cold and warm air masses in the lower part of the housing. For most residents of high-rise buildings, this problem is not relevant, since there is an apartment below, which cannot be a source of cold. Problems arise for the inhabitants of the first floors:
- not heated basement;
- poor-quality installation of floor slabs;
- freezing of the soil under an apartment that is not equipped with a thermal protection system.
It is recommended to inspect the condition of the floor, both from the side of the apartment and from the basement. Often the causes will be visible to the naked eye. In this case, it will be easier to make a reasonable decision on the method of housing thermal insulation.
If the floor is not a pronounced source of cold penetration, then it is enough to lay chipboard, OSB or non-woven foam film for the laminate under the topcoat on the floor slabs.
What to do if the floor in the apartment is cold
For starters, you can complain about cold batteries. But still, the way to solve this problem was and remains - to isolate and insulate the floor. The essence of insulating materials is in their thermal insulation properties, which do not allow heat to escape outside the apartment. There are several options for insulation, consider the popular ones.
- Bulk materials. These include expanded clay, shavings and wood concrete. They have high thermal insulation properties and are relatively inexpensive.
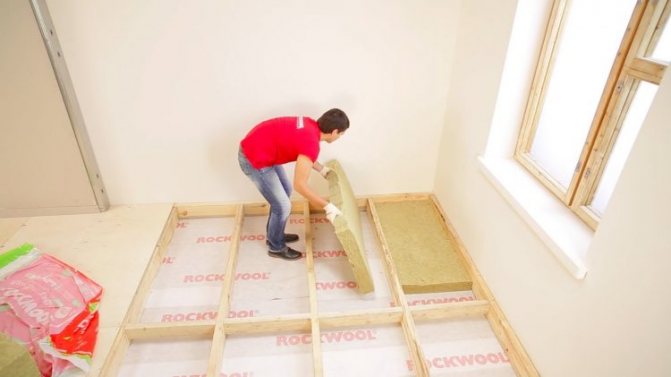
- Glass wool / mineral wool (mineral wool). They are also effective in floor insulation, while the fireproof material is not subject to fungal contamination and is hygroscopic (with mandatory vapor barrier).
- Expanded polystyrene or polystyrene. It has its advantages: it is moisture resistant, does not ignite and does not undergo deformation, has sound insulating properties and retains heat.
It is not possible to unequivocally answer the question of which material is better, since it is necessary to proceed from financial capabilities, the type of apartment and premises in it and their performance and loads. If the apartment has wooden floors, then it is better to use mineral wool as insulation. This will save money and time. The only caveat is that polymer insulation (penoplex) is not suitable for wooden floors due to the increased flammable properties of both materials. It is more effective to use expanded clay on such coatings.
More often found in urban multi-storey panel buildings - apartments with a concrete floor. It is a cold material in itself, so it can be cold in the apartment in winter, plus leaking joints between the plates, as a result - the floor becomes icy.It is interesting to know that 20% of the heat loss from the total heat loss is precisely the cold floors in the apartments.
In the corridor and living room, the floor can be insulated using expanded polystyrene, and in the bedroom and nursery it is better to use loose wood material.
If the floor in the apartment is not very cold, what to do without resorting to repair work with insulation. There are alternatives:
- Lay a rug or carpet. They have a low coefficient of thermal conductivity, the greatest insulation properties of coatings made of natural wool.
- Cover the linoleum on a felt or jute backing, or on a foam base.
If you decide to put a laminate in the apartment, then before laying it is necessary to put a special cork material, then you will not have to wonder why there is a cold laminate in the apartment, and what to do.
So, in order for the floor to have a comfortable temperature, it is not necessary to use expensive heating structures, it is enough to correctly insulate it when using available materials. Find out why the batteries are cold at the bottom and hot at the top.
Information for customers
Types of profiled timber
Profile A
- This is a classic profile view, it has a wide groove, an expansion cut from the top and bottom (it saves the timber from cracks). The timber fits tightly to each other, and so that the house does not lead during shrinkage, the crowns are fastened with wooden dowels (dowels). The docking of the timber in the corners of the house is made according to the principle of a dovetail, which ensures that there are no through gaps in the house.
Profile B
- This type of profile, which is often called Finnish or Scandinavian, is the most popular in the construction of houses from a bar. It has a double lock (which ensures the most tight fit between the crowns), a special cut from the top and bottom (it saves the timber from cracking). The best thermal insulation is helped by jute (a special seal that is placed between the crowns). Also, the crowns of the house are fastened with wooden dowels (so that the timber does not lead when drying out). A bar in the corners of the house is filed with a dovetail (so that there are no through cracks in the house). A house made of a bar of such a profile is very durable, warm and usually serves for many years without repair.
Profile B
- If you choose between a profiled beam and a log, this profile is an excellent option, as it has all the advantages of option A, plus it imitates a log from the outside. Jute is placed between the timber (the best insulation, many times better than moss and tow). And the crowns are additionally fastened with dowels (these are wooden sticks for attaching the timber to each other). This fastening ensures an even shrinkage of the house.
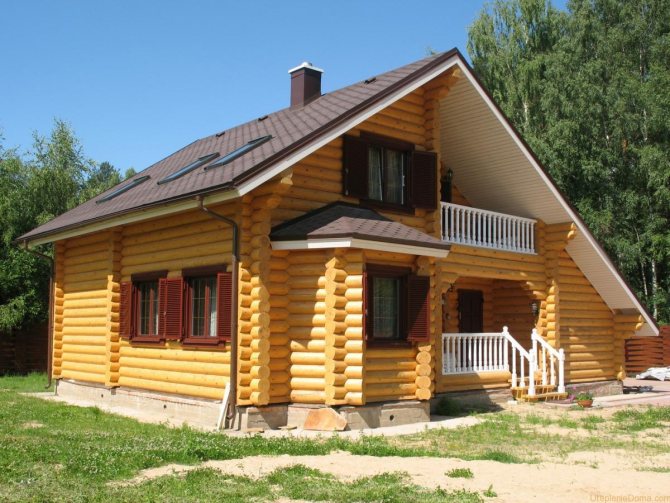
Wood, as a building material for residential buildings with year-round use, attracts with its environmental safety, naturalness and aesthetic qualities. But the wooden building itself does not mean that it will be warm in winter without additional investments. It is advisable to find heat leakage.
There may be several reasons:
- the heating stove is not properly arranged;
- mistakes in the construction of the foundation and floors;
- weak thermal insulation of the ceiling and roof;
- errors in the construction of walls.
The stove is small, but lukewarm
If a wooden house for a year-round residence does not have a gas, electric or central heating system, then the only source of heat is a heating or cooking-heating stove. It is very important from what material it is. Metal ovens heat up very instantly, but they cool down just as easily, so they are not suitable for regions with a long period of negative temperatures.
You need to fold a brick oven of a suitable size. Of course, such a stove had to be taken care of even during the construction of the house, but the situation can be corrected later. Perhaps there is already such a stove, but it does not heat well.To fold a new one or move an old brick oven, you need to buy a good heat-resistant ceramic brick. If you have experience in laying stoves, you can safely get down to business. Or you can invite a stove-maker.
A roof without a ceiling - warm to the wind
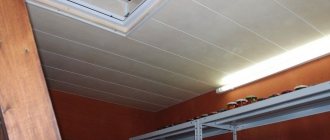
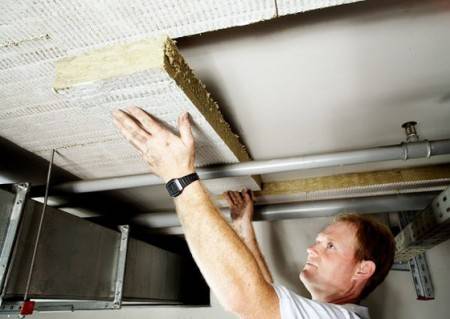
To retain heat, it is necessary to insulate the ceiling. It can be insulated both from above, from the side of the attic, and from below, if the interior decoration of the house is not yet finished. If the interior finishing of the ceiling has not yet been made, then we fix any roll insulation using the instructions for use. Then we close it with plasterboard, plywood or other finishing sheet material. The same can be done from the attic side. Photo of a wooden house (https://www.izba-mechty.ru/foto-derevyannyh-domov/interjery-derevyannyh-domov).
If it is possible to work only from the attic side, then the option using a cement-sawdust mixture is suitable. We cover the surface with a waterproofing film and fill it with a mixture made from the calculation: a bucket of cement, 9 buckets of sawdust mixed with two buckets of water.
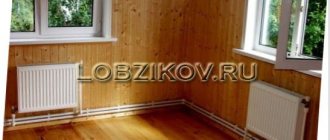
It's warm on the stove, it's cold on the floor
In a wooden house, heat loss through the floor is inevitable to one degree or another. If the situation is not critical, then cover the floors with carpeting. In more difficult cases, we lift the boards and put any modern heat-insulating material under them: panels made of pressed mineral wool or fiberglass, polystyrene.
They put a log house, and oak cheese
Wooden houses after construction for several years in the process of "shrinkage" may lose some of their properties for saving thermal energy, in addition, the thickness of the walls may be insufficient for climatic conditions.
In these cases, heat loss goes through the walls.
Many owners cherish the appearance of a wooden log house, so wall insulation is possible only from the inside. Now there are a lot of easy-to-install insulation materials and panels, it remains to make a choice from:
- insulation with heat-insulating plaster;
- thermal insulation with sprayed materials;
- insulation with heat-insulating panels: from mineral wool, from shavings, etc.
All types of work on the insulation of a wooden house, if you have the skills and desire, you can do it yourself or contact a specialist.
Are cold floors the first and worst impression of your day? Everything can be corrected. It is only important to correctly "diagnose" the problem, because the matter is not always in the absence of a "warm floor" system or the poor location of the room - everything is much more interesting. Now we will analyze the main causes of a cold floor and how to fix this problem.
Installation sequence
- The infrared film is laid out in the planned areas, fixed to the floor with a stapler or tape along transparent edges that do not have a built-in wire.
- Recesses are made in the wall. Place the cable from the thermostat to the thermostat.
- Places on the film in the connection area are thickened, for them it is necessary to create artificial technological recesses for them.
- The starting point for laying is on the opposite side of the power connections. A free space of 20 centimeters is left from the walls.
- Connect the copper ends to the thermostat using the supplied cable and terminals. Secure with pliers and isolate.
- The clamp is placed between the film and the wire. The IR strips are connected near the wall. When building them, a wire of the same color is connected to each other, followed by insulation, and additional fastening with tape.
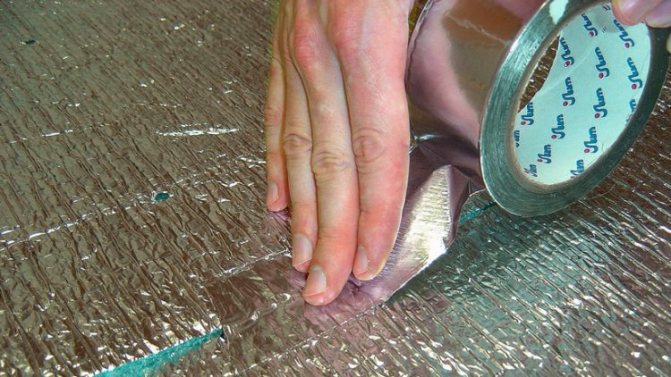
- The cable is routed inside the corrugation. It is closed with a hermetically sealed foil, protecting it from moisture.
- After completing the installation, they check the performance of the entire structure using a portable sensor.
Useful video for laying an electric floor
We install additional heaters
If all the measures for insulation and decoration did not bring the desired result, “heavy artillery” comes into play, that is, a variety of additional radiators and convectors, of which there are a great many today. If possible, the most obvious and practical solution would be to replace the old batteries with a newer model with greater heat dissipation, an attractive design and the ability to regulate temperature.
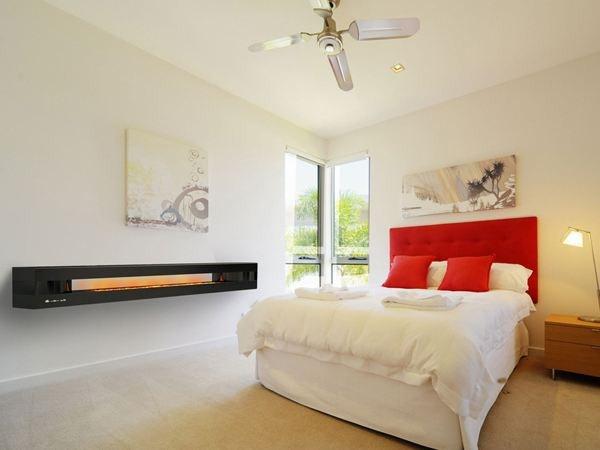
Decorative shelf-radiator, Vanixa
In addition to replacing stationary heating radiators, you can use additional options, for example, install a flat convector. Such a convector is wall-mounted and can operate continuously. There is a solid-cast heating element inside the convector, which ensures quiet operation and quick warming up of the room to the required temperature without changing the air humidity.
Convectors are compact, which is very important, Galletti
One of the most advanced heating options today are infrared heaters and panels. Their fundamental difference from other models is that they provide uniform circulation of warm air throughout the room, and not just near the battery itself. This effect is achieved due to the fact that a quartz lamp in the form of a long tube is installed inside the metal case, while you can both equip the room with built-in infrared panels and connect a portable heater.

Compact infrared radiator-bedside table, Infrared
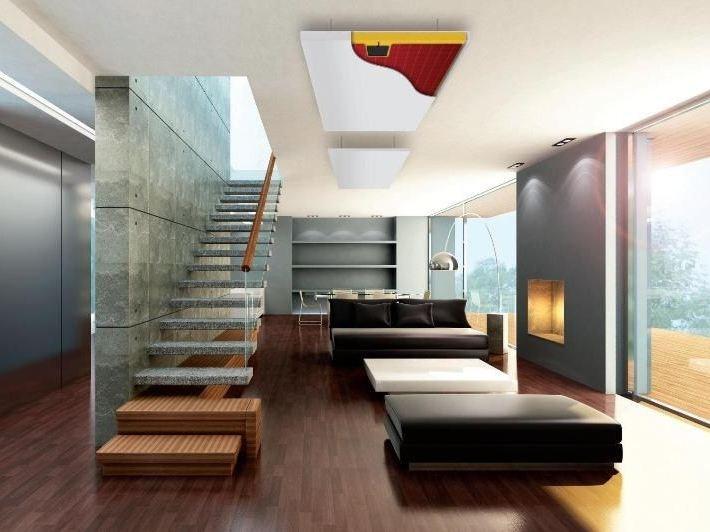
Compact and practical solution - infrared radiator on the ceiling, ATH Italia
If the lack of heat in the house is a temporary phenomenon, for example, before the start of the heating season, it is enough to get a compact electric fan or oil radiator. They are mobile and relatively inexpensive, but they dry the air, which negatively affects health, and consume a lot of electricity. It is better to have this option as an additional safety net in case of a sudden cold snap, and to maintain a constant temperature in the room at the expense of other means.
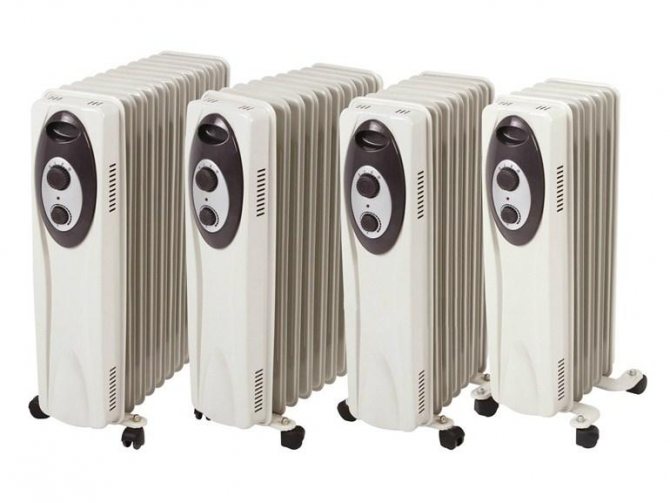
Portable oil radiators of various sizes, S&P Italia
We briefly reviewed the different options for maintaining a comfortable temperature in the house during the winter. Of course, these decorative techniques are unlikely to replace high-quality repairs, but by combining our various tips, you can easily make winter evenings much warmer and more comfortable for the whole family.
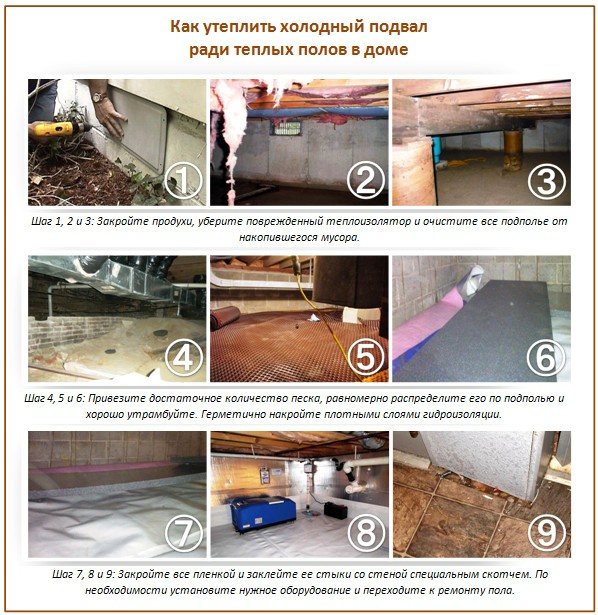
Basement side insulation
The best solution is to insulate the floor slab from the basement side. In other words, it is necessary to insulate the ceiling in the basement, thus moving the cold and the dew point away from the floor in the apartment.
To carry out such work, it is better to make an agreement with the ZhEK. This is usually not a problem. Having received such a permit, you can start thermal insulation work. For this, the following techniques are available:
The simplest, inexpensive, but at the same time quite effective method is to make foam insulation. Liquid nails are glued to the concrete base with glue. At the end of the work, all the gaps remaining between the sheets should be filled with polyurethane foam. Since the basement is quite often damp, and the foam has the property of being saturated with moisture over time, it is necessary to waterproof it. For this, a thick plastic film is glued onto the insulation sheets with the same glue. The edges of such waterproofing must be overlapped at least 10-15 cm.
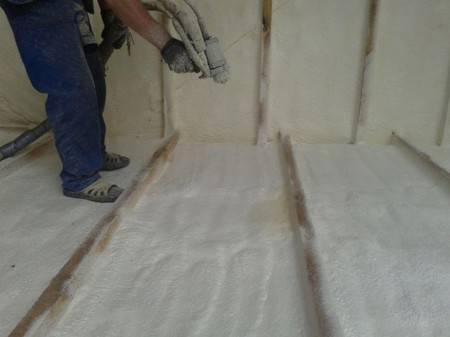
It is possible to spray polyurethane foam - one of the most reliable and durable insulation materials known today. After hardening, this material has high strength, excellent thermal insulation properties.Also, polyurethane foam does not burn and does not absorb moisture at all. The only drawback of this option is its rather high cost: spraying is carried out using special equipment and requires professional skills of the operator.
Reason number 3. Lack of insulation
Elimination of cold in the corners of the house can be done with insulation. You will feel the lack of the required insulation at lightning speed, especially if you live above a cold basement. To check the correctness of the installation of the insulation, you can find the material that was used for these purposes on the Internet and specify how much of it should be. After that, take a ruler and measure how much material you have. If it is not enough, you still have to open the floor.
If we are talking about a cold floor in an apartment or a private house, we offer you one fairly simple and budgetary solution to this problem. The sequence of work consists of the following actions:
- Place sheets of Styrofoam 10 centimeters wide on top of the clay castle in the underground. This insulation will completely cut off the cold.
- Lay a layer of expanded clay on top of the foam sheets.
- Close the entire air gap of the foundation and air vents for the winter.
- Lay the floors themselves. They should be made of wood and rest on grooves covered with rubber bands. This is to keep the floors separate from the walls.
- Lay out the sheets of rubber that will serve as a waterproofing function.
- Fill the screed with warm floors, install the floor covering.
If you have a wooden floor on logs, the insulation problem can be solved as follows:
- Remove the cover. This must be done very carefully.
- Treat the lags with a special compound.
- On the logs, fasten the corner for wrapping the cord, and then pull it.
- Attach the cord to the joists using a special furniture stapler.
- Place 5 cm thick foam sheets. Fill up the cracks between it and the wood with polyurethane foam.
- Lay penofol on top of 3mm thick foam. Install the lags in their place.
- Fasten the foam from the underground. This can be done with can lids and self-tapping screws.
We offer you to familiarize yourself with Why do thuja branches turn yellow how to treat
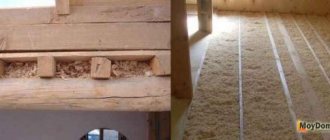
How cold floors are insulated in a private house
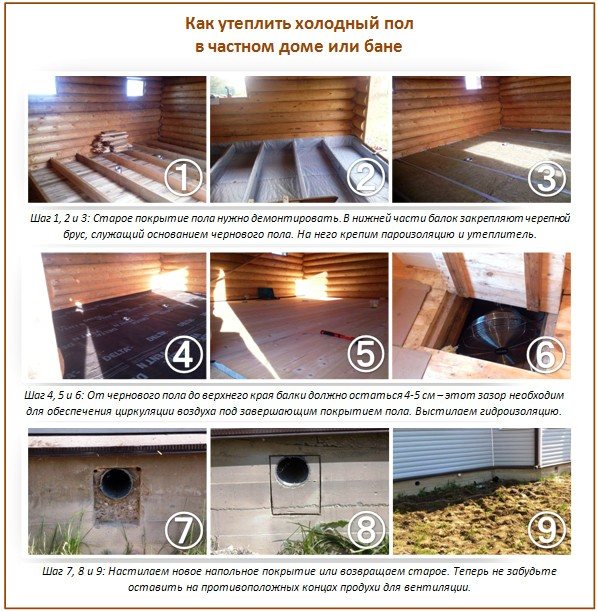
Thermal insulation of a wooden floor in an old house
Preliminary work
In an old house, you can insulate a cold floor without touching the walls and other parts of the building.
They are removing old boards. Examine them, throw away the rotten and rotten ones. Those that have not been destroyed are left and used again. Check the condition of the underground part
It is important to determine if the subfloor boards, joists and other wooden parts are well preserved. Rotten elements are removed to be replaced with new ones. While the floors are dismantled, check the ventilation vents, the condition of the subfloor and perform, if necessary, work in this part of the house.
Sometimes it is necessary to remove excess soil or, conversely, to add soil. After a thorough examination, new beams are installed or old, well-preserved logs are treated with a special protective compound. Then a sub-floor is laid from substandard or second-rate non-planed boards. They are also impregnated from rotting and damage by rodents. Further, they carry out warming measures.
Main works
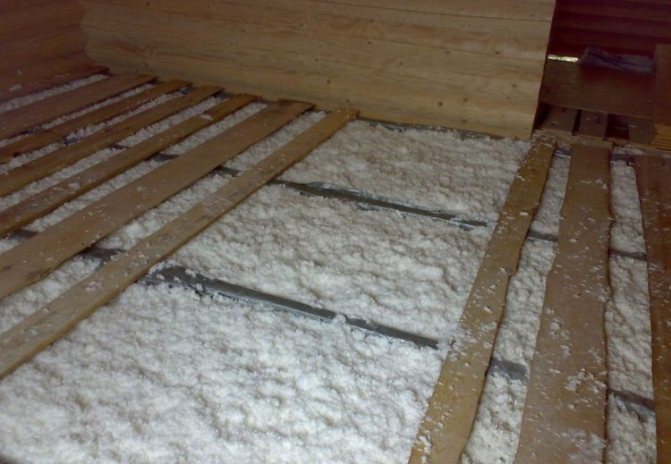
It is better to insulate the cold floor in a wooden house with natural materials based on cotton wool. If the house is located near fields and in autumn and winter it is attacked by field mice and domestic rodents, glass wool should be preferred. We'll have to experience inconvenience during installation. But this will be a guarantee that the floors will last for a long time.
- On the rough flooring, a cage is mounted or slats are nailed in 40 cm increments.
- Next, lay the waterproofing - a polyethylene film. The canvases are overlapped, do not stretch, fasten with tape. The edges are bent upward with an approach to the walls by about 10 cm.
- Insulating material is placed in the spaces between the slats. You need to fix it. It fits well into the space allotted to it and takes on the required shape and size.
- Any vapor-tight is laid on top.
- Then plywood, chipboard, OSB or floorboards are laid.
- A topcoat is placed on top.
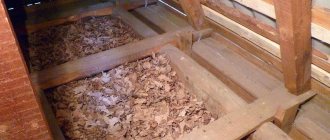
If the house is insulated with bulk material to insulate the cold floor, no waterproofing is done. Expanded clay and wood waste absorb excess moisture well and are not subject to destruction. The sawdust compresses over time and prevents heat from escaping.
Insulation of a cold, concrete floor
Underfloor heating system
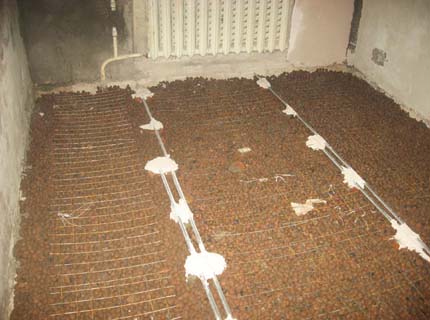
A concrete slab on the floor of a house is a good foundation for a floor heating system.
After removing the old coating, the concrete is cleaned of dust and dirt, cracks and chips are covered, and the surface is leveled. For the installation of the water system, pipes are laid according to the scheme, they are connected to a heating boiler or a special device where water will be heated. Infrared mats are laid according to the manufacturer's instructions
It is important to consider the location of additional outlets in order to provide them with power. Water insulation is covered with plywood and other leveling sheets. The infrared system is covered with a thin layer of cement screed, waiting for it to solidify. Next is the finish line.
With such a device, the concrete floor in the house will always be warm and comfortable.
Cold floor insulation in the traditional way
The underfloor heating system may seem expensive to some homeowners. To save money, you can go along the path of insulation, as with a wooden base.
- On clean concrete, slats or boards are attached to the edge. It depends on the height you can pick up from the ceiling.
- Expanded clay is poured behind a layer of waterproofing (sawdust is not suitable) or mineral wool is placed.
- Everything is sewn up with plywood sheets or boards. The latter should be as tightly connected as possible and fixed with self-tapping screws. This flooring is impregnated with a special protective compound.
- Laminate, parquet, carpet and linoleum are laid on the plywood base. Boards are coated with varnish, mastic or decorative paint.
When building a new house, all insulation measures are carried out on laying the foundation and forcing the walls. here you should take into account the design features of the building. If the house will stand on screw piles or a columnar foundation, a thermal insulation system is required. Otherwise, there will always be a cold floor in the house.
All work on insulating the lower surface of the house can be done on your own. Knowing the basis of the technology and following the advice of experts, you can permanently get rid of the problem with cold floors. To keep the feet warmer, carpet is used for the topcoat or carpet runners are laid. This is especially true for bedrooms and children's rooms.
Insulation of a wooden house and why there are drafts in the house
Let's take a look at the physics of the process of heating a room in winter. Firstly, in such a room there must be a source of heat and certain conditions for its cooling, that is, for heat exchange.
As a heater in apartments, as a rule, a heating radiator is used, and as conditions for cooling this radiator and, at the same time, air the ceiling, walls and floor protrude... It is no coincidence that these three parts of the room are presented in this sequence.
Now let's figure out why. The heated warm air from the heat source immediately rises up. The first thing is that it comes into contact with the ceiling and “spreads” along it in different directions. As long as warm air “flows” across the ceiling, it cools, transferring its warmth to the ceiling. The ceiling becomes the warmest building structure in the room and in the house as a whole. Our air has cooled down a little and has reached the walls. There he would have stopped, but the process of heat exchange goes on non-stop and the air continues to cool. As it cools, it sinks lower and lower.If the walls in the house are cold, the air not only sinks, it also increases the speed of descent. A very interesting effect can arise here when the wall is monolithic, and the full feeling that it is full of holes is blowing from it with such force.
Important for the case of a wooden house
In a wooden house, the walls are not monolithic, and the owners immediately have the feeling that the walls are full of holes.
The cold air, moving down the wall, has already dispersed well and at the floor, as you understand, it has nowhere to go and it spreads across the floor with all its speed. This creates the effect of “blowing on the legs”. In such a situation, you have to walk at home in felt boots. Familiar situation?
The most interesting thing is that in this situation it is very easy to be deceived and blame the floor for everything (again, it is especially typical for wooden houses). Indeed, the floor becomes as cold as ice, and specifically on the floor, more precisely ten centimeters from it, a strong cold draft is blowing, almost a wind. But in fact, the share of the floor in air cooling is negligible. Indeed, all the coldest air in your room is concentrated near the floor.
Now it becomes clear why the radiators are located under the windows. Warm air is cooled more precisely from the outer walls. Internal walls have room temperature and hardly participate in heat exchange. That is, the radiator is an obstacle to the cold air. The radiator meets him when he has cooled the most. It is the radiator, our source of heat, that prevents cold air from reaching the floor, heating it and sending it back up to the ceiling.
Along the way, let us draw a very important intermediate conclusion. If you heat a room with additional radiators, then they should be placed not in the middle of the room, and not in the far corner, but precisely near the outer wall, on the path of cold air descending in full accordance with the laws of physics.
What happens if you install radiators against the inner wall opposite the window? We will thus organize an air accelerator. Cold air will descend along the outer wall, pass through the entire room along the floor to the radiator, and there it will be carried away upward with acceleration. So we will only increase the draft on the legs.
Thermal insulation of a wooden house: step-by-step instructions
How to insulate a cold wooden house. We will try to do everything in stages. If you carefully read the previous text, you probably thought that you need to do the insulation of the house in the sequence ceiling - external walls - floor. If you thought so, then you are right, but before this sequence, nevertheless, take a good look at the walls for open holes.
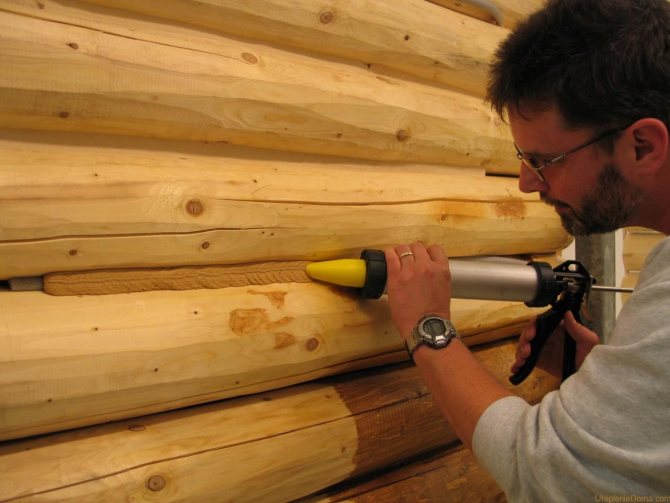
Wooden houses are not a constant value. Between the logs, and especially in the corners, there may be gaps through which it can be great to blow. Before sealing open cracks and holes in a wooden house, house insulation will be useless. But in general, if there are bad windows, then you need to start with them.
Checking the walls
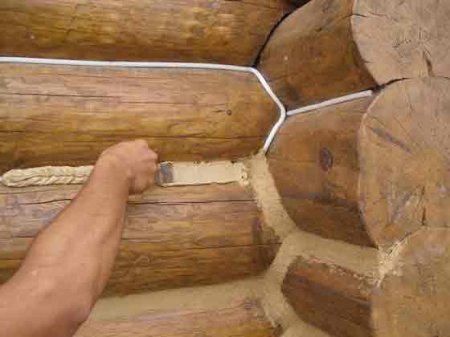
If it's freezing outside, then carefully check the walls from the inside. First of all, we are looking for places from which it blows, or places that get wet. Feel the walls and corners, the places where the interior trim meets the floor. Next, we look at the windows and window sills. Any of the above will definitely be foggy, wet, or you will feel a rather strong and cold blow. In short, we look for holes and plug them with tow or, better, polyurethane foam. If necessary, remove the interior trim. If the holes were plugged, or holes were not found at all, then we go through the list in the specified sequence: ceiling - external walls - floor.
We check and insulate the ceiling
The ceiling is the hardest part. Cold air never blows from the ceiling. Only warm air can blow from the ceiling, and not inside, but outside the room. These leaks are the hardest to spot.
You have to act blindly.To reduce the risk of missing such a leak, it is recommended to use either mineral wool or something that spills: ecowool or sawdust with impurities. If the material is loose, then it needs to be crushed a little, but also not too much, within reason. The thermal insulation layer must be at least 150 mm. Do not cover it with any materials such as roofing material, etc. Such materials are placed under the insulation, not on top of it! Don't skimp on insulation. Ruffle the edges and corners. By the way, here's a little test for the insulation quality of your ceiling. Put it in the attic, directly on the heat insulator, a basin with snow. If you have boards laid on top of the heat insulator, then just pour a handful of snow on them. Snow should not melt, or even melt.
We decided on the ceiling.
Now the walls... in most cases, it is enough to bore them from the outside and from the inside.
A very, very important role in the insulation of the house is played by windows and the interface of windows with the house. If you have money, then it is best to put plastic or wooden windows with double-glazed windows.
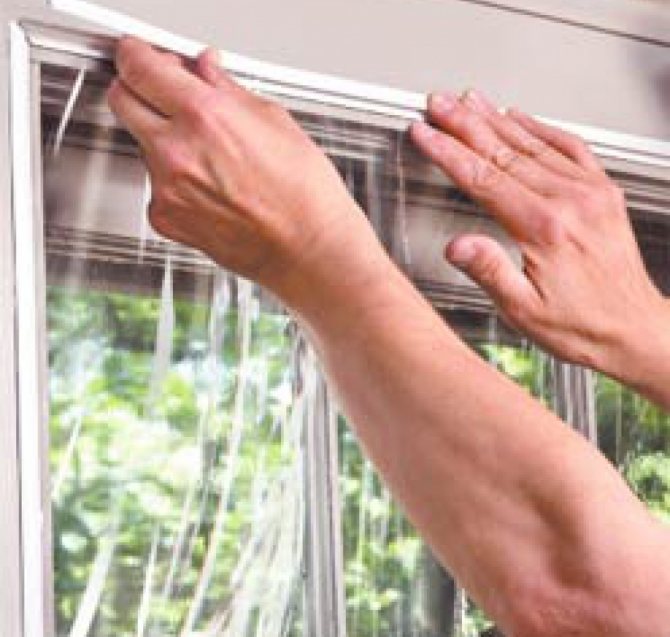
If there is no money, then insulate the available ones. Place the glasses on silicone sealant and glue the frames if they cannot be repaired or sealed. Windows are extremely important in insulating a house. If the windows are bad, then you need to start insulating the house with them.
Floor insulation
Gender is the simplest. In most cases, laying a carpet on it is sufficient. Check, by the way, if you have blocked the ventilation holes in the basement of the house.
What else can be improved
After these stages, the house in most cases will not be ideal, but, I think, a fairly comfortable home. At least it will be possible to take off the sweaters and replace the boots with warm socks.
However, there is no limit to perfection. The next stages of insulation can be the installation of additional insulation from the outside of the house, finishing the whole house with some kind of finishing material and improving the heating system.
Share this:
Insulation materials
The list of thermal insulation materials used in construction and repair technologies is quite large.
In terms of efficiency, ease of installation, the best heat insulators include:
- synthetic materials (polystyrene, polystyrene foam, polystyrene foam, teplex);
- modern wood fiber insulation;
- mineral wool;
- fiberglass;
- gypsum fiber sheets;
- liquid ceramic heat insulators.
In modern practice, bulk heat insulators are practically not used. The oldest of them, sawdust, is susceptible to decay, mold, and fire hazard.
The good thermal insulation properties of expanded clay are leveled by the large weight of the bulk material.
Fiber board materials, liquid ceramic heat insulators have shown themselves excellently, but they are expensive.
Fiberglass materials are quite heavy, can clump and cause allergies.
Quite expensive and mineral wool slabs. Thermal insulation properties are provided by low thermal conductivity of fibers from the melt of volcanic basalts, diabase, porphyrite.
For simple self-insulation, synthetic heat insulators are most acceptable, from a wide range of which you can make your own choice.
Correct floor design
We will divide all questions on this topic into two large groups - for houses with floors on wooden joists and for houses with floors on reinforced concrete floors.
There is also a separate group of houses with ground floor floors located above warm basements and a group of houses that have floors on fill soil. The problem of cold floors does not concern this group of houses, because from below they have "heating" either from the basement or from the ground, which (if not allowed to freeze) has a stable temperature of +4 degrees Celsius.
For reinforced concrete floors, insulation is usually carried out with penoplex in several layers.All insulation should be done OUTSIDE, that is, from the outside with respect to the room. This also applies to the basement and floor. The blind area is also insulated with penoplex. Insulation sheets should fit snugly against the basement insulation sheets. In the case of an unheated basement, it is possible to insulate not the entire wall of the basement, which goes underground, but only its aboveground part. Naturally, in this case, the blind area of the house should also be insulated. The width of the insulation of the blind area depends on the depth of freezing of the soil in winter for a given region. The width of the insulation of the blind area should be greater than the depth of soil freezing.
Between the wooden logs, sheets of insulation are laid or insulation is filled / blown out, which does not go in the sheets. For insulation of floors on wooden logs, you can use basalt wool in sheets and bulk, ecowool, polyurethane foam.
Reason # 2. Dampness under the floor
Dampness in the underground can still give a lot of worries. So, already in the spring, damp and warm air enters the house through the vents, and the basement at this time is still cold. Usually, this stream finds its condensation point on the logs, and manages not only to fill the unprotected insulation with moisture, but even hang on it with icicles. And this cold dampness directly touches the floor.
What to do in this case? First of all, protect the insulation from below - at least with the same plastic plate. Secondly, if this happens all the time - and completely abandon the vents, and organize the ventilation of the underground through the grate in the house itself.
You also need to try to somehow insulate the foundation itself with a plinth so that it does not freeze so much for the winter:
By the way, you will be surprised, but your tailed lodgers - - also manage to make their moves so that you feel a considerable draft near the walls. Control methods: a cat, an electric cat or an ultrasonic repeller.
Common Causes of Floor Cooling and Remedies
The temperature of the floors is influenced by 3 components: the object under the floor (base or room), thermal insulation and floor covering, its material and condition, and temperature is also directly related to the level of humidity. Sometimes the cause may lie in one of these factors, sometimes in a combination of them.
Cold pulls from the base
The floors are located too close to a cold base - soil or concrete, and there is no insulation layer between them or its thickness is insufficient. The problem is especially acute in winter, when the ground or the non-insulated foundation under the floor on the first floor freezes. You can solve the problem by lifting the floors, thoroughly insulating the space between the floor and the base, as well as the foundation or basement.
It's damp under the floor
Usually such a problem arises in the spring in private houses, when the underground floor frozen in winter begins to thaw, condensation accumulates.
The bottom should be protected from moisture by a layer of waterproofing under the insulation. Sometimes it is necessary to close the side vents - air vents - in the basement so that dampness does not penetrate there from the street, and instead install a ventilation grill above the basement, in the floor. If the floors are saturated with moisture, wait for them to dry or use equipment such as a heat gun to speed up the process. But the coating may deform as a result.
Lack or insufficient floor insulation
We need better thermal insulation, made in accordance with the calculations, it is also necessary to take care of the waterproofing and vapor barrier of the insulation, and if there are mice under the floor, think over a way to deal with them and close up the moves.
There are cracks in the floor
If the floors are planks, and the boards do not fit tightly to each other, through the cracks it will pull cold from the bottom and heat away from the house (apartment), dampness also penetrates through them. The slots can be repaired with putty, and so that new ones do not form, the loosened boards can be fixed with self-tapping screws.It is even better to supplement these operations by laying a dry screed made of plywood and other panel or sheet materials.
Cold floor covering
The problem can be solved with the help of a floor heating system, but you need to choose it correctly for specific conditions. High-quality thermal insulation must be performed under the warm floor, otherwise it will not be the room that will be heated, but the subfloor.
Working with finishing coatings
The problem is with the laminate: the outer decorative coating conducts heat well. A cheap way to solve the problem is to use a technical plug under the base coat. Expensive and more practical is the underfloor heating system. But it is appropriate only in the absence of cracks and dampness.
If the covering was laid using the locking method, there are no problems. Remove, install "warm floor", put the laminate back. If you glued it, forget it. Better take care of the heating system as a whole - install infrared heaters in the house - they heat not the air, but objects.
Absorption of infrared radiation is another reason for possible heat loss. Your flooring has the ability to absorb heat and heat up the subfloor. Place the foil material facing up under the laminate. The difference is enormous!
What to do if the floor in a private house is cold
- The only correct solution would be floor insulation.
- If the house is under construction, then you need to take care of its thermal insulation in advance. When people already live in the house, then the solution will be to build up the floor or disassemble. It all depends on your desires and financial investments.
- First of all, check the ventilation hole in the basement of the house. It should be tightly closed during the winter cold season.
- Carefully investigate the absence of gaps between the first crown and the basement of the house.
- Take a closer look at the ceiling. According to experts, the main reason for drafts and a cold floor in the house is a poorly insulated ceiling. The ceiling is insulated - the problem is solved.
- Install the "Warm floor" system. But with improper insulation of the outer space, it will bring little benefit.
Reason number 7. Tactile sensations
This is one of the most unexpected causes of cold floors in a private home. In this case, the simplest physics works: there is simply no cold, and the lack of heat creates discomfort for you.
Important! Please note that different decorative flooring does not have the same ability to absorb heat from other sources.
That is why you can experience the unpleasant sensations of walking barefoot on the floor, if, in fact, it seems as if it is not cold. To solve this problem, you can replace the decorative flooring itself. An excellent option would be PVC tiles. This material has the lowest level of thermal conductivity, in contrast to its other analogues.
Warm floors from hot water
Installation of water heating is a step-by-step observance of the entire cycle from the beginning to the start of the system. The length of the pipe is determined by calculation, depending on the area of the room.
Advantage
- Provides uniform heating of the entire floor.
- The pipes are hidden and do not change the aesthetic perception of the interior.
- The closed cycle of hot water from central heating does not affect the total cost of utilities.
- Correctly selected materials will not rust, which guarantees the system a long service life without leaks.
Equipment
- Metal-polymer or polymer pipes (preferably corrugated, bendable).
- Thermal insulation.
- Fasteners.
- A manifold with a fitting for connecting to a battery.
- A damper tape attached to the wall along the perimeter, in the aisles of the height of the structure.
- Reinforcing mesh.
- Aluminum plates.
Types of heaters
Expanded polystyrene
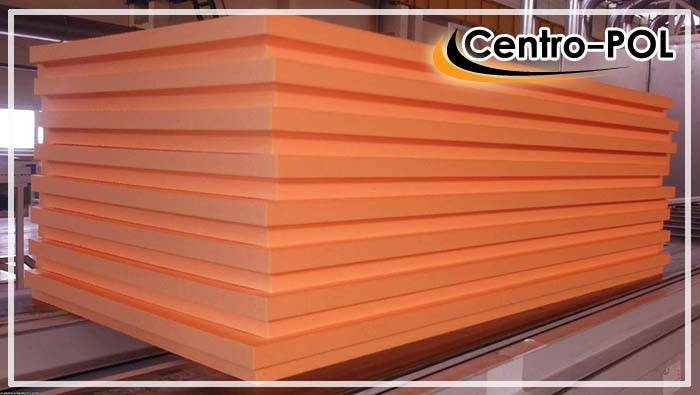
Polystyrene sheets with grooves for insulation and floor leveling
Expanded polystyrene, better known as polystyrene or its modified counterpart, penoplex has excellent thermal insulation properties, is lightweight and easy to use. There is also extruded polystyrene foam. Its difference from the usual one is in water resistance. If ordinary polystyrene foam can absorb a certain amount of liquid and deform because of this during temperature changes, then its more technological form is almost completely waterproof. The only drawback of expanded polystyrene is its flammability.
Expanded clay
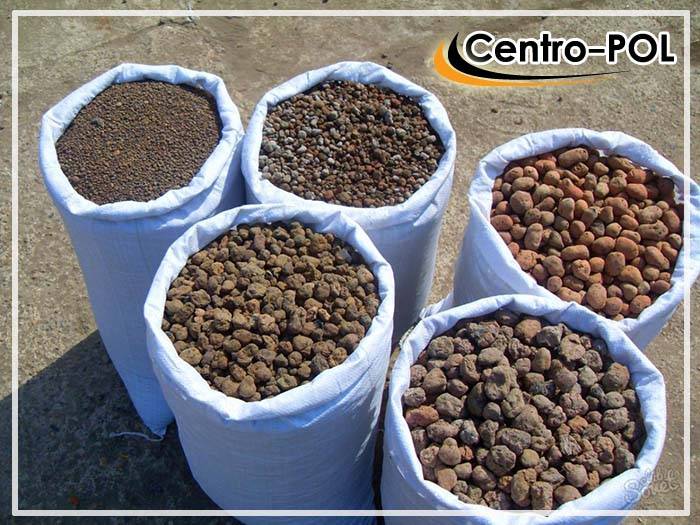
An example of different types of expanded clay used for insulation
This bulk material is attractively priced and versatile. Can be used with dry floor screed or mixed with cement mortar. Also, with its help, you can arrange a floating screed with your own hands.
Polystyrene concrete
Unlike expanded clay, polystyrene concrete requires a much smaller layer to create acceptable insulating properties. Almost anything can be laid on it, including tiles. In addition, it has excellent sound insulation properties. You will learn more about this material from the video.
Mineral wool
Mineral wool, as well as glass wool, are some of the most popular insulation materials, which are made in the form of tiles or rolls. The advantages include thermal insulation properties, reasonable price and vapor absorption. The disadvantages are the composition hazardous to health. When installing with your own hands, you should use respirators and avoid contact with exposed parts of the body. Therefore, mineral wool and glass wool need to be carefully insulated to prevent dust from entering the premises.
Bung
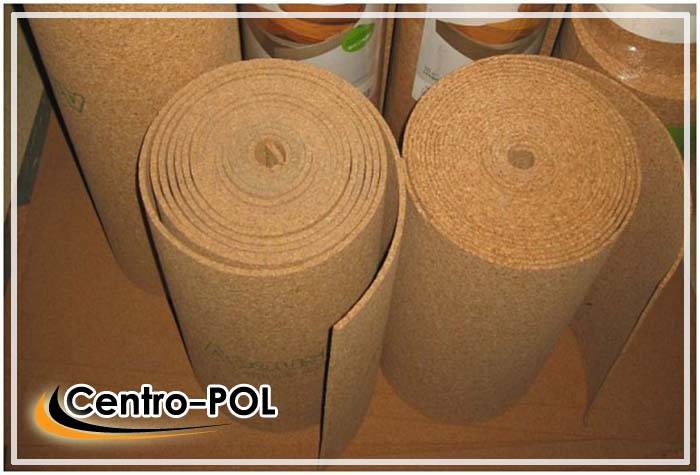
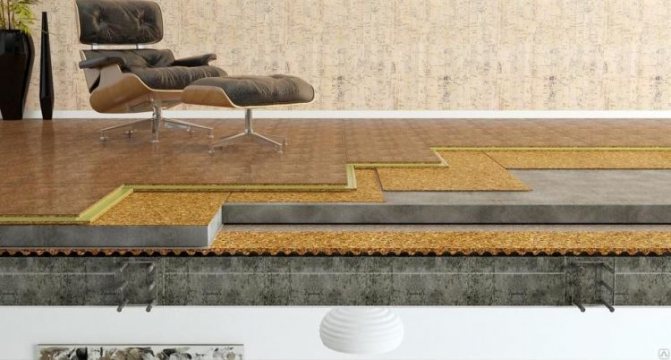
Cork is used as a backing for laminate and as insulation material
Cork is perhaps the most expensive material on our list. It is environmentally friendly, durable and moisture resistant. It can be used even for fine finishing, because in addition to its insulating properties, it looks beautiful as a top coat. Among the shortcomings, one can note the instability to cuts and other mechanical damage.
Ecowool
It is made on the basis of cellulose, which means it is environmentally friendly and not hazardous to health. It has high heat and sound insulation properties, but does not tolerate moisture. Therefore, it is used in areas where there is no risk of contact with moisture. For more information on the advantages and disadvantages of ecowool, see the video
Penoizol
This is liquid polystyrene foam, all the advantages of which we talked about above. The advantageous difference between the liquid form of such a material is in the ability to penetrate into the most inconvenient places.
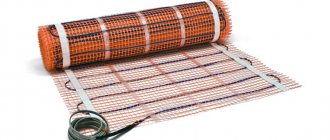
Warm floor
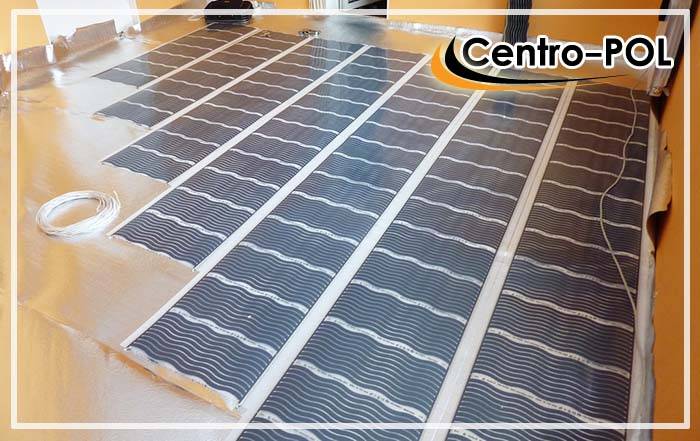
Installation of electric underfloor heating
The option of installing a warm floor is becoming more and more popular. Only its cost repels. There are several variations:
- Water;
- Electric;
- Infrared.
Water heat-insulated floor, heats with the help of communications with hot water under the sub-floor. An electric underfloor heating is also installed and heats by converting electricity into heat. Infrared is the most modern, simplest option and can be laid with your own hands without the involvement of specialists. Thin elements of the warm floor are placed under the finishing flooring. Only this type of floor can be done by hand, without special skills.
A little about physics
It just so happens that the cold, as such, does not exist. The sensation experienced by a person is the rate of heat transfer. The higher it is, the colder it is. For example, wood has low thermal conductivity, so touching it seems less cold than a tile that has a high speed. And this is provided that their temperatures are equal to each other.
But what if the use of a low heat transfer coating is inappropriate in certain areas. It is illogical to sew up the bathroom floor with laminate.You can lay a rug in the old fashioned way, walk in slippers, but this will not change the very fact of "pumping out" the heat.
The original method for solving the problem came from the West. Americans can be resourceful too - they cover the tiled floor with colorful duct tape!
Firstly, such a coating reduces the thermal conductivity of the tile. Secondly, it looks beautiful and surreal, which cannot be achieved when using goods from stores. Third, it's cheap. Fourthly, moisture does not accumulate, does not penetrate into the gaps. As a bonus, the drawing can always be changed, and the damaged coating can be re-glued to a new one, exclusively in the place of damage. These are the original solutions.
If you liked the material, I will be grateful if you recommend it to your friends or leave a useful comment.
Hello! I started building a house, not knowing about construction at all! The bottom line is that what happened is what happened.
The plot was not leveled, no one suggested, under the rough floor, due to the unevenness of the plot, there is a depression almost half a meter, now the floors are very cold in winter. I insulated it with polystyrene, but all were gnawed by mice last winter.
The question is - will the blockage help? I live alone and not very well off, can I put second floors on top?
Anna, Yakutsk.
Hello Anna from Yakutsk!
Everything was not foreseen at once, so we will have to do it now, do not freeze.
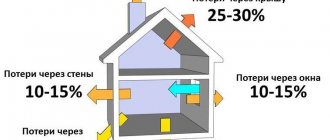
According to construction concepts, in order to keep the house warm, a number of measures are being taken even at the construction stage. Where does the cold come from? From the ground, through the walls and through the roof.
Since now we are talking about the sexes, let's talk about them. So I understand that there is no basement under your house. In such cases, sometimes, but not always, the first thing to do is remove the soil under the whole house. Then, on its surface, waterproofing is laid from some material such as roofing material, a strong film. Less often, a concrete screed is made. Then a layer of, for example, expanded clay, with a thickness of 10 centimeters or more is poured on top.
As the coating is the warmest
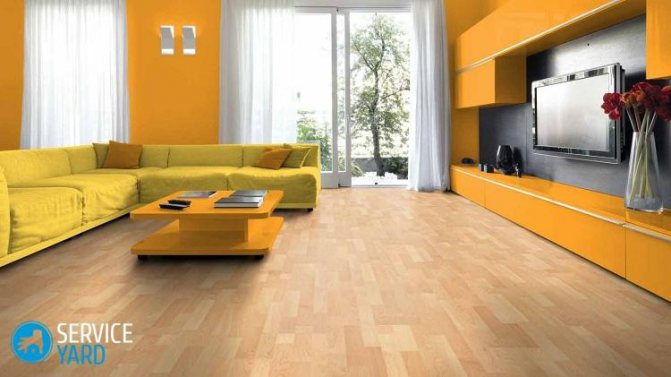
The cork is the warmest. This is an expensive elite material that can be installed in any room, except in places where there is high humidity. It is absolutely impossible to lay a cork on a bare concrete floor. This covering can be made in the form of slabs or rolls. In order to make the laminate or linoleum flooring warmer, a cork is also sometimes placed under them. It provides excellent thermal insulation and protects against extraneous noise.
The cork does not react to temperature changes and is capable of withstanding serious loads. It is not static and does not accumulate dust and hair. The carpet looks very similar to the carpet. It can be quite tough and soft. This flooring is convenient because it has a low risk of injury, so it is often installed in children's rooms. Carpets can be made from both natural materials and artificial ones. This is a warm covering that reliably protects your feet from the cold floor.
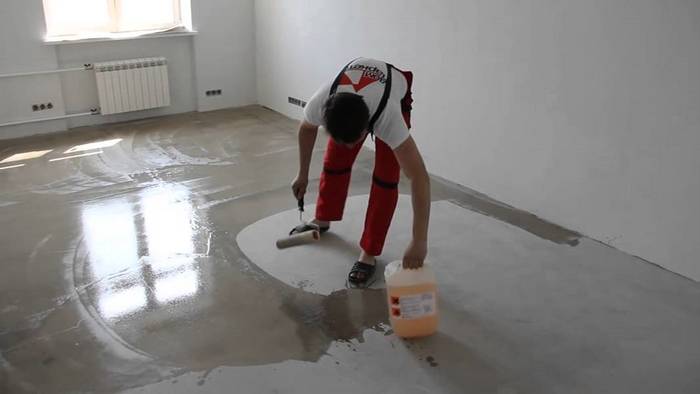
Base primer
Polyurethane
The second name of the composition is an epoxy primer, which has the property of deeply penetrating into concrete. Apply the component to the screed with a roller. Work with a brush around the perimeter of the base. Spaces are not allowed. This type of primer is effective for adhesion to self-leveling floors, prevents the formation of fungus and moisture penetration.
Concrete contact
This is a composition of acrylic with quartz sand. It is applied with a roller and a brush. After priming, a rough surface is formed on the base, ensuring tight contact with the subsequent layer. Acrylic in the composition makes the film resistant, preventing moisture from entering the concrete. After 4 hours, from the moment of applying the composition, proceed to the next stage of insulation.
Stages of work on the installation of thermal insulation
The house is set directly on the ground.
- make a bed of sand or crushed stone under the ceiling;
- build a wooden floor as a rough draft;
- a layer of waterproofing is laid;
- put a heat insulator between the logs (parallel wooden planks).
- a vapor barrier must be installed on top.
- finishing floor with the obligatory leaving of a gap for ventilation between it and the heat insulator.
The cold floor is above the basement. In this case, it is necessary to increase the floor by a few centimeters.
- A waterproofer is placed on the cleaned sub-floor.
- Lags are laid on top.
- Insulation is laid between them.
- Then the underlay and the finishing floor appear.
Little tricks:
- if there is a basement under the cold floor, then before starting the insulation procedure, take care of the thermal insulation of the basement walls;
- do not forget about ventilation when installing insulation;
- do not save money on the purchase of a vapor barrier and a waterproofer:
- do not forget to treat wooden boards with an antiseptic.
Why do private homes have cold floors?
There are several reasons why the floors are cold in a wooden house.
- The structure of a wooden house is prone to changes: the wood is deformed, the structure settles. If you hurry and install the floors until they are completely shrink, they will warp and be cold.
- Natural wood, from which floorboards are made, eventually deteriorate and dry out. Cracks are formed. Cold air enters through them, which cools the floors. If the house is old, then it is understandable why the floors are cold.
- In a new house it will be cold on the floor if mistakes are made during its installation.
- If the floor covering is laid on a concrete base, which cools down a lot in cold weather, then it will be uncomfortable to walk on it.
To properly insulate floors, you need to know the reasons for their cooling.
Reason # 1. Slots
Cold floor in winter at home, how to fix it? Of course, if it pulls cold from the floor, it is uncomfortable to walk on it with bare feet, there is no need to talk about any atmosphere of comfort in a house or apartment. And if you set a goal to solve this problem, you must first find out directly the cause of its occurrence.
Crevices are the very first culprit for the floor becoming cold and not keeping warm. In order to get rid of them, you can use the method of our fathers and grandfathers. The work progress consists of the following stages:
- Cover the cracks with putty. Store in this case will not work, so you will have to make it yourself. To do this, mix PVA glue (for furniture) with sawdust.
Important! In addition to PVA furniture glue, you can also use "Joiner", which is suitable for these purposes in terms of its water resistance.
- Use a sharp blade to cut off any remaining clumps of old paint.
- Sand the floor with a medium grit sandpaper.
- Check the surface for various defects and fix them. If there are problem areas in the boards, they must be fixed with self-tapping screws.
- Remove all debris and vacuum to keep dust free.
- Get a wallpaper that imitates wood in its pattern and texture.
- Roll out the rolls on the floor and cover them with a thin layer of parquet lacquer thinned with thinner. This is necessary in order for the adhesion to be much stronger during the gluing of the sheets.
- Cut the wallpaper into strips equal to the width of the wood planks.
- Dilute PVA glue with water to a liquid consistency, spread it on strips and boards. Glue the wallpaper strips to the floor.
Important! Pay attention to the fact that it is better to glue the wallpaper strips with an overlap. Thus, if the varnish bursts between them, it will create a kind of decorative effect.
- Press on the strips firmly and smooth with a garment brush. This is necessary so that there are no bubbles and creases.
- Remove excess adhesive with a clean cloth.
- Leave the floor to dry completely for 3-4 days, then open it with parquet varnish in at least three layers.
That's it, your new floor is ready.Surprisingly, it serves quite a long time, but you can simply forget about drafts and cold passing through the cracks.