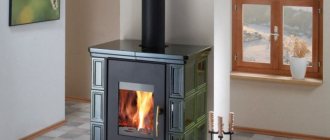
When thinking about making ceramics, you may not have the time or resources to start doing it in a professional studio. If you are someone who spends a lot of time at home, babysitting or the like, then home is often the best and only option. If so, you should consider making pottery at home, and this article will show you how to figure it out, as well as tips and tricks to get you ready quickly and efficiently.
The advantages of making clay products at home
There are several advantages of making pottery at home, which determine the popularity of this craft:
- It is cheaper in the long term as you do not need to rent a studio.
- All stocks of materials are always at hand.
- This saves time, no need to travel anywhere.
- Requires minimal investment.
- Allows you to do this in the comfort of your own home.
There are also several disadvantages of doing this at home:
- You won't have a teacher to help you.
- You have to learn everything yourself.
- You may not have the super professional instruments that studios have.
- You may be limited in the choice of products you want to make.
If you are just learning how to make pottery, you need to work on the technique first, and doing it at home is a good way to create a comfortable space and learn the basics of the craft. But if you don't have a home studio, then it's also worth trying to work in a dedicated studio, especially if you don't have your own materials. This will allow you to quickly learn the basics of technology and see if you can create a more comfortable environment in your home.
Clay selection
One detail you'll want to figure out for sure is the types of clay. If you were working in a studio, we would say just take regular clay that is used for firing depending on the temperature of your kiln, you can even work with porcelain.
Clay and ceramics are different materials that are widely used in pottery. However, the main difference between the two materials is that clay is a natural material that is naturally mined. On the other hand, ceramics are different groups of substances that are added to clay to harden it when heated.
Since ceramics contain metal oxides, when heated, they change the molecular structure of the clay. Therefore, all clays can be considered as ceramics, but not all ceramics are considered as clay. While there are various types of ceramic clays, the main uses for pottery are porcelain, potting and stone clays.
Drying and firing of ceramic products
Drying - the process of removing moisture from the product by evaporation.
Drying conditions - the temperature and humidity of the ambient air must be the same along the entire surface of the product, i.e. it is undesirable to dry ceramics in the sun or in a draft, because uneven drying may cause the product to crack. The drying speed depends on the temperature and humidity of the environment, as well as on the shape and dimensions of the product. Drying time under natural conditions is 3-10 days, in drying devices - 6 hours or less. If the product is not dry enough, it may burst during firing.
Air shrinkage - reduction in the size of clay materials due to the evaporation of water in the capillaries between the particles and the release of water from the hydration shells of clay materials (evaporation of mechanically and physically bound water).To determine the shrinkage, clay tiles are made with a size of 50 * 50 * 8 mm with marks along the diagonals at a distance of 50 mm. Air shrinkage (%) L = l1 - l2 * 100, 11 where 11 are the linear dimensions of the wet sample, 12 are the linear dimensions of the sample after drying. The highest air shrinkage is observed in highly plastic clays and reaches 12 ... 15%. Fire shrinkage is a reduction in the size of an absolutely dry clay product during its firing due to chemical transformations occurring in clay (dehydration, recrystallization of clay materials) and melting of the most low-melting impurities with the formation of glass filling the gaps between particles (~ 1%). In highly plastic clays, shrinkage during drying and firing can reach 20-25%.
Burning - the final and important stage of any ceramic production. During the firing of ceramic products, complex physical and chemical processes take place, as a result of which the ceramic mass - a mechanical mixture of mineral particles - becomes a stone-like material - strong, hard, chemically resistant, with aesthetic properties inherent only in it.
Firing periods:
- temperature rise, heating (most critical);
- holding at constant temperature;
- temperature reduction, cooling.
Firing mode components:
- heating and cooling rate,
- holding time at constant temperature,
- firing temperature,
- firing environment (oxidizing, in conditions of free access of air; reducing, in conditions of cessation of air access and excess carbon monoxide; neutral).
Physicochemical processes during firing:
- Removal of free (hygroscopic) moisture - 100–250? FROM. After drying, the products have a residual moisture content of about 2–4%, and this moisture is removed during the initial period of firing in the temperature range 100–250? C. The rise in temperature during this firing period should be done carefully at a speed of 30–50? From an hour.
- Oxidation (burnout) of organic impurities - 300–800? FROM. With a rapid rise in temperature and an insufficient supply of oxygen in the air, some of these impurities may not be burned out, which is detected by the dark core of the shard.
- Dehydration of clay materials - removal of chemically bound water - 450–850? FROM. This process is especially active in the temperature range 580–600? C. Al2O3? 2SiO2? 2Н2О> Al2О3? 2SiO2 + 2Н2О Removal of chemically bound, or constitutional, water in the composition of the main clay-forming mineral - kaolinite - is accompanied by the decomposition of the molecule of this mineral and its transformation into metakaolinite Al2О3? 2SiO2, which has a cryptocrystalline structure. In the temperature range 550-830? C metakaolinite decomposes into primary oxides Al2O3? 2SiO2> Al2O3 + 2SiO2, and at temperatures above 920? C begins to form mullite 3Al2O3? 2SiO2, the content of which largely determines the high mechanical strength, heat resistance and chemical resistance of ceramic products. As the temperature rises, the crystallization of mullite is accelerated and reaches its maximum at 1200–1300 FROM.
- Polymorphic transformations of quartz - 575? FROM. This process is accompanied by an increase in the volume of quartz by almost 2%, however, the high porosity of the ceramic at this temperature does not prevent the growth of quartz grains and significant stresses do not arise in the shard. When the furnace is cooled down at the same temperature, the reverse process occurs, accompanied by a reduction in the volume of the shard by about 5%.
- Allocation of iron oxides - from 500? FROM. In the composition of ceramic masses, iron can be in the form of oxides, carbonates, sulfates and silicates. At a firing temperature above 500? C iron oxide Fe2O3, which partially replaces Al2O3 in clay minerals, is released in free form and stains the ceramics red, the intensity of which depends on the content of Fe2O3 in the ceramic mass. Carbonic iron - siderite - Fe2CO3 decomposes in the temperature range 400–500? FROM.Decomposition of iron sulfate FeSO4 occurs at a temperature of 560–780? FROM.
- Decarbonation - 500-1000? FROM. This process takes place in faience and majolica masses, which include carbonate rocks: chalk, limestone, dolomite: CaCO3> CaO + CO2. The released CO2 does not give any defects on the products, if the ceramic masses have not yet been fluxed during this period. Otherwise, characteristic swelling - "bubbles" may appear on the surface of the products.
- Glass phase formation - from 1000? FROM. Clay minerals when heated to 1000? C do not melt, but the introduction of silicates with a high content of alkali metals into the composition of ceramic masses promotes the formation of mixtures with a melting temperature of 950? C. The liquid phase, even in a small amount, plays a very important role in increasing the sintering of the shard, as if "gluing" the mineral particles of the ceramic mass into a single whole.
- Restorative firing (for porcelain - 1000–1250? С, for pottery and majolica - 500–950? С). The reducing environment is created by increasing the concentration of carbon monoxide in the furnace gases and contributes to a change in the color of ceramic masses and decorative coatings due to the desire of CO to "take away" oxygen from the chemical elements that make up ceramic products. The purpose of creating a reducing environment in the production of porcelain is the conversion of iron oxide, which is contained in the porcelain mass and gives an undesirable yellow or yellow-gray color to porcelain, into silicate-fayalite FeO? SiO2, a weakly colored compound of bluish-white color, as a result of which the whiteness of porcelain is significantly increased. If an excess amount of fuel is supplied to the furnace in relation to the oxygen supplied with air, then the combustion reaction will not proceed completely and as a result of incomplete combustion, carbon monoxide (CO) will not form, but carbon monoxide (CO) will remain unreacted with oxygen fuel © in the form of soot and smoke. 3С + О2> 2СО + С. Carbon monoxide, being a particularly active reducing agent under these conditions, will react with iron oxide (Fe2O3) in the composition of the ceramic mass, reducing it to ferrous oxide (FeO), attaching oxygen to itself and forming due to the attached oxygen carbon dioxide CO2. Fe2O3 + CO> 2 FeO + CO2. The transformation of iron oxide into its nitrous oxide as a result of reductive firing gives the shard, depending on its Fe2O3 content and depending on the firing temperature, a shade from greenish-blue to bluish-black. By reacting with oxides in glazes, carbon monoxide reduces oxides to metals, resulting in a metallic sheen on the glaze surface.
- Melting of feldspar materials - 1100-1360? FROM. Metakaolinite Al2O3 dissolves in molten feldspar glass? 2SiO2 and fine quartz grains. In this temperature range, the formation (crystallization) of mullite 3Al2O3? 2SiO2 occurs, which, together with undissolved quartz particles, forms the framework of a ceramic shard.
Firing is usually controlled with a thermocouple or millivoltmeter. But with some experience, it is not difficult to visually determine the firing temperature at one stage or another by the color of the hot shard inside the furnace:
- dark red - 600 - 700? FROM;
- cherry red - 800 - 900? FROM;
- bright cherry red - 1000? FROM;
- light orange - 1200? FROM;
- starts to turn white - 1300? FROM;
- white - 1400? FROM;
- bright white - 1500? FROM.
Duration firing ceramic fine-ceramic products fluctuates within wide limits and depends on the design and dimensions of the kilns, the type of fuel, the final firing temperature, the chemical and granulometric composition of the ceramic masses, the size and shape of the products, etc.
Burning Some types of large-sized porcelain electrical insulators last 5-6 days, and cooling - 10-12 days, firing and cooling of ceramic tiles in roller kilns takes just 15 minutes.
The duration of firing and cooling of porcelain items (dishes) is 40–48 hours in furnaces, 26–32 hours in tunnel ovens, and 18–20 hours in high-speed conveyor ovens.
Usually, fine-ceramic products are fired twice: the purpose of the first (waste) firing is to give the products sufficient mechanical strength necessary to perform the next step in the technological process - glazing. In the production of earthenware and earthenware majolica in the process of the first firing, carried out at high temperatures (1200-1230? C), the crock is brought to the required degree of sintering, and the task of the second, or "poured" firing is only to melt the glaze onto the products. Waste firing temperature pottery - 800-900? C, "watered" - 900-1000? FROM.
Under production conditions, the process of preparing ceramic masses consists of the following main operations: coarse crushing, sieving, fine grinding, mixing, sieve cleaning, magnetic cleaning, preparation of plastic (molding) mass, preparation of a casting slip, transportation of ceramic masses to molding and casting sections.
In small workshops, the preparation of the molding material is different.
Plastic raw materials - clays and kaolins - have variable moisture, depending on the season. To equalize the moisture content and increase the homogeneity of the clay, it is used for a long time (at least three months) in special pits - clay pits. The impact of atmospheric phenomena, temperature drops (especially freezing) contribute to the redistribution of water in the mass, its self-loosening, while harmful organic impurities are oxidized, soluble salts are washed out. Under such conditions, the mass "ripens" for molding.
The main task of the first stages of raw material processing is to obtain a homogeneous mass of a certain moisture content. It is necessary to remove foreign inclusions from the clay - stones, tree roots, pieces of coal and limestone, other impurities that can complicate the process of molding and firing products. To achieve these goals, elutriation is used - one of the elementary methods of preparing the molding mass. It consists in the deposition of particles of quartz sand, feldspar and others from clay dissolved in water. When elutriated, the clay is not only cleaned, but also becomes more oily and plastic.
Stone clay
The color of such ceramics ranges from dark brown to buff. The color difference arises from the presence of impurities and the iron content of the clay. Stone clay has coarse particles that are fired at 1200 ° C. The result is a denser, more durable material that is inherently waterproof. This clay does not require any glaze. While these are the best ceramic clays to use for pottery, if you are a beginner and are just starting out with pottery, you can start with self-hardening clay... It is very flexible, which allows you to create a wide variety of pottery. You can read more about materials for ceramics in our separate article.
Choosing clay at home
However, at home, things can be a little different. You can choose from three different types of clay:
- Fired in a kiln.
- Polymeric.
- Air dry.
Each has its own pros and cons. Burnt has several advantages and disadvantages that you need to consider:
- Usually withstands higher temperatures.
- Better for ceramics used in consumption.
- Generally more durable.
- The biggest drawback is that it is more difficult to work with.
Air-dried clay also has advantages and disadvantages, namely:
- You don't need an oven or heat source.
- As a rule, you can create most products from it.
- The disadvantage is that it is usually not as strong as kiln-fired.
- Takes forever to dry
This option is usually less similar to the actual pottery making process, but it is sometimes used when you just want to make something in the simplest way.
Finally, there is polymer clay, which has advantages and disadvantages similar to the second option:
- This is a great clay for beginners.
- Allows you to work with the form.
- As a rule, durable, but not as much as fired.
- Not the most malleable compared to the other two.
- Usually used for molding and nothing more.
The ideal situation would be if you had a kiln and specialized clay, but if you are on a budget and do not want to invest a lot of money in expensive equipment yet, then these are your options.
During firing, all major changes take place in the clay and glaze, after which what we call ceramics is formed. Firing is a technological process, the parameters of which have been found by practical tests, and it must be carried out as required by the fired products. It is intuitively clear what we want to take out of the oven. The scrap is expected to have a resounding strength and some porosity so that it can absorb the glaze. From biscuit porcelain - pleasant silkiness and whiteness. Shiny glazes should shine well, and matte glazes should be truly matte. Nobody wants the curves and crackles that stick to the shelf of the glaze, and all kinds of bubbles and pricks.
It is more difficult to formulate this understanding in the language of numbers. During heating, many of the chemical compounds that make up our raw product undergo significant changes. Dehydration, phase transformations, chemical interactions, dissolution and crystallization - this is an incomplete list. Until now, there is no complete theoretical model by which it would be possible to predict the result in advance, and if it existed, it would take us a month of research on the composition of clay and glaze in order to give an exact task for the calculation. It remains for us to carry out experiment after experiment, figuring out what is important and what is not, what should be the temperature, whether exposure is needed, and why everything was fine there and then, but here and now it is a complete disgrace.
But we want to get the intended effects and the planned properties of the products, and for this we need to be able to control and manage the firing parameters, knowing the basic, most general principles.
Now specifically about these principles.
1. Types of firing, why they are needed and what needs to be controlled first of all.
2. Electric ovens and a word or two about others.
Types of firing, why are they needed and what needs to be controlled first of all.
- Let's conditionally divide all materials into 4 groups:
- — Porcelain - much smoother; when heated, a lot of liquid phase is formed in the shard. We also include stone masses here.
- — Faience - there is almost no liquid phase. By the way, no one produces faience in its formerly classic version ...
- — Majolica - here we will call things made of red clay, including potter, terracotta, etc.
- — Chamotte - by chemical composition - any of the above materials. It differs from them in that it contains grains of already fired material bound by plastic clay.
For each group of materials, we will conditionally highlight some of the points that unite them.
Porcelain firing diagram.
First, the first waste firing is carried out. That is, dried products are fired without glaze. The temperature is selected in the range 800 - 1000 ° C. After the first firing, the products acquire strength sufficient even for machine glazing (on a conveyor line). The products remain porous, but if there are cracks, they can be easily identified (by the characteristic rattling) by tapping with a wooden stick. When glazing, there is no need to stand on ceremony with the product as is the case with raw materials (single firing). You can easily glaze products by dipping, even if they are meter in size.Products after this firing are called scrap.
Then the second firing is carried out. Before glazing and, accordingly, before the second, watered, firing, an underglaze painting is applied to the product. After that, the technology pedants also carry out an intermediate fixing firing so that the paints do not wash off when dipping into the glaze. firing of a semi-fired glazed product is carried out at the ripening temperature of the shard. These are different temperatures for different types of porcelain (and we also included stone masses here). Real porcelain requires 1380 - 1420 ° C, ordinary table porcelain - 1300 - 1380 ° C, sanitary - 1250 - 1280 ° C, and stone masses - depending on what is used as a flux. The second firing finally forms the structure of the ceramic and thus determines all of its physicochemical properties. Products after this firing (if it is not painted) are called linen.
It is very pleasant to drink tea from white porcelain cups in the country. Traditions dictate a different look to porcelain: with floral painting, a picture, gold or blue border. Porcelain receives decorations in the third, decorating, firing. Conventional overglaze paints are fired at 800 - 830 ° C, luster paints and gold preparations - at the same or slightly lower temperature. Nowadays, high-temperature decoration firing at 1000 - 1100 ° C has also become widespread. Painting for it is carried out with high-fire paints (in-glaze paints) or fusible colored glazes. Sometimes, in order to obtain bright colors, two or more decorating firing is carried out. All of them, from the point of view of classification, are third. Products after the third firing are named at the Arts Council of the enterprise.
Faience firing scheme
The first firing of earthenware is high. There are practically no smoothers in the earthenware masses, therefore, during firing, a minimum amount of a liquid phase is formed, or not at all, and the clays that are part of it have high refractoriness. This makes it possible to burn earthenware products immediately at the temperatures required for the ripening of the shard. As a rule, it is 1200-1250 ° C. Unlike porcelain, the shard will remain porous, it is easy to apply a layer of glaze on it.
And the second firing, watered, can be carried out at any temperature! That is, with the one that is required for the normal spreading of the glaze: 1150 - 1250 ° C, if it is "faience" glaze, 900 - 1000 ° C, if it is lead majolica; you can apply white enamel and use the wet enamel painting technique. In all cases, if the glazes are selected correctly, we will get a product with the same strength as it was after the first firing.
The third, decorating, firing is carried out in the same way as in the porcelain scheme. If you need it. Indeed, in comparison with porcelain, the low temperature of watered firing allows the use of glazes and paints of a wide range of colors.
Roasting majolica
Red-burning clays with low refractoriness are used here. Burning can lead to their swelling and severe deformation. Red clays also have a narrow firing range. For example, at 950 ° C it is still fragile, loose, and at 1050 ° C it is a densely sintered, vitreous body. Of course, there are exceptions, but there and then. In principle, majolica is characterized by low firing temperatures - 900 - 1100oC. And just at about these temperatures, the processes of decomposition of clay materials are completed, which (processes) are accompanied by the release of gaseous substances. This makes the so-called single firing - both the shard and the glaze - in one go extremely difficult. If you refer to the table below, it will be clear how close the firing temperatures of majolica are to the critical temperatures for ceramics. The most common technology is the first, waste, and the second, watered, firing.
The mode of the first firing is chosen so that all the processes of transformation of clay minerals pass to the maximum extent. The incompleteness of these processes will certainly affect the quality of the glaze surface after the second firing.The waste firing temperature can be either higher or lower than the water firing temperature. Usually lower, somewhere around 900 - 950 ° C.
The mode of the second firing is selected based on the characteristics of the glaze, but, naturally, in this case, the temperature of the beginning of deformation of the shard cannot be exceeded.
Firing fireclay
The main difference between chamotte masses from the above is the presence in the mass of a rigid frame made of dense grains that have already passed the appropriate firing. The grain size can vary from 100 microns to several millimeters, which is determined by the requirements of the texture of the material, rather than the requirements of technology. The rigid framework prevents the mass from shrinking during the firing process. (By the way, during drying, the shrinkage of chamotte masses is not much less than that of thin plastic masses). This allows firing at slightly higher temperatures without fear of serious deformation of the product. Often the material of the grains has a different composition than the plastic component of the mass. If the refractoriness of the grains is higher, the firing temperature can be increased significantly.
But in general, the chamotte firing scheme is the same as for other types of masses: first, waste, then (if necessary) watered, then (if necessary) decorating firing.
Single firing
Single firing is when glaze is applied to the dried product and fired all in one step, combining waste and watered firing. This is the dream of any manufacturing economist:
- energy is spent only once for heating;
- the products are placed in the oven and removed once;
- no intermediate waste storage is needed;
- the cycle from raw to finished product is halved, i.e. lower relative costs for rent and wages due to increased productivity.
In principle, apart from the very low-temperature decoration firing, any material can be fired once.
- But:
- it is necessary to apply both the underglaze pattern and the actual glaze on a simply dried product, which, of course, does not have the strength of scrap;
- because of this, machine processing is excluded, and everything must be done very carefully with your hands so as not to break anything;
- dipping glazing - the most economical in terms of glaze consumption - can be carried out only for small items, making a long pause between glazing inside and outside;
- no scrap, no intermediate quality control (ovality, thin edge cracks, etc.), i.e. a higher percentage of rejects is pre-laid
- glazes must be specified for single firing.
How to determine if we need a single or double firing? The decisive criterion for an artist or an art studio is the end result - that is, the implementation of the artistic design. For workshops producing more or less serial products, and for ceramic factories, economic considerations can be decisive. Here's what to keep in mind.
- For porcelain:
- Energy costs for a low waste firing are significantly lower than those for a high firing. For the first, temperatures of the order of 900 ° C, an oxidizing air environment, an electric furnace with a weak lining are sufficient. For the second, a well-lined and preferably fired oven. Is it worth saving on scrap?
- The glazes for porcelain begin to melt at a temperature close to the ripening temperature of the porcelain shard. In the temperature range where the processes of decomposition of clay minerals take place, the glaze layer resembles a powder, and gases easily pass through it. Thus, there is no need to fear glaze defects arising from the gas tightness of the melt. Is it worth the waste firing?
- Porcelain masses are skinny, quickly soaking masses. Glazing raw requires skill. Junk is needed!
- Many large items, such as tiles, often need to be spray glazed. And when firing on a biscuit, it is not necessary to glaze at all. Then why do we need junk ?!
- For faience:
- Waste firing (remember, it is carried out at a high temperature) is a must if we are going to use low-melting glazes. Otherwise, in a single firing we will not get faience, but something unburned, reminiscent of papier-mâché.
- Waste firing is unnecessary if we use high temperature glazes, which, like porcelain glazes, begin to melt above 1100 ° C. In this case, they are applied, as a rule, by spraying with compressed air.
- For majolica, this is the most difficult case.
- Junk is almost always needed, and at the highest possible temperature. Many technologists of the Western school recommend firing majolica almost to a glassy state in order to burn out all impurities and decompose everything that can decompose in waste firing. The question is, how then to glaze? Can. Read about it in the section on glazes.
- If you use engobes or something like terra-sigil as a coating, or if you have special glazes with a very short melting interval, you can do without scrap.
For all materials, a single firing is possible under the condition of a thoroughly debugged technology, which, in the case of ceramics, is two-thirds of the experience of the workers.
It seems that in our presentation of the problems of firing, everything is already confusing enough that another layout on the shelves is required.
What happens during heating and cooling.
| Interval, C | Process |
| 20 — 100 | Removing moisture from the mass. You need to heat slowly and, most importantly, evenly. The thicker the walls of the product, the slower the heating. |
| 100 — 200 | The removal of moisture from the mass continues! If the devices show 150 ° C, this does not mean that the product has heated up to such a temperature, especially in the thicker, especially on a thick stand. The glaze coating shrinks. Water vapor released from the volume of the product can lead to cracking and flying off of the coating. VOCs are emitted from chandelier coverings. Do not force heating! |
| 200 — 400 | Burnout of organic matter. If for some reason there are a lot of them, you should ensure a good flow of air (decals, chandeliers, binder of overglaze paints and mastics). |
| 550 — 600 | Severe phase transformation of quartz. It rarely manifests itself during the heating stage, but during the cooling stage it can lead to the so-called. "Cold" cod. |
| 400 — 900 | Decomposition of clay minerals. Chemically bound water is released. Nitric acid and chloride salts (if used) decompose. |
| 600 — 800 | The beginning of the melting of lead and other low-melting fluxes, overglaze paints. At 750 - 800 ° C in the third decoration firing, the glaze surface softens and paints, gold, etc. are baked. Burnout of sulfides. |
| 850 — 950 | Decomposition of chalk, dolomite. The beginning of the interaction of calcium and magnesium carbonates with silica. These processes are accompanied by the release of carbon dioxide. In general, all transformations of clay substances have been completed. Their smallest particles have already sintered and provided a noticeable strength of the shard. By the end of the interval, the majolica glazes have completely melted. |
| 1000 -1100 | The intense interaction of lime and silica is accompanied by the appearance of a liquid phase (for example, in limestone faience), compaction and deformation of the shard. Beginning of softening of feldspars. Melting nepheline syenite. Intensive decomposition of sulfates, accompanied by the release of sulfur dioxide. |
| 1200 -1250 | Sintering interval of white-burning clays, earthenware mass. Dissolution of silica and kaolinite in feldspar melt. |
| 1280 — 1350 | The process of mullite formation. Mullite needles penetrate the porcelain mass, which will further provide it with high strength and heat resistance. Conversion of finely dispersed quartz to cristobalite. |
| 1200 — 1420 | This temperature range is typical for porcelain. Here, the processes of reduction of red iron oxides into more noble blue ones take place, if the appropriate redox firing conditions are provided.Temperatures are high, viscosities are moderate, diffusion proceeds very quickly: for example, underglaze painting loses its sharpness. |
| 1420 — 1000 | Nothing special happens during the cooling process. Both the glaze and the mass are in a fairly plastic state, so you can cool it as quickly as the oven allows. If glazes with a tendency to crystallize are used, slow cooling or holding for 1-10 hours in this interval will lead to crystal growth. |
| 1000 — 700 | Oxidation of lower oxides of copper, manganese and other metals (if used) to higher ones begins. Lack of oxygen in the furnace space can result in a metallized surface. If recovery is needed, it's time for it. The recovery environment should be maintained almost to room temperature, at least up to 250-300 ° C. |
| 900 — 750 | Both the shard and the glaze passed into a fragile state and then cool down as a single solid body. If the CTE is not agreed, the glaze may come off or rebound and even the product may be destroyed. |
| 600 — 550 | Reverse phase transformation of quartz with a sharp volumetric change. A high-speed passage through this interval can cause a "cold" crackle. |
| 300 — 200 | Phase transformation of cristobalite. It was formed if the mass contained very finely dispersed silica, at 1250 - 1300 ° C. Do not rush to open the oven door. |
| 250 — 100 | Cooling continues! In the depth of the rate, in the thick parts of the products, the temperature is much higher than in the thin edges and as indicated by the thermocouple. Let the items cool down evenly. |
The table describes the main processes. Therefore, now we will briefly point out once again what is most important in firing.
- 01First firing. We put raw in the oven. It has a lot of water in it, even if it looks dry. We heat up to 200 - 300 ° C slowly, for example, in 2 - 3 hours. We provide good ventilation so that all impurities are burned out. Final temperature - 900 - 1000 ° C. If there is no certainty about the temperature, we hold for 1 - 3 hours, allowing the entire cage to warm up evenly. Cooling is carried out at a rate with which the oven cools down. We carry out forced cooling only after several experiments - there will be no glazes, since there are no glazes, but cold crackling due to quartz can occur.
- 02Glaze firing after scrap. We put glazed products in the oven. The shard has already been fired for scrap, so the speed in the initial heating section can be higher; the main thing is to dry the glaze well. We heat up to the final temperature as quickly as the oven allows and, most importantly, the speed of heating the products. At the final temperature, we make an exposure from 15 minutes to 1-2 hours in order to uniformly warm up. If the rate of temperature rise at the end of heating is not high (50 ° C per hour or less), we assume that the exposure has already taken place. Better, of course, here to use the Zeger cones. "Shelves" (holding at a constant temperature) at the cooling stage - only for crystalline glazes and some matte glazes. The rest is the same as in point 1.
- 03Single glaze firing. We take into account everything that is in clause 1 and in clause 2. We do not force the temperature rise in the range of 500 - 900 ° C - before the glaze melts, all gases must be removed from the shard!
- 04Firing decals, luster paints, overglaze paints. We raise the temperature very slowly (in 2 - 4 hours) to 400 ° C - all organic matter needs to be burned. In this case, the environment should be oxidizing (air), and the ventilation should be intensive. From 400 to 800 ° C - as fast as you like. Exposure 5 - 15 minutes.
Read about what kind of firing conditions the furnace dictates below.
Electric ovens and a few words about others.
Firing of ceramics is carried out in a variety of thermal units called furnaces. If the heat of an electric current is used for heating, stoves are called electric, if the heat from the combustion of fossil fuel is fuel and usually, more specifically: gas, wood, fuel oil, etc.For thousands of years of ceramics firing, many designs of fuel furnaces have been invented, and over the past hundred years - no less number of designs for electric furnaces.
- Regardless of the type and design, the oven contains:
- free space for placing products, for short - a camera;
- refractory and heat-insulating shell, for short - lining;
- heat source - heater, burner, etc.
- a device for controlling and regulating the degree of heating - a regulator.
Each oven can be classified according to the characteristics of the listed attributes. If you need to order a stove, be sure to indicate these features.
The volume of the chamber determines the productivity of the kiln in one firing in a batch kiln or per cycle of pushing one trolley in a tunnel kiln. In the future, we will only talk about batch furnaces. The chamber volume can be 1 - 2 liters; such small ovens are convenient for test firing and for making small items such as ceramic jewelry. The volume of oven chambers commonly used in workshops and studios ranges from 50 - 100 liters to 1 - 1.5 cubic meters. m. For factory conditions, furnaces with a volume of 3 to 20 cubic meters are characteristic. m.
The liner and heater determine the maximum temperature that can be developed in the chamber. The higher the temperature is required, the higher the class must be for the refractories, which immediately and, note, sharply affects the cost of the furnace. Sometimes the chamber is separated from the heater by an additional lining called a muffle. (Do not call all small furnaces in a row muffles!)
The regulator contains a device for measuring temperature, which is usually a thermocouple, a device for regulating the power of the heater and a control device that matches the action of the first two.
Some oven configurations are shown below.
Bonfire
| PARAMETER | VALUE |
| Camera | 10 - 100 liters |
| Lining | layer of earth |
| Thermal insulation | layer of earth |
| Heater | the heat of burning wood |
| Thermometer | by eye by glow |
| Power regulator | throwing firewood |
| Control | own experience |
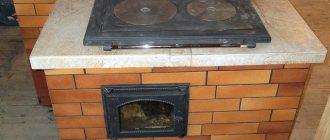
Electric furnace 200.1250.L (Termoceramics LLC), option
| 200 liters | |
| Lining | chamotte-wavy plate ШВП-350 |
| Thermal insulation | ShVP-350, ShL-0.4 |
| Heater | electric, spirals from wire Х23Ю5Т |
| Thermometer | thermocouple platinum-platinum rhodium TPP |
| Power regulator | thyristor unit |
| Control | Software, programmer KTP |
These different thermal devices are presented here in order to gain a deeper understanding of the functions of the furnace elements.
The camera is working the space where products and shelves with stands are placed, from the total volume "from wall to wall", you need to subtract the volume required for the heaters. And the calculation of the useful load of the chamber must be made taking into account the thickness of the shelves.
Example. The useful width, depth and height of the chamber is 40 cm. There is a refractory plate 39x39 cm, 2 cm thick and four racks 7x7 cm, 18 cm high. How many pots with a diameter of 18 cm and a height of 16 cm can be placed in the oven? Answer: if without a shelf - 4 pcs., And if with a shelf - 6 pcs. (not 8; see picture).
Continuing the example, let us ask ourselves the question, which, in fact, is more profitable - to burn 4 pots at a time or 6? The answer lies in the analysis of the amount of heat required to heat the additional mass of ammunition. If the pot weighs 300 grams, and the stove and racks weigh 5 kilograms ... Ie. almost all the heat will go to heating the ammunition! And the oven will cool down longer. It may happen that during the firing of six pots, two firing times of 4 pots each can be carried out.
In fact, not only the pots and firearms are heated, but also the walls of the furnace. In a fire, it is a solid mass of earth. It is difficult to warm it up, cool it too. In a modern furnace, refractories with low heat capacity, low thermal conductivity and high fire resistance. The vacuum-formed fibrous material ШВП-350 is well suited for the construction of furnaces with an operating temperature of 1200 ° C.If the entire furnace is made of heavy fireclay bricks, it will require a colossal time for heating and cooling, and, accordingly, energy costs. Such a heavy "uphill" oven will not allow you to implement high-speed heating modes if you need them for something. However, you can increase the power of the heaters.
Electric heaters are available in wire and ceramic. The wire is made from nichrome (expensive, the maximum temperature is 1100 ° C, but it remains flexible after work) or from iron alloys. The latter are often called "fechral", and imported counterparts - "kanthal"; domestic brands have the exact name - Х23Ю5Т or Х27Ю5Т. Fechral works up to 1200 - 1350 ° C depending on the wire diameter. After the first heating, it becomes irreversibly brittle, a heater that has burnt out in one place cannot be repaired by twisting!
Ceramic heaters include silicon carbide, they are also silite, they are also carborundum rods: operating temperatures up to 1400 ° C. In the last 10 years, expensive lanthanum chromite heaters with an operating temperature of up to 1700 ° C have been persistently advertised, which have a very long service life at the same 1300-1400 ° C (if they do not break when you install a heavy stove :-)). Read elsewhere on how to calculate electric heaters. Here we recommend contacting specialized companies for help.
If heating is carried out with gas burners, all temperatures in the furnace chamber can be reached up to 1700 ° C, and if oxygen-enriched air is still used, up to 2000 ° C. Gas (and other fuel) furnaces are good because they allow firing not only in an oxidizing, but also in a neutral and reducing environment. The degree of "reduction" is regulated by changing the gas / air ratio, in modern gas furnaces this is done automatically. Wood stoves, unfortunately, are more difficult to automate, but they are easy to manufacture, cheap to operate, they do not require approvals from the gas inspection, and give 1200 ° C easily.
The more powerful the heaters, the faster they can heat up. And the more carefully you need to work with them. Imagine what happens to the pots in the first five minutes, if one side of them is facing the instantly heated wall with heaters, and the other is facing the cold neighboring pot. Smooth heating (or rather, uniform throughout the chamber) is easiest to obtain using thyristor power blocks. The regulation of the output power in them takes place according to the principle of "more amperage" - "less amperage", and not according to the principle of "on" - "off". If you have only the last control method at your disposal, then set low temperatures at the first stage (first 100 ° C, after half an hour - 200 ° C, after an hour - 300 ° C, and only then - the final temperature). And if there is no control device in the oven at all, do not leave it and flip the switch every five minutes (This is not a joke!)
Naming different temperatures, we still haven't specified what we are talking about - the temperature on the heater? on the product? on a thermocouple? If a thermocouple is installed in the oven, then the device connected to it will naturally show the temperature of the thermocouple tip. For various reasons, about which volumes of scientific literature have been written, this temperature only roughly reflects the thermal situation in the furnace. During the heating process, the heaters are always hotter, and the products are colder than the thermocouple. The thermocouple shows the temperature at some point in the chamber, and what is being done elsewhere is unknown. Nevertheless, the thermocouple produces an electrical signal that is understandable for electronic devices, including power control automation. From this point of view, it is irreplaceable. Long-term practice of operating the stove gives information about where it is hotter in the chamber, where it is colder. Sooner or later, we get used to the habits of this device.But for a long time (since the end of the 19th century) another method has been known for determining the moment of reaching the required firing point. This is Zeger cone firing.
Firing is considered to be performed on this cone if the cone, deforming during the firing process, touches the support on which it is installed. The cone is made of masses, the behavior of which is similar to that of the material to be fired. If in practice it has been found that the best result is achieved when firing on a cone, say, 114, then all firing should be carried out on this cone, not paying special attention to the readings of the thermocouple. And no thermocouple is needed! The use of cones is extremely common in artistic ceramics in the West. And this is no coincidence ...
Roasting in the oven and oven
Oven firing is an option if you are working with fired clay. But, if you're willing to spend a little more money, you can buy an inexpensive stove.
Benefits of roasting in the oven:
- It's cheap since you already have it.
- Usually creates decent ceramics.
- The resulting products are quite durable.
But if you want to take it more seriously, then you need an oven, because your home oven will not give the desired temperature. It has many advantages over the oven:
- Your products can be more varied.
- You will be able to create the right atmosphere for work.
- You will be able to work with a wider variety of glazes and clays.
- The process is easier to manage as it is slower.
- Allows the use of high-temperature (biscuit) firing, which makes ceramics stronger.
An oven is a good place to start if you are going to learn how to do this at home. But we advise you, as soon as you learn a little, consider buying a kiln or firing one in a studio nearby.
How to make ceramics at home
How do you work with ceramics in such a tight space? It's actually quite simple, and we'll talk about how you can use different techniques depending on the environment you are working in.
First, let's talk about creating a clay mold, for this we start with the following:
- Take the clay and roll it out.
- Cut to the desired length and width.
- If using sculpting, roll the clay into a ball.
- Choose a technique for further work.
If you create ceramics without a potter's wheel, then this is hand sculpting. Hand sculpting is, in our opinion, the best way to make ceramics as it is simpler and requires fewer materials.
Let's look at three hand sculpting techniques:
- Modeling from clay plates
- Spiral molding
- Modeling from a whole piece of clay
You can start by sculpting clay plates. For this:
- Roll out the clay.
- Cut it to your desired length / width / height.
- Set aside and repeat.
- Once all the pieces have been cut out, work on the joints by smearing them with liquid clay and then joining the pieces together.
- Smooth connections.
- Repeat these steps on each side.
For spiral sculpting with bundles, you do something similar at the beginning, but the process involves a lot more detail:
- Roll out the clay cylinder until it has the desired thickness and consistency.
- Lay it around the bottom plate.
- When you get to the end, cut off the excess and then squeeze the ends together.
- Smooth each ring as needed to even out the walls.
- Make sure everything is straight and there are no two joints ending at the same point, as this will create holes.
When it comes to pottery, ring sculpting is handy for making bowls, cups, and the like, and if you are working with fired clay this is a great option as it is easy to work with and you can do a lot.
And finally, sculpting from a whole piece of clay, which is perhaps the easiest for a beginner, but the pieces can be more uneven compared to other types of sculpting.
- Make a clay ball.
- Pressing from the center, reach the bottom of the ball.
- Continue to squeeze from the bottom to the desired width and height of the bowl to be made.
- Make all the walls as straight as possible.
All of this can be done at home using your own simple materials, so you end up with a stunning product that you can use.
Clay firing temperature
It is more difficult to formulate this understanding in the language of numbers. During heating, many of the chemical compounds that make up our raw product undergo significant changes. Dehydration, phase transformations, chemical interactions, dissolution and crystallization - this is an incomplete list. Until now, there is no complete theoretical model by which it would be possible to predict the result in advance, and if it existed, it would take us a month of research on the composition of clay and glaze in order to give an exact task for the calculation. It remains for us to carry out experiment after experiment, figuring out what is important and what is not, what should be the temperature, whether exposure is needed, and why everything was fine there and then, but here and now it is a complete disgrace.
But we want to get the intended effects and the planned properties of the products, and for this we need to be able to control and manage the firing parameters, knowing the basic, most general principles.
Now, specifically about these principles.
1. Types of firing, why they are needed and what needs to be controlled first of all.
Let's conditionally divide all materials into 4 groups:
- — Porcelain - much smoother; when heated, a lot of liquid phase is formed in the shard. We also include stone masses here.
- — Faience - there is almost no liquid phase.
- — Majolica - here we will call things made of red clay, including potter, terracotta, etc.
- — Chamotte - by chemical composition - any of the above materials. It differs from them in that it contains grains of already fired material bound by plastic clay.
For each group of materials, we will conditionally highlight some of the points that unite them.
Porcelain firing diagram.
First, the first waste firing is carried out. That is, dried products are fired without glaze. The temperature is selected in the range 800 - 1000 o C. After the first firing, the products acquire strength sufficient even for machine glazing (on a conveyor line). The products remain porous, but if there are cracks, they can be easily identified (by their characteristic rattling) by tapping with a wooden stick. When glazing, there is no need to stand on ceremony with the product as is the case with raw materials (single firing). You can easily glaze products by dipping, even if they are meter in size. Products after this firing are called scrap.
Then the second firing is carried out. Before glazing and, accordingly, before the second, watered, firing, an underglaze painting is applied to the product.
After that, the technology specialists also carry out an intermediate fixing firing so that the paints do not wash off when dipping into the glaze. firing of a semi-fired glazed product is carried out at the ripening temperature of the shard. These are different temperatures for different types of porcelain (and we also included stone masses here).Real porcelain requires 1380 - 1420 o C, ordinary table porcelain - 1300 - 1380 o C, sanitary - 1250 - 1280 o C, and stone masses - depending on what is used as a flux. The second firing finally forms the structure of the ceramic and thus determines all of its physicochemical properties. Products after this firing (if it is not painted) are called linen.
It is very pleasant to drink tea out of white porcelain cups in the country. Traditions dictate a different look to porcelain: with floral painting, a picture, gold or blue border. Porcelain receives decorations in the third, decorating, firing. Conventional overglaze paints are burned at 800 - 830 ° C, luster paints and gold preparations - at the same or slightly lower temperature. Nowadays, high-temperature decorating firing at 1000 - 1100 ° C has also become widespread. Painting for it is carried out with high-fire paints (in-glaze paints) or low-melting colored glazes. Sometimes, in order to obtain bright colors, two or more decorating firing is carried out. All of them, from the point of view of classification, are third. Products after the third firing are named at the Arts Council of the enterprise.
Faience firing scheme
The first firing of earthenware is high. There are practically no smoothers in earthenware masses, therefore, during firing, a minimum amount of a liquid phase is formed, or not at all, and the clays that are part of it have high refractoriness. This makes it possible to burn earthenware products immediately at the temperatures required for the ripening of the shard. As a rule, it is 1200-1250 o C. Unlike porcelain, the shard will remain porous, it is easy to apply a layer of glaze on it.
And the second firing, watered, can be carried out at any temperature! That is, with the one that is required for the normal spreading of the glaze: 1150 - 1250 o C, if it is "faience" glaze, 900 - 1000 o C, if it is lead majolica; you can apply white enamel and use the wet enamel painting technique. In all cases, if the glazes are selected correctly, we will get a product with the same strength as it was after the first firing.
The third, decorating, firing is carried out in the same way as in the porcelain scheme. If you need it. Indeed, in comparison with porcelain, the low temperature of watered firing allows the use of glazes and paints of a wide range of colors.
Roasting majolica
Red-burning clays with low refractoriness are used here. Burning can lead to their swelling and severe deformation.
High-grade clays, in addition, have a narrow firing interval. For example, at 950 o C it is still fragile loose, and at 1050 o C it is a densely sintered, vitreous body. Of course, there are exceptions, but there and then. For majolica, in principle, low firing temperatures are characteristic - 900 - 1100 o C. And just at about these temperatures, the processes of decomposition of clay materials are completed, which (processes) are accompanied by the release of gaseous substances. This makes the so-called single firing - both the shard and the glaze - in one go extremely difficult. If you refer to the table below, it will be clear how close the firing temperatures of majolica are to the critical temperatures for ceramics. The most common technology is the first, waste, and the second, watered, firing.
The mode of the first firing is chosen so that all the processes of transformation of clay minerals pass to the maximum extent. The incompleteness of these processes will certainly affect the quality of the glaze surface after the second firing. The waste firing temperature can be either higher or lower than the water firing temperature. Usually lower, somewhere around 900 - 950 o C.
The mode of the second firing is selected based on the characteristics of the glaze, but, naturally, in this case, the temperature of the beginning of deformation of the shard cannot be exceeded.
Firing fireclay
The main difference between chamotte masses from the above is the presence in the mass of a rigid frame made of dense grains that have already passed the appropriate firing.
The grain size can vary from 100 microns to several millimeters, which is determined by the requirements of the texture of the material, rather than the requirements of technology. The rigid framework prevents the mass from shrinking during the firing process. (By the way, during drying, the shrinkage of chamotte masses is not much less than that of thin plastic masses). This allows firing at slightly higher temperatures without fear of serious deformation of the product. Often the material of the grains has a different composition than the plastic component of the mass. If the refractoriness of the grains is higher, the firing temperature can be increased significantly.
But in general, the chamotte firing scheme is the same as for other types of masses: first, waste, then (if necessary) watered, then (if necessary) decorating firing.
Single firing
Single firing is when glaze is applied to the dried product and fired all in one step, combining waste and watered firing. This is the dream of any manufacturing economist:
- energy is spent only once for heating;
- the products are placed in the oven and removed once;
- no intermediate waste storage is needed;
- the cycle from raw to finished product is halved, i.e. lower relative costs for rent and wages due to increased productivity.
In principle, apart from the very low-temperature decoration firing, any material can be fired once.
But:
- it is necessary to apply both an underglaze pattern and the actual glaze on a simply dried product, which, of course, does not have the strength of scrap;
- because of this, machine processing is excluded, and everything must be done very carefully with your hands so as not to break anything;
- dipping glazing - the most economical in terms of glaze consumption - can be carried out only for small items, making a long pause between glazing inside and outside;
- no scrap, no intermediate quality control (ovality, thin edge cracks, etc.), i.e. a higher percentage of rejects is pre-laid
- glazes must be specified for single firing.
How to determine if we need a single or double firing? The decisive criterion for an artist or an art studio is the end result - that is, the implementation of the artistic design. For workshops producing more or less serial products, and for ceramic factories, economic considerations can be decisive. Here's what to keep in mind.
For porcelain:
- Energy costs for a low waste firing are significantly lower than those for a high firing. For the first, temperatures of the order of 900 o C, an air oxidizing environment, an electric furnace with a weak lining are sufficient. For the second, a well-lined and preferably fired oven. Is it worth saving on scrap?
- The glazes for porcelain begin to melt at a temperature close to the ripening temperature of the porcelain shard. In the temperature range where the processes of decomposition of clay minerals take place, the glaze layer resembles a powder, and gases easily pass through it. Thus, there is no need to fear glaze defects arising from the gas tightness of the melt. Is it worth carrying out a scrap bjig?
- Porcelain masses are skinny, quickly soaking masses. Glazing raw requires skill. Junk is needed!
- Many large items, such as tiles, often need to be spray glazed. And when firing on a biscuit, it is not necessary to glaze at all. Then why do we need junk ?!
For faience:
- Waste firing (remember, it is carried out at a high temperature) is a must if we are going to use low-melting glazes. Otherwise, in a single firing we will not get faience, but something unburned, reminiscent of papier-mâché.
- Waste firing is not necessary if we use high-temperature glazes, which, like porcelain glazes, begin to melt above 1100 o C. In this case, they are applied, as a rule, by spraying with compressed air.
For majolica, this is the most difficult case.
- Junk is almost always needed, and at the highest possible temperature. Many technologists of the Western school recommend firing majolica almost to a glassy state in order to burn out all impurities and decompose everything that can decompose in waste firing. The question is, how then to glaze? Can. Read about it in the section on glazes.
- If you use engobes or something like terra-sigil as a coating, or if you have special glazes with a very short melting interval, you can do without scrap.
For all materials, a single firing is possible under the condition of a thoroughly debugged technology, which in the case of ceramics, two-thirds of the experience of the workers.
It seems that in our presentation of the problems of firing, everything is already confusing enough that another layout on the shelves is required.
What happens during heating and cooling.
Interval, o C
| Process | |
| 20 — 100 | Removing moisture from the mass. You need to heat slowly and, most importantly, evenly. The thicker the walls of the product, the slower the heating. |
| 100 — 200 | The removal of moisture from the mass continues! If the devices show 150 o C, this does not mean that the product has heated up to such a temperature, especially in the thicker, especially on a thick stand. The glaze coating shrinks. Water vapor released from the volume of the product can lead to cracking and flying off of the coating. VOCs are emitted from chandelier coverings. Do not force heating! |
| 200 — 400 | Burnout of organic matter. If for some reason there are a lot of them, you should ensure a good flow of air (decals, chandeliers, binder of overglaze paints and mastics). |
| 550 — 600 | Severe phase transformation of quartz. It rarely manifests itself during the heating stage, but during the cooling stage it can lead to the so-called. "Cold" cod. |
| 400 — 900 | Decomposition of clay minerals. Chemically bound water is released. Nitric acid and chloride salts (if used) decompose. |
| 600 — 800 | The beginning of melting of lead and other low-melting fluxes, overglaze paints. At 750 - 800 o C in the third decoration firing, the glaze surface softens and paints, gold, etc. are baked. Burnout of sulfides. |
| 850 — 950 | Decomposition of chalk, dolomite. The beginning of the interaction of calcium and magnesium carbonates with silica. These processes are accompanied by the release of carbon dioxide. In general, all transformations of clay substances have been completed. Their smallest particles have already sintered and provided a noticeable strength of the shard. By the end of the interval, the majolica glazes have completely melted. |
| 1000 -1100 | The intense interaction of lime and silica is accompanied by the appearance of a liquid phase (for example, in limestone faience), compaction and deformation of the shard. Beginning of softening of feldspars. Melting nepheline syenite. Intensive decomposition of sulfates, accompanied by the release of sulfur dioxide. |
| 1200 -1250 | Sintering interval of white-burning clays, earthenware mass. Dissolution of silica and kaolinite in feldspar melt. |
| 1280 — 1350 | The process of mullite formation. Mullite needles penetrate the porcelain mass, which will further provide it with high strength and heat resistance. Conversion of finely dispersed quartz to cristobalite. |
| 1200 — 1420 | This temperature range is typical for porcelain. Here, the processes of reduction of red iron oxides into more noble blue ones take place, if the appropriate redox firing conditions are provided. Temperatures are high, viscosities are moderate, diffusion proceeds very quickly: for example, underglaze painting loses its sharpness. |
| 1420 — 1000 | Nothing special happens during the cooling process. Both the glaze and the mass are in a fairly plastic state, so you can cool it as quickly as the oven allows. If glazes with a tendency to crystallize are used, slow cooling or holding for 1-10 hours in this interval will lead to crystal growth. |
| 1000 — 700 | Oxidation of lower oxides of copper, manganese and other metals (if used) to higher ones begins.Lack of oxygen in the furnace space can result in a metallized surface. If recovery is needed, it's time for it. The recovery environment should be maintained almost to room temperature, at least up to 250-300 o C. |
| 900 — 750 | Both the shard and the glaze passed into a fragile state and then cool down as a single solid body. If the CTE is not agreed, the glaze may come off or rebound and even the product may be destroyed. |
| 600 — 550 | Reverse phase transformation of quartz with a sharp volumetric change. A high-speed passage through this interval can cause a "cold" crackle. |
| 300 — 200 | Phase transformation of cristobalite. It was formed if the mass contained very finely dispersed silica, at 1250 - 1300 o C. Do not rush to open the oven door. |
| 250 — 100 | Cooling continues! In the depth of the rate, in the thick parts of the products, the temperature is much higher than in the thin edges and as indicated by the thermocouple. Let the items cool down evenly. |
The table describes the main processes. Therefore, now we will briefly point out once again what is most important in firing.
• First firing. We put raw in the oven. It has a lot of water in it, even if it looks dry. We heat up to 200 - 300 o C slowly, for example, in 2 - 3 hours. We provide good ventilation so that all impurities are burned out. The final temperature is 900 - 1000 o C. If there is no certainty about the temperature, we hold for 1 - 3 hours, allowing the entire cage to warm up evenly. Cooling is carried out at a rate with which the oven cools down. We carry out forced cooling only after several experiments - there will be no glazes, since there are no glazes, but cold crackling due to quartz can occur.
• Glaze firing after scrap. We put glazed products in the oven. The shard has already been fired for scrap, so the speed in the initial heating section can be higher; the main thing is to dry the glaze well. We heat up to the final temperature as quickly as the oven allows and, most importantly, the speed of heating the products. At the final temperature, we make an exposure from 15 minutes to 1-2 hours in order to uniformly warm up. If the rate of temperature rise at the end of heating is low (50 o C per hour or less), we assume that the exposure has already taken place. Better, of course, here to use the Zeger cones. "Shelves" (holding at a constant temperature) at the cooling stage - only for crystalline glazes and some matte glazes. The rest is the same as in point 1.
• Single glaze firing. We take into account everything that is in clause 1 and in clause 2. We do not force the temperature rise in the range of 500 - 900 o C - before the glaze melts, all gases must be removed from the shard!
• Firing decals, luster paints, overglaze paints. Raise the temperature very slowly (in 2 - 4 hours) to 400 o C - all organic matter needs to be burned. In this case, the environment should be oxidizing (air), and the ventilation should be intensive. From 400 to 800 o C - as fast as you like. Exposure 5 - 15 minutes.
Read about what kind of firing conditions the furnace dictates below.
2. Electric ovens and a word or two about others.
Firing of ceramics is carried out in a variety of thermal units called furnaces. If the heat of an electric current is used for heating, stoves are called electric, if the heat from the combustion of fossil fuel is fuel and usually, more specifically: gas, wood, fuel oil, etc. For thousands of years of ceramics firing, many designs of fuel furnaces have been invented, and over the past hundred years - no less number of designs for electric furnaces.
Regardless of the type and design, the oven contains:
- free space for placing products, for short - a camera;
- refractory and heat-insulating shell, for short - lining;
- heat source - heater, burner, etc.
- a device for controlling and regulating the degree of heating - a regulator.
Each oven can be classified according to the characteristics of the listed attributes. If you need to order a stove, be sure to indicate these features.
The volume of the chamber determines the productivity of the kiln in one firing in a batch kiln or per cycle of pushing one trolley in a tunnel kiln. In the future, we will only talk about batch furnaces. The chamber volume can be 1 - 2 liters; such small ovens are convenient for test firing and for making small items such as ceramic jewelry. The volume of oven chambers commonly used in workshops and studios ranges from 50 - 100 liters to 1 - 1.5 cubic meters. m. For factory conditions, furnaces with a volume of 3 to 20 cubic meters are characteristic. m.
The liner and heater determine the maximum temperature that can be developed in the chamber. The higher the temperature is required, the higher the class must be for the refractories, which immediately and, note, sharply affects the cost of the furnace. Sometimes the chamber is separated from the heater by an additional lining called a muffle. (Do not call every small furnace in a row as muffles!)
The regulator contains a device for measuring temperature, which is usually a thermocouple, a device for regulating the power of the heater and a control device that matches the action of the first two.
Some oven configurations are shown below.
Bonfire
| PARAMETER | VALUE |
| Camera | 10 - 100 liters |
| Lining | layer of earth |
| Thermal insulation | layer of earth |
| Heater | the heat of burning wood |
| Thermometer | by eye by glow |
| Power regulator | throwing firewood |
| Control | own experience |
Electric furnace 200.1250.L (Termoceramics LLC), option
| PARAMETER | VALUE |
| Camera | 200 liters |
| Lining | chamotte-wavy plate ШВП-350 |
| Thermal insulation | ShVP-350, ShL-0.4 |
| Heater | electric, spirals from wire Х23Ю5Т |
| Thermometer | thermocouple platinum-platinum rhodium TPP |
| Power regulator | thyristor unit |
| Control | Software, programmer KTP |
These different thermal devices are presented here in order to gain a deeper understanding of the functions of the furnace elements.
The camera is working the space where products and shelves with stands are placed, from the total volume "from wall to wall" you need to subtract the volume required for the heaters. And the calculation of the useful load of the chamber must be made taking into account the thickness of the shelves.
Example. The useful width, depth and height of the chamber is 40 cm. There is a refractory plate 39x39 cm, 2 cm thick and four racks 7x7 cm, 18 cm high. How many pots with a diameter of 18 cm and a height of 16 cm can be placed in the oven? Answer: if without a shelf - 4 pcs., And if with a shelf - 6 pcs. (not 8; see picture).
Continuing the example, let us ask ourselves the question, which, in fact, is more profitable - to burn 4 pots at a time or 6? The answer lies in the analysis of the amount of heat required to heat the additional mass of ammunition. If the pot weighs 300 grams, and the stove and racks weigh 5 kilograms ... Ie. almost all the heat will go to heating the ammunition! And the oven will cool down longer. It may happen that during the firing of six pots, two firing times of 4 pots each can be carried out.
In fact, not only the pots and firearms are heated, but also the walls of the furnace. In a fire, it is a solid mass of earth. It is difficult to warm it up, cool it too. In a modern furnace, refractories with low heat capacity, low thermal conductivity and high fire resistance. The vacuum-formed fibrous material ШВП-350 is well suited for the construction of furnaces with an operating temperature of 1200 o C. If the entire furnace is made of heavy fireclay bricks, it will require enormous time for heating and cooling, and, accordingly, energy consumption. Such a heavy “uphill” oven will not allow you to implement high-speed heating modes, if you need them for something. However, you can increase the power of the heaters.
Electric heaters are available in wire and ceramic. The wire is made from nichrome (expensive, the maximum temperature is 1100 o C, but it remains flexible after work) or from iron alloys.The latter are often called "fechral", and imported counterparts - "kanthal"; domestic brands have the exact name - Х23Ю5Т or Х27Ю5Т. Fechral works up to 1200 - 1350 o C, depending on the diameter of the wire. After the first heating, it becomes irreversibly brittle, a heater that has burnt out in one place cannot be repaired by twisting!
Ceramic heaters include silicon carbide, they are silite, they are also carborundum rods: operating temperature up to 1400 o C. In the last 10 years, expensive chromite-lanthanum heaters with an operating temperature of up to 1700 o C have been persistently advertised, which have a very long service life at the same 1300-1400 o C (if you don't break it when you install a heavy slab :-)). Read elsewhere on how to calculate electric heaters. Here we recommend contacting specialized companies for help.
If heating is carried out with gas burners, any temperature can be reached in the furnace space up to 1700 o C, and if oxygen-enriched air is still used, up to 2000 o C. Gas (and other fuel) furnaces are good because they allow firing not only in an oxidizing environment, but also in a neutral and reducing environment. The degree of "reduction" is regulated by changing the gas / air ratio, in modern gas furnaces this is done automatically. Wood stoves, unfortunately, are more difficult to automate, but they are easy to manufacture, cheap to operate, they do not require approvals from the gas inspection, and give 1200 o C easily.
The more powerful the heaters, the faster they can heat up. And the more carefully you need to work with them. Imagine what happens to the pots in the first five minutes, if one side of them is facing the instantly heated wall with heaters, and the other is facing the cold neighboring pot. Smooth heating (or rather, uniform throughout the chamber) is easiest to obtain using thyristor power blocks. The regulation of the output power in them takes place according to the principle of "more amperage" - "less amperage", and not according to the principle of "on" - "off". If you have only the last control method at your disposal, then set low temperatures at the first stage (first 100 o C, after half an hour - 200 o C, after an hour - 300 o C, and only then - the final temperature). And if there is no control device in the oven at all, do not leave it and flip the switch every five minutes (This is not a joke!).
Naming different temperatures, we still haven't specified what we are talking about - the temperature on the heater? on the product? on a thermocouple? If a thermocouple is installed in the oven, then the device connected to it will naturally show the temperature of the thermocouple tip. For various reasons, about which volumes of scientific literature have been written, this temperature only roughly reflects the thermal situation in the furnace. During the heating process, the heaters are always hotter, and the products are colder than the thermocouple. The thermocouple shows the temperature at some point in the chamber, and what is being done elsewhere is unknown. Nevertheless, the thermocouple produces an electrical signal that is understandable for electronic devices, including power control automation. From this point of view, it is irreplaceable. Long-term practice of operating the stove gives information about where it is hotter in the chamber, where it is colder. Sooner or later, we get used to the habits of this device. But for a long time (since the end of the 19th century) another method has been known for determining the moment of reaching the required firing point. This is Zeger cone firing.
Firing is considered to be performed on this cone if the cone, deforming during the firing process, touches the support on which it is installed. The cone is made of masses, the behavior of which is similar to that of the material to be fired. If in practice it has been found that the best result is achieved when firing on a cone, say, 114, then all firing should be carried out on this cone, not paying special attention to the readings of the thermocouple. And no thermocouple is needed! The use of cones is extremely common in artistic ceramics in the West. And this is no coincidence ...
Using a potter's wheel at home
You can use a potter's wheel, although we do not recommend starting with this. Let's talk about some tips that will make this task easier for you.
- First, you need a potter's wheel that can hold at least a kilogram of clay.
- You'd better consider the electric potter's wheel as it is easier to use.
- Make sure you know how to use the clay you are working with to keep it moist, dry it and burn it.
- Knead and roll the clay into a rope to prepare the piece.
- Remove all air bubbles to prevent cracking in the oven.
- Stick the resulting lump of clay onto the circle and center it.
- Moisten your hands and keep them wet so they glide over the clay.
- Start the circle, increase the speed and pull the clay upward, smoothing the walls.
- Wrap your arms around the clay and pull it out from the center.
- Rinse the bottom, stretch the clay to get the desired shape.
- Keep the walls as flat as possible.
Ultimately, this is all you need to do to mold a piece of clay on a potter's wheel.
Can I add some decorations?
Yes you can! There are several ways to decorate clay products:
- Counter-relief stamps. They can be found in specialized stores. Use them on slightly damp clay to make markings that work great for designs or even signatures.
- Tools: forks, knives, needles, combs or the like that can create amazing designs and textures that your ceramics will benefit from.
- Prints: leaves, stones, twigs, or the like. Press them gently against the clay to create an imprint before burning or drying.
The decoration really looks good, and if you are not creating pottery that requires glazing, then these little decorations will make your pottery even more attractive.
Clay drying
If you are not working with an oven, then most likely you are going to dry the clay by air drying or baking in the oven. There are several ways for each of them.
For baking in the oven:
- Preheat the oven to the desired temperature.
- Place the clay blank on the tray.
- Bake for the required amount of time.
- Check the hardness of the product.
It's simple, but again, the heat isn't strong enough for porcelain or earthenware.
For air drying:
- Place the product in a safe place.
- Wait. This can take up to 24 hours.
- Check the product for hardness and give it more time if necessary.
- If you're air drying, use a fine-grain sandpaper to remove any minor irregularities before moving on to painting.
Pottery takes time to dry, but you can benefit from it with the right technique.
Latest publications
Clay drying and firing
To give additional properties to clay products, they are subjected to high temperatures - firing. But the technology for firing clay is quite complex and resource-intensive, so I will try to tell you about some of the nuances that you may encounter.
Preparation for firing
Before firing the product, it must be thoroughly dried for 2 - 7 days, depending on the size of the product. You need to dry the product away from heating devices, direct sunlight, drafts - that is, to exclude any sudden changes in the environment in which the product is located. At room temperature and in a dark dry place, the product will dry evenly.
If it dries unevenly, the product may crack and its small parts will simply fall off. Insufficient drying will result in firing defects. It is impossible to overdry the product.
After the product has dried, you need to carefully inspect it for cracks. If there are any, you can try to cover them with liquid clay, but this does not guarantee the safety of the product during firing. The best option is to prevent cracks from appearing, and this is obtained with high-quality modeling and competent clay preparation.
Be sure to check the sound of the whistle - if it disappeared or became deaf, then it is not too late to try to fix everything.
In some situations, during shrinkage, a spider may settle in the products (there was a case when he chose one of my whistles), in which case he needs to be moved to a safe place .
The final stage of preparation will be grinding the product. When sanding, fingerprints, various crumbs and bumps may disappear, and the product will acquire a noble appearance. Sanding can be done with small-sized sandpaper.
Firing conditions
Temperature. The most important thing in firing is a gradual increase in the firing temperature and a gradual cooling of the product after firing. In the first two hours, the temperature should not exceed 400 degrees. The temperature range should be between 300-900 degrees Celsius. At lower temperatures, firing will be insufficient and the product will not acquire the required properties. At high temperatures, the product can be completely destroyed.
Duration. Depending on the size of the product and the method of firing, the duration of the process can vary from 8 hours to several days. Very small items can be burned in a minimum time.
The composition of the material. The firing technology largely depends on the composition of the clay. Natural clay has an admixture of sand and the less sand, the lower the firing temperature. In my practice, there have been cases when powder purchased clay at 750 degrees literally boiled and dried up in the form of a porous sponge. In this case, the product was completely destroyed. The clay should not contain stones and air. If the material is not homogeneous, rupture will occur. Since materials of different densities will expand with temperature changes in different ways.
The quality of the sculpting. The main requirement for sculpting is the absence of air bubbles in the product. As the temperature rises, the air will expand and look for a way out, tearing the product. Therefore, when covering cracks and fastening parts of the product, exclude the possibility of the formation of air capsules.
Firing methods
Firing in a muffle furnace. There are several methods of firing clay products, but the most common is firing in a muffle furnace. This is an electric oven equipped with a temperature control mechanism.
Modern furnaces have automatic programs for firing products of various types, a window for viewing the status of products and other options. Another important characteristic of a muffle furnace is the volume of the chamber. Some swords have a cylindrical chamber in which only small items can be placed, while there are large kilns for firing pottery and sculptures.
Firing on a fire or in a non-electric oven. Quite a non-trivial task associated primarily with the fact that there is no way to fully control the temperature. In addition, the stove is rarely heated for eight hours, and it is difficult to sit around the fire for a third of the day. However, if you are still thinking - place the product in a container with sand - this will smooth out the sharp rise in temperature.
Firing at home. On a gas or electric stove, you can also burn a clay product, but I warn you - this is quite dangerous and the quality of firing will still be far from ideal. To do this, you can take a cast-iron frying pan with dry washed river sand and put it on the fire. From above, you need to carefully install the product and cover with a fireproof container - an earthen pot or saucepan. The process should be supervised and the room should be regularly ventilated so as not to cause overheating and oversaturation of the air with poisonous gases.
Why do you need firing
In the process of firing, the clay gets rid of almost all moisture, so the product becomes much lighter. In addition, clay elements are sintered and transformed into a single ceramic ingot, which is resistant to deformation and moisture penetration. Hence the whole need for firing.
The fired products are ready for painting, and after painting for use.
It is important to know
After firing, the clay is not suitable for modeling, since it is no longer clay, but ceramics.
Firing can be carried out several times, gradually increasing the limit temperature for optimal results and gaining experience.
After the main firing, the product can be coated with a special compound and fired again. Having melted, the composition forms a glaze.
In the process of drying and firing, the product can be deformed and, as a result, become smaller than planned. Therefore, when creating a product, it is necessary to take into account the composition of the clay and the purpose of the future product. Clays with a high sand content are less prone to compression.
During the firing process, organic compounds will burn out (especially in natural clay) - this can lead to unpleasant odors. It is necessary to be able to ventilate the room.
Product readiness can be determined by weight, color and sound. Any colored clay turns red after firing. If it turns black, the product is overheated, if it has not changed color, it is not burned enough. Fired products have a lighter weight and a sonorous nature. However, whistles during firing can completely lose sound (incorrigibly) or, conversely, be transformed.
In any case, the correct firing of earthenware can only be achieved with experience. So go for it and good luck!
Staining clay products
You can paint the clay with acrylic or latex paint if it is air-dried. It is important that you follow certain rules here as well.
Some tips for coloring:
- Make sure that if you are firing clay, the paint is designed for use in the oven.
- Some paints do not require firing, which can sometimes be a convenient option.
- Choose a paint that is suitable for the required temperature, as air-dried clay cannot be fired.
- Apply paint with brushes, sponges or other methods.
- Let the paint dry according to the paint instructions.
- If you intend to fire utensils for food and liquids in the oven, use paint and sealant first, and then start firing after drying.
- If you are using an oven, then also use a glaze to completely cure the paint.
Painting adds a touch of uniqueness to your artwork, and while it may not be necessary in the first steps, you can really benefit from it if you have interesting painting ideas. Some also prefer to color the products after baking in the oven, you decide for yourself as you like best.
Preparing clay products for firing
Before firing, the product must be thoroughly dried. Drying time depends on the size of the craft: it can last from two days to a week. Drying is carried out at room temperature in a dark place without excessive moisture. It should not be such that the sun's rays fall on one side of the craft, and the other remains in the shade. If not properly dried, the product may crack and small parts may fall off. Therefore, it is not worth drying near heating appliances. When the drying is insufficient, defects appear during firing. The craft can explode if heated if moisture remains in it. This can also happen when there are stones or air bubbles in it. The explosion occurs because different structures react differently to the effects of high temperature.
Precautions
Remember to take some precautions:
- Review the instructions for materials and equipment.
- Remember that the oven you are using is hot and you need to be careful with it.
- Be careful when molding the clay to avoid injuring yourself.
- Learn what chemicals are in everything you work with.
Many people enjoy making ceramics at home, and in this article we have tried to show you how to do it.If you want to get into pottery and are worried about whether what you are doing will make the right impression on someone, then just don't think about it. Improve your technique and always create at the maximum of your capabilities, and you will get unique clay products that will create coziness and comfort in your home, add color and festivity to your everyday home environment, and emphasize your individuality.
Clay - modeling and treatment
Clay making is a very exciting and interesting process that allows you to reveal your imagination and talent. If you want your clay figures not to lose their shape for a long time, they need to be dried, and then fired at home, adhering to a certain technology. After all, a long line of service of your products will delight you constantly. All of your figures are unique - she only looks like herself.
Material composition
Clay can be of different composition. It directly affects the firing technology. Natural clay contains an admixture of sand. This pattern stands out: the less sand is included in the clay, the lower the temperature should be when firing products. There are situations when, when using powder purchased clay, it boils at 750 degrees, and then dries up. As a result, the product resembles a porous sponge. In this case, the clay figurine is usually destroyed.
The composition of the clay should be free of air and stones. Never use dissimilar materials, as an explosion may occur. Since the composition will include materials that have different densities, and they will each expand in their own way, when the temperature changes.
Natural clay is a material of natural origin and is often not subjected to additional processing. In nature, you can find clay of various colors, which depends on the presence or absence of certain elements. For example, clay acquires a red color due to the presence of a large amount of iron. And if in raw clay there are small amounts of iron and titanium oxides, then the white color of the material remains even after firing.
Preparation of material for firing
Before making clay firing, it must be dried. You will spend about a week on this process, depending on the size of the product. It is recommended to dry it in places where there are no heating devices nearby, and where the direct rays of the sun do not fall. The best option is room temperature and a dark, dry place. It is there that the product will dry evenly.
If the clay has dried unevenly, then cracks or chips may form on the product. If it is not dry enough, then the products may have defects after firing. But it is impossible to dry out the clay.
When the product is dry, it must be carefully inspected for cracks. If they are present, then they can be masked with liquid clay, but this does not guarantee that the product will not lose its shape during firing. It is best to avoid cracking. This can be achieved, it is enough just to properly prepare the clay and mold the product with high quality.
The final stage of preparation is grinding the clay figurine. During grinding, fingerprints, bumps are removed, as a result, the products acquire a beautiful and well-groomed appearance. Grinding is carried out using sandpaper. Another important factor is the quality of the sculpting. Make sure that there are no air bubbles in the figure during sculpting. When the temperature rises, the air expands and looks for an outlet, as a result of which the product will burst. When covering cracks or holding particles together, do it very carefully so that air capsules cannot form.
Firing rules at home
You can burn the clay at home. First you need to dry the product, and then burn it in the oven. In this case, you need to gradually increase the temperature within two hours to 200 degrees.Clay figurines can be placed in a skillet or cast iron pot. It should be borne in mind that a full-fledged roasting in the oven is impossible, because the temperature is insufficient, it cannot harden it, but only dry it.
How to determine if a product is ready?
Very easy in terms of color, weight and sound. If the color of the fired clay is black, then the figurine is overheated. If the color has not changed, it means that the product is not burned enough. The fired colored clay should be red in color.
Clay firing technology
Clay kiln
The best option for firing clay is this is a muffle furnace ... The temperature can be adjusted in this oven. It should be remembered that such a stove is very expensive and not everyone can afford to buy it. But there is no need to be upset, because it can be replaced with other good devices, for example, baking clay in the oven. Start firing the clay at 200 ° for 2 hours. Then gradually raise the temperature to 1000 ° over 6 hours. This temperature regime protects the clay product from the appearance of stains and helps to maintain a homogeneous structure.
Clay can also be fired in grill or brick oven ... These species are enclosed spaces characterized by a stable temperature. It is needed so that the clay product is evenly heated, and various defects such as surface spreading do not form on it. The product that is fired must be left until the fuel is completely burned out and the firebox cools down. The product should be in the oven for about 4 hours.
Firing pottery over a fire is a very affordable option. It is used for firing small items. So, take an earthenware product and place it in a tin vessel, which you previously heated and made holes on the sides. In most cases, the container is a regular tin can. Fire the product for about 8 hours, no less.
Burn the clay impossible in the microwave ... Such an oven can only remove moisture. Clay products, after you have dried them in the air, are placed in the microwave unit for 3 minutes. This is done to improve their condition.
Temperature regime
The main rule in firing clay products is that you need to gradually raise the firing temperature, and then gradually lower it, giving time to cool the product. At first (the first 2 hours) the temperature should be no more than 400 °. The firing temperature can fluctuate between 200-1000 ° during firing. If the temperature is lower, the firing will be insufficient and the figurine will not have the desired properties. If the temperature is very high, then the figure may collapse.
Duration
This process can last from eight hours to several days. It depends on the size of the product and the firing technology. If the figurine is small, then this can be done in the shortest possible time.