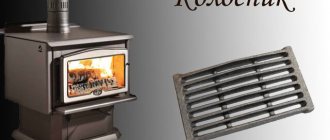
To give strength and durability to clay products, they must be subjected to high-temperature heat treatment. Burning crafts on an ordinary gas stove or in the oven is not only ineffective, but also dangerous, since poisonous gases are formed and released during the process. For work, you need a special sealed clay kiln that can be heated to a predetermined temperature. Finished equipment can be purchased from a specialist store or built yourself.
Clay and ceramic mixtures. Clay properties
Clay is the basis for the production of tiles
It consists of oxygen, hydrogen, silicone and aluminum and, when water is added, changes its structure, becomes more flexible and viscous. When the water is removed, the clay hardens and hardens. It is very important to know that clay that has only recently been dug out of the ground is not yet ready to be used as a raw material for ceramics. Freshly mined clay leaves a lot to be desired in performance
The main characteristics of clay that will be important to you are plasticity, firing temperature range and shrinkage.
Clay plasticity
Plasticity allows complex shapes (such as step angles, for example)
If the clay is too plastic, it will not have sufficient strength to make large-scale products from it, it will break down at high temperatures. In this case, coarse-grained materials should be added to it. Clay with a coarse-grained structure will not be sufficiently plastic, it will break when twisted and molded, it will be impossible to get the desired shape from it. To make it more convenient to work with, add more sticky or more plastic clays to the composition.
The plasticity of the clay is easy to determine by eye by squeezing and rolling the lump. You can conduct a simple test - mold a sausage out of clay and start bending it in an arc. The smaller the radius of the arc along which the clay bends and does not crack, the more plastic it is. Another easy way to determine plasticity is to break a clay sausage into 2 pieces. If the ends of the edges are thin and stretch like threads, the clay is plastic. If the ends are thick and dry, like stumps, and the clay itself crumbles in the hands, it is low plastic. Potters call plastic clays fatty clays, and low plastic clays - skinny clays.
Let us repeat that none of these types of clays can be used in their pure form for making tiles; they will definitely need to be mixed to obtain the material of the desired consistency.
Clay firing temperature range
Each type of ceramic clay and each added ingredient has its own specific melting point, which determines the firing temperature required to sinter the clay when it turns into ceramic. The composition of the clay mass formula or formulation can include several different clays, as well as other non-clay materials that are added in order to obtain a material with certain properties, depending on the purpose of using the product.
Potters distinguish low-melting clays (with a melting point below 1350 degrees), medium-melting (temperatures from 1350 to 1580) and refractory (the temperature, you guessed it, is higher than 1580 degrees). The more plastic the clay is, the lower the firing temperature it can withstand. To increase the temperature, add chamotte or pumice to the clay (with pumice, the temperature will drop to 800 - 950 degrees).
Clay shrinkage
Your product will change its weight and size during drying and firing as water evaporates from it. When you are going to make tiles that are specifically designed for a limited space, you need to know as much as possible about the shrinkage of that clay.
The greatest shrinkage occurs during firing, when chemically bound water leaves. Further, there is a continuous process of hardening and compression with the formation of glass crystals in the fired clay, which turn the clay mass into ceramic. The higher the firing temperature, the more the clay shrinks. To reduce shrinkage, increase the amount of chamotte in the ceramic mass.
How to avoid cracking and deformation of clay
Whether you succeed or fail in your tile endeavor depends on choosing the right type of clay. One of the most difficult tasks for you will be to avoid cracking and deformation of the products during drying and firing. Fortunately, this task can be made easier by adding a significant amount of granules or particles of coarse material such as chamotte to the clay. Ideally, the amount of chamotte should be between 15 and 40 percent, while it is desirable that the particles are of different sizes.
A good clay mass for tiles should contain 12/2? percent of chamotte finely ground and 25% - medium grinding. For those who already have experience with ceramic masses, such an amount may seem extremely large (and it is not suitable for the manufacture of small ceramic figures, where the content of chamotte is unlikely to exceed 20%), but the open porous structure that is obtained thanks to chamotte, allows tiles to dry more evenly and avoid deformation.
Using a potter's wheel at home
You can use a potter's wheel, although we do not recommend starting with this. Let's talk about some tips that will make this task easier for you.
- First, you need a potter's wheel that can hold at least a kilogram of clay.
- You'd better consider the electric potter's wheel as it is easier to use.
- Make sure you know how to use the clay you are working with to keep it moist, dry it and burn it.
- Knead and roll the clay into a rope to prepare the piece.
- Remove all air bubbles to prevent cracking in the oven.
- Stick the resulting lump of clay onto the circle and center it.
- Moisten your hands and keep them wet so they glide over the clay.
- Start the circle, increase the speed and pull the clay up, smoothing the walls.
- Wrap your arms around the clay and pull it out from the center.
- Rinse the bottom, stretch the clay to get the desired shape.
- Keep the walls as flat as possible.
Ultimately, this is all you need to do to mold a piece of clay on a potter's wheel.
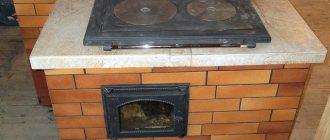
DIY construction process
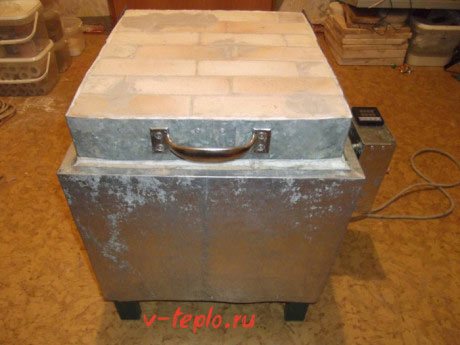
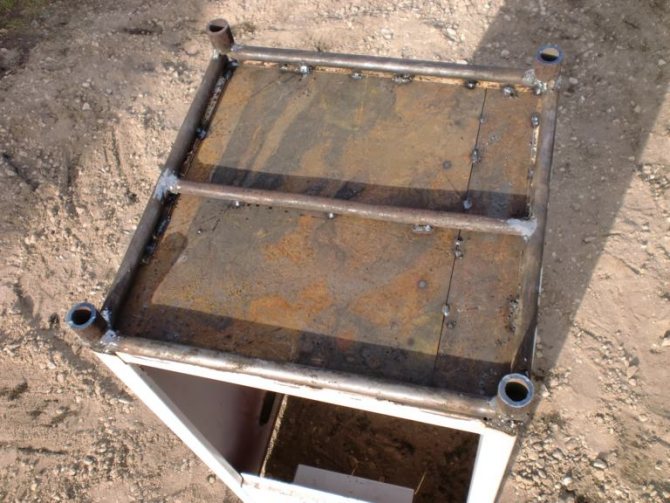
Following pottery traditions, craftsmen continue to make kilns with their own hands. So, a do-it-yourself dome stove is often found on the territory of workshops and other other options. First of all, it is necessary to prepare the case of the future device. Even a washing machine can act in its capacity, it would be better to say, its body. You can also make the body yourself from galvanized sheet. In this case, the following dimensions should be adhered to: width - 50 cm, length - 50 cm, height - slightly less than 100 cm.

Next, you need to strengthen the bottom of the box with a corner or pipes, which are welded along the perimeter of the base and through the center. It is recommended to make legs with the same pipes. In addition, it does not hurt to strengthen the rib with the door hinges and the door itself.
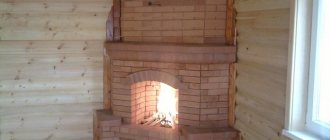
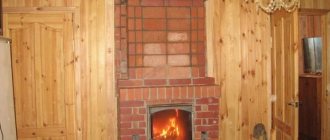
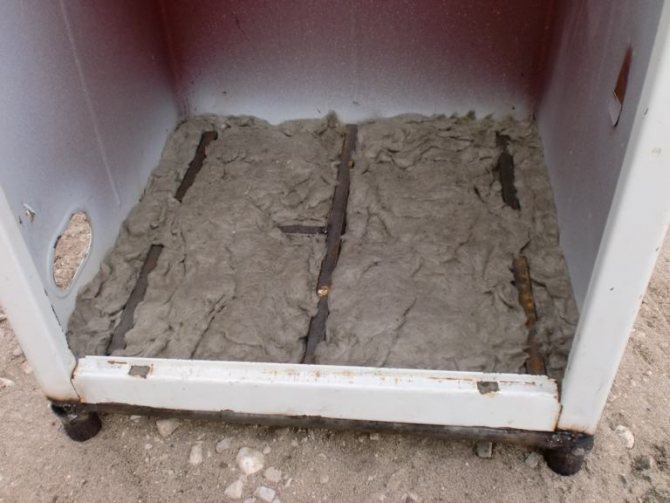
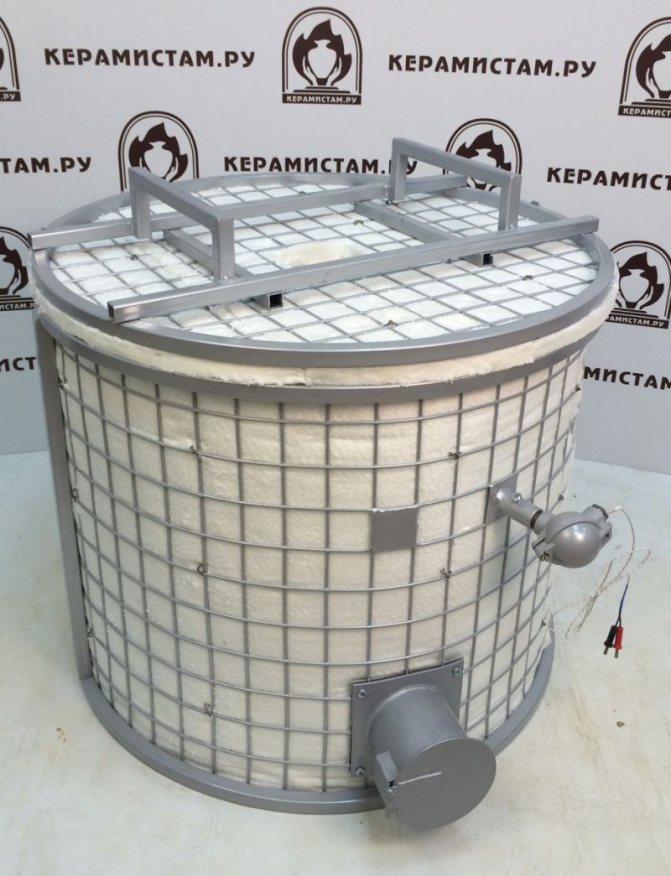
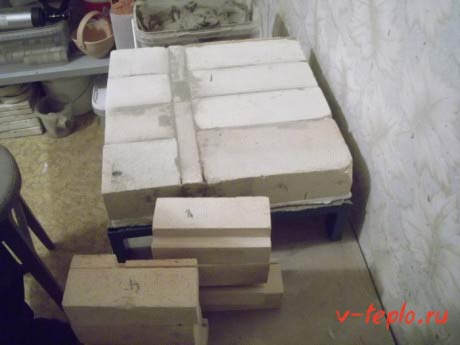
The bottom and walls are covered with 10 mm thick basalt wool, for its safety it is necessary to lay out several pieces of a square pipe and cover everything with a metal sheet. Do not be afraid that outwardly the pottery stove does not resemble the beautiful Duet fireplace stove, because they have completely different functions. Fiber plates and fireclay bricks can be used as refractories. Sealant for fireplaces and stoves in the case of fireclay bricks will be presented with a special mixture.
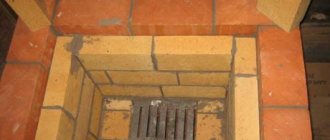
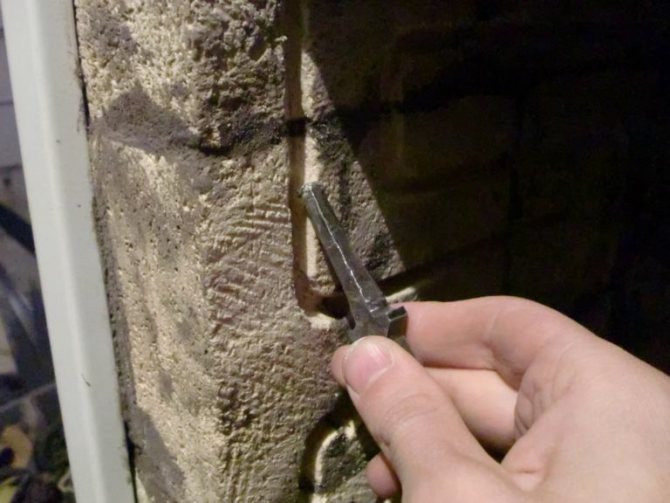
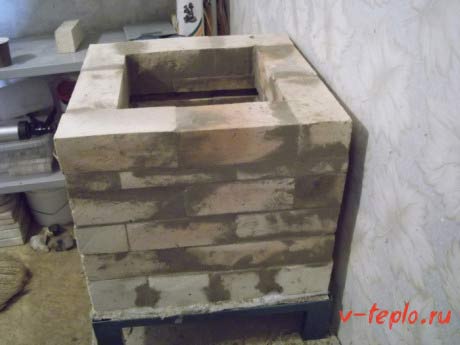
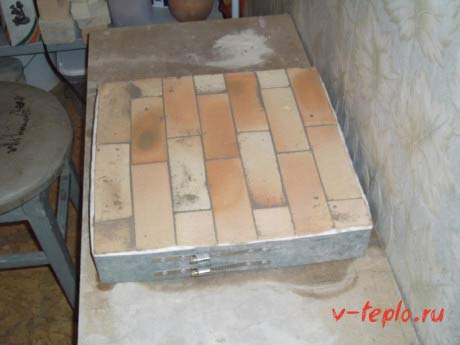
Tightly docked bricks act as masonry; they can be cut to the required size. First of all, the bottom of the case is laid out, the refractory mixture is diluted with water, while cement is also added for the outer layer. Bricks must be soaked in water before laying. Further, the masonry is thrown onto the walls and ceiling. Moving to the top, it is necessary to equip the middle with blocks laid out in a trapezoidal shape. Do not forget that the door must also be lined with bricks. After that, the door is welded to fit the size.
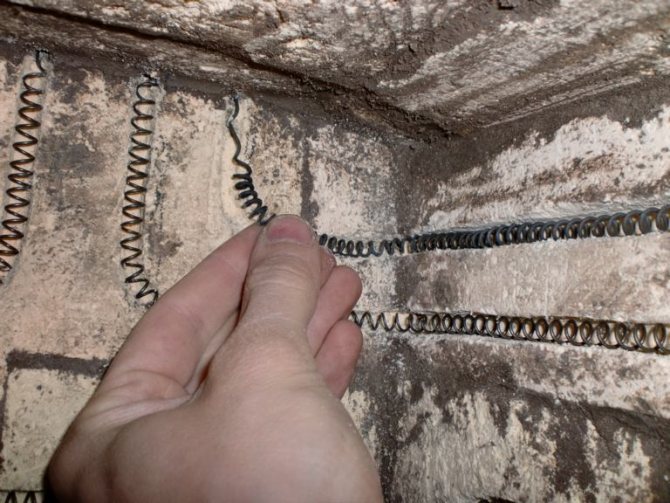
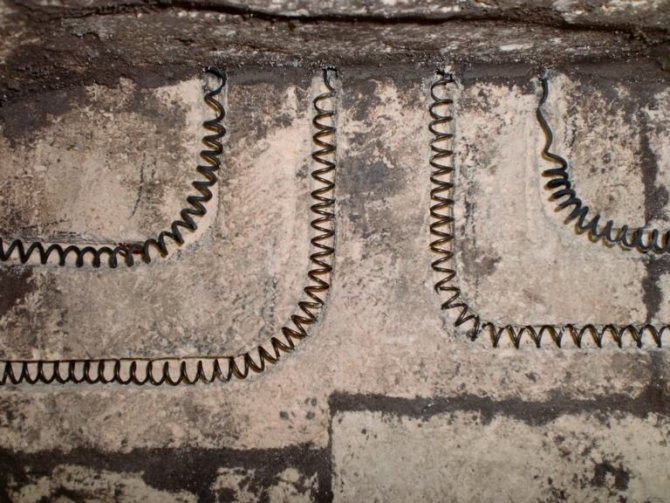
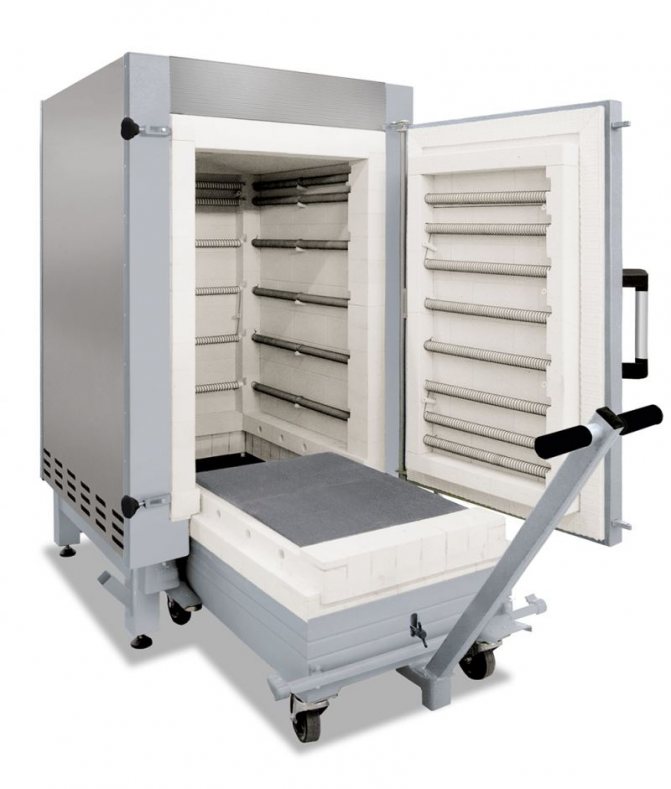
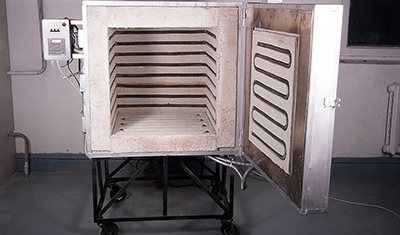
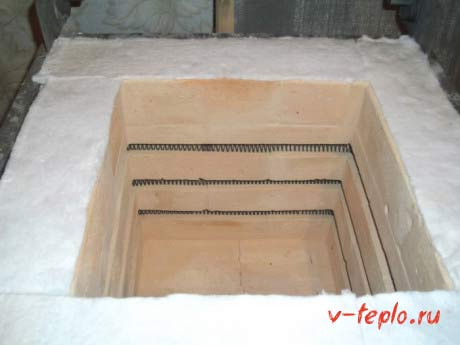
This is followed by the laborious process of conducting electric heating coils. Grooves for spirals are formed along the entire perimeter, while the depth of the grooves should correspond to the diameter of the wire. Nichrome wire or ready-made spirals from it can be selected here. Do not under any circumstances allow the coils of the spirals to touch.
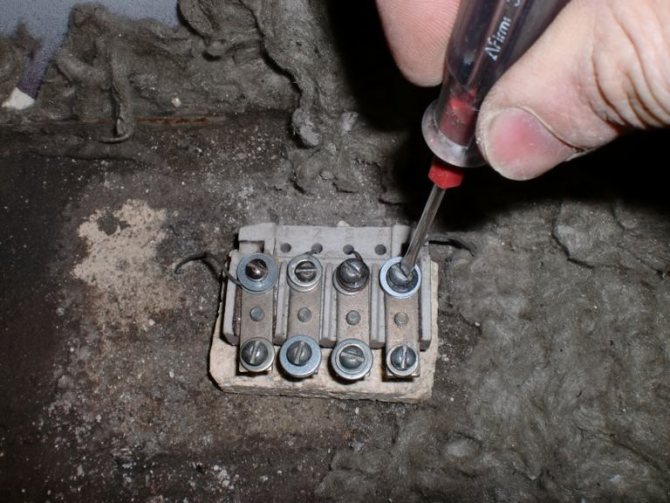
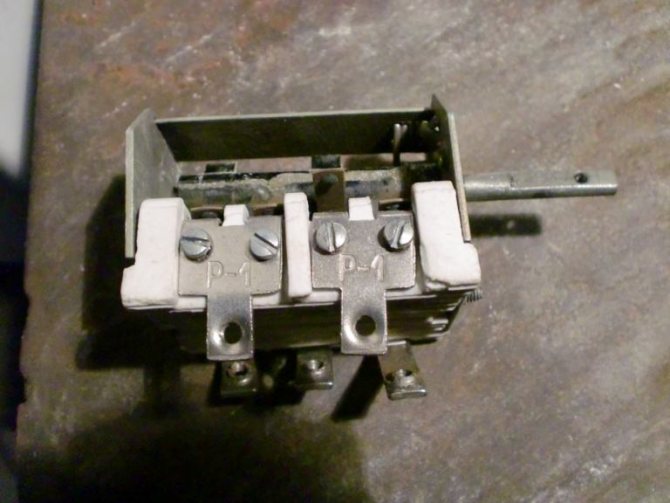
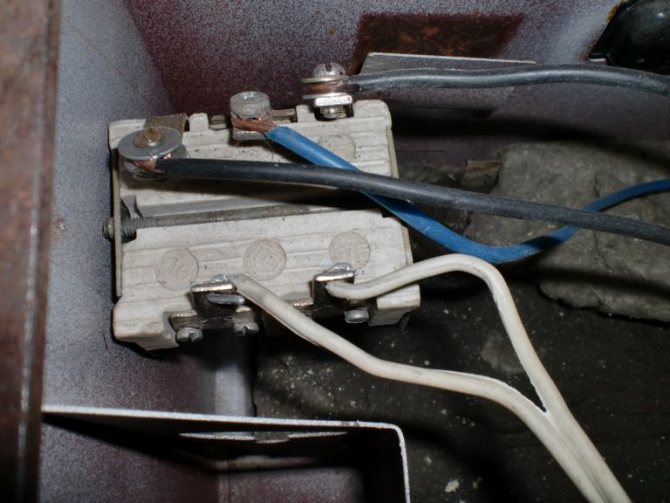
After laying the spirals, its ends must be brought up, then install the ceramic plate from the hotplate and fasten the ends with bolts. Next, a spiral switch is installed with two contacts on one side and three on the other, and the wires are connected. The pottery kiln is ready, it must be dried and the tiles for stoves and fireplaces must be laid
It is important to remember that this oven is dangerous, and you must always be on your guard with it.

Furnace device
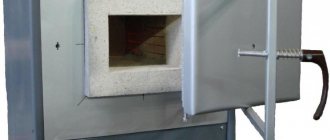
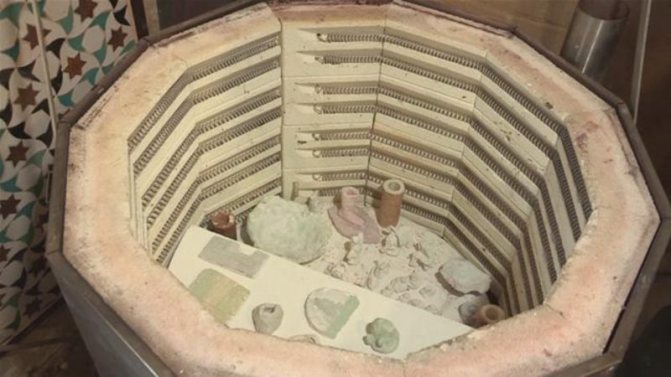
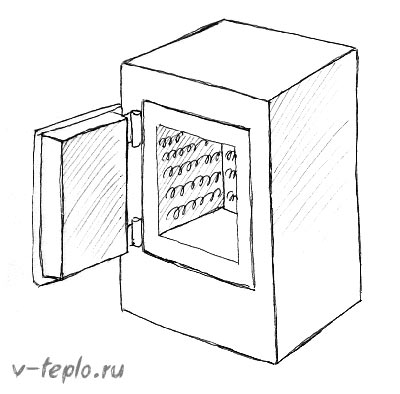
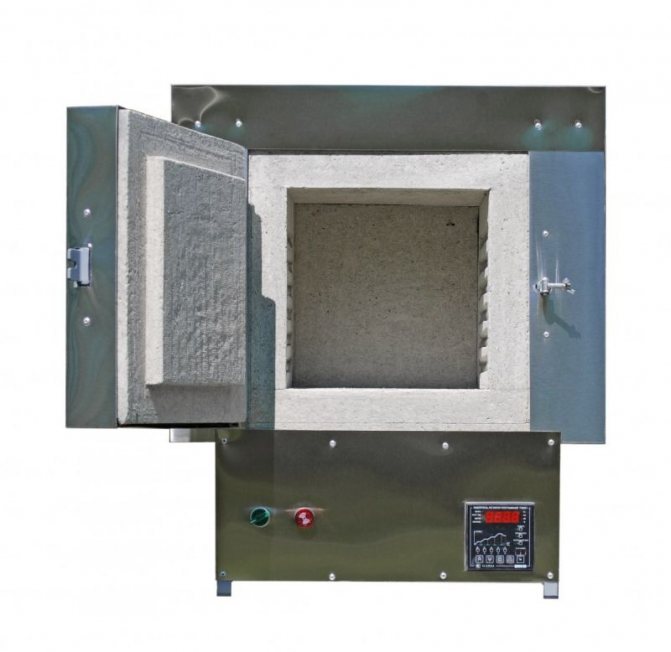
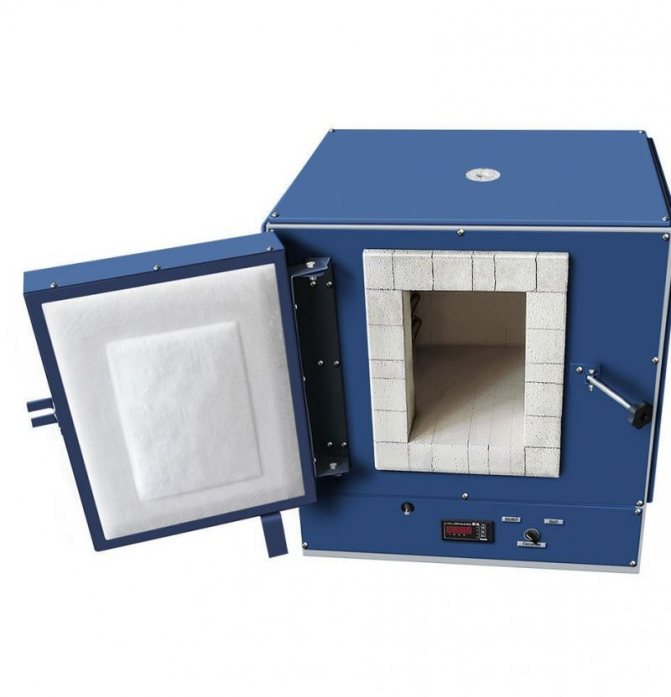
The final stage in creating a ceramic product is firing it. In this case, pottery kilns are indispensable devices. Before you start building your own, or make a purchase of a ready-made one, you need to understand the design of this invention. It has a very simple structure:
- Heat-insulated firing chamber made of refractory material
Gas burner, or heating device
Loading and unloading device
Regulating devices
A serious approach to the choice of equipment will ensure the production of quality products. Moreover, not only the design is important, but also the accompanying materials, be it a mixture for fireplaces and stoves, solutions and other means. All modern furnace equipment is equipped with a software system, thanks to which the furnace for heating or for firing has a convenient control. With the help of this system, the performance of work can be regulated by dozens of specially established modes, in which it is possible to burn a wide variety of materials and objects.
Today, the production of bricks and other clay-based materials is very profitable. Large enterprises use large-format industrial furnaces in a variety of sizes and shapes. (See also: Do-it-yourself tandoor oven)

Of course, for your own production, by the way, a small-sized oven is suitable. Many businesses today are engaged in the manufacture of devices to order at the request of the consumer. Moreover, this option for purchasing equipment is the most optimal, since the furnace will be made for a specific job.
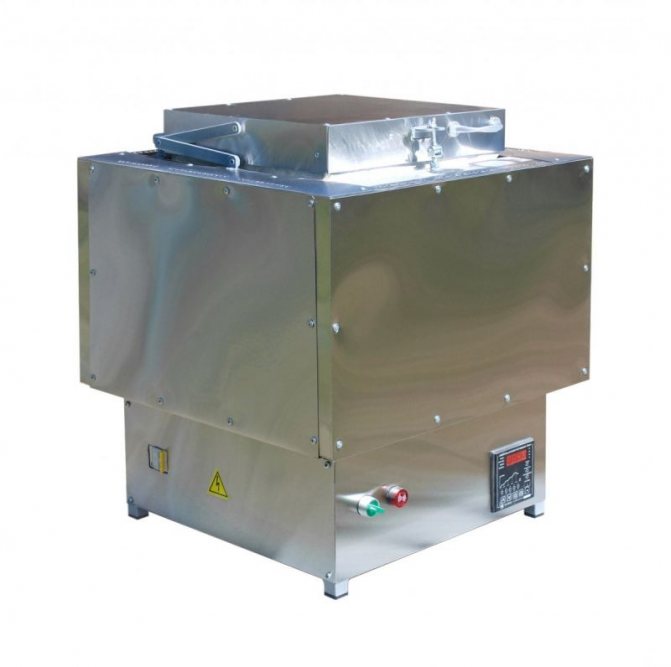
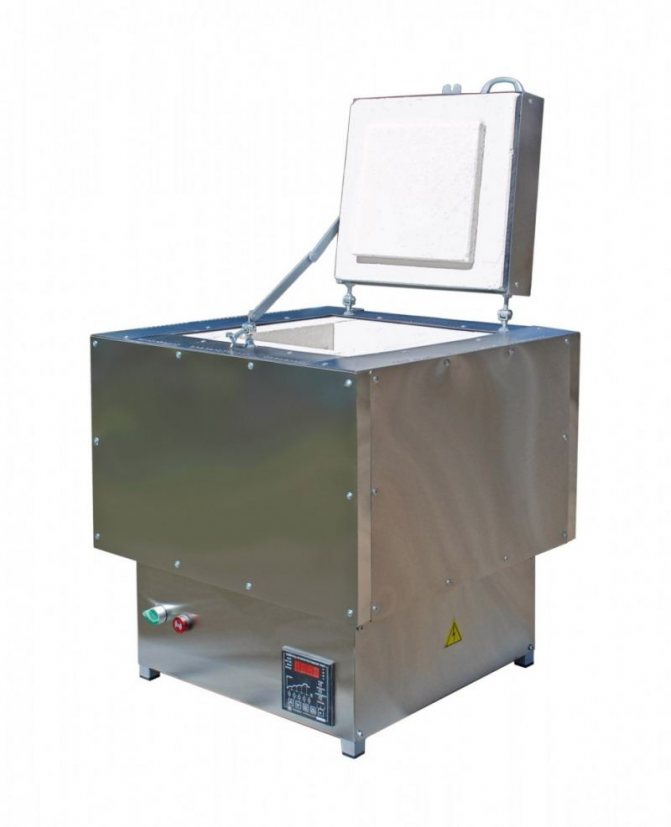
Electric ovens are now very popular. They have a special welded chamber made of metal profiles. Needless to say, it has high thermal insulation, since there are refractory bricks and various fibrous materials here. These ovens are characterized by small dimensions.Often such a design is mistaken for a decorative stove, however, this is not the case. Its small size is associated with a smaller lining thickness. The equipment is equipped with a swing door and high level heating coils. This approach excludes the possibility of deformation of the fired products. The equipment is equipped with a software system and a microprocessor-based temperature controller.
How to choose a finished oven?
The wide assortment confuses even those stove-makers who actually ate the dog, their eyes run up, a lump rolls up to their throats with excitement, one stove is better than another.
The stoves are ceramic, combined, wood-fired or powered, so which one to choose?
Pottery kiln manufacturing technology
"Factory" furnaces, especially for professional purposes, are very expensive (over 35,000 rubles), but craftsmen have learned how to make devices for firing with their own hands. It is worth noting that, according to the type of fuel used, such furnaces can be:
We will only consider the first two, since it will be quite difficult to achieve the required temperature by burning wood. Let's start with electrical equipment. According to the arrangement method, these kilns for firing can be:
- muffle (in them the heating elements are located around a sealed vessel (muffle) made of chamotte material; with the help of such furnaces, Russian schools are often heated);
- chamber (the heating device is located inside).
The second option is more suitable for home-made, since it is rather difficult to build a large muffle on your own, and the heat loss in the muffle structure is high. Let's consider how you can make a chamber furnace.


How to make a tile yourself Technology review
| Various types of dry mix and wet clay | Before starting work, wet clay is deposited in a bag | After the clay dries, its color and mass will change. |
In modern factories and plants, tiles are often produced by pressing and firing dry matter. Responsible for this are huge, expensive pressing machines and special furnaces. At home, this is not the best option, so you will need to use wet clay, which you will shape into any shape.
Briefly, the process looks like this: wet clay is taken, it is shaped, it is dried, fired, glazed and fired again (so that the glaze sets).
Now a little more detail
Before starting work, the wet clay lies in a bag and waits for you to make something out of it. When you start making a tile, it turns into a raw stoneware. While you are molding the tiles, they will dry out a little, and will harden a little by the end of the molding. This stage, while the clay is still wet, is called the hard skin stage.
When your tiles are completely dry, you will find that the clay has become lighter in color. Now we can say that it is at the raw stage. At this point, the tile is already quite hard, but if you hit it lightly, it can crack or shatter. If you leave such a tile to dry in the open air and it gets caught in the rain, then the tile can become limp and turn into a lump of clay. There is no need to be upset about this, because this property of clay is very beneficial. If you've made a bad sample, just toss it in the waste bucket and forget about your troubles. Later, when the clay lies down, it can be processed again and made something new and beautiful out of it.
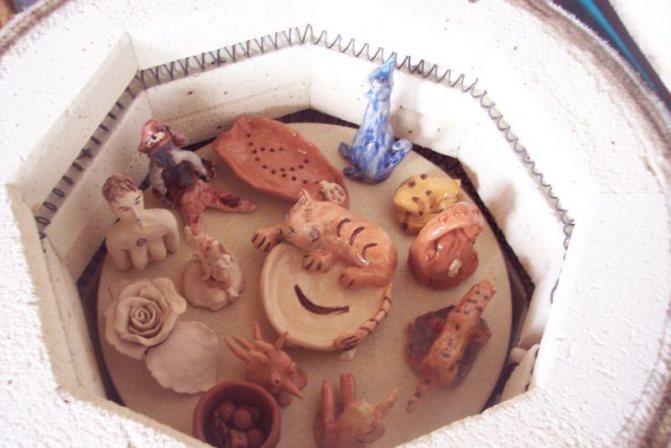
After all the moisture has evaporated from the clay and the tiles have reached a raw state, they are ready to be placed in the oven and fired. What you do next depends on which glazing technique you use; but in accordance with general practice, during the first firing, which is called biscuit, the clay is not specially burned. Depending on the ripening temperature of the clay, the biscuit firing temperature can range from 850 ° C to 1000 ° C. Under these conditions, ceramics remain porous and can easily absorb glaze.
The second (glaze) firing takes place at the temperature required for the glaze to mature.This temperature may be lower - but never higher - the temperature required for the clay to mature; otherwise, the glaze will melt and turn into glassy balls.
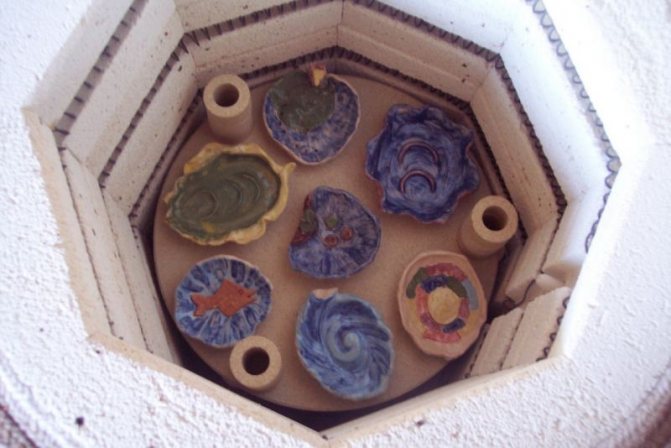
How to fire ceramics?
In order to properly fire ceramics, it is important to observe the temperature regime in the oven. Firing takes place in three stages:
- Evaporation of moisture. Products are heated up to 250 ° C and stand at that temperature.
- Glowing up to 900 ° C in a closed oven. Clay sintering takes place.
- Gradual cooling.
The kilns must not only develop the required temperature, but also allow it to be regulated. The design should be as simple as possible, loading and unloading products - easy.
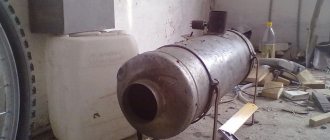
Method two. We make a stove without having a metal case at hand
The manufacturing process in this case is not much different from that described above, but there are definitely some nuances here. To begin with, the working volume of the design below will be about 13 liters. The spiral, as mentioned above, will be able to warm up to a thousand degrees in just 1.5 hours, while the temperature of the outer walls of the device will not exceed 100 degrees. The algorithm of actions should be as follows.
Step 1. First, using a profile pipe 4x2 centimeters (with a square section), we construct a stand for the device. After that we paint the finished stand with enamel.
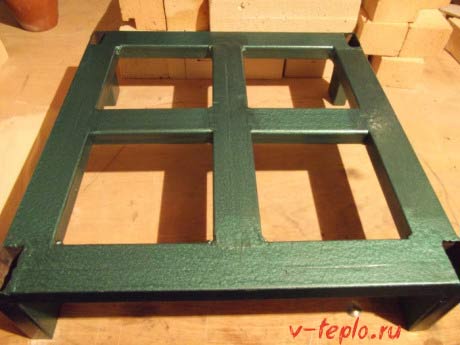
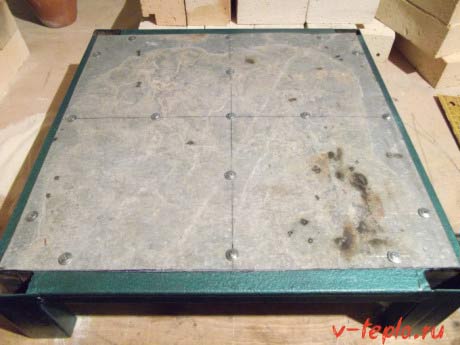
Step 2. On top of the stand, we attach a sheet of galvanized steel (its thickness should be approximately 0.1 centimeters), using self-tapping screws for this purpose.
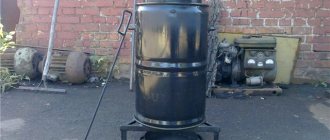
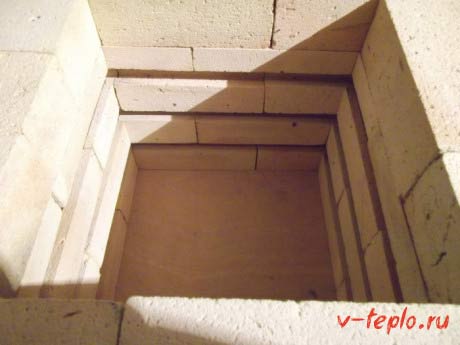
Step 3. We make the walls from fireclay bricks and a special fireplace composition (everything is the same as in the previous version). After the solution has solidified, we make grooves for the spiral.
Step 4. We assemble the bottom of the brick separately, use the same mortar for fastening. Before continuing to work, we wait until the structure is completely dry. Do not forget to wet each brick just before laying.
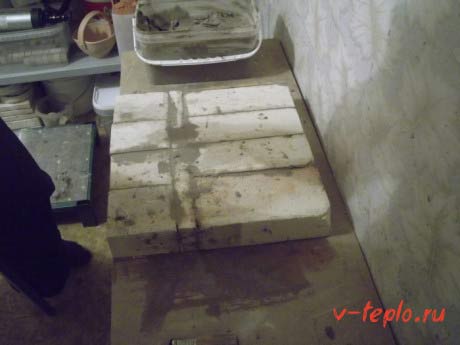
Step 5. On top of the metal base, we lay a thermal insulation layer (we can use the same basalt wool for this). In order to maximize the compaction of this layer, it must be moistened before fixing the brick bottom.
Step 6. We continue the traditional laying of the stove, but try to fill all voids and seams thoroughly.
Step 7. The cover for the camera is traditionally made of fireclay bricks, but at the same time we fasten them together with a metal tie.
Step 8. We put the spiral in the prepared grooves, insulate the structure from the outside with thermal insulation material. Next, we cover all with sheets of galvanized steel, which are cut in accordance with the dimensions of the resulting chamber.
As you can see, this requires knowledge not only in the furnace business, but also in the field of electricity. You can familiarize yourself with another possible manufacturing method from the video below.