How is the heating cable arranged?
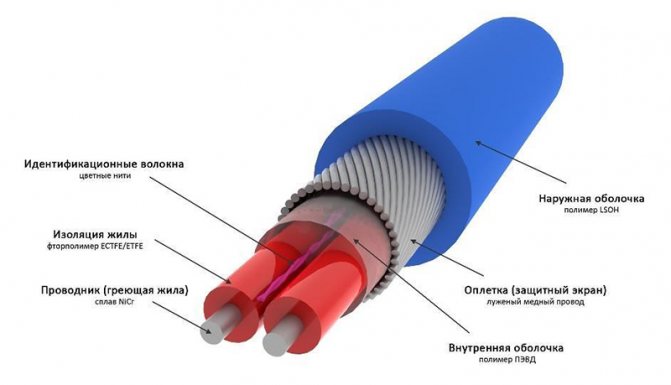
The heating cable prevents the pipeline from freezing due to the electric current passing through it. It consists of a protective, general sheath and an inner core:
- A continuous aluminum or copper layer of material protects the inner core of the cable;
- The main part in the heating wire is the inner core, which creates excellent electrical resistance. It is made of a special alloy;
- The upper sheath protects the entire wire with high quality, made of polyvinyl chloride.
Self-regulating heating cable

Types of heating cables
Plumbing cables are divided into self-regulating and resistive. It is necessary to insulate the pipeline before laying them, since in severe frosts it will be necessary to spend a lot of electricity power, and this threatens with large monetary costs.
Resistive cables maintain the same heat generation at all times, regardless of the outside temperature. A metal conductor in a cable heats up when an electric current flows through it. In order to reduce the cost of electricity during warming, regulators and temperature sensors are installed in the system. When laying this type of wires, it is necessary to ensure that they are not located tightly to each other, as this threatens overheating and breakdown. Resistive cable is divided into single-core and two-core:
- Single-core wires are not always convenient because they are connected to the mains with two ends;
- The two-core wire is good because on the one hand, a plug for a 220 V network is installed, and on the other, a plug.
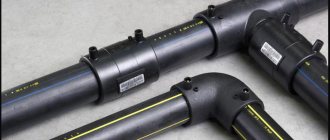
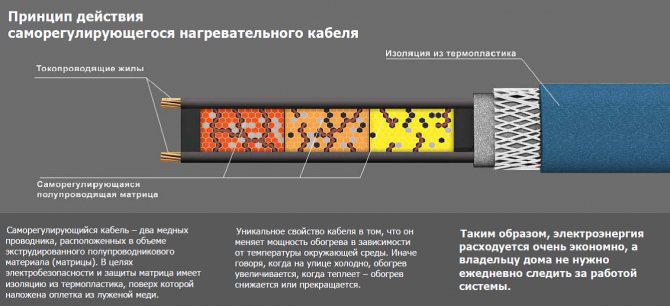
Self-regulating cable
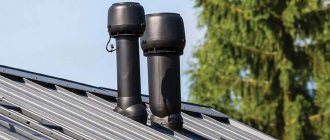
It is used to protect the water supply system from freezing and to maintain the temperature in the hot water system. It can also be used to thaw snow or ice in gutters when building storm sewers.
How does it work
The cable has two copper conductors with a carbon dust polymer resistor in between.
When a voltage of 220 volts is connected, the current passing through this resistor heats it to a certain temperature.
When heated, coal dust expands and its resistance increases. As a result, the load current decreases and the heating power decreases.
The constantly repeating heating-cooling cycle creates a self-regulating effect.
The total load varies along its entire length, depending on the ambient temperature for each section of the cable. That is, if the temperature of the medium increases, then the released power decreases, and vice versa.
Thus, self-regulation prevents overheating of warmer areas. It can be lengthened or shortened anywhere along the route, since the voltage is applied to it in parallel. This capability simplifies on-site cable design and installation.
During installation, do not exceed the maximum power for different temperatures during cable operation. It can be bent with a radius of at least 25 mm and only along the flat side.
The use of a heating cable for any water supply that runs down the street is necessary. But there are many problems associated with this, one of which is fragility. Therefore, very often, when laying pipes in the ground shallowly, they use a gasket inside the pipes.
Very often a cable of this type performs its functions in a very narrow range, and therefore you have to turn it on / off manually.
If you do not connect temperature sensors, then you can do with manual switching on and off of the heating system.And the energy savings with this method of heating control will still be tangible.
The only problem is knowing when to plug in the cable. To do this, there is the simplest way - you need to measure the temperature of the pipe and water in the water supply system or in the well during the onset of cold weather. If both indicators are approximately equal, then the pipe does not need to be heated.
When to turn on the heating is up to you, but it is advisable to do this if there is a large difference in the measurement results, based on the outside temperature.
How to connect the cable?
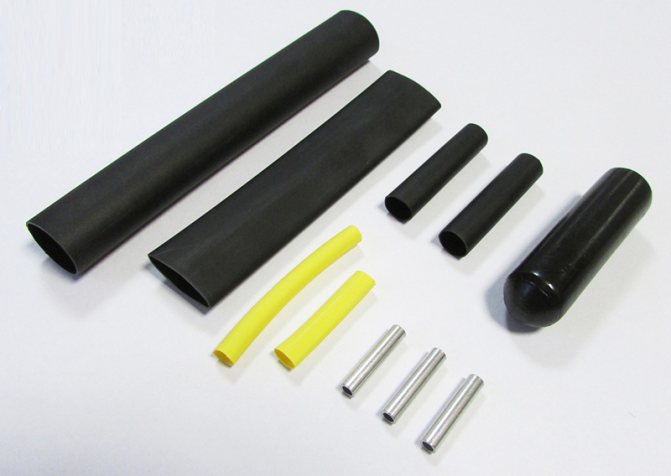
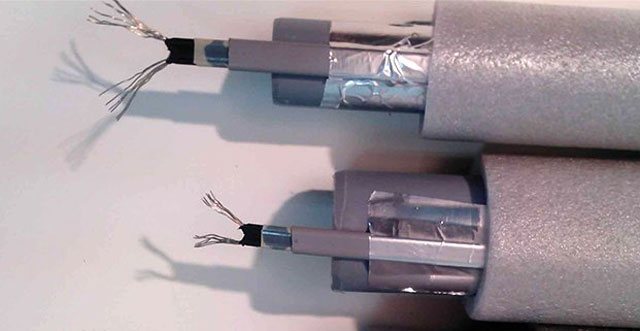
- A cable is threaded into the heat pipe, after which 5 cm of the top layer and 1 cm of aluminum are removed from one side. The emerging wires are cleaned of the insulating layer and separated.
- Pipes are taken a little smaller and put on each wire. Their ends are heated and smoothed to 6 mm, combined, and then clamped in an iron tube.
- The top sheath up to 8 cm is removed from the power cable and unwound into parts. One wire is left long for grounding, all the rest are cut by 3 cm. All wires are stripped to 6 mm.
- The supply and heating wires are inserted into an iron bushing installed in a heat pipe, after which they are heated and strongly clamped.
- The joints are insulated with heat-resistant tape.
- Then use a pipe, wider in size, with which the connection is closed.
Views
If the question of how to choose a cable for warming up communications is being decided, all existing varieties are considered:
- resistive;
- self-regulating.
The first of the options has a simple design. Heating is carried out by means of a single-core or two-core cable. They are covered with insulation: main, additional, shielding. In addition, protection is provided on the outside in the form of a strong shell. The installation of a single-core cable is carried out according to the ring principle: first, it is connected to a power source, then it is passed through the pipe and returns to the beginning.
The single-core design is suitable for external installation: on the outside of the pipe. When such a cable is used for internal installation (through the communication cavity), the risk of overheating increases, which is possible when crossing the turns.
If the product contains 2 cores, the design becomes more complicated. This option contains grounding (additional conductor). It is connected according to a different scheme. In this case, the power supply is connected to one side. The other end of the cable runs along the pipe. Each of the veins performs its own function: one contributes to heating, the second is responsible for the supply of energy. The two-core version of the product can be used for laying inside communications.
The resistive design is inexpensive. Material can only be purchased in a given length. In this case, the resistance will be the same throughout the length of the segment. To determine the temperature, a thermal sensor is additionally installed. However, this element does not perform a heating correction by itself. For this, a thermostat is connected. When the temperature changes to a predetermined limit (upper or lower), the system shuts down. The resistive product has disadvantages:
- limited length, you cannot cut the material;
- there is no way to repair a section that has burned out due to excessive heating; you will have to replace it along the entire length;
- power is not regulated;
- high risk of overheating; when sections of the heating system intersect, the likelihood of this increases when installing single-core material.
Self-regulating cable has a more complex design. It contains 2 cores connected by a semiconductor matrix, thanks to which the temperature is monitored and regulated. To increase efficiency, a shield is incorporated into the structure, as well as multi-layer insulation with excellent strength characteristics.Such material can be used for different purposes, it is distinguished by a wider field of application in comparison with resistive.
The advantage of a self-regulating design is the ability to control as well as change the heating temperature without outside participation. The main function of the semiconductor matrix is to change the resistance of the cable system. As a result, the current strength increases / decreases, and at the same time the power increases or decreases. Another feature of this design is the ability to change the temperature zonally: in areas that have undergone intense heating or, conversely, cooled down.
How to insulate a pipeline?
If the pipe needs to be buried in the ground, good insulation will be needed. You can insulate it with expanded polystyrene. It has ideal thermal insulation properties, high density, which can withstand heavy loads, is not afraid of moisture. Created in the form of pipes of various widths in the form of a shell. Also, a rigid plastic sewer pipe is suitable for this; it is worn on top of a foamed polyethylene insulation. You can use foam rubber if the pipe is located in the sewer.
Can not use!
- Mineral wool is afraid of moisture, getting wet, it loses its properties, and it is very difficult to remove moisture around the pipe. After freezing, it crumbles into small particles.
- But it is also impossible to use heaters that lose their thermal insulation qualities under the influence of loads.
Self-regulating pipe heating: installation methods
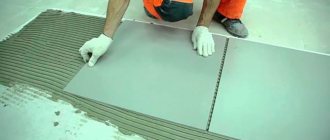
Heating of the pipeline with a cable from the outside is produced as follows: the cable is fixed at the bottom of the pipe or twisted around the pipe in a spiral manner. To secure the cable, use aluminum tape and wrap it around the entire heated pipe section.
To increase the efficiency of the heating cable, it should be used in combination with waterproof insulation (for example, made of foamed polyethylene).
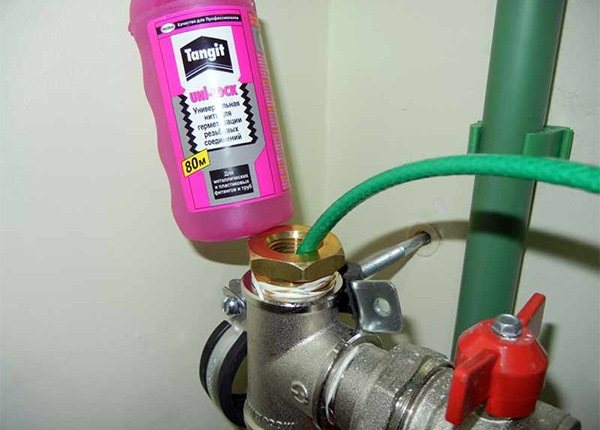
The second way is insulation from the inside - suitable in cases where access to the water supply is difficult. A saddle must be installed before inserting the heating element into the pipe. After installing it, we screw in the pipe insert and through it we introduce the cable into the pipeline as required by the instructions.
Important limitation: insulation from the inside can only be used if the pipe diameter exceeds 20 mm. For thinner pipes, refer to the external insulation method.
Installing a thermostat
To make less money spent on heating the water supply, you can install a thermostat. By setting the temperature of +5 degrees on it, it will automatically turn off after reaching this line, thereby several times reducing the cost of heating the water supply. Since the heating cable has a certain service life, which is measured in the number of working hours, it will last much longer.
The thermostat is connected to the electrical panel in the house using a circuit breaker. The heating cable and temperature sensor are connected to the connectors on the thermostat housing. There are markings on the body that show what is connected to what. If there is no marking on the purchased thermostat, it is better to replace it with another one.
Installation methods
There are several ways to connect the heating cable: internal and external. In the latter version, the wire is fixed along the pipe, in the first, it is wound inside. Both methods are actively used in private construction.
Outdoor method
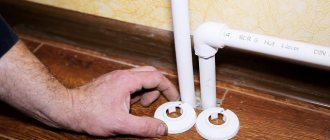
The linear version of laying the wire along the pipe is quite easy. The cable is secured on one side with heat-resistant fiberglass self-adhesive or plastic ties. The holders are fixed with a distance of 40 cm. It is prohibited to use metal fasteners.Calculating the length of the wire is very simple - it is equal to the size of the pipe that needs to be heated.
For pipes that are buried in the ground, the wire is not laid clearly from the bottom or top, but slightly offset by about 4 or 8 hours.
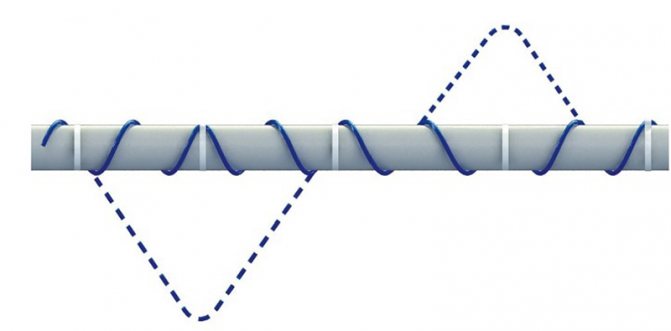
In addition to linear installation, spiral installation is often used - the wire is wound along the required pipe length with the same distance. The advantage of this installation is the maximum contact with the pipe, the disadvantage is the high consumption of the cable.
The distance between turns can be changed taking into account the conditions. For example, for zones that are exposed to significant freezing, the step is reduced, so the entire surface warms up as much as possible.
The wound version is best suited for large cross-section pipes - drainage, sewer, but it is also used for heating the water supply system.
Internal option
The internal installation option is not used for all pipes, but only for products with a diameter greater than 45 mm. In pipes with a smaller cross-section, the wire can partially block the water flow.
It is rather difficult to equip a large pipe with internal heating, but for zones of 2-3 meters this is the best option. The easiest way is to run the wire in vertical sections. The process is carried out using a tee and a seal sleeve to prevent the lace from slipping off.
In certain situations, internal installation is more expedient than external, for example, to replace or repair individual sections. It is very easy to insert and connect the finished system, it is much more difficult to assemble it.
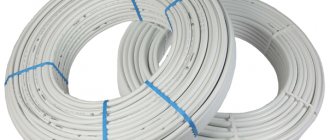
DIY cable making
Using some materials, you can make your own heating cable. For this, a telephone wire under the number P274-M is suitable. It is strong enough, tough, has a suitable diameter, and thanks to its good insulation, it can be used in a humid environment. It will lack self-regulation, but if it is laid outside the pipeline and rarely connected, for example, in the country, then this will be enough.
The telephone cable is divided into several separate wires, one of which is folded in half and then twisted back. With the help of a sealing gasket from the water supply hose, a sealed entry is created at the open end of the wire. It is fixed with a connecting pipe with wires running inside.
Fill the connecting nipple with epoxy glue, crush it a little. Then tighten with a union nut, so the connection will be much tighter.
Outdoor cable
When laying the heating cable on top of the pipe, it is not dispersed into separate wires. It is enough to connect the heated part of the pipeline from the reverse side with wires, not forgetting to insulate all connections well. In this case, the cable is carefully fixed on the surface. This method of external heating is also well suited for sewer pipes.
- First, the pipe with the heating wire is wrapped with foil;
- To tightly press the wire to the surface of the pipe, wrap it with tape from above;
- Then they are twisted around with mineral wool.
Frost protection of pipes
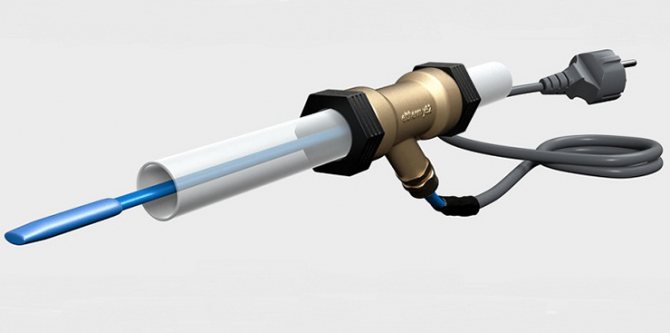
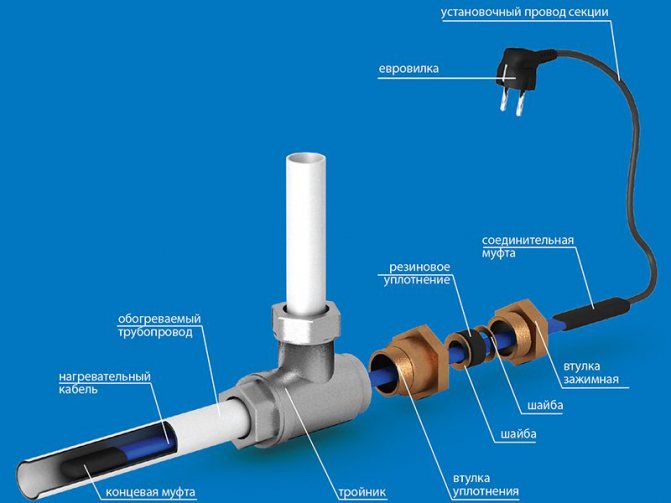
The nuances of connecting the cable inside the pipe
When heating water supply networks, internal installation is often chosen. For these purposes, a conductor is used, enclosed in an additional food shell that does not emit toxins and is completely safe for humans.
The heating system is introduced into the pipe, most often the water supply. A tee is installed at the point of its entry, for which the water supply is temporarily interrupted
Next, we will consider how to properly connect and connect a heating cable designed to heat the pipeline from the inside. The process itself at many stages is almost identical to that discussed above.
The work includes the following steps:
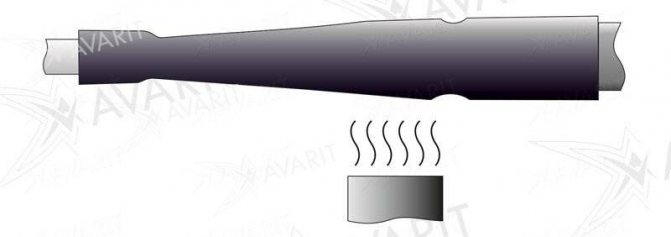
- Isolation of the free end.
- Fastening the conductor and sealing the entry point.
- Installation of external thermal insulation and protective casing.
- Electrical connection.
- Installation of additional devices - thermostats (if necessary) and automatic devices.
The second step is different - so let's take a closer look. It is necessary to place the prepared cable inside the pipe using the lead-in kit.
But it is advisable to perform step number 4 before the conductor is placed in its permanent location. For what it is necessary to connect the supply wire with the heating one.
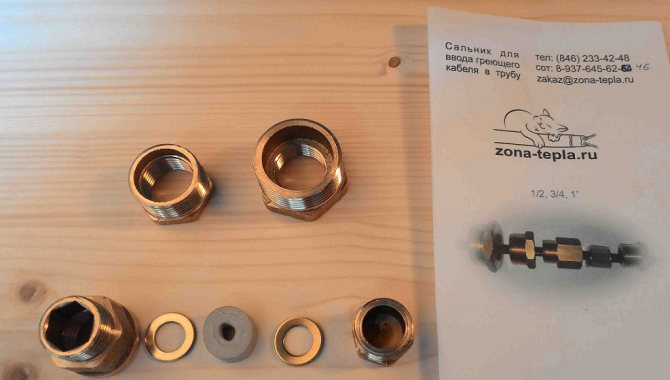
To enter the cable, you will need a pass-through kit, which comes with detailed instructions for its use. Putting on the gland is easy, the main thing is to do it before the end termination and tighten the fastener firmly to ensure tightness
The following article will acquaint you with the rules and features of laying the heating cable inside the pipe, which we strongly advise you to read.