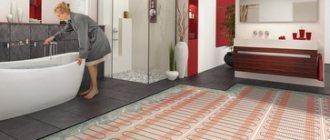
In this article, we will look at how to make an electric heated floor under the tiles with your own hands. A heated electric underfloor heating system can be a great addition to the main heating system in your room. It can be used in cases when, for one reason or another, the main main heating does not work. In addition, a heated electric floor can also be an independent means of heating rooms, which will allow you to re-approach the design of the room, getting rid of conspicuous radiators.
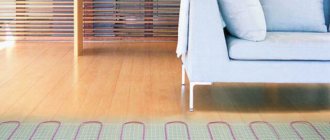
In any case, a heated electric floor creates a heating zone in the immediate vicinity of the floor. This is especially important in areas where you have to step barefoot on the floor, such as bedrooms or bathrooms.
In addition, the heated electric floor will be indispensable in children's rooms, because the child spends a lot of time playing directly on the floor.
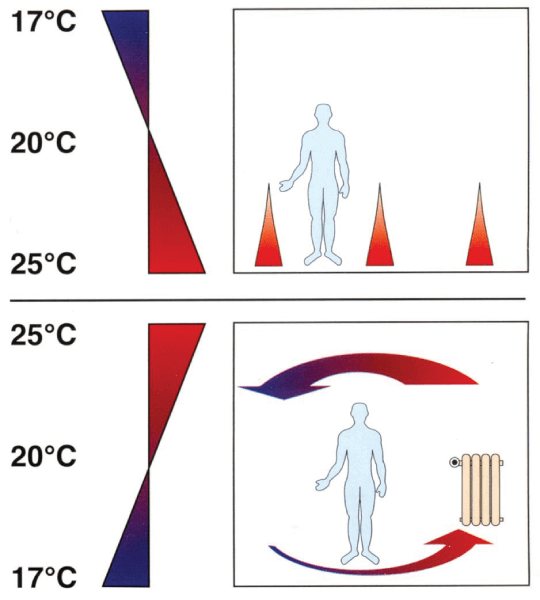
Difference between radiator heating and underfloor heating
You can install the heated electric floor heating under any final floor covering, including under the tiles, for example, in the bathroom.
The construction of an electric underfloor heating is possible with your own hands, without the involvement of third-party specialists.
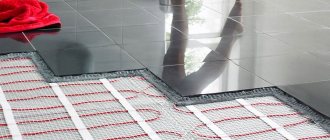
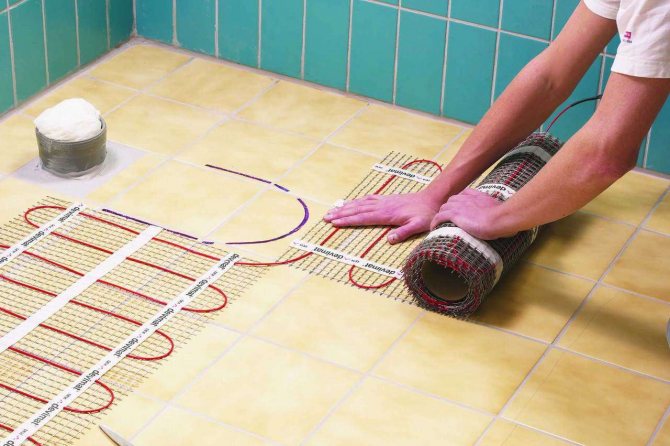
Now on the market, ready-made sets of electric underfloor heating of the following main modifications are offered for sale: infrared film and from a heating cable, which can be assembled into special mats.
Laying tiles on a warm floor
The warm floor under the tiles, undoubtedly, brings comfort and coziness to the room. The installation of underfloor heating is most often carried out in the kitchen, as well as in the bathroom, and the advantages of its use are that it is absolutely not susceptible to moisture and all kinds of pollution. With all its tangible advantages, ceramic tiles also have disadvantages, the main one being that they are cold to the touch. It is generally not recommended to lay warm carpets with warm pile in bathrooms and kitchens. What to do in such a situation? Obviously, stepping barefoot on a cold floor is uncomfortable. In this case, both you and your child can get sick. The emergence of such questions led to the fact that heated floors were invented.
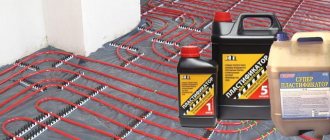
To date, they have come up with a lot of options for warm floors: • Water; • Film; • Electric. Before installing each of them, be sure to cover with a special heat-insulating material. After that, a sand-cement screed is carried out, and already on top, on the mortar, the necessary flooring is laid - ceramic tiles, wooden boards, linoleum or any other. Heat sources in these cases can be water, infrared floor film, or an electric cable.
Heating system options for ceramic tiles
There are at least 3 electrical floor heating systems. The table describes their differences.
| Electric floor | How to work with the structure |
| Cable | Lay the cable on the prepared surface, fix it and connect it to the system |
| Reinforced mesh cable | Lay out the finished mesh on the surface, connect it to the electrical system of the house |
| Film | Lay the film with heating elements on the floor, and lay the tiles on top |
The film is laid on the surface in a minimum time. All that remains is to connect to the electrical system of the house.
For the effective use of the "warm floor", a full-fledged construction device is required.Its task is to direct heat upward and minimize losses. An important part of the "pie" is a properly selected insulation.
How to properly install a warm floor
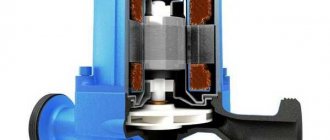
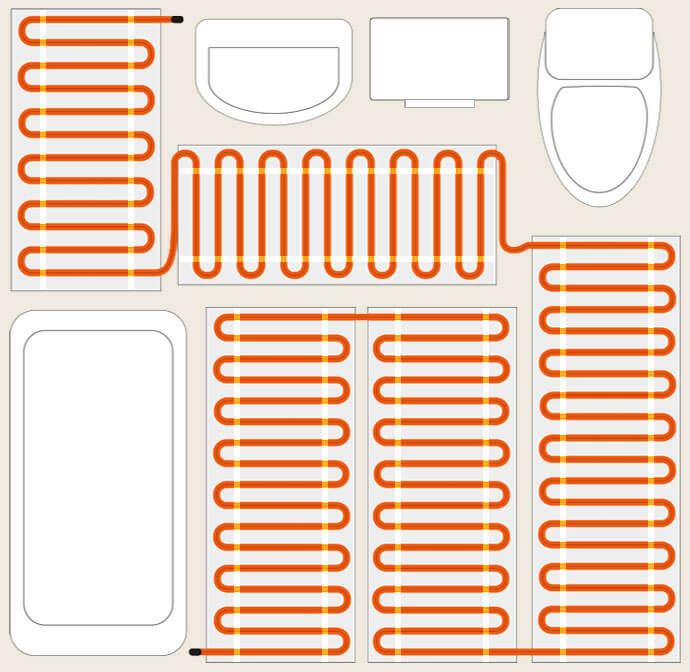
If you plan to cover the floor with ceramic tiles, electric heating mats will be the best option for underfloor heating. Structurally, it is a fiberglass mesh, to which shielded heating sections are attached. These heating sections are distinguished by increased reliability, due to the fact that they are produced according to special technologies - they are connected by a clutchless method, by connecting cold and hot parts. Underfloor heating is installed, as a rule, in several stages: 1. At the first stage, it is necessary to draw up a diagram in which the heating mats should be correctly positioned. When doing this, it is worth considering the fact that it is unacceptable to place electric heating elements in the places where furniture is located. 2. At the second stage, it is necessary to prepare the floor surface - remove foreign objects from it, debris, if the surface is uneven, it should be leveled. 3. At the third stage, you have to lay the heat-insulating material, this will lead to a decrease in heat losses. 4. At the fourth stage, a cement screed is installed, which is the basis for a ceramic tile covering; 5. After that, at the fifth stage, it is necessary to lay the heating mats, according to the scheme that you created earlier. You will need to install the thermostat and connect it to the mains. In general, a warm floor consists of the following electrical elements - a heating mat, a thermostat, a temperature sensor, an RCD - a residual current device. It happens that in the process of work a new task arises - the cut of the fiberglass mesh. This work must be done very carefully, without touching the heating electric cable. 6. To test the system for operation, the electrical wires are connected to the network. If you see any malfunctions or inappropriate results, then this is the best time to fix something. In the event that you complete all the work, improving or replacing something will be certain difficulties. To make adjustments, the entire floor will have to be dismantled. 7. At the seventh, finishing stage, you will have to install the mats using ordinary tile adhesive. When doing this, make sure that the layer does not exceed seven millimeters. An interesting feature that you should know is that you should turn on the installed underfloor heating no earlier than after 20 days, since you must wait until the glue is completely dry. When using underfloor heating, we advise you to carefully monitor the temperature control, and also make sure that your floor covering is practically in its original state and is not damaged.
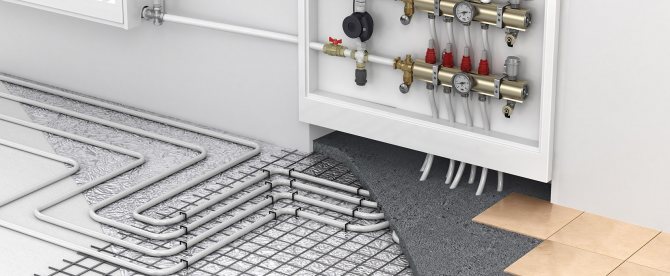
Installation of a water floor is carried out in a specific sequence, just like an electric floor. However, the principle of operation of these two floors will be very different, since it lends itself to completely different laws of physics. Here's one of the differences - an electric cable has the same temperature throughout its entire area, while a water cable heats up a little differently. The highest temperature will be observed in the place where the water flows from the chamber to the floor heating system. When water circulates, its heat is lost and when it is returned to the boiler, it is already in a practically cooled state. [/ Vc_column_text] [/ vc_column] [/ vc_row]
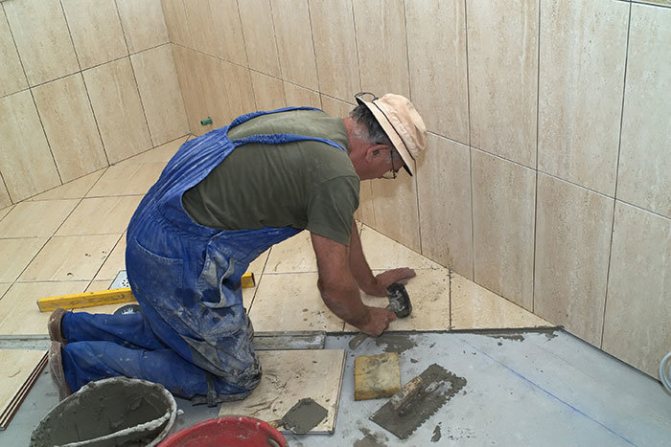
photo tile stacker
The maximum temperature will be at the point where water from the boiler heating chamber enters the floor heating system. Circulating, the water loses its heat, and it returns to the boiler, already cooled. Hence, it turns out that the temperature of the coolant differs at the outlet and inlet.If you install the water floor incorrectly, this will significantly reduce the overall efficiency of the heating system. It turns out that the independent installation of such a floor must necessarily be carried out only after careful acquaintance with its technological schemes, it is also advisable to study the video and instructions.
Before you decide to install a water floor, know that there are two possible ways to install it: • An installation system that involves the use of concrete: • An installation system that is a flooring (it is also called a polystyrene foam or wood system). The installation system, which is the use of concrete, is more economical. For this reason, it is especially popular among consumers who prefer budget repair options. The sequence and principle of its installation is absolutely similar to the installation of a warm floor, which uses heating mats. Compared to the electric cable of the pipe, the water floor is absolutely immune to overheating. However, it must be mounted in accordance with the specified scheme, without losing the sequence, in addition, it must be completely free of fractures and bends. In this case, special fittings with a mesh size of about 15 cm, as well as a wire diameter of five mm, are quite suitable for you. Why are these dimensions minimal? Because smaller fittings can simply not withstand the high load in the form of a warm water floor. During installation, there is such a parameter as the laying step, it should not exceed 30-40 centimeters, in general, the water pipes practically do not overheat. If you make the distance between the pipes even slightly smaller, the efficiency of the entire heating system will significantly decrease. In addition, the likelihood that various low-temperature areas of the warm floor will appear over time is not excluded. To secure the pipes, you need fasteners such as clamps and dowels. In order to lay the piping of the water system, you can use various methods: • Spiral; • Spiral way, in which the center is shifted; • Parallel, or as it is also called the "snake" method; • Meander or double snake method. When choosing any of the methods, consider facts such as the size of the room, the heat loss that occurs in the rooms, what floor you are on, the number of window openings and exterior walls, the number of doors, and so on. You should also be aware that pipes with the hottest heat carrier are laid exactly in those places where the greatest heat losses occur. There is also an unacceptable pipe length, any length over 100 meters! If you make the pipe significantly or even slightly larger, the effect of using the underfloor heating will significantly worsen. To calculate the required number of pipes, you need to arm yourself with the following building standard: for each square meter, you need 6-7 meters of pipe. The return and supply ends of the pipe are led out into a manifold cabinet, which is mounted in a specific niche in the wall. This cabinet can be made open, or as it is also called invoice. Which method you use in this case depends entirely on your preferences. The pipes must be routed to a manifold cabinet, and the main heating circuit must also be connected to the pipes. After that, valves are mounted, which are necessary to shut off the coolant, as well as temperature regulators. You can use a special electronic valve to regulate the temperature. Its advantage is that it reacts to signals from a temperature sensor and controls the room temperature autonomously. Before the screed is poured, a check is made for the quality of the system as a whole, to prevent possible leakage of the coolant.Using a floor mounting system, you can completely eliminate the creation of a screed based on cement and sand. Thus, you will be able to significantly speed up the process of putting the warm floor into operation, as well as reduce the load on the supporting structures of the building.
ceramic tile stacker
Installation technology
Laying a warm floor with your own hands requires knowledge of the technology for carrying out installation work. With all the variety of electrical systems, there is a sequence of work that must be performed:
- The heating element (cable, thermomat) is placed on a flat, clean surface. It is not recommended to lay heating cables or heating mats on wooden substrates (plywood, chipboard), this will lead to heat loss.
- Thermal insulation works.
- Installation of heating elements.
- Connection to the power supply system.
- Commissioning works.
- System testing.
- Screed device.
- Installation of floor material.
These are the main stages of the technology for installing electric underfloor heating with a tiled floor. The content of each stage when laying different systems will differ in volume and content, taking into account their specifics.
Preparation of the base
Preparation of the base for the tiles consists in cleaning the surface from protrusions, sealing cracks and removing dirt and dust from the surface. Leveling is carried out using a concrete screed or using a self-leveling floor device, which significantly reduces the time of work.
Self-leveling floor hardens faster than concrete screed. But if it is necessary to lay a concrete screed, then further work can be carried out only after the concrete has completely dried. It is better to grind the walls for electrical wiring after leveling, but before starting the installation of thermal insulation.
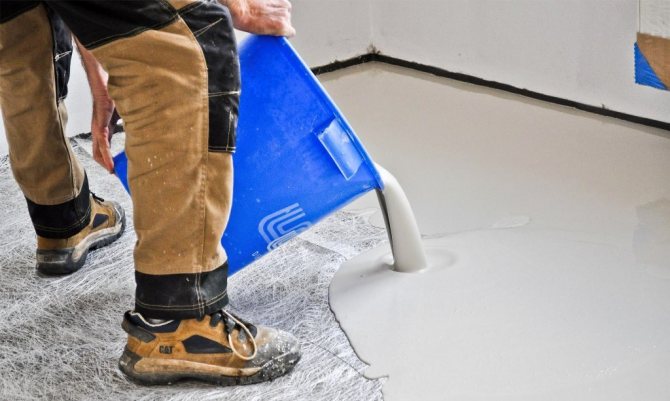
Pouring the self-leveling floor
Installation of thermal insulation
When installing a warm floor, polystyrene or expanded polystyrene, foamed foam or penoplex are most often used as a heat-insulating material. Depending on the condition of the floor, the thickness of the selected material, work is carried out before or after the preparation of the base. If thermomats are used as a heating element, then they can be laid directly on the penoplex, laying a thin layer of thermal insulation.
If there is a thick heat-insulating material at hand, then it is laid before the base is leveled. Thin thermal insulation is placed only on the prepared base of the floor.
When installing thermal insulation, it is necessary to observe the distance from the wall, since the linear expansion of the insulating material must be taken into account.
The thickness of the insulating layer can be from 20 to 100 mm. The edges of the installed thermal insulation are fixed with a damper tape, it compensates for linear expansion. It would be quite useful to make waterproofing of the floor surface before the start of thermal insulation work. When using foil insulation, it is laid with a reflective surface towards the room.
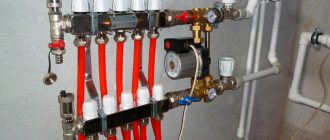
System design features
The technology for laying cables and heating mats is described in detail in the accompanying instructions for ready-made kits. Different systems have their own characteristics. So when laying the cable, first of all, it is necessary to check its performance by measuring the resistance. To do this, you need a regular tester.
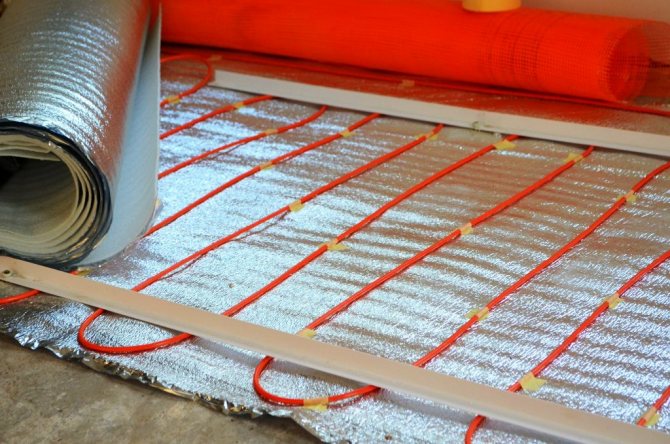
In order to give a certain rigidity (strength) to the system, you can use a metal mesh, securing the cable to it with plastic ties. It is not recommended to tighten the ties tightly: the heat conductor should walk freely on the mount, taking into account the linear expansion during heating, but the main thing is that with such a mount, you will evenly arrange the turns over the entire area. The laying is carried out at a distance of no more than 100 mm between turns or rows and no closer than 150 mm from the wall.
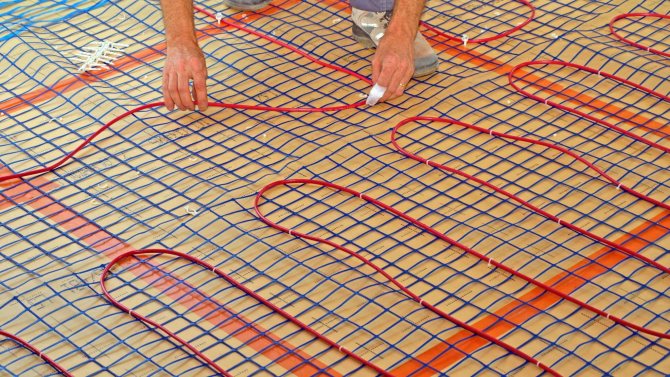
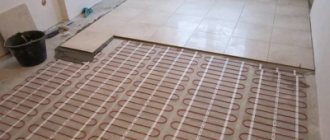
Laying the underfloor heating cable on the grid
Installation of heating mats is easier.They can be laid in a straight line, at different angles, bypassing decorative projections (sill, podium). To do this, cut the base - fiberglass - and unfold it at the desired angle. The distance between the sections can be from 50 to 100 mm, and they can be fixed with tape or any other adhesive tape.
Before installing the heating mat, you must pick up the tester and check the electrical resistance of the heating element and its serviceability.
Checking work
Before laying the screed on the heating element, it is necessary to conduct electrical tests of the structure you have assembled again. Chopping a concrete screed in a shower room or on a balcony when it turns out that the system is inoperative is a completely thankless task. When checking the electrical resistance of the heating element of the system, the permissible error from the declared passport data should not be more than 10%.
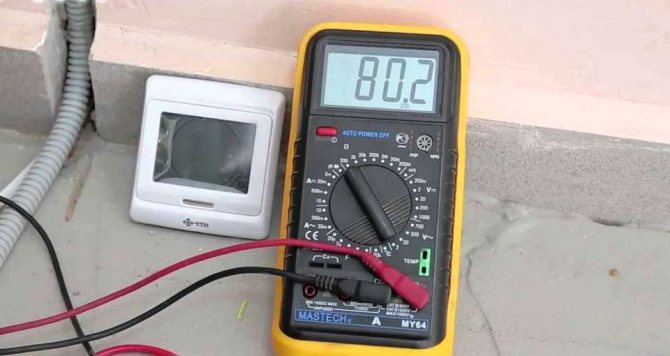
Measuring the resistance of a heating element
It would not be superfluous to check another parameter of the heating component of the system - insulation resistance. You can measure this parameter yourself using a megohmmeter or invite an electrician. After that, temperature control and control devices are installed.
When installing the electrical system, it is necessary to have grounding and protective system shutdown devices (RCD), which will work when voltage appears on the floor surface. There is an opinion that the RCD is installed exclusively in wet rooms (in the bathroom, shower, bath), but the electric potential that is on the floor does not care where it is, but it can harm the health of household members.
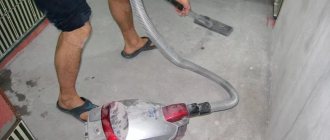
Screed
The screed device is a mandatory stage in the installation of the underfloor heating cable system.
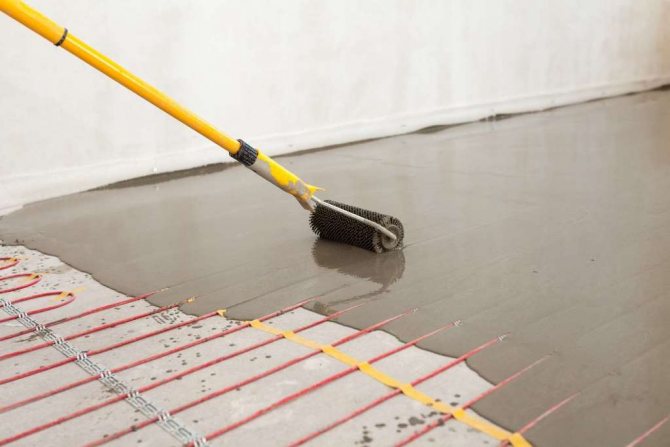
Underfloor heating screed
It is forbidden to turn on the heating element until the concrete screed is completely dry. In this regard, the launch of the system into operation may take a month. The screed is made of sand-concrete mixture in a standard proportion:
- 1 part cement;
- 2 pieces of sand;
- from 4 to 5 parts of fine gravel;
- a small amount of water;
- synthetic additives for elasticity.
The thickness of the screed varies from 30 mm to 50 mm and directly depends on the thickness of the heating cable. The thicker it is, the higher the screed. And this is another reason to think about which floor heating system to choose. For example, when installing heating mats, the screed is either not used at all or its thickness is up to 30 mm, and the best option is a screed using an adhesive base (up to 30 mm) for laying tiles.
It is important that no air bubbles remain during pouring, which, when dry, can damage the heating elements.
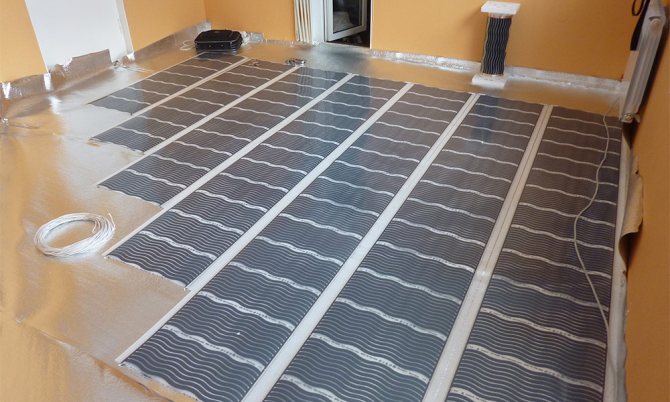
What is Infrared Tiled Floor
Infrared radiation is responsible for floor heating. Its main advantages are that by radiating heat, it is absolutely harmless to health. In addition, the infrared type of floor is characterized by high efficiency, as well as radiant heating. For this reason, this floor is much more economical than traditional floors, by about 15-20 percent. To lay this type of warm floor under the tiles, you will need: • Perforated film; • Insulating tape; • Instruments; • Two types of adhesive tape: bituminous and painting; • Wires; • The foil substrate, that is, the film that covers the foil, is not electrically conductive. The installation of the floor is divided into the following stages: At the first stage, the surface is prepared: debris is removed, it is necessary to mark the area planned for laying the film, and everything must be carefully primed. The foil backing is laid in such a way that the location of the foil is on top. According to the correct technology, the substrate is placed in stripes, which must necessarily coincide, in width.Craftsmen recommend doing so that the length of the stripes is the same as the length of the room. The cut should be in a place where there is no graphite layer.
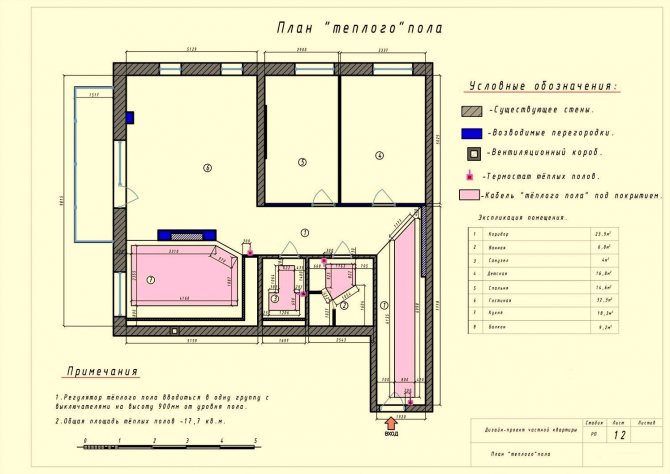
Underfloor heating scheme
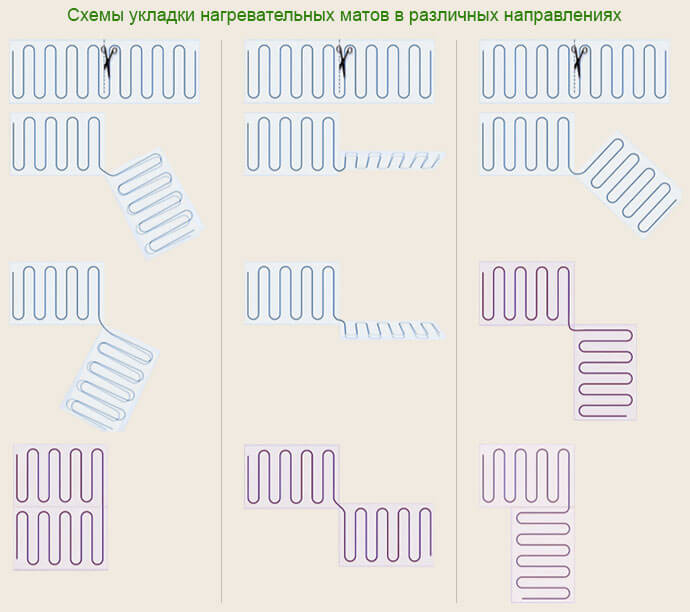
Underfloor heating scheme
Warm floor scheme
Before laying the cable, you need to properly prepare the floor surface: remove all unnecessary items and furniture, dismantle the old flooring, clean everything of debris and level the floor with a cement screed, if necessary.
If necessary, you need to conduct a separate wiring for the warm floor. You should also decide where the thermostat will be located to adjust the floor temperature, and prepare a place for it in the wall. Modern thermostats can also maintain the required temperature in automatic mode, depending on the time of day, which saves energy consumption.
How to stack cut film
With the correct technology of work, you should make sure that the copper contacts are at the bottom, while the matte surface should be on top. The contacts must be turned to the wall, in the place where the thermostat is planned to be placed. In the next step, you have to cut circles in the foil backing that coincide with the holes in the film. These works are carried out very carefully in order not to damage the ferrite layer. Having done and checked all this, you will need to attach the copper clamps to the film. For these purposes, you will need pliers, or a hammer, while the copper clamps must be tightly clamped on the conductors. After that, it is necessary to carefully check the reliability of the contact. In order to qualitatively fix the connection points of the wire, bitumen tape is used, so that the contacts do not get into a humid environment, and also so that the metal does not appear.
You may be interested in an article about porcelain stoneware steps. It is quite complete and interesting.
Installation rules
So, the place for the thermostat has been selected. The surface, including the screed, is prepared. According to the scheme drawn up by our own golden hands, the required amount of materials has been determined. Now you can perform the arrangement of the layers of the cake.
Cable floor installation
The device of the pie looks like this:
- waterproofing;
- insulation;
- foil. The thickness of this material must be at least 14 microns. In this case, the thermal conductivity of the foil will be at the level of 0.049 W / mK;
- grid. With this layer of cake, it is quite easy to lay the cable and fasten the coils to the cells.
Fix the elements of each separate layer with construction tape. Now you need to lay out the cable on top. The first turn from the wall should start at a distance of at least 5 millimeters. The pitch between the turns can be from 15 to 25 centimeters.
Installation of the film floor
You need to lay out the finished film with your own hands. Connect the electrical wires, connect everything to the thermostat. It is worth making sure that its replacement is done without destroying the screed.
Thermostat. Its connection to the system
The technology requires that the heating cable is connected to the thermostat and then to the electrical network. The required cable section is easy enough to find out based on the following information:
| Current strength | Maximum power | Cable cross-section (copper) |
| 19 A | 4 kW | 1.5 m2 |
| 27 A | 5.5kw | 2,5 m2 |
A section of 1.5 m2 is enough for heating a 20 m2 floor. However, a more powerful cable will last longer.
How to install the film correctly
It is possible to place the film only in some, far from all, areas. When placing it, make sure that it is not in the places where the furniture is installed. In order for a warm, comfortable temperature to prevail in the room, you can install the film on an area of seventy percent of the entire room, and this will be quite enough. After the film is laid, you will need to attach it to the foil backing. For these purposes, you can use molar or thin double tape.After that, in order to make the installation of thermal sensors, next to the place where the thermal regulator is located, a small piece is cut in the foil substrate and a groove is made. This sensor is installed under the film. The distance between the sensors must be at least one cm in order to be able to install the sensors. After that, using foil tape, no matter where on the substrate, you need to install a ground wire. For fixing the backing sheets, ordinary foil tape is also used. Next, you must make a wire connection to the grounding pin that is in the outlet.
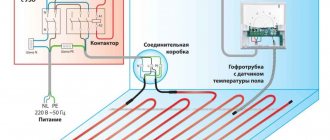
Electrical connection
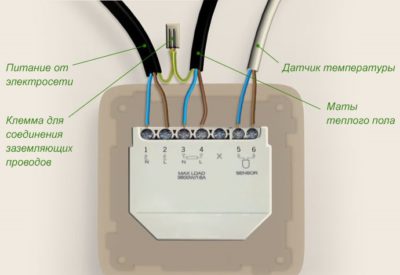
Diagram of connecting the cable for underfloor heating to the network
To connect the electrical elements laid in the heated floor installed under the tiles, you will need to allocate a separate power line. It must be protected with a circuit breaker, for reliability to include an individual RCD in series with it. Before starting electrical work, you should decide on the connection area for the warm floor. To do this, you need to select in a convenient place on the wall a site for installing a thermostat, to which the power supply line of the heating system is connected.
In rooms with high humidity, the thermostatic control unit is moved to another room or corridor, where there is free access to it.
A control unit with a thermal sensor is purchased separately, only in rare cases this device is included in the delivery set. In this case, as a rule, there are no difficulties, since all blocks have standard dimensions and are easily mounted on a standard socket. The advantages of this option include the ability to choose any sample you like from the assortment offered by the market. It can be the simplest electromechanical model or a modern electronic control module with the option of programming the operating modes.
How to install a thermostat
As a rule, experienced craftsmen advise placing the temperature controller near the electrical wiring. In order to make the correct connection of the temperature regulator, carefully study the instructions. Connecting the sensor to the timer is as follows: • The temperature control sensor (red wire) is connected to the sensor connector; • Emergency shutdown sensor (black) - connected to the sensor 2. In the next step, you will have to connect the temperature controller to the mains. This must be done in order to check the correct operation of the system as a whole. If you did everything absolutely correctly, after one minute, you should already feel the heat coming from the film, and each of the installed modules should be warming up!
How to install floor tiles on a warm floor
Take a regular mounting mesh, which has medium-sized cells, and secure it to the floor in different places using masking tape. After that, you can start laying the tiles. When your glue starts to set, never turn on the heating film. Next, lay the tiles using standard technology, you can read about how to do it correctly on the pages of our website. We wish you an interesting reading. Hopefully laying tiles on a warm floor will take place with your participation without incident! Happy repairs!
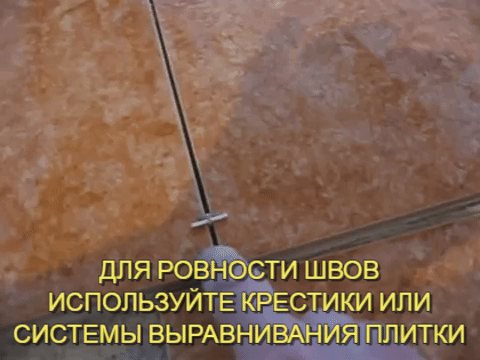
Our online store is pleased to offer you a wide range of tile leveling systems. We implement these tools in three flavors - DLS, SVP and Litolevel. All of them have excellent factory quality, are manufactured in modern factories, on innovative equipment, using the latest technologies in this area.Their main positive characteristic is high strength - they do not bend and break only in special places, as required by the technology. Another product sold by our company is 3D crosses, which help to make perfectly straight seams. If we compare them with systems, then they are functionally weaker, since leveling systemsadditionally help to ensure a perfectly flat surface during installation. The positive thing about the systems is that they are relevant for both professional bricklayers and ordinary beginners. Professional bricklayers prefer to use leveling systems , since these tools significantly accelerate the speed of work, two to four times, thereby they make a double or even triple rate in one working day and, accordingly, earn more. Beginners use tile leveling systems, as they help to lay the tiles with high quality, while not requiring any specific skills.
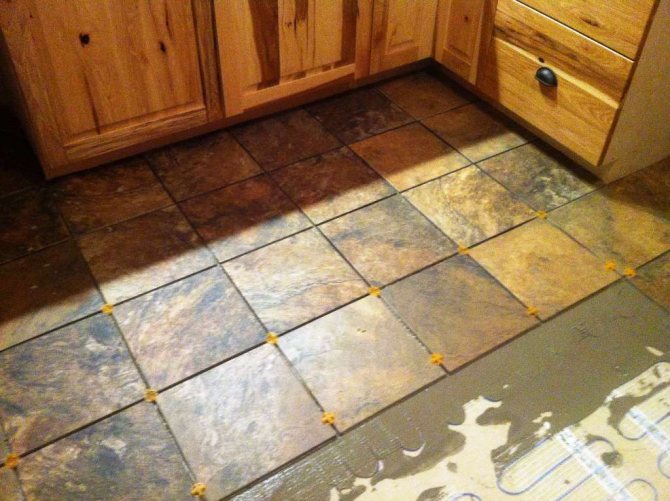
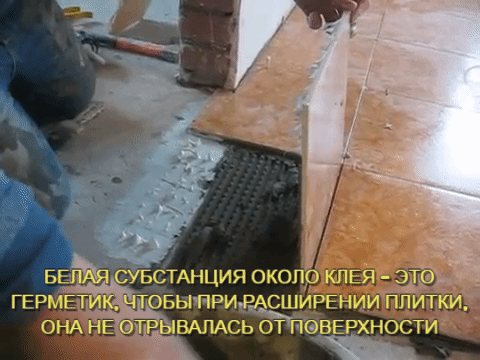
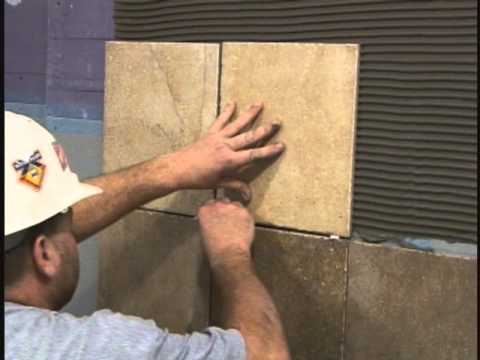
We lay the tiles
Tiles are laid directly on a layer of tile glue, or on mats pre-filled with a screed.
The thickness of the screed should not be less than 2 cm. If chipboard, plywood, etc. are used as a substrate, then they are not suitable as a basis for laying tiles.
The mat is covered with a layer of tile adhesive. If the room is humid, then a small layer of glue immediately goes, then a layer of waterproofing and glue again.
Preference should be given to special adhesive mixtures designed for warm floors, they have better elasticity.
The adhesive is evenly spread using a notched trowel. In this process, only plastic combs are used to avoid damage to the cable.
Next, tiles or porcelain stoneware are laid on the glue, leveled. The thickness of the tile adhesive layer together with the tiles must be more than 2cm. In the recommendations of some manufacturers it is written that the optimal thickness of the covering layer is 5 cm. This contributes to an even distribution of heat.
Benefits of working with tile leveling systems
The tile does not sag, even after the glue dries; Even a beginner who is faced with this type of work for the first time is able to lay the tiles well; The workflow is significantly accelerated, it becomes two to four times faster than the traditional method; One of the parts is reusable, so you significantly save on subsequent installation - in all rooms, starting from the second; Application tile leveling systems makes it possible to make perfect, geometrically correct seams, as well as create a flat surface; And much more. In addition, using these tools, you will be able to avoid the formation of a crooked floor, and these are: • Stumbling and falling, which can lead to injury. Take care of yourself and your loved ones - do not allow low-quality styling; • Formation of chips and cracks, in places where tiles are laid crookedly, as a result of the impact of heavy objects, such as furniture; • Abundant formation of dirt in the joints between the tiles, in places where the tiles are not laid in a level. This spoils all the aesthetics of the room. As you already understood, in all these cases, the ideal option would be to use tile leveling systemsto avoid such situations.
The technological process of working with our tools is extremely simple.
Two alignment systems - DLS and SVP, structurally consist of two types of parts. One part is a leg and is responsible for creating a perfect even seam, a second part is attached to it, which ties the tile and base - leveling the surface. Thus, the need to do leveling work is removed from the stacker, and this is the most dreary and not favorite job. After you have laid the entire wall or floor, you need to let the glue dry for about one day.After that, you have to dismantle the tile leveling systems, use a rubber mallet for these purposes, just knock them down at the right angle so as not to damage the glazed tile surface. After that, the upper knocked down parts should not be disposed of, collect them in a bag or in a box from the kit, and leave them for laying tiles in subsequent rooms. Some part of the legs will remain in the seams between the tiles, but after they are sealed with a fugue, they will not be visible. Here, in general, is all you need to know regarding the process of working with tile leveling systems.
Pouring screed and laying tiles
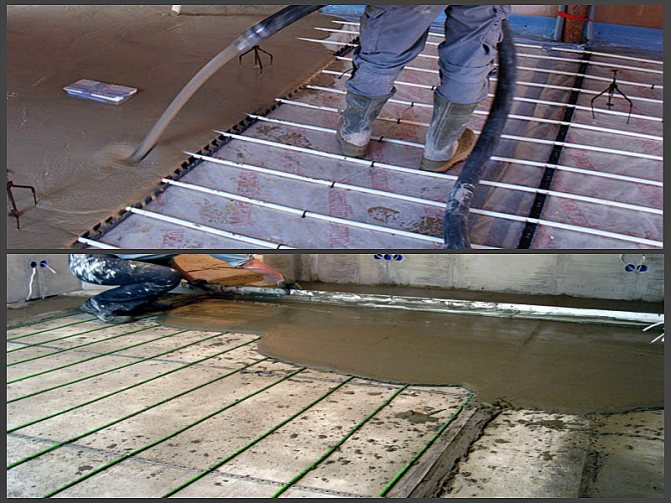
Pouring heating cable into concrete screed
To increase heat dissipation, the heating cable under the tiles is often installed directly into the cement grout. When arranging it, the following options are possible:
- wet screed, made on the basis of a cement composition with the addition of various plasticizers and fiberglass;
- semi-dry mixture, obtained by limiting the amount of water in its mass;
- dry screed, prepared on the basis of ready-made mixtures containing small expanded clay granules or slag fragments.
The thickness of the electric underfloor heating installed in the screed is usually set in the range from 3 to 5 cm. It is not recommended to violate these indicators for reasons of safe operation of the heating structure. Laying tiles on a ready-made electric floor is allowed only after the previously poured screed is completely dry - after four weeks.
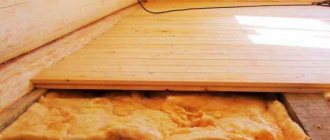
Floors without screed
The design of heating mats and heating cables does not exclude the possibility of laying them without a screed. In the assortment of electric type underfloor heating offered on the market, there are samples with flat and very thin cables. It is laid directly on the concrete base, and then fixed using the hardware supplied with the kit. The step-by-step procedure for arranging an electric floor allows ceramic tiles to be laid on top of a securely fixed cable or flat mats. Sometimes moisture-resistant multi-layer plywood is used as a substrate for it.