The concept and purpose of crimping
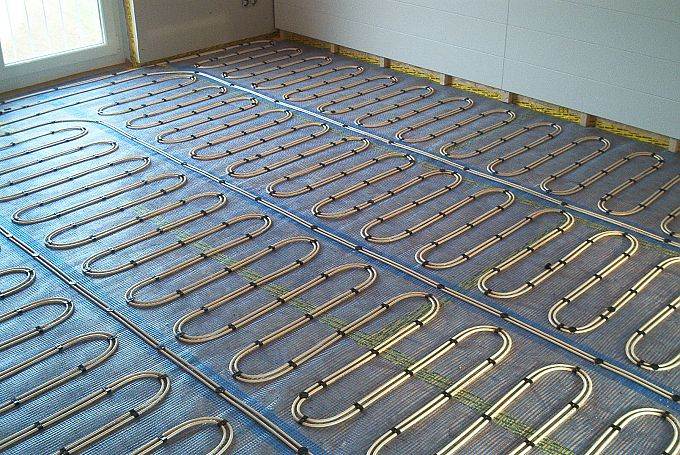
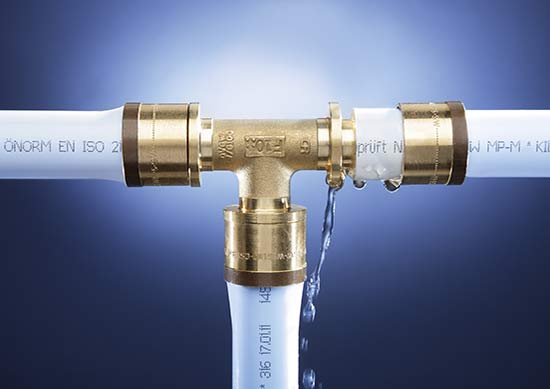
Pressure testing is carried out before pouring the screed in order to identify leaks in advance
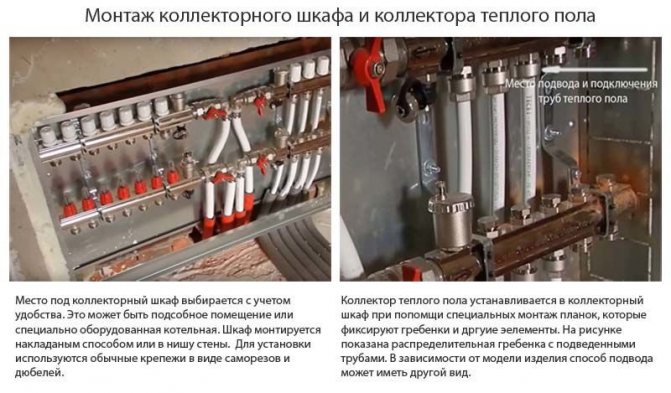
Installation of underfloor heating requires a high-quality system - pipes without defects and leaks. Pressure testing is the creation of excess pressure, which allows you to detect breaks in connections and hidden pipe problems. At the end of the work, you can correct the existing problems and fill the screed.
Testing the pipeline by pressure is necessary to check:
- hidden factory defects of pipes;
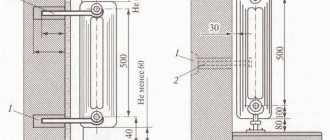
- strength and integrity of radiator casings, heat exchangers, reinforcement elements;
- quality of fasteners;
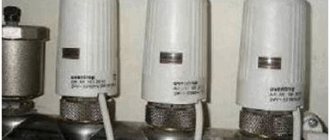
- holding valves, gate valves, manometers and taps.
Through complex measures, you can check the quality of hot water supply, sewer drain, well.
Pressing is allowed to be performed in the unconnected boiler mode or when one room is ready.
Output
Despite the fact that the installation of a warm water floor is a rather complicated process, if you adhere to the technology outlined above and carefully perform the work at every stage, then you can cope with the task on your own.
If any errors were made during the installation process, they will be identified during the crimping process. Therefore, checking the system must be approached especially responsibly.You can get additional information on this topic from the video in this article.
Crimping technology
In order not to dismantle the water heated floor, it is possible to create conditions of increased pressure before starting. Testing is also done post-assembly to determine leaks, breaks, and corroded areas. The procedure consists of pressure testing and flushing the line, checking and replacing units, restoring the insulation coating. Depending on the state of communications, you can select the appropriate technology.
Using water
Excessive pressure in the pipes should be 2 times higher than the norm. The system must withstand 2 days in this mode.
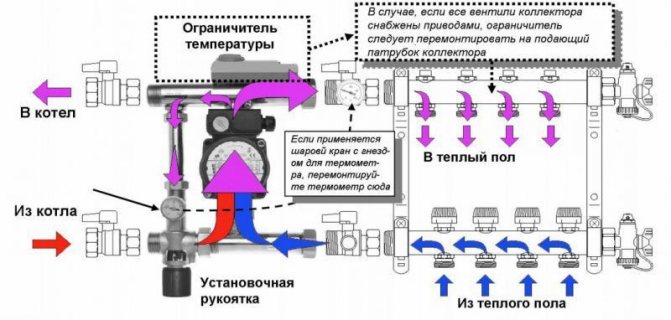
Before pressing the warm floor, install the collector box and connect the water circuits for heating. The system is filled with water from the supply valve - the caps are screwed on the return manifold, in the supply mode the valve is brought to the open position. Fluid enters the line, displacing air through the vent, as evidenced by a hiss.
To bleed the air masses, the return valve of one or more circuits is opened. The steps must be repeated until air is pumped out of the pipes. At the end of the bleeding, the manifold inlet valve is closed.
The hydraulic method is also divided into several types.
Control check produced with a gradual increase in operating temperature. Initially, +20 degrees water is supplied to the circuit, after a few hours the temperature indicator rises by 5 degrees. After that, joints, external sections of the pipeline, and attachment points are checked.
If there are leaks, the water is drained from the system and the malfunctions are rectified. After re-supplying the coolant and reaching the desired temperature, the system is not operated for 2 days. Breakdowns are determined visually, the temperature is lowered to a cool state, then the screed is poured.
Overpressure injection created by filling the line with cold water. The pressure parameters should exceed the norm by 1.5-2 times. The valves are closed, the circuit is not operated for 24 hours.
During this time, water flows out of ruptured pipes or connections. The damaged areas are determined visually. The repair is started after the coolant has been removed. At the end of the work, re-control is carried out and the system is filled.
The optimal pressure indicator is from 2.3 to 2.8 atm.
Air pressure testing
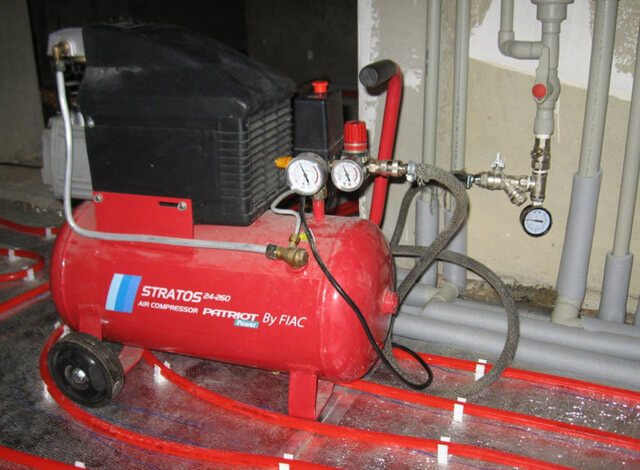
If there is no water in the house, pneumatic pressure testing is carried out, increasing the pressure by 2 times
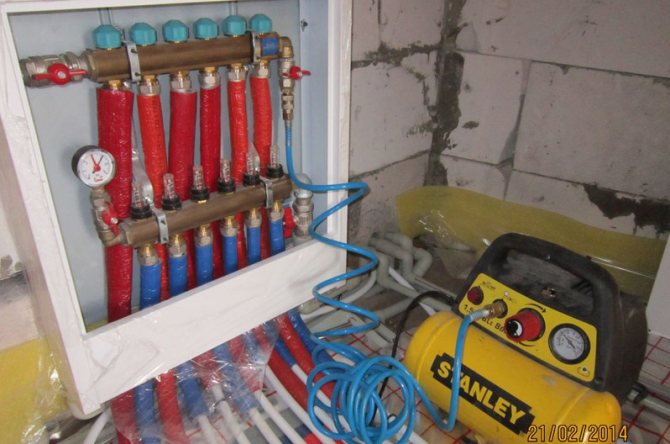
The procedure for crimping the underfloor heating system with air is performed when it is not possible to test them with water. To create excess pressure, a floor compressor, an automobile pump or a sprayer with a pressure gauge is used. The air pressing technology is implemented as follows:
- Checking the condition of the cranes. They are hermetically sealed.
- Removing the automatic air vent, installing a temporary plug in its place.
- Connecting a pressure supply device. A hose is attached through the fitting, and then a tap.
- Creation of increased pressure. They work only with pipes, the area from the collector to the boiler is not tested so as not to damage the heating devices.
- Shutting off the valve after the required pressure is reached. The line remains in the received condition for 24 hours. The pressure indicator is constantly monitored.
- Inspection and clarification of damage. Leaky joints are treated with soapy water. Soap bubbles indicate the need for repair.
- If the pressure test is successful, the air remains in the communications until the screed is poured.
If the system operates under a pressure of 1.5 to 2 atm., It is necessary to test at a pressure of 4 to 5 atm.
Heating the system water underfloor heating
Start warming up the system at a temperature of 19-26 degrees. Increase the temperature by 4-5 degrees every day until the temperature set in the project is reached.
Floor coverings for finishing floors with warm water floor system
- Better heat dissipation from ceramic or porcelain stoneware.
- Textile coverings should be no more than 10 mm thick.
- Parquet must be laid on floors, with a water-heated floor system, with a parquet humidity of at least 4%. The parquet must be glued over the entire floor area.
- The thermal resistance of any material should not exceed 0.15 kW (Kilowatts) per square meter of floor.
- Coverings that can be installed on floors with a water-heated floor system are provided with special pictograms on the packaging. See below.
This completes the test of the water-heated floor system! Good luck in your endeavors!
Almost everyone can lay a warm floor with their own hands. Most often, such a system is installed in private houses, since some problems can be encountered in an apartment. The heated floors are made of concrete screed, inside of which there is a pipe system.
Laying a water-heated floor can be done in several ways.
Any pipes can be used:
- copper;
- polyethylene;
- metal-plastic;
- galvanized;
- others.
However, it is recommended to opt for metal-plastic. The reliability of pipes is determined by their high density. During the technological process, the raw materials are initially subjected to spectral analysis, and the degree of integrity, fluidity and density is also checked. At the finishing stage, they are covered with a special protective layer.
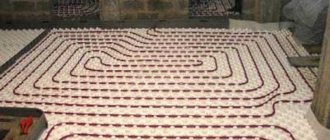
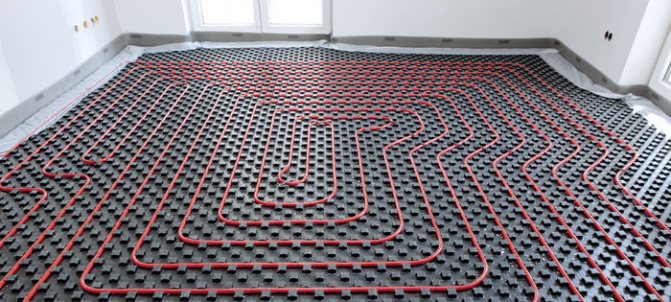
The underfloor heating system consists of several layers:
- a layer of hydro and vapor barrier film, with a damper film around the perimeter;
- thermal insulation;
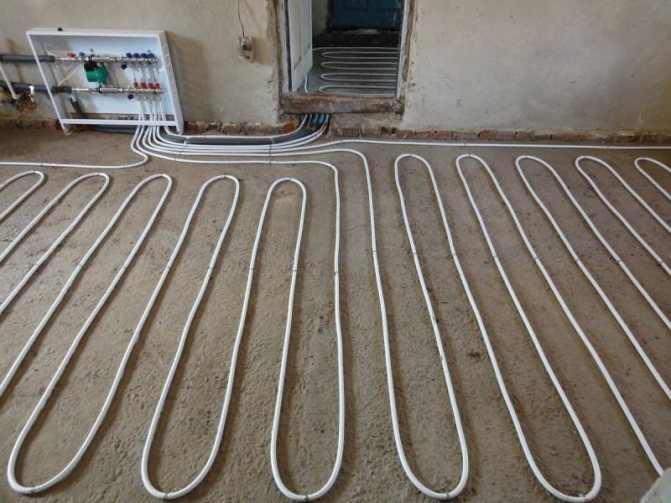
- zigzag or spiral pipe system;
- interlayer;
- finishing layer.
The floor covering, the power of the underfloor heating, the height of the screed affect the thickness of the structure, which should be about 5-15 centimeters.
Underfloor heating surface device
Nuances of choosing technology
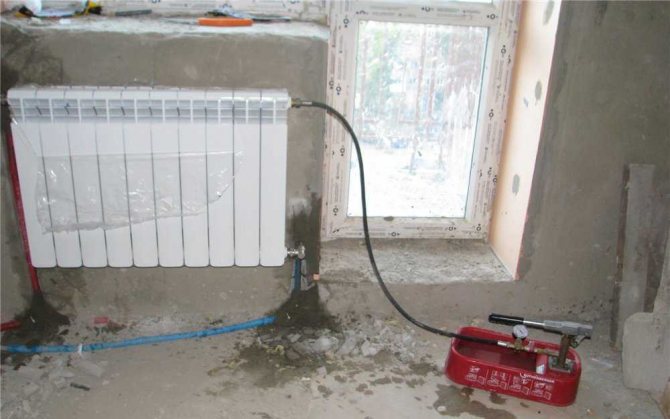
Before pouring the screed, the hot coolant circulates in the system for several days, then it is poured with concrete
To press underfloor heating correctly, you should take into account the features of the pipeline. In the presence of metal-plastic fittings, the test is carried out with cold water at a pressure of up to 6 bar and leave them for a day. In the absence of pressure changes, a screed is made.
A polyethylene pipe is tested with a pressure of 2 times the working pressure, but not less than 6 bar. 30 minutes after the decrease in the indicator, the working value is restored.
Before starting to fill the coolant, the check is done twice. At its end, the pressure indicator is returned to its primary state, the pipes are kept for at least 48 hours. An indicator of less than 1.5 bar indicates a successful test, the health of the heating.
After water pressure testing, re-work must be carried out. A hot coolant is pumped into the communications, which is heated gradually. The circuit functions in this way for several days. When leaks are formed, the joints are tightened. If the system is in good working order, the water in the pipes is cooled and re-pumped without a decrease in the pressure indicator.
Air pressure testing is the best option for the cold season, because with the onset of a cold snap, water can freeze and burst pipes.
What type of crimping is preferable?
It is preferable to pressurize the system with air. Why? If you pressurize the system with water in the summer and so it will remain under pressure until the cold weather, and it will not be possible to start the system in a timely manner for any reason, then with the onset of cold weather there is an obvious risk of defrosting the heating system. It doesn't matter if it's underfloor heating or radiators. With air, there is no danger: you can pressurize and forget. This applies especially to underfloor heating, because if water can be drained from the radiator system at any time and quickly without problems, then it will not be possible to drain from the underfloor heating.
Water pressure testing process
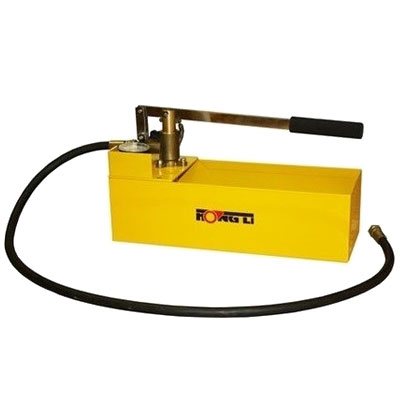
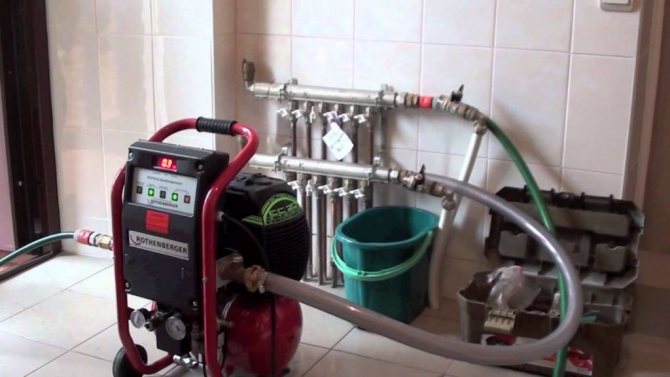
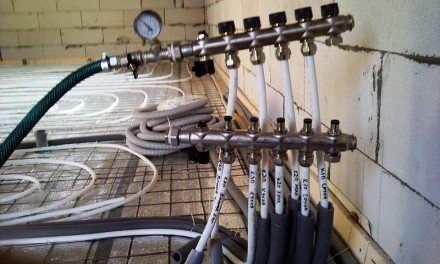
Professional equipment is used for crimping
The use of the hydraulic method provides for pressurization up to 6 bar, but in fact the indicator in the system is 3 bar. Several devices are used to obtain the optimum level.
Pressure Operator - Professional Equipment
Manufacturers produce manual and electric models, the main difference between which is cost. It is advisable for a home craftsman to use a manual crimper:
- The hose of the device is connected to the system, water is poured into a special container.
- Pumping is performed in manual mode with periodic opening and closing of the valve.
When working with an electric pressurizer, you will need to connect it to a water supply system or a water tank. Further actions are carried out according to the manufacturer's instructions.
Garden sprayer
You can use a garden sprayer
The device is selected according to the working pressure parameters indicated on the body or in the passport. In the process of using the sprayer you need:
- Pour water into the tank.
- Connect the hose of the device to the supply valve.
- Create a pressure of 4 to 6 bar - one full tank is enough for this.
- Pump it manually until the required pressure is reached.
One filled container is enough for one circuit.
Deep Well Vibrating Pump
The devices create pressure up to 6 atm., Therefore, they are excellent for crimping. The work is carried out with an assistant - one person opens the taps, and the second monitors the pump. The vibrator hose is connected to the manifold.
The pump is activated after opening the valve. The return hose is connected to the complete container. After complete bleeding of air from the circuit, the return valve is closed. Next, you need to monitor the indicator of the manometer until a pressure of up to 6 atm appears. After that, the supply tap closes and at the same time the pump turns on.
The maximum level of pressure drop during pressure testing for metal-plastic pipes is 0.2 atm., For polyethylene pipes - 0.5 atm.
Verification and test run
After assembling the system, you need to find out its operability and eliminate installation defects. The check is carried out at the end of flushing and filling with a coolant. If successful, the system is operated in a test mode.
Testing methods
You can find the flaws in the installation of underfloor heating and check the communications as follows:
- Run at operating temperature. The indicator rises gradually to 20 degrees, and after 2-3 hours it rises by another 5 degrees. If there is a leak, the system stops, breakdowns are eliminated. The coolant is brought to the design temperature, the line is kept for 2-3 days.
- Overpressure testing. Water works at a standard temperature, but the pressure rises 1.5-2 times. If it falls by no more than 1.5 bar, there is no leak.
- Dry pressure testing. Air is pumped into the pipeline at a pressure 2-3 times higher than the norm. The work is performed before pouring the screed with the design water temperature.
Air pressure testing is not suitable for underfloor heating with antifreeze due to its increased fluidity.
Test run sequence
The system is tested at full operating temperature for 2 - 3 days, eliminating leaks if they form
Before hiding the contours under the screed, a test run of the system is performed:
- The valves are closed up to the distributor and the circulation of the "boiler - collector" zone is organized. The heating boiler is connected, but not at maximum power, and the circulation pump. The fastener points are inspected.
- The circuit valves open. After the boiler has heated up, the temperature difference between the supply and return zones should be 5-10 degrees.
- The second circuit opens, as evidenced by a hiss.
- The temperature regime of warm floors is brought to a maximum of 60 degrees, if it is the only source of heat.
- In the presence of a combined heating system, the operating temperature mode is set on the thermostats.
- The system is at a maximum temperature of 6 hours.
The screed is started to be poured only after pressure testing and test run.
First launch - what to look out for
The control start of the underfloor heating crimping is carried out according to the following scheme:
- Close the system. For this, the valve in front of the manifold is closed. First, the pump is started in turn, then the boiler, but not at full capacity. Already during this stage, the quality of the assembled structure is assessed and the first cracks are identified - the result of insufficient qualifications or low-quality parts.
- Open the floor loop. The main thing is to wait until it is completely heated and only after the difference between the temperature values reaches 5-7 degrees, open the second, third and other taps. That is, with each new start of the circuit, air is released.
- The temperature of 50-70 degrees is set on the water supply, it is permissible to take the average value. With mixed heating, the temperature of the circuits is set on thermostats.
- To complete the crimping work, everyone is kept in working order for some time. Depending on the quality of the material and the faults found (they are corrected even at later stages), this time can vary from several hours to a whole day. But for safety reasons, it is not recommended to neglect the check, since after pouring the floors, it will be quite difficult to change the pipes without much damage.
In the absence of pressure drops and other malfunctions, the crimping process is completed and the floors begin to pull together.
Crimping underfloor heating must be done before pouring the concrete screed or laying the finished floor (if the system is wooden)!
Do-it-yourself crimping features
Leaks are additionally crimped with fittings
It is possible to pressurize a water-heated floor made by hand using a hydraulic or pneumatic method.
- Preparation taking into account the type of coating. For concrete screed, pressure testing is performed before pouring. In the presence of a polystyrene or wooden surface - but closing the heating main with plywood or gypsum board.
- Communication testing. All heating circuits are connected to a manifold and tested individually. The areas are filled with water until the air is completely expelled. For regulation, return and supply valves are used.
- Cold testing of metal-plastic communications. It can be made with a cold coolant with a pressure of 6 bar and the system can be kept for 24 hours. If the pressure has not increased, the line is in good order.
- Inspection of polyethylene pipes. The system is loaded with a pressure of 2 times the standard pressure, but not less than 6 bar. After 30 minutes, the indicator is restored. The operation is carried out three times, then the pressure is brought into the pressure test mode and left for 24 hours. If the reading has dropped by less than 1.5 bar, the system is working properly.
Additional testing is performed by injecting the pressure of the heat carrier, which is at a temperature of 81-86 degrees for 30 minutes. At this time, the fittings are inspected, if they are loosened, they are tightened.
Before operating a water-heated floor, it is necessary to fill it with a coolant. The line is brought to the operating temperature mode gradually, with preliminary pressure testing. The work allows you to identify breakdowns, leaks, installation defects.