Greg West
The material was prepared based on the translation of the PDF file.
This solar collector uses recycled aluminum soda cans as an absorber. Cans with cut tops and bottoms are collected in vertical pipes through which air passes. The black-painted cans heat up more in the sun, and the sun's heat is transferred through the air that rises through the pipes.
I drilled holes with a cutter using a vertical drilling machine, which in itself was a rewarding experience. It took me a while to fill my hand, and several cans almost hit me.
You will be surprised how quickly a saw can rip a thing right out of your hands. therefore safety comes first
... Wear safety goggles and leather gloves with a few cloth gloves underneath. The jars heat up quickly when the tops and bottoms are cut from them.
Through the intake manifold at the bottom of the air heater, air from the room enters all the pipes from the cans. The heated air collects in the exhaust manifold at the top and flows back into the room. The combination of the uniform air flow into the collector and the large heat transfer surface that the cans form contribute to the efficiency of the solar air heater. In addition, my manifold has a Twinwall polycarbonate coating - a type of double coating that reduces heat loss and thus increases the efficiency of the appliance.
So let's start from the very beginning. First of all, I would like to thank the guy who is registered on YouTube under the nickname “my2cents0”. He directed me to a Hungarian Internet resource, where I found an engineer whom I only know as Zoli. In general, Zoli speaks better French than Hungarian. I thank this man for his incredible patience with me. I got him to death for almost three months working on this project until I was convinced that I did everything right.
Types of solar heating collectors for home
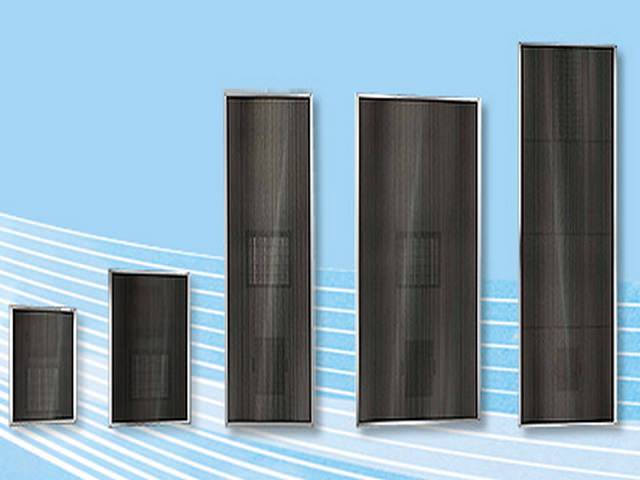
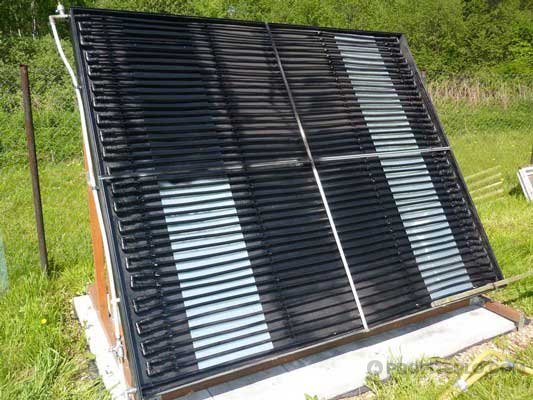
Modern industry has mastered the production of various types of solar heating collectors. In order to understand which of them can be suitable for installing a home heating system or a hot water supply circuit in your home, you need to familiarize yourself with their varieties. There are two main types: flat and vacuum, air collectors are less widespread.
Flat light absorbing
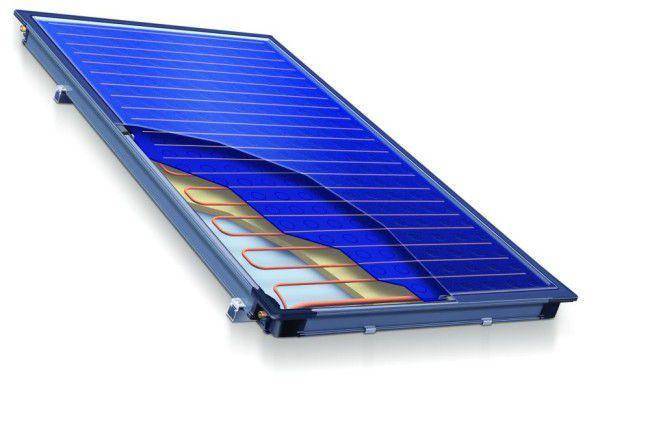
A flat heating solar collector is a thin box, inside of which there is a special substance that actively accumulates and absorbs heat. The top of the box is covered with glass, which allows the sun's rays to pass through. Inside the adsorbent layer that collects heat, there is a system of pipelines, inside of which the coolant moves. Propylene glycol is usually used as a heat carrier in such systems.
sectional flat collector
Vacuum
Inside the vacuum heating manifold, in place of the only flat box, there are hollow glass or quartz tubes from which air is evacuated, that is, a vacuum is created. But already inside such hollow tubes there are tubes with a substance that adsorbs solar thermal energy. Accordingly, the pipelines with the coolant are located inside the pipes with the adsorber. The sun's rays easily penetrate the vacuum in the gap between the pipes and heat the coolant. However, the same vacuum prevents the reverse leakage of thermal energy from the adsorber into the surrounding space, acting as a heat insulator.
vacuum manifold
Air
As the name implies, such devices do not have a heat-insulating vacuum layer. Consequently, the efficiency of their action will be lower than that of vacuum collectors. It is recommended to install such devices in areas with a lot of sunny days. Moreover, in such collectors, the coolant is ordinary air. It is transported to the heated room by a fan or natural convection. Fan operation while moving air currents also requires a separate power supply. This is an additional reason that this system has a lower efficiency than flat or vacuum collectors. Of course, there can be no question of any hot water supply in such a design.
Short description
On the table you can see my cans, hermetically glued together and connected to the top and bottom manifolds. The dimensions of my heat exchanger panel are 17 cans wide and 17 cans high. That's how much I managed to squeeze into a 4 x 8 ft (1.21 x 2.43 m) polyisocyanurate insulation board (polyiso) insulated box. This will be the outer size of the air heater.
The manifold covers are 44.5 inches (about 1.11 m) long and 0.5 inches (1 cm) at the edges.
I drilled holes in the comb with a diameter of 54 mm with a distance between their centers 66 mm. In the end, I found that the pipes from the cans were pressed too tightly against each other. Perhaps, with a 67 mm distance between the centers of the holes, this difficulty would not arise. In this case, the gap between the edges of the holes will be 11-12 mm - so, I think, the pipes will be placed more freely. In the next manifold, I will make a 67mm spacing between the centers of the holes. Step 10 mm from the rim on the top of the can, mark out and drill a hole. I made holes in the bottoms with a diameter of 44 mm, and in the tops - 51 mm. You need to be very careful with the tops - the cutter is almost the same diameter as the holes should be, and there is no room for error.
Technology
The canvas should always be installed from the south side. The size of the collector is chosen so that it heats the room well. That is, you need to take into account the dimensions, the scheme allows the difference. It goes without saying that it also depends on the size of the southern wall and the amount of money.
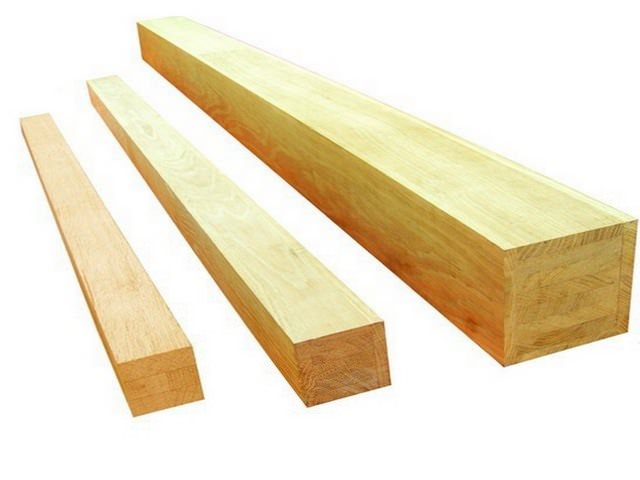
Wooden bar of 150 x 50 mm for the manufacture of the frame of the air collector
First, we make the frame of the device. To do this, you need a bar 150 by 50 mm. In principle, the upper part can be made from a bar of 200 x 50 mm, then you get a visor. In the middle of the frame, it is better to make an additional overlap or even several, depending on the size of the frame. This will increase the strength of the structure. If a double-glazed unit is planned to be used as a protective coating, then the frame must be reinforced.
The frame should be securely attached with your own hands to the wall of the house and all the cracks between them should be insulated with foam. The casing of the solar air collector must be sealed.
Then, above and below on the wall inside the frame, you need to make holes for air exchange. If the walls are made of planks or similar materials this will be easy, but if the wall is brick it will be more difficult. But still, this must be done carefully.
In an air solar collector, a metal mesh acts as an absorber. It can be a mesh, like a mosquito, only made of metal, but expanded or perforated sheet gives much better results.
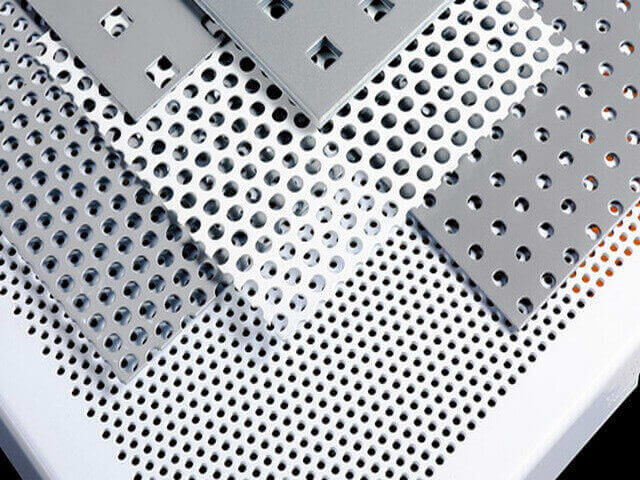
Perforated metal sheets for the manufacture of the absorber
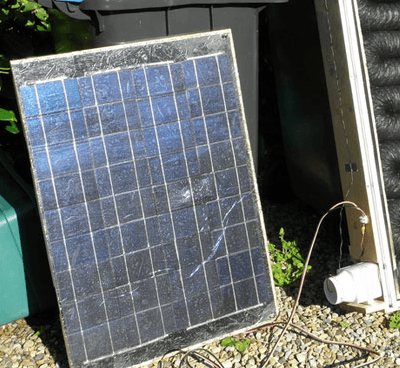
Aluminum has a high thermal conductivity, so it is best suited. In addition, the larger the area that can receive energy, the better the end result. Unfortunately, due to the high price, few people can afford it, so they usually get by with a metal mesh.
The surface must be covered with black paint, this will enhance the selective ability of the absorber.
On the upper holes through which warm air will enter the room, it is necessary to install valves, this is easy to do with your own hands. Otherwise, in cloudy weather, cold air will get inside the collector.
A piece of not too dense polyethylene is suitable as a valve. It is attached only to the upper edge and warm air will be able to lift it, but cold air will not get through.
On the lower holes you need to install a fine mesh, preferably nylon. It will protect the collector from dust getting inside, so it is better to put several layers. Dust should not be allowed to get inside the collector, because it will settle on the protective glass and worsen the efficiency of the device.
The nylon mesh will need to be changed from time to time with your own hands, because it will clog up with dust and stop letting air through. You can also wipe it down occasionally.
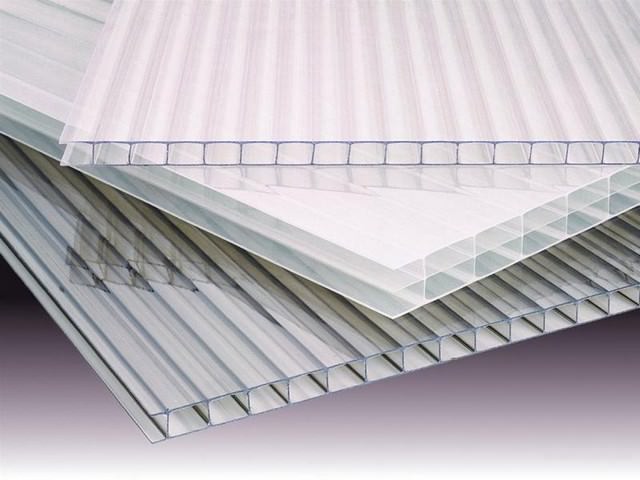
Transparent polycarbonate for installing the protective layer of the air manifold
Then you need to install a transparent protective layer. It can be tempered glass, different types of polycarbonate, transparent slate, glass unit or something else. The main thing is not to forget that the box of the solar collector must be airtight, and all the cracks must be reliably sealed. A double-glazed window is best, but it costs much more, but there are different types of more affordable polycarbonate.
According to this scheme, you can do it yourself heating a chicken coop or any other economic structure.
SolarVenti System
Separately, you need to remember the SolarVenti system. This is an air collector that works on the ventilation principle. It is used in those rooms where musty or mold can form. For example, basements, garages, summer cottages, construction cabins, boats, terraces, residential buildings and the like.
A distinctive feature of the SolarVenti system is that the fan does not need additional power supply, and the absorber is protected by polycarbonate.
As in conventional collectors, in SolarVenti, the absorber collects energy from the sun's rays, but then the built-in photocell is activated. It converts it into electricity, which turns on the fan. That is, even the fan is powered by solar energy.
SolarVenti air collectors
Fresh air enters through many small holes on the back wall without the help of pipes. This ensures the proper circulation. There is also a filter to keep dirt out of the SolarVenti. It also uses the heat from the walls to increase the heating performance of the home. Usually some kind of polycarbonate is used as the protective layer.
Making pipes from cans
First, I made some wooden blocks in order to hold the cans in place while working on the vertical drilling machine.
I used a small cutter to start making a hole that should fit into one of the can's edges in diameter. After that, believe it or not, I inserted a small router bit with straight cutting edges into a vertical drilling machine and expanded the holes to the desired size.
If you have a steady hand, press-cut with a vertical drill - it's very easy to do. Notice my extension arm - the pressure is generated by a spring from the grille door. My God, need really teach everything! I cut the pads out of a huge block - two 1 "x 4" (25.4mm x 101.6mm) wood planks glued together. I then cut these pads to a size that is convenient to use.
Here is the jar topping block. The inner edge should be flatter and have a deep notch to hold the can tightly where it expands from the rim to the body.I made the same holder for the bottoms of the cans.
After all these difficulties, I found that it is easier to drill the tops and bottoms of the cans by simply placing them in the convenient holder, as shown in the picture, and doing the work by hand. This is where leather and cloth gloves come in handy. As I said, the 51mm cutter fits snugly into the space inside the rim of the can. This is where you need to be very careful - this is where you are most likely to miss. I set the machine to medium speed and used Lenox saws. The jar can rotate slightly, it does not interfere with the work. With one finger, press the top of the jar close to the saw, while the rest hold onto the block. The jars will heat up quickly.
Cut the bottoms of the cans with a 44mm cutter. After the first few cans, it will come out light. Remember that if the jar rotates a little, this does not need to be interfered with. If you press down on the can too much, the saw will sweep it inside the block. In this case, the bank will deteriorate - the metal will bend, and the smallest cracks will certainly appear on it, although they may not be seen. For example, I primed one of the cans.
The ring that you see around the can will crack when using the hot air heater due to the expansion and contraction of the metal under the influence of temperature changes. Soda cans are only 10 microns thick and can crack very quickly.
Several jars with the tops and bottoms removed.
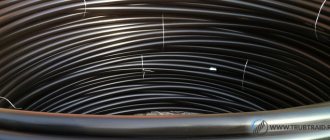
I used 3 "(76mm) PVC pipe cut in half lengthwise to hold the can pipes while the sealant hardens. I advise you to buy an end cap, cut it in half and glue it to the pipe. Next time I will. I think 3 "x 4" (76mm x 101.6mm) nailed planks will work just as well, but haven't tried it myself yet.
Here is a photo of how I made a pipe from cans. I simply applied silicone sealant around the bottom opening of the can and pressed the glued cans into the PVC pipe. With one finger, I smoothed out the glue, and with my free hand I turned the pipe from the cans.
On the left you can see a nearly finished pipe in a PVC holder. One of your hands rests calmly on the penultimate can in the row, while the other turns the glued cans with your thumb and forefinger.
The bricks are used to press down on the silicone coated cans. I was working in my living room because it was too cold in my store. If you tilt the pipe slightly, the brick will press down with enough force to hold everything in place until the sealant sets. I used this method until I ended up with a battery of 17 cans high and 17 wide. So you have made bundles of pipes. If your heater is not 4 x 8 ft (1.21 mx 2.43 m), determine the appropriate number and length of canned tubing.
Does the solar collector work in winter?
According to statistics (data are given in Wikipedia), there are about 0.2 square meters per 1,000 Russians. m of solar collectors used in our country, while in Germany this figure is 140 sq. m, and in Austria - as much as 450 sq. m. per 1,000 inhabitants.
Such a significant difference cannot be explained by climatic conditions alone.
Indeed, in most of Russia, the same amount of solar energy reaches the surface of the earth per day, as in the south of Germany - in warm weather this value ranges from 4 to 5 kW * h / sq. m.
What caused our lag? It is partly due to the relatively low incomes of Russians (solar power plants are still quite an expensive pleasure), partly - the presence of their own large gas fields and, as a result, the availability of blue fuel.
But the bias on the part of many potential users, who consider the installation of a solar collector inappropriate, also played a significant role.Say, in summer it is already warm, but in winter this system is of little use.
Here are the arguments put forward by skeptics regarding the operation of solar plants in winter:
- The installation is constantly covered with snow, so that solar radiation does not reach it very often. Unless, of course, the owner is constantly on duty on the roof with a broom or brush.
- The cold, frosty air takes away almost all the heat accumulated in the collector.
The all-season damaging factor is often mentioned - hail, which can smash the solar plant to smithereens.
To understand how true these arguments are, consider the design of various types of solar collectors.
There are many reasons to build your own solar water heater. The most important of them is that the energy obtained in this way is completely free.
Alternative energy sources for a private house are discussed in this review.
And in this thread https://microklimat.pro/sistemy-otopleniya/alternativnoe-otoplenie/solnechnye-kollektory-dlya-doma.html everything about heating a house with solar energy and how to make solar panels with your own hands.
Making intake and exhaust manifolds
Figure 1 Intake manifold directs air evenly into pipes from cans (Zoli drawing)
First, I took a 1 "x 4" (25.4mm x 101.6mm) comb material and measured out the dimensions that Zoli specified in his model in SketchUp. I made a test comb to make sure the parts fit together. It turned out to be narrow. Since everything in the UK is measured in metric units, I went the same way. The most can-sized cutter I could find is the 54mm. According to the drawings, the holes should be 55 mm in diameter, and the distance between their centers should be 66 mm. I stepped back 10 mm from the edge of the comb and made the markings. I think that increasing the distance between the centers of the holes to 67 mm will not damage the drawing of the combs, because there is quite enough space for this.
I secured 1 x 4 ft (30.5 cm x 1 m 22 cm) unnecessary material under the comb and cut the holes by hand. It worked out well. The photo shows how it is cut by hand. Be very careful.
After all this was done, I connected the canned piping system to the top and bottom dies and sealed the connections with sealant.
Feel free to apply a lot of sealant, but make sure it doesn't block the airways. Measure your product and cut out the flat aluminum plates that will make up the front, back and bottom of the intake manifold. Its body should be approximately 6.75 inches (171.4 mm) high, 44.5 inches (1.11 m) wide and 3.5 inches (89 mm) deep. The overall structure - can tubing and manifolds - must fit snugly in a 4 x 8 ft. Polyisocyanurate (1.22 mx 2.44 m) polyisocyanurate enclosure.
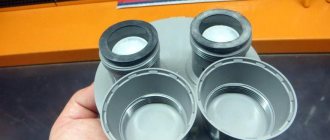
The photo above is a new model of the intake manifold with air separators and end plugs, which I had to make myself.
I made these parts from rolls of aluminum frames. Semicircular cutouts should be made along the edges so that they fit the edges of the collectors.
Making End Caps
I did this on a saw table and used clamps and a rule. Bend the sheet and tap the edge with a hammer and it will align.
Types of solar collectors
The design of the solar collector can be one of the classes described below.
Flat light absorbing
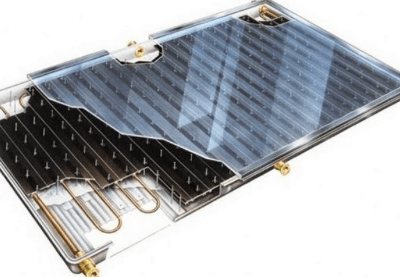
It is a dark aluminum box with copper tubes inside. The bottom is limited by a layer of thermal insulation. The top is covered with tempered glass and propylene glycol, which acts as a sun absorber. Functional at any time of the year, popular due to its affordable cost.
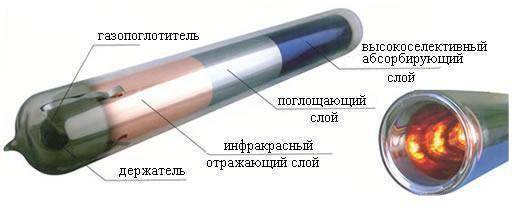
Vacuum
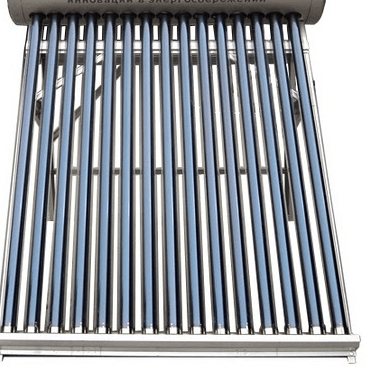
The vacuum manifolds are made up of numerous copper tubes. Elements are laid in even rows.Each tube with absorbing and reflecting substances is located inside another glass bulb of the same shape, but with a larger diameter. A vacuum is formed between the walls of the tanks, which acts as a heat insulator and a conductor. The main advantage of the class is a large receiving area, which means high efficiency.
Air
Based on the greenhouse effect principle. The rays hit the absorbing coating and are completely absorbed by it. The charged receiver heats the air masses inside itself. Hot air fills the rooms, entering the house using natural convection or a fan.
All classes are suitable for heating private houses in equal proportions. The specific type is selected based on own needs, solvency, roof area (or other surface) for installation.
Painting and final assembly
Here is a photo of the painted heat transfer panel. Paint outside the home or store you work in.
The heat exchanger housing must be reflective in order to cast all incoming sunlight onto the heat exchanger.
Photo of an inlet with a cover, which I made out of aluminum, and a 6-inch (152.4 mm) duct connection (fitting) attached to it.
Photo of the outlet. As you can see, I only had drawing (photograph)
simple air baffles. Zoli said he liked my work.
Photo heat exchanger, 3-inch (76.2 mm) tubes and cans.
What is solar collector
With the rising cost of natural resources and conventional energy sources such as gas, coal and electricity, more homeowners are starting to think about the still outlandish solar heating system. The construction of so-called "eco-houses" using solar systems is becoming more and more popular, and this technology is slowly but surely moving from the category of technical innovations to the category of expensive but effective alternative energy sources.
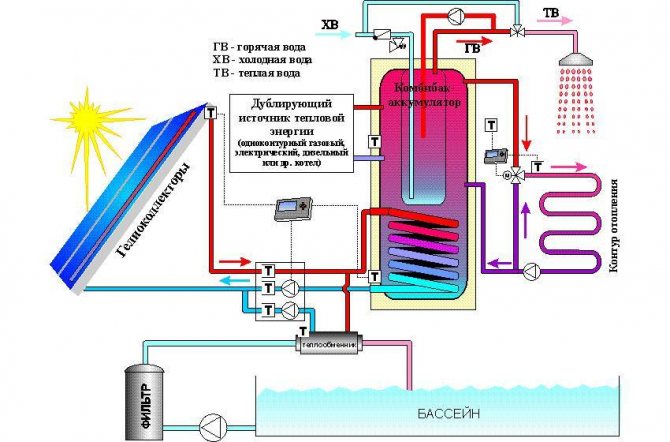
Solar collector connection diagram.
What is a solar system and how profitable is its use for heating a house in winter? If we recall the laws of physics, then everyone knows that the sun's rays are more concentrated on dark surfaces and they are heated much more intensely, in contrast to light ones. From time immemorial, the people have learned to apply this feature of the return of solar energy, and in fact, primitive heliosystems are used everywhere in the construction of hotbeds, greenhouses, summer showers, and so on.
A natural question arises: why, if solar energy is so efficient, the industry of this technology has only recently begun to develop and is not being introduced everywhere? The answer to this question is ambiguous. Location, time zone, length of daylight hours, well, and banal dependence on the weather are of great importance.
Diagram of a flat solar collector.
Therefore, the use of solar systems in the middle lane is not very efficient, such as in the Mediterranean, where this technology has been introduced into use everywhere and has practically cut electricity costs in half.
In conditions of short daylight hours, it is advisable to use the solar collector as an additional source of energy, and it is still too early to talk about a complete transition to solar panels for heat generation. But nevertheless, research in this area is gaining momentum and, due to the depletion of natural resources, it becomes more and more relevant. That is why this technology develops, improves and occupies an ever more extensive niche in the heating and energy supply industry.
Summer design option
The black plate absorbs heat and transfers it to the coolant moving through the tubes (water or antifreeze).The glass has 2 functions: it allows solar radiation to pass to the heat exchanger and serves as protection from precipitation and wind, which reduce the performance of the heater. All connections are made hermetically so that dust does not get inside and the glass does not lose transparency. Again, the heat of the sun's rays should not be vented by the outside air through the cracks; the efficient operation of the solar collector depends on this.
Getting Started
Before constructing a solar collector, it is necessary to make the appropriate calculations and determine how much energy it must generate. But you should not expect high efficiency from a self-made installation. Finding that it will be enough - you can proceed.
The work can be divided into several main stages:
- Make a box
- Make a radiator or heat exchanger
- Make an advance chamber and drive
- Assemble the collector
To make a box for a solar collector with your own hands, you should prepare an edged board 25-35 mm thick and 100-130 mm wide. Its bottom should be made of textolite, equipped with ribs. It should also be well insulated with foam (but mineral wool is preferred), covered with a galvanized sheet.
Having prepared the box, it's time to tinker with the heat exchanger. Follow the instructions:
- You need to prepare 15 thin-walled metal pipes 160 cm long and two inch pipes 70 cm long
- In both thickened tubes, holes of the diameter of the smaller tubes are drilled into which they will be installed. In this case, you need to ensure that they are coaxial on one side, the maximum step between them is 4.5 cm
- The next stage - all pipes must be assembled into a single structure and welded securely
- The heat exchanger is mounted on a galvanized sheet (previously attached to the box) and fixed with steel clamps (metal clamps can be made)
- It is recommended to paint the bottom of the box in a dark color (for example, black) - it will better absorb solar heat, but in order to reduce heat losses, the external elements are painted white
- It is necessary to complete the installation of the collector by installing a cover glass near the walls, while not forgetting about reliable sealing of the joints
- A distance of 10-12 mm is left between the tubes and the glass.
Read more: How to decorate a house for the New Year 2020 with your own hands. New Year's decor ideas
It remains to build a storage device for the solar collector. Its role can be played by a sealed container, the volume of which varies about 150-400 liters. If you cannot find one such barrel, you can weld several small ones together.
Like the collector, the storage tank is thoroughly insulated against heat loss. It remains to make an advance chamber - a small vessel with a volume of 35-40 liters. It must be equipped with a water-dropping device (articulated faucet).
The most crucial and important stage remains - to put the collector together. You can do it this way:
- First, you need to install an advance camera and a drive. It is necessary to ensure that the liquid level in the latter is 0.8 m lower than in the front chamber. Since water in such devices can collect a lot, it is necessary to think over how they will reliably overlap
- The collector is located on the roof of the house. Based on practice, it is recommended to do this on the south side, tilting the unit at an angle of 35-40 degrees to the horizon.
- But it must be borne in mind that the distance between the storage and the heat exchanger should not exceed 0.5-0.7 m, otherwise the losses will be too significant
- At the end, the following sequence should turn out: the avancamera must be located above the drive, the last one - above the collector
The most crucial stage comes - it is necessary to connect all the components together and connect the water supply network to the finished system. To do this, you will need to visit a plumbing store and purchase the necessary fittings, adapters, squeegees and other shut-off valves.High-pressure sections are recommended to be connected with a pipe with a diameter of 0.5 ", low-pressure - 1".
Commissioning is carried out as follows:
- The unit is filled with water through the bottom drain hole
- An avancamera is connected and liquid levels are adjusted
- It is necessary to walk along the system and check that there are no leaks
- Everything is ready for everyday use
You can make a solar collector with your own hands quickly enough, this is not a very difficult job. To use it in the country, in the summer, you do not need complex circuits and special equipment:
- If water is needed only outside (outdoor shower, hot water for washing, swimming pool, washing dishes, other household needs), the tank is also installed outside.
- When water is needed in the house, the tank will be installed inside.
- In such a system, there is a natural circulation of liquid, so the tank must be installed 8-10 centimeters above the battery level.
- To connect the tank to the battery (absorber), you need pipes of a certain diameter.
- With a long system length, it is better to install a pump that will enhance the movement of the coolant.
Solar collector made of metal-plastic pipes