Basic repair methods
When using a tank, the plastic undergoes constant deformation - it contracts and expands due to constant temperature fluctuations. Thermal and pressure effects provoke the appearance of cracks in the structure of the material.
At the same time, plastic is used for the manufacture of expansion tanks, which does not react with adhesives. Therefore, it is almost impossible to perform high-quality gluing of such surfaces. In this regard, soldering is most often used to repair this car part. A sealant or adhesive can be used as a temporary measure.
Soldering
Most often, cracks and cracks in the plastic of the expansion tank are sealed by means of a reinforcing metal mesh.
Cold welding
Cold welding is justified as a temporary measure. With its help, it is possible to close up the cracks in order to get to the car service.
Sealant
Sometimes a special sealant is used to repair the expansion tank. However, this tool is also difficult to call reliable.
Effective remedies
Today, there are many effective compounds on sale that are used to eliminate breakdowns of plastic car parts.
3M DP8005
This tool is actively used for fixing different types of polyethylene and polypropylene. This glue is characterized by a high degree of strength. This engineering adhesive is a two-component adhesive. With its help, it is possible to fix polymer compounds without preliminary preparation.
The adhesive is considered a modern alternative to the common methods of mechanically joining or sealing damaged parts. As a result of the use of the substance, it is possible to obtain a seam that is characterized by resistance to water, high humidity and the action of aggressive substances. Therefore, it can be safely used to repair the expansion tank.
The only drawback of the composition is the high cost. However, if it is necessary to repair the tank of an expensive car, such costs are fully justified.
Hosch
To fix the plastic parts of a car, it is permissible to use this two-component glue-welding. It is produced by a German company. The substance is specially designed for fixing polymers. With the help of this glue, it is possible to seal holes and cracks in various plastic products. The seam remains flexible even in frosty weather. It is able to withstand pressure up to 12 atmospheres.
Typically, the bonding area with such glue is stronger than plastic. The kit contains 2 components that complement each other. These include liquid cyanoacrylate ether and fine powder. The mixture contains metal oxides. It also includes catalysts that enhance the adhesion of the glue line and improve the adhesive characteristics.
Operating instructions
In order for the repair procedure to be successful, it is worth choosing the right method and following a number of recommendations.
Soldering
Before starting the procedure, it is important to prepare everything you need. This will require the following:
- a soldering iron with a flat tip - its power should be 40 watts;
- a fragment of a brass mesh with small cells;
- scissors for metal.
It is permissible to use a more powerful soldering iron. But in this case, you should be careful when working. Otherwise, there is a risk of a through hole appearing on the material in the areas of attachment of the metal mesh.
It is permissible to remove the brass mesh from the car gas pipe.It is located right in the tank. This mesh is used in the vehicle power system and acts as a filter. After alignment, it is permissible to use it as a reinforcing layer. This will help stop the reservoir leak. If you can't find a brass mesh, it is permissible to use a steel mesh. This material is sold in hardware stores and is at an affordable price.
After completing the preparatory work and determining the area of localization of the leak, the tank should be thoroughly dried. This will help get rid of any remaining moisture.
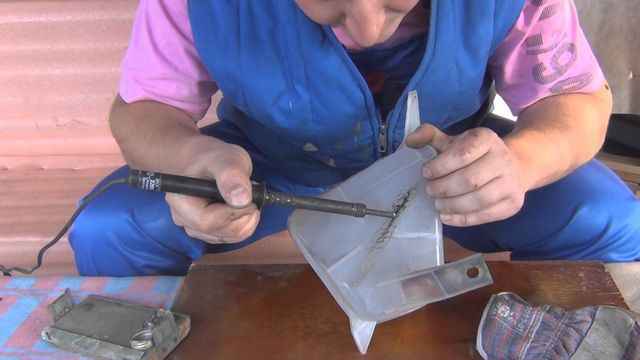
Soldering is considered the most reliable method of eliminating cracks. Plastic melts easily even at relatively low temperatures. Therefore, to carry out the manipulation, it is permissible to use an ordinary soldering iron. To solder the tank, you should follow these steps:
- Place the tank on a flat surface. Moreover, it is recommended to direct the crack upwards.
- Heat the soldering iron to operating temperature.
- Cut the metal mesh so that it is slightly larger in length and width than the damaged area. Apply material to the damaged area.
- Solder the mesh into the plastic with a soldering iron tip. It is recommended to do this along the entire length of the damage.
During the procedure, it is recommended to carefully melt the plastic right in the crack. Otherwise, it will not be possible to deal with the damage efficiently. Wire mesh is considered to be an excellent reinforcing material. However, the patch will only be able to withstand pressure if the plastic layer is uniform.
Gluing
To achieve good results with this method, you must use a two-component formulation. To do this, you should do the following:
- Prepare surfaces. It is recommended to clean them from dirt. To do this, you should use acetone.
- Apply glue. A thin layer of a liquid substance is applied to the damaged area. From above it is recommended to cover this place with welding granulate from another bottle. Then again cover the surface with impregnation glue.
- Glue the details. The adhesive composition sets almost instantly. Already a few minutes after using the substance, it is permissible to return the tank to its place and fill it with liquid.
It should be borne in mind that the interaction of the liquid adhesive part and the welding granulate causes an exothermic reaction. It is accompanied by the release of steam and heat. Therefore, it is recommended to observe safety precautions.
Welding
Cold welding is considered an auxiliary method that does not provide long-term and reliable results. This method helps to achieve temporary fixation, which will ensure comfortable delivery of the vehicle to the service station. In order for cold welding to give results, the surface should be pre-cleaned.
Application of epoxy adhesive
The use of such a substance is also considered a temporary method. It will not fix the crack for a long time. To get a good result, the plastic is pre-cleaned from the remnants of dust, grease, dirt.
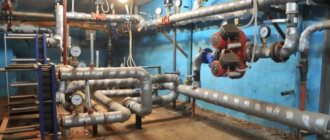
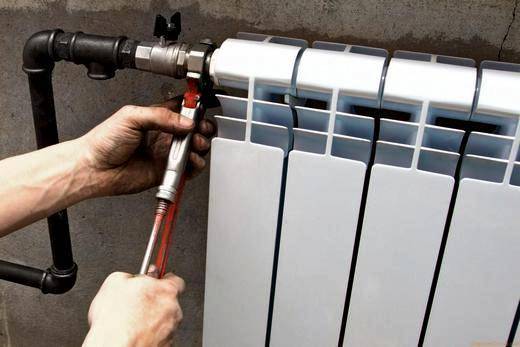
Ways to eliminate leaks in a straight heating pipe
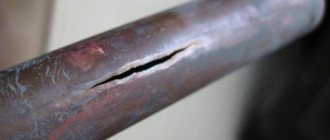
Local leakage of a metal pipe in its straight section (fistula) is the easiest option for self-elimination. There are several ways that you can deal with the problem without draining the water.
Mechanical leakage repair
The classic way to seal a leak is to install a crimper on a rubber gasket while the heating system is running.
The methods are as follows:
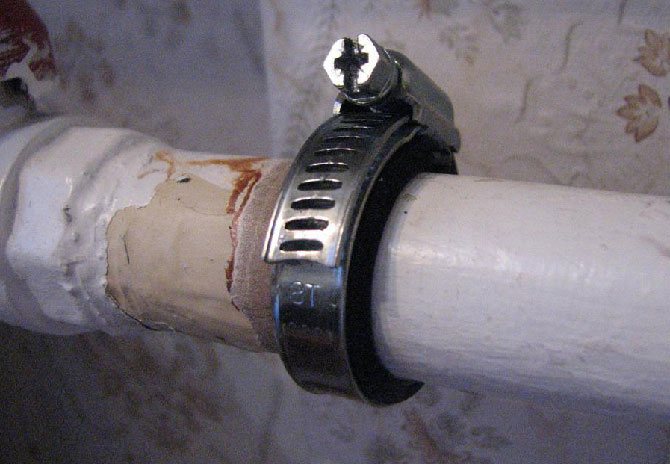
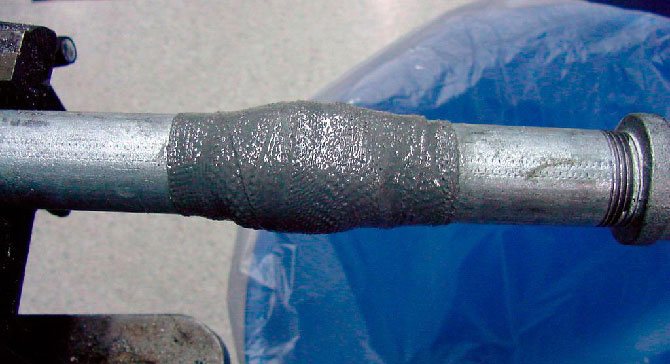
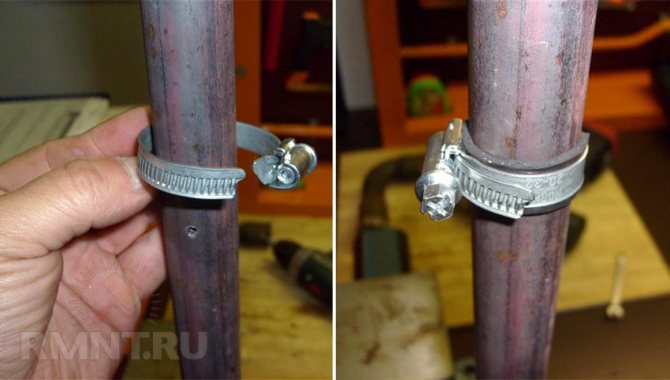
- The damaged section of the pipe is wrapped in soft rubber (for example, a bicycle tube). Fix the patch with a metal wire, tightening it well in several turns along the length of the rubber.
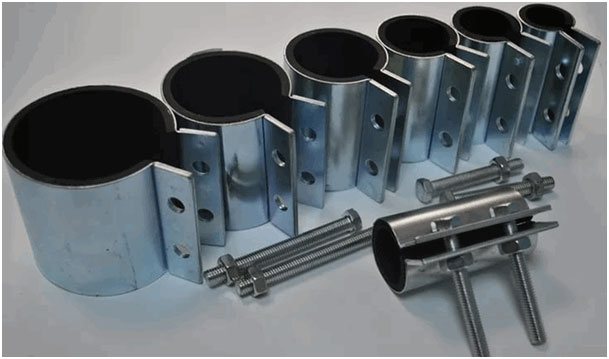
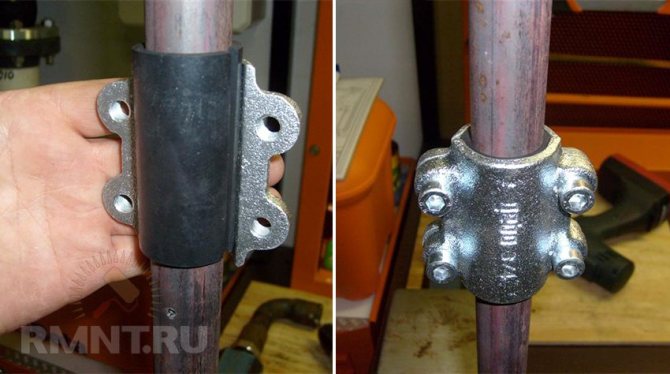
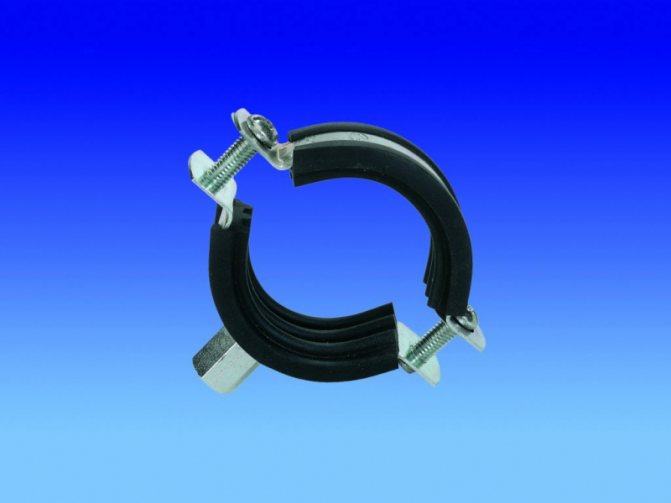
- The rubber patch is secured with two narrow crimp clamps of the appropriate diameter.
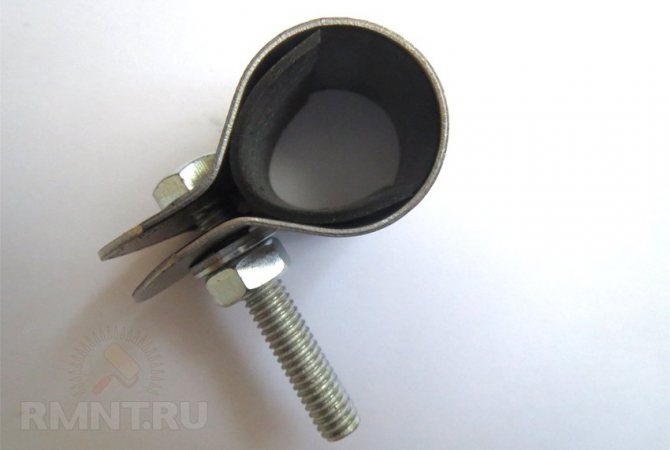
- If there are several leaks, they are localized in close proximity to each other, then the leak in the heating pipe can be repaired by installing a metal holder. It is a wide clamp with an integrated rubber gasket that tightens in two places.
Note! In this way, the leak is closed temporarily, eliminating the problem for the period until a repair specialist is called or until the end of the heating season.
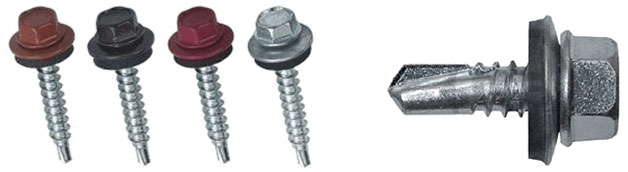
If a fistula has formed in a thick-walled pipe, then it can be repaired by installing a special self-tapping screw with a rubber seal in front of the cap. To do this, clean the leak and screw in a self-tapping screw with a hand drill.
Note! You can use an electric drill only if there is no coolant in the system. Otherwise, you risk getting an electric shock if water escapes from the pipe.
Chemical methods to eliminate leaks
Manufacturers of sealants for repairs offer a lot of materials for sealing leaks in heating systems with metal or polypropylene pipes.
We recommend that you familiarize yourself with: Soundproofing methods to reduce hum in a sewer riser
From available tools, you can use automotive sealants for high-temperature operating conditions. With this composition, the fabric is impregnated and the pipe is wrapped, where the damaged area of the heating circuit is found.
This method of eliminating leaks is used not only in straight sections, but also in places of threaded connections or joints of pipes of different diameters. This is justified if it is impossible to turn off the heating at the time of repair of the joint.
The following chemically active substances are used to seal leaks in heating pipes:
- Two-component epoxy-based sealing resins.
- Adhesive silicone mixes that set quickly (cold weld).
- Heat-resistant rubber-based mixtures.
Note! It is possible to seal a leak in a heating pipe using chemical sealants only when the heating is turned off and the system is empty.
The algorithm of actions is as follows:
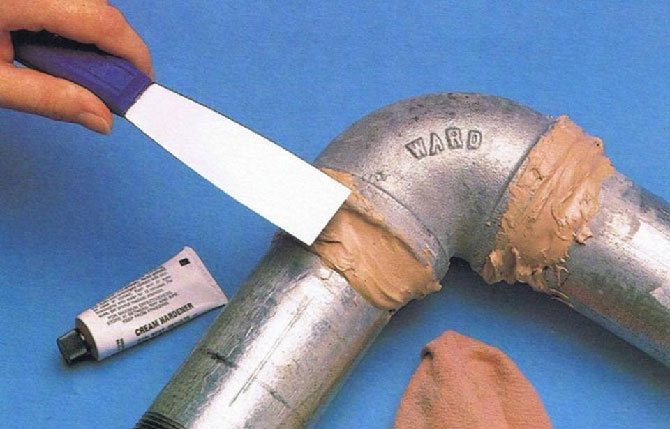
- The damaged section of the pipe is degreased, dried and a sealant is applied to it in a thin layer.
- The area to be repaired is wrapped with a special fiberglass tape with a serpyanka. It serves as a reinforcing element in the mass of the hermetically sealed compound.
- The chemical composition is again applied to the serpyanka. The action is repeated.
As a result, a sealing layer forms on the pipe body, which reliably protects it from leaks.
Note! Silicone sealant adheres significantly better to smooth surfaces than rough surfaces. Contrary to habit and popular belief, the damaged section of the pipe should not be sanded with abrasives (for example, cleaned with sandpaper).
Additional tips and tricks
In order for the repair of the expansion tank to be successful, it is worth following these recommendations:
- it is best to solder the damaged area;
- a brass mesh is used as a reinforcing layer - aluminum material in this case will not work;
- It is recommended to grind, putty, prime and paint the connecting seam.
A breakdown of an expansion tank is considered an unpleasant violation. It is recommended to use a soldering iron to repair the damage. As a temporary measure, it is permissible to use reliable adhesives. Two-component substances are considered a suitable option.
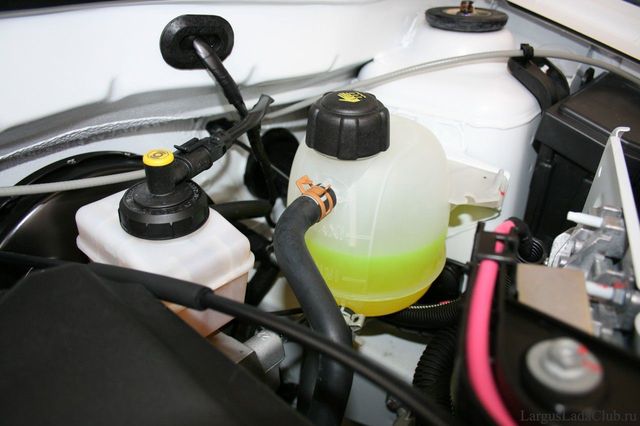
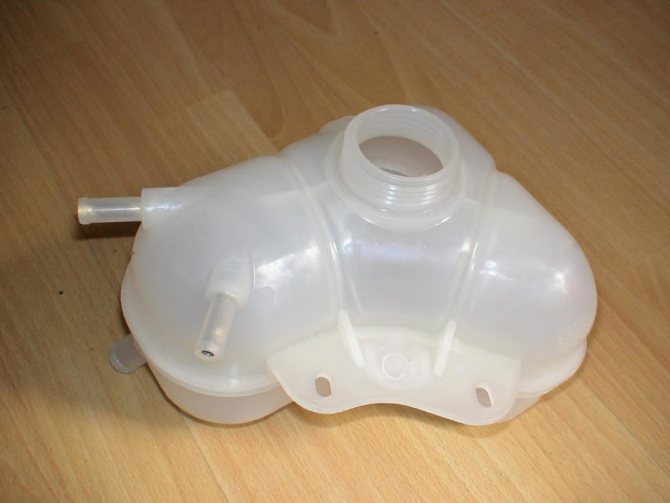
The expansion tank of the car is an integral part of the cooling system. Its task is to compensate for the increasing volume of antifreeze or antifreeze at high temperatures and an increase in pressure in the cooling system. The design features of the cooling system dictate what shape the expansion tank has and what additional functions, in addition to collecting liquid, it has.
Causes of breakdowns of plastic containers
The car as a whole and its individual elements acquire various defects during operation. The expansion tank is also susceptible to breakdowns, leading to depressurization with the subsequent leakage of coolant as a result of the following reasons:
- Increasing pressure in the cooling system.
- Insufficient thickness of the plastic from which the container is made, leading to cracking of the walls.
- Long-term presence of boiling antifreeze in the tank.
- Mechanical impact, shock.
When antifreeze is released, it is necessary to determine the location of the leak and repair the expansion tank.
Diagnostics of the depressurization of the case
If cracks appear in the tank housing, it is necessary to turn off the engine, wait until the coolant has completely cooled down, and only then proceed to the following actions:
- loosen the fasteners holding the plastic container;
- disconnect the pipes and hoses;
- dismantle the tank;
- drain the coolant;
- locate the hull defect.
Methods for eliminating cracks in a plastic container
During the operation of the tank, the plastic undergoes multiple deformations: contraction and expansion as a result of temperature changes. Operating under peaks in temperature and pressure will result in cracking of the material.
The plastic used in the manufacture of expansion tanks is not capable of reacting with adhesives of any brand. In this regard, high-quality gluing is impossible. The most widely used by car owners are the following methods for eliminating cracks:
- Seal the cracks in the plastic case using a reinforcing metal mesh.
- Seal the leaks with epoxy resin, cold welding, special sealant.
The use of cold welding and epoxy is used to seal the cracks in the tank for short periods of time, for example, to get to the garage.
Algorithm of work when sealing cracks in the tank with your own hands
Many car owners are interested in how to seal the cracks and cracks in a plastic container. To seal the resulting defect, the following operations must be performed:
- thoroughly clean the plastic from the remnants of antifreeze at the crack with a napkin;
- degrease the welding area with solvent or acetone, dry;
- cut a strip of brass metal mesh, consisting of small cells, at least 10 mm wide of the corresponding length;
- apply a mesh patch to the sealed joint;
- evenly, in several approaches, solder the mesh to each edge of the joint, fusing the plastic with the metal and forming a reinforced layer over the entire area of the patch;
- grinding of the formed connecting seam;
- putty, primer and painting of the welding point.
For soldering, a flat-tip soldering iron with a power of at least 40 watts is used. The exact implementation of each point of the repair measures allows you to fully restore the strength and reliability of the body part.
In the absence of a soldering iron and a metal mesh, in order to repair the tank body, the craftsmen use a special polyadhesive sealant DoneDeal red for plastic.
This product has high thermal stability and resistance to oily liquids. Before applying a polyadhesive to a defect in a plastic case, it is necessary to perform thorough preparatory operations for cleaning, degreasing and removing traces of previously used substances.
One of the elements, without which the normal functioning of the car's cooling system is impossible, is the expansion tank. It is designed to compensate for the increasing volume of antifreeze during heating and increasing pressure. During the operation of the vehicle, the capacity may fail. The tank is easy to replace or repair with your own hands.
Bonding the radiator with epoxy resin
Necessary materials:

Epoxy is required when gluing the radiator.
- rag harnesses or bandages;
- epoxy resin;
- steel rope;
- zinc white;
- metal clamp with bolts.
Often, cloth tapes soaked in various solutions are used to eliminate radiator leaks. So, before winding a rag tourniquet over the rupture site, it is advisable to clean the damaged surface to metal using a knotted steel cable. It is necessary to wind the fabric in several layers.
It is recommended to use a mixture of bronze paint (bronze powder) and epoxy resin as a fixing solution that can be used to seal the hole of the radiator. The combination of aluminum powder with epoxy adhesive has similar properties. In the absence of the above components, you can seal the hole with fabric tapes dipped in zinc white. In this case, it is advisable to use at least 4-5 layers of fabric. After the tape with the fixing compound is wound on the radiator, a metal clamp should be placed on top of the fabric layer, which is tightly tightened with bolts.
Putty is applied to the metal clamp with bolts, which will keep the flow in the pipe.
If you use iron putty, you can do without tape. In this case, you should know exactly where the radiator is leaking. The putty is applied directly to the clamp. If there is no way to make a metal clamp, then a layer of cloth soaked in a solution of iron putty is wound over the hole, over which a layer of insulating tape should be wound. The entire structure should be pressed along the edges with a few wire twists. If you have to use such sealants for a long time, you should replace the old layers of windings with new ones before the start of the heating season. The fabric should dry well before connecting the heating.
When the winding is used for a long time, the putty in the winding can be washed out by hot water. When replacing the old layer with a new one, it is advisable to rinse the problem area with gasoline or acetone: this will create optimal conditions for more reliable fixation.
Related article: How to install a bathtub on legs: the secrets of proper installation
What malfunctions can occur
The expansion tank of the cooling system has such a simple design that it does not even suggest its possible breakdowns. It would seem that there is a plastic container with a lid, why is there anything to fail? But it is the cover that can sometimes cause problems. It contains a pressure valve, on the correct functioning of which the operability of the engine cooling system as a whole directly depends.
During the operation of a vehicle with a tank, malfunctions of the following nature may occur:
- rupture of the container body;
- the appearance of a coolant leak from under the cover;
- plug valve breakage or contamination.
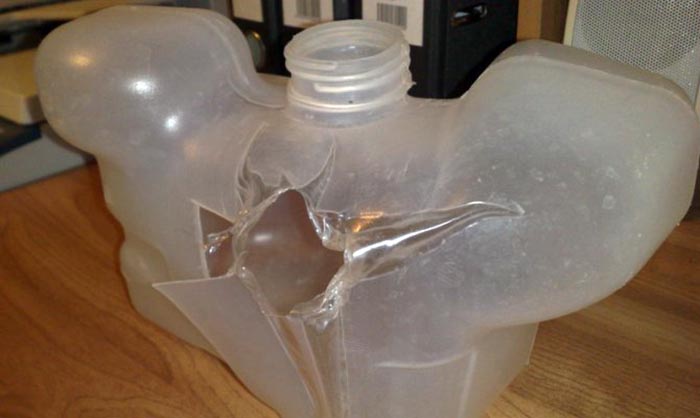
In case of serious damage to the tank, for example, in the event of a rupture, the capacity cannot be restored
Many car owners, in the event of a lid or tank breakage, simply buy a new part, due to its low cost and availability. But if desired, these elements can be repaired: the container can be sealed, and the lid can be cleaned from contamination. If smudges appear, then the reason, as a rule, boils down to a loose fit of the lid to the body due to design features.
Most car owners, when a tank or lid breaks down, buy a new part so as not to waste time repairing them.
Chimney type
How to arrange a hole and how to seal it depends on the material of the structure itself and the location. The most common types of chimneys are:
- metal pipe - for a bath and other ancillary premises a product made of heat-resistant and acid-resistant steel is used, for residential buildings a "sandwich" is preferable: steel cylinders nested inside each other with heat-insulating filling in the inner layer;
- asbestos-cement - it is used less often due to its greater weight and rapid clogging: the inner surface of the product does not remain smooth for long;
- brick chimney - the classic version, built from refractory bricks.

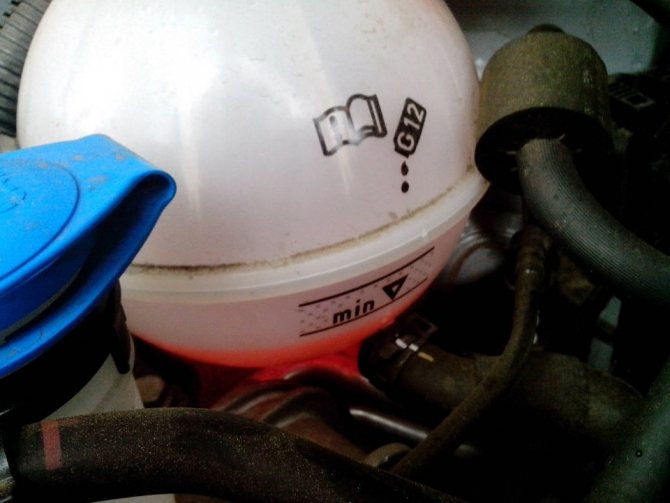
How to check the expansion tank
A fairly common reason for tank breakdowns is the failure of the valve built into the lid. In case of incorrect operation of the element, the engine cooling system begins to function incorrectly. In addition to the formation of air pockets, excessive pressure can occur, which can rupture the container. As a result, you have to replace the tank with a new one. It is recommended that the valve be checked periodically to avoid damage to the engine.
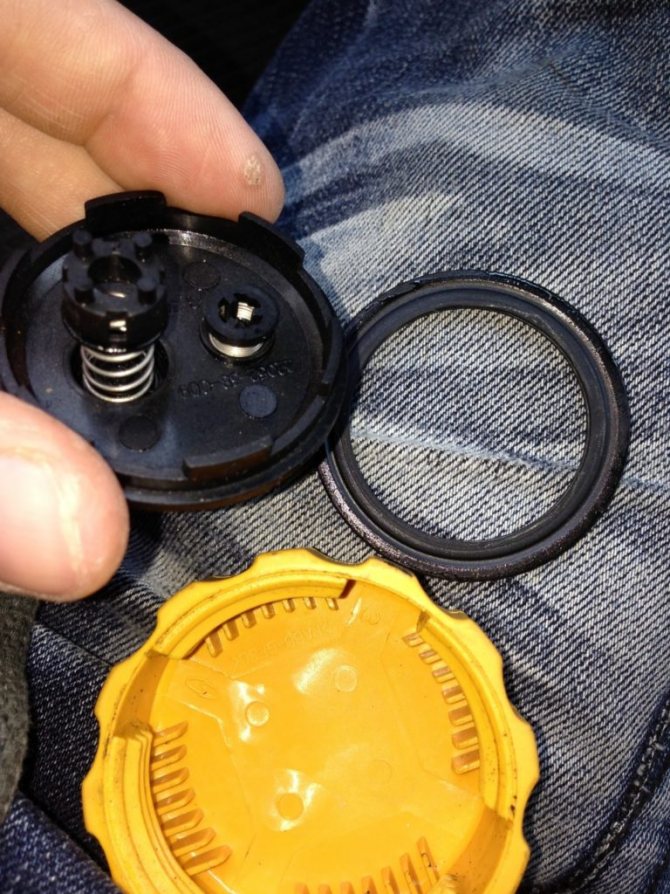
In the cover of the expansion tank there are valves that must open at a certain air pressure
The essence of the valve is that when the liquid is heated, a strong pressure is created in the system. At a certain moment, the valve in the expansion tank opens and releases air. When the system is cooled, the reverse process occurs when air is sucked into the tank.
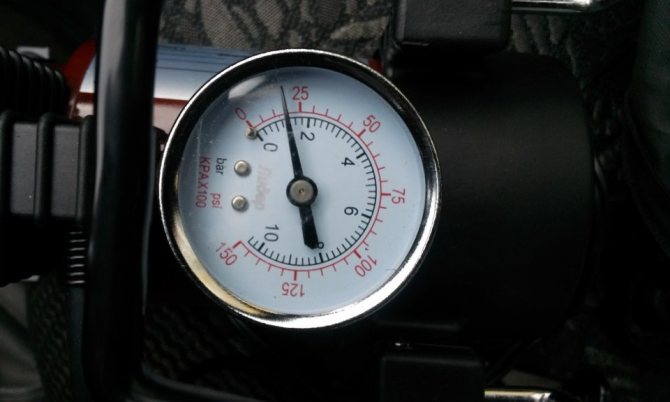
You will need a pump and a pressure gauge to check the valves in the cover. To do this, remove the hose from the thin upper fitting, which goes to the cooling radiator, and put on the hose from the pump. As air is injected, you need to follow the readings of the pressure gauge and assess the plug by ear. The valve on the tank, designed to release air, must open at a pressure of 1.1–1.5 bar. In this case, a growing hiss is heard from the cork. In this case, the increase in pressure should stop.
If there is a need to reduce the readings, then the cork is disassembled and a thick spring is bite off with pliers, adjusting the value to the desired pressure. It is recommended to replace the reservoir cap every two years to maintain optimal pressure in the system.
Video: checking the pressure of the expansion tank
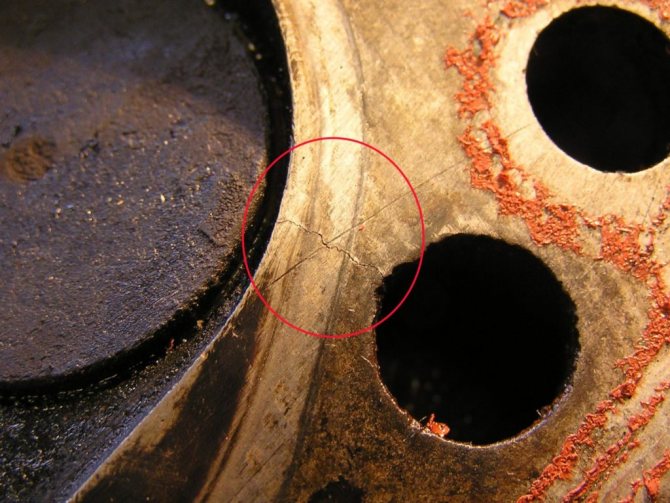
The appearance of cracks in the tank is evidenced by the appearance of a coolant leak, an unpleasant odor is possible, since the antifreeze gets on the hot exhaust manifold. If damage is found in the housing, it is necessary to turn off the engine, wait until the coolant cools down, and then proceed to dismantle the element:
- release the container fasteners;
- unscrew the clamps and remove the hoses;
- dismantle the tank;
- drain antifreeze;
- find a problem spot on the case.
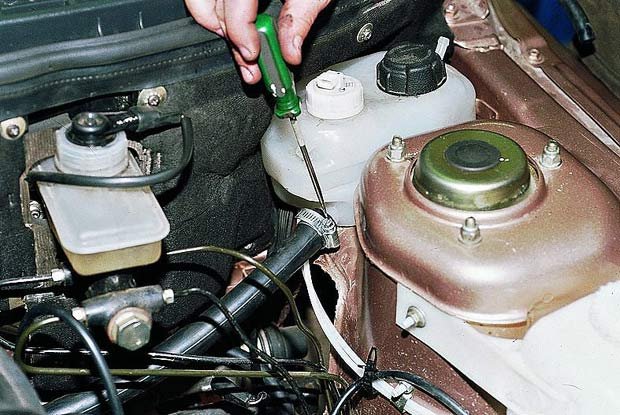
In order to remove the expansion tank, you will need to unscrew the clamps and pull off the hoses
Breakdowns of the reservoir lead to its depressurization, as a result of which the coolant flows out. The main reasons leading to such consequences:
- excessive pressure in the cooling system;
- a container with insufficient wall thickness (low-quality product);
- boiling antifreeze is in the tank for a long time;
- shock or other mechanical impact.
If antifreeze leak was found, it is necessary to determine the place where it originated from and repair or replace the vessel.
Expansion tank valve opening does not work
One of the reasons for the increased pressure in the cooling system is a malfunction of the valve in the cover of the expansion tank: it simply jams (sours). As a rule, the valve is not repairable and must be replaced. Although there are car owners who, using carburetor cleaning fluids, remove all deposits and return the part to work.
High pressure in the system can lead not only to rupture of the expansion tank, but also to damage to the heater radiator, which once again confirms the need to periodically check the valve. But the pressure can be not only high, but also low, which indicates insufficient tightness in the system. In this case, special equipment will be required, since at home it will be very problematic to find the cause.
Why is there oil in the expansion tank
Such a problem as the appearance of oil in the expansion tank is faced not only by the owners of domestic cars, but also by foreign cars. The presence of the following factors in the vessel makes you think about possible problems with the motor:
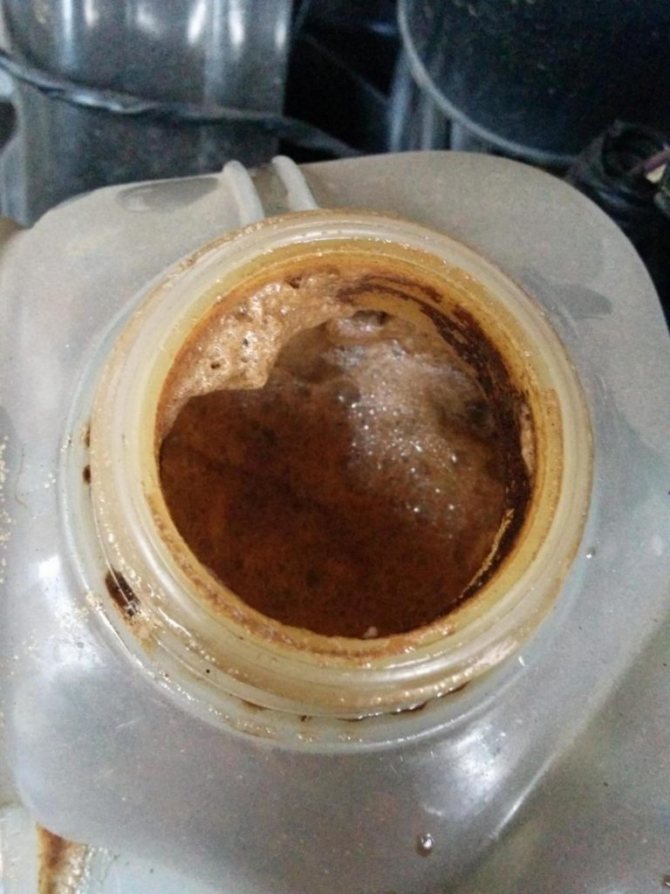
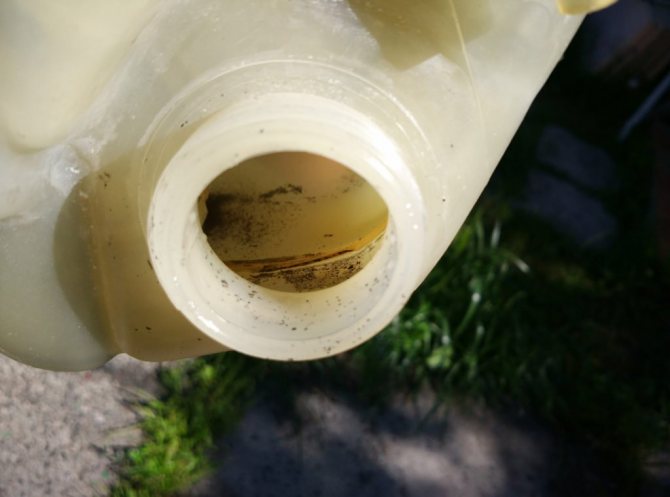
- an emulsion was found on the walls of the neck of the tank, which occurs when the coolant and oil are combined;
- the presence of an oil film on the surface of the antifreeze;
- the appearance of an unpleasant odor and discoloration of the liquid in the tank.
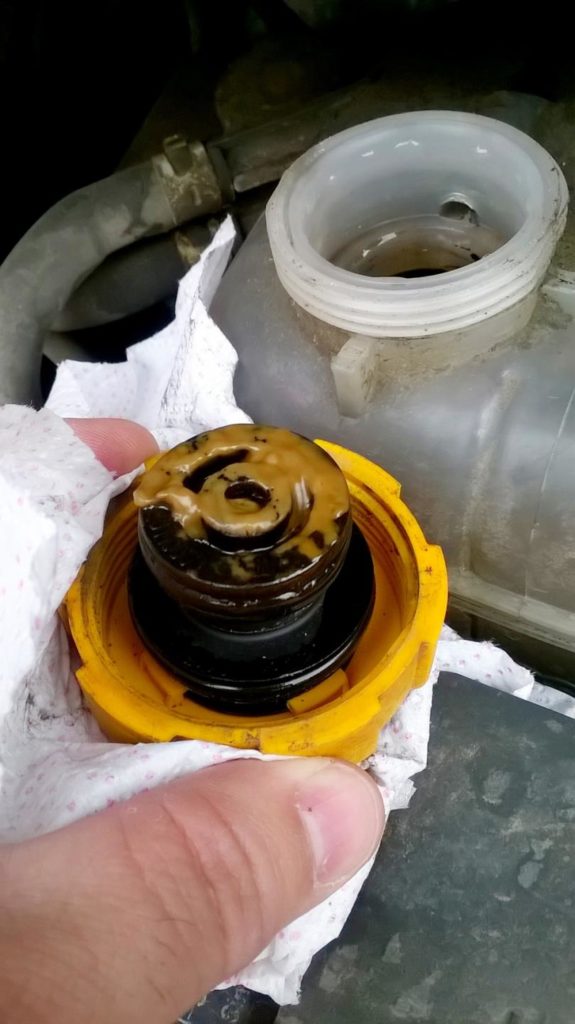
The presence of oil in the expansion tank (emulsion on the plug) indicates a problem with the engine, which must be eliminated as soon as possible to avoid serious damage to the engine.
If it was revealed that oil is still present in the tank, then most likely it will be necessary to carry out repair work on the engine. This conclusion is explained by the fact that oil and coolant flow through different channels in the motor. If they connect, then the integrity of one of the channels is compromised. But first you need to understand what can lead to such a situation.
The most obvious reasons are:
- Failure of the cylinder head gasket, damage to the cylinder block or head. In this case, gases, engine oil appear in the cooling system, and condensation is observed in the exhaust pipe. These signs indicate damage to the gasket and the need to replace it.
- Damage to the heat exchanger. The pressure in the lubrication system is higher than in the cooling system, which can lead to oil penetration into the heat exchanger. This is due to the wear of the gasket (rupture, hardening). The element cannot be restored and requires replacement.
- Mixing different antifreeze. As you know, antifreeze can be of different classifications and you should not mix the first liquid that comes across with the one that is used in the car. The fact is that the coolant has differences both in composition and in class. It is impossible to mix antifreeze of different colors, since the composition of the liquids is different, and the additives contained can enter into a chemical reaction, which will lead to unpredictable consequences.
The appearance of oil in antifreeze can be caused by damage to the heat exchanger gasket, which will require replacement
How to check the expansion tank cap
The cap in the expansion tank is an important part. Due to its incorrect operation, antifreeze may boil, which will lead to a leak. To avoid trouble in the future, you need to know how to check the cover for possible problems. Let's briefly consider the steps of the sequence of actions:
- We inspect the part for possible damage (scratches, cracks).
- The main elements of the cover are a spring, fasteners and a metal top. An important element is the spring, which should not be compressed easily.
- To check, you can put the lid in your mouth and inhale. If air is drawn in easily, the valve is working. Otherwise, the spring will wedge.
- You can also check with a pump with a pressure gauge. The pump is connected to the upper thin fitting and air is forced on. When a pressure of 1.1–1.5 bar is reached, the air must be vented. During normal operation of the valve, the pressure in the system is maintained within the specified limits.
To assess the performance of the cover, a visual inspection is carried out and the pressure of the element is checked using a compressor and a pressure gauge.
Why expels antifreeze from the expansion tank
During the operation of the car, you can face such a problem as ejection of the coolant from the tank.The main reason for this phenomenon is the wear of the pipes and other elements of the system. Since the hoses operate under high pressure and high temperature, over time, their integrity is broken, as a result of which the liquid from the reservoir goes out. But this problem is not unique to used cars. In new cars, due to malfunctions in the tank, antifreeze also goes away. The reason for this is the poor quality of parts or manufacturing defects. If there are burrs on the neck of the vessel, the lid will not provide proper tightness. As a result, the liquid is thrown out through this gap.
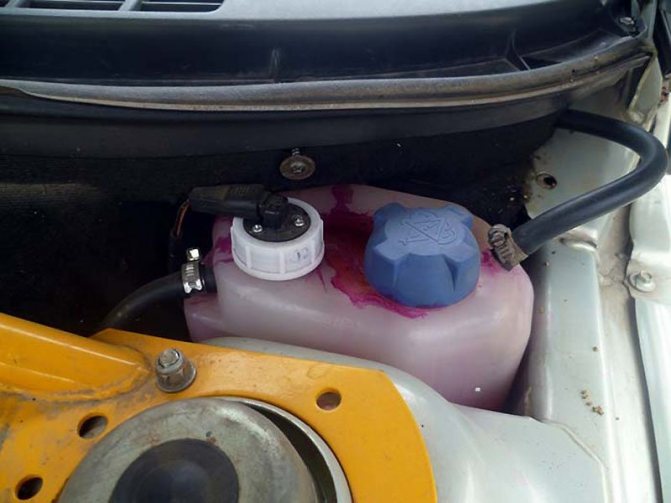
Antifreeze from the expansion tank may leak due to poor sealing of the cover due to factory defects of the element
There are situations when a crack appears on the tank itself. The reason, as a rule, is the poor quality of plastic and high pressure in the cooling system. However, antifreeze from the container can leave as a result of boiling, which is associated with car malfunctions, which lead to overheating of the engine. One of the problems may be a thermostat failure, a clogged cooling radiator, a pump breakdown.
Video: expels antifreeze into the tank, how to fix the problem
The reasons for the boiling of antifreeze and the appearance of foam in the expansion tank
Antifreeze or antifreeze, in comparison with water, is a liquid in which the boiling point is higher and the freezing point is lower. However, under heavy loads, the liquid is capable of boiling, which some motorists have to deal with. There may be several reasons for this:
- Insufficient level of coolant in the tank and, as a result, overheating and boiling. You can get out of the situation by adding liquid to the required volume, but you need to figure out why the level has decreased.
- Failure of the thermostat. If the assembly does not work properly, the fluid circulates in a small circle, which leads to the gurgling of antifreeze in the expansion tank. This is due to the fact that the liquid simply does not have time to cool when passing through a small circle. For diagnostics, you should find two nozzles coming from the thermostat. If the engine is warmed up to operating temperature and one hose is hot and the other cold, then the reason is clear - the thermostat does not open.
- High pressure in the cooling system. To identify that the problem is precisely in excessive pressure, you can use the temperature sensor in the car's interior: if the readings are normal, but the antifreeze is boiling, the cause is overpressure.
- Problems with the performance of the cooling radiator. Such a phenomenon as the boiling of antifreeze is especially important in the summer heat when it is idle in traffic jams. To eliminate boiling, just stop the engine and stand for a while. In addition, contamination of the radiator is possible, due to which the speed of movement of the liquid inside is reduced. You can try to eliminate contamination by flushing with both special and improvised means.
With an insufficient level of coolant in the tank, overheating and boiling of antifreeze occurs
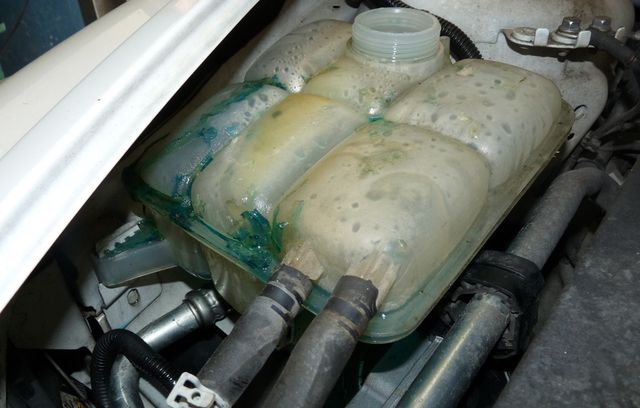
If the antifreeze in the tank foams, then there are two main explanations for this:
- Poor quality coolant.
- Damage to the gasket between the cylinder head and the cylinder block.
Foam may appear in the expansion tank, which is associated with the use of poor quality antifreeze or damage to the cylinder head gasket
In the case of a low-quality coolant, the foam can be easily removed with your own hands. It is enough to drain the bad antifreeze from the system, pour a solution of citric acid with distilled water. In this way, you can remove the remains of low-quality liquid. If the gasket is damaged, small bubbles first appear in the tank, and then large bubbles. A foamy mass is gradually formed.
There is only one way out in this situation - replacing the gasket, that is, you will have to remove the block head. In the worst case, it may be necessary to replace not only the gasket, but also the head, which is associated with overheating, the appearance of cracks.Cracks will further contribute to the formation of foam. Depending on the make of the vehicle, repairs can be quite expensive. Therefore, there is no need to hesitate in solving such a problem.
Cracks in the cylinder head lead to the appearance of foam in the expansion tank, which indicates the need for serious engine repair
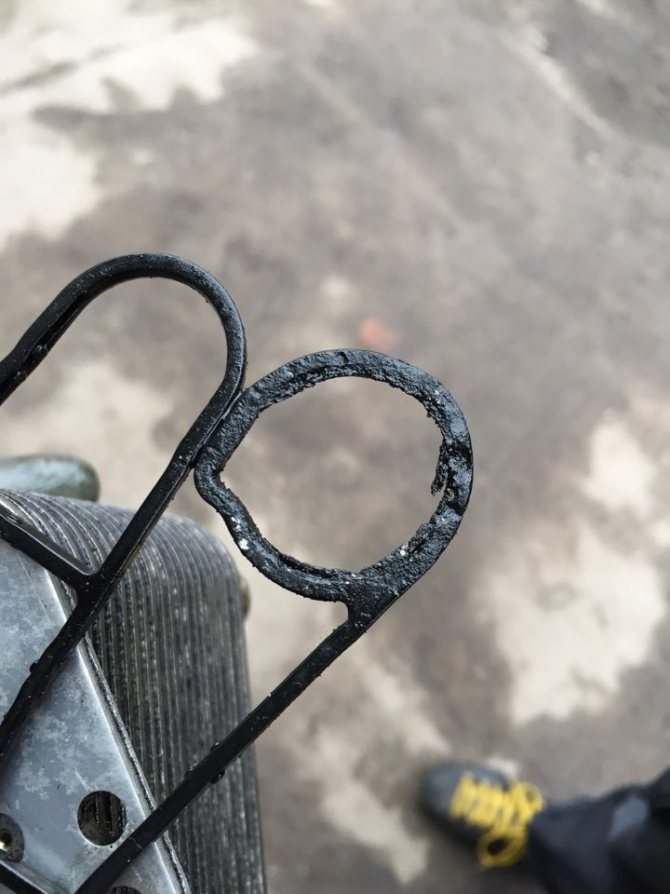
Bridging the Big Gap
When the leak is too strong and there is no option than to glue the radiator, you should immediately call the emergency service. If, due to the high flow of boiling water, it is not possible to access the battery, it can be covered using a thick blanket. This will not reduce the flow of water, but it will be possible to come closer to the radiator and inspect the details of the accident.
You can temporarily bandage the radiator with an elastic band while you wait for emergency services.
Related article: Practical plinth cladding with artificial stone
It is quite easy to deal with a situation where a leak has occurred in the place where the battery is attached to the pipe. In this case, before the arrival of the emergency service, you can use a wire and a piece of rubber, covering the hole with them. In the presence of a metal clamp, the flow can be completely eliminated.
When a leak occurs at the junction of the sections, an unusual method can be used. So, the hole can be tightly wrapped with strips of fabric, previously soaked in moisture-resistant heat-resistant glue. When the glue mixture is completely dry, the radiator leak will be hermetically sealed.
Another good way to seal the radiator is various polymer and powder sealants. They are able to eliminate the leak for a while, before the arrival of emergency workers. The principle of operation of these sealants is to instantly polymerize when exposed to air. The sealant can withstand high temperatures, is not prone to evaporation, and can prevent leakage for a long time.
With a welding machine, leaks in steel pipes can be repaired. Before repair work, they must be freed from water. If the rupture caused a large hole to appear, an additional steel plate made of sheet material should be used. It is imperative that the welding machine be grounded during repair work.
Do-it-yourself expansion tank repair
During operation, the expansion tank is constantly affected by deformation: the capacity narrows and expands due to temperature changes - this is the mode of its operation. At peak values, cracks appear on the walls of the tank. The problem can be solved in two ways: buy a new tank or repair the old one.
Expansion tank crack
The material used in the manufacture of expansion tanks does not react with any adhesives, regardless of brand. This suggests that it will not be possible to repair the tank qualitatively by gluing. Those car owners who decide to restore capacity usually resort to the following methods:
- solder the cracks of the case using a metal mesh;
- use epoxy resin, special sealant or cold welding.
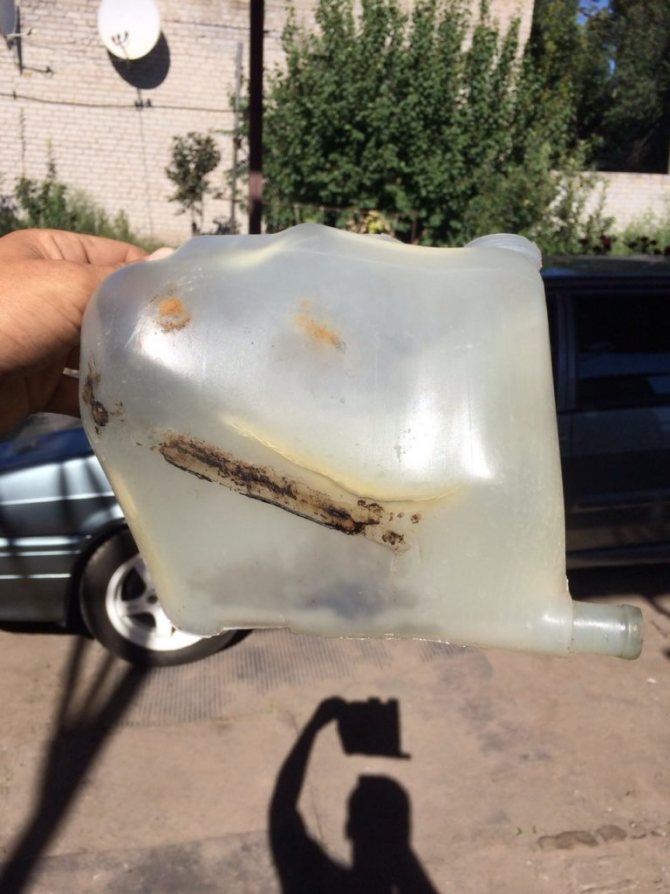
Due to the constant impact on the expansion tank of high pressure and temperature, cracks appear on the vessel over time.
It is worth noting that cold welding and epoxy fix the problem only temporarily and you will still have to return to repair or replace the tank.
Some motorists are wondering how and how can the cracks in the plastic housing of the expansion tank be repaired? To carry out the procedure at home, you should:
- clean the case in the place of the crack with a clean cloth or napkin;
- degrease the area with a solvent, then dry;
- cut a piece of brass mesh with small cells along the length of the damage;
- apply a strip to the repair site;
- with a heated soldering iron, solder the mesh to the edges of the crack in such a way that a reinforced layer is formed over the entire area of the mesh;
- grind the seam;
- apply a putty, a layer of primer and paint.
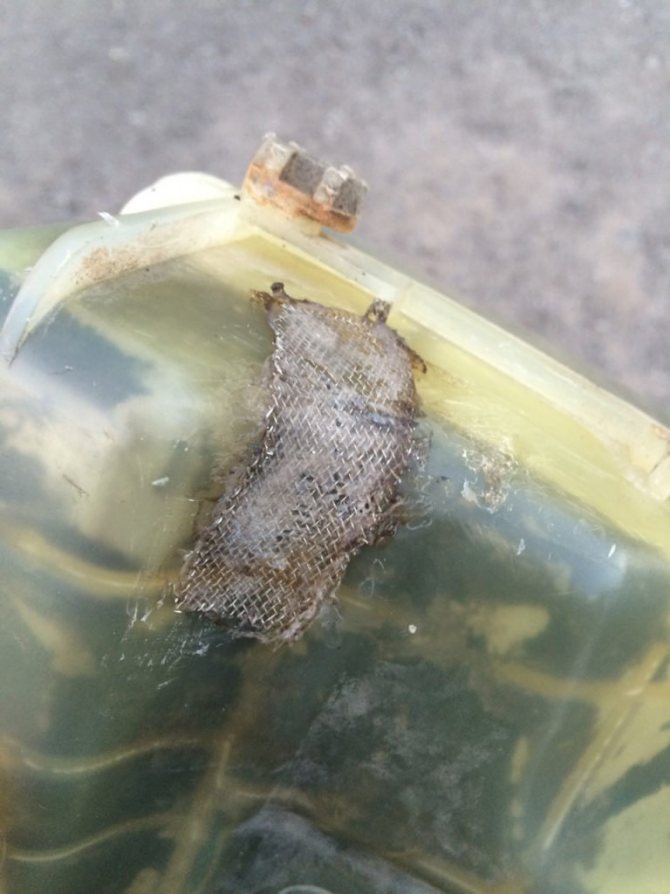
The most common and affordable way to restore the expansion tank is to solder using a fine metal mesh.
This procedure requires a soldering iron with a minimum power of 40 W with a flat tip. You can restore the tightness of the tank using the special red Done Deal sealant, which is designed for plastic. Before applying the substance, the body is thoroughly cleaned and degreased.
Video: repairing an expansion tank by soldering
Sealing leaks at joints
The leak at the joints of the heating circuit can be sealed in the following ways:
- Install a classic clamping clamp, having previously eliminated irregularities with additional rubber bands.
- Close up the leak at the joint by wrapping several layers of impregnated elastic fabric around it. As an impregnation, you can use waterproof adhesives or ordinary nitro enamel.
- Minor damage can be repaired with baking soda and glue-moment. Lightly moistened baking soda is rubbed into a crevice or fistula so that it fills the entire space. Super glue is poured on top. Substances instantly react with each other, forming a strong plug.
We recommend that you familiarize yourself with: How to calculate which pipe cross-sectional size is better and more expedient to use for heating a private house
It is convenient, just in case, to have a ready-made kit for local repair of the Siloplast type at home. The kit includes an acrylic fistula pad and a specially impregnated leak seal tape. It is enough to wind it around the pipe and moisten it with water. For such a repair, it is not required to drain the water from the heating system.
Note! High-quality repair of threaded connections requires mandatory dismantling and diagnostics.
How to wash the expansion tank inside
The expansion tank of the cooling system during operation can be contaminated, not only outside, but also inside. If it is not so difficult to wash the container from the outside, then it is quite problematic to clean it from the inside. Contamination can be of a different nature: sediment, scale, oil, etc., as a result of which even the liquid level in the vessel may not be visible. To eliminate contamination, first of all, the container must be removed from the car. Depending on the design, the body can be separated by partitions, which complicates the cleaning process. You can try to remove dirt through the hole in the cork using tools at hand, for example, by winding a rag on a wooden stick, pushing it inside and wiping off the dirt.
Sometimes it becomes necessary to clean the expansion tank as a result of its contamination. For these purposes, you can use both improvised means and materials, and special liquids.
Depending on the type of contamination, citric acid, laundry detergent, kerosene, or white spirit may help. There is another option - a mixture of powder, gasoline and warm water, which is poured into the tank, the holes are closed and left for a day. Shake the container periodically. Some motorists pour some sand into the vessel and, by shaking, clean it, but it is not always possible to achieve perfect cleanliness. If none of the above helped, they resort to the use of modern chemicals, the variety of which today will satisfy the needs of any car owner.
The expansion tank of the cooling system is a reliable component. However, there are times when problems arise with the capacity. In order not to have to resort to premature replacement of the tank, it is recommended to periodically check the lid for valve operability. If the part is intact, it will be possible to avoid the rupture of the case from high pressure.
Radiator drip. What to do legally
If your heating radiator is leaking, then, of course, the management company, the service company that serves your home, will do everything possible for you to fix and repair your battery yourself. Do not think that the officials and managers of these organizations have never heard of the Resolutions of the Government of the Russian Federation and the State Construction Committee listed in the first part of our article. Have you heard!
Replacing a heating radiator with your own hands
But they will try to come up with different reservations like: "We serve until the first valve, and the rest is all yours!"
As a rule, if you seriously intend to resolve the issue in court, then the nerves of officials and managers do not hold out, and they give up their positions. But sometimes they can outplay you. For example, you have a drip tap on a battery. Who should change it? As a rule, such a crane does not appear in the technical documentation (especially if you live in a Khrushchev or Brezhnevka built in the 60s and 70s of the last century). It means that you set it up yourself, and you yourself must take care of it.
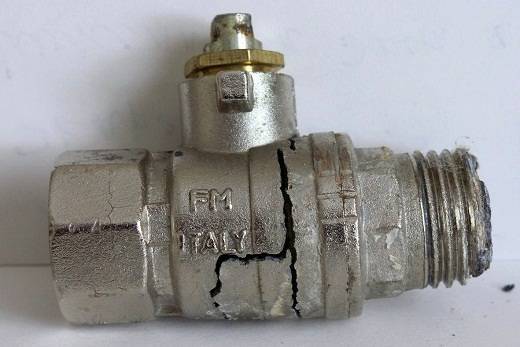
The cause of the leakage of the tap may be its destruction.
Now service organizers even draw up an inventory of the property they take for service. And, for example, if you changed an old cast-iron battery for a newfangled bimetallic one, then the service organization may not take it for service! The battery is really yours! And you installed it for sure without coordination with the housing office and all the rest of the communal vertical of power!
For information on how to properly replace batteries in an apartment, see the following article.
If you are interested in where you can buy a tap for a radiator, read the article at: https://remontspravka.com/gde-kupit-ekran-dlya-batarei/
The replacement of batteries in an apartment building must be coordinated in the same way as any other alteration of common property: the installation of additional doors in the main walls, the removal of heating to a glazed loggia, etc. That is, draw up a plan, order a technical project from a certified organization, etc.
In general, you will not get around the trouble. Therefore, in Russia in general and in Moscow in particular, if a heating radiator leaks, "what to do?" citizens do not ask, but go to the store, buy a new radiator for their hard-earned money, secretly give a plumber on their paws so that he installs this radiator, and they themselves make sure that it does not flow.
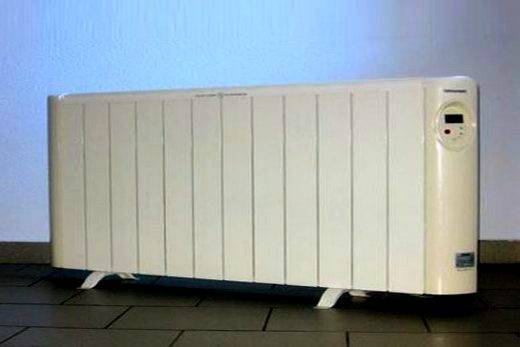
Electric oil cooler can leak too
If we have already discussed such a delicate topic, then it would be a sin not to answer the question: "What to do if the oil cooler leaks?"
We are talking, of course, about an interior electric heater. and not about the car's radiator cooling.
Again: there are two options.
1. The radiator flows at the place where the heating element is connected. The reason is the gasket is out of order. You can change it, but try to find the one you need! Even in branded service centers it is not always the case.
The second option is to cover the leak with a high-temperature oil-resistant sealant. These are sold in parts stores, used to repair car radiators.
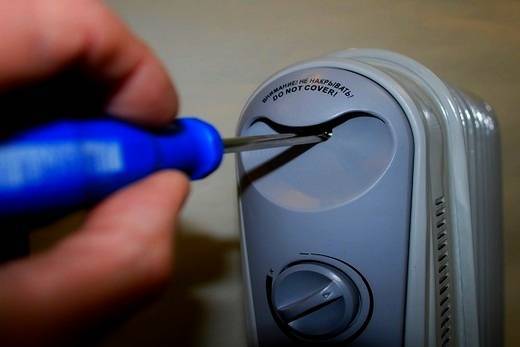
Repairing the oil cooler
2. The radiator flows "along the edges" of the convector. The reason is the depressurization of the device. Usually the result of a fall. We must throw it away. You cannot fix it at home, but in the workshop they will ask for so much that it will be cheaper to buy a new radiator.