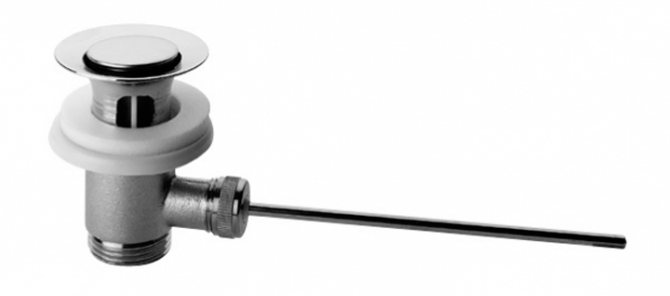
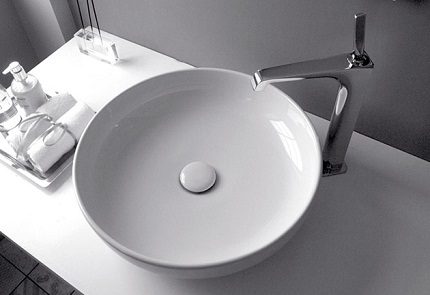
The washbasin bottom valve, which has recently appeared on the plumbing market, has quickly gained wide popularity.
This device is designed to block the drain hole when you need to collect a certain amount of water in a bidet or sink.
England is considered the birthplace of the bottom valve, where the issue of economical use of water is quite acute. The device was originally used to mix hot and cold water from separate taps in the sink.
mentality and sink
Hearing the words "bottom valve" for the first time, not every person will be able to immediately realize what it is. And this is an invention of the British, who did not think of coming up with a mixer or who considered this convenience a very unaffordable luxury. Despite the fact that it may be comfortable to wash or wash your hair in a sink puddle.
It is difficult for a Slav to realize this, because he performs every washing of his face with renewed water. As a rule, a modified shell with us is a tribute to fashion or simple human curiosity. And because the valve is included in the set of many mixer models, then why not install it, especially since the sparkling circle looks more beautiful than the drain hole.
It is fair to admit that in many cases the bottom valve is possibly very ergonomic - wash trifles, splash the kids, steam up the hands before a cosmetic procedure, or cool the wild little head at the end of the holiday. But in the kitchen sink and bathroom, a water damper will undoubtedly be a more useful and economical device.
The detail itself does not carry an extraordinary semantic load and, therefore, does not require important transformations in the installation of the mixer-sink-drain chain for a sink with a bottom valve. The device is installed / removed in a matter of 60 seconds, which makes it very easy to clean.
Note! Over time, valve wear can lead to leaks, therefore, in order not to flood neighbors, you need to have a sink with an overflow.
Types of siphons with overflow
A variety of siphons are used in modern plumbing devices:
- The bottle type is most often used in the kitchen sink because the bottle shape reliably collects large amounts of waste that comes from the kitchen.
- of the tubular type are represented by a curved knee, in which not only excess components are deposited, but also a constant amount of water is present, which completely blocks the lumen in the pipe and thereby blocks the flow of sewer odors into the apartment.
- corrugated siphon is convenient to use when installing drains in hard-to-reach places; a classic example is a sink under the bathtub, which can also use a foot valve.
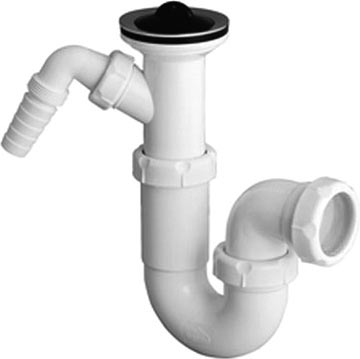
Each of the presented types of siphons has its own advantages and disadvantages. For example, a corrugated siphon is cheap, and the overflow pipe can be turned in almost any direction. The bottle-type deposit is good at settling waste at its bottom, and the tube-type one reliably locks the odors out of the pipe.
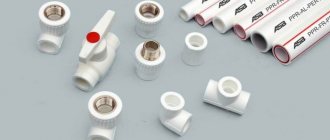
When choosing a material, it should be borne in mind that plastic siphons with an overflow have several advantages over classic metal products:
- they are not susceptible to corrosion;
- they are very easy to assemble according to the instructions; you do not need to have plumbing skills for this;
- plastic is a chemically inert material, therefore it does not support rotting processes on its surface;
- since the surface of the plastic is smooth and does not become rougher over time, traces of grease and mechanical impurities do not get stuck on the pipe walls;
- it is also easier to clean plastic pipes from blockages, it is also easier to clean their inner surfaces than metal ones.
Some types of overflow siphons are shown in the figure below.
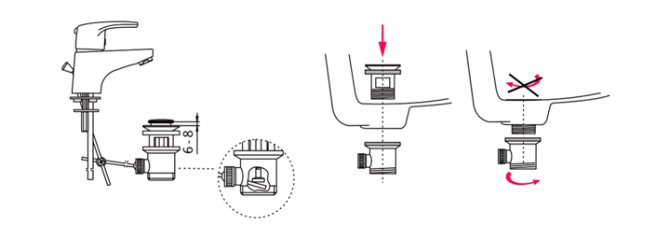
The diagram of the finished device is shown in the figure below.
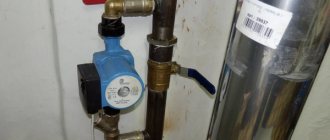
Here is an example of the installation of a bottle siphon with overflow, showing the connection to the drain of the washing machine so that the water used up during washing can drain into the drain.
To assemble the siphon, you need to do the following:
- It is imperative to shut off the water in the room. In modern houses, as a rule, there are taps right in the apartment. If they are not there, then you need to block the entire riser.
- Prepare a bowl and a large doormat to collect any water that will inevitably flow out of the drain.
- Next, you need to carefully remove the old siphon and thoroughly clean the drain surface from foreign dirt and mucus. It is on a clean surface that it is better to mount a new device, as well as a sink bottom valve.
- Now you need to insert the rubber gasket into the sewer pipe so that the siphon is inserted as tightly as possible.
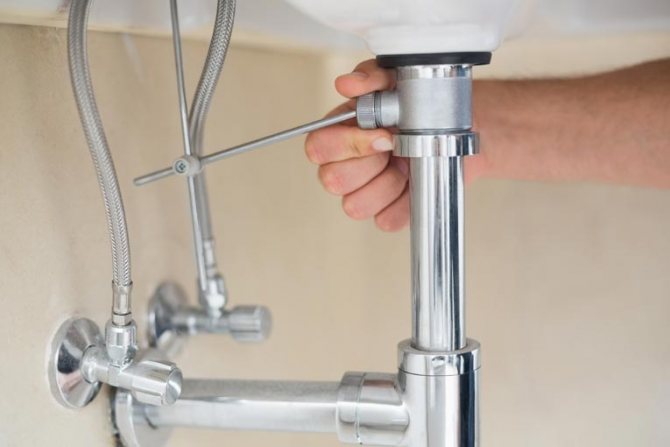
- Further, the installation of the siphon is carried out according to the scheme, which is supplied to any device of this kind. In general, you first need to unscrew the screw that is in the center of the sink hole.
After carrying out all operations, it is necessary to thoroughly test the correct operation of the entire system: a siphon with an overflow and a bottom valve. To do this, carry out the following steps:
- For 15-20 minutes, water of any temperature is spilled in different streams - gradually increasing and then again weakening the pressure. You also need to do several cycles of impulse water supply - a sharp pressure and weak. If the pipes did not give any leaks, then the installation was done really well.
- If there is a small leak, then the first measure is to tighten the nuts and check the tightness again. If this did not help, you will have to dismantle and assemble everything in a new way.
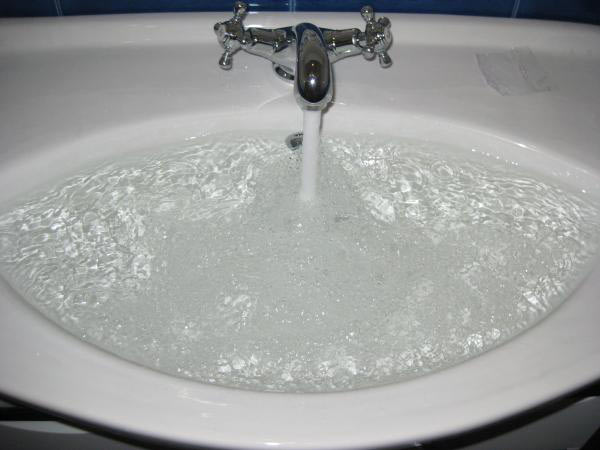
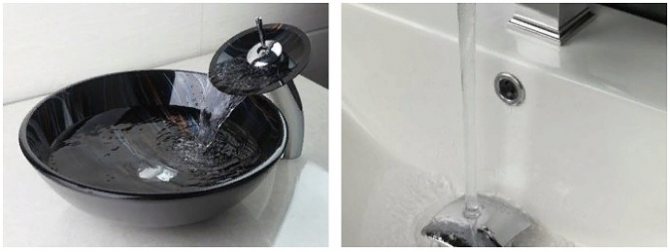
- When the siphon has proven its tightness, it is required to check how the sink bottom valve and the overflow mechanism work. To do this, the valve is switched to plug mode with one press and the sink is filled with a continuous flow - at first strong, then it can be increased. If the water does not come above a certain level, then the drain works efficiently.
- Then you need to turn off the water and leave the sink full for half an hour, noticing the water level. If after this period the water has not decreased, it means that the bottom valve for the sink is working efficiently and can ensure the complete tightness of the system.
You can more clearly see how to assemble a siphon with an overflow to a sink or washbasin in this video.
Having assembled a sink with a bottom valve and an overflow system, we get a reliable mini-bath, which not only helps to save water, but is also an indispensable household helper in a variety of situations!
The use of such a mechanism has several advantages:
- With the help of the valve, it is possible to collect the required volume of water, use it to the maximum and only then drain.
- It prevents clogging more reliable than any mesh, which is especially important for kitchen sinks.
- The bottom valve for the sink also does not let foreign odors from the sewer system, since it closes the drain hole sufficiently tightly.
- Finally, it can be easily installed in any sink - no special skills are required. You will soon be able to see for yourself.
- The valve is durable and very easy to maintain.
- It is very easy to use - with one click you can close the drain and also open it with one click (English "Click-Clack" - click and click).
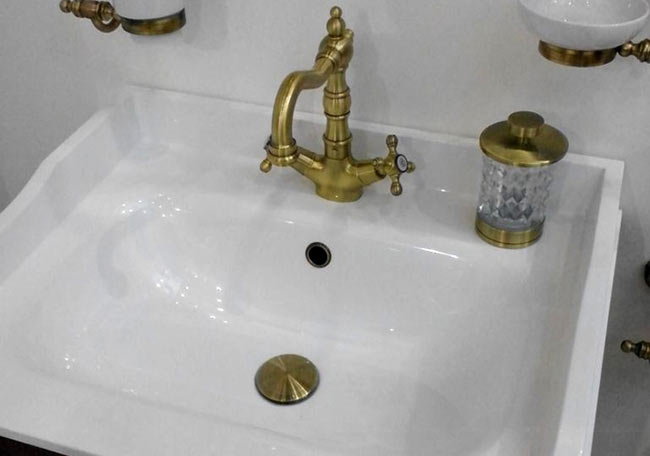
- Finally, the device gives a beautiful look to the washbasin if the mixer is removed from it - thanks to the plug, you can mix hot and cold water right in the sink.
Types of bottom locking devices
The valves are available in 2 types:
- mechanical (spring) - Click-Clack, which are adjusted with one finger press on the cover of the device;
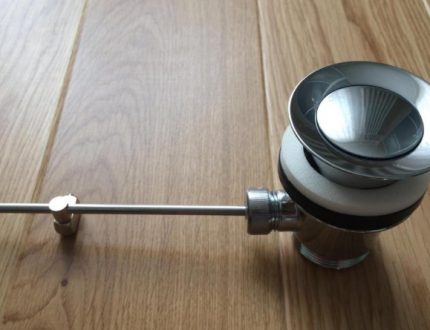
- automatic, controlled by levers.
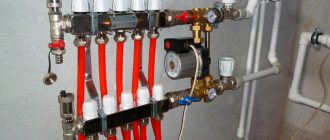
The lever system consists of narrow iron rods, the main connection of which is under the sink. The lever with which the person will specifically "work" is located in the slot in the back or side of the mixer body.
The essence of the bottom valve
The water seal device is suitable for any sink - corner, sink, pedestal.
The price of valves can range from 900 to 4000 rubles or more and depends on several parameters:
- material (brass, brass, ceramics);
- type of coating - chrome, colored;
- type of cartridge responsible for mixing warm / cold water. Italian Newform cartridges are capable of withstanding water hammer up to 35 atm;
- manufacturer.
The operation of the hydraulic seal is ergonomic and pleasant for several reasons:
- ergonomic and easy one-finger control;
- from the outside, an attractive look that has nothing to do with the former classic corks made of rubber and plastic;
- easy cleaning due to the ergonomic shape;
- reliable fastening in the drain hole, excluding the possibility of getting lost, before the plugs were attached to a fishing line or chain;
- protection from unpleasant odors from the drain hole - you never know what can happen;
- keep your jewelry from traveling into the bowels of sewer pipes;
- saving water.
Some annoyance can be caused by:
- to spring models, opening / closing which it is necessary to lower your hand into unclean water;
- inconvenience of cleaning the levers under the sink;
- and the hole in the mixer, which is located behind - out of sight.

Benefits of a sink waste
The basin drain valve is a specific plug. Its direct purpose is to retain water directly in the sink itself. Most of all, countries such as Germany, England and France need this device, since there are no mixers in many apartments here. In our country, this device appeared relatively recently, but many people already liked it.
This device is easy to close and open thanks to the button installed on the mixer or tap.
The bottom valve allows you to quickly draw the required amount of water into the washbasin bowl, and also quickly, with one click, drain the water. In most cases, this set comes with a mixer. This device can be called an alternative to a conventional rubber stopper. Just do not forget that the rubber stopper has low hygiene properties, is inconvenient to use and has an unaesthetic appearance.
The washbasin waste has a coating that is easy to clean
Unlike a rubber stopper, a foot valve has a number of advantages:
- Reduces consumption of consumed water;
- The valve is easy to use as it is very easy to use;
- The valve is matched to any bathroom design;
- Prevents the spread of unpleasant odors from drain pipes;
- Valve installation does not require special skills and knowledge;
- The material from which the valve is made has high strength properties.
Modern consumers have appreciated all the advantages of this device. But before making a choice in favor of a bottom valve, you should carefully study all the characteristics of this device.
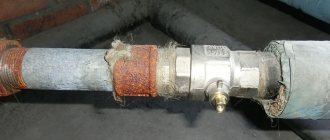
Installation of a shut-off device for water
A full siphon equipped with an outlet pipe that connects to the drain at the bottom of the sink allows the washbasin faucet to be fitted with a bottom valve. A semi-siphon for a sink with a waste water valve, which has no outlet, allows the installation of an optional Click-Clack system valve.
Note! In order not to scratch chrome-plated surfaces, use tools with sponges. If these are not available, it is possible to use gaskets made of cardboard, copper or brass.
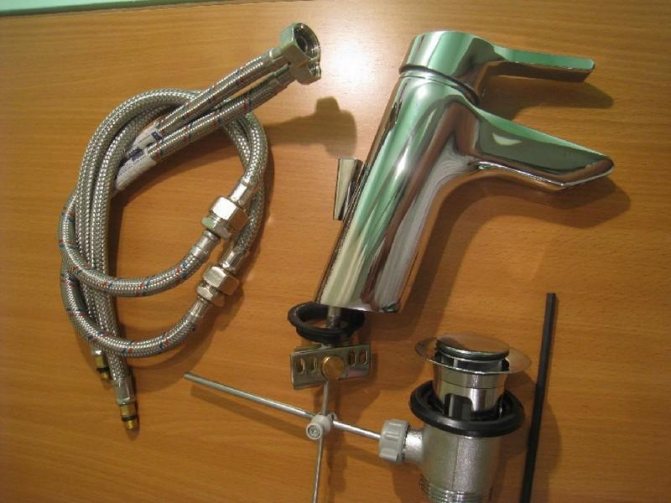
Because the hydraulic seal is often supplied with a mixer, consideration of installation work will include the installation of both of these units.
- A valve lever and flexible hoses extend from the mixer - all this is displayed in the hole at the bottom.
- The faucet body is fastened with a compression nut over the corresponding hole on the sink pedestal... Rubber grommets must be placed on both sides of the mounting hole.
Note! If the supply is made with solid pipes, they will probably need to be bent with their own hands, which requires a certain skill. If the tubes need to be shortened, then during grinding and cutting, the shavings can get inside and break the operation of the crane - it will not turn. It will be helpful to rinse the insides and dismantle the "aerator" with a strong stream of water.
- Connect the hoses to the hot / cold water connections with rubber nuts... A U-shaped pipe bend is allowed, an S-shaped bend is unacceptable, due to the fact that the movement of the water flow is impeded and the pressure increases, which adversely affects the connection points.
- Place the odor trap in the recess of the drain hole.
- Fold the knitting needles (levers) of the device crosswise and secure with a special plastic cross.
- One end of the spoke connects to the lever and to the valve eye... Moving up and down, the lever will move the spoke, which will allow the valve to move.
- Connect the siphon or corrugation from the bottom.
- Lead the hose to the drain pipe.
- Test the assembled system as required by the instructions... First, let the water flow in a simple way, and then try the valve: close it, fill the sink and drain.
- If leakage is found, tighten the screw connections.... It cannot be ruled out that a sealing tape will come in handy in these places.
- If all the joints are dry, you have the opportunity to congratulate yourself.
What are the criteria for selecting stubs?
First of all, you should decide on the price. You need to understand well what the buyer gets for his money - the quality of materials and workmanship, design or additional convenience.
An important selection criterion is the quality of the metal and the threaded connection. To understand how reliable the chosen model is, you need to make sure of the strength of the material. It is advisable to check how the stub is assembled and disassembled
Consider several design features on which the price depends:
- the presence of overflow;
- type of control;
- design;
- brand.
The model should be selected based on the type of sink. If it does not provide for the possibility of removing excess water, install a bottom valve without overflow. Option - replacing the siphon with a more practical one.
As for the management mechanism, you need to clearly define the goals. If the sink will be filled with water for hand washing, then after use it is unlikely to be too dirty. There will be no problems with lowering your hand to the spring valve.
But if you plan to wash dirty shoes or oily items, it is better to give in to natural disgust and buy a lever device.
Design affects the cost of a product. Taking into account the range of prices, the overpayment for the beautiful design of the bottom valve is not so great. Therefore, you should not deny yourself the pleasure of putting a beautiful plug on the sink.
Summarizing
At first glance, unnecessary devices for bathrooms, showers or sinks can actually be irreplaceable.Providing comfort, they instantly become design elements and create a calm atmosphere. And the practical use of such innovations as, for example, the bottom valve, will expand as you get used to the European "little thing". Due to the fact that if people are economical in Europe, then in the Russian Federation they are creative.
Any theory must be supported by a deed and the video in this article can be a practical guide for you on installing a bottom valve.
Installation of a mixer with a bottom valve
A corrugated hose or siphon must be installed before checking. If the sink does not include a cabinet, it is best to purchase a beautiful chrome siphon. It will provide not only free water drainage, but also an aesthetic appearance.
If you follow all the installation rules, the valve installation will take a couple of minutes.
Checking valve operation also requires a sequence:
- Open the tap that cuts off the water supply. After, it is necessary to trace whether a leak has formed under the sink and at the joints.
- Places where water seeps out must be tightened or use a special tape.
- Open the tap to full capacity and check the siphon connection.
- Open and close the valve several times, checking its correct operation.
- You can make sure that water does not seep through the valve by drawing water into the sink bowl.
When checking the operating condition of the valve, it must be remembered that dripping water is the first sign that the installation was carried out with technical errors. If malfunctions occur, it is best to fix them immediately.
Leak testing and maintenance
The serviceability of the equipment is checked in stages. After turning on the water supply, you need to make sure that there is no leakage at the joints, as well as in the design of the mixer itself. If water seeps out, a special fluoroplastic tape "Fum" is additionally used for the thread, and the nuts should also be tightened.
To check the tightness of the siphon, unscrew the entire tap. In this case, you should also make sure that the valve is working properly. To do this, open and close the cork 2-3 times, collect and drain water into the sink. Carrying out such a check is a necessary condition for the further, uninterrupted operation of the system. It will not hurt to check the strength and reliability of hoses and pipes even before installing the mixer and valve.
Push Open system
Less common Push Open valves. Their main disadvantage is that to open the drain hole, you must manually act on the valve, that is, wet your hand. But on the other hand, such a valve is mounted quite quickly and is much easier to maintain.
It is also used for baths, bidets.
This type of set for sinks, like a bottom valve, began to appear in our apartments quite recently, so not many people know about it. However, it is becoming more and more popular in our country. Next, we will consider what is the convenience of this design and how to install it on the sink.
The procedure for installing the drain system
You can install the bottom valve yourself, and you do not have to have special plumbing skills.
Since the installation of the valve is inextricably linked with the installation of the mixer, the necessary sequence of actions should be observed:
- First of all, the hoses are laid connecting the mixer and the bottom valve.
- The faucet is fixed to the sink; in order to seal it, a rubber gasket of the appropriate size is required (usually comes with a faucet).
- Next, you should check the identity of the diameters of pipes and hoses at the joints. If necessary, boring of connections is performed. This procedure must be done carefully, pieces of metal can get inside the drain mechanism and lead to its premature breakdown.
- Next, pipes and hoses must be connected to each other; for this, special nuts with rubber seals are used.
- A valve is inserted into the drain hole, the mounting spokes must be fixed parallel to each other.
- In the last turn, the spokes are connected with the valve and the lever.
It's important to know:
before using the installed system, you need to check the reliability of the pipes that ensure the flow of water into the sewer.
When choosing a sink or bidet, it will be useful to have a so-called "drain-overflow" system.
". When installing a foot valve, such a system is especially necessary. The fact is that when the drain is blocked, the risk of flooding the bathroom increases (they simply forgot to turn off the tap).
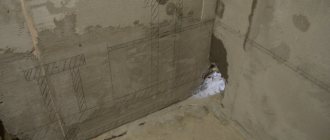
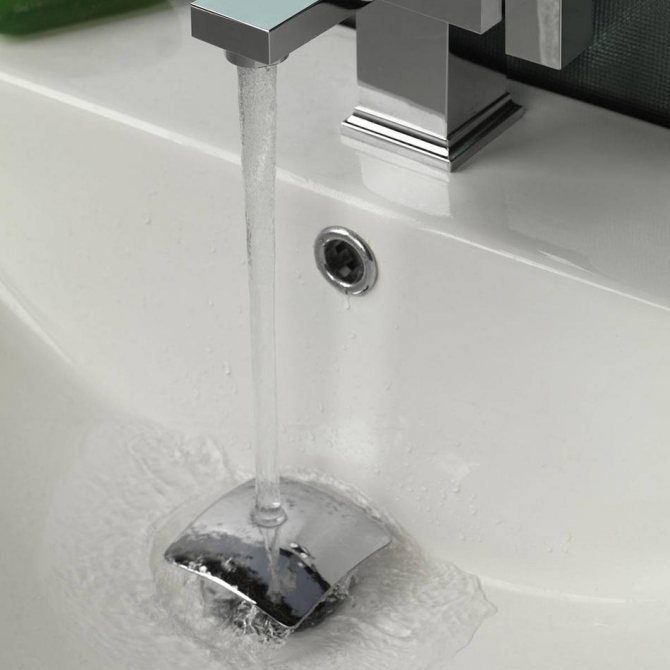
To avoid trouble, there should be a hole at the top of the sink to allow excess water to enter. Often, such a hole spoils the appearance of designer plumbing. In this case, provision is made for the presence of grooves around the perimeter of the washbasin, camouflaged with decorative rims.
After finishing the installation work and starting the water, you need to carefully inspect all connections for possible leaks. If leaks are found, they must be repaired, otherwise over time it can lead to more serious leaks.
Watch the video, which clearly shows how to properly mount the foot valve with a mixer on:
The prim and conservative Britons didn't like the traditional mixer used by the rest of the world.
Instead, the British put two conventional valves for hot and cold water. And they came up with a bottom valve for mixing.
This fixture is installed in the bottom of the sink and closes the drain pipe.
Thanks to it, you can draw water into the sink from two taps, getting a comfortable temperature for use. The British found it unhygienic to use a regular cork. Moreover, it allowed to reduce the incidence of fungal diseases, which are quite common in the damp climate of England.
Now this device is widely used in other countries, it is installed together with a conventional crane.
A great impetus to the spread of this device was given by a total enthusiasm for economy, because in many European countries it is necessary to pay not only for each cubic meter of consumed water, but also for the amount of slop drained into the sewage system.
The popularity of the bottom valve is due to its advantages:
- the ability to save water when washing and other procedures;
- unlike a conventional plug, you do not need to touch the mechanism itself with your hands to turn it on and off;
- attractive appearance;
- ease of cleaning, maintenance.
Today, this mechanism is installed not only on washbasins, but also in bidets and some other plumbing fixtures.
Benefits of using
Installation
the device has many advantages:
- The main advantage is significant water savings. The cost of hot and cold water is constantly increasing and installing a bottom valve will help reduce costs.
- Ease of operation. Even a small child can handle a small lever or button.
- The appearance of the sink becomes much more aesthetically pleasing; instead of an unsightly drain hole, a beautiful shiny valve is visible.
- The device does not require additional maintenance; the valve can be cleaned in a matter of minutes.
This device has no significant drawbacks
... Of course, it will take some time to get used to this method of saving water; washing in this way is not always convenient at first.
In addition, you will have to carefully monitor the water level in the sink, sometimes the pressure is too strong and overflow in this case cannot be avoided.