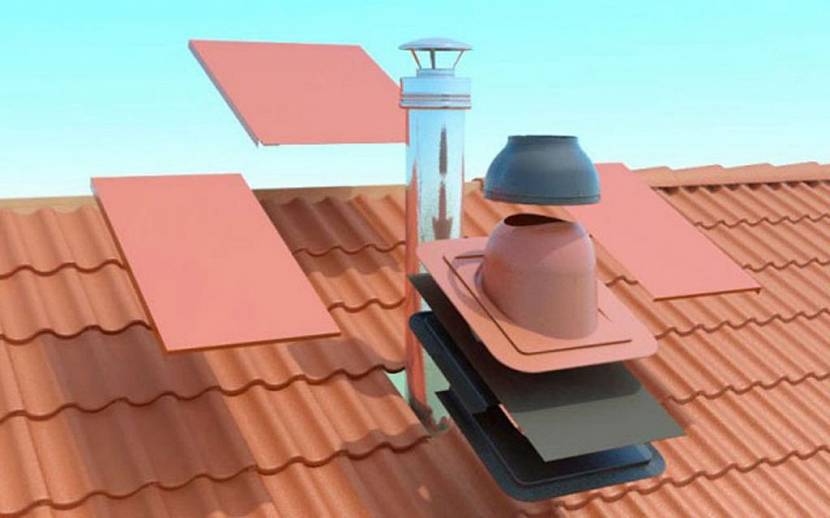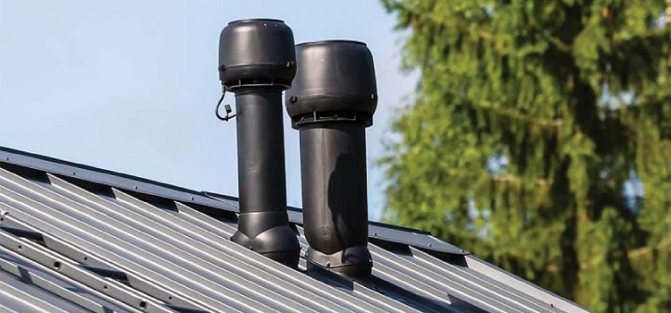
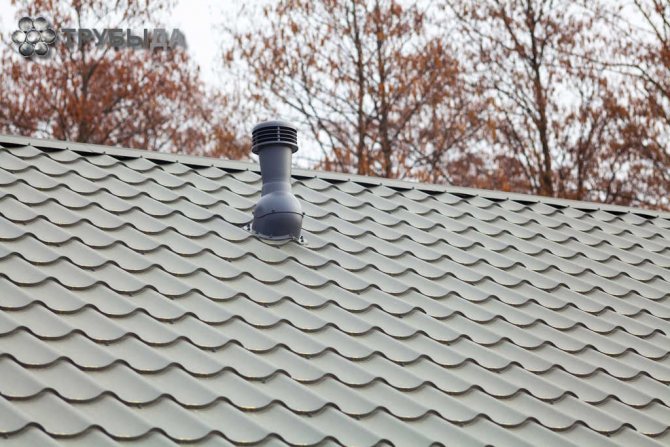
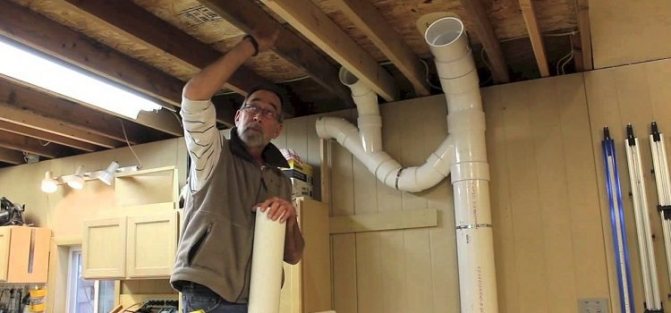


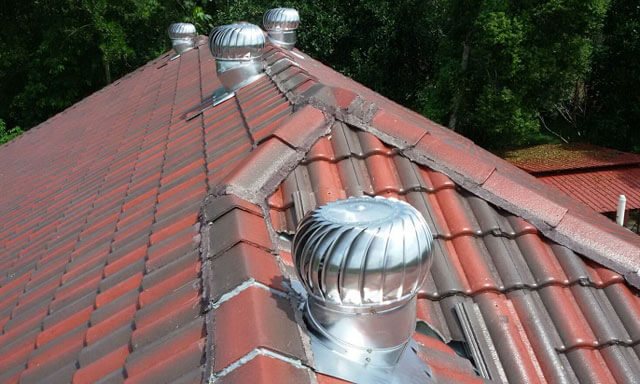
The ventilation pipe is one of the main elements of the housing air supply system. The outlet of these pipes is most often carried out through the roof. Installation must be carried out in accordance with building codes and regulations (SNiP), because if the ventilation pipe on the roof is not installed correctly, all unpleasant odors and harmful substances will accumulate in the room.
Pipes for ventilation are most often brought out to the roof and the installation of such a system must be carried out in accordance with all the rules
Features of the output of pipes for ventilation to the roof
The main task of the ventilation system is to create and maintain an optimal microclimate in the house. The air in ventilated rooms must necessarily comply with sanitary and hygienic standards. The air should not be too humid, contaminated with dust and hazardous substances.
Installation of the ventilation structure is quite easy, however, before installation, a compulsory item is to create a project. It should include a plan that takes into account which elements will be used during installation and where they will be placed.
The installation of ventilation parts must comply with building codes and regulations (SNiP) and be carried out taking into account all safety points. In addition, the correct positioning of the ventilation pipes allows for the most efficient ventilation. A very important point is the location of the ventilation pipe on the roof. Its output is carried out from the main equipment or from the wall. The number of component parts may vary. It depends on the specific case and on the plan for the future design.
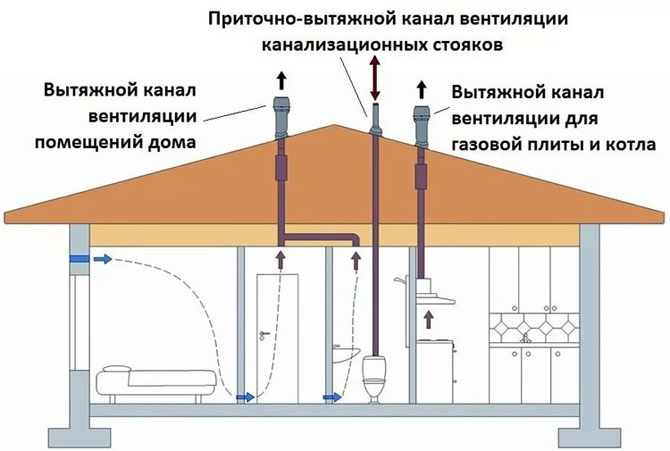
The outlet of the ventilation pipe through the roof is performed for:
- oxygen flow into the house;
- installation of the fan part of the sewer riser;
- air circulation in the attic.
The choice of the place for the pipe when installing on the roof must be carried out in such a way that nothing interferes with the removal of polluted air. The height and diameter of such products is determined taking into account their operational characteristics.
The height and diameter of the pipe depend on the type of ventilation, the volume of the room and other factors.
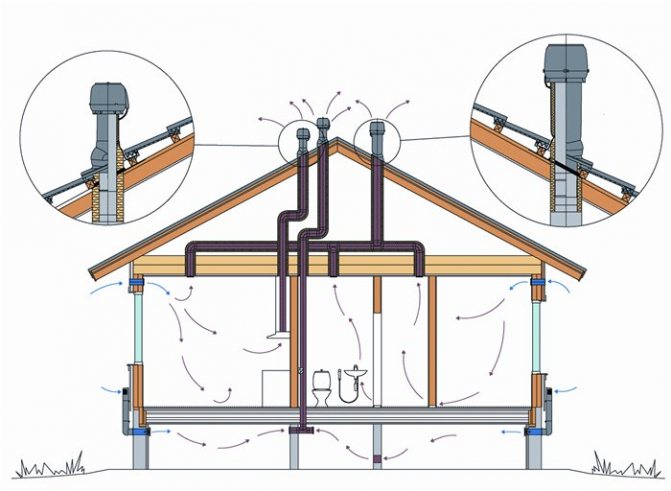
Note! The simplest option to carry out the pipe outlet through the roof is installation through the ridge. However, such an installation should only be carried out if the roof rafters are not equipped with a ridge beam. In addition, with such a channel output, it is very easy to insulate it.
For a pitched type of roof, the correct solution would be to install a ventilation structure near the ridge. This arrangement does not require additional fixation of the duct.


Features of installing a ventilation outlet on the roof
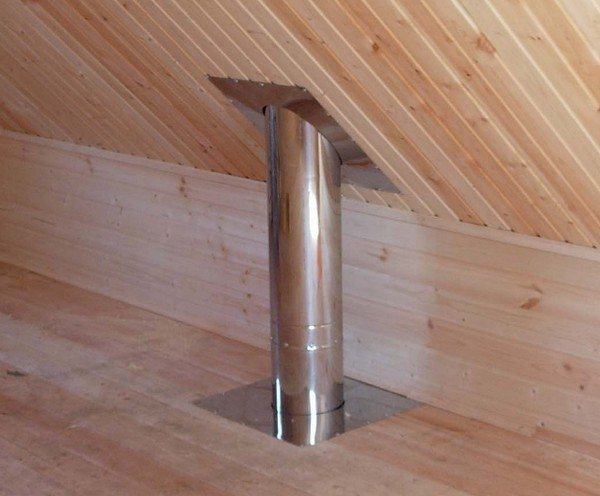
The method of installing the ventilation duct on the roof depends on the design of the roofing cake, lathing and rafter system. The easiest way is to install a ventilation pipe in a non-insulated attic. In this case, you do not have to fiddle with the mineral fiber mat.
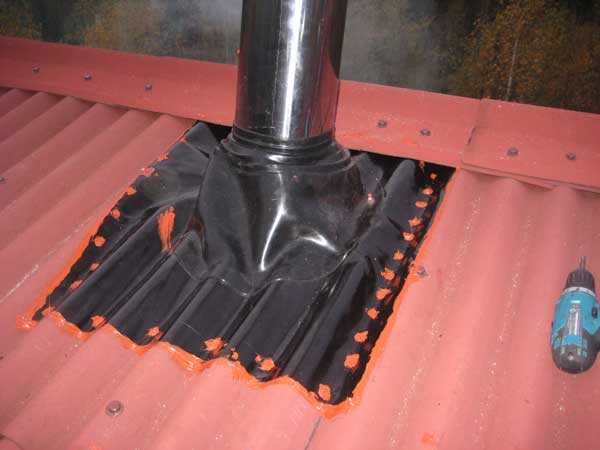
The most difficult thing is to install pipe air ducts in attic rooms, especially if non-rigid materials such as ondulin or glass roofing material are used as roofing. In this case, the roof passage assembly is performed according to the scheme of sealing the ventilation pipe on the roof of industrial buildings.
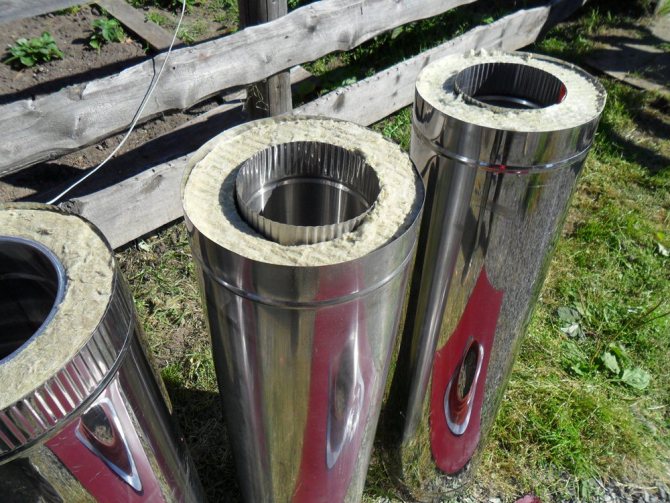
Most often, for the manufacture of ventilation ducts, polyester and fiberglass material, thin sheet stainless steel or galvanized steel are used. The average diameter of the air ducts is 150 mm.If, according to the project, the outlet is installed at a height of 2.5-3 m above the ceiling or 90-120 cm above the roof covering, then a rather non-rigid structure is obtained, which is easy to deform in winter, especially during heavy snowfalls. Therefore, the output will need to be fastened at least at two points, and with a large windage of the pipe, for example, due to a deflector or a nozzle, the body has to be fastened at three points.
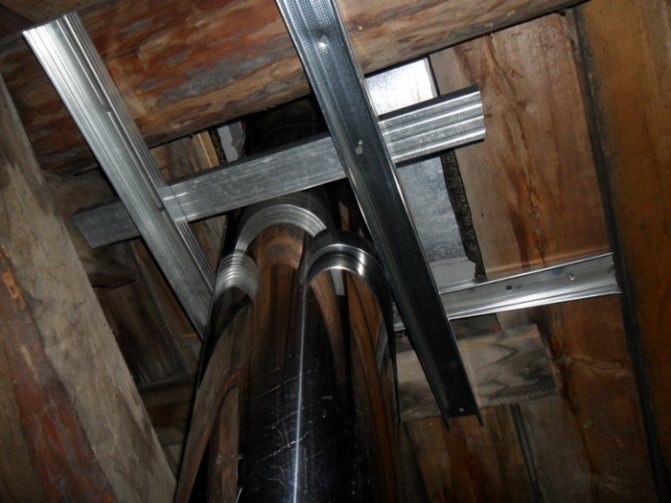
The location for the installation is selected so that the vertical duct body exits in close proximity to the rafter beam and the nearest brace. The beam and strut plank will support the relatively weak pipe.
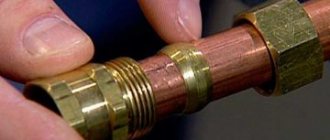
When purchasing materials, it will be necessary to purchase an installation kit:
- A set of mounting clamps for fixing the pipe to the rafters;
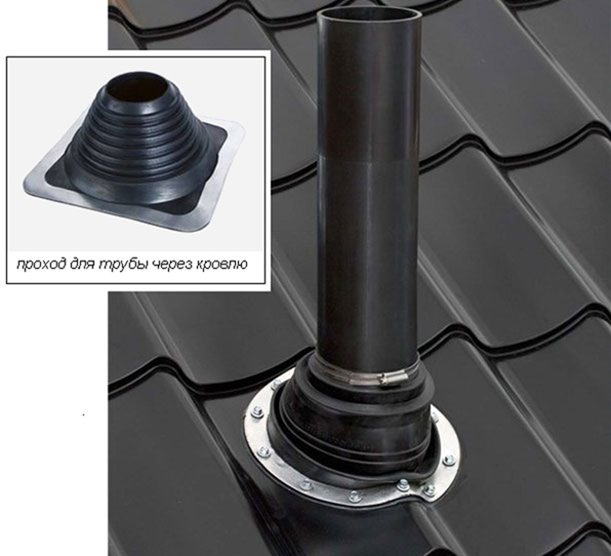
- Adapter plate made of metal or plastic with gasket;
- Silicone case and adhesive sealant.

You can do without a kit, but in this case it will be much more difficult to achieve a high quality waterproofing seal.
Sometimes, due to the installation conditions, the ventilation system cannot be attached to the roof rafters. In this case, it is necessary to assemble a package of two boards, between which the housing of the ventilation pipe is laid. The sides are fastened with polyurethane foam and allowed to dry for an hour. A board is stuffed onto adjacent vertical posts, to which the previously assembled structure from a pipe and boards is attached.
If it is not possible to fix it in this way, then the air duct is installed on the wire extension. Preliminarily, two plastic rings are put on the body, directly under the roof and below. The pipe is stretched by the rings with wire ties and wrapped with insulating material.
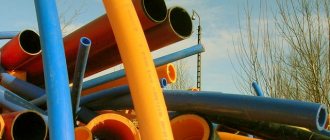
Varieties of ventilation pipes
The range of such products is quite extensive and includes parts of various materials and characteristics. Each of the species has certain advantages and disadvantages. Studying the characteristics of the products will allow you to choose the most suitable pipe for a specific system.
Construction requirements:
- moisture resistance;
- corrosion resistance.
At low ambient temperatures, condensation accumulates on the walls of the ventilation pipe, which can damage the structure in the future.
Important indicators that a pipe should have:
- the thickness of the walls must be small in order to ensure a high throughput of the mine;
- smooth surface of the walls, due to which the resistance to air movement is reduced;
- the number of connections should be minimized to increase the circulating capacity;
- ventilation should be lightweight so that it is easier to install and, if necessary, modernize.
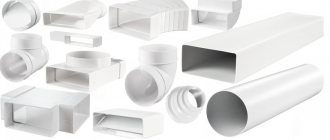
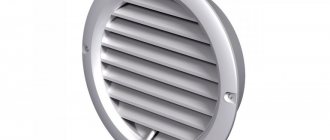
The section of the ventilation system can have a variety of shapes: rectangular, round, square; it also affects the productivity of the system. Round pipes are considered the best; it allows the air to be removed without hindrance.
In ventilation systems, it is preferable to use pipes with a circular cross section.
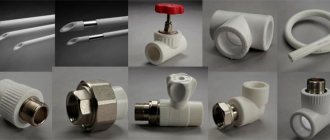
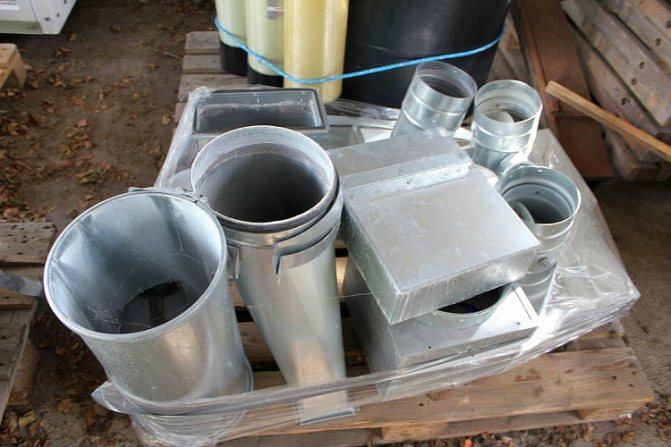
The most popular materials used in the production of roof ventilation elements:
- Cink Steel;
- plastic;
Galvanized. The most budgetary option are products made of galvanized steel. The protective coating of this material has good corrosion resistance. In addition, such products have a good strength factor. The disadvantage of such ventilation pipes for hoods on the roof is their weight.
Plastic. Such products are the most popular for the ventilation system. This can be explained by the fact that plastic has many positive qualities and not many disadvantages.The main advantages of plastic ventilation pipes for roof installation: low weight, low cost, ease of installation. Any person can install such a structure. You do not need to have any special building skills for this. In addition, plastic products are resistant to corrosion, and the smoothness of the walls allows the system to operate as efficiently as possible.
What you need to consider when removing the ventilation pipe to the roof
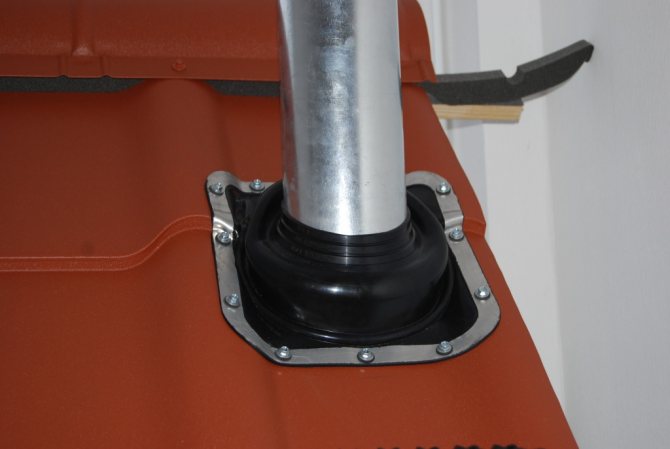
The outlet of the ventilation duct to the roof is made so that water does not get under the roof covering. Reliable sealing of the joint is a very important measure. If it is incorrectly implemented, problems may arise in the future due to the fact that water will flow through the ventilation structure into the house. The sealants required in this case can be purchased at any hardware store.

Particular attention should be paid to sealing the pipe at the exit points through the roof.
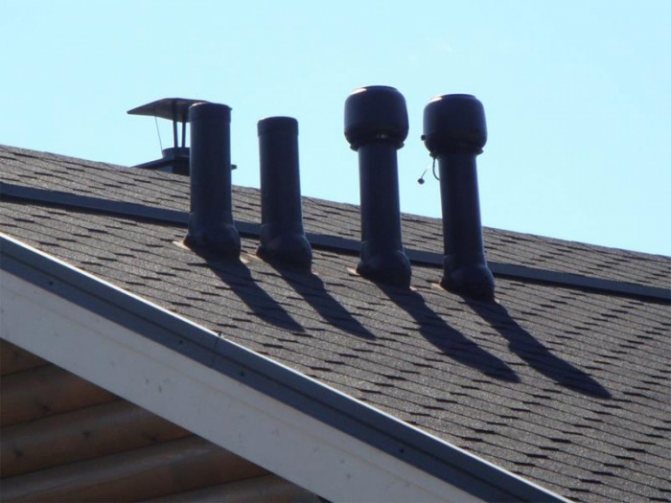
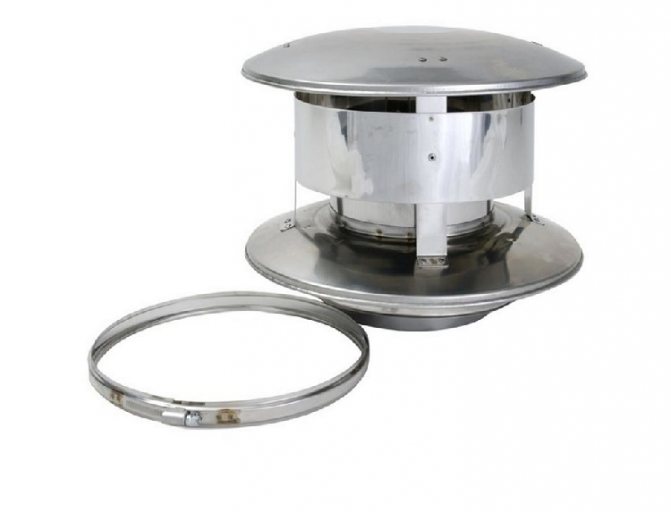
Important! The upper end of the pipe must be closed with a protective cap, which will prevent atmospheric precipitation from entering the system. There is a more functional way - equipping the end of the pipe with a deflector.
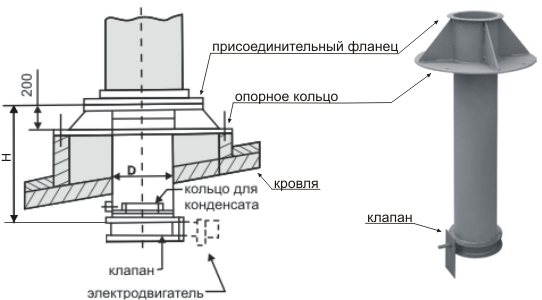
The lower end of the ventilation structure, which opens onto the roof, is connected to the air duct. Docking is usually carried out using connecting flanges. To improve the tightness, the outlet can be equipped with a special support ring. In addition, a valve is mounted directly into the pipe body, which will regulate the movement of air.
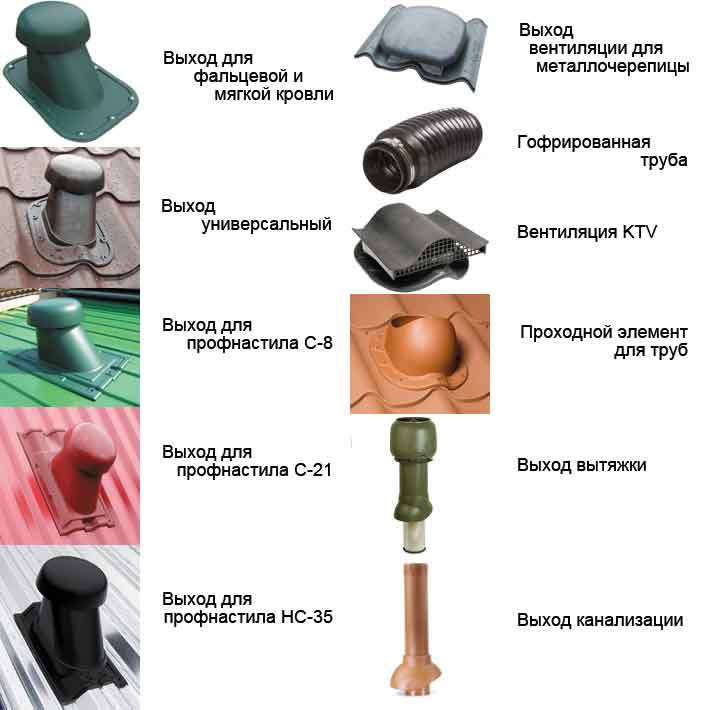
Ventilation pipes on the roof are mounted using auxiliary elements, which are offered in a huge range. If you wish, you can consult with specialists who will tell you which parts to choose in order to simplify the work as much as possible.

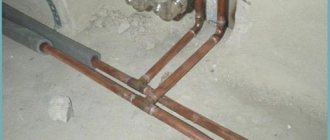
Roof pipe installation technology
Before constructing the outlet of the ventilation pipe, it is necessary to complete the installation of internal utilities and fix the air ducts. The list of necessary tools depends on the type of roofing material and may include a chisel, metal shears, a drill and a jigsaw. In addition, you will need a building level to control the correct location of the ventilation pipe and a marker for marking.
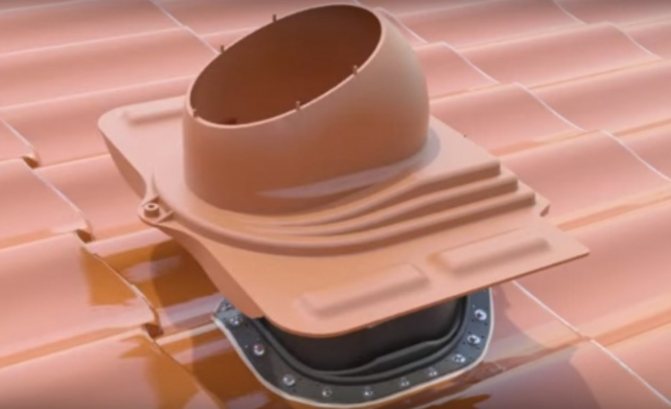
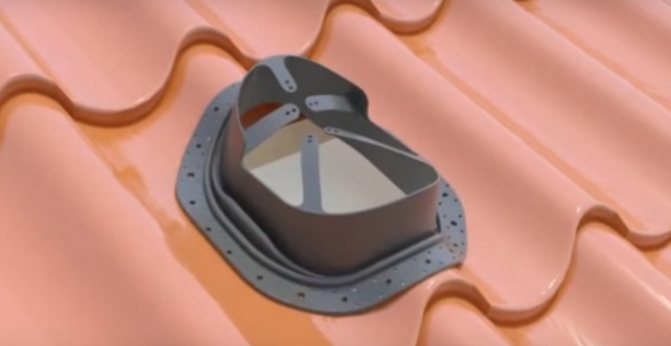
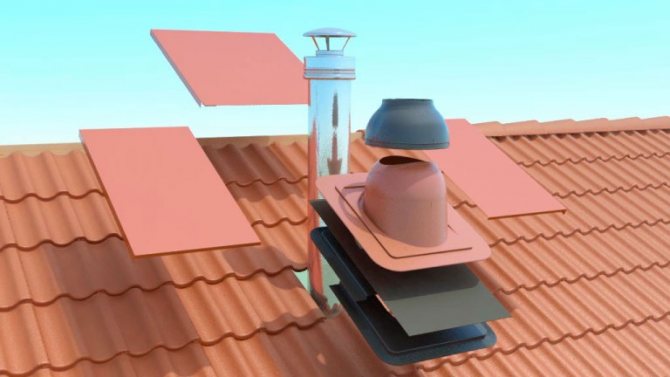
Stages of installation of the passage assembly
It is more convenient to bring the pipe to the roof through the ceilings using a ready-made construction of the passage assembly, which is installed as follows:
- determine the place of installation of the passage element on the roof, taking into account the features of its design and the requirements of SNiP;
- outline the contours where the pipe for ventilation will be located, and cut a hole of the required diameter in the roof, choosing a tool and method depending on the material used;
- holes are made in the same way in waterproofing and insulation;
- mark the position of the pass-through assembly according to the template and drill a number of holes for fastening self-tapping screws;
- clean the roof surface from dust, dirt and moisture;
- apply a layer of sealant to the lower surface of the sealing gasket and place it in the intended place;
- a passage element is installed on the gasket and fixed with self-tapping screws;
- the ventilation pipe is inserted into the passage assembly, then the verticality of its location is checked and fixed with screws.
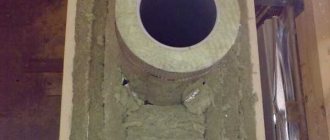
The design of the passage unit for the outlet of the ventilation pipe to the roof
After installing the ventilation pipe on the roof, check the tightness of the base of the passage element: it must be pressed against the roof in such a way that excess sealant from under the construction gasket is eliminated. In addition, from the attic side, the air duct outlet to the roof should be sealed.
Recommendations for choosing a location for a ventilation outlet
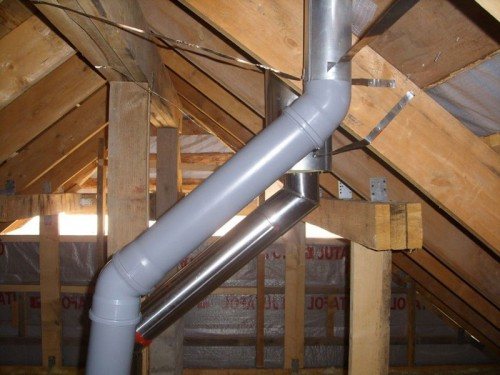
Craftsmen recommend choosing a place to exit to the roof so as to make a channel without bends.Then the performance of the system will be maximized. If this option is not feasible due to certain circumstances, then you will have to use corrugated products. The use of corrugated pipes will allow you to easily mount structures of the required shape.
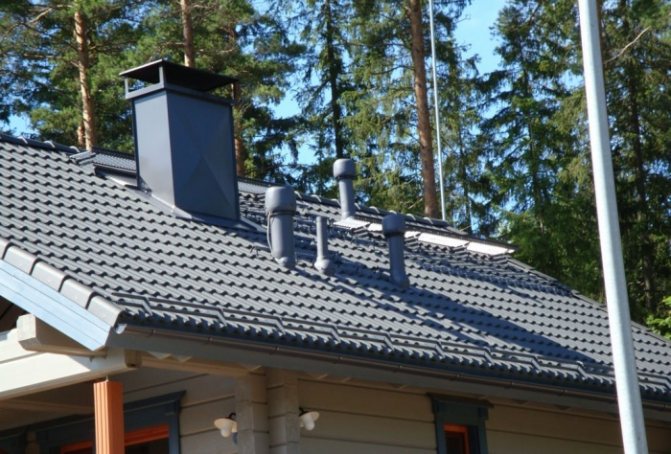
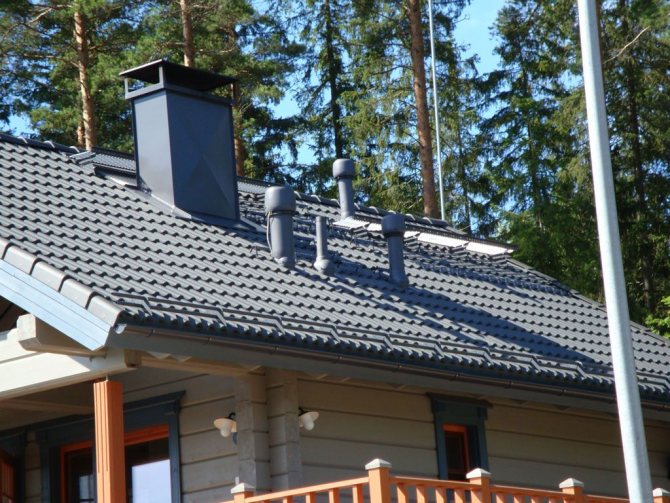
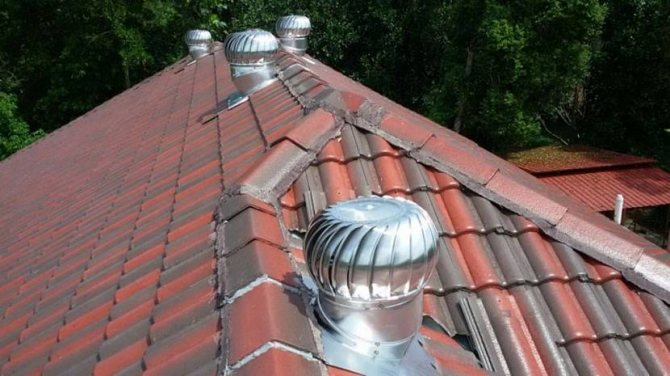
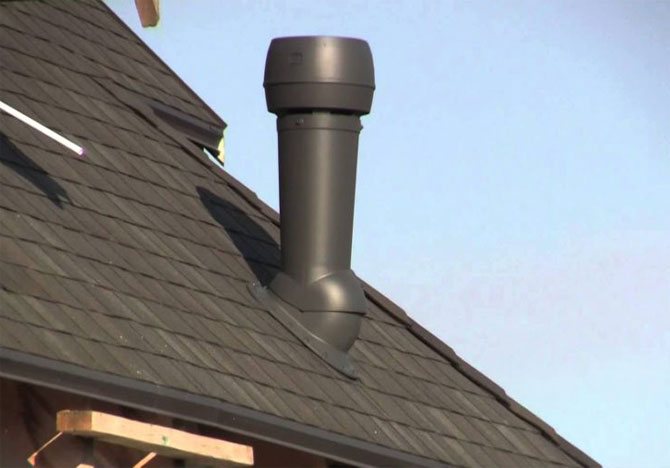
As mentioned above, on pitched roofs, the roof penetration is installed as close as possible to the ridge. In this case, the reliability of the system increases, since a larger segment of the pipe will be located in the room and protected from temperature extremes and other atmospheric phenomena. The short end of the duct that goes out will be more resistant to gusts of wind.

Pipes should be installed as close to the roof ridge as possible
For any variant of the placement of the ventilation pipe, wind back pressure indicators must be taken into account. Strong winds can impede normal airflow or even direct it in the opposite direction.

Choosing a place for the node of passage through the roof
All recommendations for choosing the place of passage through the roof are reduced to ensuring that its location allows you to make the channel with the fewest turns. In this case, the performance of the system will tend to the maximum.
Sometimes, for objective reasons, bends are indispensable. Corrugated pipes will come to the rescue. The use of corrugated pipes makes it possible to install air ducts with the necessary turns.
As noted above, the passage through the roof with the rafter system is carried out as close to the ridge as possible. Then, the largest part of the pipe will remain in the attic space, protected from temperature extremes and ultraviolet radiation. The whole pipe will not be afraid of a sharp wind, since only a smaller part of it will come out.
Wind back values must be taken into account for any location of the chimney through the roof. Strong winds can cause poor air outflow or direct air into the system.
The height of the ventilation pipe above the roof
When choosing the height of the pipe that will be on the roof, first of all, you need to take into account its diameter. According to SNiP, the height of the ventilation pipes above the roofs must comply with a number of rules, depending on the type of roof and other conditions. The main ones are:
- If the ventilation structure is located in the immediate vicinity of the chimney, its height should be similar to the chimney.
- If the roof is flat, then the recommended height of the ventilation outlet must correspond to a parameter of at least half a meter.
- If the pipe is installed at a distance of 1.5 meters from the ridge, then its height should be more than 50 cm.
- When the distance from the ridge to the ventilation pipe is from one and a half meters and above, its height should correspond to the ridge or be higher than it.
- If the pipe is located far from the roof ridge (by 3 m or more), then the height in this case is calculated as follows: a conditional line is drawn down from the ridge at an angle of 10 degrees towards the horizon. The pipe height must not be lower than this line.
What to consider when installing ventilation outlets
There are a number of factors to consider when installing. The shape of the roof matters, which can be pitched and flat.
In the first case, engineers recommend installing the ventilation outlet as close to the ridge as possible. This will ensure uniform heating of the inner part of the ventilation pipe, and the outer part will be more resistant to wind and snow pressure in winter.
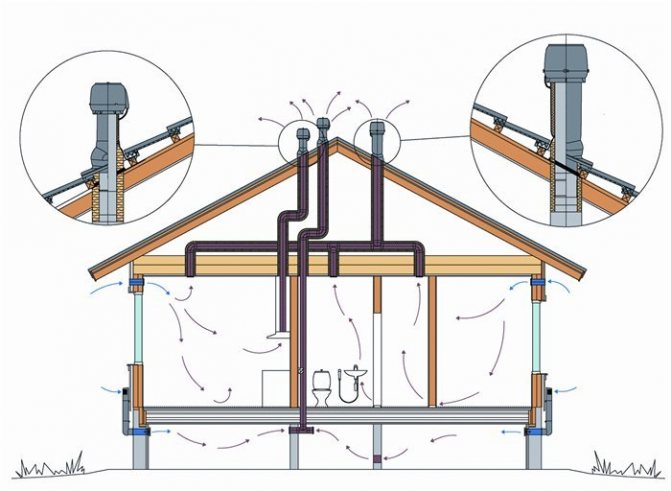
For a flat roof, the geometry of the ventilation outlet riser comes to the fore: it should be located directly under the chimney on the roof so that air can escape freely.
The height of the ventilation shaft above the roof is also important: if the chimney is not positioned high enough, the traction force will be very small and the ventilation will work ineffectively. A pipe that is too high will also reduce thrust, as the structure can suffer from strong gusts of wind, therefore additional fastening will be required.
Note! On a pitched roof, it is recommended to install a pipe outlet at a height of up to 50 cm, on a flat roof - from 30 to 50 cm.
Additional devices that increase the performance of the ventilation system
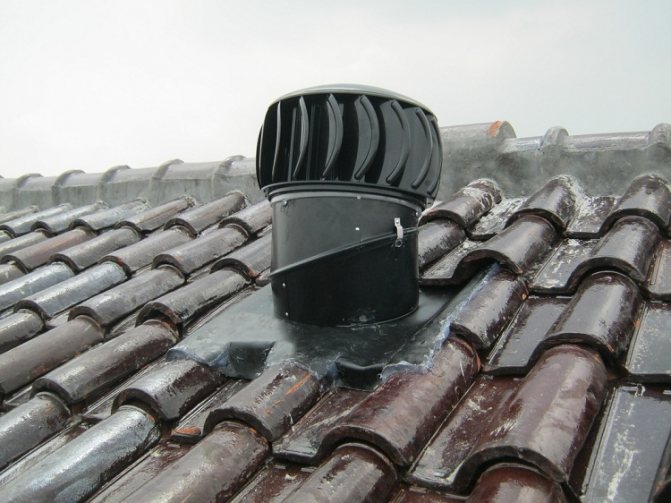
Additional elements can be used to improve the performance of the system. The most popular attachment of this type is the deflector, which looks like a nozzle and is attached to the edge of the pipe.
A special device is put on the edge of the pipe - a deflector
Important! The deflector is usually mounted on ventilation pipes or above exhaust openings. It depends on the specific case and type of construction.
The deflector is powered by the force of the wind. The element is equipped with a special device that discharges air - a diffuser. Depending on the size of this device, its performance is also increased.
To prevent the ingress of debris and atmospheric precipitation (rain, snow), special caps are used. Typically, such a device consists of two parts:
- a visor that covers the outlet of the ventilation structure;
- a drip used to remove water from the top of the visor.
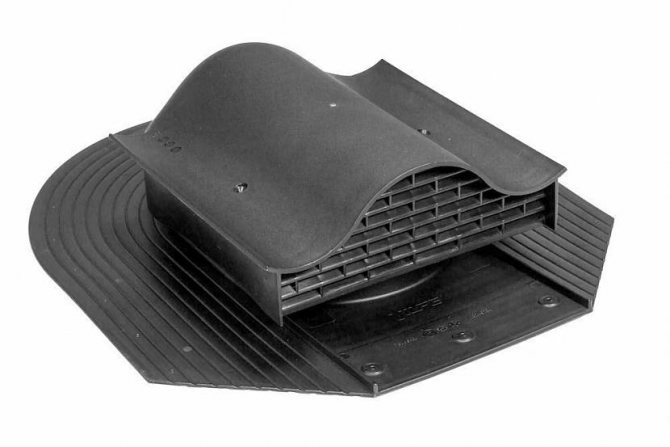
In addition to the ventilation outlet, the roof can be equipped with special devices - aerators. They circulate air between the thermal insulation layer and the outer roof covering. They are used in cases where the length of the slope exceeds 3 m and there is not enough natural draft for normal air circulation.
The main mistakes when installing ventilation
Basic standards SNiP
So, what facts must be taken into account when calculating the height of the ventilation and chimney:
- Distance to the ridge of the roof.
- Roof structure and thickness - gable, single-pitched, combined.
- Fire safety rules.
- Section.
- Organization of proper ventilation of the combustion room.
If you decide to do everything yourself, then knowledge of the technology for calculating the height, diameter and other parameters will not hurt.
The angle from the ridge to the head is 10 degrees
If the pipe is located at a distance of less than 50 centimeters from the ridge, then it is raised above the level of the roof by another half meter. The diagram shows how easy it is to calculate the height, depending on the distance from the roof ridge.
Distance from one and a half to three meters - location at the level of the ridge, more than three meters - an inclination of ten degrees downward from the ridge, the desired height - the intersection of the line of the angle of inclination and the top of the pipe.
The height of the pipe above the roof ridge is the most important calculation parameter. Good draft in the boiler and fuel economy depend on this value. When calculating, one must be guided by the requirements recommended by the instructions for the boiler and SNiP41-01-2003, as well as SP 7.13130.2009 (basic building codes for heating and ventilation).
Another very important rule is that the length of the entire chimney, from the grate of the boiler to the smoke outlet, must be at least 5 meters. For a flat roof - at least 50 centimeters.
Requirements for the chimney in the annex
The diagram shows that the chimney from the attic is determined by the intersection point of an angle of 45 degrees from the valley and a vertical line down from the end of the ramp at a distance of 50 centimeters.
It is almost impossible to describe these calculations in words, the diagram is more informative. For example, I did not complicate the process. A complete calculation and a clear plan costs only 2,000 rubles - it is carried out by design organizations, it seems to me that the price is quite acceptable.
The height depends on the roof structure
For pitched roofs, the height is calculated according to the standards, depending on the distance to the ridge. For flat roofs, the calculations are different.
The length of the chimney above a flat roof should not be less than 1m 20 cm. If the chimney is higher, then it is necessary to install retaining clamps and braces made of strong wire for a rigid reliable fastening.
For roofs of a complex multi-level structure, a calculation is applied taking into account the height difference. But all the same, the highest point of the ridge is considered to be the base one. Multilevel structures must be calculated by specialists, since in this case many specific parameters must be taken into account.
The main problem with the wrong chimney height is the risk of air turbulence. With strong gusts of wind, it can simply extinguish the fire in the boiler, which leads to very unpleasant consequences.
These conditions must be observed
There are quite a few fire safety requirements and all of them must be met:
- All structures adjacent to the pipe that may catch fire must be carefully insulated with asbestos sheets. Now fire safety requirements have changed, and many organizations do not allow asbestos, only galvanized iron. The same applies to chimneys.
- If the roof is made of flammable material, and there are ventilation holes in the pipes, then the height should be increased by half a meter so that sparks do not fall on the coating.
- Above and below the boiler, a sheet of galvanized metal must be installed, measuring 1.5 x 1.5 meters, at least.
- The distance from the chimney to the attic windows is at least two meters.
- The distance to tall trees and buildings is at least six meters.
Now, in the changed standards, it is forbidden to put protective fungi on chimneys and ventilation outlets. The requirement is terrible, since birds and debris clog the pipes every year, you have to constantly call a brigade to clean all this debris.
In the photo - a simple table for determining the required section and height
For rectangular brick chimneys, the standard is 1x1.5 cm (at least 10 square centimeters). The corners must be rounded.
The chimney is round in shape - the minimum diameter is 15 centimeters, but in our Crimea they usually require 30-35 cm. Why, I don’t presume to answer.
There is one more unpleasant nuance - there are no adapters for the passage of a round pipe through the roof on sale, only for square ones. Therefore, you will have to order such an adapter individually from the tinsmiths.
Calculation of the section depending on the width (vertical of the table) and diameter (horizontal of the table) in millimeters
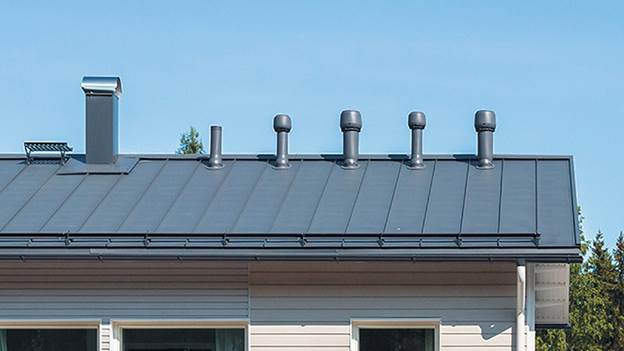
The height of the ventilation pipe above the roof according to SNiP should be calculated in principle in the same way as the chimney. The main requirement is one level in height of the ventilation pipes and the chimney, if they are located no further than 3 meters from each other.
The diameter and dimensions of the ventilation should provide ventilation of the boiler room space, and this depends on the volume of the air contained in the room.
The required volume of air entering a residential room heated by a boiler is three cubic meters per hour per square meter of area. In utility rooms (boiler rooms), this standard is at least 180 cubic meters per hour.
Formula for determining the ventilation cross-section
The calculation formula is based on the ratio of the total area of the room to the cross-section of the ventilation duct. The height of the ventilation pipe above the roof is determined according to the same principle as for the chimney.
Of course, you can do everything on your own, but there is a risk that the controlling organizations of the gas industry simply will not accept the facility into operation and everything will have to be redone, which will cost much more. Ask questions - I will be glad to discuss this topic in the comments.
Basic installation steps:
- cutting a hole in the roof for ventilation;
- fixing the sealing gasket;
- installation of the passage assembly;
- removing the pipe to the roof;
- fixing it in the passage element;
- sealing the entire joint.
We suggest that you familiarize yourself with the correct temperature in the Russian bath
The set of fasteners and accessories depends on the pipe material and the roof covering. If the roof is insulated, then you will have to cut it through the entire depth of the roofing cake and install the passage element of the appropriate length.
Ventilation pipes are installed on a metal roof using a flexible sheet of the corresponding profile. Only such an attachment will provide a reliable seal.
But for any installation method, a set of parts and tools is required:
- jigsaw for cutting a hole in the roof;
- scissors for metal or a hacksaw for plastic pipes;
- level for determining the vertical;
- gasket, sealing cover or curved sheet for metal tiles and ondulin;
- pass-through element, fixed in the roof;
- drill;
- self-tapping screws;
- sealant.
Fastening the ventilation pipe to the roof
Finally, it is necessary to check the stability of the entire structure. If necessary, carry out additional strengthening. In the under-roof space - on brackets attached to a beam or lathing. On the roof itself - with guy wires.
A typical mistake is incorrect determination of the required stability of the entire ventilation stack. Fixing the pipe only on the upper part of the roof, without support on the rafters or other element of the sheathing, does not ensure the reliability of the structure.
It is necessary to calculate the ventilation output on the roof immediately, taking into account additional nozzles and devices. They not only increase the weight of the pipe, but also create additional windage during gusts of wind. Therefore, they need a certain margin of stability of the structure.
Sealing the passage of the pipeline through the roof must be carried out not only outside, but on the inside of the roof.
A serious mistake is the haphazard ventilation in the interior. Any additional turn of the line or an extra joint leads to a decrease in traction in the system and to a decrease in the efficiency of its work.
What is needed to install a ventilation outlet on the roof
To carry out the installation work of the ventilation pipe above the roof, you need to have all the necessary tools. It is recommended to prepare them in advance so that no unforeseen circumstances arise during installation.
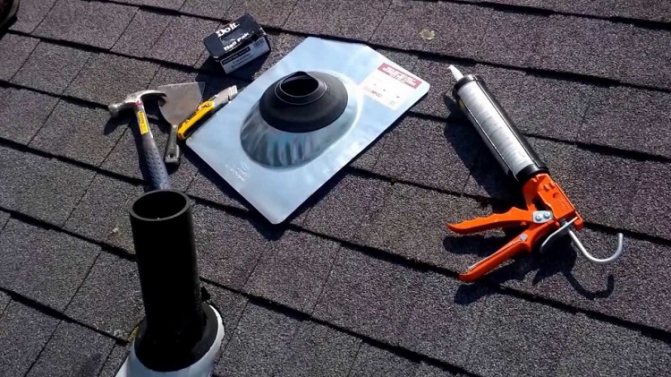
Installation of pipes is carried out using the simplest tools
The list of materials and tools that will be needed when installing the ventilation pipe:
- scissors for cutting metal;
- insulation;
- Screwdriver Set;
- marker (for marking);
- special sealant;
- self-tapping screws;
- sealing elements;
- passage node;
- work gloves.
- drill or hammer drill;
- level;
- electric or manual jigsaw.