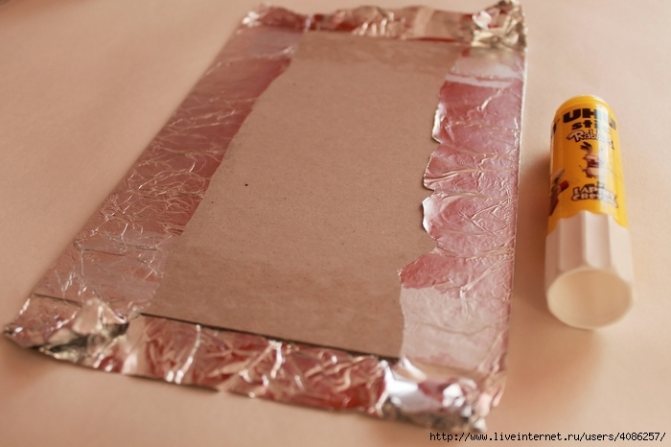
Material application
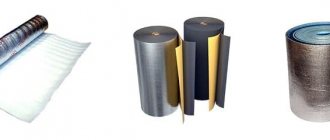
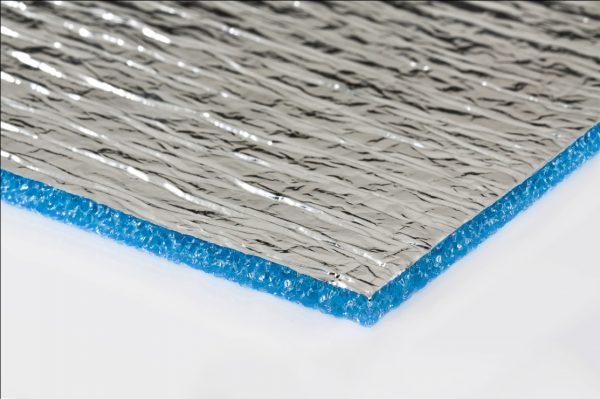
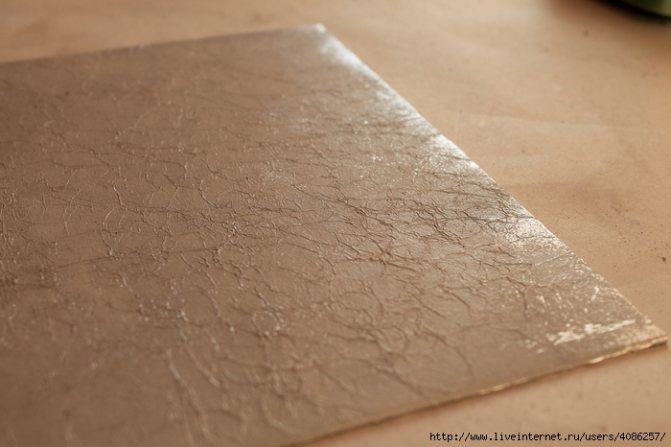
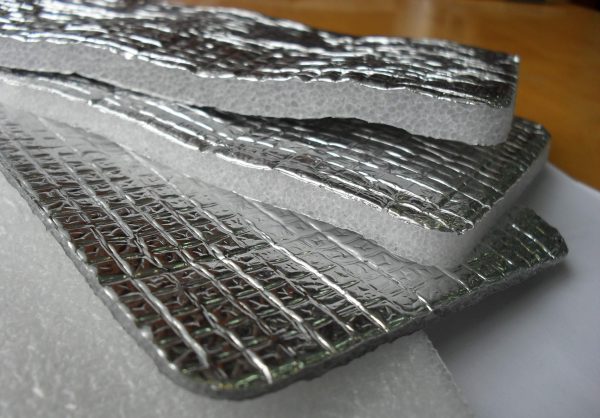
Penofol is a foamed polyethylene, covered with aluminum food foil on one or both sides. The finished insulation thickness does not exceed 10 millimeters.
The popularity of penofol as a building material is explained by its properties: it does not absorb thermal energy accumulated in the room, but reflects it. The purpose of this material is to trap warm air in winter and cool air that has accumulated in the room during morning ventilation in summer.
Insulation
Penofol can be used in other cases, for example, for isolation:
- piping systems;
- premises from external noise;
- hydro and steam systems;
- ventilation shafts.
It is also often used as a reflector of the thermal energy of a heating radiator, as an attribute for decorating the surfaces of the ceiling, floor or walls.
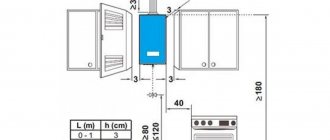
Outside or inside: what does the method of fastening the mineral wool depend on?
Insulation can be done both from the inside of the premises and from the outside, respectively, the requirements for the reliability of fixation are different. If there is enough gluing on special adhesive mixtures inside, then additional fasteners are required for the facade.
The basic rule of how to fix the thermal insulation consists in the tight fit of the edges of the slabs to each other, which should completely overlap the surface to be insulated. Consider the methods of installing basalt insulation, depending on the location of the system.
| Insulation from the inside | External insulation |
| Installation of slabs into the frame using a vapor barrier | Plaster facade: gluing boards with special glue and dowelling |
| Ventfacade: dowelling using a vapor barrier and a waterproofing membrane |
Penofol glue
Finishing and renovation work often involves bonding various building materials together. Sheet or roll insulation cannot be fixed on insulated structures without special devices, otherwise their heat-insulating properties will be lost, and their wear will be faster.
The content of the article
For such purposes, the material penofol is optimal, which has a layered structure and consists of aluminum foil, supplemented with expanded polyethylene. It is characterized by low thickness and low weight, as well as ease of installation.
Such material is used for finishing building structures, units of specialized machines and whole mechanisms, individual parts of technical equipment on a production scale, pipelines, air conditioning systems, drying cabinets, as well as inclined surfaces with a complex profile.

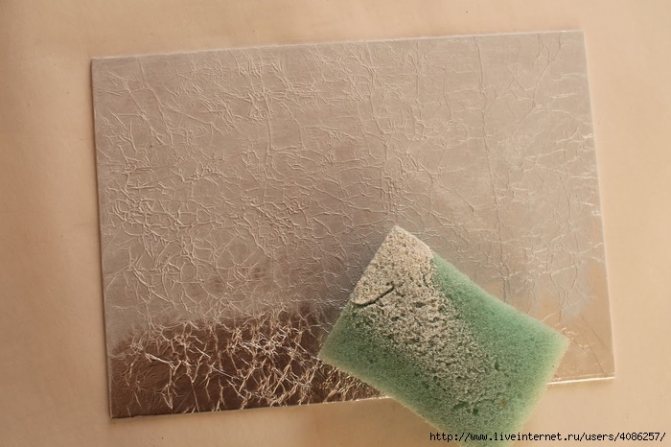
In order to ensure maximum steam, thermal, hydro and noise protection, Penofol must be glued to a previously prepared surface (cleaned and well dried).
Before proceeding with the gluing of Penofol and the work surface, it is recommended that you familiarize yourself with the instructions for the selected adhesive. However, there is one rule that applies to working with any adhesives, namely, all surfaces to be bonded must be clean and monolithic.
Previously, it is worth eliminating the existing chips and cracks, even the smallest irregularities, pollution, blockages of various origins. If wooden, metal, polymer surfaces need a primer, its chemical composition should be suitable for the selected type of adhesive.This is the only way to ensure maximum and strong adhesion of the bonding surfaces.
The adhesive method of attaching penofol to insulated surfaces has a number of advantages: it is technologically uncomplicated, does not require any professional tools and skills, and is inexpensive in terms of money and time. The only limitation of this method is the load-bearing capacity of the adhesive bond, which determines the maximum weight of the bonded coating. However, in the case of penofol, this factor is not of great importance, since foil-clad penofol and its analogs are very light materials.
How to choose the "right" glue for penofol from all the variety produced by modern industry?
A good bond quality depends on the degree of adhesion of the material to the adhesive, i.e. the ability of the latter to penetrate into the smallest pores and irregularities of the material and adhere to it. Let's make a reservation right away that any material based on an organic polymer (including penofol), if it is not porous, has low adhesion.
In addition, it must be remembered that there are no universal solvents in nature. Each of them is more "specialized" in one kind of materials. Therefore, the so-called "universal" adhesives are in fact adhesives that glue everything equally badly. For such a specific material as penofol, it is better to choose a specialized glue.
In addition to the above characteristics, which are decisive for the choice of glue, there are a number of conditions that depend on the specific construction task. So, for example, due to the peculiarities of penofol when insulating the walls of a building, the glue used must be resistant to the effects of water and water vapor.
When using glue in a residential area, its safety for human health and the environment comes to the first row. Many manufacturers, especially foreign ones, are trying to obtain EMICODE toxicity certificates from the Association of European Manufacturers of Construction Chemicals GEV for their products. Such a certificate means that the glue is safe for human health and does not emit harmful vapors.
Application rules
How to properly use glue for gluing penofol and its analogs? Usually, to obtain an effective gluing, it is sufficient to strictly follow the instructions for use offered by the manufacturer. The basic rule when using any adhesives is that the surfaces to be glued must be smooth and clean. The explanation for this is very simple.
If the wall is dusty, the glue sticks, first of all, dust, and, accordingly, its effectiveness is sharply reduced. When there are large cracks, potholes, etc. in the surface, the consumption of glue is greatly increased, and the place of gluing itself will be uneven.
Therefore, before gluing penofol, first prepare the surfaces - clean from dust and dirt, close up irregularities. In some cases, it is necessary to apply special primers before gluing - they increase the adhesion of materials. Observing these rules, you will stick penofol anywhere, easily and without problems.
There are a large number of insulation options on the market. Foamed polyethylene is the most frequently chosen because it has impressive steam, heat and sound insulation properties. The choice in today's market is really great. The proposed options can have a self-adhesive surface, can be foiled on one side or on both sides at once.
Izolon (penofol) is covered with aluminum foil, which allows you to keep warm in the best way. Its adhesion to the surface of the insulation can be chemical or physical, that is, sewn. Isolon can have additional characteristics such as thickness or color.If you are looking for a win-win insulation for your home, then this option will be the best choice.
Among them are:
- small thickness;
- ease of installation;
- ecological cleanliness.
Insulation installation is possible without the use of special tools. Working with polyethylene foam does not require additional protection of the respiratory tract and skin. The material is so light that the load-bearing capacity of the adhesive will not be critical.
How to choose glue
On sale there is a fairly wide range of various adhesives for working with foamed polyethylene. And it is advisable to make the choice using the following criteria.
- The temperature range must match this characteristic of the insulation.
- The adhesive properties must be extremely high.
- If the glue is to be used for interior decoration, then it must be certified and non-toxic.
- If the glue is chosen for exterior decoration, then it must be resistant to a variety of weather conditions and temperature extremes.
- If you intend to deal with the decoration of the sauna and bath, then the glue will need to be mixed with water-repellent agents.
Water-based glue is categorically not suitable for working with isolon, because it does not allow the adhesive to penetrate into all the pores of the insulation. Therefore, the level of adhesion will be insufficient.
Adhesive types
Let's list the most commonly used glue options.
- For rooms with high humidity, MV-40 is suitable, which has moisture resistant properties. You can also choose T-Vanguard-K.
- For residential premises, "Express" or "Universal" is usually used.
- When it comes to the installation of external building structures, then it is most advisable to choose liquid nails or assembly glue. For example, Moment Montage will do.
- Titanium is good for precast concrete base.
- Neoprene-2136 in the form of a spray or contact type Acrol is selected for adhesion to foam.
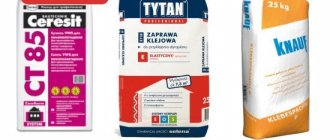
- Olfix and Ceresit are universal glue options. They are perfect for working with any kind of surface, including concrete.
- Atlas Stopter K-2 kley is chosen if you plan to glue insulation on a mineral base.
- Weicon Easy Mix PE-PP-45 is selected for bonding polypropylene to polyethylene.
After the work, the seams will need to be treated with Tilit or a specially designed adhesive tape. The choice of glue is largely determined by the purpose of the room that you plan to insulate, whether you will attach it to wood, metal, concrete, etc. etc. Choosing on your own, without having a lot of experience in the implementation of construction and installation work, can be difficult. And therefore it is always advisable to consult with specialists.
Insulation installation options
At the moment, there are two options for attaching any type of insulation and several additional ones, which I will also mention. By the way, with these fastening methods, you can install both loose insulation and denser plates.
The main ways of attaching insulation to the wall:
- Using glue;
- Mechanically, thanks to special dowels.
Let's consider each mounting option separately.
On glue
Adhesives for the installation of insulation are of two types. On a cement basis, a more popular and affordable composition, and adhesives in the form of foamed polyurethane, such compositions have better characteristics, but their cost is much higher.
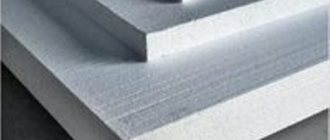
Usually dense sheets of thermal insulation are placed on the glue, such as expanded polystyrene (popularly, polystyrene) penoplex, and other heaters with similar properties.
Cement-based adhesives must be mixed in a container with cold water before use. Stir the dry composition in water until a thick homogeneous mass is obtained, resembling fat sour cream in consistency. It is important to ensure that no lumps form during the dilution of the glue powder, as this can reduce the quality of the composition.
The glue is mixed, of course, not by hand, for this you need to use a special mixer nozzle, which is put on a drill or perforator, and at low speed, the dry mixture is mixed with the liquid.
It is necessary to apply glue on the inner side of the insulation plate, while in order for the glue to fasten the insulation to the wall as well as possible, the outer side of the insulation must be roughened. To achieve this, I recommend using a foam roller or brush.
In addition, it is necessary to increase the adhesion of the walls. No, you don't need to make it rough, usually it is like that, from the very beginning. The surface should be properly primed and allowed to dry. After that, you can install the insulation on the walls.
On dowels
The second most common way of fixing insulation on the walls. Sometimes the installation of thermal insulation on dowels acts as the main method, but more often, it is an addition to the installation on glue, for a more reliable fixation.
On special dowels, which outwardly resemble fungi with a cap, all types of insulation are attached, from foam plastic to mineral wool. For example, a foam board is first attached to the wall with glue, and then fixed with several umbrellas.
Minwata is usually simply applied to the surface and five holes are made through it in the wall, one in the center and four in the corners of the slab. In the same way, holes are made in the foam.
After that, a dowel with a cap is hammered into the holes until the cap presses the plate against the wall, then an expansion plastic nail is inserted into the dowel, which, with the help of a hammer, firmly fixes the dowel in the wall, and as a result, the insulation is securely held in place ...
Other technologies
If the insulation is carried out by chipboard or OSB panels, then the plates of this material are attached to the surface with special brackets. Some roll insulation, for example, foil, is sometimes produced with an adhesive already applied to the inside of the insulation.
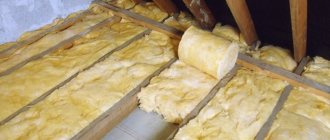
Sometimes, fasteners, as such, are not needed at all. This happens when insulation, usually loose, such as mineral wool, is placed in a special wooden frame.
Some heaters are glued to the wall, just like wallpaper, for example, cork insulation. There is also heat-insulating paint, which is applied to the surface with an ordinary brush or roller.
Penofol varieties
Penofol types
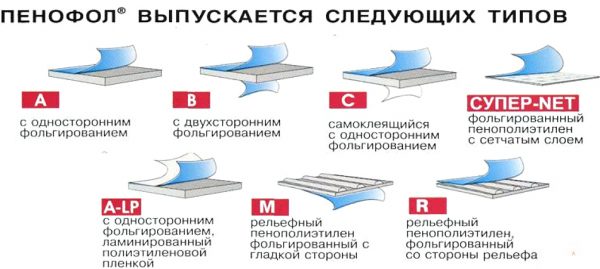
The most common option is a material covered with foil on one side only. It is marked "A". Most often, craftsmen prefer to lay it.
There are also other types of penofol:
- covered with foil on both sides (marked "B");
- on the one hand - foil, and on the other - a self-adhesive coating (a product of this type is marked with the letter "C");
- there is a metal layer on both sides, and one of the foil sides is covered with an additional layer of film (this type is marked with the letters "ALP");
- only one side is covered with foil, the other is provided with a relief pattern (similar products are marked with "M" and "R").
Penofol, marked with the letters "AIR", is used to equip air ducts. Products that are used for heating mains, about. As an independent heat insulator, only penofol marked "C" is used, however, provided that the room temperature does not drop to very low rates.
Insulation with sealing tape
Plastic windows
Usually, plastic windows lose heat for two reasons:
- breakage of fittings;
- wear of the seal.
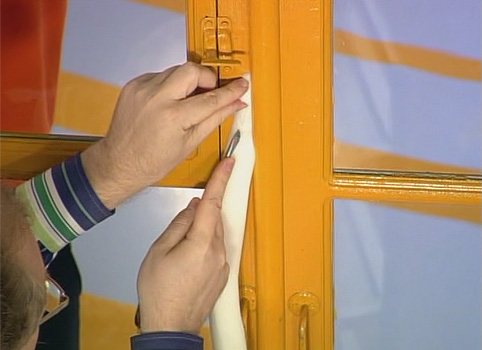
Correct installation of the tape increases the insulating capacity of the window. The following sequence of work is recommended:
- before installation, the tape is kept at a positive temperature, since it depends on its expansion inside the groove;
- the tape is cut to fit the window. The joints are cut at right angles. For thermal expansion, a stock is created: for each meter 1 centimeter of material;
- the tape is pressed into the groove with a spatula, and the adhesive strips are removed in small sections.
Important!
1. In the corners of the frame, the tape is connected only butt.
2. To prevent impregnation from coming out, the tape does not shrink more than the allowable value.
After mounting the sealing strip, the locking mechanism is adjusted: the clamp is changed by pins, which are located at the end of the sash.
Adjustment is made with a hex wrench. The pressure increases when the trunnion head is installed in a horizontal position.
Wooden windows
The Swedish method of insulating such windows using the EuroStrip technology is in great demand. It has the following advantages:
- there is no need for annual window insulation;
- after airing, the tightness of the windows is not disturbed;
- the service life of the frames increases;
- high degree of protection against dust and street noise.
For insulation, two types of tapes are used: rubber and silicone.
By the way, branded Swedish silicone seals are easily inserted into the groove and serve up to 20 years.
Installation is carried out in the following sequence:
- the sashes are removed from the hinges and inspected. Rotten areas are identified, and then restored;
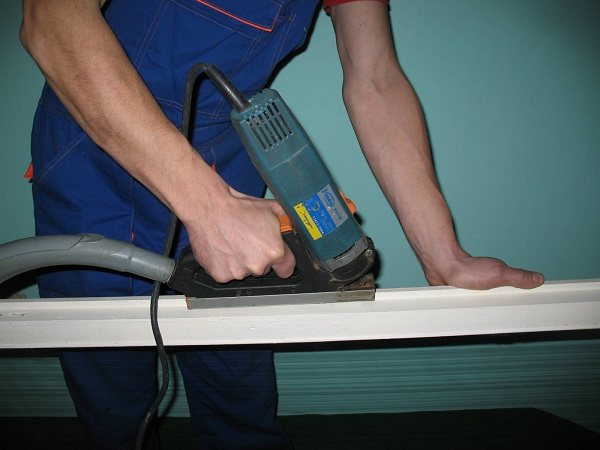
- a groove for the tape is cut along the entire sash;

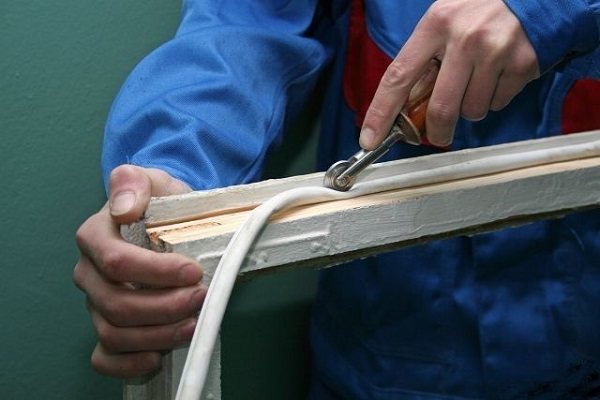
- using a roller, the tape is pressed into the groove;
- a rubber cord is laid inside the frame, and then the sashes are pulled together;

- the window is hinged and adjustable. If necessary, the hinges are rearranged and the fittings are changed.
So, both types of tapes for window insulation deserve attention. Which one is better depends on the state of the window.
If you choose the right one, the insulation will quickly pay off, and the apartment will always be warm and cozy.
One of the most common ways to get rid of drafts and insulate windows is to use a special seal. This option is acceptable for many people, plus everything is practical and simple. But let's not get ahead of ourselves and take a closer look at window seals.
Insulation sealant is necessary in areas with low temperatures
How to glue penofol to concrete, what to glue insulation with foil on
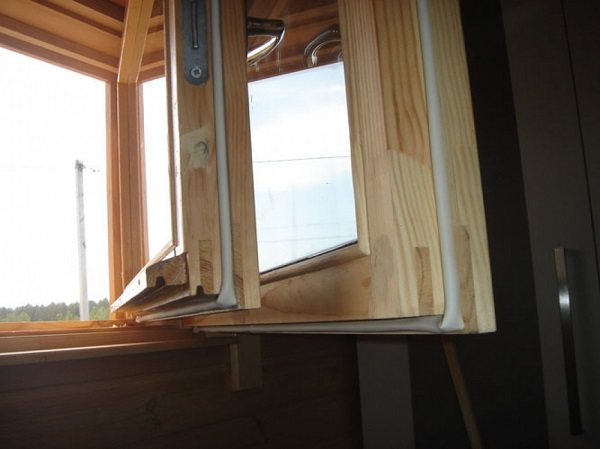
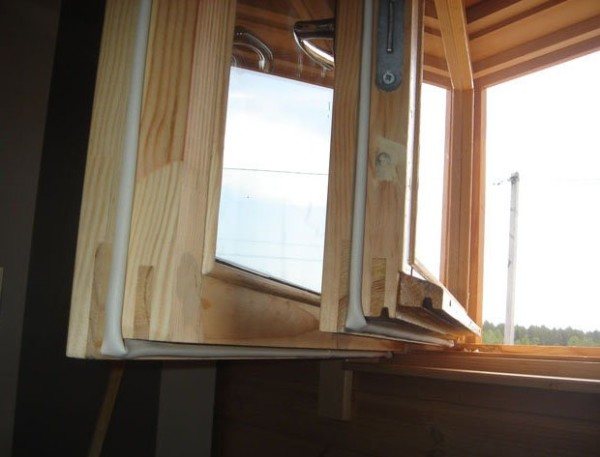
Laying insulating material on the floor
In this case, the material is usually used as an additional layer. The main one is foam, expanded clay or expanded polystyrene under the screed. In addition to penofol and the main thermal insulation material, the contractor must have at hand a metal (or wooden) crate, tools for installation and locksmith work, an adhesive solution (or hardware), as well as wooden logs.
The following can be used as an adhesive solution:
- liquid Nails;
- Double-sided tape;
- polyurethane foam (applied in a thin layer).
Sequence of execution:
- Before proceeding with the insulation work, it is necessary to level the floor using a concrete screed for this purpose. Lay a foam or expanded clay base.
- The role of a wooden frame is recommended to be assigned to logs impregnated with an antiseptic composition or to use a metal frame. Products are laid on an insulating layer, and cladding is placed on top of it.
Hello. We will try to answer your question.
Penofol is an energy-saving material with a laminated structure.It combines the properties of foamed polyethylene and thin aluminum foil. The material is characterized by lightness and low thickness, and therefore is often used on various objects (including on the balcony) for insulation, ensuring tightness, thermal, noise, steam and waterproofing. However, to ensure high-quality protection, penofol is not enough to lean against the insulated surface - you need a special glue for penofol.
A large number of modern finishing materials require a certain fixing.
Roll or sheet insulation, such as penofol, is best fixed to the surface with glue. This way you can completely avoid the loss of technical properties of the material.
Glue for penofol is chosen taking into account which surface the heat insulator will be fixed to.
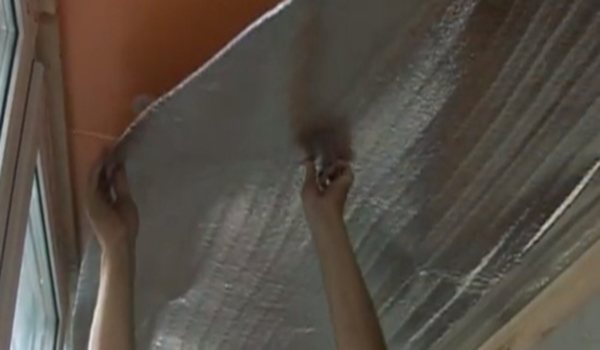
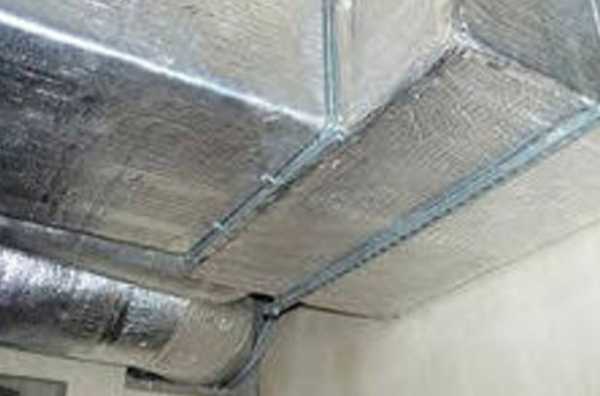
Fig. 1 Penofol on the concrete structure of the balcony
Penofol is a foamed polyethylene coated with an aluminum technological foil. Installation of the canvas is not difficult due to the lightness of the material. It is used not only in construction. It is perfect for thermal and sound insulation of machine parts.
But how to glue penofol to concrete? After all, it is a very unstable material with high thermal conductivity, heat capacity and even the ability to accumulate moisture.
To fix the insulation on solid brick or concrete surfaces, the glue must have a number of properties:
- Have a high degree of adhesion and hygroscopicity;
- Do not destroy the material;
- Be resistant to weather conditions;
- Withstand large temperature drops;
- Have fungistatic and antiseptic properties;
- Do not lose their properties over time.
For the best fixation of any material, special solvents are added to the glue. They create a certain porosity of the bonded surfaces. Moreover, there are no universal solvents; each material needs its own.
But, for example, penofol is able to reliably adhere to penoplex without solvents.
If a bath or sauna is insulated, then when choosing an adhesive, one should pay attention to its heat resistance and resistance to water vapor.
Fig. 2 Fixing penofol on metal structures
An important property is environmental safety, especially when using material for interior decoration. Only certificates of conformity can refute the toxicity of the glue. Import manufacturers often use toxicity certificates under the abbreviation EMICODE.
The technique of using the glue method of penofol is simple and cost effective. The insulation is very light, which means that it does not require the application of a large amount of adhesive. When fixing to metal, it is worth making sure that there is no water base in the composition, otherwise this will cause significant surface corrosion and damage to the insulation itself.
The surface for gluing foam foam should be flat, free of dust. Concrete walls or floors should be plastered without cracks, and metal surfaces should be treated with an anti-corrosion coating.
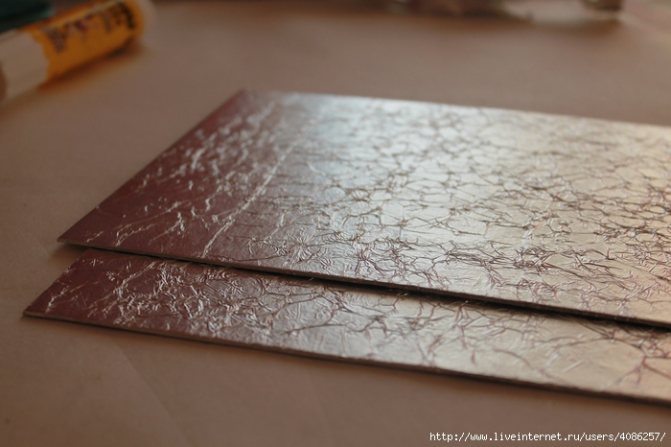
The glue is applied on the non-foil-protected surface of the penofol in an even layer. All sections of the insulation should be oiled. Particular attention is paid to the edges of the panel.
Before fixing penofol, hold for a time from several seconds to 1 minute, so that the glue dries a little. This will ensure the best adhesion. After the canvas is pressed to the surface, holding it, gently smooth it until it is completely fixed. Seams between pieces of insulation can be greased in advance or after finishing the entire surface.
Can be glued with glue from the "liquid nails" series, for example, "Moment-Montage",
just consider in which room you will glue penofol.
There are "liquid nails" of this brand for wet rooms (baths, saunas), there are for outdoor, for indoor work.
Also consider the material of the surface (metal, brick, concrete, etc.).
In general, the very idea of gluing penofol is not entirely correct.
If some air ducts are insulated with penofolm,
then penofol type "C" is bought, it is with an already applied adhesive layer (self-adhesive).
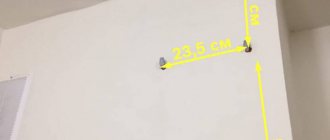
If the wall is insulated, then penofol is attached with an air gap (up to 2 cm, this is enough), that is, at the beginning of the crate, then penofol, fastening with brackets (you need a stapler), then counter-crate and finishing finishing material.
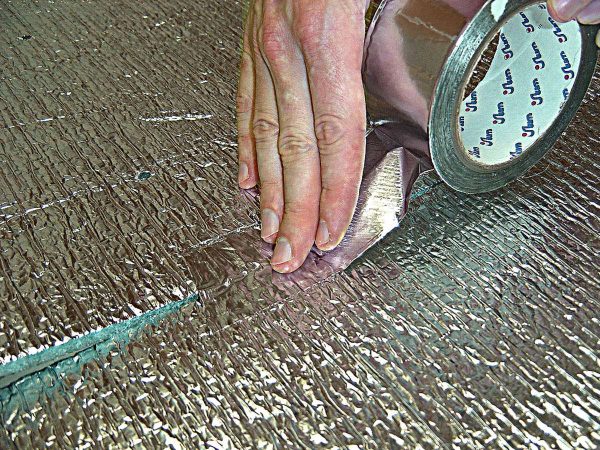
The joints are glued with foil tape,
overlap fastening is unacceptable, only end-to-end.
It is not necessary to glue penofol at all, it is attached differently, without an air gap there is no benefit from it.
On the loggia you need penofol type "B", this is penofol with double-sided foil, one layer of foil (do not forget that penofol is reflective insulation) will not release heat from the room, the other will not allow the sun's rays to overheat the room in the summer (this is important for the loggia ).
Penofol type "B" is not glued, it is attached with a gap on the staples (see above).
In your case, the glue method will not work, just spoil the material and do not insulate the loggia, fix the penofol according to the technology described above (crate, gaps and so on).
Modern heaters like penofol require high-quality fastening. Penofol is polyethylene in a foamed state, it is covered with foil on top. Regardless of the type of finishing material: roll or sheet, a special adhesive is used as an attachment. It allows you to keep the technical properties of the material at a high level.
When choosing an adhesive for penofol, it is worth considering the type of surface to which it will be attached. The foil cover does not allow draft and heat to pass through. To save heat in the building, penofol is attached from the inside to the insulation. The air space should be 1 cm. Penofol must be fixed with an air gap.
As a heater, foam plastic is used with a width of 5-10 cm. The sheets must be glued tightly onto a special adhesive composition suitable for the foam. Plastic umbrellas provide additional fixation. A mesh is attached on top.


Preparation of surfaces for insulation
Before fixing the insulation on the wall, its surface must be prepared. This is due to the fact that the thermal insulation process ensures complete overlap of the wall material for a long time, and only the correct processing is able to provide the required durability.
In the process of preparing the surface for fixing heat-insulating panels, typical instructions recommend performing the following operations:
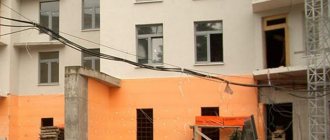
- The base is cleaned of old finishes, plaster and putty... In some cases, it is allowed to preserve the plaster layer, but it should be carefully inspected.
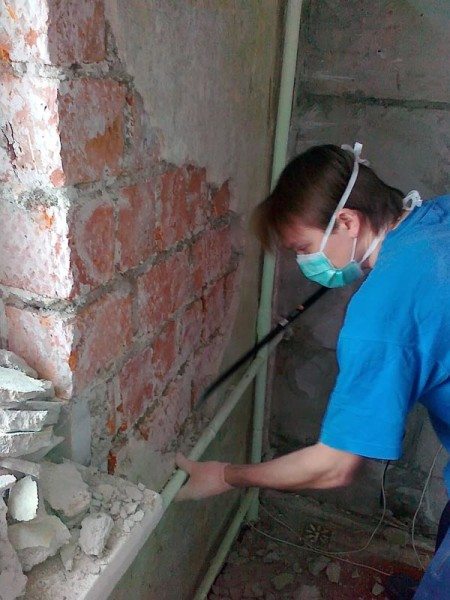
The wall needs to be cleaned - as shown in the photo
- The detected weak sections of the wall are dismantled using a hammer drill or chisel... Cracks are embroidered with a grinder to a depth exceeding the size of the cracking. After that, the damaged areas are repaired with either cement mortar or quick-setting epoxy mixtures.
Advice! Fasteners for insulation can only be fixed in a sufficiently strong base. If the wall has a tendency to collapse, then it makes no sense to insulate it.
- For thermal insulation using high-density polymer panels, the surface is carefully leveled with plaster... If the insulation is made using mineral wool or other loose materials, then you can do without alignment.
- In order to avoid damage to the material with fungi, we treat the base with a fungicidal composition... This should be done even in cases where vapor-proof materials are used for insulation (polystyrene, polystyrene, penofol, etc.).
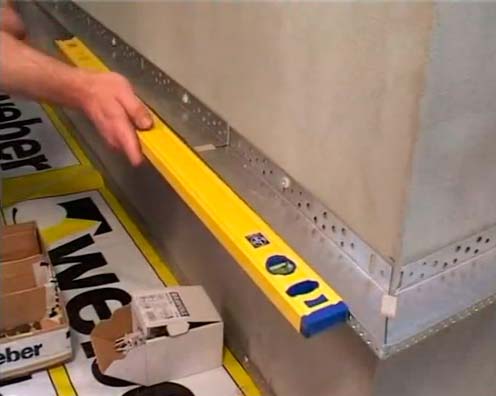
Plinth profile installation
A so-called plinth profile can be used as an auxiliary device for the installation of many types of thermal insulation materials. It is a perforated metal plate that is mounted on the bottom of the wall.
The plate is rigidly fixed on the base and serves as a reliable support for the plate heat insulator, preventing it from sliding under its own weight.
Advice! The basement profile must be selected depending on the dimensions of the insulation used.
Advantages and disadvantages of penofol
Advantages of foil-clad material
Even a person who does not have the skills of a builder can easily cut this material and apply it to any surface. Since the main components of the product are polyethylene and food foil, rodents and all kinds of domestic pests are indifferent to penofol.
The material is environmentally friendly and will not ignite even if other household items are ignited. Due to the fact that the products practically do not allow steam to pass through, it is widely used to isolate public and home saunas.
With regard to the shortcomings, it is better to carry out insulation with penofol from the inside. The product is not recommended for use when decorating the outside of the living space. It is difficult to fix it with glue and glue solution, and it can tear when fixed with nails. Penofol is inconvenient from a technological point of view - this material is difficult to "mask" due to the softness of its structure.
Specificity of fastening to different types of walls
Penoplex is an effective insulation that is popular due to its performance and ease of installation.
One of the key factors influencing the choice of fastening method is the type of surface. The fixing of the slabs to different bases is carried out using various compounds and additional devices. The correct choice of installation method is the key to the durability and effectiveness of the heat-insulating material.
Concrete
Concrete surfaces are porous, which affects the absorbency of the mix. Before fixing the penoplex to concrete, the base should be treated with a primer. This will reduce the consumption of glue and improve the adhesion of the materials. To attach Penoplex to a concrete wall, you will need not only a layer of glue, but also additional dowels. At the same time, the reliability of fixing the insulation increases. To exclude the absorption of moisture by the concrete wall, you will need to lay the slabs in a checkerboard pattern.
Brick
There are many options for installing foam to a brick base. Professionals recommend not to dwell on this method, but to combine different methods. The difficulty in fixing the insulation is made up of irregularities that have a base. To minimize the negative consequences of this phenomenon, before attaching the penoplex to a brick wall, it is worth priming it. The following methods are used to fix the sheets:
- glue;
- foam;
- liquid Nails;
- cement mixture;
- dowels;
- self-tapping screws.
When using dowels as an additional fastening, you will need to pre-drill holes in the brick wall with a puncher.
Blocky
Professionals identify several rules on how to fix penoplex to a wall of aerated concrete blocks. This is due to the special structure of the material, since block walls are subject to the negative influence of moisture more than other types of bases.
How to insulate the ceiling?
Penofol bonding
In order for work with this material to quickly argue and be crowned with a satisfactory result, you need to know some of the styling features. This will create reliable insulation that will last for many decades.
You must adhere to these rules:
- There should be an air space between the foam layer and the wall.
- For gluing to concrete, the surface must be prepared: level, eliminate cracks, prime.
- All joints of individual sheets of insulation should be carefully glued with construction tape or silicone sealant. Otherwise, depressurization of the structure may occur.
- Avoid the formation of joints at the corner joints of the ceiling and walls.
- Make sure that the foil side of foam foam does not come into contact with electric wires and cables, since aluminum is an excellent conductor of electric current. Therefore, all possible joints of material and wires must be insulated.
- The reflective side (the one covered with foil) should be directed towards the interior of the room.
- Fragments of material should not overlap each other. Condensation may collect at the edges as a result of the ingress of moist air on the inner surface of the heat insulator.
- Before gluing penofol to the surface, it is necessary to ensure that all areas of the panel are smeared with an adhesive. During this time, the glue will dry out a little (the allowable time is 5 - 60 seconds), due to which maximum adhesion will be achieved.
- The glue-treated panel of insulation (its non-foil side) should be pressed to the surface, then gently flattened, holding until the sheet is completely fixed.
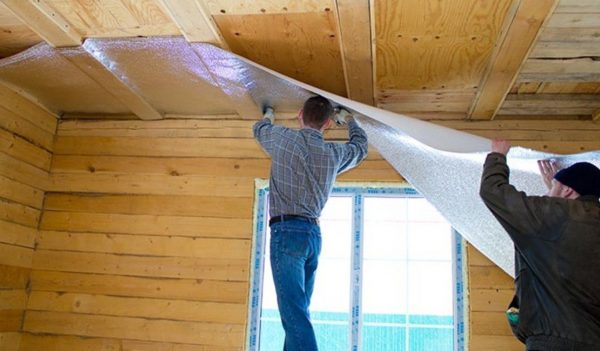
Laying penofol on the ceiling
Experts recommend penofol as an ideal heat insulator for the ceiling. This opinion is due to its low weight and small thickness, as well as the minimum amount of effort that will be required to apply to the person performing the installation.
For the successful implementation of the work, the performer, in addition to penofol, will need wooden slats, hardware, tools and facing material.
- The ceiling is insulated in two passes. First, with the help of wooden slats, the initial layer is attached to the surface. For this, the thinnest type of penofol is usually chosen. When fixing the first layer, the slats are laid in the longitudinal direction, and when attaching the next layer, in the transverse direction.
- Insulation materials are covered with a lining of foam or other lightweight materials.
How to fix basalt insulation to the wall with facade insulation?
In fact, stone fiber is not attached to the walls in order to block any elements from view. The purpose of the event is to isolate the vertical surface from the external environment.
Fibrous mineral wool with air perfectly inhibits heat exchange, and the chaotic arrangement of the threads can damp a lot of acoustic noise. But fixing a slab or several products will not solve the issue, a balanced and comprehensive approach is needed here. The main task is to select a basalt insulation with the appropriate properties, but this is not enough either. You need to know exactly how to fix the insulating material and the sequence of installation of the entire thermal insulation system.
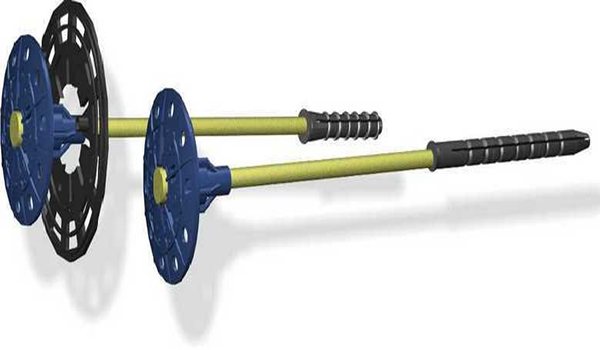
Outdoor systems are characterized by a high mechanical and atmospheric load on the finish and the entire fastening subsystem, therefore, the fixation must provide sufficient strength and reliability. In addition, the dowels with which the basalt insulation should be fastened must have an athermal head and a supporting mushroom cap.
Let's consider in detail how to fix basalt thermal insulation on walls in plaster facade systems:
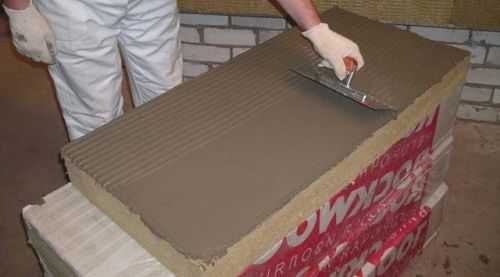
- Preparation of the base. Basalt insulation slabs are glued to the walls, so their surface should be fairly flat. For this, chips and potholes are closed. Before the very fixation of basalt wool, priming is performed, designed to strengthen, dust-free structures and improve adhesion.
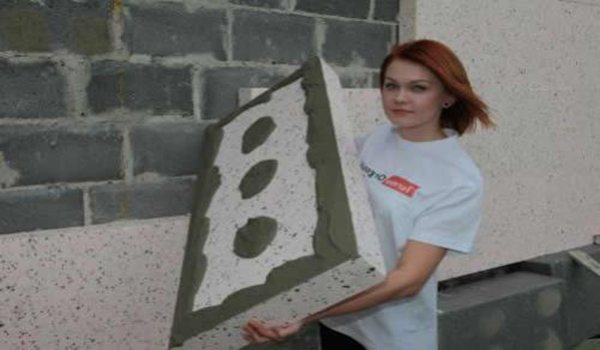
- Bonding of min-plates. For this, special adhesives are chosen, designed to both fix the basalt insulation to the walls, and ensure its snug fit to the surface.Such dry mixtures provide maximum adhesion of thermal insulation to masonry, concrete walls and other surfaces, have frost resistance of the frozen layer, and special modifications make it possible to fix min-plates at sub-zero atmospheric temperatures. The glue is applied according to a special scheme, carefully working out the perimeter and applying the composition in the middle, after which the slab is pressed to the surface. The position of the slabs is maintained using a level. After installing the first row, the second is fastened with an interval at the seams so that the joint of the slabs falls in the middle of the min-slabs of the lower line. The rule must be followed for all subsequent bands.
- Dowelling. Basalt insulation should be fastened to the wall using disc dowels after a certain time, allowed to dry the glue. Then all work is carried out both on the arrangement of plastering and decorative layers, and on the final painting of the facade.
To understand the intricacies of fixing mineral wool slabs to facade walls, we suggest you watch a video about the installation of a thermal insulation system.
Facade insulation using ventilated gap technology has a slightly different approach to fixing basalt wool.
- Installation of a vapor barrier. A special film covering that supports the removal of moisture and vapors from the walls of the house.
- Frame device. The design feature of the ventilation facade provides for the installation of finishing at a distance from the insulation, therefore, a rigid frame system is initially mounted from a profile that is resistant to corrosion and mechanical stress.
- Laying slabs. It is quite easy to lay min-plates between the frame guides. Having chosen products with a certain stiffness and insulating properties, they are installed with a slight squeezing of the edges. After leveling, the practical basalt insulation for the facade fills the allotted space, which ensures sufficient fixing strength.
- Dowelling. The supporting disc dowels must be installed according to the scheme and in the amount specified by the board manufacturer or system designer. Particular care should be taken to fix the two-layer thermal insulation, due to the increased weight.
- Installation of a hydro-barrier. The membrane is able to protect the thermal insulation from water droplets condensed in the air gap of the ventilation facade.
After proper fixation of the mineral wool insulation, the lathing is installed, the space for ventilation is observed and the decorative trim is installed.
To understand how to fix basalt insulation to the wall, you need to decide on the method and design of the thermal insulation system. The selection of fasteners, adhesive mixtures and other structural elements of the system will be helped by specialists and professionals in the field.
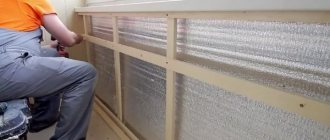
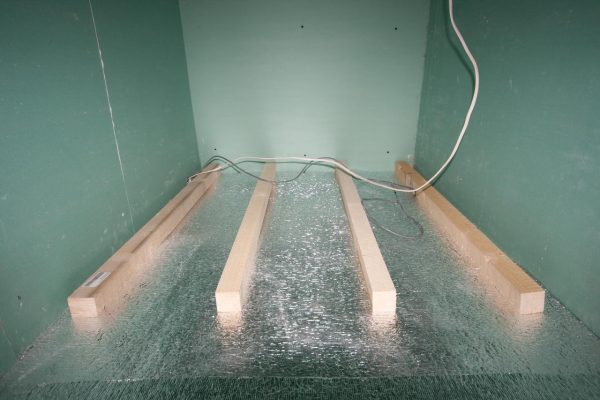
How to insulate a room on your own from the inside?

Insulation of the house inside
Before starting work, it is necessary to insulate the electrical wires and stock up on the necessary materials. In addition to penofol, the contractor will need assembly glue or a stapler, as well as wooden lathing and hardware.
- The first task facing the performer of this work is the construction of a wooden frame to which the penofol will be attached. The air layer separating the insulation from the wall should not be less than 20 millimeters.
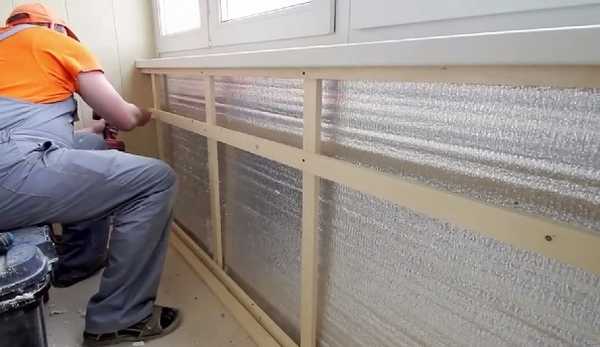
- Then, armed with glue or a stapler, it is necessary to fix the insulation on a wooden frame, not forgetting that foil is an excellent conductor of electric current. All electrical wiring must be insulated in advance.
- Now is the time to install the second timber frame. Finishing materials will be applied to it. The maximum thickness of the structure is 20 millimeters.
Advice and recommendations for the installation of insulation.
Before using and applying the adhesive to the foam surface, it must be moistened with water, which ensures reliable adhesion of the adhesive and material.
The insulator must be staggered. This will avoid cold bridges and achieve a high-quality result.
- If the thermal insulation material is attached to external walls, then it should not be left exposed to the air.
- The process of installing a heat insulator should be approached responsibly, as well as carefully study all the qualitative characteristics of the material and how to work with it correctly.
- Insulation laying is necessary from the bottom up. This is necessary for smooth installation of the product.
- Before insulating a house made of natural wood, it must be impregnated with special solutions that will protect it from decay processes.
- With the correct work under the insulation, you can hide some defects and unevenness of the existing walls.
- When fixing mineral wool from the inside, it is necessary to select an adhesive composition without harmful emissions.
If you adhere to all technologies and rules, you can make a high-quality installation of heat-insulating material yourself, without the involvement of qualified craftsmen. The result will be a warm microclimate in the house in winter and cool in summer. Insulation with good materials, with correct installation, will allow the building to be operated for at least 10 years without repair work.
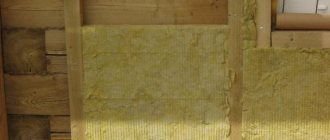
How to glue mineral wool
Thermal insulation of houses with mineral wool is a fairly common procedure, especially now, when prices for heat have become very significant. But experts know that the structure of this insulation is quite peculiar and not every adhesive composition can ensure reliable adhesion of mineral wool to the surface.

Modern manufacturers have developed a special plaster-adhesive mixture, the composition of which you can see here. It is ideal for fastening this type of insulation, but nevertheless, in order to ensure the highest quality adhesion, you need to know some secrets.
How to properly glue mineral wool is described in detail in this article.
Glue application rules
Many people think that for the best adhesion of the insulation to the surface, it is necessary to apply a thick layer of glue to it. This is of course true, but why, as they say, pay more if there are other, more budgetary and equally reliable options.
So, in order to properly glue mineral wool to the surface, you need:
- Clean the wall from interfering elements - fittings, brackets, etc., and level it.
- After making sure that the wall is as flat as possible and there are no unreliable areas in the form of fallen off plaster on it, the surface should be primed with a special solution.
- The glue should be applied to the reverse side of the insulation, while covering at least 60% of its area and preferably along the contour. In this case, the glue layer must be at least 6 mm.
- With the help of a toothed float, you need to make longitudinal and transverse grooves on the surface of the adhesive, after which, apply a mesh for reinforcement on it.
- On top of the mesh, it is worth smearing the solution that has emerged through it.
- On the wall, on top of the primer, it is worth applying about eight glue cakes, after which, literally, press the ready-made thermal insulation into them.
Please note that the adhesive does not freeze instantly, so each layer of insulation can be adjusted so that it lies as flat as possible in relation to the adjacent slabs.
Additional mounts
Since the glue does not freeze immediately, there is a high probability that the already glued plates will fall off during the alignment of the neighboring ones. To prevent this from happening, additional fasteners are needed, which are:
- Anchors with wide washers.
- Plastic dowels with large caps.
Remember that to fix the dowels, you must first drill the wall at four to five points for each plate, and then drive the fastening rods into these points.
In this video, you will see how to properly apply the adhesive to the mineral wool and arrange it on the facade:
Tweet
urokremonta.ru
An unusual way of insulation
We told you how you can independently solve the problem of cold air entering the apartment through the window. But the above methods are considered common, you must admit that sometimes you want something that will make you stand out.
In this case, Santa Claus window insulation is suitable. You can buy it in the store, or make it yourself.
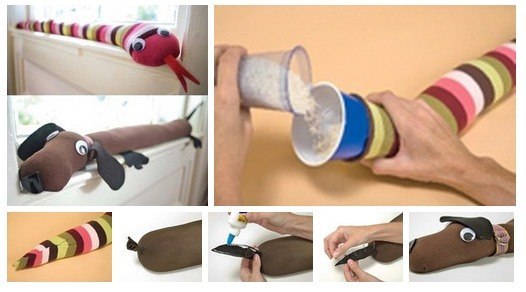
Santa Claus can be replaced with any other creature, be it a dachshund or a snake
For those who do not have extra funds, a homemade option is the most optimal, the only thing is that you need to somehow own a needle and thread.
Another option, which can be called the simplest, is to use regular foam rubber