Regardless of what building material was used to build a house, one of the main tasks of its owner is to reduce the cost of heating and repair measures. A logical solution to the problem is building insulation.
Expert opinion
Konstantin Alexandrovich
If the building is erected from a material that is not able to retain heat well, such measures should be carried out as soon as possible. This article discusses in detail the principles of how to insulate a house from slag.
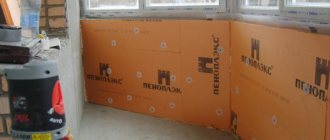
Insulation materials
How to insulate the outside of the wall of a cinder block house? It is clear that any owner wants to spend the optimal amount of money on the thermal insulation device and finish the work as soon as possible. On the construction market, you can buy various materials that have good thermal insulation properties and are suitable for facade work.
What materials are suitable for external insulation of a cinder block wall? Currently, the following types of materials are mainly used for these purposes:
- polystyrene (extruded polystyrene foam), polystyrene foam, polystyrene foam; glass wool (fiberglass and mineral wool).
Each of these materials has both advantages and disadvantages.
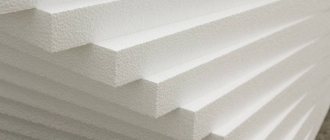
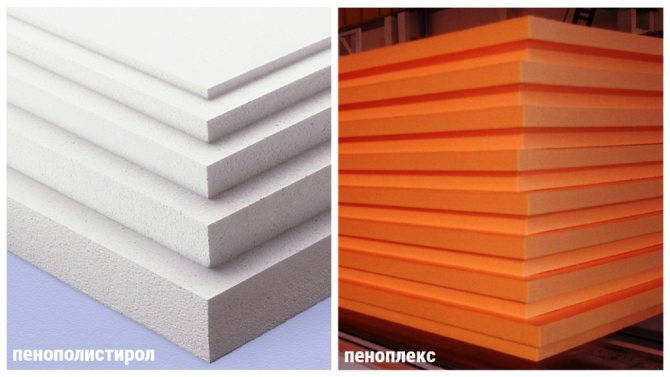
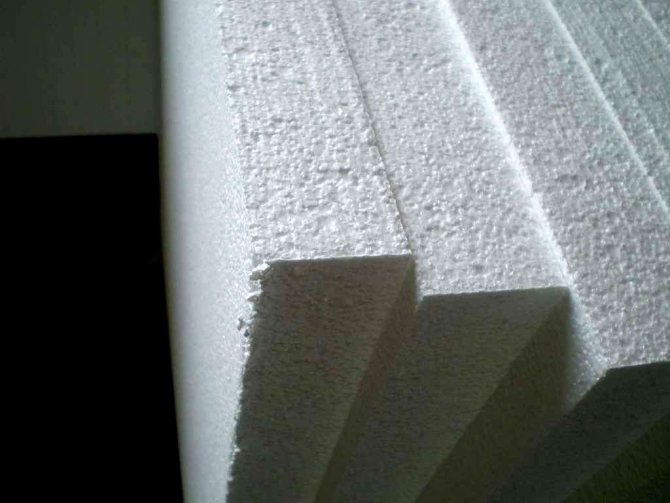
These materials have low thermal conductivity and therefore provide good heat retention. Importantly, they do not support combustion, therefore they are not fire hazardous. However, some types of foam give off toxic chemicals when they burn, so poisoning is possible if they catch fire.
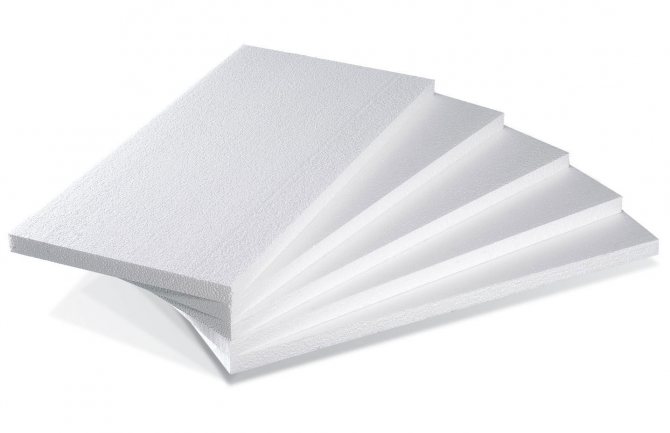
Polyfoam is the most popular heat insulator. The low cost of the material and ease of installation allow it to be used in the construction of houses for more than 80 years. Foam plastic has weaker sound insulation properties compared to fiberglass.
But he is not afraid of dampness. Even in conditions of significant humidity, the physical properties of this material practically do not change. It is convenient to fix the foam boards on flat surfaces, so the work takes little time. However, the slabs themselves are quite fragile, so care must be taken when working with them.
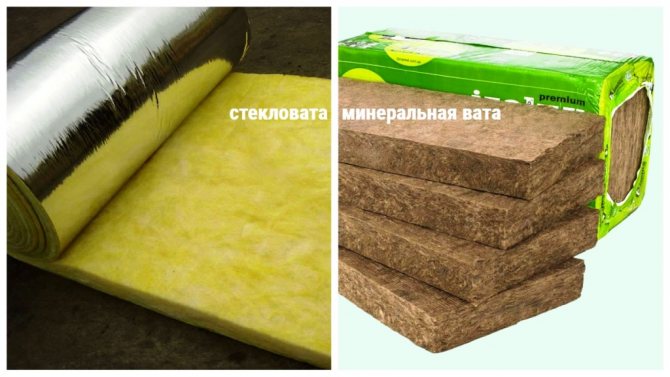
Small rodents are able to gnaw through foam, they are happy to arrange their home inside such an insulating layer. Penoplex plates are more durable and resistant to mechanical damage. Rodents and insects will never start in them. But the cost of the material itself is significantly higher. Mineral wool consists of inorganic fibers, which are made from molten rocks, slags and mixtures of sedimentary rocks. Glass wool is made from glass production waste.
It is composed of limestone, soda, sand, borax and dolomite. These materials are absolutely non-combustible. The advantages of glass wool insulation include high noise insulation. In addition, this material is convenient for filling gaps and voids.
The structure of glass wool allows it to be applied even on uneven surfaces, but the installation technique for glass wool insulation is more complicated. The disadvantage of this material is wetness. When moisture gets on the fiberglass, the indicators of heat preservation and sound insulation are significantly reduced.
How to properly insulate buildings
Speaking about the insulation of any buildings and structures, they always divide the possible options for thermal insulation into two types - insulation outside and inside.
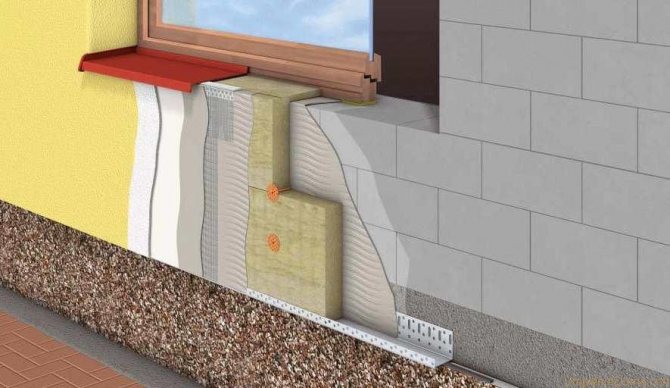
For cinder block houses, it is usually recommended to insulate the walls from the outside, this is due to the fact that when insulating the walls from the inside, it is possible to shift the dew point located between the building structure and the thermal insulation. Moisture can accumulate on the walls due to the displacement of the dew point, causing mold and mildew.
Internal insulation of buildings has other disadvantages, in particular, due to the large thickness of the heat-insulating layer, the area of the interior will be reduced, which is especially unpleasant for the owners of small cinder block houses, where there is already a lack of living space.
For these and other reasons, it is customary to install a layer of thermal insulation on the outside.
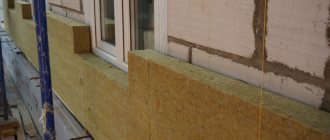
How to insulate walls from the outside with fiberglass?
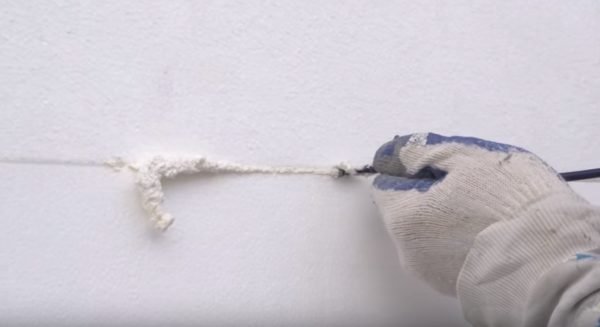
Before installing thermal insulation, it is necessary to prepare the walls of the house. If there are large cracks or voids in the walls, they are filled with polyurethane foam. It will take about a day for the foam to dry.
Then the surface of the walls is leveled with plaster using a plumb line and level. This will close all microcracks. A primer is applied to the plastered walls.
Then a starting profile or a base is built, on which the first row of glass wool will later lie. To do this, first, using a level, mark all the outer corners of the building and connect them with one line. The width of the starting profile or plinth should be slightly wider than the thickness of the insulation boards.
After that, vertical guides are attached to the entire height of the walls. The distance between them is made slightly less than the width of the roll or plate. This is done so that the insulation fits snugly between the guides.
The next step is to prepare the glue according to the instructions on the package. When using fiberglass, it is more convenient to apply the adhesive to the wall.
It is better to insulate the house in stages. First, one wall is closed with insulation, then sheathing is mounted or reinforcing mesh is attached, putty is applied on top of it. Then another wall is insulated.
Installation technology
Thermal insulation technology for cinder block walls.
However, each of these steps consists of many sequential stages, which I will try to describe in the most detailed and thorough way.
I recommend starting with carefully preparing the walls of the house for further insulation. This is done as follows:
- I level the surface of the cinder block masonry. It is necessary to remove protruding parts and repair cracked cavities:
- Using a chisel or perforator, you should remove the pieces of mortar that was used for laying the cinder block.
- Then you need to fill the through joints in the cinder block masonry with assembly mortar.
- Large chipped wall blocks must also be leveled flush with the surface using a cement mortar.
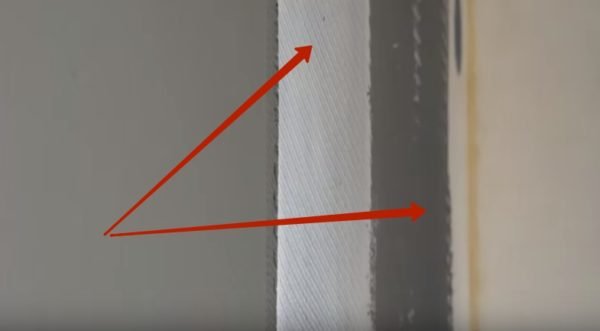
- If significant defects (cracks, distortions) are found, it is necessary to get rid of them before installing the heat-insulating layer.
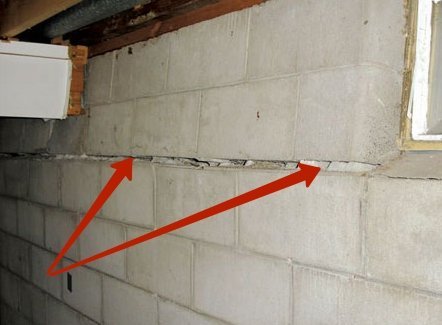
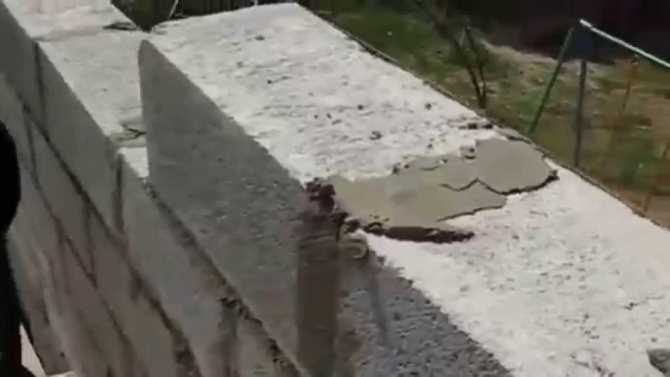
The cracks indicated in the photo lead not only to heat loss, but also threaten the integrity of the whole house.
- I clean the surface of the cinder block walls from dust and debris. To do this, you can use a regular brush. If the walls are not cleaned, difficulties may arise during the subsequent priming of the enclosing structures.
Cinder block masonry, ready for insulation.
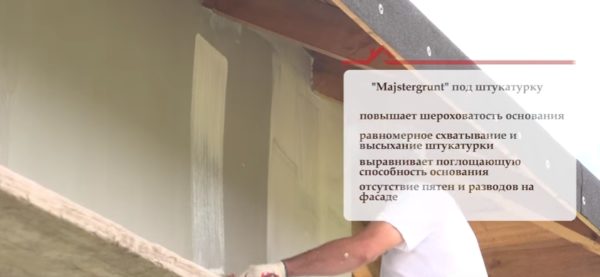
- The soil surface of the walls with a penetrating primer. To work in the case I am describing, I used the MajsterGrunt composition. The work is done in the following sequence.
- First, pour the primer into the bucket, and then dilute it with clean water in a ratio of 1 to 1. With this solution, I pre-treat the walls in order to reduce the absorbency of the surface.
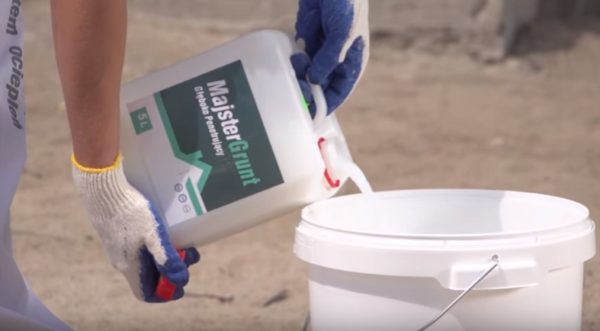
It is better to dilute the primer for the first layer with water.
- I apply the first layer to the walls of the dwelling with a spray gun.Thus, the time for processing cinder block masonry is significantly reduced. After that, it is necessary to allow the primer to partially dry for 2-3 hours.
- Then I ground the walls a second time using a brush, with which I carefully rub the liquid into the cinder block. A deeply penetrating primer improves wall adhesion, evens out the absorbency of slag blocks, strengthens the base and removes dust from the wall.
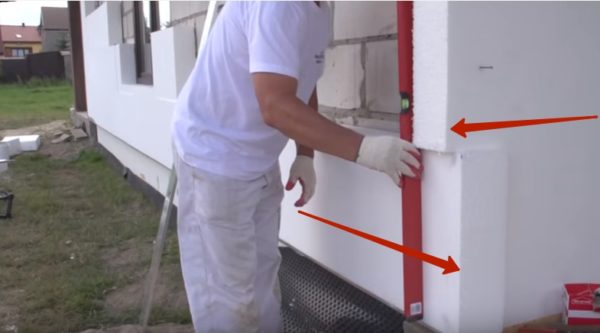
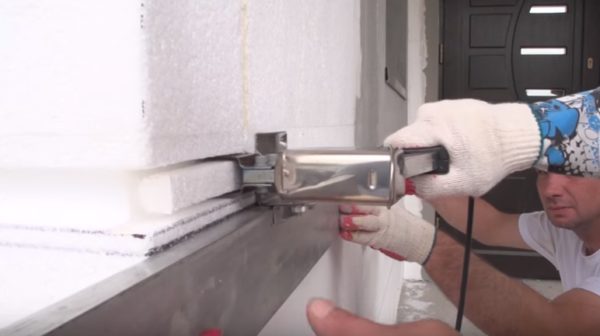
- I am mounting the starting profile, on which the entire insulation layer will be based. It is a perforated galvanized metal part that is installed at the junction of the basement and the walls of the house and supports the expanded polystyrene while it is glued. Another purpose of the bar is to protect the insulating layer from damage by rodents. It is installed as follows:
- With the help of a laser or water level, a strictly horizontal line is drawn along the wall around the entire house, which will serve as a guideline for the installation of a starting profile for insulation.
- The profile is attached to the wall with screws and dowels, which are inserted into pre-drilled holes.
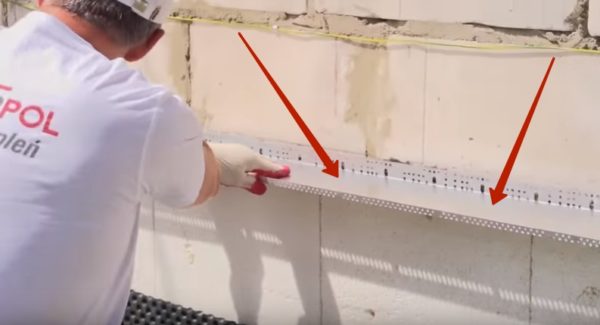
Setting up a start profile.
- It is not necessary to dock adjacent parts closely. There should be a gap of 2-3 mm between the individual elements of the starting profile to compensate for the possible thermal expansion of the metal.
- After installation, I recommend that you once again check the correct installation of the part using a long water level.
Control of the correct placement of the start profile.
On this, the preparation of the walls from the cinder block for subsequent insulation can be considered complete. And it's time to move on to gluing polystyrene foam.
I'm getting started with the installation of thermal insulation. The instructions for carrying out the work are as follows:
- I am preparing an adhesive composition. The correctness of all subsequent work depends on how correctly this seemingly insignificant stage will be performed:
- For gluing polystyrene foam in the case I am describing, I will use Styrolep K dry mortar, which can be used to glue and reinforce polystyrene inside and outside the building.
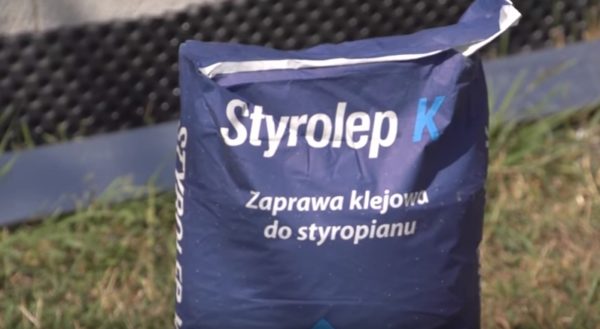
Mix for gluing foam.
- To prepare the solution, you need to pour a certain amount of water into the bucket (in my case, 6 liters), then pour the powder from the bag into it and stir with a low-speed drill with a mixer.
- As soon as the solution becomes homogeneous, you need to leave it alone for 5 minutes to activate various additives that improve its quality and performance. After this time, the mass should be mixed again.
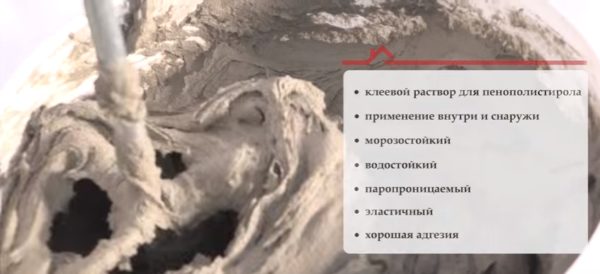
Properties of the ready-made adhesive solution for expanded polystyrene.
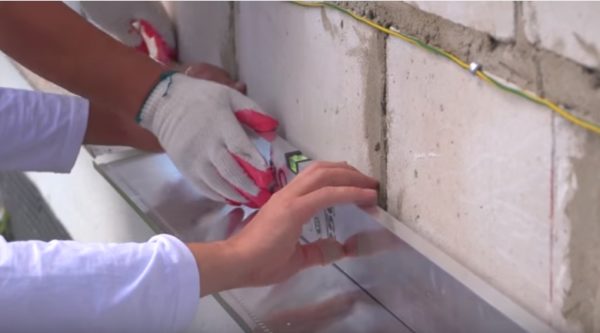
- I apply glue to sheets of expanded polystyrene. This process significantly affects the reliability of the installation of insulation boards. Therefore, I will talk about the process of applying glue to the insulation in more detail:
- The ready-made adhesive composition is applied with a trowel to the edge of the expanded polystyrene board. In this case, you need to work so that the solution does not fall on the end of the part (the place that will form the seam).
- After that, 3 slides of glue are placed in the middle of the insulation slab so that after it is distributed during gluing, more than 40% of the foam surface is covered.
Applying glue to the insulation.
- I glue the insulation panels on the block wall. The essence of the process, I think, is clear without much explanation. I'd rather focus on those nuances that are not obvious to a novice master:
- When gluing the first row, it should be supported on the starting profile, carefully monitoring the correct installation (vertically and horizontally). All subsequent rows rest on the first, so if you glue the first insulation belt crookedly, the rest will also be mounted incorrectly.
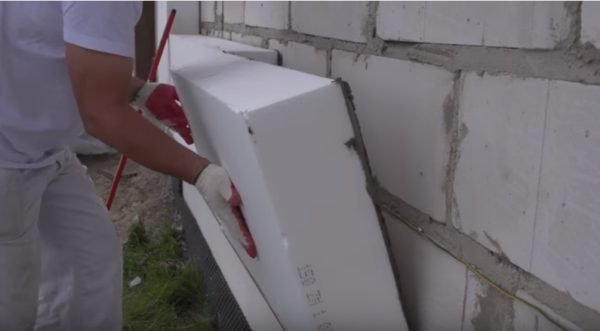
Foam bonding.
- The seams of the upper row should not coincide with the seams of the lower one, but be staggered with an offset relative to each other at a distance of at least 15 cm.
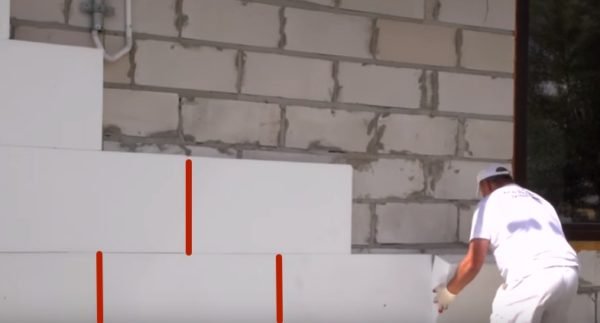
Displacement of seams when gluing expanded polystyrene.
- When joining sheets, it is necessary to ensure that they fit together as tightly as possible. If necessary, the end of the insulation can be slightly cleaned with a foam float or coarse-grained sandpaper. Otherwise, there is a danger of the appearance of cold bridges, which reduce the energy efficiency of the home.
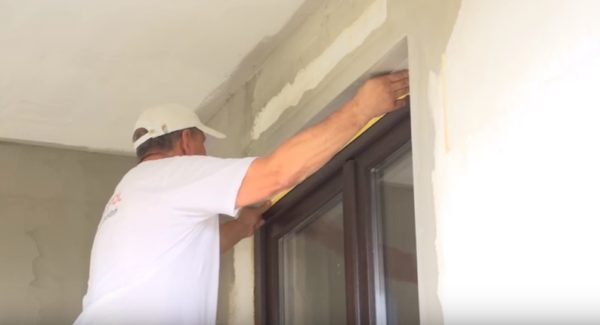
- When gluing expanded polystyrene plates in the area of \ u200b \ u200bthe windows, it is necessary to arrange the sheets so that the seams of the insulating layer are not a continuation of the slope of the window opening. To do this, you need to cut out L-shaped parts from the foam, which are glued to the corners of the window.
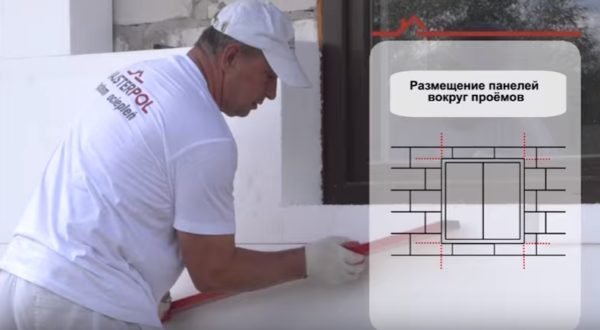
Window opening design.
- At the corners of the building, thermal insulation slabs are installed using the gearing method. This means that the slab of the upper layer should hang over the slab of the lower one, and so on in order to the very top. Moreover, the part of the slab that protrudes beyond the cinder block wall should not be larger than the area to which the glue is applied. It is difficult to describe in words, but you can clearly see everything in the illustration.
Bonding foam at an angle using the gearing method.
- After 12 hours (time of partial curing of the adhesive), it is necessary to seal the joints between the foam sheets with a polyurethane foam adhesive (eg Ceresit). It is necessary to seal the seams with a pistol so that the foam fills the entire joint space - from the cinder block wall to the surface of the expanded polystyrene.
Sealing of seams with polyurethane glue.
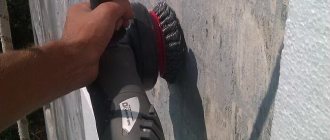
- After the foam hardens, it is necessary to cut off the excess sealing compound flush with the surface, and then finally clean the surface of the insulating layer with a float. It is necessary to make sure that there are no protrusions and irregularities on the foam (especially in the area of the seams).
Surface sanding.
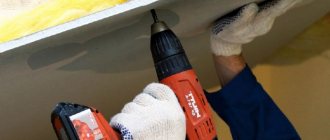
- Additionally, I fix the expanded polystyrene on the cinder block wall using dowels. The dowels can only be used on surfaces that are subject to increased wind load. It is obligatory to use dowels on buildings with a weakened base or having walls more than 12 meters in height. The working rules are as follows:
- It is necessary to start installing the dowels 72 hours after gluing the expanded polystyrene plates.
- The consumption of dowels should be 4 pieces per square meter of the insulated surface in the central part of the wall and 6 pieces near the corners and window openings.
- Before fixing in expanded polystyrene, a hole is drilled with a special drill with a round disc, which makes a depression in the surface sufficient to accommodate the dowel head.
- After that, a dowel is inserted inside, into which a plastic core is hammered. In this case, the dowel head must be recessed into the surface of the expanded polystyrene.
- Then the hole is closed with a foam circle. It all looks like this:
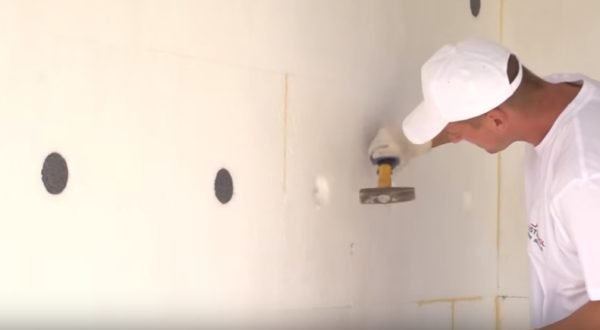
Reinforcement of the insulating layer with dowels.
Following the above tips, you can easily glue cinder block walls with expanded polystyrene sheets. After that, you can safely proceed to the reinforcement of the insulation layer and the final decorative finish.
We suggest you familiarize yourself with: How to make a view on a pipe
For reinforcement, you will need the glue with which I glued the foam, fiberglass mesh for outdoor use and a variety of profiles. However, I'll tell you about everything in order.
- Reinforcing the outer corners of the building. For this, special perforated profiles are used with fiberglass mesh attached at the edges. The strengthening process is carried out in the following order:
- I measure the corner of the building with a level, after which I cut off all the protruding parts of the expanded polystyrene plates that were not removed during the gluing process.
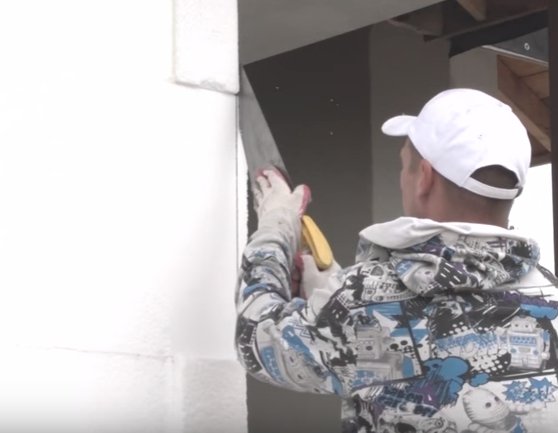
Cutting styrofoam at the corners of the building.
- After trimming, I clean the surface again with a perforated metal float or coarse sandpaper.
- I coat the corner of the building with an adhesive mixture. I apply a layer 1 cm thick and 10-15 cm wide. Here you can not be afraid to overdo it with glue, as its excess will be removed through the perforation in the corner.
- I apply an angular profile to the smeared area, then press it deep into the glue and press it tightly against the expanded polystyrene surface.
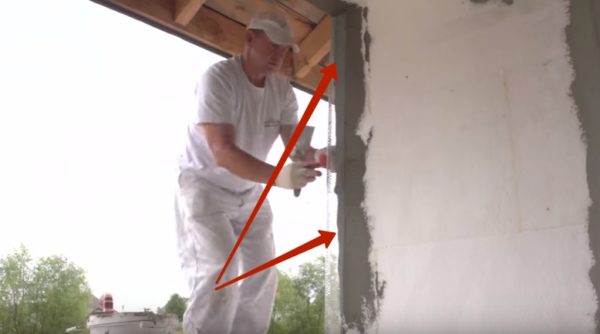
Installation of a corner reinforcing profile.
- I remove the excess glue from the profile, and press the mesh fixed to it into the glue, after which I smooth the solution with a trowel on the wall.
- Reinforcing window and doorways. These are sections of the walls that are subject to increased loads during operation. Therefore, special attention should be paid to their strengthening. The sequence of actions is as follows:
- I install fiberglass kerchiefs at an angle of 45 degrees relative to the horizontal at the corners of the window opening on the surface of the walls. To do this, you need to coat a section of the wall with a reinforcing mixture, attach a piece of mesh to it, then press it into the solution with a trowel and smooth the surface.
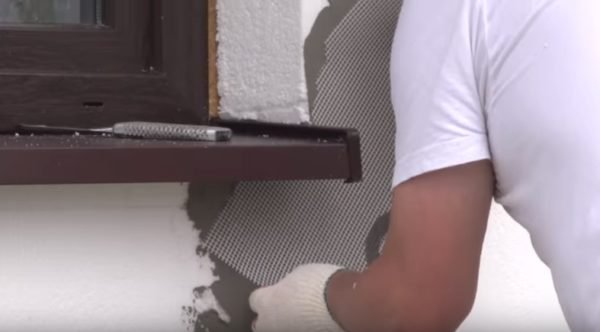
Gluing kerchiefs.
- I glue self-adhesive reinforcing profiles with the mesh already attached to the window blocks. To do this, proceed as follows: Clean the window unit from dust and debris to ensure a snug fit of the parts to each other.
- Degrease the surface of the window block with an alcohol-based solution
- Remove the protective tape and press the part firmly against the window. This can be done once. If you stick it unevenly, you will have to change the part to a new one.
- Smear the surface of the window slope with an adhesive, then attach a mesh from the profile to them, and then use a trowel to deepen it into the glue so that the fiberglass does not rise above the surface of the glue.
Gluing the profile to the window.
- I strengthen the corners of window and door openings with perforated profiles. The process is described in detail in paragraph 1, so I will not repeat myself.
- I install decorative elements. We are talking about specialized profiles in the shape of the letter P, which are mounted in a foam layer and serve as a decoration for the facade. They are fixed as follows:
- On the wall, with the help of a building level, I draw a strictly horizontal line, which will serve as a guideline for further cutting a groove in polystyrene foam.
- Sawing a groove. For this I used a special device, but it is quite possible to replace it with an ordinary stationery knife or other suitable tool. Although in the latter case, the complexity of the process will slightly increase. I note right away that if the decorative profile passes through the corner of the building, then it must be fixed before gluing the corner reinforcing part (point 1)
Cutting strobes in foam.
- I insert a special aluminum or plastic profile inside the groove. Shaped parts are used to connect parts to each other and arrange corner turns. Parts are fixed on expanded polystyrene with an adhesive solution.
Installation of decorative profiles.
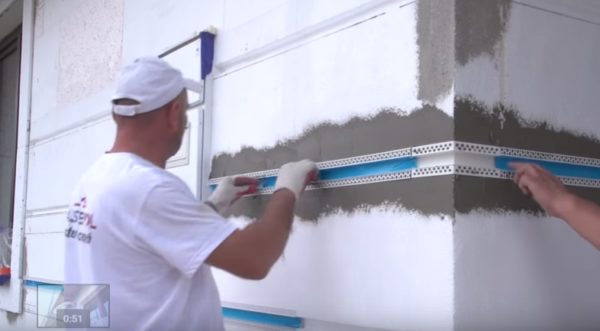
- I reinforce the entire surface of the walls of the building. For this I use fiberglass mesh for outdoor work, which prevents the destruction of the decorative layer due to temperature fluctuations of the insulation layer and external mechanical influences. The scheme of work is as follows:
- I clean the surface of polystyrene foam from dust and foam granules adhering to the walls during the installation of thermal insulation boards.
- I cover the entire surface of the expanded polystyrene with Styrolep Z, and then evenly distribute it with a notched trowel. It is necessary to apply the solution starting from the top of the wall in strips, the width of which is equal to the width of the reinforcing mesh used.
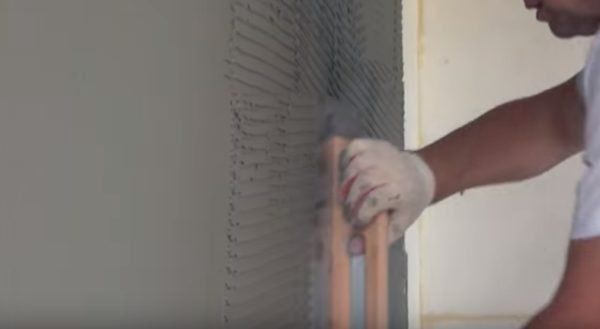
Applying a reinforcing compound to the walls before installing the mesh.
- I apply a strip of mesh to the wall, and then press it into the mortar with a plaster float. At the inner corners of the insulating layer and at the junctions of adjacent mesh elements, it must be positioned so that an overlap of 10 cm wide is formed.While working, I recommend that you be especially careful so as not to damage the fiberglass with the working part of the plaster float.
Installation of reinforcing mesh on walls.
- After pressing the mesh into the reinforcing compound from above, I apply another layer of mortar and smooth it so that the fiberglass mesh is not visible on the wall surface.
- Primed walls before applying decorative plaster. This must be done after the reinforcing layer on the insulation has completely dried. I selected the primer in such a way that its color was as close as possible to the shade of the future facade plaster. Priming of the reinforcing layer is necessary to improve the adhesion of the surface, to ensure uniform adhesion of the plaster and equalize the absorbency of the walls.
Priming the reinforcing layer is a mandatory step before decorative wall decoration.
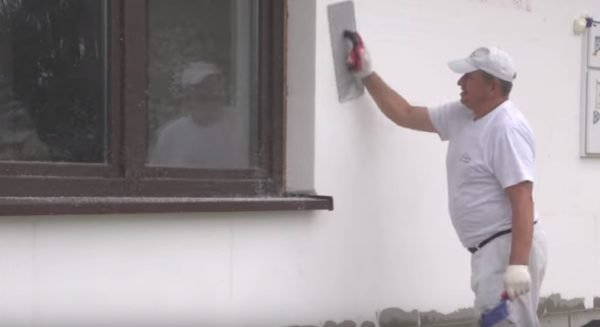
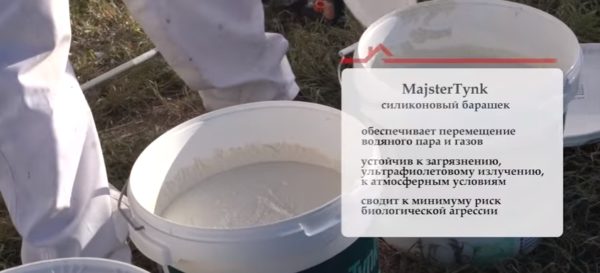
- I carry out the final decorative processing of the walls. To do this, I took a lamb-type silicone facade plaster of the MajsterTynk trademark. Its features are high vapor permeability, resistance to destructive external phenomena and good antiseptic properties.
Insulated facade plaster.
Tags: from the inside, wall, insulation, cinder block
«Previous post
How to insulate walls with styrofoam?
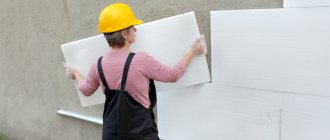
Wall preparation for foam sheets is carried out in the same way as for glass wool. All cracks are closed, and the surface of the wall is leveled with plaster. Then a primer is applied to the dry plaster and an adhesive solution is prepared.
When working with foam or foam boards, it is better to apply the glue to the boards themselves. In this case, the coverage area should be at least 80% of the slab area. They glue the sheets of insulation in a checkerboard pattern, carefully making sure that there are no gaps between them.
If cracks are found after installation, they are sealed with polyurethane foam or glue. On the fixed sheets of foam, a layer of glue is applied in an even layer and a reinforcing mesh is glued. After the glue has completely dried, an ordinary or decorative putty is applied to the mesh.
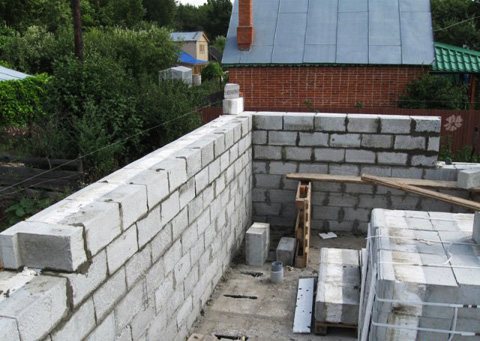
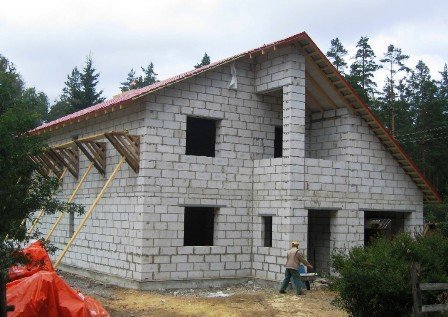
Despite the need for additional insulation, building a house from cinder blocks has its advantages. The cost of a cinder block house is much lower than building the same area from bricks, and even more so from wood.
It takes much less time to build a house from a cinder block, due to the fact that a cinder block is much larger than a brick. The material itself has relatively good sound insulation properties. If you use a high-quality cinder block, then you do not need to spend money on the cladding of the house.
However, cinder block houses have their drawbacks.
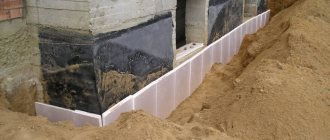
Since this is a rather heavy building material, the foundation for it must be made more durable than for a brick or wooden house. A fresh cinder block, according to some experts, is capable of releasing harmful substances. Therefore, before starting construction, the cinder block is recommended to be kept in the fresh air for at least six months.
Cheap varieties of cinder block have a gloomy gray color, so a house made of such a material must be plastered both inside and out. If the cinder blocks get damp, they can crumble, therefore, among other things, buildings made of this material need good waterproofing. Despite all the shortcomings, cinder blocks are widely used, especially when building country or country houses.
Before insulating a cinder block house from the inside on your own, you need to know the rules for carrying out such work.It is important to choose materials that are suitable for this. Today the construction market is saturated with such products.
There are a large number of them. Usually they are made on the basis of mineral wool or foam. Thermal insulation of a building with this or that product requires certain skills. How to properly insulate a house from a cinder block will be described below.
Walling
Building a building box begins with setting the corners and leveling them. When this painstaking work is done, a rope is pulled between them, along which the next rows will be equal. Pay special attention to the first three ordinary masonry, the evenness of the walls will depend on them.

To make ordinary masonry mortar better and more viscous, you can add super plasticizers or red clay to it at the rate of one third of the clay to four parts of the mortar.
The thickness of the seams should not exceed one and a half centimeters. In this case, significant losses of precious heat will occur through them.
It is better to use monolithic reinforced concrete ceilings, not made of wood, but if you nevertheless chose it, then you will save on additional work and lose in durability. Therefore, a stove is a more reliable option. For its device, it is imperative to strengthen the last row with iron or an armored belt.
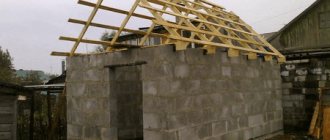
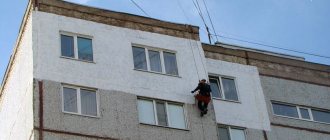
After building the walls, proceed immediately with roof construction and façade work. Because wetting cinder blocks can lead to their early destruction.
Video lesson of cinder block masonry
How to insulate a house from cinder blocks?
How to insulate a house from a cinder block from the outside? Outside finishing can be done with expanded polystyrene.
This material is easily glued using a special mixture. Beforehand, it is worthwhile to level the wall under it and prime it so that moisture does not leak out. So how to insulate a cinder block building correctly?
To create thermal insulation inside, preparatory measures will be required.
For this, the surface is leveled, and then primed. Such work can be done with plaster or putty mixture. The walls must first be cleaned of dirt or dust.
In order for the thermal insulation to last a long time, it is important to put a layer of waterproofing under the thermal material. This will help prevent condensation from forming.
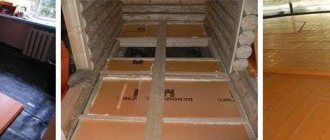
For finishing inside you will need:
- Insulation. The thickness of the sheets should not be more than 5 centimeters. Spatula. Glue.
After the site is prepared, you can proceed with the installation of the plates. The adhesive mixture must be prepared according to the instructions on the package.
It is applied to the surface with a spatula. Then the insulation material is glued to the glue. At the same time, there should be no air under the plates.
Important! The adhesive should only be applied to the substrate, not the slabs. The thermal material itself must have a clean surface. The sheets adhere tightly to each other after gluing. If gaps remain, they can be blown out with foam or filled with putty.
Features of thermal insulation of a cinder block building
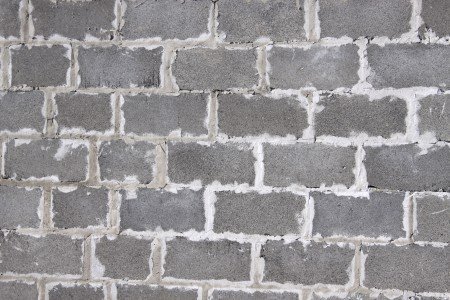
Cinder block walls are highly durable and durable. Therefore, a house built from this material will withstand external negative factors well and have a long service life.
However, if we consider the cinder block from the point of view of thermal insulation properties, then its thermal conductivity coefficient will not be enough to effectively retain heat inside the room and protect the rooms from the summer heat.
Cinder block walls 1 block thick retain heat poorly inside the room.
https://www.youtube.com/watch?v=sFDuvaLuFu8
According to SNiP number 23-02-2003, in order to provide a comfortable microclimate for living, it is necessary to erect walls from a cinder block with a thickness of 150 to 200 cm (depending on the region of the Russian Federation).
Naturally, enclosing structures of this thickness will have many disadvantages:
- the estimated cost of construction increases;
- the weight of the house increases, which makes it necessary to make a more solid foundation;
- the appearance of the house is deteriorating (window and doorways look especially strange).
The way out of this situation is quite simple - to insulate the wall from cinder blocks using some kind of heat-insulating material. I will tell you about the choice of the latter a little later, but now is the time to decide on which side you need to mount the insulation - from the inside or from the outside.
I will immediately answer that I prefer to insulate the wall from a cinder block from the outside, since this method has several important, in my opinion, advantages:
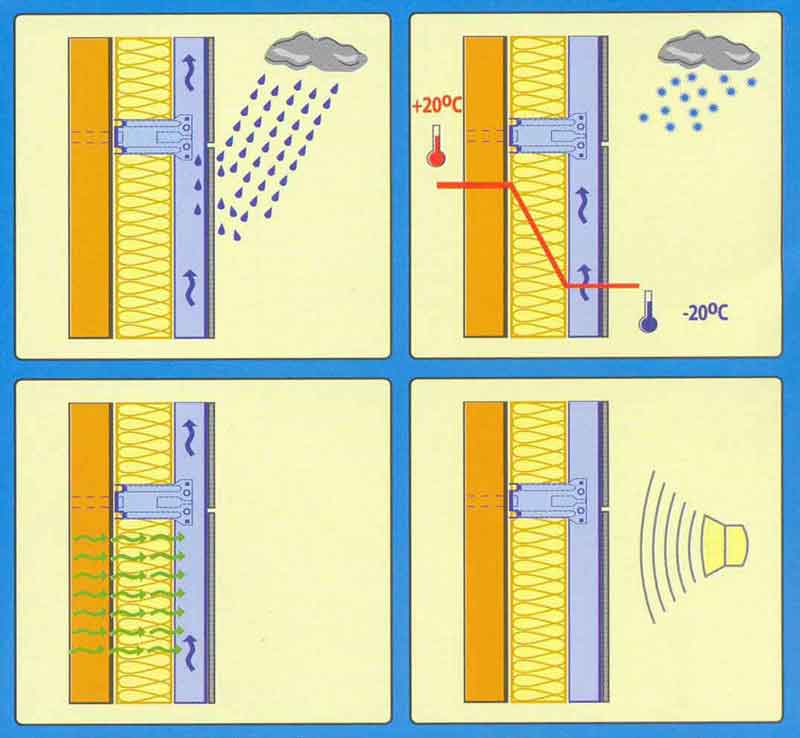
- A wall of cinder blocks, in contact with the warm air of the room, when heated, is capable of accumulating thermal energy, and then, when external conditions change, give it off. Consequently, the thermal inertia of the dwelling increases and with short-term frosts there is no need for additional heating.
- Insulation installed outside protects the cinder block from temperature fluctuations. The material will not constantly experience successive freeze-thaw cycles, which has a positive effect on its service life.
- The outer insulation layer shifts the dew point so that moisture does not condense inside the wall. Excess water vapor collects on the surface of the material and evaporates.
- Insulation, protected by an external decorative material (cladding or plaster), additionally prevents damage to the enclosing structures as a result of external destructive natural factors (snow, rain, ultraviolet radiation, frost, and so on).
- The insulating layer installed on the outer surface of the cinder block walls does not reduce the usable area of the rooms.

It is better to insulate cinder block walls from the outside.
I can give many more similar reasons, but I think that the above are enough for you to come to a common opinion with me on the choice of the installation site for the insulation material.
In the meantime, I will move on to choosing a suitable heat insulator.
Foam insulation
The difficulty of using this product is that its installation requires an even base. If this is a cinder block wall, then it will need preliminary plastering, and then a primer. The surface must be free of dust or paint.
So that it does not absorb moisture, waterproofing is imperatively placed under it. This will make it possible for the insulation to last longer.
Waterproofing will not allow condensation to form, and therefore the walls will always be dry. To work you need: Styrofoam. Spatula. Glue. Installation is simple. The prepared surface is covered with glue, and then the plate clings there. Then the plate must be pressed to squeeze out the remaining air from under it. It is recommended to apply the glue exclusively to the wall and not to the sheet.
Then all the gaps between the slabs are sealed with plaster. Installation can also be done with plastic dowels. But usually they are glued inside the house with a mixture. The final stage will be finishing or painting.
Installation options for the insulation layer
Before insulating a house from a cinder block, you need to choose a thermal insulator. Insulation of a house from a cinder block from the inside can be done with different materials. Their installation has certain nuances, depending on the type of insulation. It is important to know such moments before starting the event.
The difficulty in using this product is that its installation requires an even base. If this is a cinder block wall, then it will need preliminary plastering, and then a primer. The surface must be free of dust or paint.
So that it does not absorb moisture, waterproofing is imperatively placed under it. This will make it possible for the insulation to last longer.Waterproofing will prevent condensation from forming, and therefore the walls will always be dry.
To work you need:
- Styrofoam.
- Putty knife.
- Glue.
Installation is simple. The prepared surface is covered with glue, and then the plate clings there. Then the plate must be pressed in order to squeeze out the remaining air from under it. It is recommended to apply the glue exclusively to the wall and not to the sheet. Then all the gaps between the slabs are sealed with plaster.
Also, installation can be done with plastic dowels. But usually they are glued inside the house with a mixture. The final stage will be finishing or painting.
Mineral wool insulation
This method is quick and practical. The main advantage is that it is not required to level the surface before laying mineral wool. The installation process is carried out on the frame. It can be made of wood or aluminum. Before strengthening, the tree should be treated with mixtures that will not allow it to rot and will prevent the appearance of insects.
We offer you to familiarize yourself with the Deflector for the chimney pipe with your own hands
The frame consists of cells of a certain shape, where the mineral wool is laid. Then from above it is all sewn up with drywall, and then finished.
After laying the thermal material, it is important to check its sealing at the joints, sockets, switches and other things. Air can enter the gaps remaining in these places. To prevent this from happening, sealants are used. If the gaps are large, polyurethane foam is used.
To insulate a block house, it is not enough just to purchase the required amount of insulation material, you also need to carry out a high-quality installation.
The process of installation work in a block house will differ, depending on the type of insulation chosen.
Insulating a cinder block house with mineral wool is not an easy task, but you can cope with it if you follow professional instructions. When using such a heater, the most popular method is wet installation.
To begin with, the owner, who wants to insulate the house, needs to prepare the surface for laying a layer of insulation, it is required to clean the walls from dirt, plaster all cracks and irregularities, after which a standard primer is applied.
In the process of preparing for installation, it is also required to install the base of the support of the first row of insulation.
When the preparatory work is completed, it will be necessary to prepare the required amount of adhesive solution for laying the insulation. The glue must be prepared in strict accordance with the manufacturer's instructions, which must be found on the packaging.
The prepared glue is applied to each individual insulation board, after which it is installed on the wall surface.
After placing a layer of insulation on the surface of the walls of the house, a special reinforcing, protective mesh is attached on top of it. After a day or more, you can complete the installation - plaster the surface of the insulation.
Styrofoam installation
If it was decided to insulate the house from the outside with the help of expanded polystyrene, then this work will have a different sequence of actions, although many stages of work will be very similar to wet laying of mineral wool.
First, you need to prepare the walls - cleaning, sealing cracks and irregularities, after which the surface is primed.
At the second stage, the owner will need to prepare glue and apply a waterproofing layer, which are necessary to protect the insulation material from moisture. After that, the foam tiles are glued to the walls, and there should be no gap and gaps between the individual plates.
The glued polystyrene foam boards must be primed and a protective mesh must be fixed on their surface. When the glued mesh dries up, it will be necessary to re-apply a primer to its surface, after which putty is already allowed.
Thanks to the application of putty, the owner can get a perfectly flat surface of the walls, which can be finished with various facing materials to give the building the required appearance.
Mineral wool insulation
This method is quick and practical. The main advantage is that it is not required to level the surface before laying mineral wool.
The installation process is carried out on the frame. It can be made of wood or aluminum. Before strengthening, the tree should be treated with mixtures that will not allow it to rot and will prevent the appearance of insects.
The frame consists of cells of a certain shape, where the mineral wool is laid. Then from above it is all sewn up with drywall, and then finished.