
Quality finishes
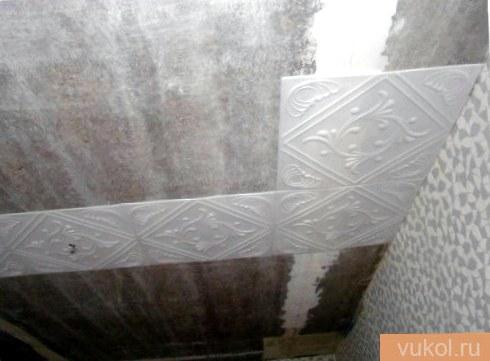
Among the wide variety of finishing materials for ceilings, polystyrene tiles are quite common due to their low cost and ease of installation. Moreover, the surface to be glued does not need careful preliminary preparation. It can hide many irregularities and defects. It is attached to the ceiling with glue.
How to glue with your own hands, and what glue to glue the ceiling tiles to make it beautiful and cozy in the house?
Is expanded polystyrene harmless?
With regard to all products of the chemical industry, the consumer almost always has a negative memory, which in reality turns out to be incorrect.
- As for expanded polystyrene, it is based on styrene. For the first time this substance was taken by the German pharmacist Eduard Simon. He conducted experiments with styrax (a type of resin), and their result was the receipt of a new substance. It had the property of changing its structure, forming a denser consistency, similar to jelly.
- Then the pharmacist did not continue his research, since he did not see the introduction of styrene, as he called it. Decades later, the property of creating a jelly-like mass will be called polymerization, and thanks to the formation of this process, chemists will learn how to obtain polymer materials.
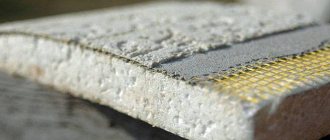
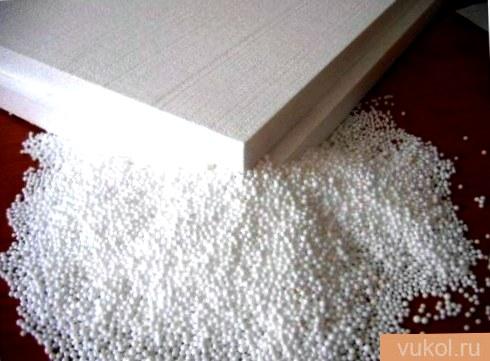
- In production, styrene granules are combined with a polymer composition in special forms and heated. As a result, a lot of balls are formed, which, increasing in volume, stick together and fill the entire shape. The resulting slabs are dried and cut. Expanded polystyrene blocks produced using this technology are in good standing with builders engaged in insulation of premises.
In other words, the use of the material in residential premises is not allowed by the construction and sanitary and hygienic requirements. Styrofoam ceiling tiles have excellent reviews, especially when it comes to cheap and quick redecoration.
How the base of the ceiling affects the choice of adhesive
First, let's figure out what kind of glue to glue the ceiling tiles, depending on the type of base.
There are four main types of adhesive mixtures:
- water-based;
- solvent based;
- hot melt glue;
- compound.
The most popular are water-based adhesive solutions. However, they have one significant drawback - long drying time. In addition, water-based mixtures cannot be used in cold rooms. Due to the water base, microorganisms can multiply in the composition, therefore the base needs additional antifungal treatment.
Solvent-based ceiling adhesive is fast fixing. It contains a liquid thermoplastic polymer and additives. It has properties similar to hot melt glue. But you can work with the composition only after it is heated to high temperatures, so you will have to buy a special gun for work.
The compound has a silicone base, so it dries very quickly. After mixing, the composition can be used for a short time, which is not very convenient. Many craftsmen prefer to glue foam ceiling tiles on liquid nails. They are solvent and water based. Water-based liquid nails are harmless and environmentally friendly, but not suitable for gluing ceiling tiles in bathrooms and other areas with wet processes. It is better to use the same solvent-based adhesive there.
Attention! Any glue does not adhere well to the whitewashed base, therefore it is recommended to clean the whitewash layer with a spatula before gluing.
All of the listed adhesives are suitable for gluing on cement, concrete, wood, gypsum and plasterboard, so the question of what is better to glue the ceiling tile disappears by itself. The only caveat is that water-based adhesives cannot be used to glue elements to a metal base, because they corrode the metal.
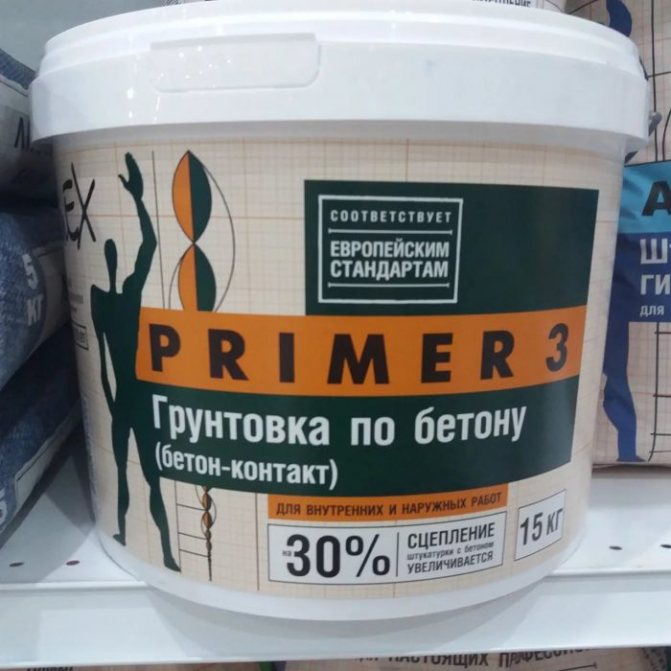
Another no less important question than priming the base surface. Experts recommend buying a primer on the same base as the glue, because such mixtures give a good adhesion.
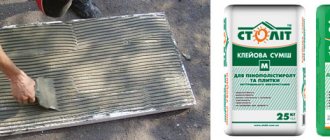
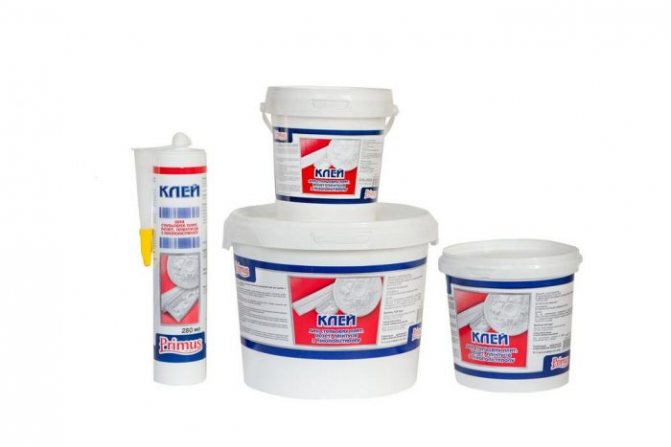
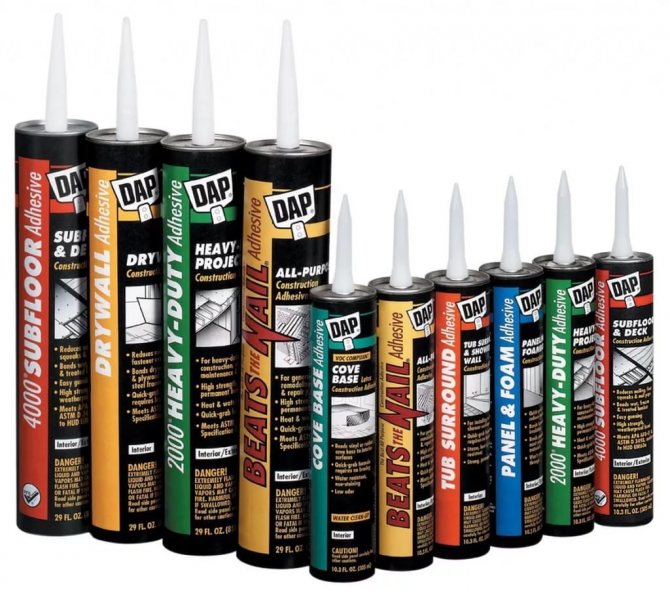
Which tile adhesive is best?
Important! If you decide to buy foam ceiling tile adhesive, the price per liter (kilogram) is in the range of $ 1-7.8 and depends on the composition.
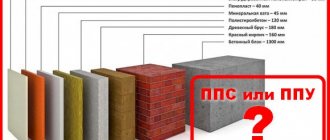
Styrofoam ceiling tiles. Which view is best?
The method of production of expanded polystyrene tiles will affect its properties and appearance. It is easy to distinguish between them, here is what will indicate the production method:
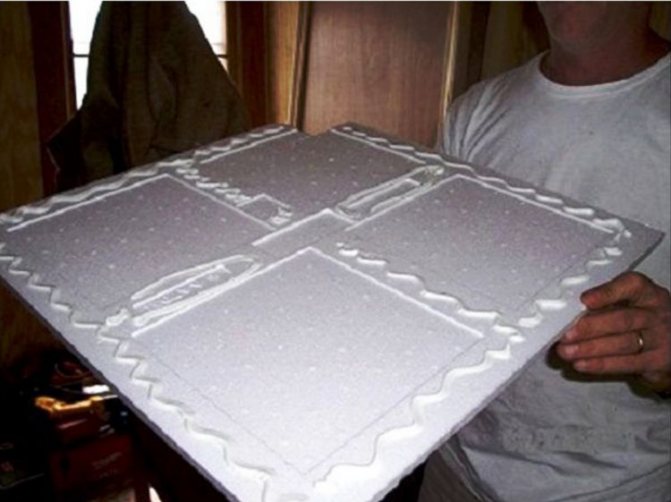
- If on the counter there is a tile with a width of 5 to eight mm, the sketch has fuzzy outlines and the relief of the pattern is implicitly expressed, then this tile was made by stamping (pressing). Curly squares are stamped from the finished polystyrene foam plates. The surface of the product is loose and pores are clearly visible on it.
- The main advantage is cheapness, and the disadvantage is the ability to rapidly absorb dirt and dust. But such a tile, as it gets dirty, can be painted with acrylic compounds, so the ceiling can be quickly refreshed.
- The smooth surface and the corresponding shine will give out a product made by the method of warm extrusion. The molten mass is pushed through the holes in the profile. It does not have such an obvious porous structure. Usually, this expanded polystyrene ceiling tile is not uniquely colored and imitates marble, wood species or other materials. Some manufacturers create laminated extruded tiles. The cost of this polystyrene foam ceiling tile is low, it is easy to wash it with plain water.
- The thickness of the tiles in 10 - fourteen cm allows you to make the sketch deeper and very pronounced. Complex floral patterns or imitation of stucco moldings are often significantly transferred to such material, made by the most expensive method. The mold is filled with watery raw materials and left to solidify at tremendous temperatures.
- It is easy to distinguish injection tiles by smooth edges; to obtain the result of a seamless ceiling, you just need to take it. Later, it will not be painted, and it costs more than other types.
There is no need to say about the obvious advantage of one tile over another, and there is no golden mean in this case. In addition, cheap stampings will look great on the ceiling if they are made from high quality raw materials. To make sure of this, when buying, you need to carry out a number of easy manipulations:
- During visual inspection, it is important not to see dents and scratches on the smooth extruded tile. On the ceiling, any defect will be noticed by the rally, and it is forbidden to "repair" the warped element. Chips and uneven edges are another excuse to purchase a coating from a different batch (or elsewhere). This requirement is especially true if the tile is not square, but abstract, with wavy edges.
- If you carefully take the tile by the corner and just swing it up and down, it should not crumble and break. Of course, foam polystyrene tiles have low fracture strength, but they must withstand a similar load.
- Right angles are a guarantee that the process of gluing tiles will not be transformed into an eternal attempt to assemble a puzzle with a missing piece.It will not be possible to dock such squares so that they fit perfectly, without gaps, as if the master did not try.
- The decorative characteristics of colored tiles are, without hesitation, the highest, but at times you should refrain from purchasing it. The fact is that the paint will burn out from UV rays, so it is better to purchase a snow-white coating suitable for painting in a room with windows facing the sunny side. If, nevertheless, colored tiles seem to be a prettier option, then go to choose products with a uniform color over the entire area.
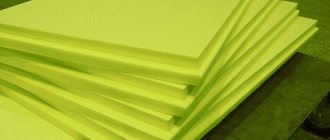
Ceiling tile from expanded polystyrene photo
Types of glue
Ceiling tile adhesives come in many different categories. The main ones are:
polymeric universal; liquid Nails; acrylic putties; polyvinyl acetate adhesives.
Depending on the base, the products are solvent-based, water-based, hot melt adhesives, adhesives-compounds. Water-based products are the cheapest, but they will dry longer than others. Also, such adhesives cannot be used at low temperatures. After installing the plates, fungus and mold often settle in such adhesives, so you will have to additionally cover the ceiling with a special compound.
Solvent adhesives dry very quickly and are liquid polymers. Hot melt adhesives contain thermoplastic polymers, so they must be applied after heating to a certain temperature. Adhesives-compounds are kneaded, applied quickly, as they dry within a few minutes.

Clay Titan
Glue Titanium is very popular among builders; it is made on a polymer basis. With its help, you can stick polystyrene foam material, plastic coatings on concrete, plasterboard, plastered, other type of ceiling. Among other things, "Titan" glues glass, paper, wood, ceramics.
There are several types of this tool. It is best to buy a universal glue "Titan", which is squeezed out of a strong package with a thin layer of a dispenser. The composition is transparent, has good heat resistance, moisture resistance, quickly sets. The material dries completely in 1 hour, for the initial setting it takes less than a minute. Also on sale there is a glue-mastic "Titan", it is bought if the ceiling has large irregularities.
Product characteristics
"Titanium" is characterized by resistance to stress, it is elastic, not brittle after solidification. It can be operated in conditions of high humidity and temperature. Economical consumption. The product does not contain harmful components, it is safe for humans. Here are the main technical parameters of the all-purpose adhesive:
We recommend: How to make plasterboard slopes with your own hands: explaining the essence
layer thickness - 4 mm; mass per 1 sq. m - 4.5 kg; breaking force in the transverse / longitudinal direction - 400/600 N; heat resistance +140 degrees.

How to breed material
If the glue is too thick, it can be diluted. You can dilute Titanium with rubbing alcohol. Dilution will make the composition more smear, convenient to use, it will better penetrate into small cracks. Do not pour too much alcohol as the drying time will be longer.
The universal composition is applied with a broken line to the tile, after which it is allowed to dry for a minute, the material is pressed against the ceiling. It will dry for about an hour, the final polymerization takes place in a day. How to apply glue-mastic? It is applied with a spatula on the slabs with points - in the center, 3 points on each side. The product will set in literally 20 seconds, completely dry in 12 hours.
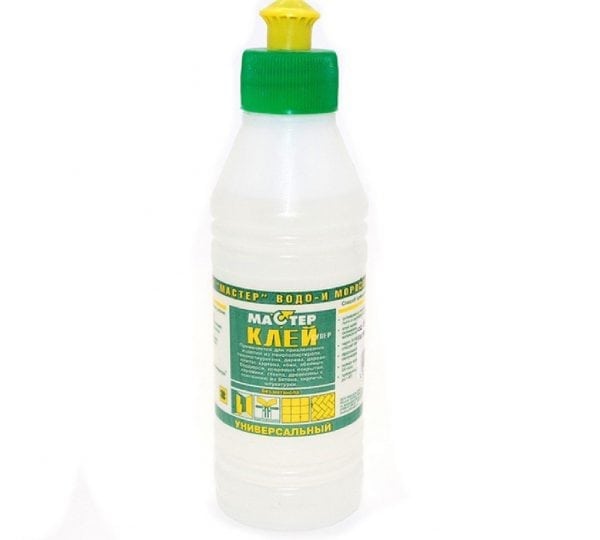
Master
When choosing how to glue the tiles, some stop at the "Master" composition. Its characteristics, in comparison with Titan, are worse, but the price is lower. In order not to keep the tile on the ceiling for too long, you need to apply the "Master" to the coating, hold it for a few minutes, and then attach it to the ceiling.Unfortunately, the smell of this material is rather unpleasant and harsh; you will have to thoroughly ventilate the room. Drafts must not be allowed - they impair adhesion, and the tile can move even after 1–2 hours.
Moment
Glue "Moment" is of excellent quality, very reliably attaches polystyrene to the ceiling, dries quickly. To use it, you need to buy a special glue gun. The rise in the cost of repairs will also occur due to the high consumption, high prices, therefore it is rather unprofitable to glue the tiles with "Moment".
Eltitance
The manufacturer of this tool is located in China. It is highly popular among users. "Eltitance" allows you to glue tiles to any surface - concrete, plaster, wood, you can also use an adhesive for other needs. It perfectly holds parts made of ceramics, glass, leather, mosaics. The product is frost-resistant, waterproof after drying, the seam will be strong and highly elastic.
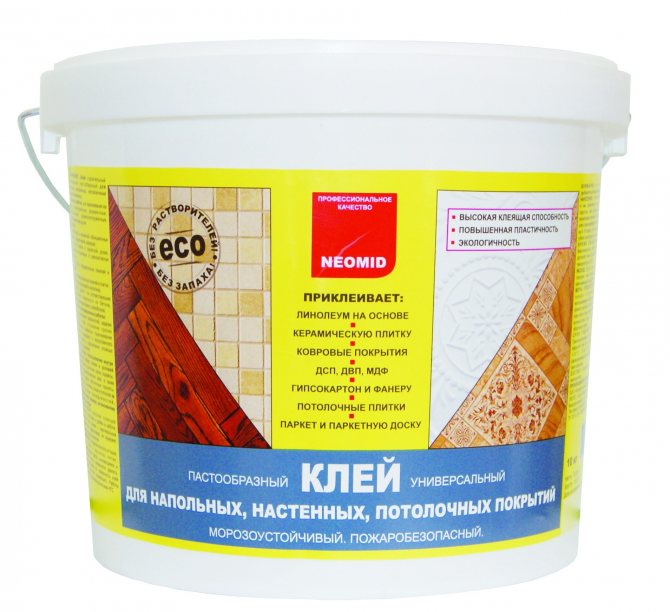
Polyvinyl acetate adhesive
PVC materials are almost odorless and very easy to work with. But the expense of funds will be high, because both the plates and the ceiling will have to be smeared. Therefore, you will have to buy the material in a large bank, which is quite expensive. Due to the double work, the total waste of time is greatly increased.
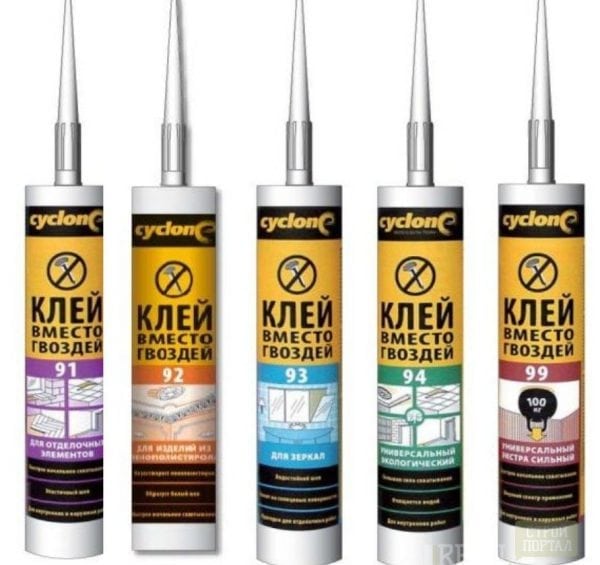
Liquid Nails
Adhesives of this type are in great demand for any finishing work. With the help of liquid nails, you can not only glue the plates, but also close up joints, seams. To use them, you will have to purchase a glue gun that will help squeeze out the glue in the right doses. Point strokes are applied to the surface of each square in the center and along the edges. If the base is uneven, an order of magnitude more is applied to level the ceiling. You should step back from the edge so that after pressing the tiles, the glue does not squeeze out from under them.
Acrylic putty
This method of sticking the material is used less often, but it is no less effective. The putty is viscous, reliably holds polystyrene products. Even thin seamless tiles can be glued with acrylic putty, the product will not shine through. A thin layer of the product should be applied to certain areas of the square, immediately pressed against the ceiling and fixed in the desired position.
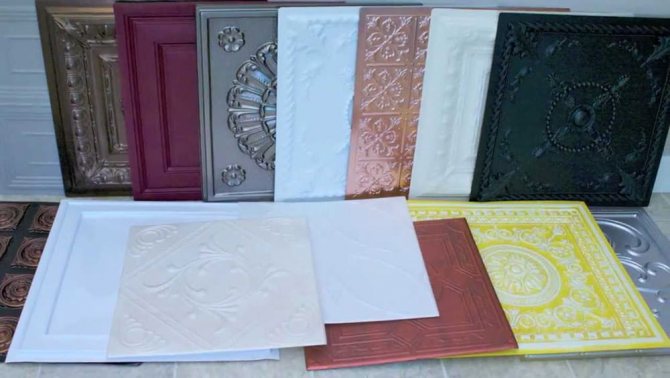
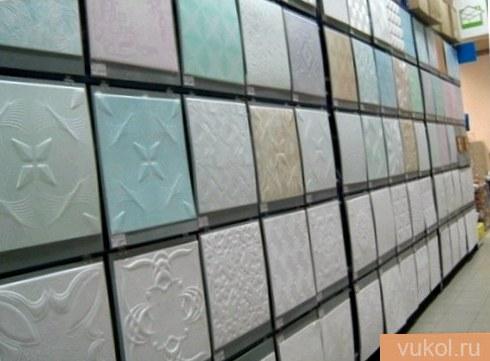
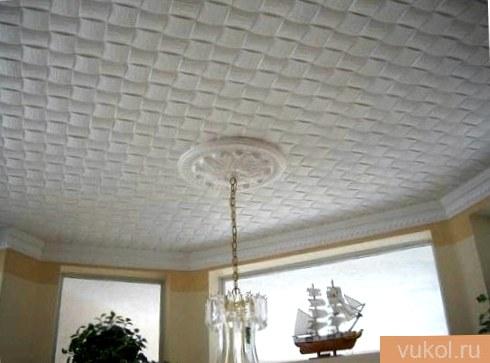
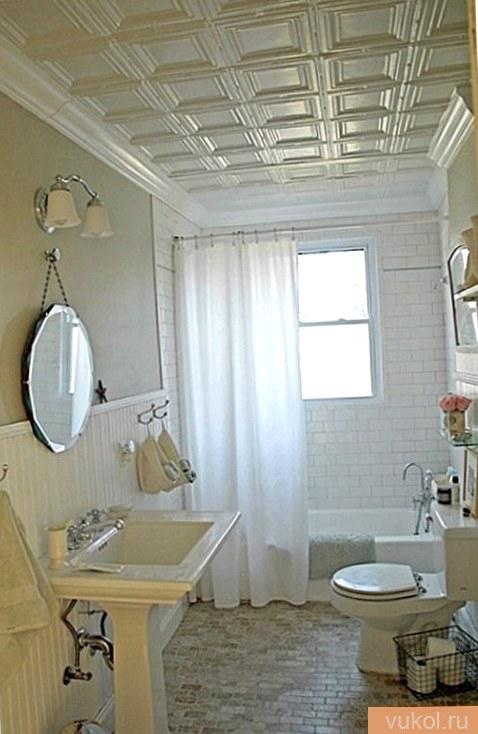
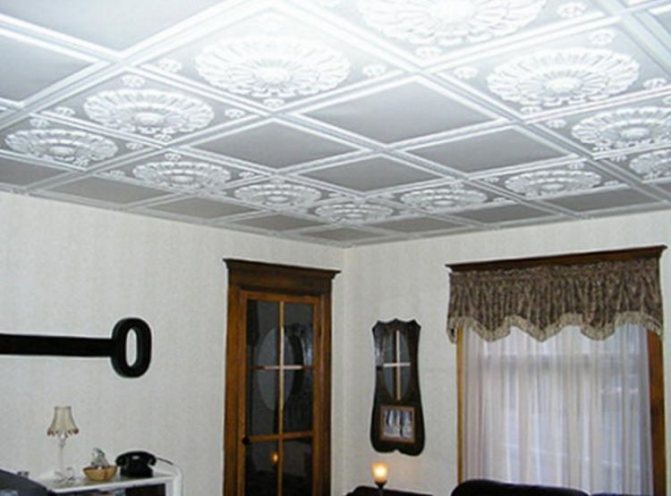
Range of expanded polystyrene ceiling tiles
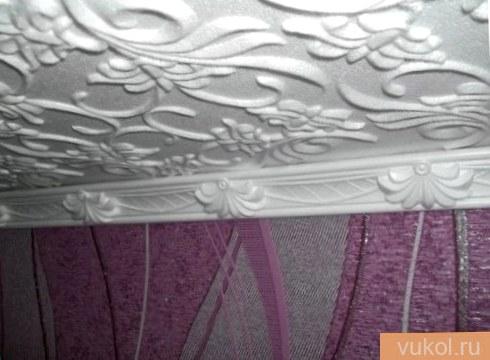
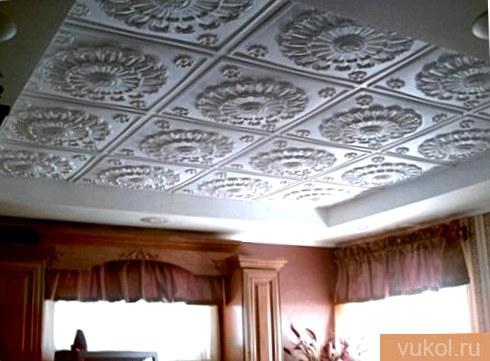
Styrofoam ceiling tiles have different colors and patterns. Maybe find a suitable pattern for both traditional and modern interiors. As for the dimensions, in addition to that, in the base of figured tiles there are two main shapes: a rectangle and a square, depending on this, elements of the following sizes can be found:
There are also a huge number of tile varieties:
- Traditional form and design,
- Embossed and smooth
- With a convex or sagging pattern,
- With perforations and of course a pronounced structure.
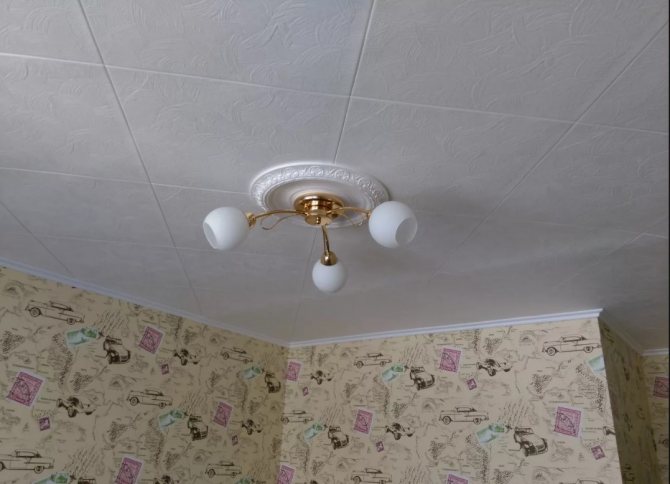
In addition to the ceiling made of expanded polystyrene tiles, you can pick up various decorative elements: diamond-shaped, round chandelier places for design, imitating stucco rosettes.
Finishing touches
The last rows, as a rule, have to be cut with a knife to the required size, and after trying on the adhesive is applied. Consider some margin for fitting when buying tiles. The gap between the wall and the outermost tiles will be covered with a skirting board. Remaining glue must be removed immediately with a sponge.
Installation of ceiling tiles without seams is possible. In order for the ceiling covering to look like a whole, all the gaps between the tiles must be filled with a sealant. For this, a silicone sealant is used, which is resistant to water and temperature extremes. After filling the gaps, the sealant must be smoothed with your fingers or a trowel, and the excess removed with a damp cloth.
If desired, the ceiling can be coated with water-based paint. Any light tone will look best. At the same time, the ceiling plinth is also painted.It is installed last. Upon completion of the work, the windows and doors in the room must be tightly closed.
Pros and cons of polystyrene foam tiles
Before completely choosing this option for finishing the ceiling, the tile should be judged by its advantages and disadvantages. She has gained popularity for many reasons:
- The ability to make a ceiling with a unique design.
- Not a bad value for money.
- Safety. Styrene releases volatile compounds that are harmful to health only when heated to extreme temperatures. In everyday life, this is an unrealizable condition, unless a fire starts. But in this case, no one remains in the burning room to deliberately inhale the poisonous fumes.
- If, nevertheless, there are doubts about the safety of expanded polystyrene tiles, then when buying, you may ask the dealer to present a certificate for the product. If all the technological conditions of the production process were met, the polystyrene is of high quality and with the addition of fire retardants (not supporting combustion), then there are no excuses for excitement.
- Taking care of the tiles can be at least some ergonomic way: vacuuming or wiping with a damp cloth. Depending on the degree of contamination, the water can be diluted with soap or any kind of detergent. Stamped products, at the time when they lose their attractive appearance, are painted in the color you like.
- Albeit to a small extent, but a narrow layer of expanded polystyrene on the ceiling will create a heat and sound insulation barrier.
Of course, there are also negative features:
- The fragility of the boards requires caution during transportation and installation. Dents and scratches are easy to form, but you will not be able to get rid of them, you will need to use a new element;
- Part of the tile located closer to the light source may turn yellow from the light of the chandelier. The closed type of shades almost always eliminates such problems;
- From abrupt and constant temperature changes, the ceiling tiles sometimes move away from the base. The task may not be admitted if you take high-quality glue from a trusted manufacturer;
- Stubborn dirt: carbon deposits, nicotine gums, fat very quickly eaten into the porous structure. Removing their non-uniqueness is very problematic. There is only one advice - to often arrange wet cleaning of the ceiling. It is not recommended to use an imperfectly wrung out cloth or brush.
But the statement that expanded polystyrene tiles contribute to the formation of high humidity in the room, that it does not breathe, is erroneous. The porous structure slightly hinders air exchange, but the glue layer, on the contrary, plugs up small holes. It is on this basis that the adhesive is applied pointwise along the perimeter of the tile and in the center, and not entirely over the entire surface.
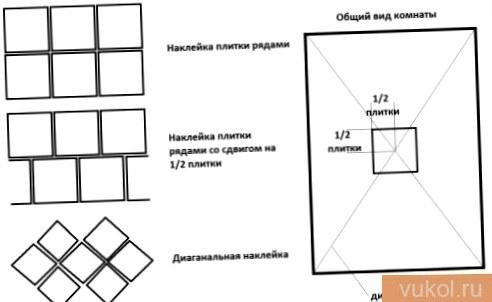
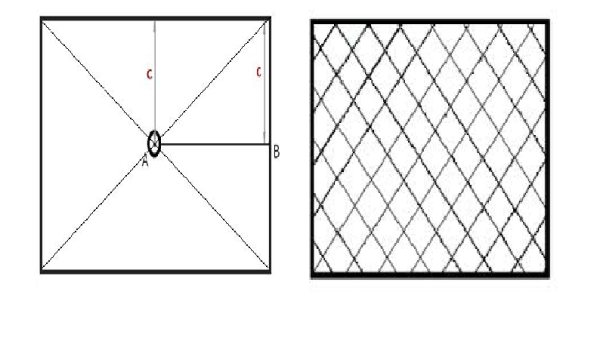
Application of markings with a painter's thread
Before gluing the foam to the ceiling, you need to make the markings. To carry out the work of the next stage, you will need a painting cord. The markings made will allow you to glue the foam tiles not only evenly, but also diagonally. The markings should be applied according to the instructions:
- the point of intersection of the diagonals is determined;
- the center of the ceiling is indicated;
- the painting cord is fixed at two points (beginning and end);
- the cord is pulled down and released like a bowstring.
The markings on the whitewashed ceiling are necessary so that the glued material is not only durable, but also neat. The panel is aligned along the markings. It allows you to select the location of the guide lines before gluing the tiles diagonally to the ceiling.
It is not at all necessary to mark the ceiling in squares at all, but only to outline several lines according to the size of the tile. You can apply only 2 of them in the center, and in the process of gluing the ceiling with tiles, align the elements relative to each other.
How to glue expanded polystyrene ceiling tiles
Calculating the right amount of material
The cost of expanded polystyrene tiles allows you to purchase it with a huge supply, but, as experience indicates, later these 7-8 remaining pieces lie dead weight: it is a pity to throw them away and there is nowhere else to adapt. Not every store agrees to reverse the leftovers. Based on this, in order not to buy one or two tiles and not suffer, where to put the excess, it is better to spend some time on calculations.
You won't have to mess around with the ceiling of the correct shape. The calculation takes into account the size of the tile you like and the dimensions of the glued surface.
- For example, the ceiling has dimensions of 4.9 m and 3.8 m. For its design, a tile of a standard square shape with a side length of 0.5 m is chosen. We calculate the number of tiles: 4.9 × 0.5 = 9.8. The end result is the desired number of parts. It is directed to be rounded up, 10 tiles come out. At the moment 3.8? 0.5 = 7.6, in other words, eight tiles. We multiply 10 and 8, as a result of the ceiling it will be necessary to purchase eighty polystyrene foam tiles.
- This method is suitable for calculating an easy way of gluing, at a time when all the tiles are in rows horizontally and vertically. Some people like it more, at a time when the elements are stacked obliquely. At the same time, significantly more material will go to waste, based on this, the number of pieces about the supply needs to be expanded. If, with the standard version, the surcharge for the number of tiles creates from fifteen to 20% of the required, then when gluing obliquely, you need to take 20 5 -30% more, especially if this is the 1st experiment.
- To find out the amount of material for ceilings of an unusual shape, it is not difficult to make a cardboard template according to the size of the tiles you like. By applying it to the ceiling, the numbers of interest can be found.
What else will need to be purchased and prepared for work
- Apart from tools and tools: a ladder, a construction knife, a level, a pencil and a tape measure, you will need to buy baseboards and glue.
- Can be purchased with “watery nails” or a watery rubber compound. The latter option is available, has proven itself well, and is substantially often offered by traders. Consumption for the glue, which has a thick and dull consistency, is indicated on the label. Because it needs to be applied in the form of drops and at a distance from each other, then a huge number of packages will not be needed. An important point when working with rubber-based glue: at the end of its application, it is forbidden to glue the tiles to the ceiling. A pause of 2-3 minutes will ensure the best adhesion of the composition to the tile and the glued surface.

- The skirting boards are taken from the calculation of the perimeter of the room with a small supply, since for joining in the corners it will be necessary to cut the ends at an angle of 40 5 °.
Ceiling markings
- When placing tiles horizontally, work should be started from the center of the room. If a place for a chandelier is already foreseen on the ceiling, then just take it as a starting point. Otherwise, the center is defined as follows:
- Draw stripes obliquely from corner to corner. Do the same with 2 other angles. The intersection of the lines will be the center of the ceiling.
- Can be pulled from the corners of the ropes by nailing or otherwise. In the place of crossing, there will again be a point of departure.
- Starting from the central point, the ceiling must be divided in half horizontally and vertically, drawing an extraordinary coordinate axis. The first four tiles will be laid, one in each sector that appears. Together with this, their angles will converge at the center point.
- It is understood that the markings are applied to a flat ceiling, free of whitewash or wallpaper. The tile will be able to hide minor differences and shortcomings, but it will not mask a very lumpy surface.In addition, it is problematic to glue the squares of expanded polystyrene on an uneven base - large drops will not allow it to stick to the ceiling.
The sequence of actions when gluing polystyrene foam tiles
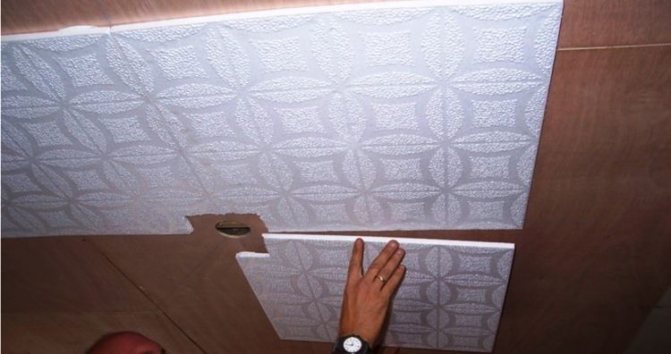
- The first tiles should be centered on the ceiling. It is necessary to apply glue on them and put it off for a while. At the end of a small pause, at least some element is alternately taken and pressed against the ceiling. It is not necessary to press the tile hard against the base, it is quite simple to press along the perimeter and in the center. The protruding droplets of glue can be wiped off with a dry cloth, but this must be done off, then there are no traces on the expanded polystyrene.
- At the location of the chandelier, a hole of a suitable diameter is simply cut into the tiles. A construction knife will cope with this. Next, the tiles are glued around the starting square. If you mark the trajectory of movement, then there will be a spiral. The tiles are simply adjusted to size, cut with a construction knife. There is no need to worry if the edge is not torn enough along the cut strip - these flaws will be hidden by the skirting board.
- It is comfortable to work together: while one is applying glue, the other is gluing the tiles already prepared in this way.
- Pasting work must be carried out with closed windows, not counting drafts. If it was not possible to avoid gaps between adjoining tiles, the voids can be filled with a snow-white silicone-based sealant.
- Bonding skirting boards is the final step of finishing the ceiling. It remains to hang the chandelier, wait for the glue to dry and ventilate the room. Pasting with expanded polystyrene tiles is the case, at a time when the preliminary step takes significantly longer than the main work.
How to glue ceiling tiles correctly
Gluing process
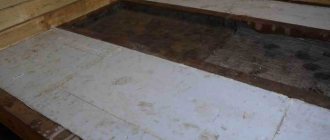
The process of gluing the finishing material begins with the preparation of the ceiling surface. For this purpose, the dismantling of the old finish is carried out.
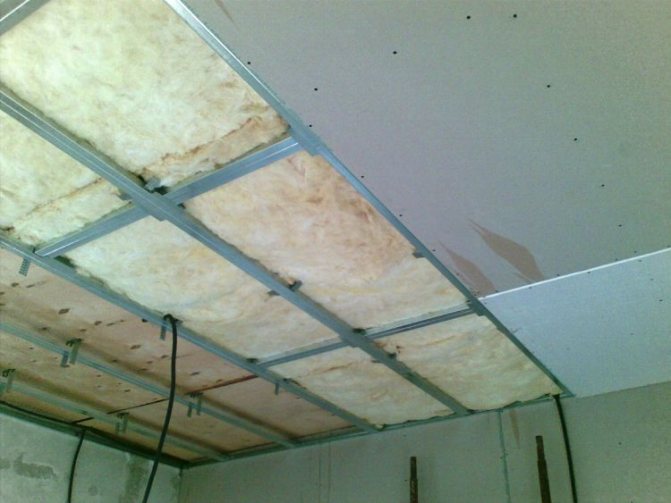
If necessary, arrange the electrical cables according to the lighting scheme and fix the imperfections in the ceiling. You can level the ceiling with putty, or with plasterboard.
Leveling the ceiling before gluing the ceiling tiles
On a note! To level the ceiling surface, you can use both putty and drywall.
After the ceiling is dry, prime it. In some cases, when a light finishing material is used, the dark surface of the ceiling shines through it (for example, if the ceiling is made of concrete or cement). A white primer will help solve this problem.
Having prepared the ceiling, mark it out.
Important! Start gluing the tiles from the middle of the room.
Remove the finishing material from the packaging and lay it out on a smooth surface. The tile should lie in a dry room for 2-3 days.
The adhesive composition is applied to each part in a couple of drops at the corners. Place the glued tile against the ceiling surface and move it if necessary. It is important that the glue from the part is not smeared.
After the part is in the optimal position, press it against the ceiling surface for a couple of minutes (refer to the time indicated in the instructions that came with the glue). Press evenly over the entire tile area, but not hard.
Advice! When gluing the tiles, use protective gloves: they are more comfortable to work in, and besides, you will get less dirty.
Any excess adhesive protruding at the edges of the tiles should be removed immediately, as it hardens quickly.
According to this principle, each element is mounted.
You need to glue the parts as tightly as possible, but do not press down too hard. The corners require increased attention: it is this part of the tile that is prone to peeling off.
After gluing one row, combine all the parts with tape and wait until the glue is completely dry.
When decorating the ceiling surface with expanded polystyrene tiles, you need to remember that lamps or a chandelier will be placed on the ceiling. Holes need to be made for lighting fixtures, but this work requires care. The most suitable tool for creating holes for lamps is a clerical knife, but it is better not to use scissors (they can damage the finishing material).
The cavities are filled after all complete parts have been laid. To do this, the required part is cut off from the solid tile; the pattern must be taken into account.
Recommendation: In the corners at the junction of the wall and ceiling, use a little more glue, because in these areas the plinth will be mounted (the final stage of finishing the ceiling), and the mass of the mounting blocks will increase. This point cannot be ignored if you want to create truly high quality, durable cladding.
After completing the installation of the finishing material, close the windows with doors and let the ceiling "hang" for two days, after which you can use the room.
More detailed information regarding the process of gluing the ceiling polystyrene tiles can be obtained by watching the video instruction, which clearly demonstrates how to properly mount the finishing material.
Styrofoam ceiling decoration
Today on sale there are all the necessary components for finishing work with this material. Its low weight allows you to independently carry out all the work. The installation can be carried out even in rooms with high humidity, the material easily tolerates the influence of this factor. In addition to skirting boards, the interior space can be decorated with:
- Ceiling tiles;
- Sockets for lighting fixtures;
- Decorative moldings, usually located in the corners.
Of course, the most popular are skirting boards with tiles, since the stucco molding, even though foam, will not look appropriate in every room.
Surface preparation
Styrofoam can be glued to any surface, but for a high-quality work, you need to clean the ceiling of dirt and apply a primer with a deep penetration composition.
This will improve the adhesion of the boards and prevent the appearance of harmful microorganisms under the foam.
Markup
To facilitate and improve the quality of the installation of foam plates, mark the ceiling, for this use a marking cord. Ceiling markings are easier to do together. Pull the cord diagonally and mark it. Do the same with the other diagonal. The point where they intersect will be the center of your ceiling. From it you need to start gluing the ceiling tiles with your own hands.
Laying out in rows (left) and diagonally (right).
The system can be glued in straight rows, or with a shift to the floor of the product. Which method you choose will depend on your desire.