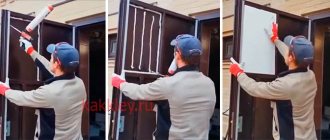
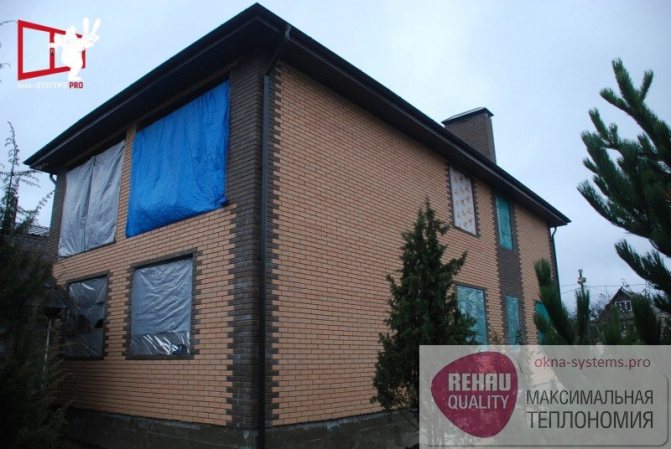
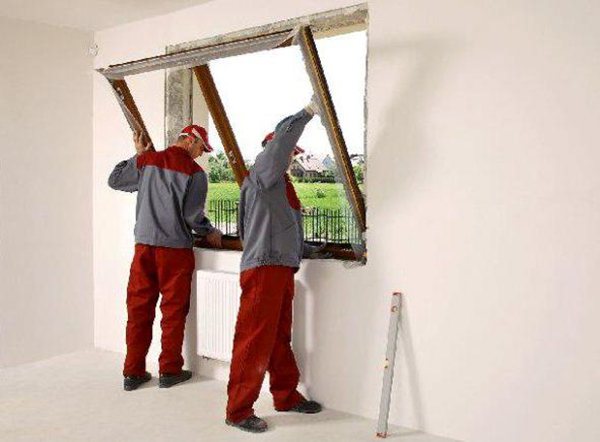
We bring to your attention a photo report on the work done on the high-quality installation of plastic windows in multilayer walls. More precisely, in this case, we will figure out how and where to correctly install plastic windows in a multilayer wall.
As an example, we present photographs of the re-installation of plastic windows in an apartment building with multilayer walls.
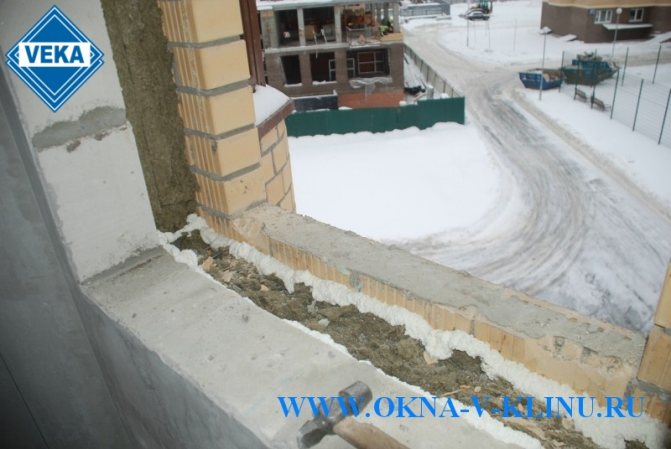
Today, there are many different types of multi-layer walls. The most common option is a multi-layer wall, where from the side of the room the wall is formed from foam blocks, outside there is a facing brick, and between the brick and the foam block there is insulation and a ventilation gap. Most often, when installing plastic windows, we come across just such multi-layer walls and, as a rule, they require serious preparation before it will be possible to correctly and efficiently install a plastic window in them.
In order to choose the right way of fixing and installing a plastic window in a multilayer wall, I suggest referring to GOST 52749-2007.
From which it becomes clear that before installing a plastic window in a multi-layer wall, it is necessary to provide the following points:
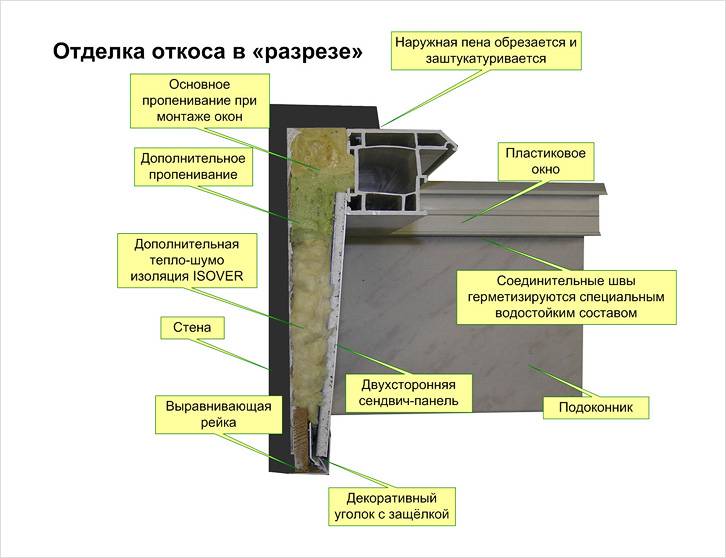
1-Preparation and organization of the base for the installation of the plastic window frame. 2-Preparation and sealing of the sides of the window opening 3-Preparation and sealing of the upper part of the window opening, in the area of the lintel
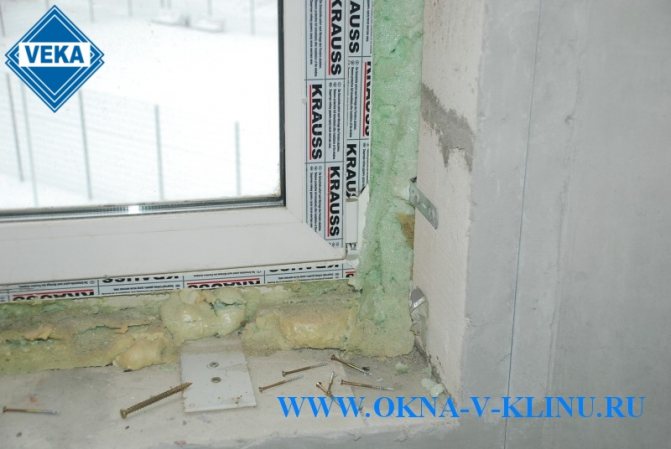
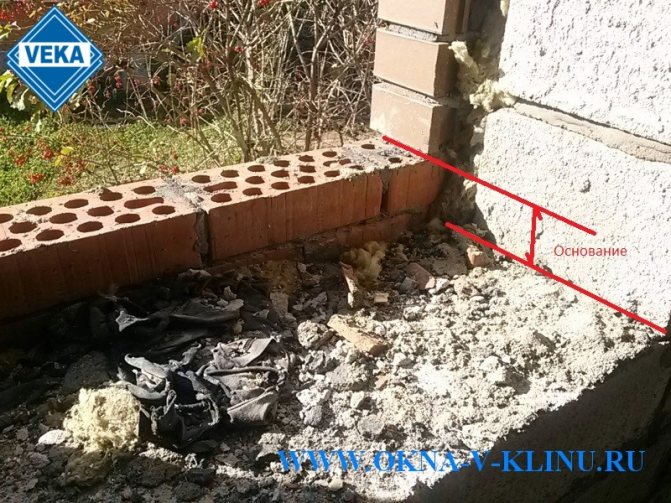
Preparation and organization of the base for the installation of the plastic window frame.
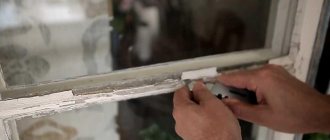
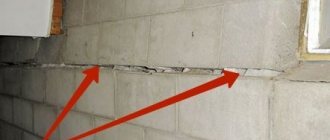
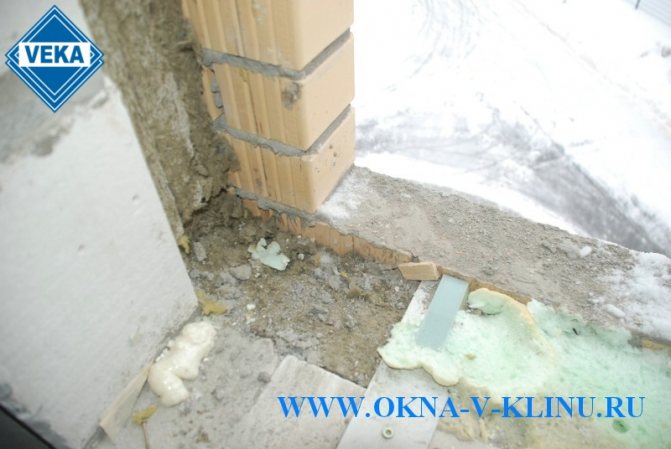
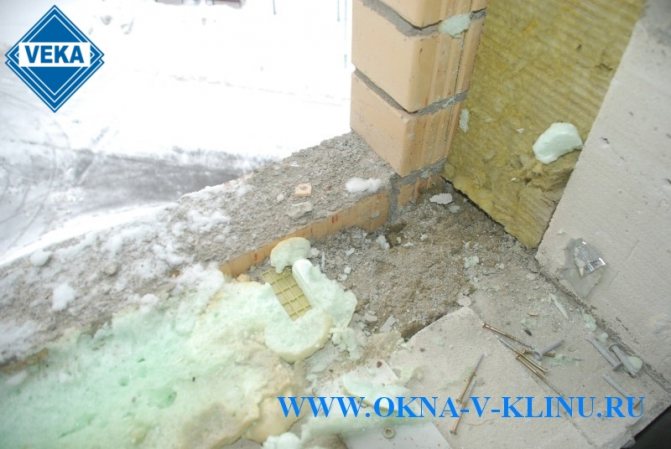
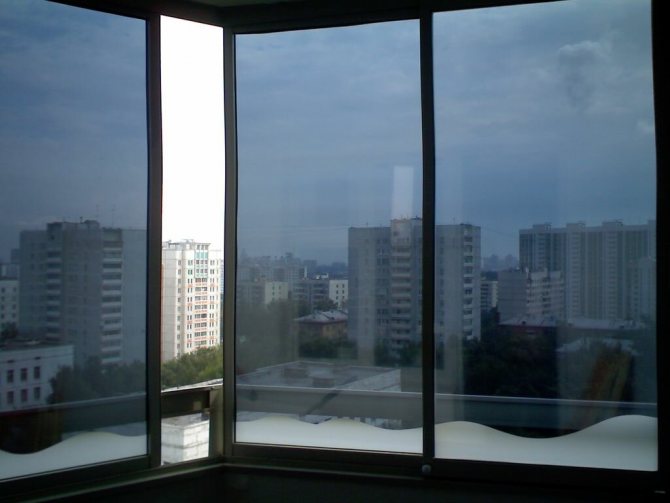
As a rule, the window opening after the completion of construction work looks like in the photo.
That is, provided that we have to mount a plastic window in the insulation zone, we have neither support nor the ability to fix the windows in the opening.
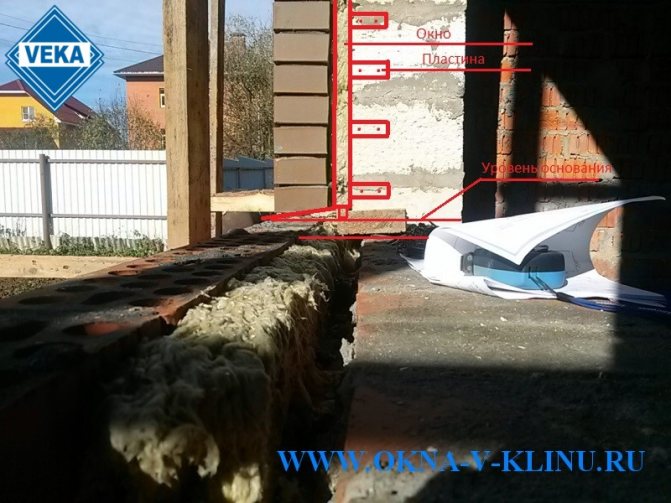
In such cases, the base for attaching a plastic window to a multi-layer wall must either be foreseen in advance or modified before installing the windows.
There may be several options:
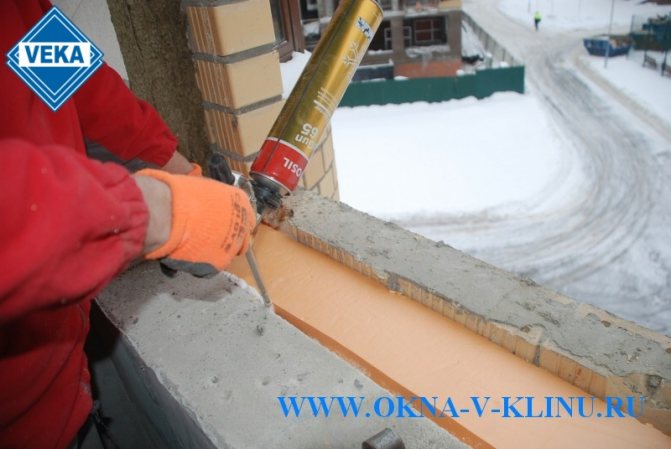
1-The use of metal plates on which the installation of the plastic window is carried out.
In our case, just such plates were used by the builders of the apartment building.
2-Use of antiseptic bars or boards or osb, depending on the thickness of the insulation and the ventilation gap.
Installation of "Budget" windows
The simplest, inexpensive installation of glazing is single-layer on classic foam. In many companies, it is still the only type of installation, despite the fact that new materials and technologies have appeared. The result of such glazing can be seen in every apartment building, simply by paying attention to the windows, from which you can see the yellowed, half-destroyed polyurethane foam.
I strongly advise against using the "Budget" installation for warm, heated rooms, as it cannot provide sufficient energy efficiency.
Installation benefits
- Affordable cost.
- Fast installation of structures.
- Protection from wind, rain and snow (temporary).
- The customer himself can make hydro and vapor barrier, while saving a lot.
Window structures are fixed in the opening with the help of special fasteners (anchors), and the seam is closed with polyurethane foam, which works well if hidden from sunlight and moisture. However, such foam is absolutely not airtight from precipitation, which affects the further operation of the assembly seams and the tight fit of the structures to the base of the opening. How does this happen?
Reinforced-plastic windows are deformed: in summer, due to high temperatures, they expand, in winter they shrink. This is considered the norm, especially for laminated and painted structures.Classic polyurethane foam is not able to withstand all loads, but if it is not even closed from the sun and water, after the next deformation of the window, the foam can move away from the opening, forming a gap.
Where to use "Budget" editing
I use such an installation less and less often, because it is only suitable for cold, unheated premises: warehouse buildings, exhibition complexes, outbuildings, or window or door openings inside the premises, etc. The cost of installation does not include hydro and vapor barrier. These processes are carried out by the customer independently.
Installation warranty - 1 year.

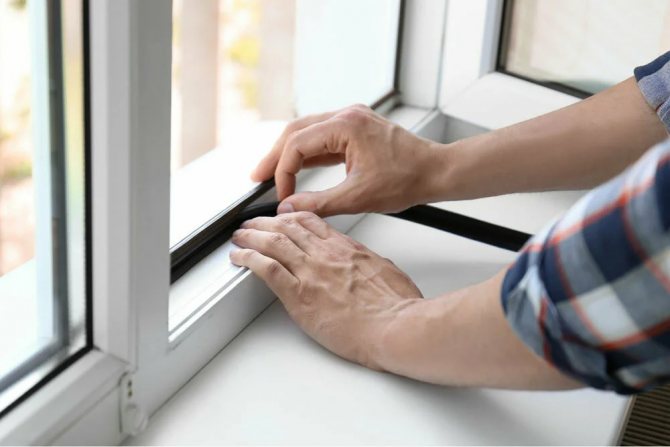
Additional recommendations for the insulation of window structures

Since plastic windows include a lot of expensive and sensitive fittings, it is strongly discouraged to insulate them with window tape or self-adhesive sealants. When the time comes to remove these adhesives, you can easily damage the parts at the junction of the sash and box. In addition, with temperature drops, metal and plastic components react differently, causing fluctuations in the gap in the narthex and, as a result, breakage of the fittings. If you still have broken fittings - contact window repairs inexpensively.
If we are not talking about gluing a thermal insulation film, it is better to invite qualified specialists to insulate plastic windows. When it comes to isolating slopes and low tides from the side of the street, it is quite difficult to do it on your own, especially when housing is located on high floors. The craftsmen, on the other hand, have special devices for performing such work and provide a guarantee that it is never superfluous.
If the thermal insulation of your window structures leaves much to be desired, we recommend contacting our company. Qualified employees will make an expert opinion on the cause of heat leaks and carry out the necessary work to eliminate them. Sealing seams, replacing parts, installing a new seal, straightening the sash and much more - all these services can be ordered from our company so that the autumn and winter cold does not disturb the comfortable microclimate in your home.
Installation of windows "Standard"
Single-layer installation on elastic foam is one of the budget options for glazing metal-plastic windows. New generation high-quality superelastic foam is used in the installation. Its main difference from yellow foam is the ability to deform, while keeping up with the window opening. This property directly affects the tightness of the entire structure, the absence of drafts and cracks. How?
Plastic, like many materials, deforms under the influence of temperature. For example, in summer, when the sun's rays heat the surface, the window expands, and in winter, at subzero temperatures, it contracts. These fluctuations occur regularly and the flexible foam is perfectly adapted to them. It, like the window itself, shrinks, stretches and takes on its original shape without damaging the structure.
Installation benefits
- Fast installation.
- Affordable cost is the cheapest option.
- Using blue elastic foam.
- Applying a steam and waterproofing sealant (if necessary).
- Decorative strips (optional). They are a flexible self-adhesive PVC strip with elastic edges. They are used to protect the seam between the window and the wall.
Where to use "Standard" mounting
The thermal insulation of a room depends not only on the quality of the mounting foam, but also on the support profile, or rather, the material from which it is made. In this installation, I use a plastic or metal support profile, which does not perform any function, except for transporting and fixing the window sill, ebb.And since there are no thermal insulating properties, I recommend using the "Standard" installation only in cold, unheated rooms, including balconies.
Installation warranty - 6 years.

Modern windows - modern installation
It can be argued that windows installed 100 years ago performed worse than modern windows, but hardly anyone needs to be convinced that the current requirements for building products are different from those in the past. The first energy standards in the building industry appeared only in the second half of the twentieth century, and clear rules for saving energy and thermal protection of buildings are the effect of subsequent findings. If we plan to replace or install windows today, then why draw inspiration from the ideas of the early 20th century?
Modern architecture is different from what was popular decades ago. Changes in legislation force us to look for a new approach to the development and implementation of all elements that affect the thermal insulation of walls, and thus the building as a whole. This applies in particular to windows and the sealing of their constituent components.
Products that contribute to the reduction of energy losses in a building are the future, as exemplified by the “warm” installation technique and the emergence of products to ensure proper sealing both inside and outside the window unit. The range of energy efficient solutions, which also includes specialized products for window installation, is the answer to the growing demand for sealed systems in Russia.
WINDOWS MEDIA recommends to read: Materials for installation of plastic windows
Installation of windows "Warm"
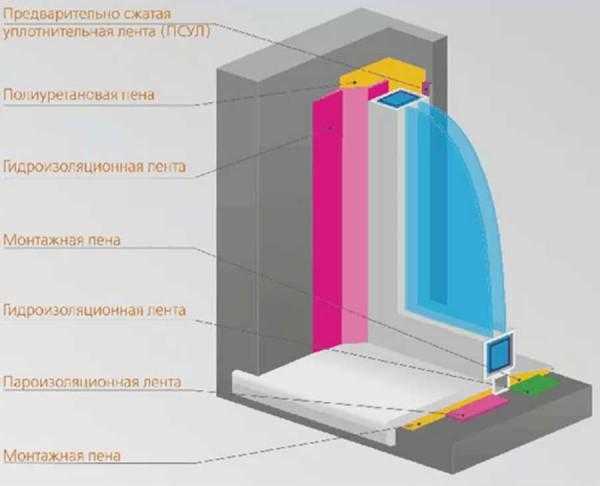
Warm three-layer installation on flexible foam using vapor and waterproofing sealant - reliable protection of the room from cold and moisture. The uniqueness of this installation of plastic windows is associated with the use of a three-layer construction of the assembly seam and the prevention of foam destruction with the help of special sealants. Complicated? Let's figure it out.
The three-layer construction of the assembly seam consists of three layers, each of which performs a specific function:
- The first layer is waterproof, vapor-permeable (street side). We use STIZ-A sealant.
- The second layer is heat-insulating (inside the structure). We use flexible polyurethane foam.
- The third layer is vapor barrier (indoors). We use STIZ-B sealant.
The main role in retaining heat and protecting from cold is played by the second layer, for which a new generation high-quality superelastic blue foam with low coefficient of expansion is used, which works to maximize window deformation. But it, like ordinary yellow polyurethane foam, is destroyed by ultraviolet rays and moisture, even from the side of the room. How?
Imagine that there are three people living in a house: dad, mom, and a child. They make tea, take a bath, dry clothes, clean up, and finally breathe. As a result, about eight liters of moisture is released into the air, which in the form of water vapor settles on hermetically insulated windows and slopes, which means it imperceptibly penetrates into the foam. The negative consequences of such a process are not immediately noticeable, but soon fungus and mold appear on the slopes, which indicates the destruction of the polyurethane foam, which means the loss of heat. And since this problem can arise both from the inside and from the outside, two additional mounting layers eliminate its occurrence.
Advantages of "Warm Montage"
- Fast installation.
- Three-layer assembly seam.
- Protection against excessive outdoor heat, cold and moisture.
- Always comfortable indoor temperature.
- Lack of mold, mildew and condensation.
- Affordable cost.
- Use of high-performance elastic polyurethane foam, steam and waterproofing sealants.
- Installation of a window on a warm support profile.
- The use of decorative strips (if necessary).
Where to use "Warm Montage"
In this configuration, there is a warm support profile - ultra-dense polystyrene foam. It perfectly protects windows from freezing and icing in the lower part of the window, and the room - from drafts and blowing. Such a profile is much warmer than the window frame and even more so than the usual plastic support profile, which means that the heat inside the house will no longer “heat” the street. I recommend using "Warm Installation" for all window structures, except for aluminum, in heated rooms.
Installation warranty - 6 years.
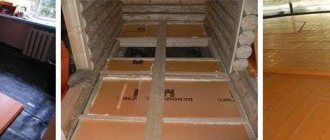
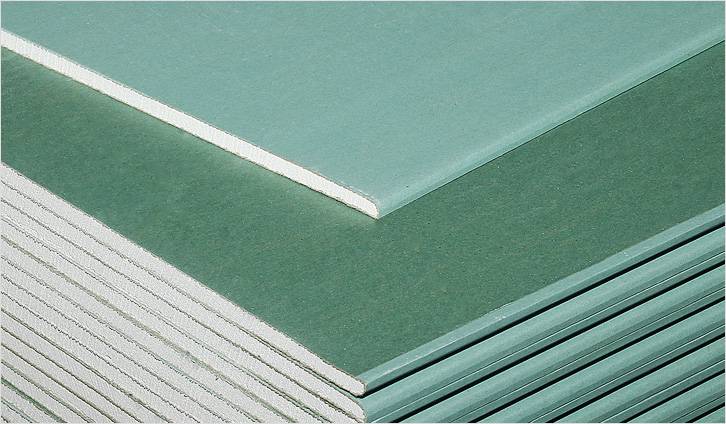
How to insulate with drywall
For internal insulation of window openings with plasterboard, you will need:
- drywall,
- gypsum plaster,
- polyurethane foam,
- moisture resistant primer,
- sealant,
- wooden bars,
- roulette,
- painting knife,
- Scotch.

Plasterboard slopes
The insulation process should be carried out according to the following scheme:
- Cut out drywall blanks based on the size of the window.
- Treat the workpieces with a moisture-resistant primer and dry them.
- Make an incision with a knife around the perimeter of the window, 1 cm deep.
- Insert drywall of the required width into the recess.
- Fill the remaining gaps with polyurethane foam.
- For the convenience of fixing, use scotch tape and wooden blocks.
- Wait until the foam is completely dry, cut off its edges.
- Smooth the surface with gypsum plaster.
- Carry out painting work.
Video: the option of making plasterboard slopes
Installation of windows "Warm +"
Warm four-layer installation on flexible foam using sealant, steam and waterproofing tapes is a modern, highly efficient technology that has no equal. And that's why. Firstly, all joints are carefully sealed, so the heat remains inside the room. Secondly, such an installation significantly reduces heating costs, which means it saves the family budget. And thirdly, mold and mildew on the slopes simply have no chance. The word "four-layer" raises a lot of questions, so let's figure it out.
1 layer. Warm base profile + blue super-elastic foam.
The problem of freezing in the lower part of the window is one of the main ones. Colliding with a wall, the wind rises upward. On the way, he meets an ebb, where the force of pressure accumulates and reduces the tightness of the windows. This process becomes the cause of the formation of cold bridges, through which heat leakage occurs. That is why we focus on the area under the window: we install a warm support profile - ultra-dense polystyrene foam, and cover the assembly seam with blue foam, which works to maximize window deformation.
2nd layer. Superelastic polyurethane foam.
It has a heat and sound insulating function and, unlike ordinary yellow foam, shrinks, stretches and returns to its original shape without damaging the structure. And since all metal-plastic structures are prone to deformation, such foam eliminates the occurrence of cracks.
3rd layer. Vapor barrier assembly tape.
It is used for internal protection of assembly seams from the negative effects of moisture, which, as you know, is present not only in the bathroom or kitchen, but also in other rooms. The tape is glued to the window structure and the wall in such a way as to completely cover the installation gap. As a result, the occurrence of mold and mildew is excluded.
4th layer. Breathable mounting tape + PSUL in a quarter.
To protect the external assembly seam from the damaging effects of sunlight and moisture, a special tape is used for ebb tide. It is vapor-permeable, and water condensate, which accumulates in the pores of the polyurethane foam due to the transition from cold to heat, is calmly removed outside and does not destroy the foam.
A quarter of the window uses a PSUL (pre-compressed self-expanding tape).Externally, the material is similar to foam rubber - the same porous and elastic, but has a number of advantages: good waterproofing with excellent vapor permeability, and a long service life. But that's not all. To ensure 100% vapor permeability and protect the material from destruction, STIZ A sealant is applied on top.
Advantages of "Warm Installation Plus"
- Four degrees of protection.
- Lack of mold and mildew.
- Keeping warm in the room.
- Savings on heating.
- High soundproofing characteristics of the assembly seam.
- Durability.
- Lack of drafts, cracks, blowing.
- Fast installation of windows.
- Affordable price.
- Decorative strips (optional).
Where to use "Warm Montage Plus"
The main reason that heat leaves the house is poor installation and the use of outdated materials. I work with new technologies and modern materials that will make your home a cozy place. "Warm installation plus" is suitable only for heated rooms.
Installation warranty - 9 years.

"Warm installation" - energy savings at a good price
When choosing a way to install windows, people are often guided by the price, taking it for the truth that "invisible to the naked eye" is not so important for the overall characteristics of the building in order to overpay for quality or innovative solutions. In real life, it often happens that an investor, after deciding on a "warm" installation, has doubts: either perfect filling and sealing of joints is possible only with the help of products developed specifically for energy-efficient construction, or whether "home" ideas will be as effective as professional systems designed for multi-layer installation?
Is the price of the components of the "warm" installation as high as it is often believed? Is a subjective estimate of the installation cost sufficient to justify abandoning a modern solution that will save on heating costs for many years? Judge for yourself, in the case of sealing windows using a warm installation system, the cost of work in comparison with traditional systems can exceed 200 rubles per running meter.
If you do not want your investment in energy efficient windows to be wasted, then make sure they are installed using high quality window insulation products. Let's not trust omniscient contractors who “did not do such things”. Look for installers who base their actions on experience gained over the years, but for whom new solutions are not just a "marketing ploy" to draw attention to day-to-day work.
WINDOWS MEDIA recommends reading: Why you should replace old windows
Installation "Warm" in the insulation area
Warm remote installation of windows behind the plane of the load-bearing wall is the most progressive and effective way to reduce heat loss, preserve energy efficiency of structures, their resistance to atmospheric loads and fire resistance. This is a well-thought-out method of installing metal structures, not only in terms of organizing steam and waterproofing, but also in terms of accuracy and quality of work on site. The innovative Triotherm system has won recognition in many countries, and you will soon understand why.
"Window by window"
In order for the warmth to remain in the room, it is important to take into account not only the intimacy of the windows, but also their location in the window opening. The location of the window in the zone of wall insulation is recognized as the most effective, since it is there that the zone of "contact" of temperatures passes: between the room and the street. The new Triotherm technology avoids cold bridges and distortion of temperature isotherms, thus providing a uniform thermal barrier.
"Window by window" means that metal-plastic structures are not mounted in a window opening, but on special extension profiles that are attached to the outside of the wall. Let's consider in more detail.
Stage 1. Installation of Triotherm polystyrene profiles.
These profiles are made of high density, moisture and fire resistant polystyrene. Despite their low weight, they are capable of supporting up to 1000 kg per attachment point! This means that the beams will perfectly handle the weight of a standard or panoramic window.
The fixing of the profiles to the wall surface is carried out with the help of a special glue - sealant, which reliably fixes the polystyrene and ensures good tightness. After that, holes are drilled in the profile and screws are screwed in. The fastening process is complete.
Stage 2. Installation of the window frame
To exclude the appearance of cracks and heat leakage, a warm support profile is used - ultra-dense polystyrene foam, which once and for all eliminates the problems of blowing and freezing. It is attached to the bottom of the frame and screwed in with self-tapping screws.
Step 3. Closing the assembly seams
The last stage of the remote mounting is the application of special elastic blue foam or PSUL self-adhesive tape (pre-compressed sealing tape). For reliability, the internal and external seams are closed with steam and waterproofing tape.
Advantages of warm installation in the insulation area
- Fast installation.
- Anti-freeze guarantee.
- Lack of mold and mildew on the slopes.
- Burglar resistance thanks to the use of a hybrid polymer.
- 100% thermal insulation.
- Possibility of replacing windows without damaging the facade.
Where to use warm installation in the insulation area
The installation uses reliable, energy-saving materials, the main purpose of which is to keep the room warm. Therefore, remote mounting is suitable only for heated premises: apartment buildings, cottages, office buildings, etc.
Why do plastic windows need insulation?
Experts name several weighty reasons at once, due to which modern plastic windows can lose their thermal insulation properties. Among them, the following should be highlighted:
- Shrinkage of the building is typical for those cases when the installation of windows was carried out in a new, recently built house. Shrinkage processes are normal at the beginning of the operation of a building and can lead to some deformations and distortions of window openings. As a result, slots and gaps can form along the perimeter of the glass units, through which air from the outside flows freely. To eliminate this defect, it is necessary to adjust using the clamping fittings or reinstall the structures again.
- Drying of the rubberized seal - during operation, the rubber profiles serving as a seal begin to gradually dry out and thin out, losing their insulating properties. This picture is most typical in those places where the sashes are adjacent to the frame. Improper operation and excessively frequent opening and closing of the flaps can also provoke thinning. Some owners are trying to get rid of such a defect by applying a layer of silicone, but this does not give the expected effect. The solution to the problem is to completely change the rubberized seal.
- Depressurization of the connecting seams between the frame and the opening is in most cases the result of poorly performed installation work. Through the cracks formed, street air penetrates into the room, forming drafts. To get rid of this defect, you will have to dismantle the slopes and make a new fill at the corners of the perimeter. After complete drying, you can re-install the slopes.
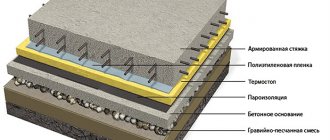
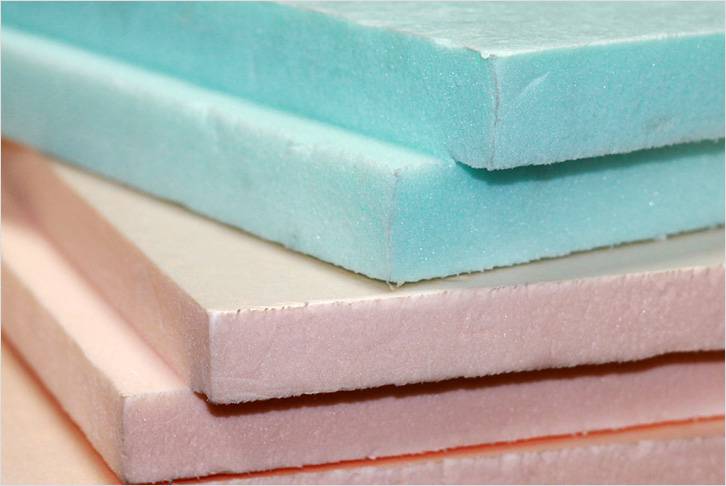
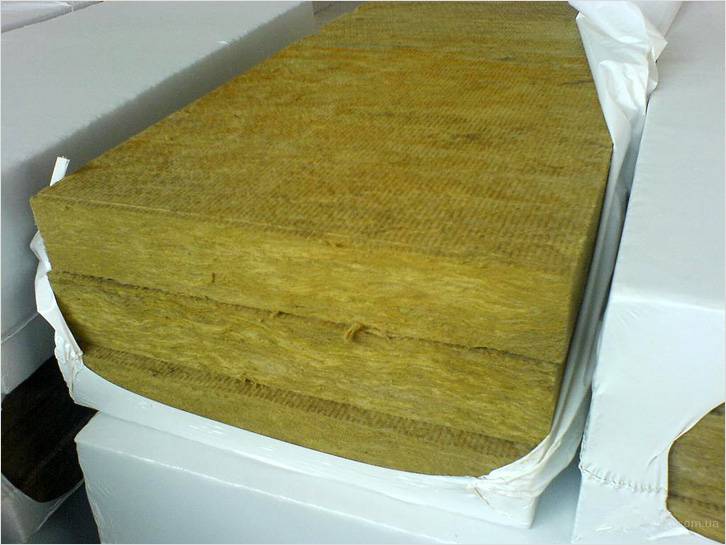
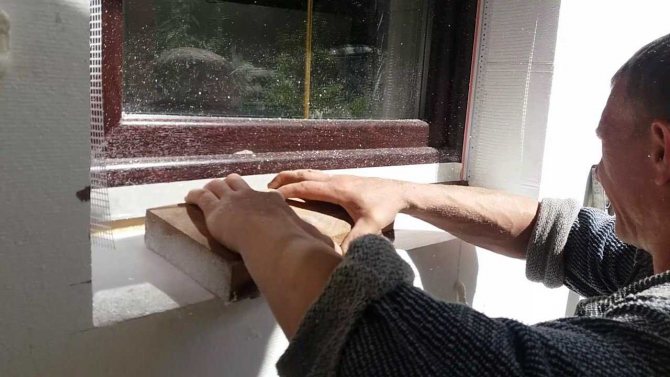
Materials such as mineral wool, drywall, polyurethane foam are also used as an insulating layer. However, if the slopes have irregularities, then sooner or later they will have to be leveled in order to maintain tightness for a long time.


Reasons for blowing plastic windows
The main reasons why a plastic window lets outside air in a locked state include:
- violation of the tightness of the window frame structure;
- problems with the clamping mechanism;
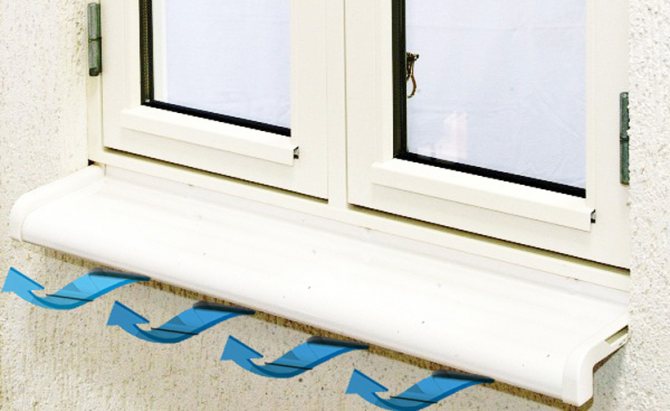
- blowing out from places around the frame - slopes and window sills.
Many owners of such windows are faced with the problem of drafts and cold penetration into the room.
Most often, when it comes to blowing out a new window, the first thing to do is to check the quality of the installation. In this case, you can contact the installers with the requirement to eliminate the imperfections. When installing windows on your own, you should carefully check the quality of sealing of all places where the frame joins the wall.
Determining the reason for blowing a plastic window begins with whether it is new or old.
How to find the place from where it is blowing
In most cases, it is not difficult to find the place of blowing. Most often they use for this:
- The palm of the hand. Passing it along the frame, you can catch the movement of air, thus identifying the problem area.
- Lit match. The flame will begin to ripple when near a leaky area.
- Paper. Thus, the reliability of the seal of the window elements is checked - if the sheet easily passes between the individual sections of the glass unit in which the seal is installed, then the problem is in this element.
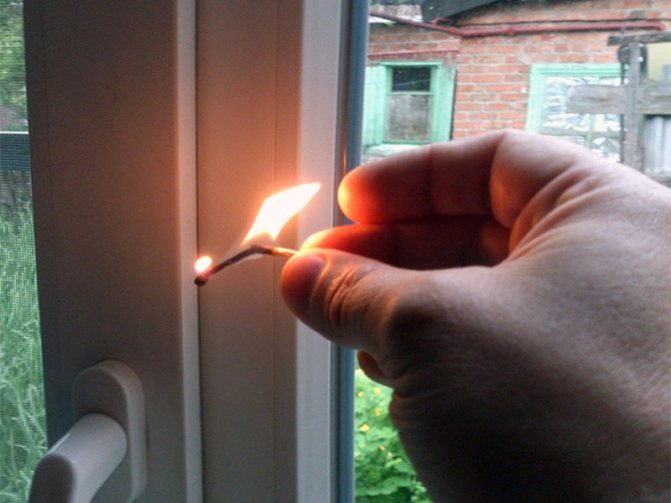
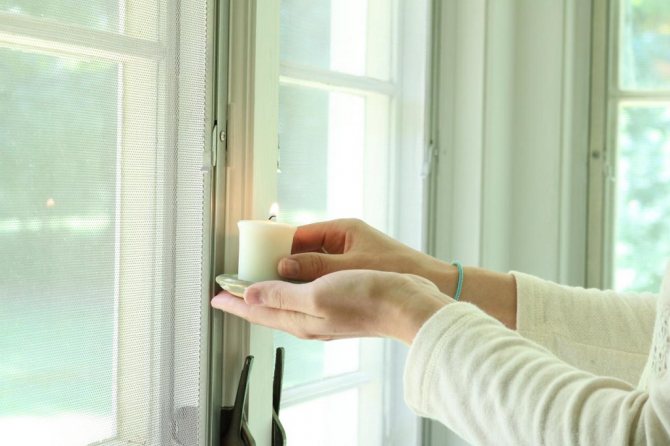
You can check with a lighted match or candle - the light will begin to vibrate at the slightest movement of air.
When checking, it is necessary to pay attention both around the entire perimeter of the window frame and under the windowsill. Problems with outdoor air access often appear there as well.
If you encounter a problem with improper installation or obvious factory defect, repairs under warranty should cover all additional costs.
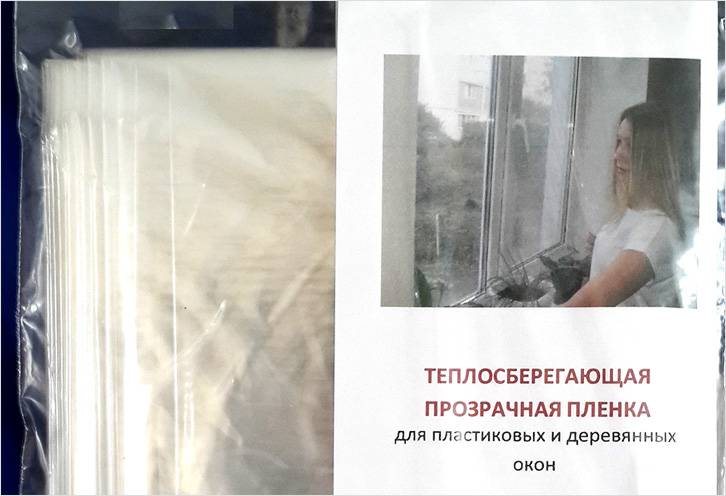
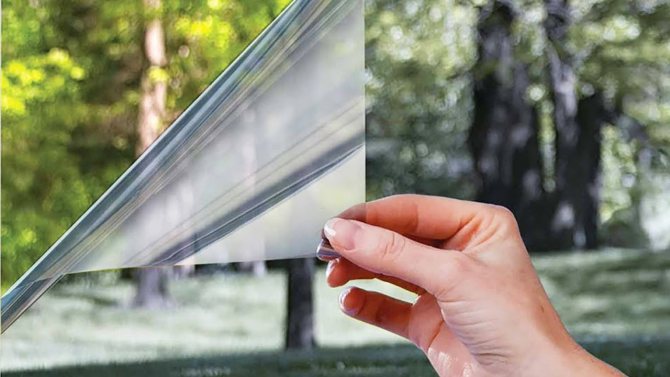
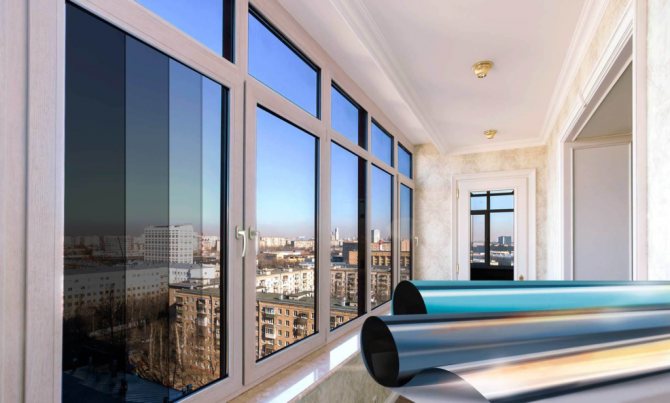
Installation of heat-saving film: instruction
For internal insulation of window openings with a heat-saving film, you will need:
- heat-saving film,
- double sided tape,
- household hair dryer,
- construction knife,
- scissors.
Installation of heat-saving film
The insulation process should be carried out according to the following scheme:
- Degrease the work area.
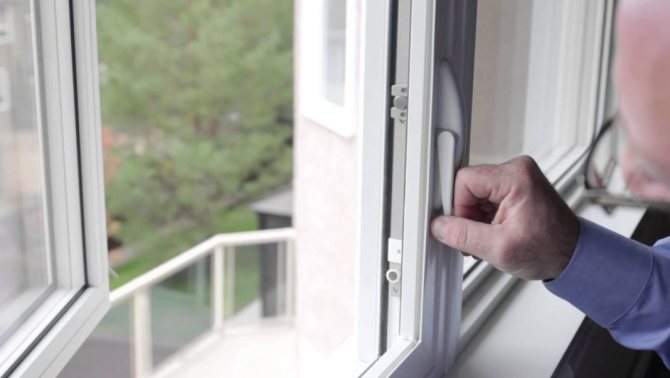
- Remove the handles from the window.
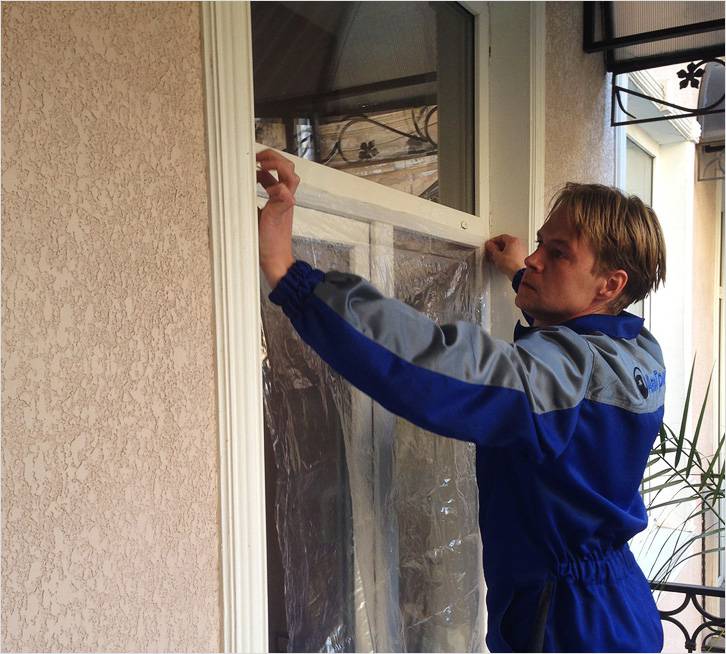
- Cut the film into one layer based on the parameters of the window. Make the edges 2 cm larger for easy gluing.
- Stick the film around the perimeter of the window with tape.
- Remove the protective strip from the tape.
- Holding the film by the top edges, attach it to the tape.
Blow out the window with a hairdryer to shrink the material and smooth out folds.
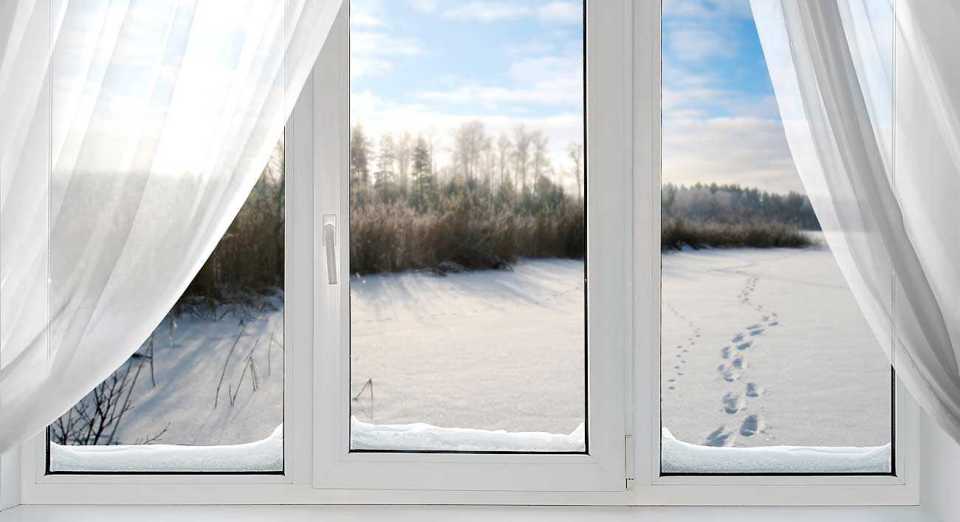
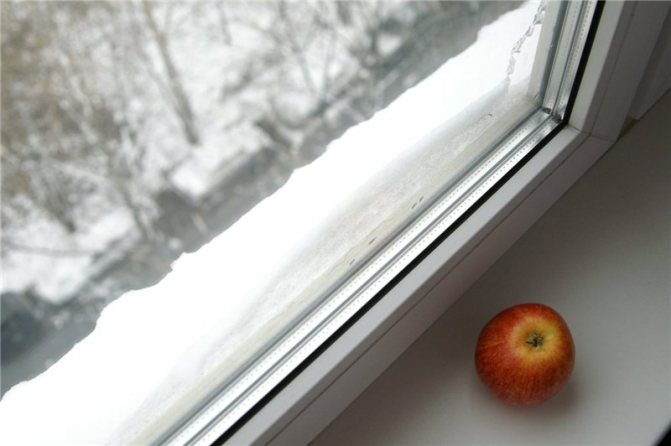
Preparing for the cold: we insulate windows for the winter
New plastic windows are the dream of most home owners. It seems that with their installation all the problems associated with the thermal insulation of windows will disappear.
In fact, often even the best plastic double-glazed windows require insulation for the winter. This is due not so much to the quality of the material as to errors in their installation. There are other reasons why this issue is becoming relevant. But how to insulate old wooden windows for the winter and what materials may be needed is indicated here.
Why is it necessary to insulate plastic windows?
Gone are the days when we insulated wooden windows with paper or other tapes so that there were no drafts in winter. Modern windows require new insulation methods. When is it necessary?
- Shrinkage of the wall. It's no secret that walls (especially of old houses) sometimes sag. In this case, gaps appear between the window and the wall surface, as well as between the sashes themselves. How do you fix them? You just need to adjust the fittings. It turns out that everything is simple, and there are no additional costs.
- The rubber seal has aged and lost its elasticity. This also leads to the appearance of gaps, although in this case they are more difficult to detect. The result is coldness in the room. The solution to the problem will be to replace the seal.
- Incorrect finishing of slopes. Over time, this leads to drafts. It is necessary to redo the slope or insulate it.
- Loss of tightness in areas between frames and slopes. If there is a problem of depressurization, it means that the installation of the windows was made illiterately. If the gaps are large, then dismantling of structural elements and their subsequent correct installation will be required. With minor deviations, you can simply insulate the windows.
And here is how the adjustment of plastic windows takes place in winter summer, you can see here.
Additional thermal insulation in any case will not be superfluous, even if there is no apparent reason for this. Insulating windows will help save heat in the house and reduce heating costs.
When should thermal insulation be carried out?
The Russian proverb “get your sleigh ready in summer” is a direct answer to this question. Of course, you need to take care of the insulation of windows in advance, even in the warm season. Although many people prefer to wait for the moment when they are already completely baked; as a result, many difficulties arise, especially if the insulation is carried out outside, and it is already quite cold outside.
Modern materials for insulation often do not withstand low temperatures. In addition, work in the winter with open windows will not add to the joy of the residents.
But how the shutters on the windows in a country house may look like, this information will help to understand.
Insulate plastic windows in advance. If you do not have the basic skills to do it yourself, invite a qualified technician who will save you from heat leaks in the future.
maybe
New technology for installing windows from the Belgians
Today, more and more often you can find repair teams who, when installing windows, use a new technology from the Belgian company Soudal to protect the mounting foam and increase the service life of the window.
It is known that polyurethane material helps to fix the window frame in the desired position and at the same time insulates and reduces heat loss in the room. Previously, the foam was practically unprotected from human exposure and weather conditions. If the insulation was protected from the destructive ultraviolet radiation by various facade materials, such as plaster, PVC or MDF panels, then nothing saved the foam from exposure to moisture.
The Belgians propose their own formulation to reduce all these malignant factors, namely the application of the Soudal Window System (SWS) tape.
Properties of the SWS mounting tape
- creation of three-layer thermal insulation;
- increase in the service life of thermal insulation;
- great adhesion to all building substrates of the adhesive layer of the tape;
- high strength of the tape, which allows it to withstand diagonal deformations of the building;
- the surface of the tape can be easily painted or plastered.
Thermal insulation of wooden windows
When insulating windows in a wooden house, increased requirements are imposed on both aesthetics and insulation. Not every material can be suitable for thermal insulation of windows in a wooden house. One of the best outdoor insulation options is to install a shutter. However, this element does not always fit into the architectural concept of the house, therefore, the following materials are most often used for insulation purposes:
- foam pads;
- tubular profiles;
- silicone sealant.
Foam pads
The first option for thermal insulation consists in filling the gaps between the frames with foam rubber, and then gluing a fabric or paper strip on top. This method, on the one hand, is the simplest, but at the same time the most inconvenient. So you can insulate the windows for only one season, and in order to ventilate the room, you will have to remove all the insulation.
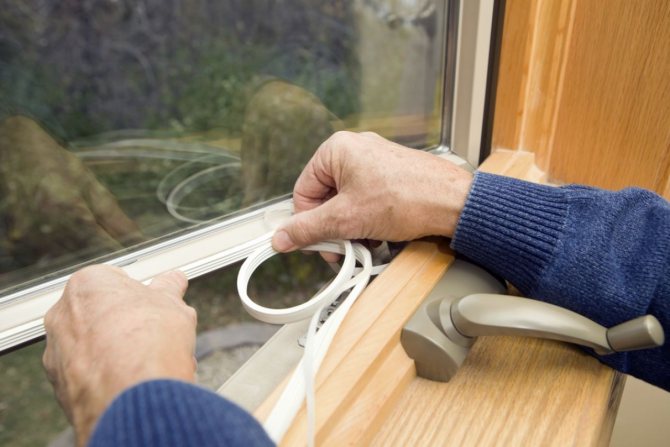
Sealing profiles
More reliable and effective insulation is obtained when using tubular profiles, which can be made of the following materials:
- rubber;
- polyvinyl chloride;
- polyurethane;
- polyethylene foam.
Depending on the size of the slots, a profile of a certain shape should be selected:
- In the shape of the letter "P", this gasket is suitable for sealing medium-sized gaps.
- The D-profile can be used to seal wide gaps.
- Type E is used to seal small holes.
In addition, gaskets are classified into:
- self-adhesive,
- glued with glue.
The first type is the most convenient and easy to use. The seal is simply glued to one side of the frame. Sealing of windows with sealing profiles must be carried out in warm weather (+10 degrees), so it is advisable to carry out work in advance before the onset of cold weather.
Tubular seals last at least five years, but they have one drawback - they do not look very aesthetically pleasing on the window.
Application of sealant
Silicone sealant is used to insulate the joints between the window sash and the glass. It can also be used to seal gaps between the window sill and the frame.
Insulation with a sealant is performed as follows:
- First you need to remove the glass from the frame; for this, all the glazing beads and slats that hold the glass must be carefully pulled out of their places. First of all, the lower glazing beads are removed, then the side ones and only after that the upper one. Very often, when dismantling, the glazing beads break, so it is best to purchase new ones.
- The inside of the frame must be thoroughly cleaned from debris, dirt and dust accumulated there.
- A sealant is applied around the perimeter of the frame, and then glass is installed.
- After the sealant has dried, new glazing beads are installed.
The sealant is absolutely invisible, it can be used to insulate windows without deteriorating their appearance. The silicone sealant can be replaced with a special window putty. The work is carried out in a similar way, but immediately after installing the glasses, it is necessary to remove excess putty, since when it is completely dry it will be more difficult to do this.
Thermal insulation of windows using Swedish technology
This method of insulating wooden windows is the most progressive and at the same time inexpensive. It provides a high level of tightness, which is comparable in efficiency to plastic windows.
The essence of this method is to create a special groove in the frame, where the insulation is then laid. This option allows not only to insulate, but also to repair and replace the broken elements of the window block and fittings. The whole process of thermal insulation consists of several stages:
- The sash of the window is removed.
- With the help of a special cutter, grooves of 4x3 mm are made along the entire perimeter of the sash. The grooves must be knocked out at an angle of 45 degrees from the outside.
- A tubular seal is placed in the grooves; it can be made of PVC, polyethylene foam, polyurethane, silicone.
- A silicone sealant is applied to the places where the glass and the sash join.
- The sashes are placed in place, then the fittings are adjusted.
This method of insulation works for at least ten years, but only if the wood is not rotten, and all the window elements are intact.