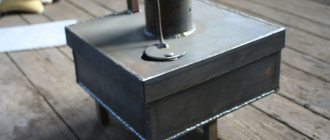
Facing methods of ovens made of bricks
Even if there is the presence of modern heating systems, as before, many homeowners of private houses prefer to keep classic wood-burning stoves in the house. They are erected even in new buildings - fuel regularly rises in price, and the situation with firewood is somewhat easier.
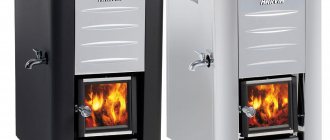
A wood-burning stove will always remain a very profitable option for heating your cottage.
And since an attractive interior in a house is very important for the good mood of those living in it, a lot of homeowners are also interested in cladding for the stove.
How and with what is it possible to decorate the stove? Facing in most cases appears to be a necessity. Often, stoves are laid out of bricks with good operational properties, but completely unsightly. Furnaces without lining become covered with layers of dust for a certain period of time, and it is very difficult to remove it from a rough surface. Also, due to the additional mass formed by the lining, the heat capacity of the furnace increases. Methods of execution are selected depending on the owners' own desires.
Which tile to choose for the fireplace
Stoves and fireplaces are not uncommon in private estates and cottages, even with a modern heating system.
The source of living warmth creates an atmosphere of a cozy home, near which the whole family gathers to while away a long winter evening. Particular attention is paid to surface finishing.
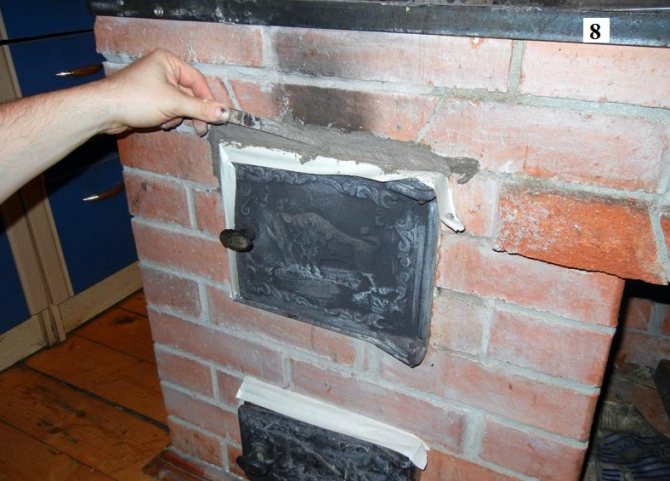
High-quality tiles for stoves and fireplaces are designed to withstand high temperatures, are durable, and have an attractive design.
Finishing work is no less important stage than laying a stove or building a fireplace. Stove makers recommend choosing materials for decoration that meet the following characteristics:
- heat resistance (heating t reaches 1200-1300 ° C);
- strength;
- low porosity structure;
- no chips or cracks are formed under mechanical stress;
- thickness 6-8 mm and more.
Compliance of tiles for the stove with operating conditions is a prerequisite for the durability of the cladding. Scattering, damage to the surface negatively affects the aesthetics. Replacement is not always possible: each batch of tiles made from natural materials has a unique shade, so it is unlikely that it will be possible to achieve an exact tone match.
The harmonious design of the materials is also an important parameter. The tiles are selected taking into account the peculiarities of the interior. The hearth, decorated in accordance with the general stylistic decision, will become a real highlight. Guests will definitely pay attention to the tastefully decorated stove or fireplace.
There is a wide range of tiles on the market for finishing stove and fireplace surfaces. Let's dwell on materials that are distinguished by high performance characteristics, stylish design and ease of use.
Terracotta tiles
Terracotta tiles for stoves are a classic version with excellent thermal properties. They are used indoors and outdoors. For decorating hearths, stationary brick barbecues and barbecues.
Terracotta is a natural material made from kaolin clay. The tiles are made using the technology of high-temperature firing at t 1100 ° C. Differs in the following features:
- not susceptible to a sharp temperature drop, the effect of an aggressive external environment;
- colorfast and not subject to fading;
- heat resistance - 1100 ° С;
- has high heat-saving properties;
- environmentally friendly.
The stove, faced with terracotta tiles, retains heat longer and has a high efficiency.
Clinker tiles
Clinker tiles for the stove are deservedly popular. One of the most durable and easy-to-use facing materials. Used when carrying out interior and exterior finishing works.
We suggest that you familiarize yourself with Growing salad from seeds in a greenhouse
In the production of clinker tiles, special grades of highly plastic slate clays are used. The prepared mixture is fired at t 1200 ° C. Possesses the following properties:
- frost resistance;
- not affected by ultraviolet rays;
- heat resistance - 1200 ° С;
- wide range of colors, which includes more than 100 shades from chocolate brown to white and light beige;
- environmentally friendly.
IMPORTANT TO KNOW: For maximum strength and durability of the cladding, materials with a low-porosity structure are chosen.
Terracotta and clinker tiles, with all their advantages, have one significant drawback: they are not intended for painting on the surface and creating intricate patterns.
Therefore, ceramic tiles for stoves are still in demand - tiles and majolica. Both classics have survived for centuries.
Today, drawings covered with special glaze look actual and belong to the category of win-win interior solutions.
Suffice it to recall the Dutch tiled stoves, the popularity of which is beyond doubt in the domestic practice of laying live heat sources. Also, these materials are used for facing fireplaces. Majolica and tiles have excellent performance characteristics:
- heat resistance;
- heat-saving properties;
- environmental Safety.
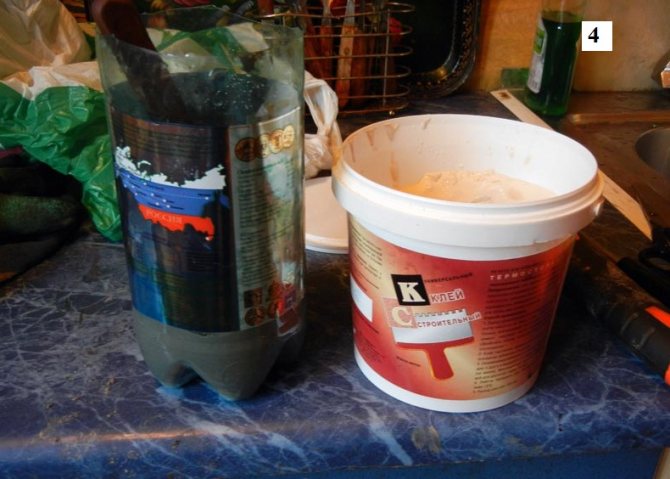
Professional laying of stove and fireplace tiles is impossible without the use of special tile adhesive. All efforts will turn into a huge disappointment if you make a mistake in choosing the composition for the cladding. The following requirements are imposed on the adhesive composition:
- heat resistance and immunity to sudden temperature changes: like tiles, the composition must withstand prolonged exposure to high temperatures and be adapted to rapid heating;
- adhesion strength of surfaces - base and cladding;
- environmental friendliness and non-toxicity;
- convenience and ease of use.
It is better to entrust the choice of tiles, glue and the finishing process directly to professionals. Facing stoves and fireplaces is a rather complicated process. You should not undertake the implementation of the entire complex of work without proper experience.
Any mistake will lead to irreparable consequences - at best, you will have to rearrange the tiles, at worst - buy new materials. Turning to qualified craftsmen is a solution you will never regret.
All work will be performed at a high level, and the quality guarantee will serve as an additional bonus. Real pros are always responsible for the result.
The crackle and aroma of logs, the warmth emanating from this structure, are conducive to a pleasant, unhurried conversation and a positive mood. Now the design of a stove or fireplace can be made so great that it will look like a real masterpiece.
And in order to create a beautiful, reliable, safe thing, you need to use only high-quality materials.
The most important properties of the oven tile adhesive are:
- Elasticity. Since the thickness of the walls does not increase much during leveling, this feature allows you to preserve the structure of the masonry.
- Fire resistance. Stoves and fireplaces are usually heated with solid fuels. Therefore, it is very important that the structure is durable and fireproof.
- Special composition. In its structure, the product has a special fibrous substance. Thanks to this element, you can not only glue the tiles to the product with high quality, but also very easily strengthen the plaster mesh or simply process the stone surface.
- Resistant to sudden changes in temperature.During the operation of the fireplace, significant temperature changes are inevitable. A special adhesive helps to protect the tiles from deformation.
The range of adhesive mixtures for tiles today is very large. Therefore, there is always an opportunity to choose the most optimal option.
Most often, tile adhesive is sold in powder form. But lately, you can see jelly-like compositions. Their advantage is that they are ready to use. Any tile adhesive contains:
- Sand;
- Cement;
- minerals;
- fireclay fibers;
- synthetic components.
It is chamotte fibers that provide heat resistance and rigidity to the masonry. Actually, therefore, the oven brick must be glued exactly the first time. In the event of shear, the adhesive loses its properties.
For external cladding, tile adhesive with high ductility is used. If, for example, it is necessary to glue ceramic tiles on the fireplace, then you should buy mixtures with a significant number of plasticizers.
They significantly improve adhesion.
When choosing a heat-resistant glue, you should consider some of its qualities:
- Durability. When buying, you should pay attention to the service life of the tile mortar. The bigger it is, the better.
- Linear expansion. The presence of this characteristic will not allow the material to crack with a sharp change in temperature.
- Moisture resistance. Such a quality is necessary for glue, especially when the fireplace or stove is located in a room with high humidity or outdoors.
- Environmental friendliness. If heat-resistant glue is used for cladding a fireplace or stove, it will constantly heat up. Therefore, such a tile mixture should not emit any harmful substances.
- Heat exchange. The higher this indicator, the better the heat transfer will be. But such structures are built for the most part for heating.
Which glue is better?
On sale you can see a wide range of similar products. But most often, consumers choose these mixtures:
- Terracotta The composition of this product has increased heat resistance. The glue is used not only for tiling stoves and fireplaces, but also for installing heated floors. It interacts perfectly with natural stone and has excellent plasticity.
- Profix is the best choice for tiled chimneys. Tile adhesive is fire-resistant, sets very quickly, which can significantly shorten the working life.
- К-77V The basis of this tile adhesive is aluminate cement and modern synthetic admixtures. Therefore, it has great thermal stability and is not afraid of a sharp temperature drop.
- Ivsil termix This product is highly elastic. With its help, they not only install fireplaces, but also decorate the facades of buildings, decorate kitchen areas next to stoves and ovens.
- Hercules This tile adhesive is used both for cladding and for masonry. It has shown excellent performance in various areas of finishing and construction processes.
- Polimin P11Effective heat-resistant mixture will allow you to glue not only ceramic tiles, but also to use for leveling walls. It withstands temperature changes well, shows excellent properties even on problem areas of the surface.
- CM-17 Heat-resistant tile adhesive is used for stoves, fireplaces, warm floors, it has proven itself well when working with drywall, chipboard, concrete, clay.
It is not difficult to lay a stove or fireplace on your own. The main thing is to adhere to some rules for working with the material.
- First you need to prepare the surface. The base should be cleaned of dirt, lime, grease, dust, and so on.
- One day before starting work, all seams and holes should be repaired.
- If the surface on which the glue will be applied is highly absorbent, it is treated with a primer four hours before facing.
- Heat-resistant tile adhesive is mixed in the ratio: 200 g of water per kilogram of dry mix. In any case, the manufacturer indicates on the package how to properly dilute the powder. Kneading is carried out using a construction mixer until smooth. Then you need to leave the mixture for ten minutes and repeat the procedure again.
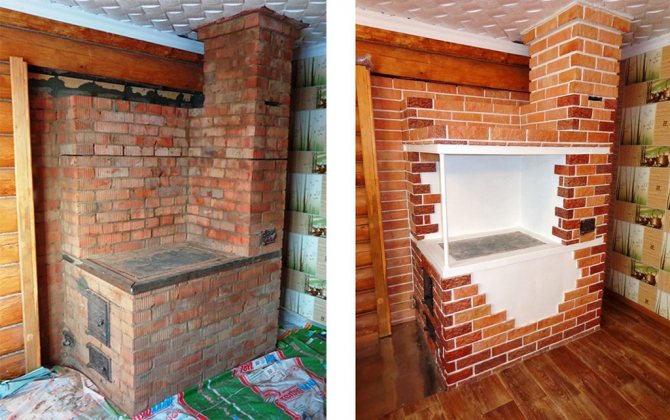
Finishing options for stoves made of bricks
Whitewashing and painting
When choosing the classical method, the surface on the outside of the brick stove is rubbed to reduce the roughness and is wetted with water. Treatment with a penetrating primer mixture will not be unnecessary. The stove must be painted with glue-based paint. You can also whitewash with slaked lime with the addition of blue, ocher or red lead. Metal elements such as a cast-iron door can be painted with a fairly heat-resistant black paint.
Plastering
For good adhesion of the plaster to the brick, a metal mesh is used.
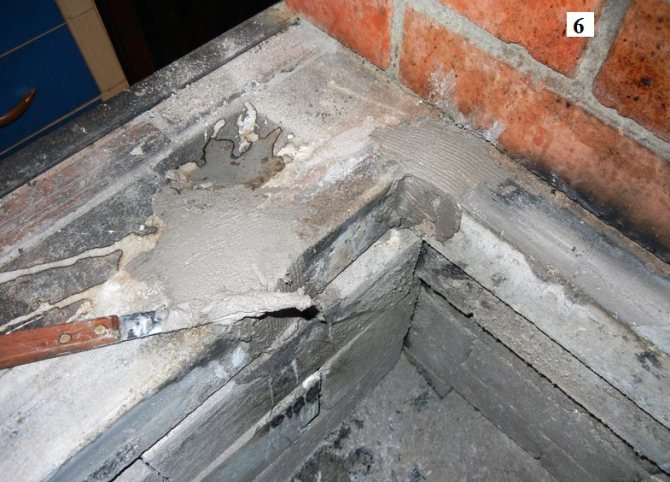
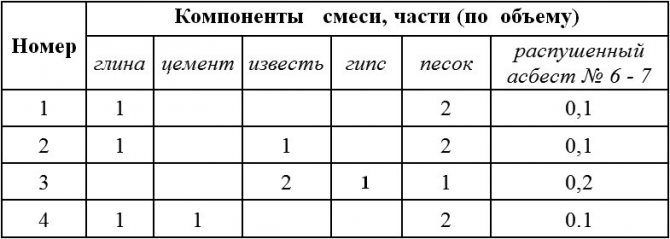
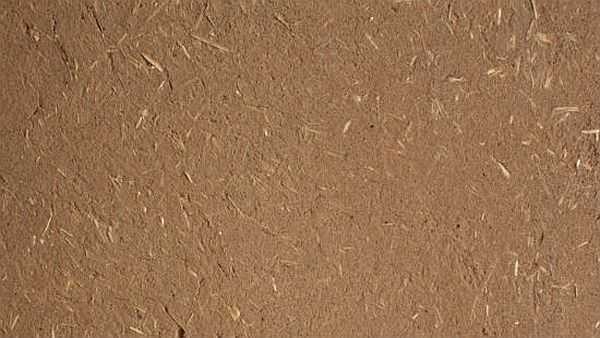
The simplest type of cladding is a hut. This is the name of the rural lining of the furnace walls, which is an uneven coating by hand with further whitewashing, on which hair cracks are allowed. At the end of the heating season, the hut requires an "economy class" repair every year - the cracks that have arisen are treated with a mixture of clay, cement and sand with water, and whitewash is applied on top. Most of the manufacturers of dry plastering compounds recommend ready-made dry mixes, but grandma's recipes have not lost their popularity. Such mixtures are based on sand, cement, asbestos.
Good advice: to prepare the mixture, dry components are sieved through a sieve and mix well with each other. The resulting composition is mixed with a thick solution of lime or clay water. Separately from the mixture, gypsum is diluted to be added to the finished lime solution. Since the gypsum solution sets very quickly, you need to prepare a similar amount of the mixture, which can be lubricated in about 5 minutes.
To avoid premature cracking, plastering should be started after the brickwork is completely dry.
You need to start plastering only after the oven masonry is completely dry and settled. The surface of the brick oven is perfectly cleaned of dust and clay with a metal brush, the seams are cleaned to a depth of 5-10 mm. In such seams, plaster mortar can wedge perfectly. A metal mesh is fixed on the surface, the cells of which are 10-20 mm. The oven must be well heated before plastering. On a hot surface moistened with water, the made solution is applied in two layers, of which the second should be thicker than the first. Each layer should be approximately 4-6 mm thick. Throw the plaster over and rub evenly. After plastering, the brick stove is painted or whitewashed.
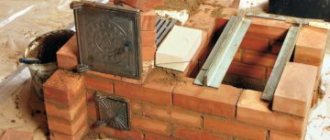
Surface finish with tiles
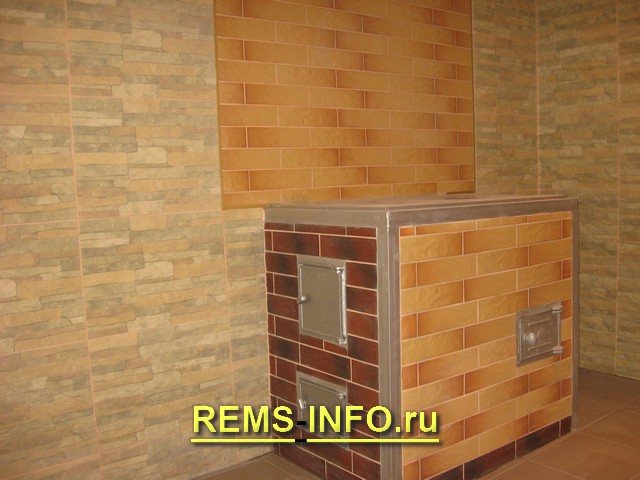
Decorating the stove with tiles, in addition to increasing the heat capacity, makes it look solid and old.
Tiles - handmade tiles. This finishing material is produced with a tile box on the back. It is necessary in order to make installation in brickwork. Tiled cladding is considered an ancient and respectable type. A surface of this type is quite easy to wash and wipe when dust appears, and the penetration of flue gases into the space of the room is practically excluded. The absence of dust makes for greater and better heat dissipation. Since the mass of the finishing furnace is very large, its heat capacity also becomes larger. Because of this, the entire heat supply that accumulates in the furnace will be given off much longer.
Tiles, if done in good faith, must be made, fired and signed by hand. Thanks to this, one should not be amazed that they have a wide spread in shape, color and size. It can even be in the same batch or box.
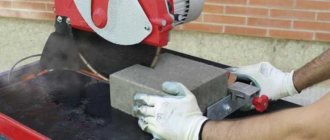
Selecting and sorting tiles
Tiles for the stove are made by hand, so you must always sort them by shape and shade.
Tile cladding begins with sorting the tiles by shape and shade. Products must be chosen so that they do not have noticeable imperfections, and with a slight impact, they would emit a large, clear sound. This confirms that there are no internal cracks in the product. Sort the tiles by color shades. To do this, they are spread directly on the floor or on a wide workbench. The selected products must be processed. Previously, it was done like this: a specialist chopped them off with a knife to the required state, then hewed them and carried out manual grinding. It was necessary to saw through the hard tiles manually using steel wire. Also, by hand, neighboring samples rubbed against each other. At this time, with the help of mechanization, everything has become much very simple. The horizontal edges are slightly grinded inward, so the finished tiles on the wall will not be supported by glaze, but by the edge of the tile edge.
Correct laying of tiles
When laying tiled tiles of any of the rows, you need to start from the corners. They begin to put a row by moistening the corner parts in the water mass and starting laying from them. A thick solution is placed under the tiller. The adjacent tiles must be held with one hand, and the mortar must be placed between the trowels, after which the brick must be pressed in. The tiles are fastened using pins made of knitting wire, the diameter of which is 4 mm. The pins are inserted vertically into the holes on the horizontal shelves of the tiller.
You need to start laying stove tiles with corner pieces.
The pins are tied together with a knitting wire (diameter 2 mm). Additional pieces of wire are tied around the pins, then they need to be hidden in the masonry seam. These pieces are called lobes. The ribs of the box rods are held together by metal clamps. There should not be more than 2 mm joints between the tiles, which are overwritten with stucco. So the tiled stove becomes, as it were, a solid monolith, which is repeatedly reinforced with stove wire. Attention! The tiles should not hang on the brickwork - they rest on the very foundation of the stove.
Facing with tiles, tiles
Facing with tiles, tiles of ovens made of bricks has been used for a long time. Very often, the following options are used to decorate stoves made of brick:
- Terracotta - pressed ceramic unglazed tiles. Famous since antiquity, it is made of special types of clay;
- majolica - pressed tiles, covered with glaze on the front side. It has been used since the Middle Ages;
- brick facade tiles are created from a mixture of highly plastic clays of various types. The product is relatively new; during the manufacturing process, the tiles are fired at high temperatures and pressed.
It is undesirable to handle the stove with tiles of impressive size, as well as the likelihood of cracking it increases.
When decorating stoves, the main problem is the unequal heating of various sections of the stove surface and stove walls at a depth. The geometric dimensions of the oven change all the time - alternating compression and expansion over time can lead to the fact that the tile, glued firmly, will crack, and the one glued loosely, on the contrary, will be able to fall off. Attention! Large format tiles should not be used - they are very likely to crack. Tile cladding should be started only after the combustion chamber has been lined with fireclay bricks. Such an operation is necessary in order to reduce temperature fluctuations on the furnace surface.
External cladding using tiles should be carried out on the plaster applied on the grid. In most cases, a mesh (1 more layer) is attached to the plaster layer specifically for the tile.It is carried out in such a way to communicate good reliability - another layer of mesh is precisely in order to strengthen the adhesive for the tile. The mesh is attached with self-tapping screws and washers.
There are a lot of glue mixtures that are designed specifically to decorate stoves with tiles. They stand out for their very high resistance to high temperatures and retain little elasticity throughout their service life. After grinding the seams, it is enough to apply a heat-resistant organosilicon impregnation to them, but it does not protect against subsequent contamination. The same can be attributed to porous terracotta tiles, and to wild stone with porous rock.

Varieties of materials
For such work, you need to take a small bottle.
If you choose a natural stone, then it is best suited:
- small bottle;
- large pebbles;
- large crushed stone.
Before finishing the stove, you need to take into account the weight of the stones and think over ways to securely attach them to the wall of the stove. Due to the fact that wild stone comes in different shapes and sizes, stone facing furnaces requires skill and experience. After the masonry is dry, you can open it with heat-resistant varnish. This will simplify maintenance and preserve the natural beauty of the stone.
Decorative stone for facing is made from a mixture that includes:
- sand;
- cement;
- fillers;
- plasticizers.
Formed under the influence of vibrocompression or vibrocasting. After processing, a tile of a given shape and size is obtained, with a characteristic pattern that imitates a natural stone. At the final stage of manufacturing, they are covered with a protective layer. Due to its low weight, it is easier to work with artificial stone than with natural material. Such a brick is well suited to surround the stove in a bath.
What can be used to overlay a brick oven?
- Choosing a finish
- Natural stone
- Ceramic tiles
- Majolica and tile
- Facade tiles for brick and ceramic granite
- Furnace cladding material and tools
- Brick stove decoration
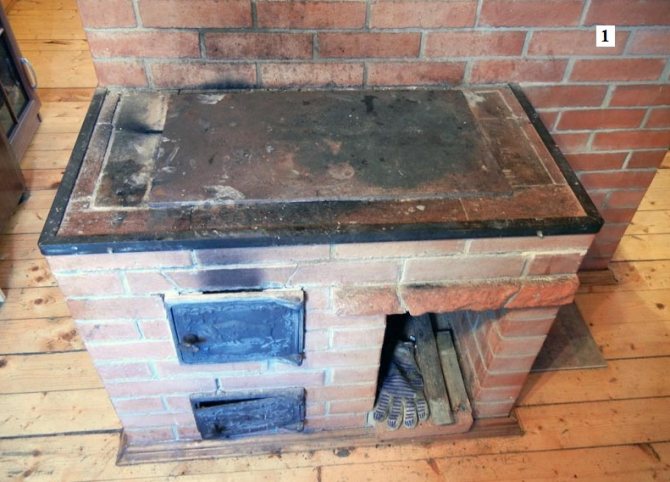
Most owners of private houses and summer cottages put wood-burning stoves to winter comfortably. After completing the work, the owners think about how to overlay the brick oven. After all, it occupies a significant place in the very center of the house, and therefore must have a beautiful appearance and fit the image of the room. But not only as an interior decoration, decoration is needed. Brick, as is clear from practice, cools quickly. Thus, so that the expensive heat from the stove is not lost very quickly, and this layer of insulation is needed. Consider several options for insulating and decorating a brick stove using different cladding materials.
Furnishing of the stove is very often done using tiles, real stone or tiles.
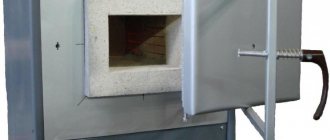
Furnace surface preparation
Stoves are divided into two types - brick and potbelly stoves. If the residents live annually in the house that she will heat, it is better to install a brick oven. To know how to overlay the stove in the house, you need to think over the plan and scheme of its device well. First of all, the stove must have a ventilation system and a chimney. In winter, due to the frequent use of the stove, the ventilation system usually has a heavy load. If the chimney and ventilation are not built correctly, the house will not be able to meet all the requirements of the residents.
When constructing stoves, care must be taken that the stove is fenced off from the wall. For this, special panels made of ceramics or artificial stone are used. This is dictated not only by aesthetic considerations, but also necessary to avoid fires (panels will shield the stove from the entire space in the house). These panels will not heat up or rust.
Before starting the facing work, you need to wait until the mortar on which the masonry will be held completely hardens and sags.
During this time, you need to prepare materials and tools for further work. If the oven is treated with plaster, it is necessary to prepare a solution. Mortars can be clay, lime, cement. This is followed by the following order of work:
- The brickwork is cleared of dirt and the joints in the brickwork are deepened up to 10 mm.
- Beacons are placed along which the surface will be aligned.
- Next, you need to apply a mesh metal mesh to the surface.
- Then the stove warms up and the plastering process begins. The composition is applied to a damp surface in several layers. When the plaster layer reaches a thickness of 5-6 mm, then you can stop working.
After plastering, the stove should be painted. For this, the plastered surface is moistened or rubbed, and then covered with a primer in several layers. After priming, the stove can be painted. So that in the future the paint does not leave when the oven is heated, you can apply paint with a base on glue. It is better to cover iron stoves with organic flint paints, since they have thermal resistance.
Choosing a finish
As mentioned above, the stove is considered the center of the house both for its own practical purpose (as a heat source) and in a spiritual project. After all, the whole family gathers near the warm stove, it is so nice to fill the dark evenings in winter! Thanks to this, it has long been customary to decorate the brick stove with a variety of decorative materials. The following materials are classically used:
- natural stone;
- ceramic tiles;
- majolica;
- tiles.
This choice is not accidental, all these materials have refractory qualities and a high level of heat capacity. Now new, modern ones have been added to them, thanks to which you can now incredibly beautifully overlay a brick stove. These are ceramic granite and heat-resistant brick-like facade tiles. Consider any of the furnace facing materials separately. Recall that today they produce tiles with a notch on the other side to strengthen the hitch, and also with grooves and ridges for a lock hitch, in which seams are not noticeable.
to come back to the beginning
Natural stone
The scheme of finishing the stove with natural stone.
It is the oldest of the materials used for facing brick ovens. For the most part, sandstone and shell rock are used. They are inexpensive materials with good heat storage properties.
They will give the stove a special, slightly wild look, as if time turned back and outside the window again the Middle Ages with knights, castles and magical stories.
Also, the decoration of a brick stove with a coil is now in vogue. It is an attractive natural stone of greenish-gray color with a high coefficient of heat capacity.
The more traditional material is marble, a reliable and attractive natural material. This finish will add a noble and representative look to the stove.
to come back to the beginning
Ceramic tiles
Mankind has been using baked clay tiles since ancient times, as well as an insulator. Ceramics are used for the stove, which has a number of specific qualities:
- thermal stability;
- fortress;
- dense structure.
The latter is important due to the fact that through the wide pores, the material quickly loses the heat received from the bricks.
The strength of the tiles is achieved through their thickness. For finishing, experts advise using products with a thickness of at least 8 millimeters. All these requirements are met by a terracotta made of baked clay, not covered with glaze. Terracotta was used to decorate ovens made of bricks back in Greece.
to come back to the beginning
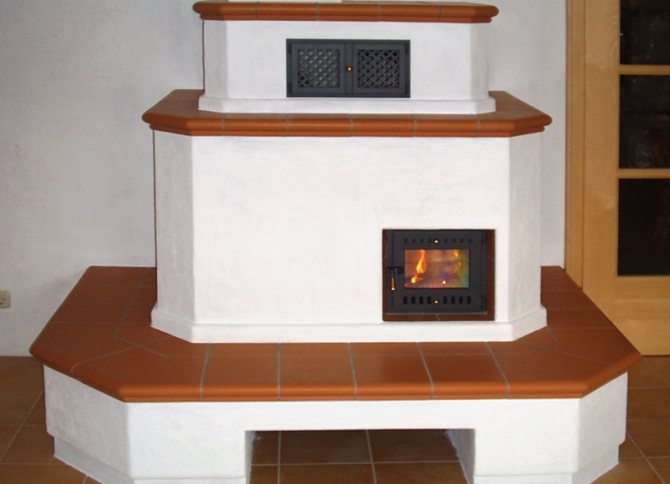
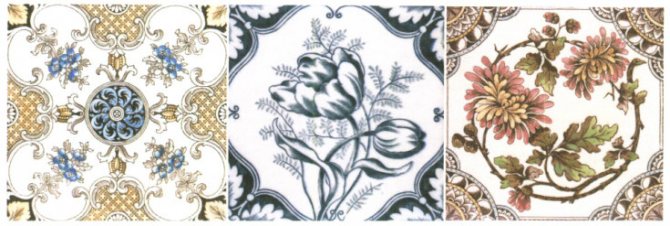
Majolica and tile
Installation diagram of tiles.
Majolica is a bright tile, painted with paints and covered with glaze, came to us from antiquity.The inhabitants of Rome exported it from the island of Mallorca to the Mediterranean, however, only successful people could afford to finish the oven with majolica.
The glazed layer on the tiles was created for a reason. It is considered to be an additional layer of insulation that retains heat in the middle of the tile. Due to this property, majolica has become a very popular facing material for ovens made of bricks. It gives the stove a bright and festive look.
Tiles have long been used in cold countries. By their own design, the old tiles were quite different from the tiles. They were made in the form of rectangular ceramic boxes attached to the brick wall of the furnace with metal pins.
The void between the brick and the surface of the tile served as an air cushion, which accumulated heat and gave it away little by little. Thanks to this, tiled stoves have gained their popularity in northern Russia, Germany and Holland. It is not just that the stoves laid out with tiles have received the name "Dutch women".
to come back to the beginning
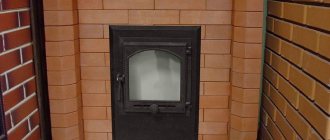
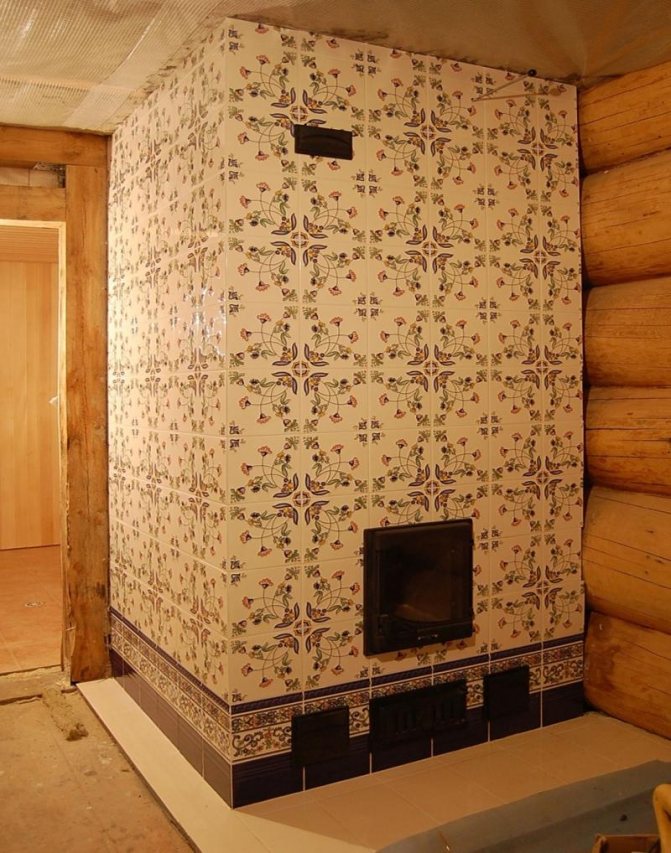
Decorating the stove with tiles
The tiles are handcrafted ceramic tiles specifically for the cladding of stoves and fireplaces. They are resistant to high temperatures, so they can safely be used to decorate the outer walls of the ovens. On the reverse side, they have ceramic boxes (tumblers) for mounting in brickwork. Stoves were decorated with tiles both in merchant houses and in imperial palaces. The advantages of this material are that it is easy to clean, does not let flue gases into the room, it has a high heat transfer and heat capacity, due to which the stove gives off heat for a longer period of time. Real tiles must be made entirely by hand, so there is a wide variety and range of colors, shapes, sizes and prices.
Facade tiles for brick and ceramic granite
Brick facade tiles are made from a mixture of chamotte, clay and mineral dyes. The resulting mass is compressed under high pressure, after which it is fired at high temperatures.
The resulting tile stands out for its strength, heat capacity and low porosity. With the help of various additives, it takes on very, very different shades. Thanks to this, brick-like facade tiles have become a very popular facing material for stoves made of bricks, capable of matching almost any design.
The scheme of finishing the stove with tiles.
Porcelain stoneware is a composite-based material that emerged in the 1980s and immediately became very popular. It was invented in Italy. A mixture of clay, sand, granite and marble with the addition of natural dyes is pressed at high temperatures and under very high pressure.
In the end, a monolithic material without pores is obtained, shock-resistant and excellent heat retention. Ceramic granite can be given any color or shade, as well as texture, which makes it so popular in the field of building materials and finishing works.
Porcelain stoneware tiles copy terracotta tiles, majolica, tiles and natural stone. At the same time, it is much cheaper and more functional.
to come back to the beginning
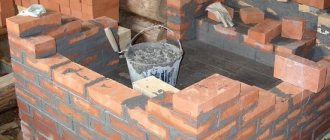
The choice of bricks for cladding
An incorrectly selected building material will lead to rapid deterioration of the finish, which may entail the need for reconstruction and additional costs.
Therefore, this work must be taken seriously. On the construction market, there is a large selection of stone products that are created for various types of work. However, not all of them meet the operational characteristics of the fireplace cladding. The finish must be correct, and only two types of bricks are suitable for this:
- fireclay (refractory);
- red, hollow or full-bodied.
It should be borne in mind that this brick must withstand constant temperature drops and a regular change in the heating-cooling process, as well as be resistant to high temperatures.
Chamotte is made of refractory clay, thanks to which it becomes durable and invulnerable to heat. Therefore, it is most often used to decorate a fireplace with your own hands. Red brick is not so resistant to the effects of large temperature fluctuations. Most often, this building material is used for facing buildings where contact with fire is not expected.
When choosing a material, there should be no cracks on the surface, and the masonry should have a flat surface.
Furnace cladding material and tools
The process may require:
- plumb line;
- level;
- roulette;
- Master OK;
- putty knife;
- container for solution;
- paint brush (wide);
- tile cutter (angle grinder);
- iron brush;
- mallet (rubber or wood with a rubber top);
- a hammer.
Also, when facing, you will need nails, self-drilling screws, tile crosses, and a clean rag.
A mortar for plastering brick kilns is prepared from cement (grade not lower than M400), clay and sand. The ratio is recommended to select the following: 1.0 part of cement to 3.0 parts of clay and 0.2 parts of sand. The sand is needed small, but the type of clay does not play a role.
to come back to the beginning
Brick stove decoration
Finishing work of a brick stove is carried out in stages.
Tools for finishing work.
The initial stage is cleaning the surface from dust, dirt, expanding and deepening masonry joints between bricks (up to 1 cm). Cleaning is carried out with an iron brush or an "angle grinder" with a special attachment. Then the bricks are wiped with a wet cloth.
The second stage - the surface of the furnace is covered with a mesh made of metal (the width of the cells is not more than 150 mm). It is fixed with carnations or with self-tapping screws at the discretion of the master in places where the temperature is highest (furnace flap, surface for cooking food). A metal corner is fixed in the corners of the furnace. This frame will make it possible to avoid surface deformation during the working period and during the further operation of the brick stove.
3rd stage - application of a plaster layer to the wire frame. Its surface is carefully leveled using a level and a plumb line, so that later you can easily glue the tiles or fix the tiles. A layer of plaster is allowed to dry, after which some masters recommend to flood the stove and warm it up properly.
The fourth stage is the actual gluing of the tiles. It must be said right away: the process of fixing tiles is very peculiar, it is better to entrust it to competent specialists. For gluing, a specialized heat-resistant glue is used, produced for fireplaces and stoves. Before starting work, the tiles should be sorted out so as not to get chipped, cracked or with damaged glaze. They begin to glue the tiles from the bottom, using a level, checking and correcting each row. Masters advise first to glue tiles at the corners and lead each new row from them. To make the distances between the tiles similar, crosses are used.
The fifth stage is grouting and impregnation with a heat-resistant compound. The latter will keep the surfaces of tiles and seams from dirt. Allow the glue to dry for 3 days before grouting. Having prepared the mixture (detailed instructions are placed on the package), it is applied in an even layer. In order for the grooves of the seams to be filled in the same way, the masters recommend doing this with a pistol used for the sealant. After completing the work, wash the surface and remove the remains of the mixture.
Now you can say everything, the oven is ready. And already a day after the completion of all the work, you can begin to heat it.
Self-lining oven
In this note, the reader can find out the answers to the questions: how to decorate a brick stove, what materials to use for this, and also learns the technological characteristics of one or another type of cladding.
In addition, detailed instructions will be presented here, which will describe how to do the finishing work on the stove in the cottage with your own hands using selected technology.
A simple home oven.
Decoration without cladding
There are many design options for stoves made of brick, but here we will talk about the most popular types of cladding that combine affordability, practicality and a suitable appearance. .
One of the fairly common and cheap methods, which is very often used in the construction of stoves in houses outside the city or in the construction of fireplaces, is considered to be decorative brickwork. In this case, the role of decorative design is played by the surface of the external bricks and the seams between them, in other words, the entire Part, which is visible from the brickwork. (See also the publication How to veneer the basement of a brick house: options.)
When choosing this option, this moment must be provided even at the construction stage and used for the outer row of brickwork if there is a possibility of the most even brick without flaws and cracks. At the same time, great attention must be paid to observance of right angles, to prevent deviations from the vertical and horizon, and also to look after the uniformity of the joints between the bricks.
Decorative brick laying.
Further, certain tips will be offered for decorating the outer rows of brickwork in a decorative style:
- The outer wall surface should be as smooth as possible, without cracks, cracks and empty spaces, otherwise, during a certain time, dust accumulating in them when heated from the stove may emit a fetid odor.
- To give a more dramatic appearance on the corner edges of the outside of the brick, you can remove a small chamfer with a grinder.
- Use a mixture of asbestos powder with cement as a mortar for grouting joints between bricks.
- To give the grout of different colors, finely ground brick flour, black clay powder or other inorganic dyes can be added to the solution.
- After grouting, it is recommended that the joints be routed using a long flat plank and a convex jointing tool. When joining, first of all, it is necessary to process all the vertical seams, and then the horizontal ones.
- If you wish, you can whitewash the oven with a solution of slaked lime and salted water at the rate of 100 grams of sodium chloride per bucket of water.
- Doors, blowers and other metal elements can be painted with heat-resistant silicone enamel.
It must be said that the decoration with brickwork can also be used for metal stoves, for example, facing a stove for a bath with bricks is often used to increase safety and improve its beautiful qualities.
The photo shows a brick for masonry with decorative elements.
Advice! Before finishing the brick stove with whitewash, it is recommended to grind the surface from the outside. To do this, the wall must be carefully sanded with a half of an ordinary red brick soaked in water.
Surface plastering
If, for example, the appearance of unfinished brick does not correspond to the entire style of home decoration, the stove can be plastered with clay lime or gypsum mortar, followed by painting with interior water-dispersion paint. Also, this method is perfect for the restoration of old or decorative design of previously built stoves. (See also the publication Plaster for decorative work from putty: subtleties of design.)
Facing a brick stove with a plaster mortar can only be done after the brickwork has completely dried.
The sequence of actions is as follows:
- It is worth removing the mortar from the external masonry seams to a depth of 10-15 mm, and cleaning the furnace surface with a metal brush.
- Fix a metal mesh with a mesh size of 10-20 mm on horizontal and vertical planes.
- To fasten the mesh during the construction of the furnace, it is necessary to provide for the laying of a whisker made of soft steel wire. If this is not possible, it can be fixed with nails with a 100 mm step, placing them like in chess.
- Before applying the solution, you need to warm up the oven to a temperature of 50 - 60 ° C.
- A ready-made plaster solution is required to be applied to a moistened heated surface in several layers with a transitional drying of each layer.
- Apply the solution by scattering it with an iron trowel or spatula. and then rubbed with plastic or wood grout.
Plastering on an iron mesh.
Advice! When preparing plaster mortar on your own, all dry important parts (sand, cement, gypsum, etc.) should be carefully sieved with a very small construction sieve.
Tile application
The most of the rather practical options for how to decorate a brick stove is the laying of tiles. Due to the fact that its outer part is covered with glaze, it has a beautiful appearance, and it also becomes much easier to care for its surface.
The main difficulty of a good fixation of the tile is that the surface of the stove, while heating up, then cooling down, regularly changes its own geometric dimensions. In this case, insufficiently securely glued tiles can fall off, and firmly glued tiles can burst in two.
Facing with brick-like ceramic tiles.
As a result, ceramic tiles can only be installed on plastered furnaces with a lined combustion chamber. For lining, the combustion chamber is lined with a layer of fireclay bricks inside, thereby reducing the difference in temperature differences.
Further, certain recommendations for finishing the stove with ceramic tiles will be presented.
- It is better to use small tiles as a cladding material. In this case, the effect of different coefficients of thermal expansion of materials is less pronounced.
- Before tiling on plaster, a metal mesh with a mesh size of 10 mm should be reinforced with screws with wide washers.
- To fix the tiles, use special adhesives that are intended for finishing work on stoves. Despite the fact that their price may be slightly higher, they are specially designed for operation in very high temperatures, and after drying they have sufficient elasticity.
- Grouting of tile joints can be performed using ordinary grouting mixtures, if necessary, adding inorganic pigment dyes.
Refractory tile adhesive.
You need to pay attention! The decorative design of the stove, in addition to its beautiful qualities, also makes a useful role. no matter how to finish the brick oven. plaster or ceramic tiles, the finishing material increases its physical mass, as a result of which its heat capacity increases.
What oils and drying oils are suitable for wood
Caustic quicklime for whitewashing walls before being used in business turns into slaked lime, which is achieved by extinguishing it with water. Caustic lime is placed in a box designated for extinguishing and a sufficient amount of water is poured onto it, and extinguishing occurs, that is, a strong absorption of water. At the same time, the lime is very hot, boils and emits a lot of thick steam;
If a lot of water is taken during extinguishing, then the lime will weaken its strength, and if it is not enough, then quicklime and, therefore, unusable pieces will remain in the lime.These are the main aspects of how to properly dilute lime to whitewash the walls, if you follow them, then the preparation of a working solution will not seem difficult.
As for the amount of water required for slaking lime, it is not always the same and depends on the composition and quality of the lime taken. That is why water is not poured into lime immediately, but gradually, until all the lime is extinguished.
Lime gives on water a very common strong white paint for cheap brick and plaster work.
Lime destroys organic colors, but with earthy colors it gives strong tones.
Spar, light and heavy, serves as an admixture in paints to make them cheaper; it does not affect the color, but it weakens the roofing performance. A surrogate, although common, but unscrupulous.
Most of the paints are diluted with oil, which is of mineral, vegetable and animal origin. Mineral oils include oil, rock wax, etc.
In the painting business, oil and drying oil for wood are used exclusively of vegetable origin, obtained from the seeds of various plants and mainly flaxseed. About which ones are suitable - you can find out further in the article.
Vegetable oils are very diverse in composition and are commercially available in solid (Japanese wax), thick (coconut oil), and liquid (linseed oil).
All vegetable oils in the air, with prolonged standing, are oxidized, thicken and bitter.
Liquid and lubricating oils tend to be viscous, harden and are able to form a beautiful elastic, rubber-like mass.
We suggest that you familiarize yourself with the Scheme of water treatment of the overflow pool
The second: wood, olive, almond, rapeseed, rapeseed, mustard, beech, castor, etc.
Flaxseed oil is extracted by pressing flaxseed. Cold pressing produces the best grade of oil with a pleasant smell and light yellow color, which makes it possible to eat it.
In oil mills, however, cold pressing is considered disadvantageous due to the relatively low oil yield and is replaced by hot pressing, and the resulting product will be darker in color with a strong odor. Such crude oil is used almost exclusively for the preparation of drying oil (boiled butter).
As for the quality of the oil, it depends on the method of preparation and the quality of the seed from which it is prepared.
Since linseed oil is a rather valuable product, it is often mixed with various impurities that spoil its quality. The most common impurity in linseed oil is mineral oil. Such drying oil usually dries poorly and gives tack. If you look at it through the skylight, you get a bluish tint, which, however, is not always noticeable, because recently, well-purified mineral oil (colorless) has been used as an admixture.
Of all vegetable oils, flaxseed oil is the most widely used in painting, representing the best product for preparing flaxseed oil.
Poppy oil is obtained from poppy seeds by pressing at ordinary temperature, or by heating. In the first case, the oil will have a light color, pleasant taste, and therefore such oil is usually used for food. In the second, the dark color and bitter taste due to the abundance of impurities make such oil suitable only for technical use, such as in the preparation of expensive dyes. For ordinary painting work, this oil is rarely used.
Sunflower oil is extracted from the seeds of sunflower, which grows almost everywhere in Russia and is sown especially a lot in Little Russia, southern provinces and the Caucasus. The color of the oil is golden yellow, fresh has a pleasant taste and smell and is readily consumed in food. Sunflower oil is mainly used for the preparation of light drying oil, for the cultivation of white and light colors.Dries much slower than linseed. With inept preparation, such drying oil gives a touch and takes on a red tint.
Drying of vegetable oils is based on the ability of these oils to absorb oxygen from the air, which, however, occurs very slowly in crude oils. To accelerate this process, the oil is subjected to high temperature together with oxygen-rich substances, which partly dissolve themselves, partly give up their oxygen to the oil. For this purpose, red lead, silberglet, manganese peroxide and others are used.
When cooking for making linseed oil from sunflower oil at home, one must not forget that an excess of oxides, or the so-called drying, adversely affects the strength of the drying oil and the paints prepared on it.
Making small amounts of butter at home is difficult and requires a lot of skill, as the slightest oversight can ruin the whole job. If the oil is overcooked, then it will dry poorly and give tack, while undercooked will have its own, no less significant disadvantages.
Any pure, quick-drying vegetable oil without impurities can be suitable for the preparation of drying oil. The best oil in this respect should be considered old linseed oil, exactly the one in which, from time and long standing, impurities, mucous substances managed to settle and water separated.
High-quality oil is poured at least 4.5-9 cm below the upper edge of the kettle so that during boiling it cannot overflow and burst into flames.
A not particularly strong fire is made under the cauldron and, without covering the cauldron with a lid, the oil is allowed to boil for at least 2 hours, after which a little bit of red lead and zilberglet are added, counting 400 g of zilberglet and 100 g of red lead per 16 kg of oil, with constant stirring with a wooden paddle. The oil is allowed to boil for 1-1.5 hours, and then the fire from under the boiler must be extinguished and the oil must be gradually cooled.
How long it takes to cook linseed oil from sunflower oil cannot be determined with accuracy, since here it is necessary to conform to the quality of the oil. Usually, the following practical method is followed in order to find out if the oil is cooked enough or not: dip the end of a goose feather in boiling oil, and if the feather curls into a tube, then this may be a sign that the oil has cooked enough, otherwise the feather will not bend ...
During the cooking of drying oil, cases of oil ignition are very possible. Then the boiler must be immediately covered with a metal lid, but by no means fill the burning oil with water, which can cause a dangerous explosion. Before making drying oil from sunflower oil, you need to study all the technologies and safety rules.
It should be generally noted that home cooking of drying oil should be avoided, the quality of the resulting product is not always satisfactory. That is why there is no calculation to cook it at home, but it is better to buy ready-made linseed oil. Buying oil from reputable companies that are specially engaged in cooking in large sizes, in specially prepared apparatus and devices, you can completely guaranteed to get a homogeneous product of good quality, which is especially necessary in the production of painting work.
In some cases, it is possible to make linseed oil from the oil cold by adding 3 to 5% paint drier to the crude oil.