What is "Penofol" and its analogues
Thin polymer insulation is made from the following materials:
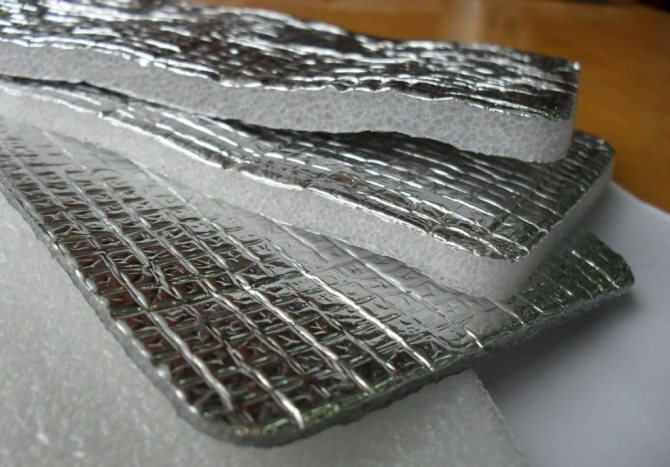
- The main insulating layer is 3 ... 10 mm thick foamed polyethylene with closed air pores. The thermal conductivity coefficient λ of this interlayer is within the range of 0.037—0.051 W / (m • ° С), depending on the operating conditions.
- The outer reflective layer is 14 micron thick aluminum foil, securely glued to the polymer base.
- The third layer on the back of the polyethylene can be glue for ease of installation, or the same aluminum.
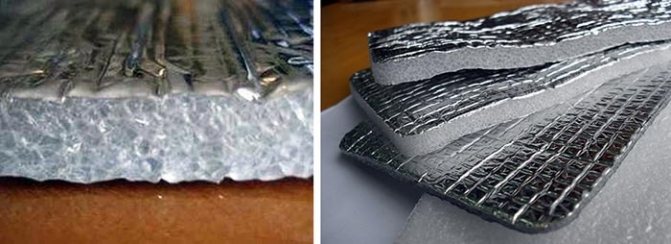
Reference. All specifications are taken from the manufacturer's official website. Thermal insulation performance of other brands may vary. For example, the thickness of a similar material reaches 150 mm.
The peculiarity of the material is impermeability to moisture, the declared indicator is simply scanty - 0.001 mg / m • h • Pa. The insulation is quite light - the density is in the range of 16 ... 35 kg / m³, it is sold in rolls. Due to these parameters, the material serves well as an internal vapor barrier.
Penofol is available in 3 versions:
- two-layer type A;
- three-layer - the base is covered with aluminum on both sides (type B);
- the same, with an adhesive layer - Type C.
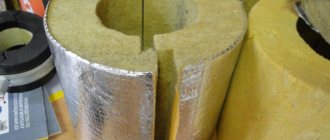
The foil side acts as a reflector of the radiant (infrared) component, the polyethylene foam resists direct heat transfer. For wall cladding outside, the perforated version of "Penofol" is offered, shown in the photo. Many small holes are intended for the escape of water vapor from the thickness of building structures.
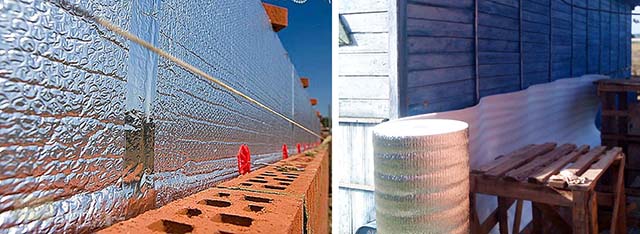

The outer wall cladding is made with a special perforated insulation
Distinctive characteristics of work on insulation of the ceiling with penofol
Penofol is a material made from synthetic products and has several layers. At the heart of the insulation is foamed polyethylene foam, which, due to its characteristics, is considered an unusual heat insulator. So, from the outside, it is covered with aluminum foil with a thickness of 10 microns. The main function is to reflect heat in the direction where it is needed. It is noteworthy that the surface in the form of a mirror retains up to 97% of heat.
Penfol is also divided into several groups of modifications, which differ in a metallized shell on one or both sides, as well as the presence of an adhesive layer.
Penofol insulation has unique characteristics that prevent heat leakage through convection, conduction and IF radiation. At the same time, other types of modifications are deprived of this degree of protective properties. It is noteworthy that penofol has the ability to replace several other types of heat insulator at once, or 1, but with a large thickness.
For your information: the average thickness of penofol is from 2 to 10 mm. There are also more massive models on the market, but experts note the inconvenience of installation.
This insulation is used in everyday life and production as the main heat insulator, and as an additional one. In addition to the main functionality, it also solves the problem of vapor barrier. In view of this, it is used in hammam, steam bath, sauna and steam rooms.
When installing penofol, you should know that it cannot be fixed on self-tapping screws or nails. Otherwise, the material will lose its ability to reflect heat. Therefore, the manufacturer advises to mount the insulation with glue. 100% efficiency is achieved when there is a gap of 1.5-2 cm between the ceiling and the canvas. As a rule, after installation, an overlap is installed under the material.However, in rooms with high humidity (basements, garages and industrial buildings), specialists leave the material without decorative design.
Most often, penofol is used in tandem with foam. In this case, an auxiliary material is installed with the first layer, and then the main insulation is fixed on it. The "pie" is covered with plasterboard. As a result, a microclimate is created in the room in which cold does not enter inside, but heat does not evaporate.
Penofol properties and characteristics
Penofol is a rolled multilayer insulating material consisting of expanded polyethylene with a closed cell structure and a layer of aluminum foil. It has the property of reducing heat loss in a convective and radiative way. In terms of efficiency, the material surpasses other insulating materials due to its high moisture resistance, minimum weight and several times smaller thickness.
The efficiency of reflection of heat waves due to the use of a polished foil layer is more than 97%. Its thickness is only 12-30 microns.
Due to the cellular structure filled with air, the thermal conductivity is significantly reduced, which is 0.037-0.052 W / m · K, with a thickness of the polyethylene layer up to 10 mm. The level of water absorption is also minimal and does not exceed 0.7% of the total volume.
It is important to note that the vapor permeability of the insulation is not violated, the value of which is from 0.001 mg / m ∙ h ∙ Pa. This allows it to contact without problems with wood and other natural materials without the appearance of condensation, mold and mildew.
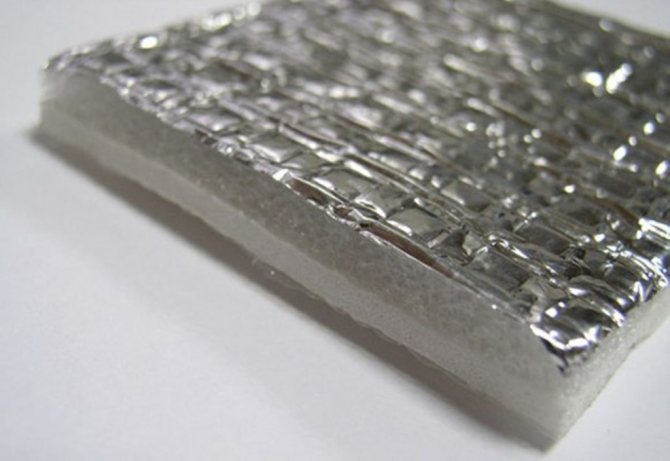

Penofol close up
Insulating a house from the inside with penofol is also beneficial due to its following characteristics:
- operating temperature range from -600C to + 1000C;
- resistance to compressive stresses up to 0.035 MPa;
- sound insulation level up to 32 dB;
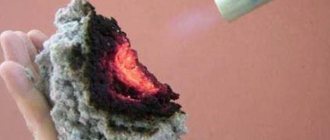
- the material belongs to the class of hardly flammable;
- standard roll sizes: width from 58 to 120 cm, insulation area 18-36 m2;
- specific gravity 44-74 kg / m3;
- specific heat capacity 1.95 J / kg · K.
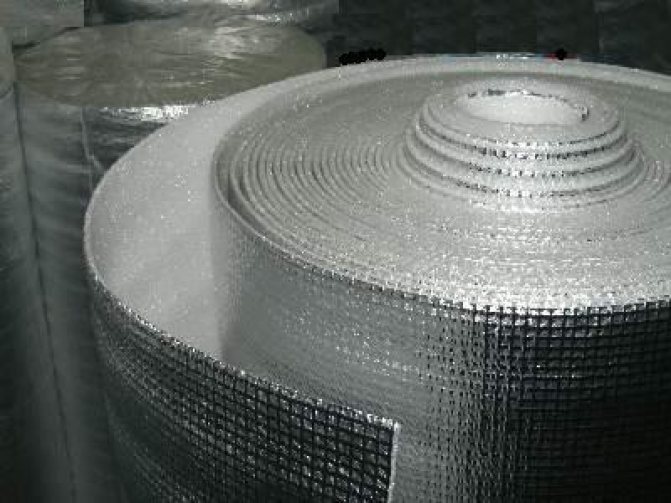

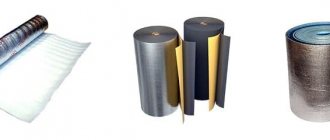
Penofol with a one-sided foil layer and a self-adhesive base
Features of Penofol and its insulation from the inside
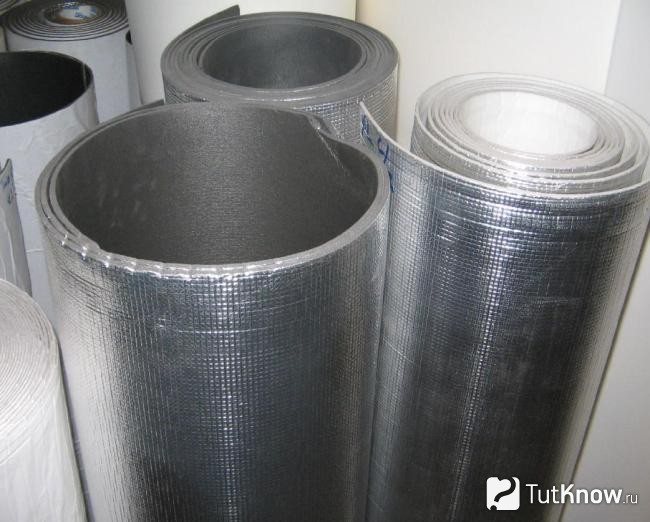

Penofol belongs to the category of very thin polymer-based insulation that is produced using the foaming process. The base is polyethylene foam, which can have various thicknesses, structures and densities. The material owes its name to it.
Subsequently, a layer of reflective aluminum foil is attached to the layer of such polyethylene. It can be fixed on one or both sides, polishing it to such an extent that the reflection coefficient reaches 97%. It is applied by heat welding.
Penofol manufacturing technology gives it a closed structure, which is why this insulation is not able to pass moisture and water vapor. As for the foil, its main task is to reflect back the heat flows passing through the room.
In principle, the insulator resembles a classic thermos. If you insulate the walls from the inside with foil-clad Penofol in the house, then in the cold months it will keep it warm, and in the summer - cool. If other heat insulators keep the heat that comes out of the room, then the material with an aluminum layer reflects it.
Wall insulation with Penofol from the inside can be done in one of 3 varieties of this material: type A - foil on one side; type B - foil on both sides; type C, where on one side there is an adhesive base, and on the other - foil. One of the most popular last types can be considered Penofol, pasted over with foil on one side, but at the same time many small holes are punctured in it. Such a perforated material becomes vapor permeable.
Penofol is produced in various thicknesses - from 3 to 10 mm. In some cases, when material is required for harsh climatic conditions, the thickness can be increased to 40 mm. Its ultimate strength during compression is not less than 0.035 MPa.
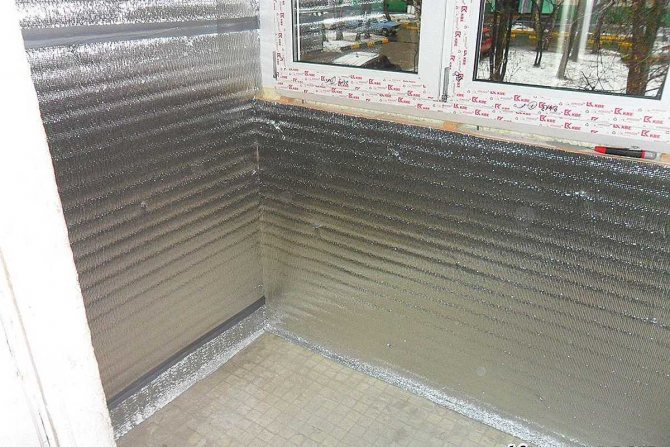
The scope of this heat-insulating material is internal insulation of residential and industrial premises, including walls, as well as balconies and loggias. The range of temperatures at which it can be used is from -60 to +100 degrees Celsius.
Penofol has proven itself as an independent heat insulator or a middle layer of insulation when protecting baths, attic rooms, showers, basements. With its help, heat reflection of household batteries, insulation of floors and pipelines, as well as various communication systems are produced.
Truly effective results in insulation can be achieved by combining Penofol with other materials. The combination with other heat insulators allows you to increase the layer thickness, which will create the necessary margin of safety for severe frosts. The Penofol foil itself perfectly reflects moisture, as a result of which the entire structure is operated for a long time.
Scope of application
Due to its high technical characteristics and versatility, penofol is widely used as a heater, both in the industrial sector and in the arrangement of residential buildings, household agricultural buildings.
In the construction of buildings, foil-clad material is used for thermal insulation:
- ceilings;
- floors;
- external and internal walls;
- windows and doors;
- roofs and attic spaces;
- basements.
Penofol is used for thermal insulation of various types of pipelines, ventilation, heating and water supply systems, as well as railway cars, trucks and cars.
Material application
Penofol is a foamed polyethylene, covered with aluminum food foil on one or both sides. The finished insulation thickness does not exceed 10 millimeters.
The popularity of penofol as a building material is explained by its properties: it does not absorb thermal energy accumulated in the room, but reflects it. The purpose of this material is to trap warm air in winter and cool air that has accumulated in the room during morning ventilation in summer.
Pros and cons of wall insulation with Penofol from the inside
The material has more than enough advantages - it is not for nothing that it has become so widespread. Let's name the following positive qualities:
- Saving usable floor space
... This became possible due to the small thickness of Penofol in comparison with other heaters. At the same time, it can replace heat insulators with a thickness ten times greater. - Good thermal insulation
... Provided by the reflective ability of the material. - High degree of environmental friendliness
... The insulator is practically non-toxic, because it is made on the basis of aluminum foil and polyethylene, which have long been used in the food industry. - Fire safety
... This quality is due to the fact that Penofol is classified as a non-flammable material. - Low vapor permeability
... In this case, it does not matter what the weather is outside the window, since moisture is not absorbed by the insulation. - Sanitary safety
... Penofol is considered a material that is difficult to reach for rodents. - Easy to transport
... This is due to the fact that the heat insulator is rolled up and easily transported. - Excellent sound insulation
... If such material is mounted on the main structure, then it will help protect against acoustic noise. - Ease of installation
... Penofol can be easily cut with any knife, and it can be fixed not only with small nails, but even with tape. But at the same time, it is difficult to break or crumble.
However, as is the case with other heat-insulating materials, Penofol also has certain disadvantages. They are as follows:
- The need for an additional layer that will help in reflecting heat energy and protecting against moisture ingress.
- The lack of sufficient rigidity does not allow using it under plaster or wallpapering. The material can be pressed through with light pressure.
- The need to use special adhesive mixtures, since the insulator is not recommended to be nailed to the wall - from this it loses some of its heat-insulating qualities.
Advantages and disadvantages
The main advantages of penofol include:
- Low vapor permeability. Polypropylene is vapor-proof. There is no need to apply additional vapor barrier measures.
- Low thermal conductivity. In terms of the efficiency of keeping heat in the room, half-centimeter penofol is comparable to mineral wool, at least 1 cm thick.
- Resistant to moisture. Regardless of installation, penofol does not absorb moisture.
- Endowed with high sound opacity. Material of this class is regularly used in order to make the room soundproof.
- Refractory. In the event of fire, the material melts rather than burns.
- Has a small thickness. From 3 mm. up to 1 cm.
- Flexible. Convenient to work with.
- Lasting.
- Does not require complex installation technologies.
- It is lightweight, which greatly facilitates transportation and installation.
- Affordable price.
- Easy. Does not load bearing elements.
The disadvantages of penofol are as follows:
- Due to the presence of the foil in the composition, it is a conductor of electric current.
- Possesses poor adhesion, as a result of which fastening with glue is impossible. The use of specialized tape or staples is required.
- The low rigidity of the material leads to its deformation. Hence, its application for separate purposes is not possible.
Views
There are 3 main types of penofol, depending on the production technology, dimensions and technical characteristics:
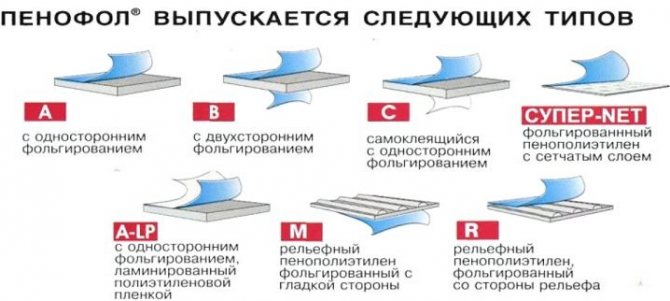

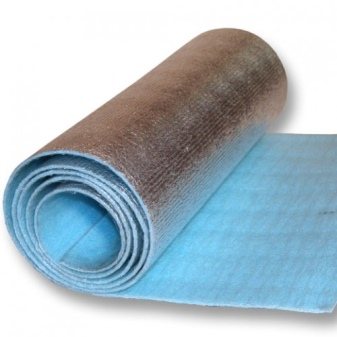
Type A
Polymeric insulation material of various thicknesses, foil is applied only on one side of the building material. This type of heater is popular in the complex insulation of building structures; it can also be combined with some heaters: glass wool, mineral wool.

Type B
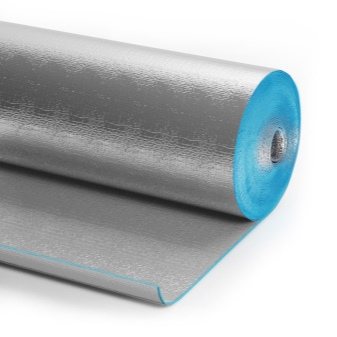
Insulation covered with foil on both sides. Thanks to this design, the material has the maximum insulation effect.
This type of insulation is used for thermal insulation of load-bearing structures of the attic, waterproofing of basements, floors and walls. The foil material laid under the roof prevents heat from entering the room.

Type C
Self-adhesive penofol, which is covered with foil on one side, and on the other, a thin layer of adhesive coated with a film is applied to it. Depending on the size of the product, it is used on almost any surface, which saves time. Before starting work, this building material must be cut into strips of a certain size.
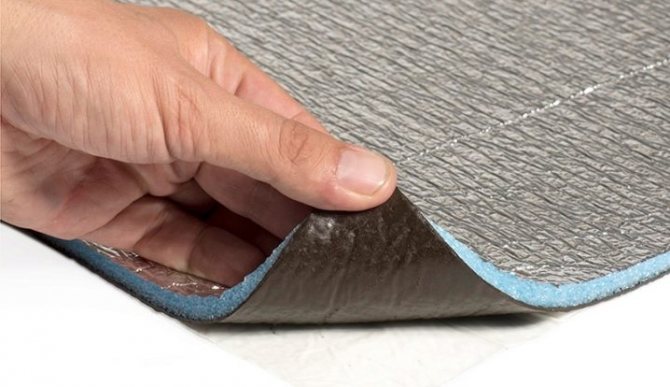
Regular penofol (types: A, B, C) has a white base, while penofol 2000 has a blue base.

There are several more types of penofol that are not in great demand among consumers.
R type
One-sided insulation, which has a relief pattern on the foil side of the insulation. It is similar to type A penofol, but it is mainly used as a special decoration element for interior decoration.
What is Penofol?
Penofol is a building material, the main task of which is heat and sound insulation. Consists of several layers: two layers of foil and a base made of pre-foamed polyethylene.
It is used as the main and additional heat-insulating material. The heat reflection coefficient is 96-98%.
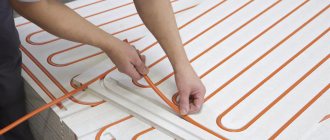
Penofol will be the main source of thermal insulation in a room with acceptable heat losses (baths, rooms in which a heat source is installed). They will be used to create a "warm floor" system. However, we do not recommend doing this and wrote a separate article about it.
It will serve as an additional insulation in the process of carrying out complex thermal insulation of residential and industrial premises. It is permissible to insulate the house with penofol from the inside, and during outdoor work. The temperature range is in the range from "-60" to "+100" degrees Celsius.
Penofol is used both on a civil and industrial scale as a heater: floor, ceiling, walls, basements, roofs, attic. It is used in hydro and thermal insulation: door and window openings, water heating elements, air conditioning systems, pipelines.
The use of penofol was noticed in the process of assembling a car as insulation of interior elements.
Dimensions (edit)
Penofol is produced in rolls of various lengths, the maximum size of which is 30 m. The width of the web varies from 0.6 to 1.2 meters. The thickness of the material depends on the type of foam foam. Standardized material thickness: 2,3,4,5,8,10 mm. In rare cases, 40 mm thick materials are produced.
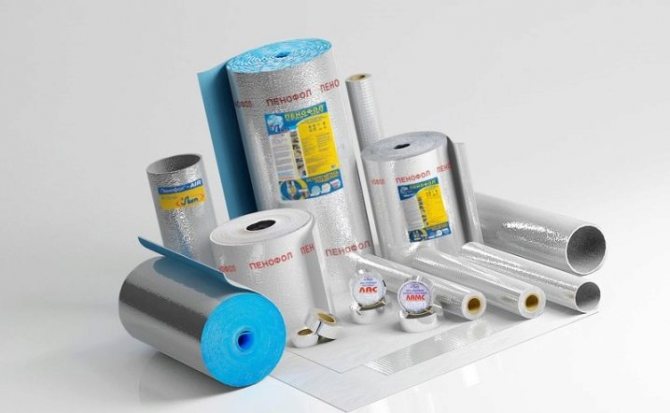

The foil material, which is 1 cm thick, has a high level of noise protection and retains heat much better. Insulation with a thickness of 5 mm, which has high technical characteristics, is very popular.
Penofol is available in rolls. The standard length of the rolled sheet depends on the thickness of the building material and is 5, 10, 15, 30, 50 m.
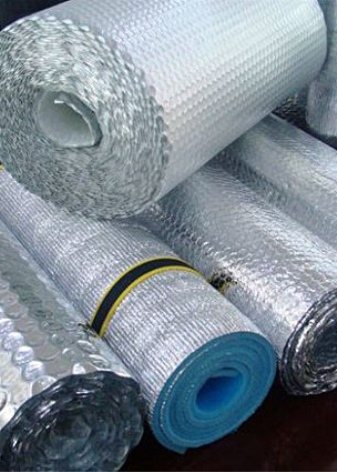

The nuances of installation technology with penofol
Foil penofol is one of the best materials for home insulation. With its help, it is possible to provide high-quality thermal insulation of both the inner and outer parts of the building. At the same time, the entire installation process is not particularly difficult, and you can do the insulation yourself.
Tools and materials
To insulate a residential building, it is enough to use penofol brands "A", "B" and "C". To install it, you need to select the following tools:
- chancellor's knife;
- construction stapler;
- a hammer;
- screwdriver;
- roulette.
The following materials will be used during the installation process:
- penofol in rolls;
- wooden slats with a thickness of 1.5 to 2 centimeters;
- staples;
- adhesive composition;
- self-adhesive aluminum tape.
The fixing of the insulation can be best done by means of staples, but self-tapping screws are also well suited for these purposes.
Insulation of the walls of the house from the inside
Internal thermal insulation of walls with penofol will allow not only to keep warm in the house, but also to protect against moisture formation. The installation of the material is carried out in the following sequence:
- Fasten the slats vertically to the wall surface. It is recommended to keep the distance between the wooden elements 60 centimeters, since the width of the insulating material is 1 meter 20 centimeters. Such parameters provide a convenient use of foil-clad canvas.
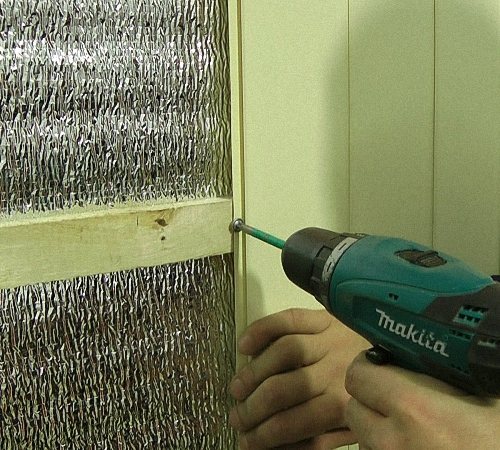
- Lay penofol on the wall between the wooden frame. Thermal insulation sheets should be placed with the reflective side inside the room. Laying is done so that the edges of the material are in the middle of the installed strip. Each next canvas is mounted end-to-end to the previous one. The material is fixed to the staples.
- Ensure sealing of the seams. All joints should be glued with a special self-adhesive tape.
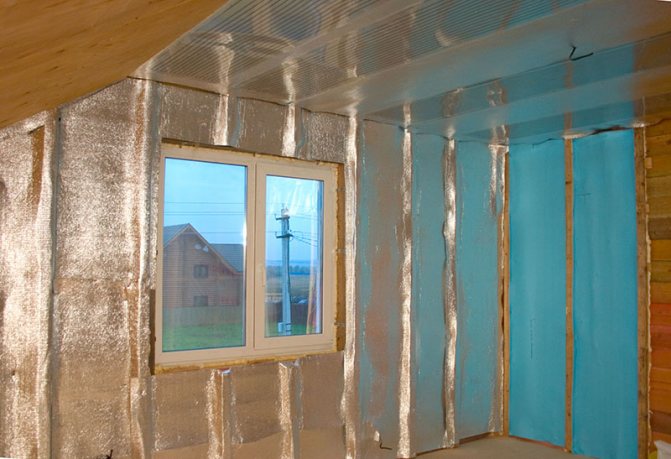

Penofol insulation of the walls of the house from the inside
A frame made of wooden slats is stuffed onto the insulated surface of the wall. Its design depends on the type of future finish.
Ceiling and roof cladding
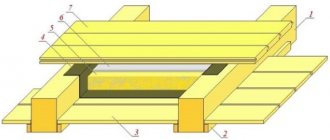
Preliminary insulation of the slopes of the attic roof is proposed to be done according to the following scheme (shown above in the drawing):
- On top of the rafters, waterproofing is laid horizontally - a diffusion membrane, with a minimum overlap of 100 mm. The order of attaching the canvases is from bottom to top.
- The membrane is pressed against the beams by counter-lathing bars, the horizontal boards of the main lathing are nailed to them. A roof covering is mounted on top - metal tiles, slate, profiled sheet and so on.
- From the inside, horizontal beams 50-60 mm thick are attached to the rafters, the installation pitch is 60 cm.

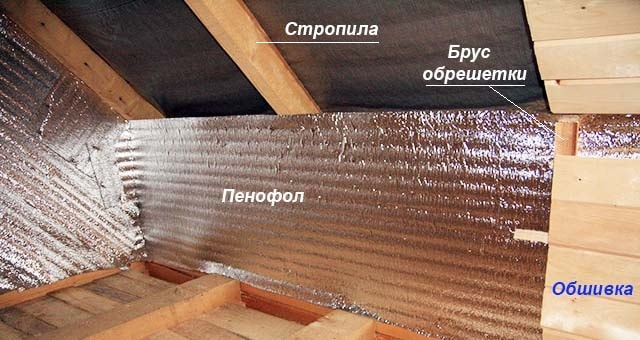
- A three-layer "Penofol" type B with two foil surfaces is targeted at the bars. Note that thin insulation bypasses the rafters so that there is a gap on both sides.
- Internal cladding is screwed vertically to the ends of the bars - lining, moisture-resistant gypsum board, chipboard panels or other finishing materials.
Attention! A roll of "Penofol" is rolled vertically on the surface, adjacent canvases are stacked end-to-end, not overlapping. Carefully glue the seams with aluminum tape.
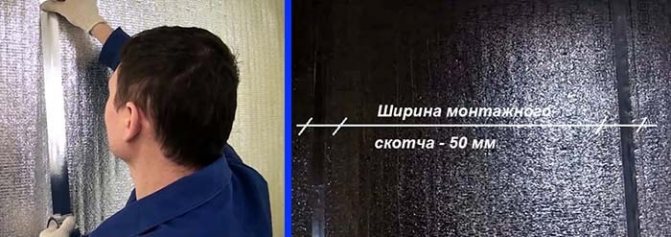

For gluing joints, an assembly tape with a width of at least 50 mm is used
In this case, the insulation reflects heat flows from both sides, which is very useful in the summer, when the metal roof gets very hot. The inner layer remains unventilated, moisture from the outer air is removed through the membrane. Since "Penofol" serves as a barrier to steam, in the attic it is necessary to organize a natural exhaust through a separate ventilation duct.
Please note that an inaccuracy was made in the drawing above - there is no external counter grill, which creates a ventilation duct above the superdiffusion membrane. In the next version of the diagram, which shows the insulating "pie" of the attic roof, the frame of the lathing is clearly visible. What is the difference between this sheathing method:
- Between the rafters there is a thick layer of the main insulation - 120-200 mm of mineral wool.
- The bottom of the mineral wool is hemmed with a two-layer "Penofol" type A right along the ends of the beams. The aluminum faces into the attic room, the canvases are turned horizontally.
- Between the polyethylene and mineral wool insulation, a gap of 2-3 cm is left, from the side of the foil - about 4 cm.
- Bars for interior decoration are nailed to the ends of the beams directly through the polyethylene layer.
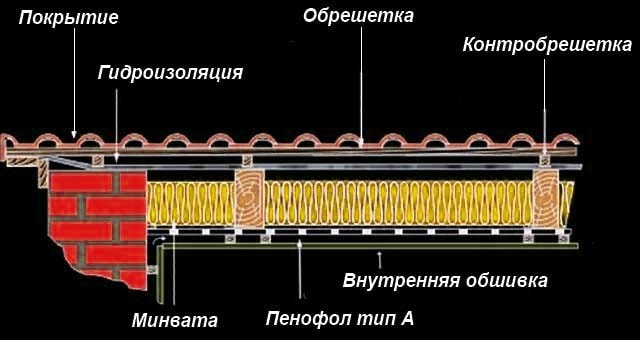

The foil surface faces the inside of the room, a gap is provided between it and the cladding
The section clearly shows that "Penofol" plays the role of an additional insulator and vapor barrier - the traditional film from the inside is not used. The moisture formed in the mineral wool is removed through the upper air and the waterproofing membrane. Vapors from human activity are removed by supply and exhaust ventilation.
Advice. When working with Penofol, it is important to understand the essence: we always leave a layer in front of the foil, we lay the polyethylene base close to the building structures. We connect the canvases only end-to-end.
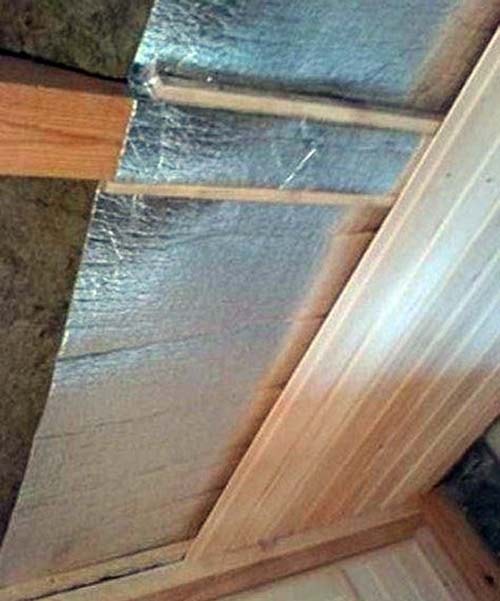

Ceilings are insulated according to a similar principle:
- If from the side of the attic the wooden floor is covered with expanded clay, sawdust or reeds, it is enough to lay 1 layer of "Penofol" type B, making gaps with the help of the crate.
- Type C material can be glued directly to the concrete ceiling, foil downwards. Next, mount the frame for attaching the gypsum board or other finish.
- When capital insulation of the ceiling is required, use an attic scheme, only without the membrane and outer sheathing. Install a frame made of beams or galvanized profiles, insert the main insulation between them, then hem the bottom with type A polyethylene foam.
If Penofol is the only heat flow insulator (which is not always correct), choose the maximum material thickness - 8 ... 10 mm. In tandem with other heaters, a sheet with a thickness of 3-4 mm works well. For more details about the device of the attic roof, see the video:


Floors and ceilings
We would like to warn you right away: when insulating an existing wooden floor, it will not do without opening. It is necessary to remove the topcoat and get to the log in order to properly lay the reflective insulation. The overlap can be insulated according to a simplified scheme, repeating the insulation of the roof:
- A roll "Penofol" type B with a thickness of 8-10 mm is rolled across the log. The material is aimed at the beams in such a way that 2 layers are formed at the top and bottom.
- The second canvas is laid end-to-end with the first, fixed with a stapler, and then glued with metallized tape.
- A subfloor and a topcoat are laid on top of the log.
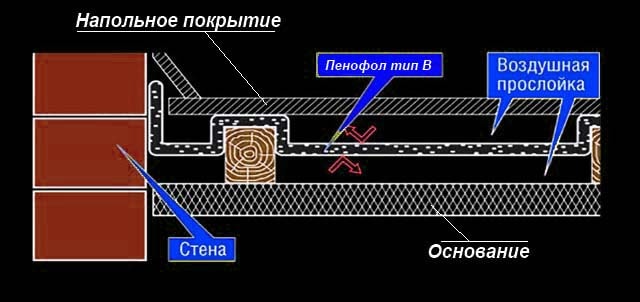

An important nuance. In theory, the roll can be rolled directly underneath laminate or linoleum. But the whole point of reflective insulation will be lost - the aluminum coating will not work.
The second option provides for laying one-sided "Penofol" type A under the rough floors with a foil layer downward. Note: a large cavity remains under the thin insulator, equal to the width of the log. If the room is located above a cold basement or an unheated room, be sure to lay 10-15 cm thick mineral wool between the beams. Do not forget to provide an interlayer of 20-30 mm between the polyethylene foam and the mineral wool.
Heaters
84 votes
+
Voice for!
—
Against!
Penofol is a new generation thermal insulation material. Among the alternative options for insulation, it is distinguished primarily by the presence of a foil layer, because of which it has certain advantages. We will consider the features of the installation of penofol and its application further.
Table of contents:
- Characteristics and properties of foamed foam
- Penofol foil application and advantages
- House insulation with penofol - installation features
- Disadvantages of insulation with penofol from the inside and outside
- Do-it-yourself penofol insulation
Characteristics and properties of foamed foam
Penofol is called foamed polyethylene foam, covered on one or both sides with the thinnest layer of foil, with heat loss, heat is transferred in two ways:
- convection;
- through heat radiation.

But, most heaters are designed to prevent heat transfer in one of the above ways. Penofol is able to prevent both convection and heat transfer of heat. Therefore, its thermal insulation performance is significantly higher than that of alternative types of insulation.
It is precisely because of this structure that penofol is an excellent heat reflector, and does not allow air convection. With an insulation thickness of 10 cm, it is able to retain heat several times higher than a wall made of bricks 50 cm thick.
In addition, this type of insulation is characterized by ease of installation, vapor tightness and good protection against various types of radiation. Due to the presence of good technical characteristics, the material is used both for insulation of residential and public premises, and for thermal insulation of baths, warehouses and pipeline systems.
Foil-type penofol is classified as reflective thermal insulation. Since it is distinguished by the presence of closed pores and polished foil, which allows it to retain heat at a very high level.


In the process of installing foil-clad foam, there is no need to install waterproofing and vapor barrier materials, and, as a result, the costs of carrying out this type of work are reduced.
The most common are three types of foil-clad penofol:
1. Class A materials - differ in the presence of foil on only one side of the insulation. It is used in the process of insulating the roofing sections of the building and utilities.
2. Class B insulation features a double-sided foil coating. It is used in the process of warming interfloor ceilings and various kinds of internal partitions.
3.Penofol C class is characterized by the presence of a foil coating on one side and an adhesive layer on the other. It is used when carrying out installation work in inconvenient areas of insulation.
In addition, there are penofol options with a mesh layer and foil, with a foil coating and a laminated polyethylene film, with a relief polyethylene foam structure, etc.
The material is most often produced in roll form, it varies in thickness from 3 to 10 mm.
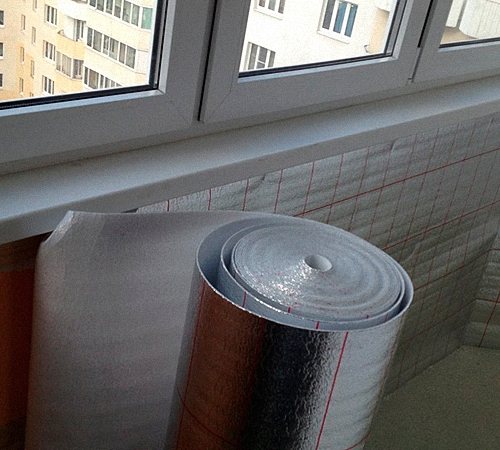

Penofol foil application and advantages
Since the foam cover is made of aluminum foil, it is capable of reflecting about 98% of thermal energy. Thanks to this, a comfortable temperature in the room is maintained: it is cool in summer and warm in winter. Due to its strength and flexibility, penofol fits perfectly on any surface, in addition, it has significant steam, heat and sound insulation characteristics that remain throughout the entire period of its use.
The scope of use of penofol extends not only to residential buildings, but also to industrial and civil construction. It is used for the purpose of performing thermal insulation on ceilings and attic floors, when arranging floors, installing wall panels, to improve the thermal insulation of basements, attics, balconies, air conditioners, air duct systems, technical pipelines, etc.
The material has high insulating properties, and therefore is suitable for thermal insulation of areas where both hot and cold products are transported. The use of penofol is associated with the thermal insulation of vehicles, tents or sleeping bags, on hikes.
Among the advantages of insulation with penofol, the following should be highlighted:
1. Multifunctionality of the insulation.
When using penofol, additional work is not required to ensure vapor and sound insulation. Installation of additional membranes, films and other waterproofing materials is not required. In addition, penofol is installed both inside and outside the room, which ensures its moisture resistance and versatility of use.
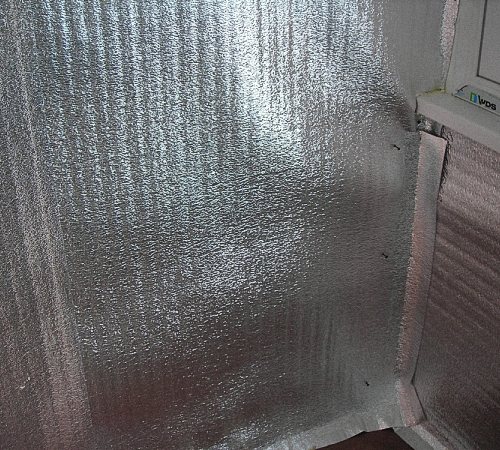

2. Small thickness of the material - high thermal insulation characteristics.
With an insignificant thickness, penofol provides several types of thermal insulation at once, which is very important when arranging areas of a hard-to-reach nature. When installing insulation in the inner sections of the room, the usable area is practically not lost.
3. Availability of a wide range of products.
There is a wide variety of types of penofol, helping to choose exactly the material that is able to fully meet the individual needs of a building or object to be insulated. With the help of penofol, buildings are insulated both inside and outside the premises.
4. High strength and good quality.
Due to the use of advanced manufacturing technologies of the material, it provides minimal heat loss, amounting to only a maximum of four percent. Another advantage of this material is the fact that it is able not only to retain heat, but also convects it back into the room. Due to the special structure, moisture does not penetrate its surface, and the application temperature ranges from -55 to +100 degrees. The principle of its operation is similar to a thermos, in warm weather it gives coolness, and in cold weather - so much needed warmth.
5. Convenience of operation and easy installation.
Since the insulation is in the form of a roll, it is quite convenient during the installation process and easily fits on any surface. In addition, for hard-to-reach areas, a special form is used, on one side of which a foil coating is applied, and on the other - a layer of glue.To install the insulation, you do not need to install additional supports or frame structures, it is lightweight and is fixed directly on the surface to be insulated. Use simple scissors to cut to size. One person is enough to carry out the work.
6. Environmental safety and reasonable price.
The composition of the material does not contain substances harmful to human health or the environment, therefore, it is used without restrictions for internal insulation. Since additional hydro, steam and sound insulation works will not be required, using this insulation will significantly save money.
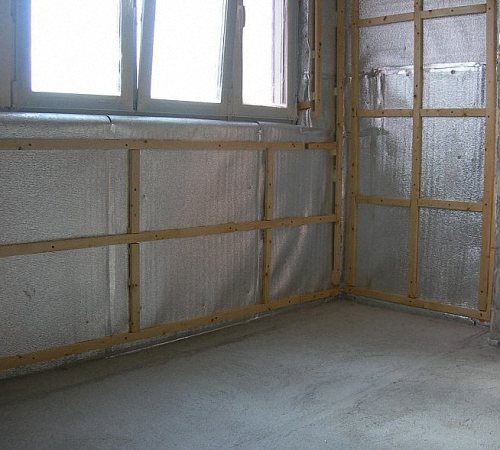

House insulation with penofol - installation features
This material is used as an independent insulation or in combination with other materials for the same purpose. In a wooden house, the insulation of a loggia with pelofolol is very simple and easy. Since it is glued to the wall before finishing it. In addition, floor insulation with penofol does not require the hiring of specialists, since this procedure can be easily performed independently.
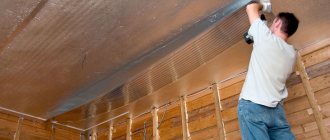
Use glue, stapler or nails to attach the material to the wall surface. For gluing seams, aluminum tape is perfect, which will help prevent damage to the integral structure of the reflective coating. Please note that the material is installed with the reflective side into the room, since it is this side that contributes to the return of heat to the room.
In addition, the use of foil-clad foam foam in the process of insulating air ducts and chimneys is widespread. This procedure is not difficult, since the material is particularly flexible and has an adhesive base, which is simply glued to them. Installation work is carried out at any time of the year and at any temperature, and no special equipment is required for their implementation.
To avoid moisture build-up, leave a small gap between the foam foam and the other material to which it is attached. The service life of this insulation is very high, since it consists of polyethylene foam, which is able to function normally for more than two hundred years.
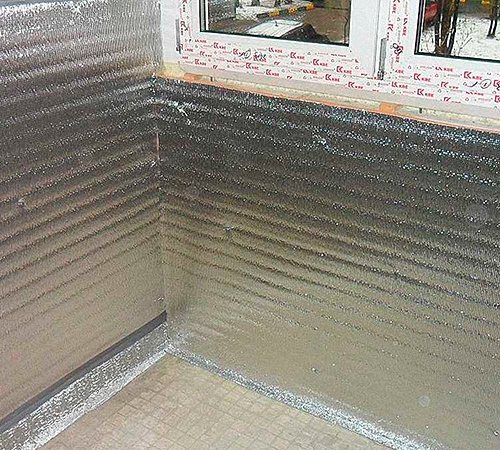

Disadvantages of insulation with penofol from the inside and outside
Although penofol differs in a huge number of advantages that distinguish it from the background of other insulation materials, it still has certain disadvantages, which we will talk about later.
Penofol is characterized by insufficient rigidity, which makes it impossible for further wall decoration, immediately after its application.
The use of brackets for installing penofol is possible, but at the same time its thermal insulation function deteriorates. Therefore, it is better to use glue.
To ensure full insulation of the walls of a residential building, it will be necessary to carry out complex heat-insulating works, which include the installation of several types of insulation together with penofol.
Tip: If in the process of work there was a deformation or cut of the foam, then to restore it, it is enough to process this place with aluminum tape.
To improve the thermal insulation properties, stack several layers of foam foam one on top of the other.
Penofol is an excellent heater for baths or saunas, since in these rooms it provides quick heating and long cooling of the walls. Please note that there should be a small gap on the side of the foil to prevent condensation.
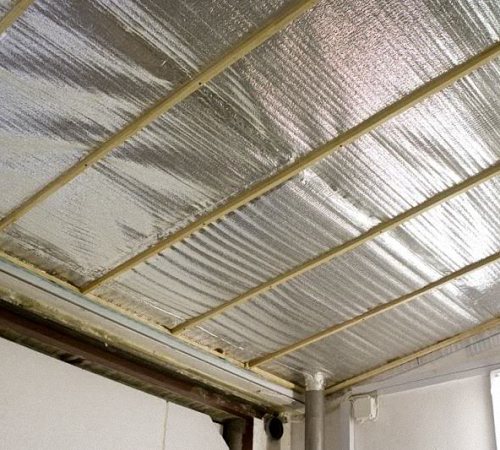

Do-it-yourself penofol insulation
We will talk about the process of wall insulation with penofol in a brick house further. We suggest that you familiarize yourself with the instructions for carrying out thermal insulation work inside the premises:
1. The benefit of insulating brick walls with penofol is the use of a minimum of usable area, which is so important for owners of small apartments or houses.
2.It is better to insulate a brick house from the inside, since when loading it has a beautiful appearance, which penofol can spoil.
3. The primary implementation of internal thermal insulation involves the application of the film using liquid nails. The thickness of this layer is two millimeters. If there is electrical wiring, additional insulation is not required, since aluminum is an excellent conductor of electricity.
4. To fix the thermal insulation on the wall surface, you will need to build a wooden frame. Please note that you must leave a ventilation gap of at least two centimeters.
5. Using a construction stapler, lay the penofol on the walls and fix it.
6. In order to eliminate the formed gaps, fill with foam or silicone. To secure the joints - aluminum tape is enough.
7. The second wooden frame is also made of beams, two centimeters thick. Drywall is attached to it. Further finishing is carried out in accordance with the personal preferences of the owners.
Insulation of the balcony with penofol has a slightly different technology, and we will talk about it further:
1. The first step is to install the lining. Its thickness is about two millimeters.
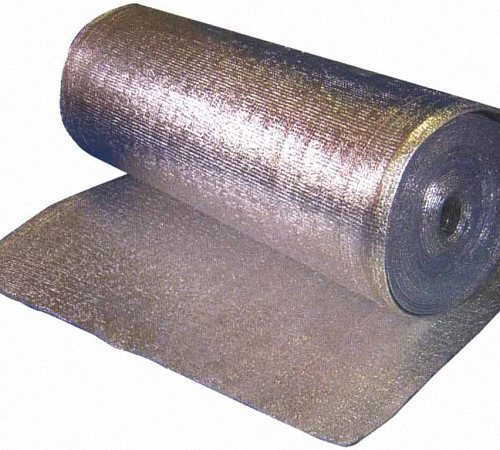

2. Further, with the help of umbrella dowels, the penoflex is fixed on the wall surface. Its thickness is the same as that of the previous layer, and the diameter of the dowels is 0.6 cm. This material ensures fire safety and moisture resistance.
3. Pay attention to the corner areas, they should not contain joints, since these areas are prone to mold and mildew formation.
4. Use high quality metal tape to cover seams. It will also provide vapor barrier.
5. Penoflex is laid on the foam foam. To carry out the installation process, use self-tapping screws, 0.4 cm thick, and a laying step of half a meter.
6. To ensure a high level of thermal insulation and vapor tightness, use metal tape to seal the foam foam joints.
7. Make a batten from wood and dowel-nails. It will be required as an attachment to the base for finishing.
8. Carry out electrical work, if necessary.
9. Cover the areas on the windowsill, if any.
10. Leave an air gap of 1.5 to 4 cm to prevent moisture build-up. Install drywall and proceed with finishing the balcony.
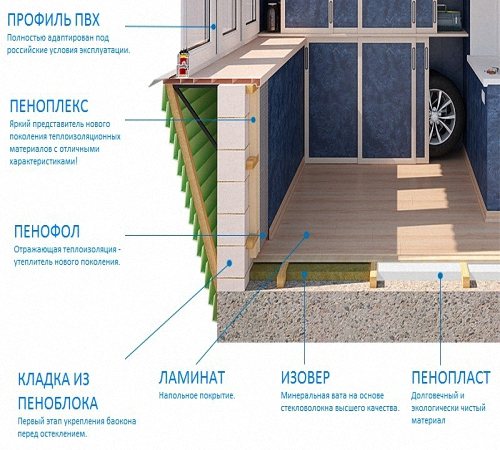

Please note that all thermal insulation work is carried out exclusively after glazing the balcony.
The procedure for insulating external walls is more complicated and requires compliance with certain technologies, which we suggest to familiarize yourself with:
1. The first step is to thoroughly remove the facade coating.
2. Next, the installation of a wooden frame takes place, on which the insulation will be attached.
3. After completion of the work, penofol is installed and fixed on the surface with glue or a stapler.
4. The next step is the installation of wind protection and waterproofing. For these purposes, a superdiffusion membrane or OSB plate is suitable.
5. Then spacer bars are mounted on which further facade cladding is carried out.
6. In addition, you should not forget about the wind gap, which prevents the accumulation of moisture.
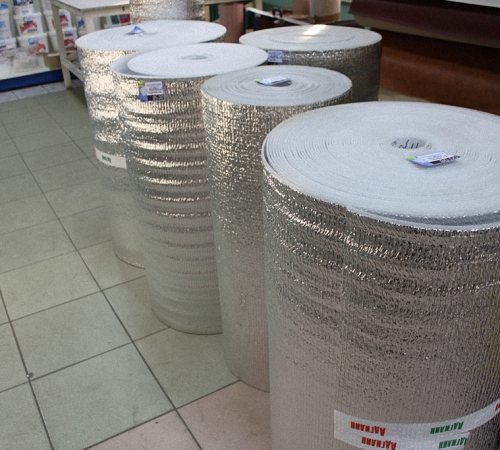

7. The final stage is the installation of facade coating, for example, siding.
Penofol insulation video:
Penofol insulation technology for internal walls
Depending on the characteristics of the room and the method of thermal insulation, the appropriate type of Penofol is selected. Some of them can be mounted autonomously (type B), others serve as waterproofing of a more powerful insulation (type A), and still others act as the basis of the heat-insulating layer (type C). This material successfully allows the surface to breathe without accumulating moisture. It relieves walls from the appearance of mold and mildew that arise after steam ingress.
Preparatory work before thermal insulation of walls with Penofol
Before starting the installation of Penofol, be sure to check the quality of the electrical wiring in the room. Unlike other thermal insulation materials, it contains aluminum foil, which is known to have good electrical conductivity. Protect the wires to prevent the insulation from coming into contact with bare cables. It goes without saying that the work surface is prepared - they clean off the debris, carry out cleaning with an emery cloth. If necessary, fill up the cracks with a filler solution. It is also advisable to buy a primer paint and paint over the wall, which will allow you to get a perfectly flat surface. Of the tools and devices for work, we need:
- Well sharpened knife;
- Furniture (construction) stapler with staples to it;
- Ruler;
- Level;
- Pencil;
- Construction trowel;
- A hammer;
- Working deep container for solution;
- Emery cloth of varying grain size;
- Screwdriver;
- Roulette;
- Dowels;
- Electric drill.
Instructions for installing Penofol on the walls
Armed with the necessary tool and using the help of another person, they carry out the following actions:
- Initially, a wall-mounted wooden frame is constructed. Its task is to enhance the effect of the use of heat-insulating material. For fixing the bars, dowels are taken, which are hammered no wider than 1 m from each other.
- Penofol is fixed on the frame with a furniture stapler. For this, the material is cut into strips with a sharp knife. The strips are not overlapped, but end-to-end, so that condensation does not form along the joint line. Seams can be glued with special tape.
- After that, another frame is attached, at a distance of 2 cm. This is done in order to allow air circulation. Now it can be covered with cladding panels, putty or wallpaper on top.
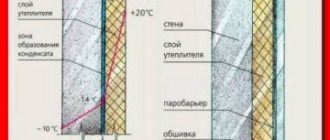
A vapor barrier film is not laid, because the material itself is considered vapor-tight. However, it is not capable of replacing waterproofing. A common mistake associated with improper installation of insulation: some craftsmen mount Penofol directly on the ceiling or wall, leaving an air gap on only one side. This leads to a decrease in its thermal insulation characteristics. Important! When installing Penofol, its foil part must necessarily look into the room, and not at the wall. This is a prerequisite for additional heat reflection.
Finishing the walls
After laying the heat insulator, cover it with crate and wood boards on top, you can start finishing the surface. You need to start by leveling it: any defects that may interfere with the reliable attachment of the plaster or the gluing of a roll of wallpaper are removed. Irregularities are best cleaned with emery, starting with coarse-grained and ending with fine sandpaper, which makes the surface even and smooth. Most often, a plaster solution is applied to the finished wall, which can then be painted or decorated in other ways. The most common are cement-based or gypsum-based plaster mixes. At the same time, gypsum is not subject to shrinkage over time, it has good plasticity and bonding properties. It does not require the use of a reinforcing mesh. If you don't have enough experience in plastering walls, you can purchase plastering signaling devices that will be limiters - they allow you to measure the thickness of the layer and protect against irregularities. After fixing the signaling beacons on the working surface, you can start preparing the solution. Take a bucket or other container, fill it with water about a third. Add the solution gradually and stir constantly to achieve a homogeneous mass.The mortar should be of such a consistency that it does not run off the spatula, and its density will depend on how thick the plaster layer should be. If the walls in the room absorb moisture strongly, they must be additionally moistened. For these purposes, a household spray gun is well suited. This is done so that the solution retains its moisture content, otherwise it will crack after drying. The plaster is applied to the wall by applying it with a spatula. If such skills are difficult to master at first, then you can apply the solution to a wooden trowel and level it on the surface. Alignment is performed from bottom to top. If plastering is carried out in the area of the slopes of window and door openings, then it is better to apply the solution with a slight overlap. Using the rule, you can remove the excess solution. Its sharp edge is directed perpendicular to the plaster beacons. You should start from the lower border. Gradually, the instrument is raised higher and higher and the excess solution is removed, throwing it up. After that, the final smoothing of the wall is carried out. This is done several times to achieve a flat surface. In order to make sure that the surface is flat, the rule is applied at various angles. The resulting bumps are scraped off with the sharp edge of the instrument. It remains to pull the beacons out of the wall with a screwdriver. Now you can grout or paint the plaster. On this, the insulation of the walls with Penofol from the inside can be considered complete.
Installation - sequence of actions
Do-it-yourself wall insulation with penofol further consists in eliminating large cracks. For this, the tree is thoroughly buried. In the same way, I get rid of the walls from the cracks that often appear as a result of exploitation.
Lathing
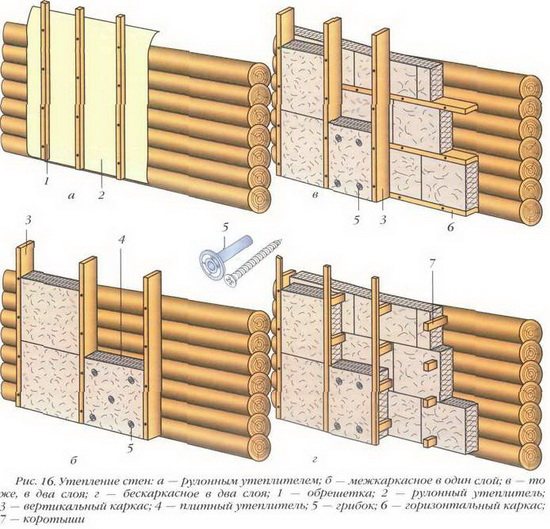
Further, a crate is arranged, with the help of which normal ventilation of the facade is ensured. If the house is made of logs, you can do without the lathing, but you should leave gaps along which condensation will be drained. They are organized around the eaves and foundations of the mansion.

Vapor barrier
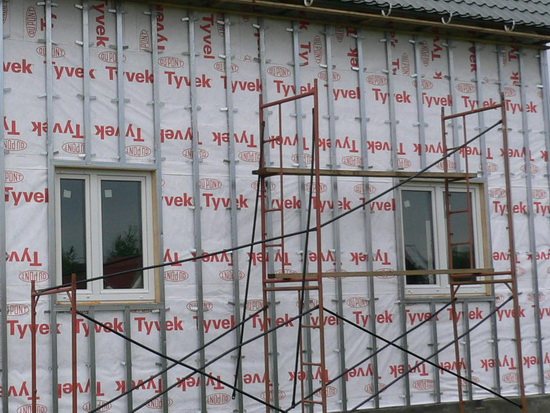
Insulation with penofol outside consists in installing a vapor barrier layer. For you need to purchase a vapor barrier film (there is no problem with this, since there are a lot of offers on the market).
The main thing is to take into account the one-sided permeability of the material - it allows moisture to pass through only in one of the directions.
For convenience, the film is made rough on one side and glossy on the other. The film is mounted with the rough side to the wall. The joint surface is overlapped and insulated.

Thermal insulation
Do-it-yourself wall insulation with penofol continues by installing the heat-insulating layer itself. Due to the fact that penofol is perfectly cut, the sizes of the parts can be easily adjusted so that they can be installed in a spar, thereby avoiding the appearance of gaps between the insulation and the cladding.
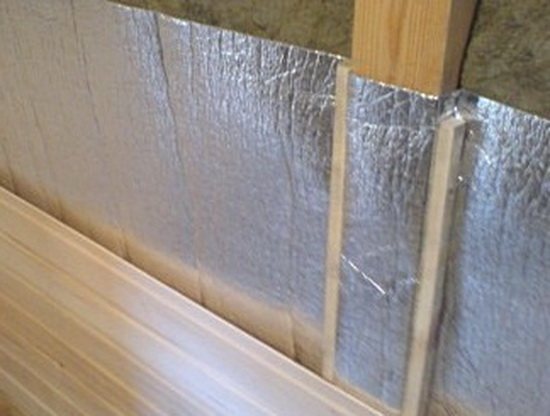

The insulation is fastened with anchors. You can combine penofol with other types of insulation - basalt wool or foam.
Waterproofing
After that, the insulation of the walls with penofol from the outside is the installation of a waterproofing layer. It is organized like the first layer (with a rough side in the direction of the wall, which will allow the insulation to get rid of excess moisture, it will not be able to penetrate back).
Cladding
Thermal insulation of a house with penofol from the outside requires the organization of the external facing of the finished "pie". This can be done using almost any cladding material (siding, wall paneling, brick, etc.).
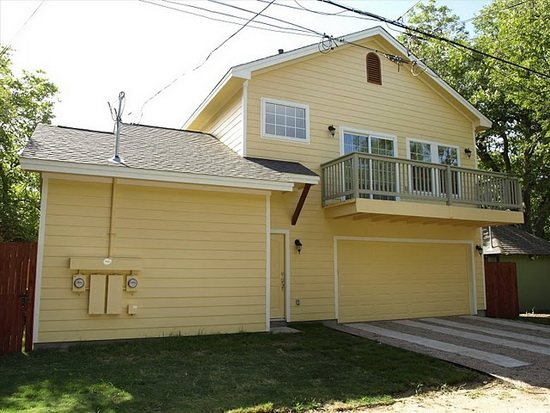

The main thing is the organization of the ventilation gap. In order for the insulation of the walls outside with penofol to be completed, siding is used, and the ventilation gaps are organized by stuffing thin boards on the frame slats.
Thermal insulation of wooden walls with Penofol
In this case, the work is somewhat different, since the wood itself is already a warm material.But, despite the fact that such a surface has a "breathing" ability, retains heat and contributes to the creation of a favorable microclimate, warm air can still seep into the street. During operation, the wood undergoes some shrinkage under the influence of natural and climatic factors. This causes the appearance of fresh cracks, cracks, and other unfavorable places. The tightness is broken, which leads to the need to apply a heat-insulating layer. Before carrying out insulation work on wooden walls, you need to make sure what kind of wood they are made of. This is due to the fact that different varieties and types of wood differ in different characteristics in terms of thermal insulation. All this leads to the fact that the cost of insulation may be different. It is the lack of external insulation that leads to the need for internal thermal insulation of the walls. Penofol in this case is perfect, especially if you combine it with other materials. Insulation of a wooden house is carried out according to the following algorithm:
- Insulation of wooden walls from the inside with Penofol should be started by filling up the cracks and gaps that are naturally formed in the wood. It is recommended to pay special attention to checking the joints, window frames, door frames, corners.
- Making a frame for a heat insulator for wooden walls is optional.
- If Penofol sheet with one-sided foil is used, then it is the side with the foil that should face the crate, that is, inside the room.
- A sharp knife is used to cut the strips.
- The strips are attached using special staples and a powerful construction stapler. At the same time, they should be in close contact with each other so that there is no free space between them.
- To fix the joints, they are glued with aluminum tape. This will provide an even and uniform reflective surface.
- The preservation of the air gap is a must for effective insulation and the absence of condensation. The air space must flow between the material and the wall.
- On top of the insulator, wooden bars are stuffed, which will serve as the crate. Chipboard sheets or plastic panels can be attached to them. The final finishing is the same as for concrete walls.
Note! It is necessary to carry out work on the internal insulation of a wooden house after the final shrinkage of its walls and foundation occurs. This usually happens no earlier than a year after the completion of all construction work. How to insulate walls from the inside with Penofol - watch the video:
The attractiveness of Penofol as a heater is largely due to its unique properties. However, one should pay tribute to its value, which fluctuates in ranges below the market average.
Additional thermal insulation for floors
Penofol laying scheme on the floor
Considering that penofol, in addition to thermal insulation, also has vapor-insulating properties, it is actively used in the arrangement of floors. At the same time, the protective tape can be installed both from the basement side and directly from the bottom of the floor.
To insulate the floor with penofol in a wooden house, two installation options are used:
- with one-way reflection towards the ground;
- with two-way reflection.
The double-sided option is used on cold foundations, but in this case, an air gap must be present on both sides of the insulating tape.
accepts orders for all types of work performed in the course of fine-tuning log and log houses to the level of readiness for finishing, including work on external and internal thermal insulation of wooden log cabins. To clarify the details of cooperation, as well as to find out the terms and cost of order fulfillment, go to the "Contacts" page and contact us in any way specified there.
Calculate the cost of painting and insulating your home right now
It should be noted that penofol insulation of private houses and apartments is becoming more and more popular for various reasons. There is also a lot of talk around this relatively new insulation, including about its unique properties and ease of use. To understand what it is - penofol, as well as to find out the whole truth about its characteristics - this is the purpose of this article. In addition, we will tell you how to use this material to better insulate walls and other structures from the inside of the house.
Criterias of choice
In order to perform high-quality insulation of the floor with foam foam, as well as walls and ceilings, it is necessary to choose the right insulation. To do this, you should be guided by the following criteria:
- for ease of installation, it is recommended to choose a material thickness of at least 5 mm;
- when insulating steam rooms, boiler rooms and industrial premises with elevated temperature and humidity, it is better to abandon the use of foam foam in favor of multilayer materials with increased moisture and heat resistance, for example, folded polypropylene;
- it is imperative to pay attention to the quality of the polishing of the foil and the type of metal from which it is made, since the amount of reflected thermal energy will depend on this, and, accordingly, the efficiency of the material;
- when buying the required amount of penofol, it should be borne in mind that the rolls are sold not by running meters, but by the coverage area, which varies within 9-18 m2;
- it is recommended to either refuse to buy a sewn insulation, or carefully study the technology, as it was done (physical or chemical method), since this criterion has a significant effect on thermal conductivity;
- it is worth paying attention to branded manufacturers who can guarantee the declared technical characteristics.
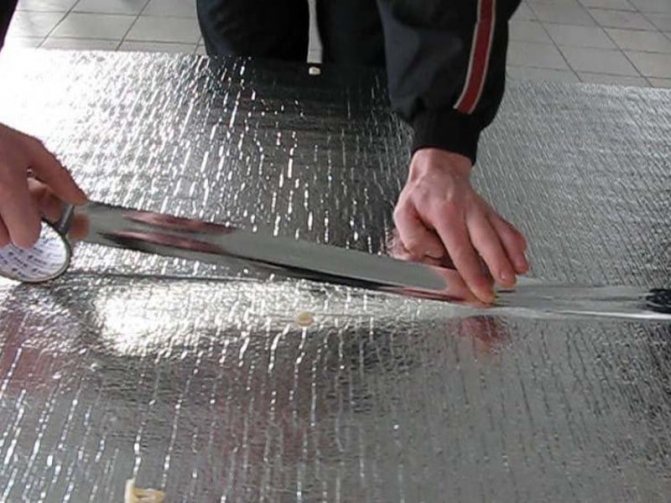

Floor insulation with penofol
Where is the method of insulation with foil insulation applied?
Foil insulation reflects infrared rays, which are, in fact, thermal. But, you do not need to apply the material everywhere. In some places, it will not work as expected.
Basically, it is mounted at sources of thermal energy:
- heating devices - batteries, air heaters. The insulation is mounted on the wall with foil into the room;
- boiler, fireplace stove.
And also it is used when installing a "warm floor". The reflective layer will direct the heat in the desired direction.
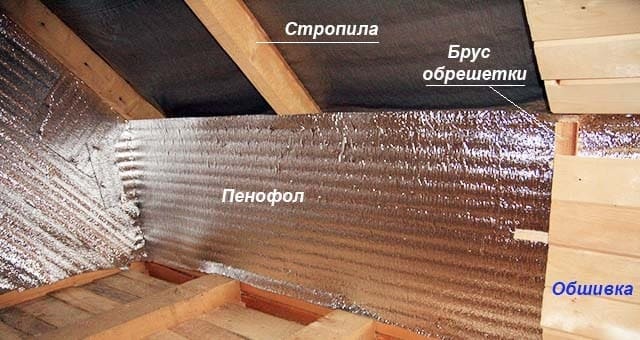

Small rooms, where every centimeter plays a role. Here, thin insulation will be appropriate on the walls and ceiling.
In the attic. Here the insulation is mounted on the roof. Apply 2 coats to combat heat and cold.
In baths and saunas. Heating of the room is not constant, the foil material is suitable for such purposes.
Garages, hangars, outbuildings - an installed radiator or potbelly stove.
They also insulate heating pipes, air ducts, wells and wells.
Benefits of penofol - debunking myths
Manufacturers and sellers of penofol attribute wonderful thermal insulation characteristics to this insulation, which is actually a myth.
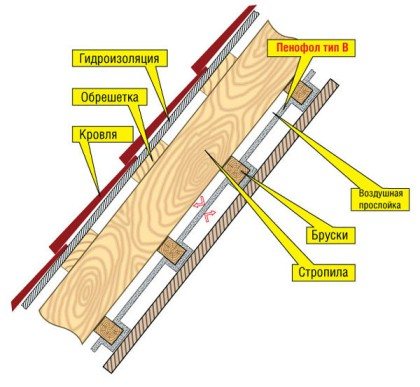
Wiring diagrams with air gaps, one of which we described at the beginning of the previous section, can also be considered as misleading the buyer. How the manufacturer proposes to insulate floors and roofs is shown in the figures:
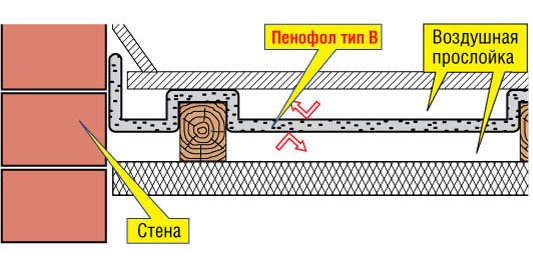

In fact, the presented schemes are nothing more than another way to improve the thermal insulation of external fences with the help of air gaps, since the intrinsic resistance to heat transfer to penofol is categorically not enough.

This can be easily verified using the best thermal conductivity from the technical data sheet, 0.037 W / m2 ° C. Then we take the canonical formula and determine the thermal resistance of a material with a thickness of 4 mm:
R = δ / λ, where:
- δ - thickness of penofol in meters, taken 0.004 m;
- λ is the coefficient of its thermal conductivity, equal to 0.037 W / m2 ° C.
We get R = 0.004 / 0.037 = 0.11 m2 ° C / W. Now we look at the comparison table, which is presented on the same resource as the technical data. It says that 4 mm of foam foam can easily replace 77 mm mineral wool or 46 mm expanded polystyrene.
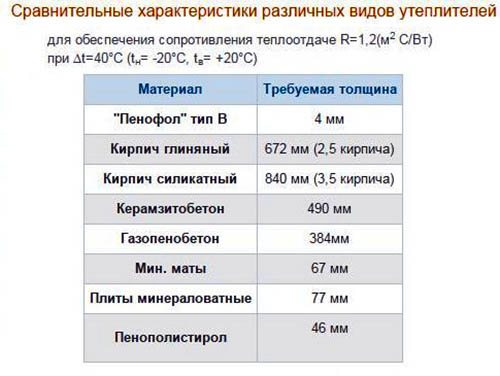

So, for comparison, it is necessary to determine the thermal resistance of a layer of mineral wool 77 mm (its thermal conductivity is 0.05 W / m2 ° C):
Rminvats = 0.077 / 0.05 = 1.54 m2 ° C / W, which is 10 times more than foamed polyethylene.
Hence the conclusion: the presented comparative table is a pure fake. The data given in it are unreliable, and although the material is a good insulation, it is not better than others. The reason is that it is too thin, although in terms of thermal conductivity it is equal to extruded polystyrene foam.
Against this background, all other benefits of penofol pale. True, there is another myth - about the reflection of infrared heat back into the room thanks to the foil surface. But none of the manufacturers explain what the foil will reflect behind the interior trim. After all, infrared radiation spreads through an open space, it will not pass through drywall or other obstacle.

What is really good about penofol is its low cost and ability to act as a vapor barrier along with other insulation, as evidenced by reviews on the forums. In addition, it is easy to install and does not take a lot of time. You can also note the durability of the insulation, reaching 50 years, provided that it is located inside the building, and not outside. By the way, it is better not to use penofol for external wall insulation, there it will be of little use. You should not take it for thermal insulation of a bath, like any polymer, when heated to 100 ° C, the material will begin to emit harmful substances.

