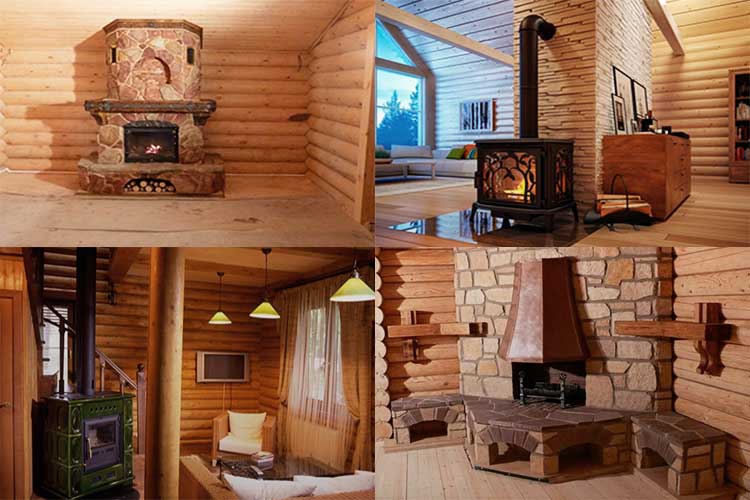
Furnace types
In our country, many types of furnace equipment are built and operated, we will list some:
- Swede
- Dutch woman
- Baby
- Heating and cooking
- Fireplace
- Stove with fireplace.
Furnace types
Despite the difference in design, all furnaces are characterized by the following parameters:
- Appointment.
- The maximum heating temperature of the furnace.
- Duration of fuel burning.
- The time it takes to warm up the structure and start full-fledged heat transfer.
- Chimney device.
- The scheme of movement of warm gases through the channels arranged in the furnace body.
- Furnace shape.
- Exterior wall finishing options.
- The material used in the construction of the furnace.
Stoves installed in homes have ancient traditions. Our distant ancestors cooked food on it, heated their homes with it and used it as a sleeping place.
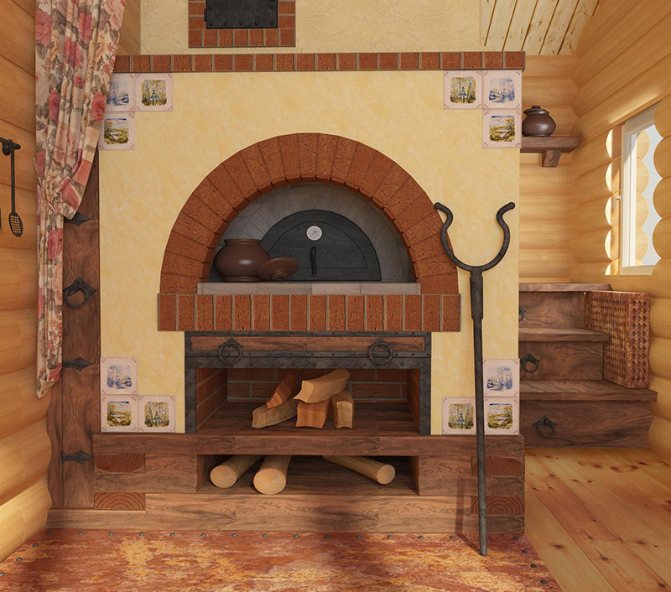
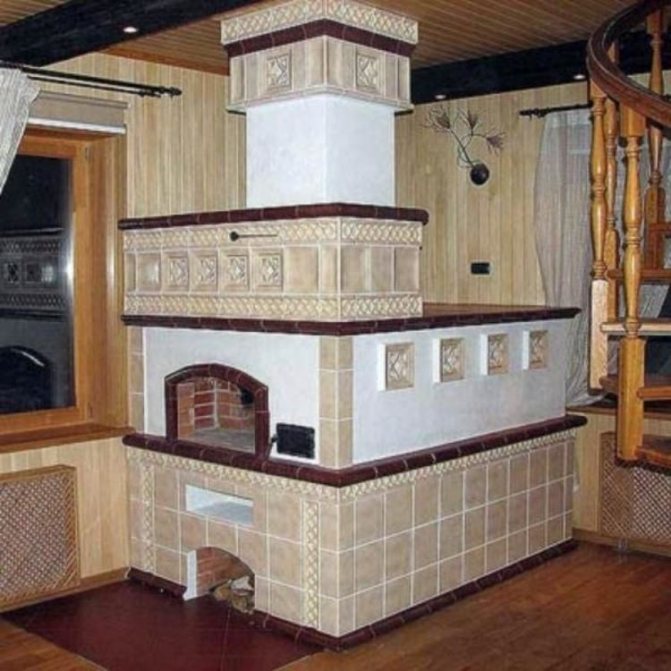
Brick Russian stove
The brick Russian stove has the following specific advantages:
- maintaining heat in the house due to long cooling;
- the ability to maintain heat in a room with any area;
- fire resistance.
Meanwhile, these devices also have a set of certain disadvantages:
- For the construction of a furnace, it is necessary to have certain skills and knowledge, which is why it is advisable to invite specialists for its construction.
- For the construction of the furnace, it is necessary, first, to equip a separate, recessed foundation.
- The oven is quite large and can take up a fairly large space.
- This circumstance must be taken into account when determining the place where the oven will be installed.
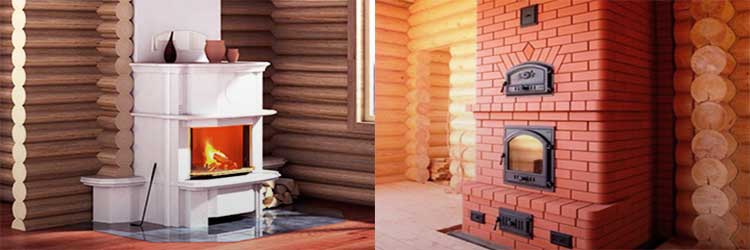
Brick Russian stove
For the manufacture of furnaces, two materials are used - metal and brick (simple red and refractory, it is also called chamotte).
A stove for a house made of wood, for the manufacture of which I use steel or cast iron, the thickness of which is from 3 to 5 mm.
The wall of this design consists of two layers of metal. There is an air gap between them. This layer is designed to protect the premises from the so-called thermal shock.
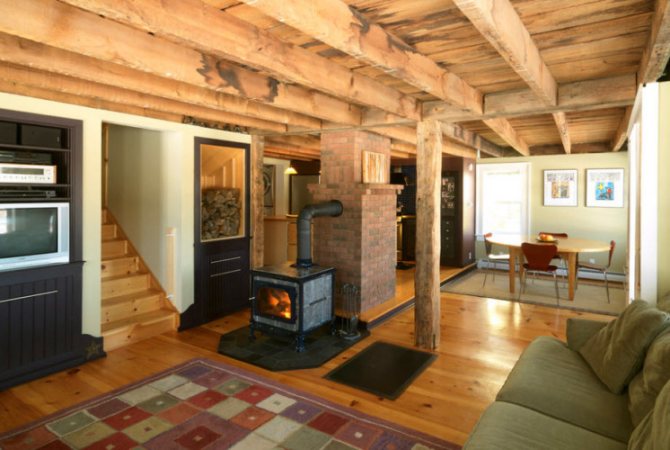
Combustion chamber design and volume
The most common option for a combustion chamber is a cube that equipped with an output channel, with the help of which carbon monoxide gases are removed. At the same time, the process of burning firewood is fast enough. For this reason, it is best to consider the option of long-burning stoves for heating a house.
When using the stove, the combustion process occurs in the form of smoldering, which is accompanied by the formation of wood gas. Entering the slam-shut, it then reaches the area of the air nozzle. The interaction of oxygen with gas leads to the ignition of the latter.
Stoves for heating a house of a similar design have the following advantages:
- High efficiency factor, which reaches 85%. In this regard, conventional models cannot be compared with them.
- Less fuel. When the furnace is fully loaded with fuel, the smoldering process can take several hours.
- Ease of use. Against the background of traditional stoves, when operating such models, you have to load new portions of firewood much less often.
An important parameter is the volume of the combustion chamber, which determines the amount of firewood needed to maintain the temperature, as well as their length. Most often they do not exceed 40 cm in length... However, the value of this parameter may differ for different models, so before purchasing it does not hurt to clarify this question with the seller.
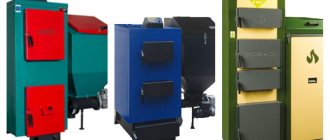
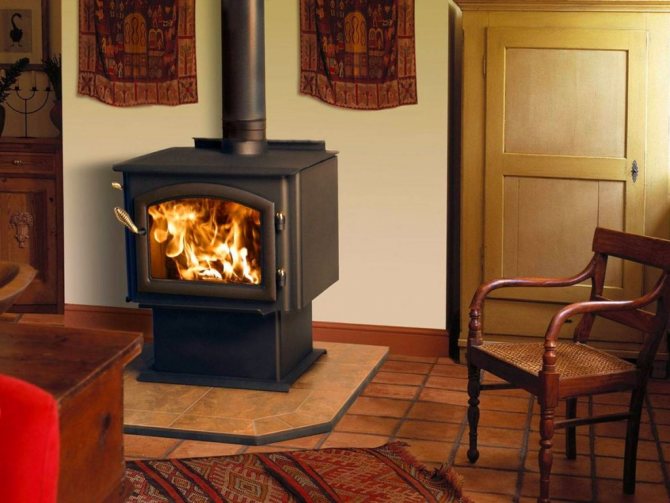
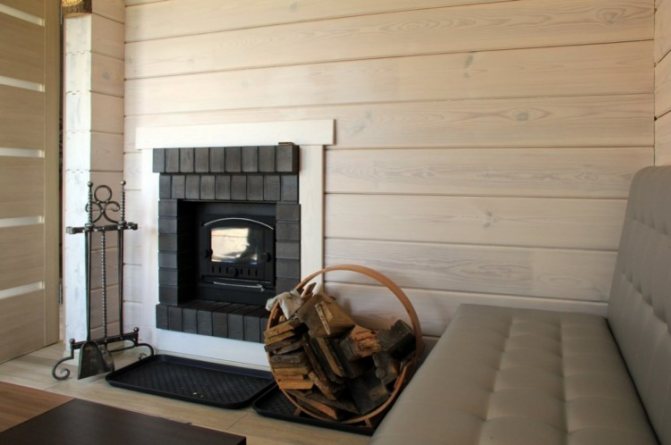
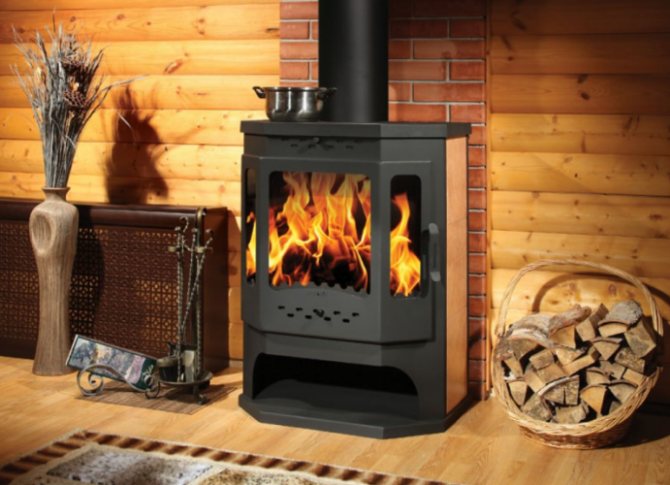
Metal oven
Metal furnaces have the following advantages:
The homeowner has the option of purchasing a ready-made stove, which includes a chimney, equipped with a temperature control system.
Pros of a metal oven:
- Furnaces made of metal can have an interesting look.
- Fast heating, which allows you to warm up the air in the room to the specified parameters in an extremely short time.
- High heat output.
- Long service life.
- The furnace can use any existing fuel to perform its functions.
Metal oven
But, furnaces made of metal also have some disadvantages, among them the following can be called:
They are not suitable for use in large rooms due to their high fuel consumption.
Rapid heating also means rapid cooling.
Metal stoves are classified as fire hazardous objects and the operation of the stove must be constantly monitored, and a fire extinguisher and other fire extinguishing means must be within reach.
If a low-quality metal was used for the manufacture of the furnace, then after the first heating, it can deform.
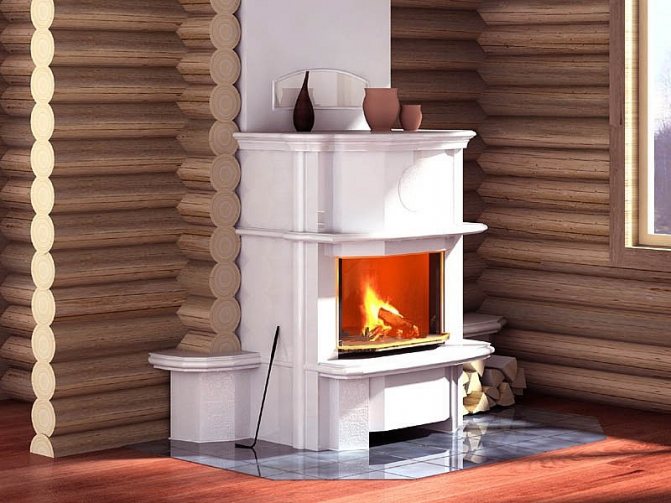
The device of a classic fireplace
Fireplaces installed in modern houses have collected all the best from those used in the Middle Ages and Russian stoves, which with high efficiency transfer heat to the home.
Fireplaces can be used not only as a source of heat, they can decorate the interior of the room where it is installed.
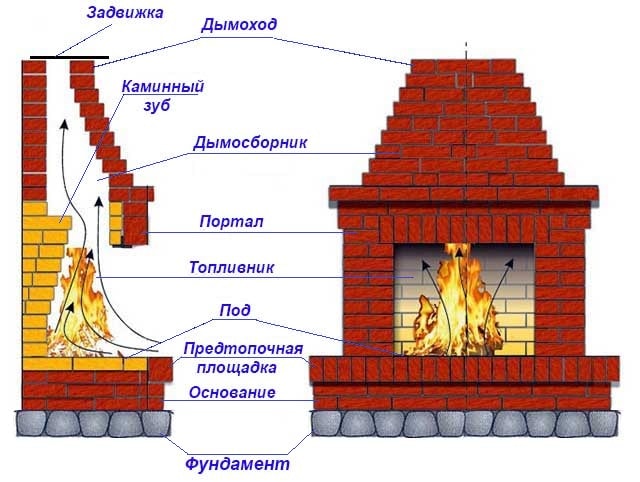
The device of a classic fireplace
Fireplaces installed in modern homes have the following properties:
Cain can be installed directly into the wall, and those that are installed next to the wall. There is another way to install it as an island.
Fuel port type. Fireplaces are open and closed. The first version is a classic version with an open firebox, in the second version, this opening is closed with doors.
The type of fuel used is coal, gas, electricity.
The design of the fireplace directly affects the efficiency. So, the efficiency of an open fireplace is 15%, the closed type shows an efficiency of 70 - 80%. A closed fireplace can act as the only heat source in the house.
Every homeowner can build such a structure in his home, this requires certain knowledge, a set of tools and the ability to work with it.
Some details require special attention:
- design and construction of the base (foundation), the larger the size of the fireplace, the larger the base should be;
- chimney design;
- volume of construction and finishing materials
- the overall appearance of the structure;
- fire safety, fire safety measures must be provided at the stage of design work;
- Tools that will be needed when performing construction work.
- trowel for working with mortar;
- hammer-pick for cutting bricks;
- jointing used to seal the seam;
- building level and plumb line, square;
- a container for preparing a solution and soaking clay.
Output
If a stove in a wooden house was not installed during its construction, then the best option is to use metal solid fuel equipment for heating. These products have good performance, besides, they are easy to install on your own, the only thing that is necessary to strictly observe the above rules.
You can get acquainted with additional useful information on the voiced topic from the video in this article.
Where is the best place to put a stove in a wooden house
As a rule, the place for installing the stove must be determined at the design stage of the house. This is necessary in order to ensure both efficient heating of the house and to secure it as much as possible.What criteria should the homeowner be guided by when planning the installation site of the future stove?
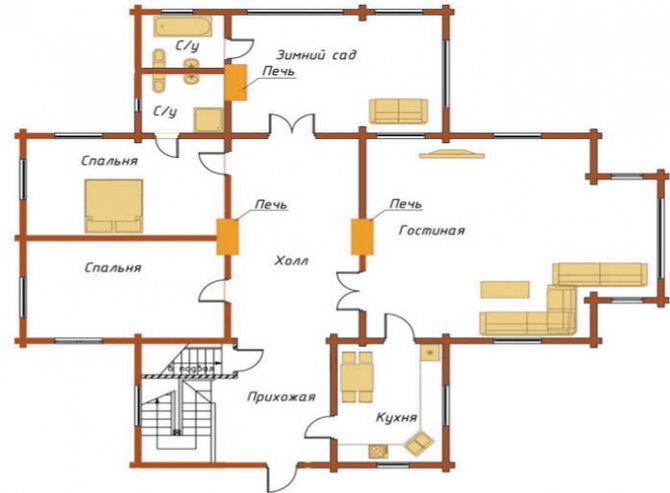
Where is the best place to put a stove in a wooden house
The heat source can be installed in rooms with an area of at least 16 sq. M. the installation must be carried out in such a way that there are no floor beams under the stove intended for the installation of floors. And in the place where the chimney exits there should be no ceiling beams, rafters.
To reduce the size of the chimney pipe, it makes sense to locate it in the center of the house. In this case, the chimney will go out to the roof in the area of the roof ridge. The construction of a stove in the immediate vicinity of the wall is impractical, since a significant part of the heat will be directed to heating the street. In addition, placing the furnace near wall structures increases the fire hazard. Based on the foregoing, we can conclude that the best placement of the stove will be in the center of the room.
A wood-burning stove will show maximum efficiency if all its surfaces give off heat. This design can easily cope with heating one or several adjacent rooms. This can be taken into account when placing rooms at the planning stage.
To provide heat to adjacent rooms, the stove is installed between the rooms in a partition. In order to keep warm in a four-room house, it is best to install it at the junction of the partitions so that one of the walls of the stove goes into the room. With this arrangement, it is possible to organize the exit of the firebox to the kitchen.

Fire safety rules for the installation and use of a potbelly stove
Compliance with fire safety rules when using a stove will protect all residents from possible unpleasant consequences:
the fuel should only be dry, no flammable mixtures should be used;
ignition is carried out by opening the combustion damper, laying the required amount of combustible material and, directly, igniting;
sufficient ignition of the fuel makes it possible to regulate the power level of the furnace device by closing or opening the ash compartment;
cleaning the furnace from the accumulation of ash is carried out with complete cooling of the body, by pulling out the ash drawer and discarding the contents.
We recommend that you familiarize yourself with the material on our website: "How to make your own stove stoves for a bath."
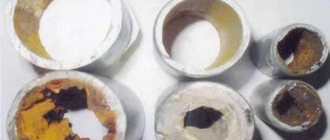
[Photo 6 Only after the furnace body has completely cooled down can the ash drawer be cleaned.]
the first use of the potbelly stove will be accompanied by the smell of melting paint, but in the future this episode has no place to be;
things that have an easily flammable composition should be located at a distance of 1 m from the stove;
within one load, it is impossible to put more than 3 kg of dry fuel into the combustion compartment, while the door must be closed;
it is strictly forbidden to use a potbelly stove when fixing any malfunctions in the operation of the chimney;
it is forbidden to leave the heater in working order unattended with the presence of children in the room;
during operation, the body of the potbelly stove becomes very hot, so you cannot touch it;
the installation of the furnace structure is carried out only on a special base (pedestal), which has non-combustible properties.
[Photo 7 For the installation of a stove structure in a wooden house, it will be necessary to make a base that is not exposed to high temperatures.]
Furnace foundation
If there is a desire to build a fireplace in your house, then first of all you need to think about arranging the foundation for it. A properly executed foundation will ensure its long-term and safe operation. In the case of negligence or committed mistakes, it will undoubtedly lead to deformations, sinking of the fireplace, and cracks.
The main requirements for the foundation can be determined as follows - reliability and lack of connection with the foundation of the entire building.
The optimal solution would be the construction of a capital foundation, and it can be built along the way with the construction of the base for the main building. At the same time, the creation of a single foundation is unacceptable. The thing is that each foundation is designed for a certain load and, as a result, they have different shrinkage.
There must be a gap of at least 50 mm between them, it must be filled with sand or other loose material and carefully tamped.
The dimensions of the foundation in the plan must be larger than the size of the base of the fireplace. That is, it should protrude from the fireplace by 100 - 150 mm. The depth depends entirely on the properties of the soil. In practice, it shows that for a house on one floor it is enough to deepen the fireplace foundation by 0.5 - 0.6 m, if the house is higher, then the depth should accordingly be greater - up to 1 m.
Channel and channelless ovens

Channel and channelless ovens
The peculiarity of channel furnaces is that their design includes channels made in the horizontal and vertical planes. Heat moves along them, which in direct-flow structures simply goes up. It should be understood that the movement of heat through the channels can be difficult. Therefore, elbows are provided in the furnace design. To prevent stagnation of warm air, some devices are arranged that regulate combustion modes. There is a summer mode, during which the stove warms up and after that you can switch to full heating.
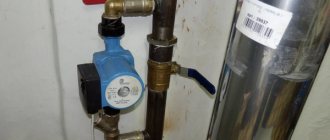
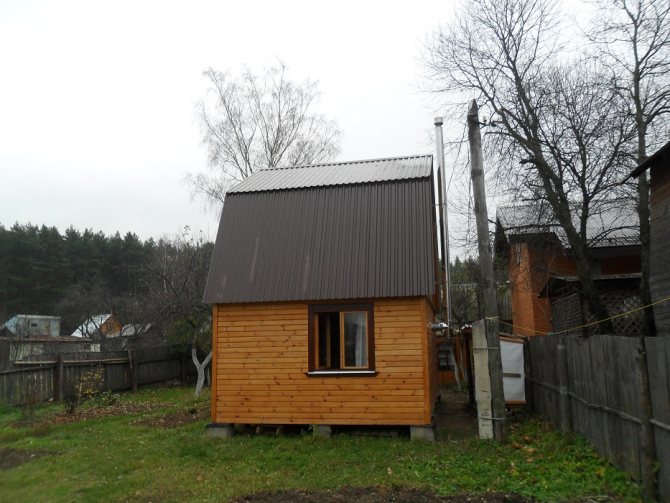
Beginning of work
There was little space for installing the pipe, so everything had to be calculated to the millimeter. He needed to lead the chimney through the wall and install the pipe strictly vertically upwards so as not to interfere with the two edges of the roofs. In addition, the pipe should be installed away from the window. Having calculated everything, he set to work.
The Predatory Mouse considered the main and crucial moment to make a support bracket for the chimney, because the entire chimney with tees and other details should rest on it. The Predatory Mouse made the support bracket for the chimney himself from a corner of 30 mm and 50 mm, using a drill and a grinder, using bolts of the appropriate length with a diameter of M10 and M8.
And before that, he had to disassemble the wall, strengthen the seats for the bracket from the inside of the house. Then he assembled the outer bracket and attached two corners to it from above in the form of runners - so that the tee could be moved when fitting, that is, to move the entire chimney away from the roof. After assembly and installation - trying on this support bracket - he coated it with metal varnish and protected it from corrosion.
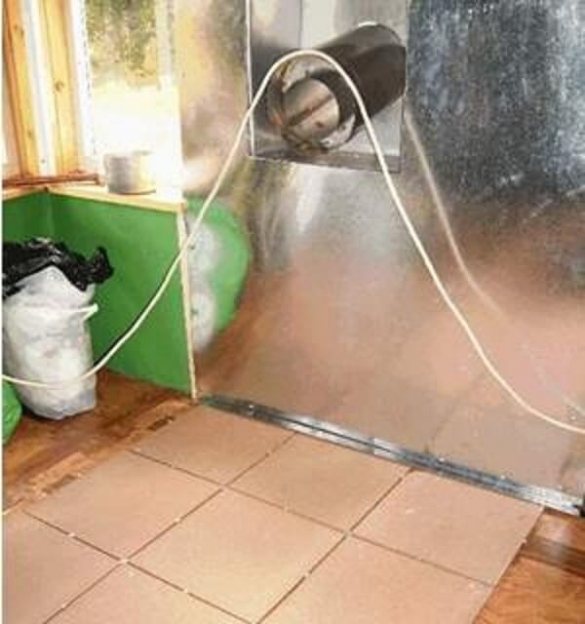
Satisfied with what was done outside the house, I proceeded to heat insulation of the wall inside the house, but first I fixed the stainless steel conduit.
From the wall of the furnace to the wall, it turned out 35 cm - this is an acceptable rate, taking into account the fact that there is a heat-reflecting screen. Therefore, he continued to work and sealed the wall with 10mm plywood, and over the entire area of plywood he fixed an asbestos sheet with screws (he worked in a respirator). Then, on top of the asbestos, he covered the entire wall with a solid sheet of galvanized metal measuring 2 meters by 1 m 20 cm. But first, he cut a square hole in this sheet for a duct-pass. He fixed everything with screws with various types of heads (flat or semicircular - depending on where they were used).
The place under the oven Predatory Mouse also well insulated from heat. First, I spread the tiles on the floor and fixed them with screws at the edges and corners. After that, I spread an asbestos sheet on top and spread a sheet of thin basalt wool on top of the asbestos sheet. He covered all this with a sheet of galvanized iron of the appropriate size and fixed it well with screws of a suitable size.At the edges of the sheet, he made a side so that the debris from the firewood would not spread around the room, but would remain on the galvanized sheet (from where it could be easily swept away with a broom).
Thus, having prepared a place for a stove and a chimney, he began to assemble the entire structure into a single whole. I drilled the necessary hole in the adapter from the oven to the sandwich, - put on the adapter and, moving the oven, - put a sandwich with a length of 50 cm into the adapter. At the same time, all connections were sealed with a fire-resistant sealant, which I bought together with the oven. It went to all the seams of the chimney - just one tube of this sealant.
When assembling the chimney, I took into account the requirement for the location of the direction of flow of water and smoke. That is, I collected it from the bottom up (I put the upper parts on the lower ones). When calculating the height of the chimney above the roof, he was strictly guided by the corresponding SNiPs. Since the Predatory Mouse placed the chimney at a sufficient distance from the ridge of the roof, he made it just below the ridge. Therefore, the length of the chimney turned out to be less than the recommended 6 meters. It turned out to be one meter shorter. Accordingly - 5 meters - and five pipes of sandwiches.
The pipe from the stove comes out of the wall of his house at a sufficient height from the surface of the earth. Therefore, the height of the chimney is sufficient. He fixed the lower segments of the chimney to the wall by means of standard wall brackets, while from the inside he also reinforced and strengthened the seats for these brackets. But the upper segments in the form of three sandwich pipes turned out to be loose.
The result is a tall construction. And on reflection, he decided to insure her. I secured the upper part of the chimney with three braces 120 degrees each from each other. The appropriate cable and special tightening clamps-hooks with versatile threads for tensioning the cable were purchased. The ends of the cables were attached by means of special brackets to the head. Only after that the chimney stood firmly and motionless on its pedestal - a support bracket.
The chimney runs at a sufficient distance from both edges of the roofs and does not come into contact with them. Simply put, the Predatory Mouse calculated everything superbly and did it perfectly.
Having drilled holes in the legs of the stove, and the tiles on the floor with a victorious drill, he screwed the stove to the floor with long bolts, and then assembled the stove and chimney into a single whole.
For three days the Predatory Mouse waited for the fire-resistant sealant to dry completely and only after that decided to heat the furnace.
First, he studied the instructions for using the control valves and for the first time he fired the stove at maximum. I did not particularly adjust the burning duration, so it worked a little over 6 hours. At first there was a terrible stench, the paint was baked. In general, what was supposed to burn out and burned out.
The temperature outside was 19 degrees - the room had risen to 40 C. so the windows and doors were kept open so that the draft would erase the smell of a burnt stove. The furnace was run in successfully. The Predatory Mouse paid special attention to the places of possible heating near the passage box. But everything was fine here.
So the oven was burned within normal limits. The second time the Predatory Mouse fired the stove literally the next morning, because at the end of June it was cold in the mornings, around 12C. Then he heated it according to the instructions for about 9-10 hours on one tab. The draft in the stove was good, which means that the chimney is set up normally.
Most of all, Predatory Mouse was afraid that he had done poorly in isolation. The fears were in vain.
And his cat liked to sit on the outside chimney - to warm up.
Total:
- The cost of installing the furnace is about 30 thousand rubles
- The installation time alone took about a week.
In general, the Predatory Mouse was pleased with the result.
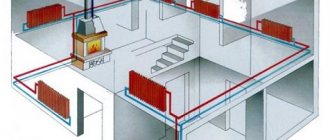
How to properly heat the second floor
Supplying heat to the second floor of a house is a rather difficult task. Alternatively, you can consider the device of the fireplace, equipped with additional equipment. The fireplace has a number of advantages. Among them, you can name the following:
- ease of use;
- small size;
- use of almost any fuel.
How to properly heat the second floor
For the sake of fairness, it should be noted that most of our people consider it a luxury item, but this design is capable of combining democratic and aesthetic properties, and excellent performance of its main task - heating the room.
Heat supply to the second floor by air convection. That is, passing by a heated fireplace wall, the air receives thermal energy and continues to move upward through a special box. Warm air is supplied to the rooms located on the second floor through ducts, which must be covered with thermal insulation. This is necessary to minimize heat loss and ensure fire safety.
Self-installation of the Russian stove
For the construction of a classic Russian stove, you will need about 1650 pieces of bricks, a gate valve with a size of 260 by 240 mm and a certain volume of clay and sand, which is enough for 80 buckets of mortar.

Self-installation of the Russian stove
To carry out the work, it is necessary to use red bricks; refractory (chamotte) bricks are used to lay out the firebox. When performing masonry, it must be remembered that the seams that form during masonry should be small. no more than 5 - 7 millimeters.
Each level must be installed using a building level and a plumb line. It depends on how well the oven will be laid as a whole.
The construction of the stove must be carried out, guided by the requirements of the order. This is the name of the scheme, which indicates the placement of bricks in each separate row. Such orders exist for almost all types of Russian stoves.
It should be noted that the laying of a stove is a rather complex construction process and requires high qualifications of a bricklayer. It is not for nothing that there is a separate specialty as a stove-maker. And for the construction of a furnace at home, it is better to invite just such a specialist.
Installation
So, we figured out the types of equipment, now we will consider how to install a metal stove in a wooden house, which, as we found out, is the best option. This work, although not difficult, requires strict adherence to the rules.
So, the installation process takes place in this order:
- Before installing an iron stove in a wooden house, you need to prepare a place for it. The floor and the nearest wall should be covered with non-flammable material. For example, ceramic tiles or even just a sheet of galvanized steel can be laid on the floor.
- A border should be made around the location of the device. This is necessary so that accidentally dropped charcoal cannot roll out onto the wooden surface.
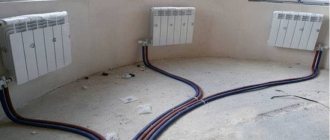
- Further, the structure is installed on the legs provided by the manufacturer and set horizontally. In this case, the distance to the wall should be at least 35 cm.
- Then you need to do the installation of the chimney with your own hands. This work is the most difficult and responsible. For this, sandwich pipes should be used, consisting of two nozzles, the space between which is filled with a heat insulator.
However, even such a chimney does not guarantee fire safety. Therefore, it should also not be located closer than 35 cm to the wall.
In addition, it is necessary to correctly pass the chimney through the ceiling and roof. For this, a special box is used, the space of which is filled with mineral wool. Thanks to this, the chimney heated to a high temperature will not come into contact with the wooden surface.
- Further, all elements of the chimney are assembled into a single structure and connected to the stove. In this case, it is important to ensure the correct installation of the elbows - the lower ones should be inserted into the upper ones, but not vice versa. Asbestos thread can be used to seal the joints.
If necessary, the chimney should be fixed on the steppe with clamps and brackets.
- Now that the stove is connected to the chimney, it is necessary to melt it and carefully inspect the structure for the absence of smoke.
Note! The height of the chimney must be at least four meters from the surface of the stove, and its diameter must be at least 15 cm. Compliance with these parameters should ensure a high-quality exhaust of smoke outside.
This completes the installation of the furnace. I must say that the chimney can be brought out not only through the ceiling and roof, but also through the wall. However, in this case, it is still necessary to provide a correct, fire-safe passage.
Advice! Often, companies that sell ovens also offer installation services. True, the cost of this work is usually quite high, so in most cases it makes sense to do it yourself.
Here, in fact, is all the basic information on how to properly install a stove in a wooden house.