The work related to the decoration of the premises is divided into certain stages, the most important of which is the tiling. This finishing option has a direct impact on the appearance of the entire room as a whole. In addition, the operational life of the coating depends on the quality of the installation. Let's try to figure out if it is possible to lay tiles on a brick wall without plaster.
Is it possible?
Experienced builders assure that it is allowed to lay tiles on a brick without first plastering it. True, there are certain nuances due to which it is not recommended to do such work on your own.
So, they are faced with tiles:
- a wall of brick material without a plaster layer. It is better if the surface is flat, but minor differences are corrected with an adhesive solution. Naturally, its consumption will increase, which will entail a rise in the cost of repair work;
- pre-prepared wall. The surface is leveled with plaster mortar and primer mixture, all that remains is to lay the tile material with a minimum consumption of glue. The option is cheaper, takes less time.
How to put tiles on a brick wall?
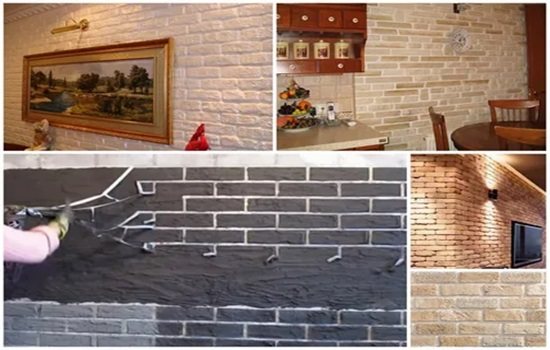
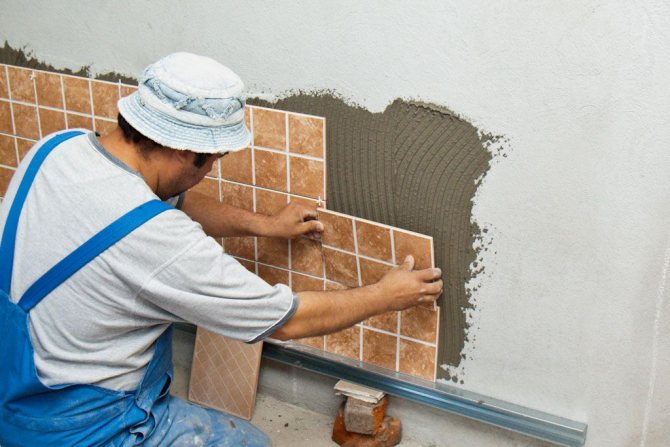
Tile is a versatile material used for brick wall cladding. Plastered correctly even walls can be safely decorated with tiled material, having previously treated with a primer. Brick walls with uneven surfaces should be carefully prepared before cladding. When done correctly, such a brick surface coating will be durable and wear-resistant. Due to unpretentiousness in care, immunity to water, a variety of shapes, textures, sizes and colors, the tile will become a functional and stylish element of any interior.
Can tiles be laid on a brick wall?
The cladding gives an aesthetic look to any room, protects the walls from destruction under the constant influence of various negative factors, for example, from moisture, grease or oil. Often, tiles are laid in the bathroom, restroom and in the kitchen, less often in the corridor, closet. But before facing the surface, preparation of the working area is required. It is not recommended to glue the material directly onto the brick due to the presence of rough seams in the walls. Priming and plastering enhance the adhesion (adhesion) of the facing material and the wall.
2 ways of laying
- If the wall is flat, then it is enough to use an adhesive solution. A special self-leveling compound securely fixes the tiles to the brickwork. Before work, the surface is cleaned and dried. Disadvantages of the technique: high consumption of the mixture, because sometimes more than 3 cm of a layer is required with rough irregularities, as well as the risk of heavy tiles caking together.
- If the surface is far from even, there are rough defects, preliminary cleaning with removal of the old cladding, drying, priming and plastering with leveling of the working area is required.
It is recommended to use a deep penetration primer.
Tools and materials
The work will require a spatula with teeth.
- Trowel, notched trowel for applying mortar.
- Cutting tools.
- Level.
- Lighthouses.
- The mixer is construction.
- Fastening solution (liquid nails, cement-sand or tile adhesive).
How to calculate the number of tiles correctly?
- Measure the length and width of the surface to be trimmed.
- Decide on the size of the tiles. More often it is 20 × 30, 25 × 33 cm.
- Divide the height and width of the wall by the same parameters of the tile material. Having received 2 digits, multiply them.The total quantity (piece by piece) of the required facing product will be obtained. At all stages of calculations, rounding is done upward.
- If necessary, carry out a piece-by-piece calculation of tiles for windows and doors, and then subtract them from the total.
- To increase the final figure by 10%. This margin is necessary for smoothing edges or in case of damage.
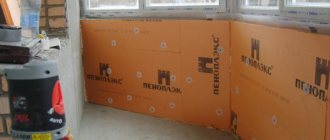
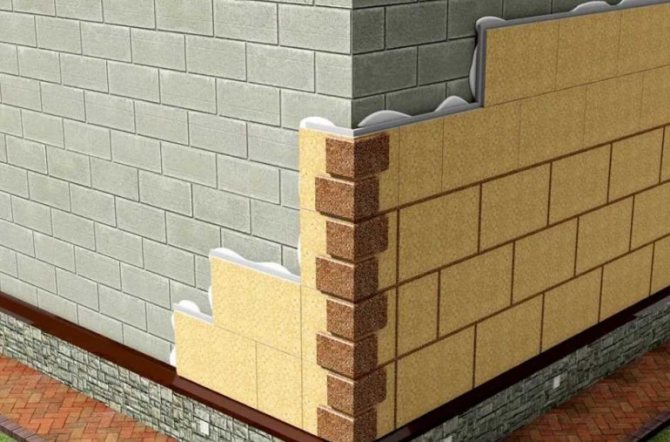
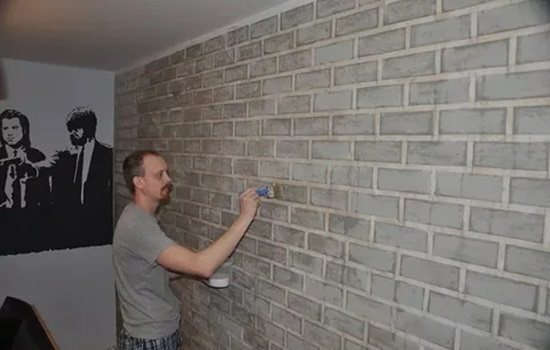
Preparing the wall
In the process of preparation, the wall is leveled with plaster.
Before any wall finishing, it is necessary to prepare the surface for finishing. Preparation requirements are standard. The surface must be cleaned of the old coating, if any. The presence of old mortar or plaster will reduce the operational time and complicate the laying of tiles. It is important to prime with a deep penetration mixture and plaster the wall, leveling and smoothing all defects. Significant differences are best hidden by drywall, since the consumption of plaster for leveling will be too large.
Laying methods and process
There are three ways to lay tiles:
- seam to seam when they match;
- in dressing - with a half offset;
- diagonally - the edges are joined on a diagonal line.
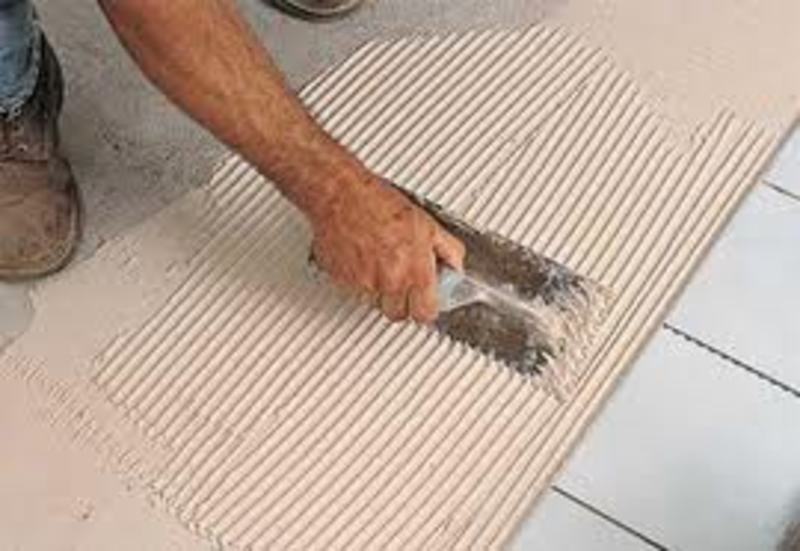
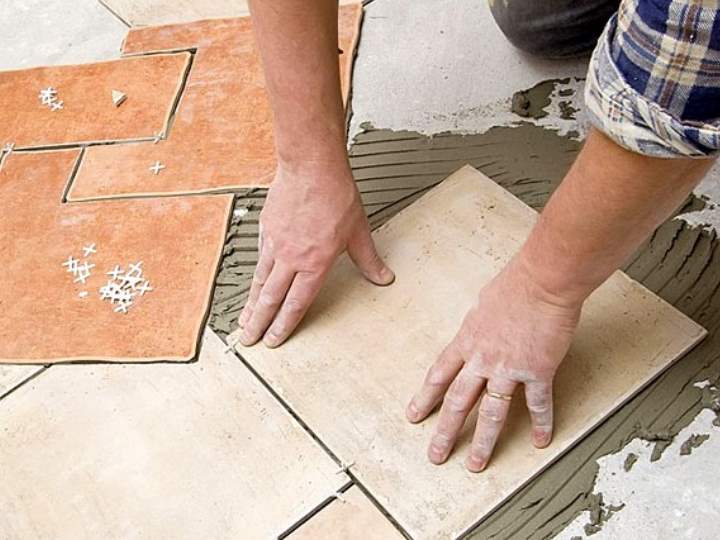
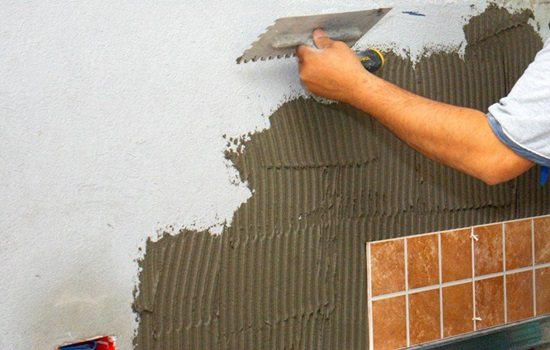
If the masonry surface of the tile is embossed, an even trowel is used, otherwise a notched trowel. Laying is carried out as follows:
The mortar is applied to even tiles with a notched trowel.
- Fasten the substrate for the masonry of the first row from the bottom up.
- The excess is sawn off with a metal file. Pruning is left to the final stage.
- The adhesive is applied to the tiles, which are firmly fixed to the wall at the level of the substrate.
- Excess solution is removed, and the remains are washed off with a wet brush.
- The width of the seams is determined independently.
- Each row is shifted by half of the previous one with imitation of dressing of seams.
- The places left are being finalized.
- The working surface is left to dry for a day or more.
- The seams are decorated with grout.
Conclusion
To put tiles on a brick wall, it is recommended to initially carefully study the technology, correctly calculate the consumables and choose high-quality glue. The work is carried out independently, but if in doubt it is better to involve professionals. For piece counting, it's best not to use online calculators.
Which tile to use
The building materials market offers the consumer a large selection of tiles designed for laying on a brick wall.
The final choice is determined taking into account the purpose of the premises and the characteristics of its further operation.
The main types of ceramic tiles are:
- porcelain stoneware. Practically does not absorb moisture, resistant to low temperatures. The tile, not covered with a glaze layer on top, resembles a stone of natural origin, but the physical characteristics and the level of strength are much better;
- clinker. Excellent material for pool cladding. Does not absorb moisture, successfully resists the effects of chemical components;
- cotto. Products are made from red clay raw materials, used for decoration. After the completion of the firing procedure, the elements are coated with a special compound that prevents the penetration of water.


How to get brick tiles
There are several ways to cut bricks.
Machine
By far the most effective is cutting brick tiles with your own hands using a special machine that resembles a circular saw for wood.
The equipment consists of:

- solid steel bed;
- an electric motor with a gear;
- node for the advancement of the workpiece;
- work area water supply systems;
- diamond disc with a diameter of 22 cm.
Such equipment allows you to quickly and efficiently make tiles from old bricks.The water will get rid of the dust, and the diamond wheel will do the job exactly to the intended dimensions, making the cut surface completely flat.
Guillotine knife
There is no opportunity to purchase a machine - it does not matter. You can use a mechanical brick splitter or grinder. In fact, an apparatus for breaking bricks is a guillotine, in the lower part of which a workpiece with a marking is attached. The knife can be lowered onto it using an automatic machine or a hand lever.
angle grinder
If you plan to use an angle grinder to cut tiles from real bricks, then you should choose a model equipped with discs of at least 220 mm in diameter. Smaller circles can also be used, but then the brick will have to be turned around and cut from two opposite sides. At the same time, the time of work will increase, the accuracy and appearance of the cut surface will suffer. It is better to choose a diamond disc, you can also make a brick tile abrasive, but such a circle quickly becomes blunt. In addition, abrasives are often deformed and cracked, so it is unsafe to work with them.
In order for the result from working with the grinder to be the most effective, you should properly organize the workplace and prepare personal protective equipment.
- prepare a flat platform on which a pre-marked workpiece is installed;
- make a device for supplying water to the working area; you can use improvised means in the form of a plastic balloon and a medical system;
- the grinder must be held with both hands in order to prevent displacement during its movement;
- the supply wire must be located outside the working area of the tool;
- it is necessary to work in gloves, goggles and a respirator.
Using a tile cutter
Brick tiles can be cut with a stationary electric tile cutter, only slightly improved. The holders for the tiles must be removed, and in their place, special runners under the brick must be installed. This video shows that they were made from a common building rule:
It is clear that the main thing is to find an old brick, and it is not difficult to cut tiles of any size and shape from it, even in a home workshop.

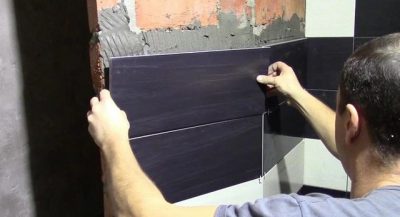
Laying steps
Laying tiles on an unplastered brick wall is a tricky job. First, you should prepare a primer mixture, a brush, tile material, glue, building level.
The technology implies the sequential execution of the following stages:
- the surface of the wall is thoroughly cleaned from dirt and dust. Oily stains and foreign particles are removed;
- a primer is applied, time is given to dry;
- the level will check the evenness of the wall surface;
- an adhesive solution is applied to the back of the tile, the thickness of which is determined taking into account the existing irregularities;
- the ceramic product is tightly pressed against the wall, checked for correct positioning with a level.
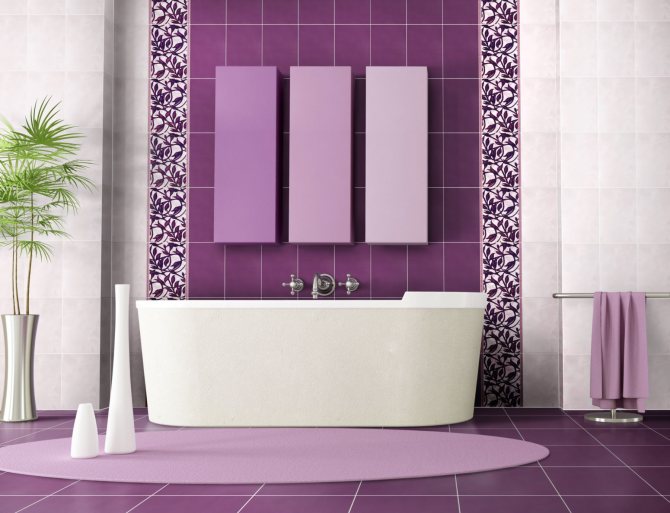
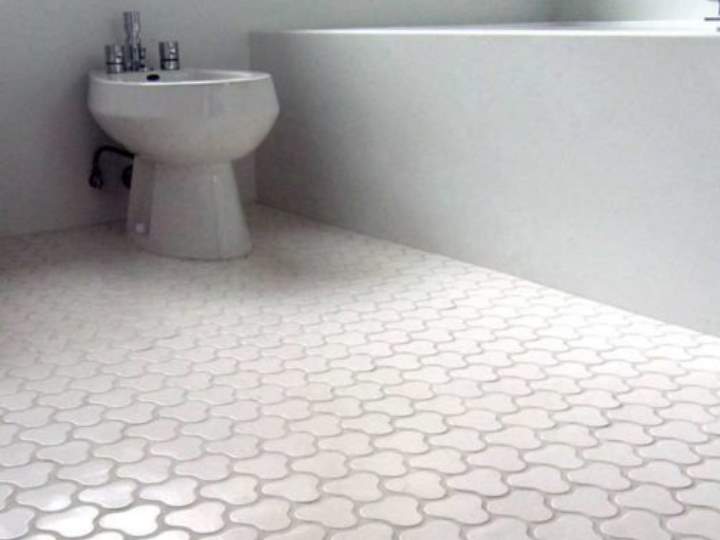
About ceramic tiles
Traditionally, ceramic tile floors are installed in so-called “wet” rooms. These include a kitchen, bath, sauna, bathroom, pool. That is, the main area of application of the material is rooms that are highly exposed to the influence of high humidity..
Today the field of application of such coatings has expanded significantly. Now ceramic floor tiles are found on open verandas, technical rooms, garages, hallways. Recently, expensive and beautiful tiles can be found in living rooms and halls.
Selection features
Ceramica Imola floor tiles are truly European quality.
When planning to carry out flooring with ceramic tiles, you should first of all decide on which manufacturer's products you prefer.The people are well accustomed to the concept that the material of foreign production is of better quality than domestic.
And for the most part, this is true, for several reasons:
- In European countries, very strict quality standards are in force, therefore dubious goods are simply not produced here.
- The high price of the product determines its undoubted quality. By purchasing such a tile covering, you knowingly overpay for the name of the company, but at the same time you get quality guarantees.
The list of the largest foreign tile manufacturers is headed by the following companies: Ceramika Imola, Aparici, Sicis, Azteca, Kerama Marazzi, etc. These are world-famous manufacturers whose products meet all the necessary quality standards. However, there are worthy manufacturers among domestic firms as well. At the same time, the cost of their products will be much lower.
For comparison, the average price for 1 square meter of domestic tiles is 150-550 rubles. Imported collections will cost you 500-2200 rubles per 1 m2.
Features of marking
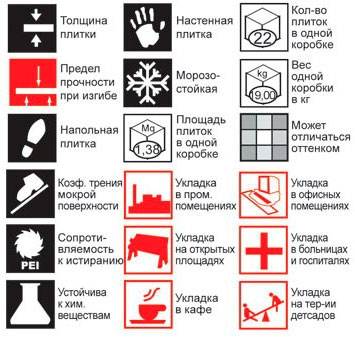
Basic marking symbols.
As mentioned above, each type of tile material has certain technical characteristics, which should first of all be taken into account when carrying out installation. Determining the type of coating is very simple - for this you should use the pictograms printed on the package. They determine the properties of the coating.
Let's consider some types of marking:
- Foot on a black background - the material is intended for laying on open terraces.
- Snowflake - frost resistance.
- The angle from the feet indicates that the product has a low slip coefficient. This is especially true for swimming pools and bathrooms.
- The foot shown against the shaded background indicates the improved wear resistance of the material.
Advice! If you plan to care for the slab base using chemical detergents, then you should purchase a coating with the AA designation.
Preparatory work
Before you start laying tiles on a brick wall, carry out the appropriate calculations that determine the need for materials. The wall does not have a layer of plaster, and everything should be done correctly in order to avoid unfortunate consequences.
First of all, the wall area and the size of the tile material are measured. Please note that a certain amount of tiles will be required for trimming so that the laying is done symmetrically.
The best option is to model the tiled rows on paper, respecting the scale.
Having finished with the calculations, we proceed to practical actions. For ease of installation, it is recommended to reinforce a profile guide or a regular wooden lath, from which the first row will begin.
The flatness of the resulting plane is adjusted according to the fastened self-tapping screws stretched at a five-millimeter distance from the surface to be trimmed. In the future, the adjustment process is carried out with an adhesive mass.
The main condition is to strengthen the first tile element, on which the final result of laying tiles on unplastered bricks will depend.
The primer is applied with a brush or roller. The first option is preferable, because the mixture is better rubbed into the brick pores, providing reliable adhesion. A spray gun is not used for such work.
In order for the glue to adhere better to the surface, do not wait for the primer to dry. For reliability, it is allowed to apply a second layer in order to properly clog the porous areas, but in this way you will create an obstacle to the quick hardening of the adhesive solution. It can crack and flake off as moisture is absorbed quickly.
The second time, the walls are primed about an hour before laying the tiles, so that they have time to dry out a little. You should not immediately process the entire surface - it is better to do this in sections, given the speed of the facing work.
How to choose material
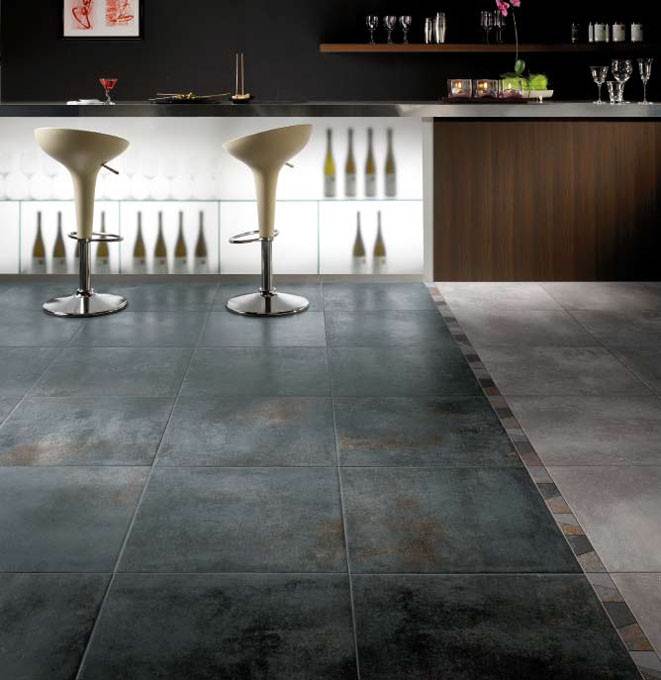
Ceramic floor tiles have been made for years. It is durable and reliable, provided that it is chosen correctly.
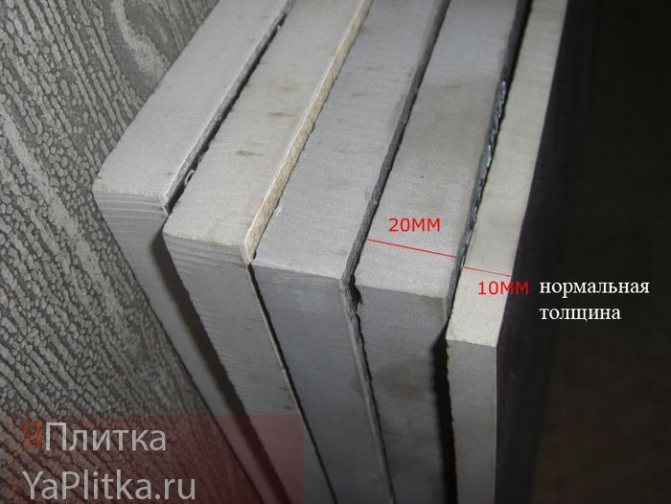
When choosing a tile for a room, you need to consider a number of facts. She should wash well and have an increased level of shock resistance. The strength class must correspond to the third according to the classification of European countries, or not lower than the fifth according to the domestic GOST. Also, the tile must be resistant to alkalis and acids. In the class table, the indicator B or AA must be indicated. The thickness of ceramic floor tiles is chosen from 10 mm, but at the moment thin porcelain stoneware is being produced, which is already gaining momentum in application. With proper installation, such material is not inferior to thick tiles.
The thickness of the ceramic floor tiles can of course lead to the idea that the thicker the better. However, using tiles of standard thickness is the most suitable option for use in the home.
First of all, owners of apartments in skyscrapers are interested in such material. In such houses, strict regulation of the weight load on the floors and thin material is the best fit for this.
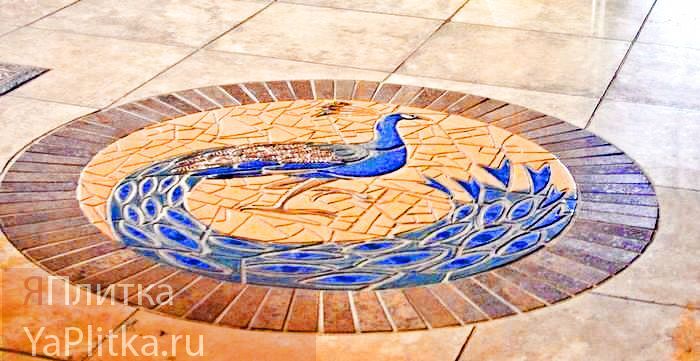
Today, the choice of ceramic tiles is simply breathtaking. The market offers a wide variety of color shades. Before buying, you need to consider the design of the room and the color scheme. The matte grained surface perfectly hides stains and dirt. You can also choose a different shape. Modern tiles are no longer limited to boring squares. You can buy rectangular, octagonal or even rounded corner tiles.
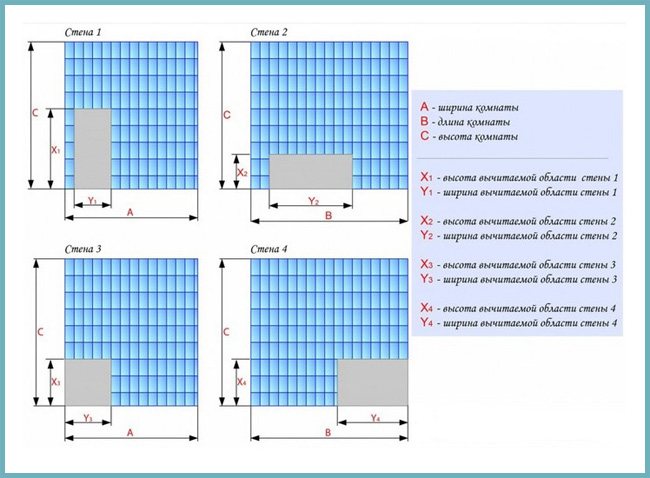
Calculation of the required number of tiles
The beauty of working with a professional installer is that they will calculate exactly how many tiles to buy so that there is enough, but not too many left. If you do it yourself, then you will have to do the calculation yourself. Online calculators can help in this matter, but their functionality does not allow you to accurately calculate the required amount of material. Better to do it manually:
- Calculate the area of the floor and walls by multiplying their width by length, write down this figure;
- If the room has windows and doors, find the area occupied by them in the same way;
- Subtract the area occupied by windows and walls from the total area of the walls;
- Calculate the area of one tile by multiplying its sides by each other. Do not forget that usually tiles for floors and walls are of different sizes;
- Divide the floor area by the floor tile area, do the same with the values calculated for the wall tile. If the result is uneven, round it up to whole numbers;
- Add 10-15% to the resulting value so that there is a margin for rejection, cutting and other unforeseen situations.
tile calculation
Please note that some methods of laying tiles with your own hands, as well as using tiles with a pattern, are associated with a large consumption of material, the stock in these cases is increased to 30%, since in order for the laying to look symmetrical, you will need to cut and combine more. Collections that include many decorative elements, tiles of different sizes or complex patterns are best calculated with the help of a consultant or an experienced craftsman.