Classification of thermostats
Temperature regulators for heating boilers provide a given temperature regime of the room with a sufficiently high accuracy. The deviations, as a rule, do not exceed 0.50 C - 1.00 C. Their work is carried out by means of a variety of actuators, which actually determines the belonging of the thermostat to one or another type. By the number and content of functions performed devices are classified as follows:
- Single-function (maintaining an exclusively set temperature).
- Multifunctional, or programmable.
According to the type of execution, the thermostats are divided into devices that are connected to the heating boiler by means of wires and wireless. The installation of the control device is carried out in an accessible place that provides sufficient air flow. In addition, it is advisable to exclude the placement of household electrical appliances (TVs, heating and lighting devices, etc.) in the vicinity of the regulator, since this can significantly affect the correctness of its operation.
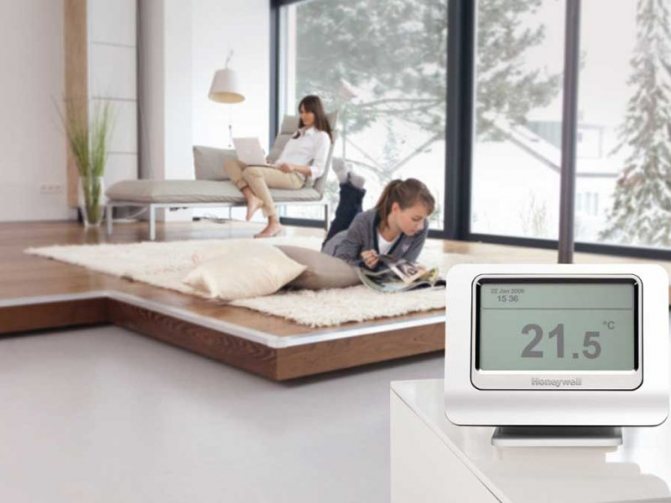
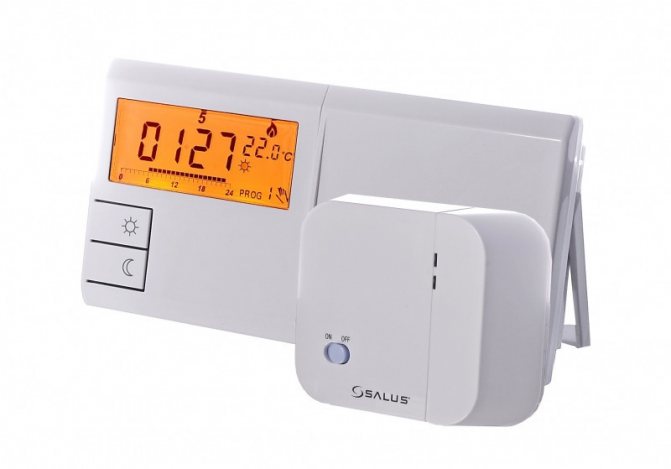
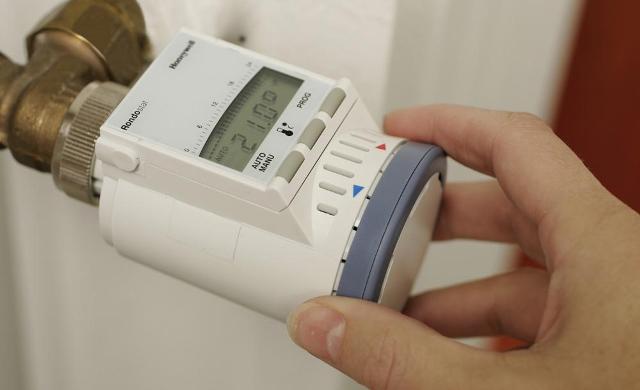
Programmable room controller
A programmable thermostat for a heating boiler provides the ability to select the required (comfortable) temperature at the desired length of time, it can be easily reconfigured to another operating mode. Equipping the device with a timer allows you to set different patterns for the functioning of the heating system for weekends and weekdays. There are timers that can support certain parameters depending on the day of the week. The presence of such functions in the temperature controller allows you to adjust the space heating system in accordance with the prevailing lifestyle and guarantee the temperature microclimate to be maintained even during the absence of the owners.
This controller has some options that significantly expand the capabilities of the heating system as a whole:
- "Batch", a function that provides periodic shutdown (for several hours) and the subsequent resumption of the system.
- "Holiday". The purpose of this option is to increase or decrease the intensity of space heating for a given number of days.
- "Overlap". A mission that allows you to temporarily change the program settings in one of the periods.
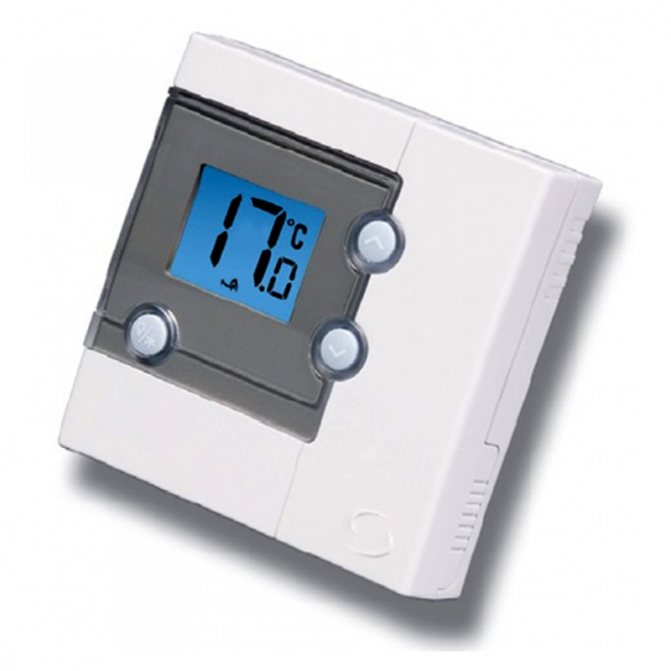
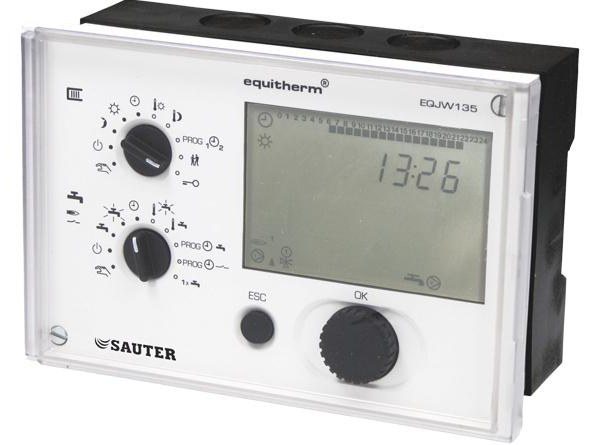
Central fixture
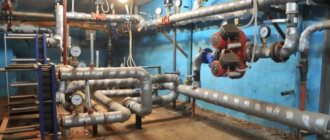
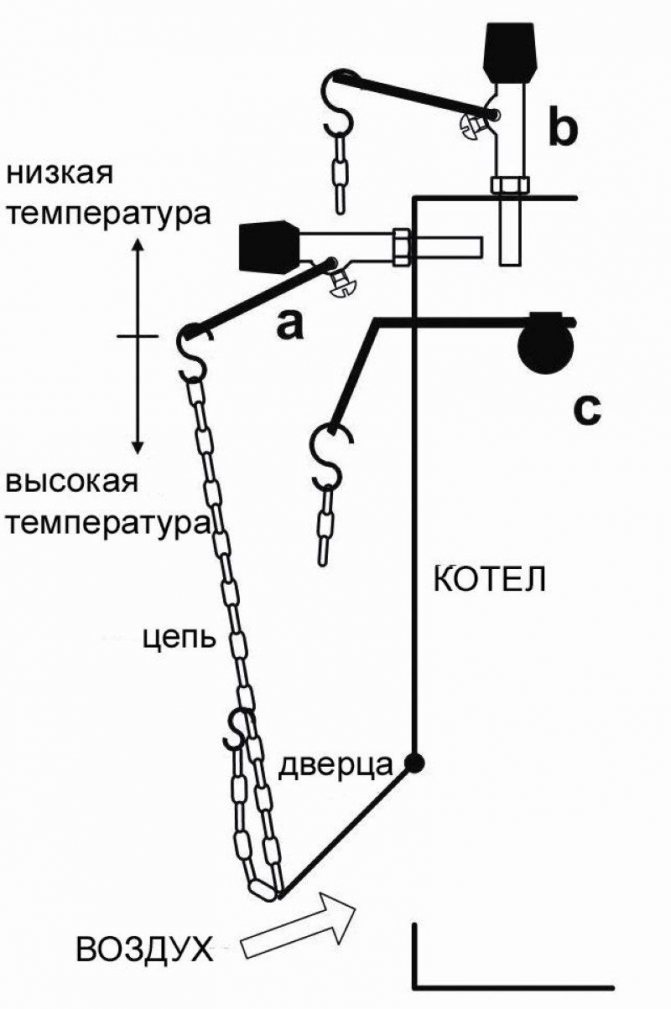
As a rule, a device of this type is used to effectively control the heating system of the whole house and is placed at some distance from the heating boiler. Such devices are equipped with a dilatometric thermostat that works remotely. The principle of its operation is to measure the ambient temperature and, depending on its fluctuations, turn on (off) the heating boiler.

Add a link to the discussion of an article on the forum
RadioKot> Circuits> Digital devices> Household appliances>
| Article tags: | Thermostat Add Tag |
K-type thermocouple thermostat
Author: DrCaH4ec, Published on 07/20/2017 Created with the help of KotoRed.
Good day!
I present to your attention the scheme of the thermostat developed by me on the K-type thermocouple.
The "brain" of this device is the Atmega8 microcontroller (I used the TQFP32 package). The data is displayed on a seven-segment three-digit indicator with a common cathode (the color of the glow to your taste). The current to the indicator cathodes goes through transistors (I used MMBT3904, but KT315 or any other low-power reverse conduction bipolar transistors are also suitable).
The device is powered by a voltage of 5V, which is provided by a 7805 voltage stabilizer, you need to take it in the TO220 case and it is recommended to install it on a radiator.
I took the diodes for the diode bridge 1N4007, but you can also use any other rectifier diodes or a ready-made diode bridge. Control is carried out by buttons S1 (T-), S2 (T +). The signal from the thermocouple is amplified by the LM358 operational amplifier. The device implements cold junction compensation of the thermocouple and 0 calibration of the operational amplifier. The thermocouple can be used from a multimeter, but it is better to take it in a protective casing, since it can be safely immersed in the substances that you will melt.
Resistors of any power.
"Exotic" resistor values in the amplification unit can be obtained as follows:
- 53,6=27+27
- 3.954k = 3.9k + 51
- 2.74k = 2.7k + 39
Diode D5 must be attached as close as possible to the place where the thermocouple contacts are attached to the board and it must be 1N4148 or domestic analogue KD522.
The load is controlled by a triac. Galvanic isolation is provided by using an optocoupler. The triac must be installed on the radiator. If you do not have air cooling, it should be large enough; with forced cooling, even a heatsink from a computer power supply will suffice.
The maximum load that can be connected to the device is limited only by the triac that you supply. It is advisable to use thicker power wires due to the fact that a large current will flow through them.
LED1 LED indicates whether heating is in progress.
The minimum temperature that can be set is 50 ° C; maximum - 800оС.
The principle of operation of the device is very simple. If the current value of the heater temperature measured by the device is less than the set value, then a logical unit appears on the B2 port of the microcontroller, the triac opens and the current flows to the heating element. Otherwise, if the current value of the heater temperature measured by the device is greater than or equal to the set one, then a logical zero appears on the B2 port of the microcontroller, the triac closes and the current does not flow to the heating element.
A properly assembled device only needs calibration.
It was decided to use the case from a computer power supply.
One of the mains wires and the output of the triac are brought out from the back of the case and through a powerful terminal block the heating element is connected to them. The thermocouple wires also come out on the back of the case. Since the thermocouple wires are shielded in my case, there is a minus on the screen.
In front, to improve the appearance, I made a bezel from a piece of PVC and an oracle. Also located here are an indicator, control buttons, an LED indicating heating and a device switch that disconnects only the power from the board and has nothing to do with the power section.
Calibration
Turn on the device. Dip the thermocouple into melt water with ice and turn the variable resistor P1 on the indicator to 0оС, or if you have a thermometer, you can measure the room temperature with it and turn the variable resistor P1 on the indicator to set the same temperature as the "reference" thermometer showed. Then boil water, lower the thermocouple there and turn the variable resistor P2, set the indicator to 100 ° C. You can perform this operation several times until the device shows the desired temperature without adjustment. You can also believe how it will show your body temperature.
Using
Immediately after switching on, the display will show the greeting НІ (from English - hello).
Then the device will show the set temperature (when you turn it on for the first time, there will be a random number) and the thermostat switches to operating mode. Where it will show the current temperature, the LED will also indicate whether heating is in progress (LED is on - on, off - not on).
To set the preset heating temperature, you need to hold down both buttons and hold until the inscription "INS" (instalation) appears.
Then the indicator will briefly show the value of the current set temperature and you can use the buttons to set the temperature you need. When you are done, just release the buttons and do nothing. After a while (about 5 seconds), the display will show the inscription "SAV" (save). And the device will go into working mode.
Well, I hope all of the above was useful for you and this device will work for you right away. All the best and good luck with your work.
An archive with the necessary files is attached.
Files:
Termoregulyator
All questions in the Forum.
| How do you like this article? | Did this device work for you? | |
| 41 | 4 | 6 |
| 0 | 0 |
These articles may be useful to you too:
Radiator thermostat-thermometer-voltmeter-car
Two thermostats.
Thermostat for warm floors.
Thermocontroller "Murka"
Automation of temperature conditions in the process of ethyl alcohol production.
A budget thermostat for a gas boiler.
Dual-zone thermal control, "ThermoOp". For soft electric heaters.
Thermostat on a PIC16F84 microcontroller and a DS18B20 sensor.
GSM thermostat + GSM alarm
Operating principle
Regardless of the type, the design of the thermostats corresponds to one general scheme. The device consists of 3 key modules (blocks):
- a temperature sensor for a heating boiler with a temperature sensitive element;
- settings block;
- control unit.
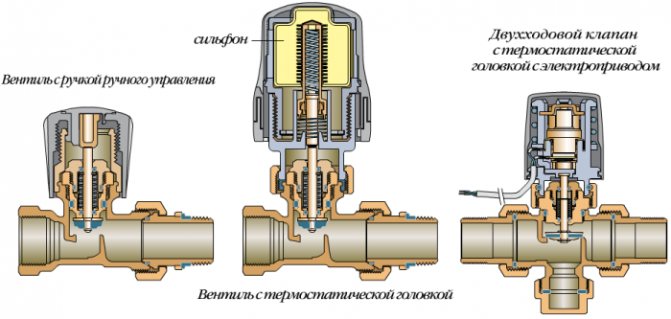
A thermal sensor with a temperature sensitive element monitors the degree of heating of the surrounding environment. Changes in ambient temperature cause changes in the physical parameters of the element, which are captured by the control unit. The control unit, in turn, transmits a signal to one of the executive devices:
- mechanical valve;
- electromagnetic relay;
- digital (analog) device performing post-processing of the signal.
The functional purpose of the tuner is to fix the parameter values, the achievement of which initiates the operation of the thermostat itself.
Installation of a temperature controller for a heating boiler is carried out with the obligatory observance of certain mandatory conditions:
- The device must be protected from UV radiation.
- The external sensor is installed in places characterized by a stable ambient temperature (no proximity to heating devices, drafts, etc.).
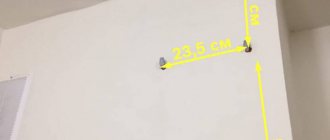
- The sensor is mounted at the height recommended by the manufacturer.
- It is unacceptable to cover the device with screens, curtains, furniture, etc.
DIY thermal sensor
Simple thermal sensor circuit
This simple thermostat circuit, made on only two transistors, can be used as a temperature rise alarm or as Temperature regulator (for example, turn on a fan to cool some monitored object).
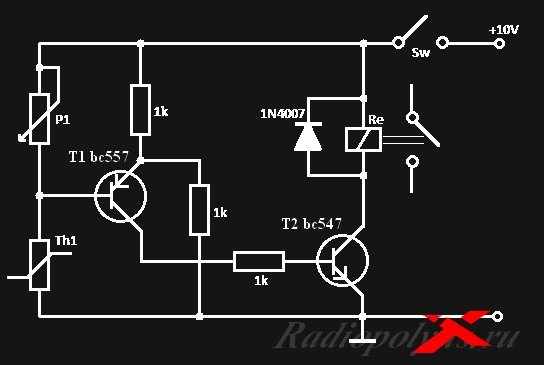
Fig. 1 Schematic of an electronic thermostat
The work of the circuit is as follows. At normal temperature, transistor T1 is off, transistor T2 is also off, so relay Re is de-energized. As the temperature rises, the resistance of the thermistor Th falls, at a certain value, the voltage at the base of the transistor T1 reaches the value at which it opens, the transistor T2 also opens, the relay Re is triggered, turning on the load.
Customization. You must adjust P1 so that the voltage across the base of T1 is 0.5V less than the emitter voltage, at a temperature slightly below the desired trigger temperature.
If you want to use the thermostat as a low temperature alarm or as thermostat for heater(the contact group of the electromagnetic relay must correspond to the current load of the heater), Th1 and P1 are swapped.
The circuit uses a NTC (Temperature Coefficient of Resistance) thermistor. The resistance of the trimmer P1 must be close in value to the nominal resistance of the thermistor Th. The resistance of the relay winding Re should be about 200 Ohms, if used as T2-bc574 (KT3102 is its domestic analog, for bc557 the analog is KT3107).
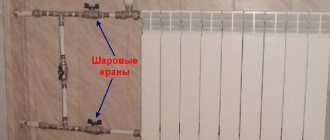
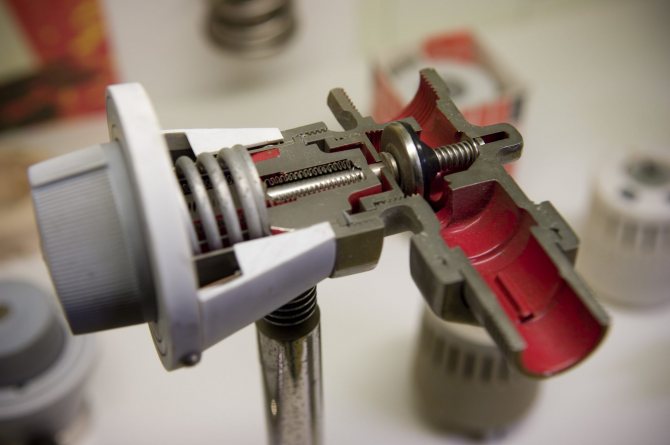
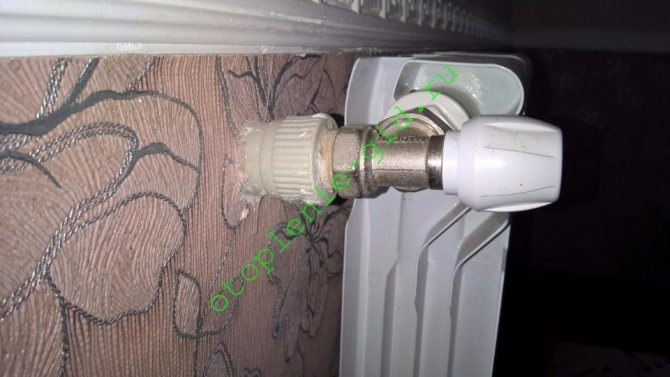
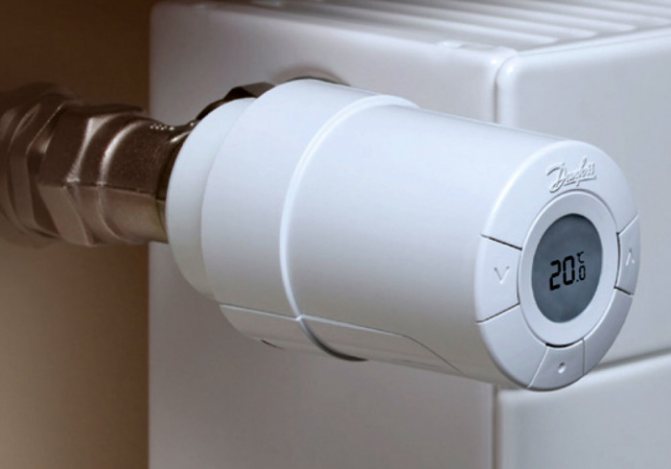
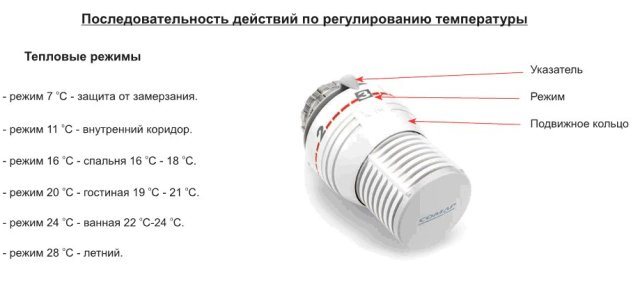
Regulating thermostatic valve
This regulating device, called a thermostatic valve (valve), is the simplest solution to the problem of obtaining a heat carrier of a certain temperature. The result is achieved by mixing cold and warm water. The control of the coolant temperature is carried out not by controlling the heating boiler, but by changing the intensity of the coolant flow through the radiator.
The design of the device is quite simple and includes two main elements:
- The valve itself (valve), which is, in fact, an ordinary shut-off valve that closes the opening at the entrance to the heating radiator. The overlap occurs in whole or in part, which, in essence, determines the amount of the coolant passed through.
- Thermostatic element with a thermostatic bulb filled with a special liquid (gas) that expands when the temperature of the coolant changes.
In addition, the thermostatic valve can be considered as an effective addition to mechanical or electronic thermostats. The advantages of such devices are their low cost and ease of use, however, they need to periodically check the operating parameters.
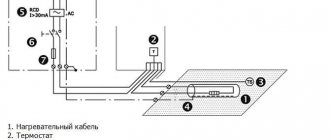
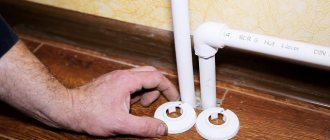
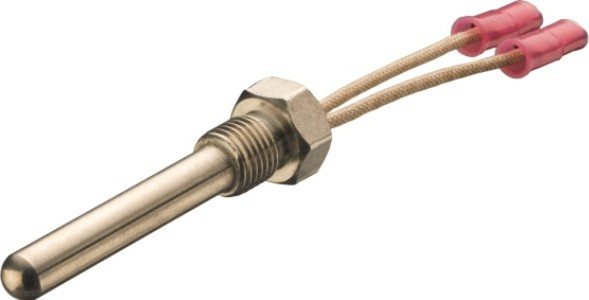
Installation and connection of the sensor
First, you need to choose a suitable place where the temperature should be measured. Further, a cable route is stretched, along the entire length of which it is advisable to avoid contacts with metal elements, too warm or cold surfaces. When installing, it is important to take into account that the flow of the measured air medium and the electrical connector of the element must be in the opposite direction. After fixing the circuit, you can connect the temperature sensor for the boiler to the pre-installed relay. This is done using complete fittings. As a rule, the black wire is fed to the "minus" thermostat, and the red wire to the "plus".
Useful Tips
To ensure high-quality and uninterrupted operation of the boiler thermostat, and the entire heating system as a whole, it is necessary to take into account some nuances. In this regard, here are some useful tips:
- The purchase of control equipment is preceded by a calculation that considers such parameters as the required temperature and the area of the heated room. This calculation will avoid the low efficiency of the system and the problems with electrical wiring, which are inevitable when connecting heavy-duty equipment.
- Despite the rather good compatibility of thermostats with most models of heating boilers, the use of equipment from one manufacturer will provide not only ease of installation, but also ease of use.
- If in doubt about the need to buy expensive equipment, buy a cheaper (mechanical) option and test its capabilities. Perhaps its functionality will be enough.
- Before installing the thermostat, carry out thermal insulation measures in a heated room, since large heat losses will negate the efficiency of the device.
Summarizing the above, we can state that thermostats for heating boilers (water circuits, gas appliances) are increasingly positioned as irreplaceable heating system equipment that provides energy savings, comfortable warmth and coziness in the room.
Benefits
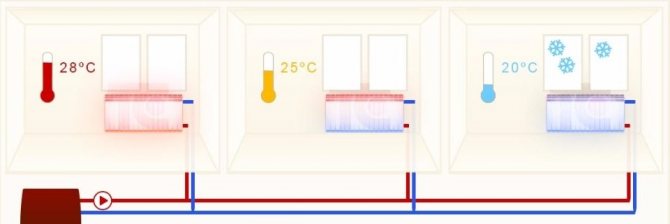
Thermoregulators can reduce heat energy consumption by 10-20%. Those systems that have not only individual thermostats, but are additionally equipped with regulators at the heating source, save 25-35% of thermal energy.
In addition, a pleasant microclimate is constantly maintained in the room, especially if automation is used to control the coolant.
Additional benefits
Other advantages of using temperature control devices include versatility and high accuracy. The versatility lies in the fact that the thermostats are suitable for installation in any type of heating system.
This equipment is used with gas, electric and solid fuel boilers.
High accuracy of adjustment is manifested in the fact that even a mechanical device stops the supply of heated water to the battery at the correct time, not to mention devices with electronic filling.
The latter can be adjusted in such a way as to maintain a specific, comfortable temperature at certain times. Often, an electronic thermostat even has a weekly programming function. The advantages also include the following qualities:
- durability - the devices are made of corrosion-resistant steel. Particularly interesting is Russian-made equipment, which in terms of hydraulic and strength properties corresponds to domestic realities;
- a wide range of brands and models - today thermostats are manufactured by many companies and supplied from abroad. High competition helps to reduce the cost of products.
Varieties of the device
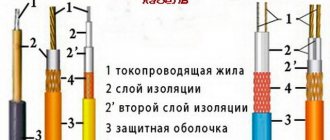
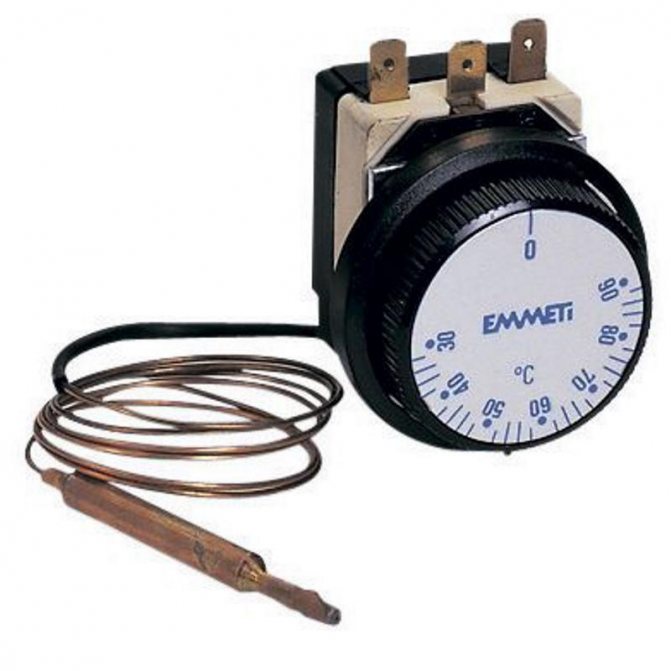
Developers of control thermostats offer sensors of different types, which differ in the principle of operation, design device, method of information transfer, and other characteristics. The simplest element is considered to be a temperature sensor for a boiler, which converts a temperature value into electrical resistance. In essence, these are thermistors, which outwardly resemble conductive elements, for which they are considered the simplest indicators. The disadvantages of such models include low accuracy and problematicity in organizing stable interaction with thermostats. More technologically advanced versions of temperature sensors demonstrate gas and electrochemical sensitive elements.
In addition, there are wired and wireless sensors. A thermostat with an external temperature sensor, operating on a radio signal, is distinguished by its wide installation possibilities. Such models, if necessary, can be installed on the street. During installation, wired devices are limited by the distance of the cable, the length of which is usually 20-30 m.
View gallery
User's manual
Work begins with programming the thermostat for a suitable operating mode. Next, you should make sure that the thermal relay sensor shows correct data and is ready for use. At this point, the connection should be established and tested. In order for the device to show correct values, it should be reliably protected from external physical influences. It is advisable to provide a solid case, but without hermetically sealed insulation.
View gallery
The indication that the sensor interacts with the relay and the controller will be the reflection of specific temperature indicators on the control panel. Some temperature sensors for heating on / off can also send information about humidity and wind speed - provided that the element is installed outside.
Types of thermal relays
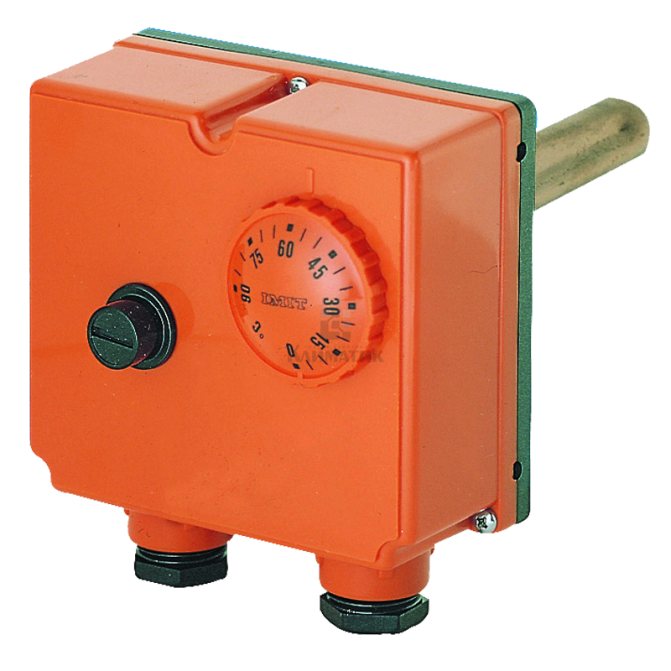
The simplest (also the cheapest) temperature controller looks like a small electronic unit with a temperature setting knob, mounted on the wall and connected to the actuator with wires. By functionality, the regulators are divided into the following views
:
- With the possibility of programming.They are equipped with liquid crystal displays, and can be wired or wirelessly connected to the controlled object. The program can be designed in such a way that during the absence of people, the temperature will decrease, and an hour before their return, it will rise.
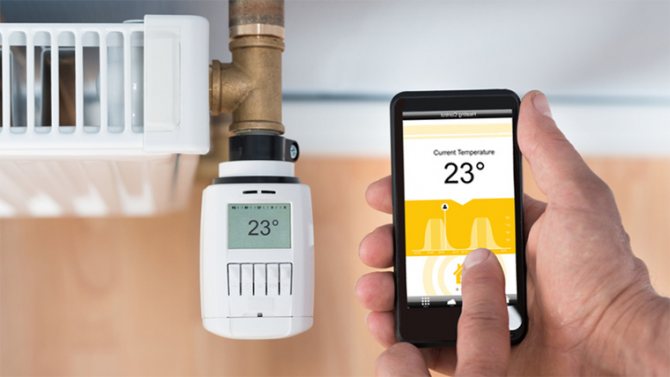
- Programmable with a GSM module, which allows remote control of the installation by means of SMS messages. Advanced models have special applications for installation on smartphones.
- Regulators are battery powered, that is, they have full autonomy. The disadvantage is that the batteries need to be changed regularly.
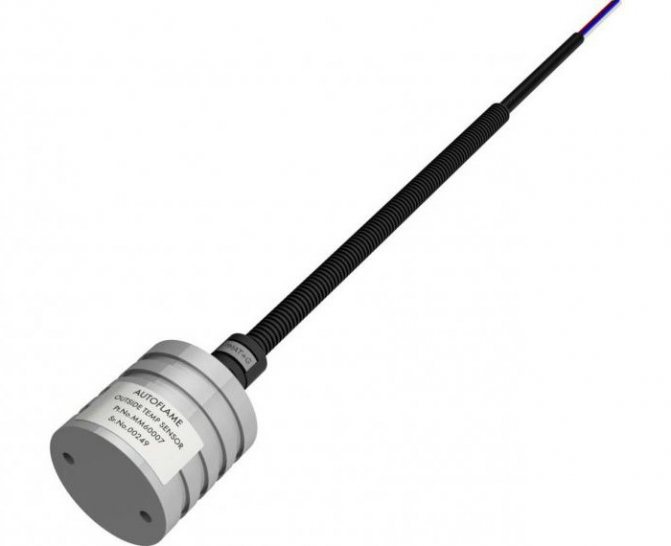
- Outdoor temperature measurement wireless with sensors. They are considered the most effective, since they provide the principle of regulation taking into account the change in temperature outside.
By appointment thermostats
classified as:
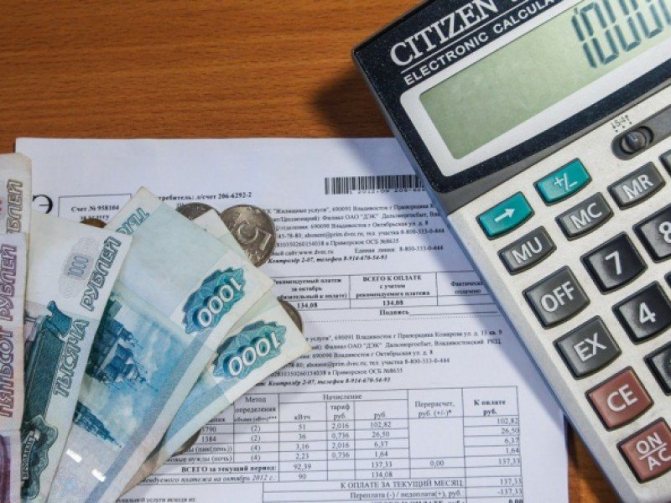
Why install heat meters?
You can only pay for the heat that enters your apartment and control your spending by installing a heat meter. The system is very similar to a system with hot and cold water meters.
Heat meters are of two types. The first one is suitable for a classic riser heating system, when from one through pipe in a room, which runs through all apartments from the first to the last floor, the heating is distributed to radiators. In this case, counters must be installed on each radiator.
The second type is used for apartment wiring, when the apartment has two pipes for the inlet and outlet of the coolant, and meters are placed on them.
How do radiator sellers deceive us?
Oil heater, infrared heater, convector or fan heater?
Without apartment or general house heat meters, the heating tariff is calculated according to the standard, which on average is 1.4 Kcal / sq. m. And heat meters determine how much heat carrier was actually consumed, and sometimes it turns out that in fact the apartment consumes 0.7–0.8 Kcal / sq. m. Thus, tenants save up to 40% of the total cost of heating.
But there is an important nuance: in order for the management company of an apartment building to start calculating the cost of heating according to the readings of an individual meter, and not according to the standards, it is necessary that the devices are installed by more than half of the residents of the house.