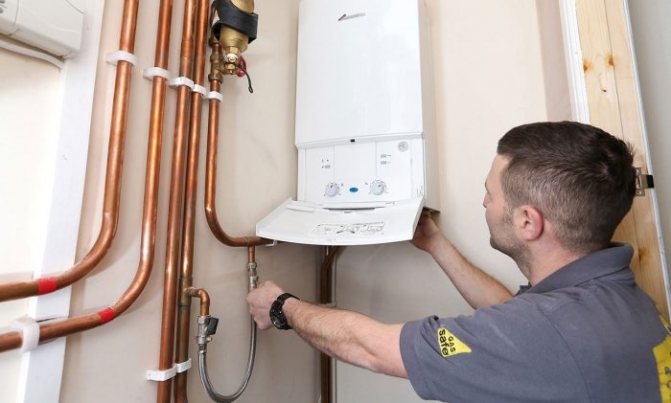
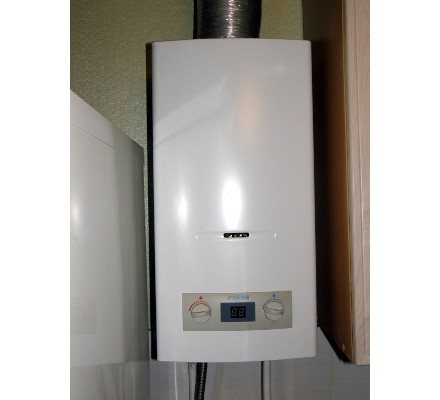
To understand in detail how to repair a gas water heater with your own hands, consider the most common breakdowns, their causes and remedies.
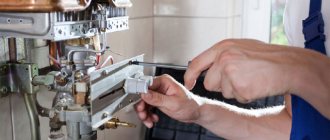
All repair work must be performed with the gas valve closed (read how to repair the Oasis gas water heater in this article), even if you do not plan to disassemble the gas part. There is a chance that you accidentally unscrew the wrong nut and gas will start to come out.
Scale on the heat exchanger tubes
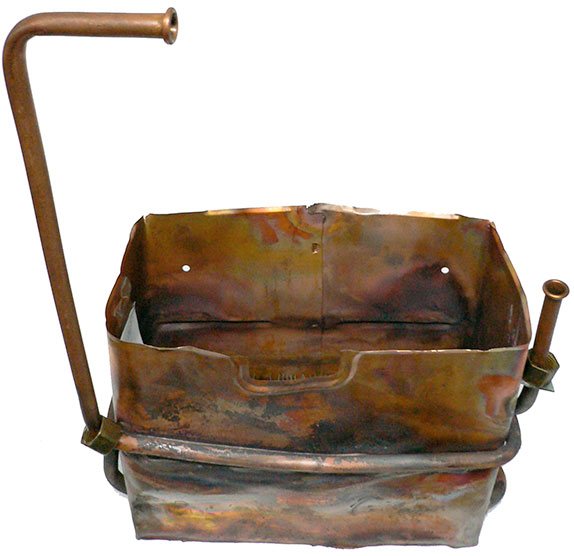
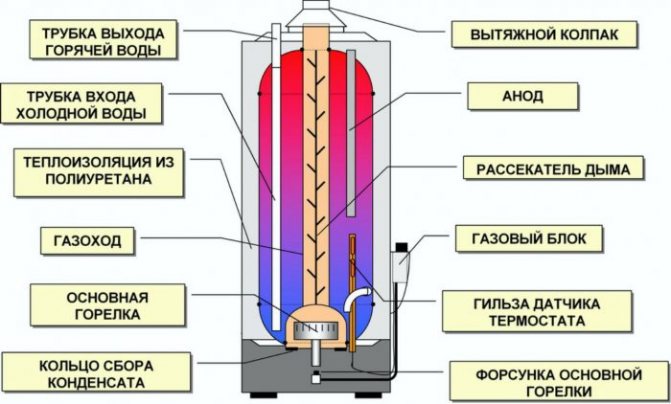
The heat exchanger consists of a casing and pipes, into which cold water enters and heats up there. In any case, over time, a small layer of scale appears inside. The main reasons for its occurrence are the high hardness of the water and the operation of the water heater at temperatures above 80 degrees.
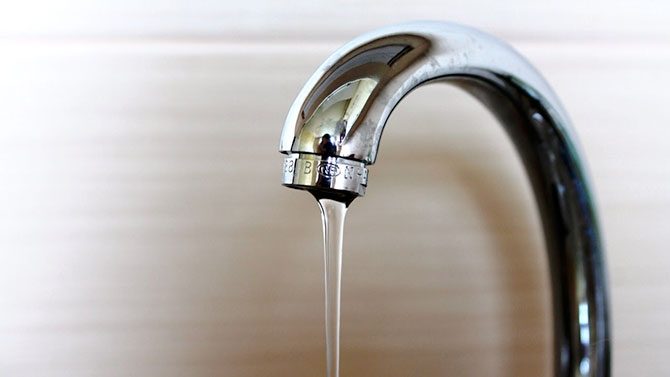
It is possible to determine that the pipes of the column are clogged with scale by the fact that cold water from the tap flows actively, and hot water from the column in a thin stream.
The column can be repaired without removing the heat exchanger. The gas is turned off and the water valve is closed. It is necessary to remove the cover from the device and drain the water. To do this, unscrew the union nut from the water inlet to the water heater and turn on the faucet located below everything in the system, usually a faucet in the bathroom. Termaxi geysers have a special tap for draining water from the system. In this case, it is easier to drain the water into the substituted container.
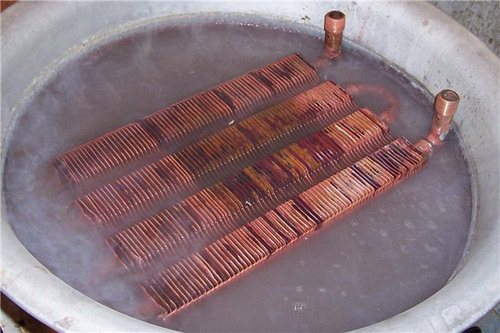
After that, the nuts at the inlet and outlet of the heat exchanger are unscrewed and a special anti-scale liquid is poured into it through a hose, which can be bought at hardware stores. You can also use a vinegar or citric acid solution.
The column is left in this form for several hours. Then everything is connected back and the water valve is turned on. You need to slowly turn on the hot water tap. Dirty liquid should pour out. If after this the head has increased, then the heat exchanger pipes are cleaned. If necessary, you can repeat the entire cleaning procedure several times.
In order to avoid this breakdown, you need to use a water heater at temperatures of the order of 40-50 degrees. You can also install a filter at the inlet, which will purify the water from salts, which form scale.
Signs of membrane breakage
How do you know when it's time to change the rubber diaphragm? You need to pay attention to:
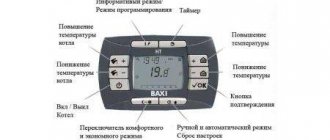
- The force of pressure of gas and water in the system. Open the tap, count how many liters are consumed per minute. Normally, it should be at least two to three liters. The gas flow can be calculated visually by looking at the strength of the fire.
- Flame location. In appliances with wick ignition, the fire must burn from the edge of the burner, be at least 3-5 centimeters high. Does not match? Then check the jets for blockages. After cleaning, look at the flame again. If the situation does not change, the problem is the diaphragm.

- Technique with piezo ignition should click when the button is pressed. This means that the diaphragm has worked. If no sounds are heard, the part may be damaged or torn.
- In some models, the rod, which controls the operation of the control unit, will help determine the breakdown. Remove the protective cover and open the water. If the stem is not moving, the diaphragm must be replaced.
After you have found a breakdown, you need to choose the right replacement part.
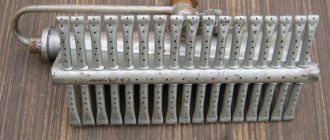
Clogged radiator
The heat exchanger radiator consists of pipes and metal plates closely spaced to each other. The plates are in direct contact with the flame, so over time, soot collects on them.
You can determine that the problem is in this by the following indicators:
- Flame yellow.
- The fire does not tend upward, but to the side, heating the case.
- When operating at full capacity, the water heats up slightly.
- Soot pours out from under the column.
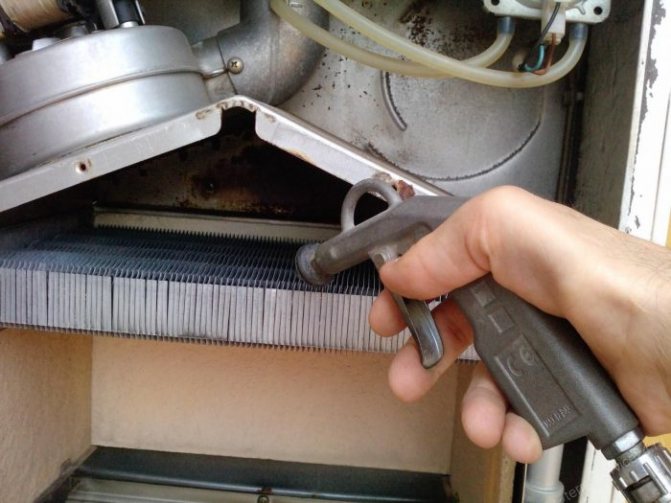
In order to clean it, you need to remove the heat exchanger. For this, the casing is removed, and all the elements that hold it are unscrewed. During parsing, cover the burner with a rag so that no soot gets into it.
After removal, the unit rushes to the bathroom and washes there. It is best to leave it in a container with high sides for a few hours to let the soot go sour. Further, the space between the fins of the heat exchanger is cleaned under running water using a long-bristled brush and detergents. At the end, dry and install in the reverse order.
Gas burner repair with automatic protection system
More complex reasons for the extinction of a gas column with an automatic protection system will be described below.
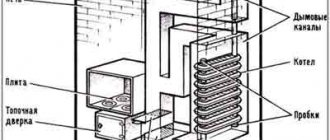
To carry out the repair of the gas water heater, it is necessary to clearly understand how the components of the protection system work.
In geysers with an automatic protection system, the gas in the igniter must burn continuously, even regardless of the position of the handle, valve valves and mixers for water supply. The simplest automatic protection system for gas water heaters consists of three elements: a thermocouple, a thermal fuse, and a solenoid valve. The wick of the gas column goes out in cases of activation of the protection elements or in case of a thermocouple malfunction or a clogged igniter.
Related article: What role do curtains play in the living room interior?
If the automation elements fail, evidence of their inoperability is the process when the igniter of the gas column goes out after they stopped holding the gas control knob. To carry out repair work, it is necessary to clearly understand how the nodes of the protection system work.
Leaking pipes
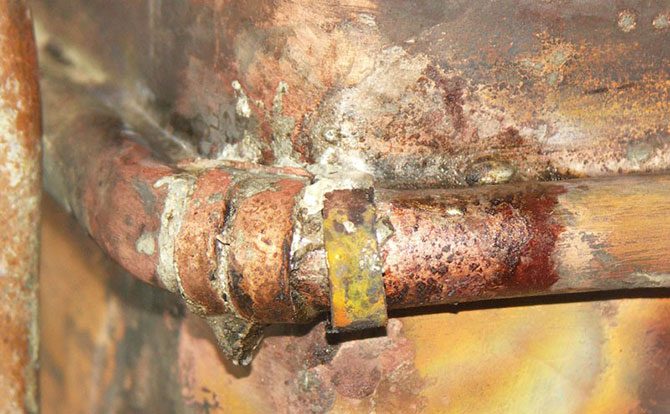
If water begins to drip from the column, the reason may be that fistulas have formed on the copper pipes. In order to find the place of leakage, you need to carefully inspect the heat exchanger with the water turned off. Some fistulas are easy to find, you will see how water comes out of these places. Small holes can be seen by green spots and rust all around.
There are three ways to eliminate the leak:
- Fit a clamp with a rubber gasket. If space allows, and the pipe does not fit snugly against the casing, the simplest, fastest and most effective is to install a metal clamp with a rubber gasket. Despite its simplicity, this method allows you to eliminate the leak without damaging the structure.
- Solder the fistula. Having previously cleaned and degreased, the place of leakage is covered with a flux. After that, using a powerful soldering iron or a torch with a gas cylinder, the fistula is soldered. In this case, it is necessary to ensure that the solder covers the desired section of the pipe with a layer of 1-2 mm.
If multiple holes are side by side, it will be effective to solder a piece of copper plate. It is not recommended to solder cheap Chinese heat exchangers. They are usually painted on top to hide the uneven color of the impure copper. In such columns, the pipes are too thin and will burn out during brazing. - Use cold welding. In this case, it is important to carefully look at the instructions and make sure that they can withstand high temperatures. A piece of cold welding is taken out of the package and kneaded with gloved hands until it hardens. After that, it is applied to the pipe and smoothed until it hardens completely.
After the end of the soldering, water is run into the water heater to check it. It is advisable to additionally clean and solder all areas of a greenish tint. Perhaps, after a while, new fistulas will appear there.
Also, leakage can form due to the fact that the gaskets are worn out.If water flows out of the pipe joints, you should simply replace the gaskets there with new ones.
What to do if the gas water heater goes out
The main reason for the extinguishing of the fire in the column during ignition may be low thrust or its complete absence in the ventilation duct. One of the most common reasons is a tightly closed plastic window. There is no air flow, and therefore the column overheats and the relay of the thermal protection of the gas column from overheating is triggered. If, when opening a window or door after 10-15 minutes, the column ignites and does not go out, then the reason for the extinction lies precisely in the overheating of the column.
The most common reason for the lack of traction in the gas column is a tightly closed window.
Provided that the chimney can be clogged with products resulting from combustion or if a foreign object gets into it, the protection system starts to work in the water heater and the gas is shut off automatically. How to check the presence or absence of draft in the chimney? It is enough to open the window and attach a lighted match or palm to the chimney opening. In the presence of thrust, the flame will deflect, and with the palm of your hand you will feel the breath.
How do I fix the problem? The answer is simple: clean the chimney and ventilation duct. Companies can help you with this, whose specialists, upon request, will come to you and clean your chimney.
Another reason for the extinguishing of the gas burner flame may be the process of discharging the supply elements. If your column has automatic ignition from generators or batteries, then you will have to replace them with new ones, having previously checked the "On / Off" button.
Related article: CBPB or cement-bonded particle board
Column won't ignite, no spark
There can be several reasons why there is no spark and the Vector gas column does not ignite:
Lack of draft in the chimney.
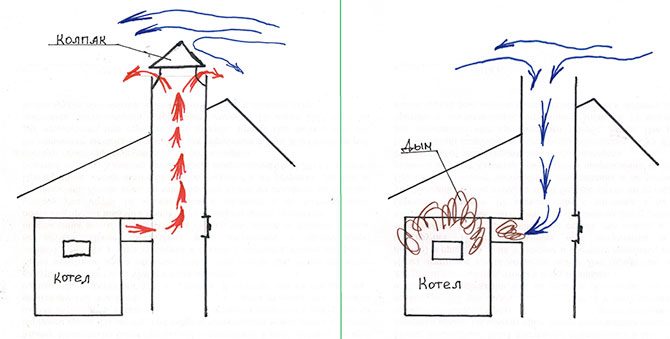
Normal thrust - - Reverse thrust
The reason may be the simplest - a clogged airway. You can check the draft in a simple way - bring a lighted candle or a match, or a thin sheet of paper to the air duct. If everything is in order with the draft, the flame or sheet will deflect towards the duct. If not, you need to clean the chimney.
Low pressure of water that enters the device.
There can be several reasons for low pressure. Clogged filter located in front of the water heater block. In this case, it is necessary to remove it by unscrewing the nuts and rinse it. If the filter is heavily clogged with limescale and cannot be cleaned, you will have to replace it.
If you have a low water pressure, then you need to either install a pump or change to a model that can work at that pressure. Clogging of the mixer components can also be the culprit. To eliminate this problem, it must be disassembled and cleaned. The fourth factor is that the heat exchanger is clogged.
It is necessary to remove the heat exchanger by unscrewing the bolts. Before that, you need to turn off all the taps and the gas valve under the water heater. Descale it using a special ready-made chemical agent or ordinary citric acid.
Diaphragm defective.
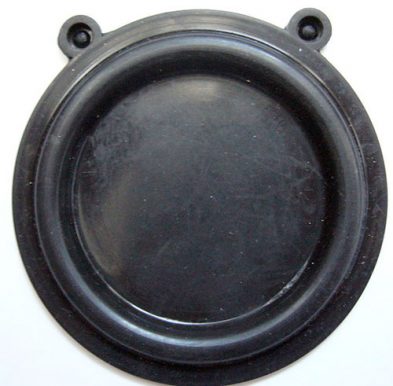
It is located inside the water block. It is necessary to remove the cover from it by unscrewing the screws. There is a rubber membrane under the cover. In working order, it should not be torn, stretched, deformed. If any defects are found in it, the membrane must be replaced. It is better to buy a silicone one, as it is more durable. When replacing the membrane, you must be careful not to damage it - first you need to tighten the screws located opposite each other, then the rest.
Dead batteries.
This is the simplest and most common cause. It should be noted that they can sit down earlier than indicated in the instructions. Replace batteries.
Oxidation of the contacts of the battery pack inside the battery pack or wires.
It is necessary to clean the contacts.
Incorrect installation of the handle.
The handle of the water regulator is set to the extreme left position. To obtain a spark and turn on the water heater, the handle must be moved to the extreme right position.
Oil seal leaking inside the device.
By unscrewing the cap, you can see water dripping from the water valve. The problem is solved by replacing the gland with a microswitch.
stock
Insufficient mobility or oxidation of the automatic stem.
In this case, it is necessary to remove the microswitch from the housing, release the stationary stem. When acidifying, it is required to clean, lubricate the stem.
The microswitch is out of order.
You can determine the breakdown by short-circuiting it. In the event of a malfunction, the microswitch must be replaced.
The integrity of the electrical circuit between the microswitch and the control unit is broken.
It is necessary to check the contacts of the control unit connector, microswitch wires for rupture and oxidation, if necessary, eliminate the malfunction by stripping and connecting the wires.
The solenoid valve is out of order.
In this case, the valve will have to be replaced.
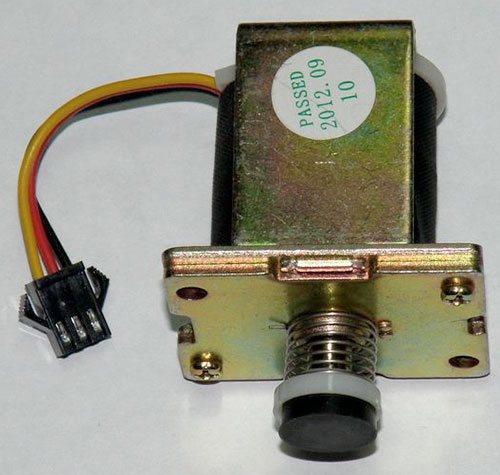
Solenoid valve
The control unit is broken.
Only replacing the block will help to solve the problem.
Troubleshooting the gas column
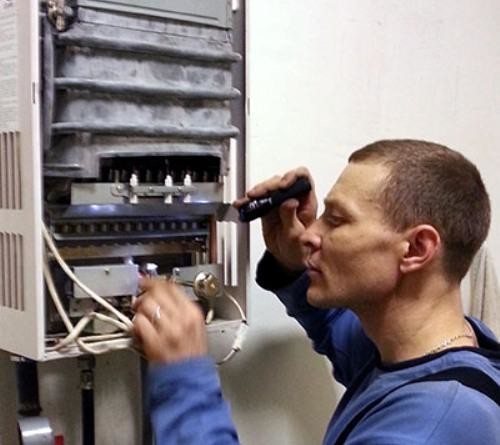
No matter how reliable the gas water heater is, whether it is a domestic or foreign manufacturer, it does not matter, sooner or later it will break down and you will have to repair it.
Gas in the igniter of the gas column goes out
Such a malfunction is inherent only in gas water heaters with an automatic protection system. The gas in the igniter must always burn, regardless of the position of the handles or valves of the taps and water supply mixers. The simplest automatic gas column protection system consists of only three elements. Solenoid valve, thermocouple and thermal fuse. The gas column can go out during operation in the event of activation of the protection elements or a malfunction of the elements themselves.
The failure of the automation elements is evidenced by the extinguishing of the gas in the igniter, after stopping the holding of the gas adjustment knob. To repair the automatic protection system, you need to have a good understanding of how its components work. Therefore, it is worthwhile to get acquainted in more detail with the device and the principle of operation of the protection elements.
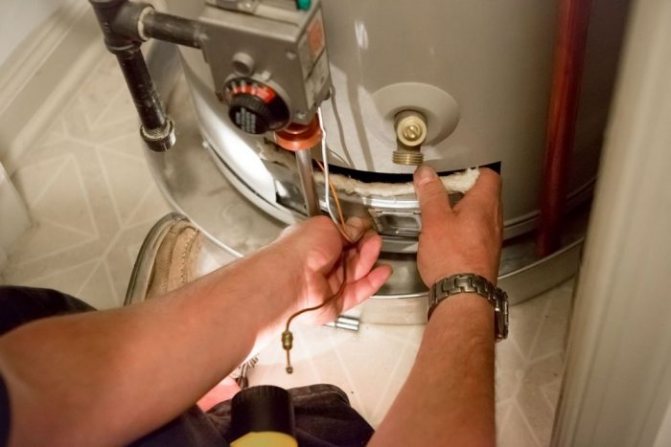
A thermocouple is two conductors welded together from different metals (I assume these are chromel and alumel), operating on the Seebeck effect and generating about 30mV EMF when heated. Serves to power the solenoid valve. Practically does not fail. The bottleneck is the unsecured center conductor coming out of the housing. Although it is insulated, the insulation can rub off over time, and the conductor can close to the case, while the gas column will go out. If the contact at the thermocouple welding site is broken, then it is not permissible to restore it by soldering with solder, since the junction in the thermocouple is a current generator, and not a simple eclectic connection of wires. The thermocouple should be replaced with a good one.
The solenoid valve of the gas column is a coil of copper wire, inside which there is a metal cylinder (solenoid), mechanically connected to the valve for shutting off the gas supply to the burner of the gas column. When a thermocouple is heated, it generates an electrical current that flows through the coil to create a constant magnetic field that pulls the solenoid into the coil. Since the solenoid is mechanically connected to the valve, the valve is displaced and gas enters the burner. If the gas in the wick does not burn, the thermocouple cools down and does not generate current, the spring-loaded solenoid returns to its original state and the gas supply to the gas column burner stops. In such a simple way, the safe operation of gas water heaters is ensured.If the wick does not burn, for example, the flame is blown out by the wind or the gas supply has been interrupted, then when the water taps are opened, gas will not be supplied to the burner of the gas column.
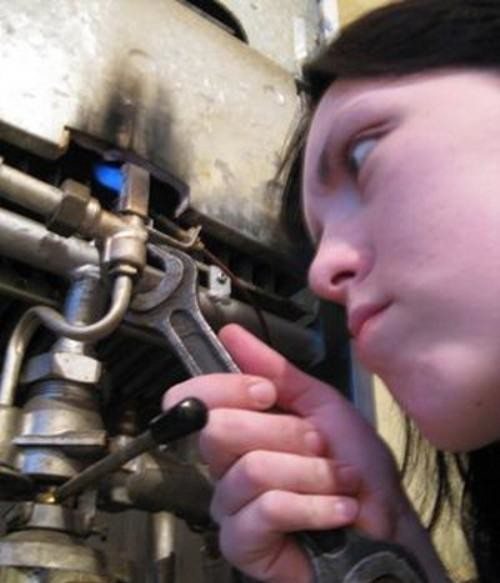
The thermal fuse is a bimetallic plate, which, when the temperature at the installation site of the thermal fuse reaches 90 ° C, bends so much that through the stem, breaks the solenoid power circuit. In addition, the thermal fuse itself is connected to the circuit mechanically, with terminals. Due to the complexity of the design and operating conditions, it sometimes fails. I had to replace it once due to the fact that the gas column went out haphazardly.
Checking the thermal fuse
It makes sense to check the thermal fuse, provided that there is good draft and sufficient air flow. If the plastic windows are tightly closed, and, in addition, the hood above the gas stove is turned on, then even with good traction, the gas water heater will overheat and just turn off the gas supply in this case and it is the task of the thermal fuse to protect the gas water heater from overheating, and the person from carbon monoxide.
Checking the solenoid valve of the gas column
If the paper clip did not help, then you need to check the functionality of the solenoid valve. The solenoid valve has a resistance of about 0.2 Ohm and consumes a current of about 100 mA in operating mode. You can check it by applying a voltage of 20-30mV to the winding at a current of 100mA. Such a mode can be easily created using any finger-type battery or accumulator and a 10 Ohm resistor. The battery must be fresh. The connection is carried out as follows. The negative terminal of the battery is connected to the column case (for the valve and thermocouple, one terminal is connected to the body, in the diagram there is a blue wire), and the positive terminal, through a 10 Ohm resistor, to the thermal fuse terminal (the terminals from the thermal fuse must be previously removed), the wire from which is not goes to the thermocouple (left red wire in the diagram). Light the wick and immediately remove your hand from the throttle control knob. The wick should continue to burn. If you disconnect the battery, the flame should go out immediately. If everything is so, the solenoid valve is working properly. Therefore, the thermocouple is faulty. If an external examination fails to find bad contacts or a short circuit in the wires, then the thermocouple will have to be replaced. It is sold complete with wires and terminals.
The geyser goes out during operation
No cravings
One of the most common cases with the arrival of autumn is a tightly closed sealed plastic window in the room where the gas water heater is installed. There is no air flow - the column overheats and the bimetallic relay of thermal protection of the column against overheating (self-healing thermal fuse) is triggered. If after 10-15 minutes the column lights up normally and does not go out with the window ajar anymore, then the reason is precisely the overheating of the column. If immediately after the gas goes out, you can light the wick, and it will continue to burn after you stop holding the gas regulator knob, then the draft is good.
The draft may still be insufficient due to clogging with soot or foreign objects entering the ventilation duct, for example, bricks from which the duct is made. To check the draft, you need to remove the gas outlet pipe from the gas column from the channel and, with the window open, close the channel with a sheet of paper. If the paper holds, then the traction is sufficient. You can bring a lighted lighter and if the flame deviates to a horizontal position, then the draft in the channel is sufficient. Otherwise, cleaning of the canal is required.
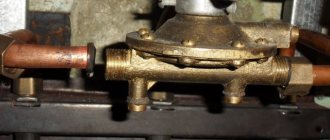
Water unit malfunctions
Even the burners in the column, both with and without automation, can go out due to insufficient water pressure in the water supply system, or a malfunction of the water unit.
If the pressure of cold water has not changed, but the water coming from the column has become weak, then the mesh filter at the inlet of the water unit is clogged. This often happens after turning off the water and supplying it again. For cleaning, it is enough to unscrew one union nut on the water supply side, remove and clean the sieve and the differential pressure calibration hole.
If a water unit is installed in the gas column as in the photo, and the water pressure has not visually changed, then it is necessary to check the condition of the rubber membrane in it. To do this, unscrew the two union nuts from the water unit, then unscrew the three screws that hold the water unit in the gas unit by the cone. Disassemble the water assembly by unscrewing the eight screws. Detaching the halves of the assembly from each other, you will see a rubber membrane. If the elastic is not flat, but deformed, with deflections, then this is the case and needs to be replaced. At the same time, you should clean the filter mesh and cavities of the water unit from dirt. I advise you to put a silicone membrane, it will last for many years. When assembling the water unit, first tighten the screws all the way, and then tighten diagonally to ensure that the rubber is clamped evenly.
In the old days, when I lived in an apartment on the top floor, where the water pressure was a sluggish trickle of water from the tap, I had to wash myself with a water regulator. With a round needle file, he increased the diameter of the calibration hole to 2 mm, removed the filter mesh, and annealed the conical spring of the gas unit. If he missed the size of the hole, then he inserted a copper wire into it to reduce it. Of course, this is a gross violation and it was necessary to constantly monitor the working column, but there was simply no other way out. But there was always hot water.
How to eliminate a leak in the gas column connections
The left pipe serves to supply water to the gas water heater, a tap is always installed on it to shut off the water supply to the column. This pipe is connected by a branch pipe to a water-gas regulator. From the regulator, water is supplied to the heat exchanger on the right side. Hot water is transferred through the middle pipe of the gas water heater to the water supply system and it is connected through a branch pipe directly to the heat exchanger on the left side. The right pipe in the gas column serves to supply gas and is connected through a copper pipe to the water-gas regulator. A gas shut-off valve is also mandatory installed on it. The water connections in the gas water heater are made by means of union nuts (American) with sealing with rubber or plastic gaskets. Over time, due to temperature changes, the gaskets lose their elasticity, become hard, crack and water leaks. To replace the gasket in the gas column, you need to unscrew the union nut with a wrench 24, remove the worn one and install a new one. Sometimes one gasket is not enough, the union nut is twisted all the way, but the water still oozes. Then you need to additionally install another gasket. Currently, silicone gaskets have appeared. They are much more expensive, but they last longer and more reliably.
Igniter repair
Try to clear the air inlet and nozzle with a thin wire, your igniter should start working again.
Sometimes, over time, the igniter nozzle can become clogged with soot, while the flame becomes insufficient and the fire may not ignite and go out. Gas builds up and an explosion can occur. The igniter needs to be cleaned urgently.
It may be that the pilot burner burns half yellow, but should burn blue. This is due to a lack of oxygen in the gas mixture. Soot is released, which settles on the heat exchanger. In this case, it is necessary to clean the hole in the igniter for supplying oxygen to the burner from dirt.
To remove the igniter, it is necessary to unscrew the nut that fixes the gas supply pipe and unscrew the two extreme screws. Next, the bar is retracted and lifted up.The jet must be clamped in the igniter of the tube, when it is released, it falls out. Clean the air inlet and nozzle with a thin wire - your igniter should start working again.
The most important thing in eliminating the problem, when the igniter of the gas column goes out, the thermocouple and other parts of your burner fail, is to be extremely careful. If you are not confident in your abilities and cannot troubleshoot problems yourself, then contact a specialist. It's dangerous to joke with gas!