Features of expanded polystyrene
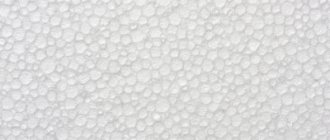
Modern expanded polystyrene is a cheap material that is widely used both in country houses and city apartments. It is made by thermal swelling of polystyrene granules. As a result, the granules are sintered to form a white material.
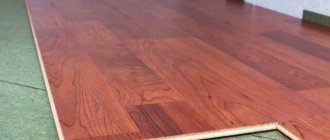
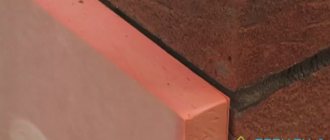
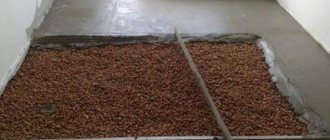
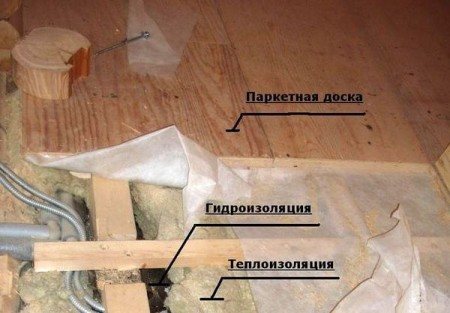
Section of the floor insulated with expanded polystyrene
Each of the expanded polystyrene granules consists of many microscopic cells with air. This can explain the extraordinary lightness of the material, because 97% of its composition is air voids.
Main varieties
Modern expanded polystyrene is represented by the widest range of brands that differ in thickness and performance properties. However, they are grouped into five groups:
- non-pressed polystyrene foam (in particular, PSB-S, ЕРS, etc.);
- autoclave (Stirofoam);
- extruded (Penoplex, XPS, etc.);
- extruded autoclave;
- pressed (PS (from 1 to 4), other foreign brands).
Expanded polystyrene of the PSB-S-35 brand.
If you need to insulate the floor on the first floor of the house, then it is better to use the material of the PSB-S-35 brand. Such boards are characterized by low thermal conductivity (0.4 W / m²) and moisture absorption (maximum 2%).
With a heavy load, it is recommended to opt for the PSB-S-50 brand. This is the ideal solution for garage and other utility buildings.
Video - Production of extruded polystyrene foam
Scope of application of expanded polystyrene
Depending on the density of the material, expanded polystyrene is used in the following areas:
- As unloaded thermal insulation
slabs with a density of up to 15.0 kg / m3 used in enclosing structures such as: floors, internal partitions, pitched roofs, attic floors, insulation of balconies, containers, etc. - For loadable thermal insulation
slabs with a density of 15.1 to 25.0 kg / m3 used in the production of sandwich panels and in, floors, rabbits, three-layer walls with a protective and decorative layer of brick. - Any facade brands of slabs with a density of 16 to 20 kg / cubic meter. used for thermal insulation of vertical enclosing structures
various facade thermal insulation systems with external plaster layers. - Plates with a density of 25.1 to 25.0 kg / m3 used in structures with significant loads - Self-leveling floors
in civil and industrial construction, insulation of foundations, walls in basements. And also in the manufacture of packaging products. - Plates with a density of 35.1 to 50.0 kg / m3 are used as thermal insulation for surfaces that are particularly loaded during operation. - basement floors, zero cycles of buildings, garages and parking lots, in the construction of floors and roofs used for automobile and pedestrian loads, etc.
The consumer must know all the properties of the thermal insulation material in order to make the best decision for himself. Consider the pros and cons of expanded polystyrene.
Material advantages
- Low thermal expansion + low thermal conductivity. Due to this, 10 cm of expanded polystyrene is comparable in properties to 40 cm of wood and 2 m of bricks.
- Environmental friendliness - the material does not harm health at all.
- The material is durable.
- Styrofoam has excellent sound insulation properties.
- It is also very durable, capable of withstanding significant loads.
- Its structure does not change with temperature changes.
- The material is resistant to moisture, that is, it does not swell or dissolve in it.
- It is resistant to aggressive environment of chemical and biological nature - to soap, bleach, salt solutions, bacteria, etc.
That is why expanded polystyrene is the best option for thermal insulation of the floor. The only negative is that it dissolves under the influence of organic resins.
Note! Recently, they began to produce slabs of different colors - green, red, blue. But this does not affect the properties and even more the cost of the material.
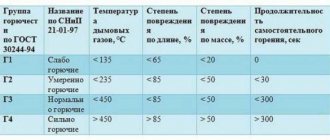
Fire safety. Modified and unmodified polystyrene foam
Untreated material is highly flammable from a lit match or sparks from a welding machine. At the same time, it cannot catch fire from a cigarette or a red-hot metal object.
Modified polystyrene foam (self-extinguishing)
Expanded polystyrene can ignite at temperatures from 200 ° C to 450 ° C, in this case it all depends on the additives used in the production.
Note! The ignition temperature must be indicated in the certificate that comes with the plates.
If ordinary unmodified polystyrene foam is burning, then the temperature around it can exceed 1200 ° C (although not for long). During combustion, toxic substances such as cyano- and hydrogen bromide, phosgene are released. If special additives were used, then the combustion temperature is reduced to that which is normalized for each specific grade of material.
In the manufacture of modified polystyrene foam, fire retardants (substances that prevent combustion) are used. In this case, the material is already considered self-extinguishing and is designated by the letter "C" at the end of the abbreviation (for example, PSB-S).
There is another way to reduce the flammability - when the granules swell, the flammable inert gas is replaced by non-flammable carbon dioxide.
Floor insulation with expanded polystyrene
There are several floor insulation technologies that differ in the material of the topcoat:
- insulation on the ground;
- wood insulation;
- insulation of the concrete floor.
But it is worth noting that the installation procedure for floor insulation is the same for all coatings. There are, of course, some nuances, but we will get acquainted with them a little later.
Sequence of work
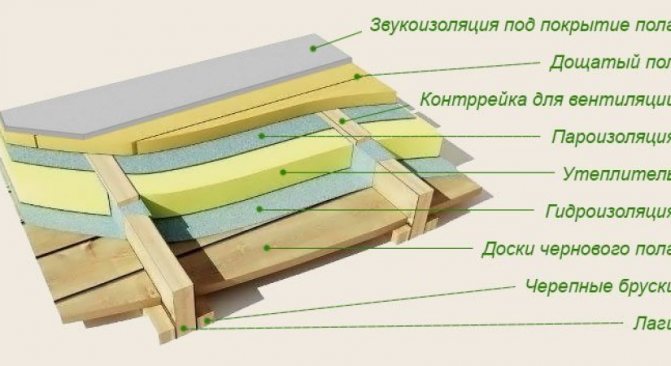
Below is the technology of insulation under the screed, but it is almost completely applicable for other methods.
Floor insulated under screed
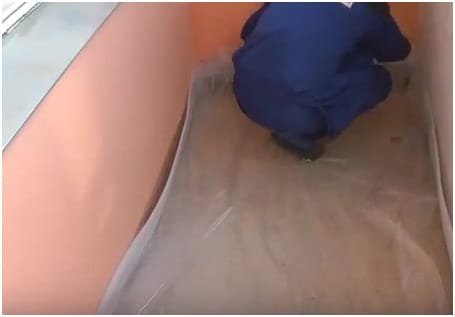
Step one. Prepare the base. If there is no concrete or wood, then the preparation consists in compacting the earth and preliminary (or rough) leveling of its surface.
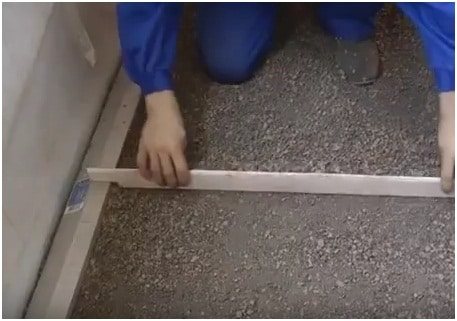
Step two. Fill in a 10-centimeter cushion of rubble, tamp and flatten it too.
Step three. Fill in the next layer of fine grained sand to hide the sharp edges of the rubble and fill the voids in it.
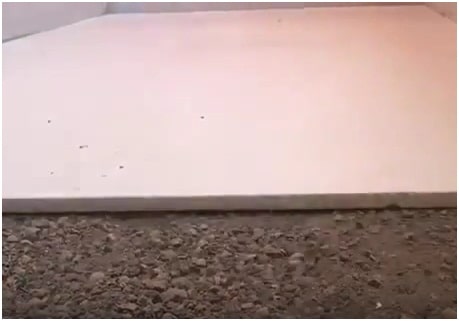
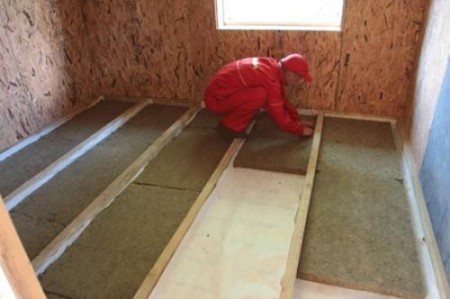
Step four. Lay the polystyrene foam plates with an overlap (modern products allow you to do this - the end parts in them have special cutouts).
Laying slabs on a prepared pillow
Step five. Lay the waterproofing membrane, also overlapping. Seal the joints with assembly tape.
Step six. Next, install a reinforcing mesh to give strength to the future structure and evenly distribute the loads (instead of a mesh, you can install wooden logs, but more on that later).
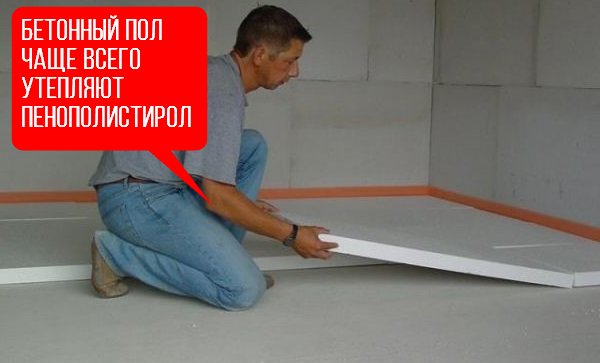
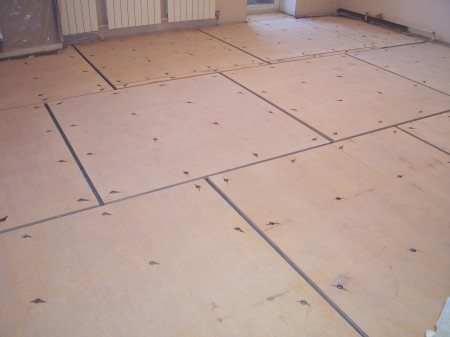
Step seven. Pour the concrete screed. The concrete layer must be at least 5 cm to withstand the loads.
Step eight. The final part of the work. After the concrete has dried, finish its surface, lay additional materials as desired (parquet, linoleum, etc.).
Note! Leave a two-centimeter technical gap between the walls and the floor along the entire perimeter of contact (for waterproofing or possible thermal expansion). Fill the gap with polyethylene foam.
Video - Expanded polystyrene
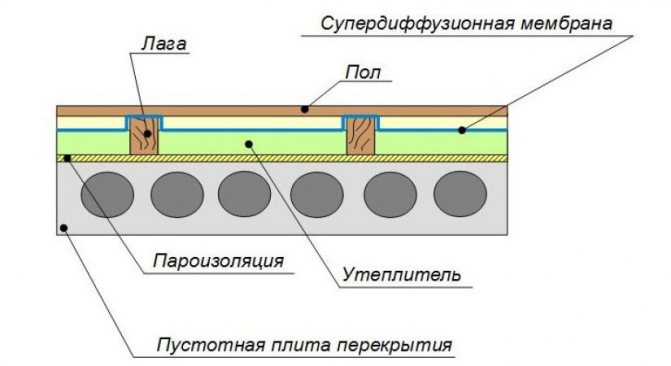
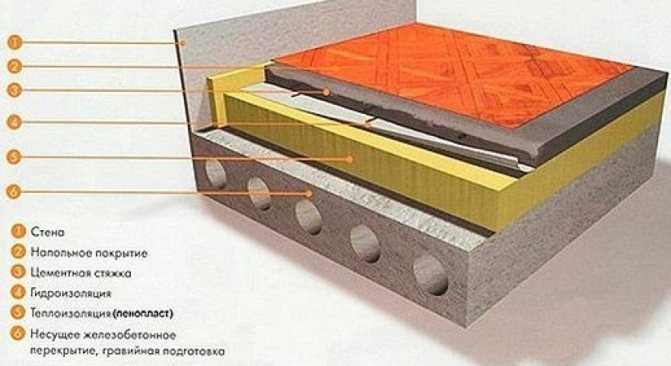
Technological method for protecting a concrete floor with expanded polystyrene
In brick and monolithic houses, floor insulation with extruded polystyrene foam is carried out under the screed.In this case, the insulation cake scheme is arranged as follows:
- Carry out the dismantling of the skirting boards, existing coating and screed to concrete floor slabs.
- The overlap is cleaned of construction debris and dirt. Then they are leveled with a cement-sandy composition and impregnated with a deep penetration primer.
- A waterproofing layer is made of roofing material, glassine, polyethylene or foil film.
- Plates of extruded polystyrene foam, the thickness of which is not less than 5 cm, are laid tightly to each other on top of the waterproofing layer. Gaps and voids between the plates are filled with polyurethane foam or special glue with pieces of insulation.
- A damper tape is laid along the perimeter of the room at the bottom of the wall.
- Expanded polystyrene insulation from above is covered with a vapor barrier membrane material, carefully sealing all seams and edges.
- A reinforced mesh is mounted and a concrete and cement screed is poured, the thickness of which is at least 5 - 7 cm.
On the screed, you can make a new flooring from boards or chipboard boards and decorate with any decorative coating.
Features of floor insulation in the loggia
Loggias differ in that the floor level in them is almost always lower than in the apartment. Therefore, in this case, insulation must also be carried out using wooden logs. Fill the steam-line membrane on the expanded polystyrene plates, and then mount the board covering.
Note! It is advisable to insulate the floor even before entering the apartment, while there is no furniture, or at the stage of building a house. And if you use extruded polystyrene foam, you can further improve sound insulation.
Why is floor insulation necessary?
The floor is the only surface in the house that cannot be avoided. Therefore, it is important to keep it at a comfortable temperature. Warm air heated by radiator heating batteries rises, and if the floor is not insulated enough, it is unpleasant to walk on it.
When using a floor heating system, insulation is also necessary. In its absence, the coolant will not give energy rationally, heating not only the floor covering, but also the underlying cooled layers.
The lack of full-fledged floor insulation leads not only to overspending on heating, but also to damage to structures by mold and fungus. Condensation falls on the warm air side, and a humid environment is beneficial for the development of dangerous microorganisms.
Advantages of using foam in floor construction
Thermal insulation of the floor with foam is a fairly common option, which has gained popularity due to the following qualities:
- ease of installation: there is no need to provide workers with overalls and protective equipment, as is the case with mineral wool or polyurethane foam;
- ease of cutting allows you to insulate the floor in a room of any geometric shape;
- the cheapness of the material in comparison with other effective insulation materials in many cases becomes a decisive factor;
- can be used to insulate the underfloor heating system;
- resistance to the appearance of mold, fungus and other microorganisms harmful to humans allows us to call the material safe, not causing allergic reactions.
These positive qualities make the material suitable for use in house building from any material.
Advantages and disadvantages of expanded polystyrene
TO positive the qualities of the material include the following points:
- Ease of use... Styrofoam plates are easily processed with a household knife or fine-toothed hacksaw. Easily fastened with mounting accessories, glued with glue or cement mortar.
- Light weight... Due to their low weight, the slabs can be lifted to a height without additional mechanisms.
- Environmentally friendly product. Expanded polystyrene is not poisonous, does not emit dust during processing, is odorless and does not cause skin irritation.
- Resistance to biological and chemical influences... Due to the fact that foam is a synthetic product, animals and microorganisms do not use it for food. It is also not a habitat for bacteria and fungi.
The advantages of the material include such qualities as sound insulation, moisture resistance, low price and durability of the material (more than 50 years).
Negative the qualities of this insulation are much less:
- Deformation... Low heat resistance allows the development of thermal deformation at a temperature of + 80-90 degrees.
- Flammability... Gas-filled expanded polystyrene granules are capable of igniting at very high temperatures.
- The need for protection from mechanical damage
Having familiarized yourself with the basic properties of the material and opting for polystyrene foam, you can use the following options for floor insulation. Warm floors are an integral part of an energy-efficient home. Floor insulation with expanded polystyrene under the screed will help reduce heat loss and will make the temperature in the room comfortable and cozy.
Insulation with expanded polystyrene is an affordable and simple way of thermal insulation.
Installation technology
Before insulating the floor with foam, you need to understand the features of its use for various structures. The laying process itself is as simple as possible, but the material requires an additional protection device against moisture and steam.
Insulation of the floor of the first floor
There are no big differences when working in a brick, concrete or wooden building. Insulation of the floor with foam is carried out both from the top of the floor and from the bottom. The method from below is more competent from the point of view of heat engineering, but it is very laborious. In the overwhelming majority of cases, insulation is performed over the floor.
Styrofoam can be laid on logs or under a concrete screed. In a wooden house, it is appropriate to use insulation between the logs.
If desired, you can lay the material along the logs and with concrete floors, if you are planning wooden floors.
Installation on lags is carried out in the following order:
- preparation and cleaning of the base;
- laying waterproofing material;
- lag layout and their fixing;
- styling foam;
- laying vapor barrier;
- installation of a clean floor.
For polystyrene, installation on logs compensates for its low strength. When laying under a screed, it must be additionally reinforced, which leads to an increase in the cost of construction or repair. Read more about floor insulation under the screed.
In a wooden building, it is not recommended to use polyethylene film as a waterproofing and vapor barrier. Better to choose a more expensive breathable material.
Use as soundproofing
To prevent noise penetration, a layer with a thickness of 30-50 mm can be used. The overlap cake should look like this:
- overlap;
- vapor barrier;
- Styrofoam;
- waterproofing;
- clean floor.
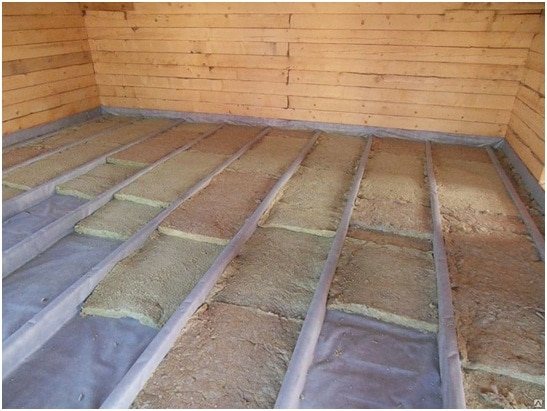
The use of expanded polystyrene for thermal insulation of wooden floors
Thermal insulation of a wooden floor on logs with extruded polystyrene foam includes the following measures:
- Dismantling skirting boards and existing flooring;
- Inspection of the elements of the wooden system, repair and replacement, if necessary, of rotten parts of the support bar, log and rough flooring;
- Impregnation with fire retardant and antibacterial solutions of all areas of wood;
- Installation of a waterproofing layer. A polyethylene or foil film is placed between the logs, while the edges should go to the ends of the log and the side surface of the walls by 10 - 15 cm.
- Plates of expanded polystyrene make an insulating layer between the logs on top of the rough flooring, connecting them to each other with grooved ends. Gaps and slots are filled with polyurethane foam or special glue with pieces of expanded polystyrene;
- The device of a vapor barrier layer. Cloths of a profiled membrane or a dense polyethylene film are laid with an overlap, the size of which is 15 - 20 cm, and fixed to the logs with construction tape. Seams and edges are glued with special adhesive tape.
- Re-assembly in a wooden house of a boardwalk, the floorboard of which is pre-impregnated with a fire retardant and antiseptic compound.
Insulation of the floor along the logs can also be performed with a cheaper material - polystyrene, since the main load in this case will fall on the wooden structural elements.
Calculation of the thickness of insulation
In a private house, it is allowed to take the thickness of the insulation layer "by eye", but if you wish, you can master the program to perform calculations. It is called "Teremok" and is freely available. Working with this software is simple. Even a person who is far from construction can deal with this. The calculation will help to provide the necessary thermal protection with minimal costs.
The floors in a private house are a place of great heat loss, especially if they are made of wood without insulation. And in our time, when the heating of the home eats up a large part of the family budget, this is simply unacceptable.
Therefore, the insulation of a wooden floor is an important point in home improvement. You need to pay special attention to this question and do not spare money for insulation.
There are several ways to warm your floor, in this article we will look at several options.
Warming with expanded polystyrene
Expanded polystyrene is an excellent solution for insulating a wooden floor if the budget for repairs is small. The density of the expanded polystyrene board should be at least 35 kg / m3. Only in this case will the material carry loads well.
For insulation with expanded polystyrene, installation begins with the removal of the old coating. All debris, dirt and dust are cleaned and the sub-floor should be assessed for chips and cracks. They are sealed with ordinary putty or glue.
Only after that the logs are laid, the distance between which should be about 70 cm. After that, the entire space between the logs is filled with expanded polystyrene. The insulation is also laid with an overlap (there are special grooves on the plates), and the joints are sealed with tape. There may be cracks in the material, and this problem can be easily solved with the help of polyurethane foam. Thus, a very warm wooden floor is obtained (in the Scandinavian countries they have long since switched from mineral wool to this insulation).
Expanded polystyrene as insulation for a wooden floor
After that, you can go to the waterproofing layer, which consists of a polymer film. Floorboards and decorative flooring are laid on it.
Thermal insulation of a wooden floor with expanded clay
Expanded clay is a fairly well-known material that is used to insulate houses. It has been in use for several decades and has not diminished in popularity due to its high performance data.
It is made of special types of clay, which is processed at high temperatures. As a result, balls of a certain size and a certain density are formed.
Before work, the surface must be cleaned of debris. A broom and a scoop will be a good helper in this matter.
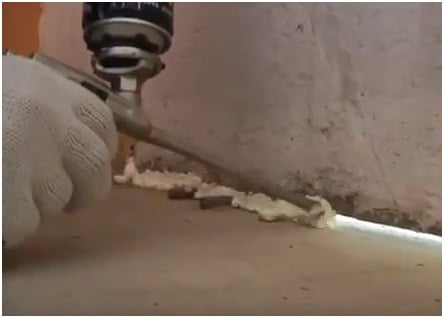
If there are gaps between the floor and the walls, they must be sealed with sand-cement mortar or polyurethane foam.

Now, so that when the dry screed expands, the floor does not bend, you need to leave a gap between the floor and the wall. To do this, you can lay a tape of polyethylene foam along the entire perimeter of the wall. Its thickness must be sufficient so that the floor can expand freely.
It will not be superfluous to lay a plastic film on the base, it will serve as a steam and hydro insulator for us.The film should rise along the edges of the walls just above the level of our future floor. It is best to secure the edges of the film to the wall with masking tape or tape.
Now that the preliminary work has been completed, we can lay a layer of expanded clay.
It should be borne in mind that for insulation it is better to buy expanded clay in which the granules are of different sizes, then the material will be distributed more evenly. The expanded clay layer should be at least 3 cm and no more than 7. Considering this, you can pick up beacons, it can be wooden slats or a metal profile of the required size. It can be fixed to the floor with both cement-sand mortar and self-tapping screws. Beacons must be perfectly level and securely attached.
Now you can scatter expanded clay and level its layer with a rule made from scrap materials.
You may not use beacons, but then you will need to align the layer with a rule that has a level indicator. It is much more difficult and not everyone can do it.
It is best to cover such insulation with sheet material. Particleboard, OSB, GVL and even plywood sheets are suitable for this. But it is most practical to use (GVL) - gypsum fiber sheets.
Some, so that expanded clay is not free-flowing, but turns into a solid surface, fill it with cement diluted with water. Such a solution is prepared using a construction mixer.
By pouring expanded clay with it, you will strengthen the surface with a depth of more than three centimeters.
After the slabs are laid, the topcoat is already mounted on top. It can be boards, parquet, linoleum and much more, even ceramic tiles.
You can read how to paint the park here, all the detailed instructions that will surely help you in this laborious task.
The use of expanded clay for insulation has a number of advantages, it is not flammable, it is lightweight, keeps heat well and does not conduct sound. It is convenient to work with it, because it gives minimal shrinkage.
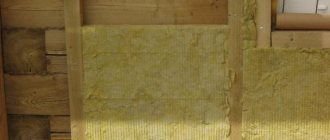
Thermal insulation of a wooden floor with mineral wool
The easiest and most reliable way to insulate a wooden floor is to use mineral wool. Usually, the floor structure contains logs, and it is between them that this insulation material is laid.
- Before starting work, you must install the plastic wrap. It is advisable to do this before installing the lag. If this is not possible, you can try to push the vapor barrier under the lags, or cut into strips wider a little more than the width of the lag. (Although not the best option).
- When the foil is installed you can place the mineral wool between the logs. There are several nuances here, firstly you need to buy insulation so that its width is slightly wider between the lags, then you do not have to adjust the material in width. You can buy insulation, and then install the logs at the right distance. Further, the height of the installed insulation should be slightly less than the height of the log.
- On top you need to lay a plastic wrap that will protect your mineral wool from moisture penetration. If you do not have such a large film, you can cover everything from several parts, the film must be overlapped with an overlap of at least 10 cm.
- On top of the film, sheet material is laid on the logs, the so-called subfloor. In the role of which the chipboard sheets should act.
Insulation technology
Spraying is a fast and high-quality, but expensive way of insulating a wooden floor. It is applied to absolutely any surface, it is used in private houses, and in apartments, and in industrial premises. Polyurethane foam is sprayed after removing the old coating. At the same time, there must be appropriate equipment; without it, the process is impossible.
Thermal insulation of a wooden floor is a responsible process that requires certain knowledge. It is important to choose the right material, since not everything that is good for a private house is suitable for insulation in an apartment.It is also important to correctly divide the warming process, especially if the installation is done by hand. Any mistake can lead to the fact that you have to redo the work done earlier.
Let's look at several options for how you can make do-it-yourself thermal insulation of wooden floors.
It is much more convenient to insulate the floor in a private house at the construction stage. But quite often this moment is missed and it is necessary to produce thermal insulation already during the operation of the building. To do this, you need to use the following technology of work:
- First of all, it is necessary to dismantle the old flooring. If you have linoleum, remove it carefully, it will still come in handy for waterproofing.
- After that, the floorboards are removed. If they are in good condition, they should be numbered to facilitate re-assembly.
- Then from below on the logs along the entire length cranial bars are stuffed, on which, in turn, the subfloor is laid. For its installation, you can use a non-edged board. Laying should be done as tightly as possible, and it is better to fill the remaining cracks with polyurethane foam.
- The next step is the installation of waterproofing material. Here you can use old linoleum or dense polyethylene.
- Heat-insulating material is laid on the waterproofing.

- The insulation must be covered with a layer of vapor barrier. Foamed polyethylene, which has a foil base, is best suited for this purpose.
- The final stage is the installation of old or new boards, you can also use plywood. Insulated linoleum can be placed on plywood sheets, which will increase the level of thermal insulation and reduce the noise level from steps.
In the apartment, wooden floors are insulated using a similar technology. It is a little easier to make thermal insulation here, since there is already a subfloor, which is played by a concrete floor slab. The technology for insulating wooden floors in an apartment is carried out in the following order:
- Just like in a private house, it is necessary to dismantle the flooring and boards.
- Wooden logs are installed on a concrete base. The remnants of the old insulation between the logs must be removed, sweep away other debris.
- After that, a layer of waterproofing is laid. In this capacity, you can use old linoleum, roofing felt or plastic wrap. It will be better if the beams are also covered with waterproofing so that they do not absorb moisture.
- Then the space between the lags is filled with heat-insulating material as tightly as possible. In this case, it is also necessary to provide a small gap so that the flooring boards do not lie directly on the insulation.
- The thermal insulation material is covered with a vapor barrier, the function of which is perfectly performed by inexpensive penofol.
- Now you can install the flooring. To do this, you can use old boards if they are in good condition, or lay new ones.
You can also install plywood sheets. It will subsequently need to be covered with a fine coating. To do this, you can use linoleum on an insulated basis, a laminate with a backing or carpet.
The timber frame structure is found not only in wooden houses, but also in many buildings built in the first half or mid-20th century. At that time, this was the most affordable way to quickly build a residential building. The characteristic features of such coatings are good thermal insulation properties.
In addition, the installation of logs is one of the effective options for creating a warm base in modern residential buildings, however, due to a decrease in the total height in the room, it is not always acceptable for standard apartments and houses.
- In most cases, the logs are installed on a rough wooden base, thereby forming several separate cells on the surface. Those.the insulation will not be evenly distributed over the entire surface, but will only fill these zones. The difference between the heat transfer coefficients of the beams and the heat insulator can cause uneven temperature distribution on the surface.
- The insulation material should not negatively affect the wooden structural elements. To a greater extent, this relates to its hydrophobicity - moisture absorption. Therefore, the technology of floor insulation along the logs provides for increased waterproofing measures.
- Mandatory air gap. It is necessary for the timely removal of water vapor emitted by wood. To do this, provide for the presence of ventilation slots between the insulation and the upper base of the floor.
Given this specificity, you can start choosing the optimal insulation scheme. To do this, consider various options for the design of the heat-insulating layer.
It is best to consider floor insulation along the logs visually, with options for installing various types of heat insulators. But first, you should carry out a number of preparatory work with a wooden structure.
Advice
If the thermal insulation layer will be installed in an old structure, a thorough revision of the wooden floor should be carried out.
During long-term use, wooden elements could be exposed to moisture or mold, which leads to a deterioration in their performance properties. Therefore, they are carefully checked and, as necessary, they carry out restoration work or a complete replacement. This procedure is not required when installing new floors.
After that, you can start installing the insulation. Regardless of its type, the subfloor is waterproofed first. Often it is also made of wooden planks, much less often you can find a subgrade. In the latter case, the beams are attached to the walls of the building and to the ground using special support structures.
At the end of the condition check, you can proceed with the installation of the thermal insulation layer. The general scheme is as follows.
- Formation of an internal waterproofing layer. For this it is necessary to use special mixtures. It is best to process the base before its installation - in this way, you can ensure maximum impregnation with a waterproofing compound. Most often, bituminous mastic with the addition of polymer components is used for this. It is necessary to process both the outer and inner surface of the flooring.
The use of roll materials is not recommended. During use, a condensation film may form between the boards and the film, which will be absorbed by the wood. The reason for this phenomenon lies in the temperature difference between the plane of the foundation and the inner surface of the board. Often the dew point is located here, which leads to the appearance of condensation in winter.
- Installing lag. If the supporting timber structures have not yet been installed, they must also be treated with a protective waterproofing material. During their installation, the optimal distance between the lags should be taken into account. It depends on the span width and the size of the beams to be installed.
If the installation takes place on a brick or concrete wall, you need to equip the place for connecting the lag and the supporting structures of the building. To do this, it is best to use a roll-up waterproofing material, such as roofing felt. Upon completion of the installation, you can proceed directly to the insulation.
- Installation of thermal insulation. The choice of technology for installing insulation directly depends on its type. For roll materials (basalt wool), it is enough to spread the material on the surface of the subfloor. During work, it is important to minimize the size of the gaps between the layers. Due to the fact that the height of the lag is often 250 mm, several layers can be installed.It is recommended to develop the scheme in such a way that the joints of each subsequent one do not coincide with the previous one. This is required to prevent the appearance of so-called cold bridges - zones where the temperature will be significantly lower than in the main heat-insulating layer.
Read next: How to choose a profile for drywall
Advice
For sheet material (polystyrene, extruded polystyrene foam), it is not recommended to fix it with mounting dowels. Since individual insulating elements will be located between the beams, it is important to draw up a plan for their cutting correctly. When tightly docked with each other, an optimal energy saving factor will be ensured. The absence of mechanical stress contributes to the preservation of the primary layout of the insulation sheets.
If loose heat-insulating materials are used - expanded clay, you must first prepare the composition. To do this, mix components of different fractions (from 10 to 20 mm), and then evenly fill the space between the lags.
- Ventilation gap. Before installing the main covering (boards or solid overlap), equip an air gap between it and the thermal insulation. It is better to install wooden slats on the surface of the beams for this. With their help, you can make ventilation voids necessary to remove moisture and level the finishing surface.
Insulated floor device