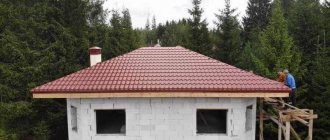
To equip a wet facade with your own hands is a decision today made by many owners of private cottages and houses, wanting to insulate the building as simply and reliably as possible.
Thermal insulation of the walls of the house in this way allows you to use overhead elements of any type with almost no exceptions, including those that are fashionable today with imitation of stucco molding.
The insulation technology is not difficult, therefore even inexperienced builders can cope with the work, and it is permissible to carry them out both in the spring-summer period and in winter, however, observing certain nuances, which are discussed below.
How to arrange a wet facade with your own hands? Detailed instructions will allow you to cope without the help of an experienced team on your own.
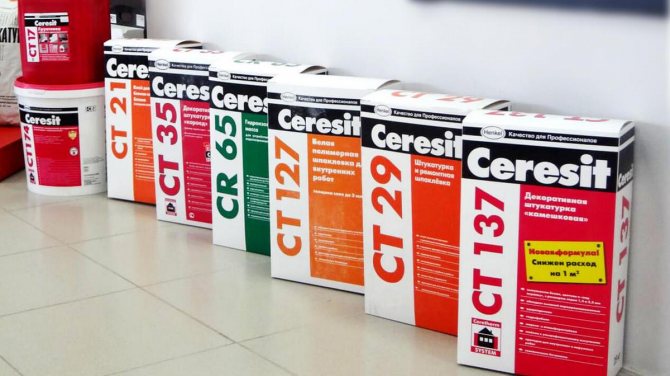
What is Ceresit facade plaster
Factories where Ceresit plaster is produced are located in various countries. There are several productions registered in Russia, which once again confirms the demand for the company's materials. The manufacturer uses a slightly different technology for the production of decorative coatings, in contrast to competitors.
As part of the Ceresit facade plaster, there are only high-tech components that make it possible to obtain high quality material. The company offers customers a wide range of products that have different compositions and textures depending on the surface to be treated.
The best prices for the installation of a wet facade!
| Service | Cost, rub. per sq. m |
| Installation of a "wet facade" (plaster) excluding materials | 700 — 900 |
| Installation of a "wet facade" (plaster), taking into account the materials | 1100 — 1500 |
| Installation of "insulated wet facade" excluding materials | 1100 — 1350 |
| Installation of "insulated wet facade" taking into account materials | 1900 — 2300 |

Popular material specifications
Ceresit is considered to be a certified product that has passed a huge number of checks. Facade plasters from this manufacturer differ from the rest by their unique characteristics.
- The density of the mixture is 1.7 kg per dm³.
- It is possible to carry out repair work using decorative plaster at a temperature of 5-30 degrees above zero.
- Drying time of the layer for textured processing does not exceed 15 minutes.
- The material is resistant to moisture.
- Possesses sufficiently stable hydrophobic properties and low moisture absorption.
- The mixture is resistant to all kinds of dirt.
- A large selection of textures, the "bark beetle" Ceresit is especially popular.
Facade plaster from the Ceresit company has excellent characteristics when compared with some other manufacturers. For the production of products, only modern equipment and quality-tested components are used, which make it possible to obtain a mixture that will make the house or premises visually attractive and protect against harmful factors.
What makes Ceresit stand out from the competition
In order to make a beautiful outer coating, it is customary to use facade plaster, which has a grooved structure. The mixture is ideal for treating surfaces made of concrete, cement, plaster or sand. Thanks to this, decorative plaster from the Ceresit company can be applied on different surfaces and at the same time, it will retain its original texture.
Manufacturers make a special composition that allows you to obtain a material with a high elasticity index, especially when compared with other companies.
Ceresit plaster does not fade under the influence of sunlight and is sufficiently resistant to mechanical damage.If we talk about competitors' products, then not all of them divide the mixtures produced into winter and summer ones. This parameter is especially important to take into account in those situations when work is performed at low temperatures, at an unconventional time for repairs.

Advantages of the Ceresit facade insulation system
Installation of the Ceresit facade insulation system will solve all the inconveniences and difficulties that arise in winter. This is both heat saving, and the absence of condensation in the walls, etc. In Ceresit wet facade technology, all components are carefully selected that complement and interact well with each other. Moreover, even all sorts of changes that may arise in the process of working with materials are calculated. The effectiveness of this method has been proven by its advantages.
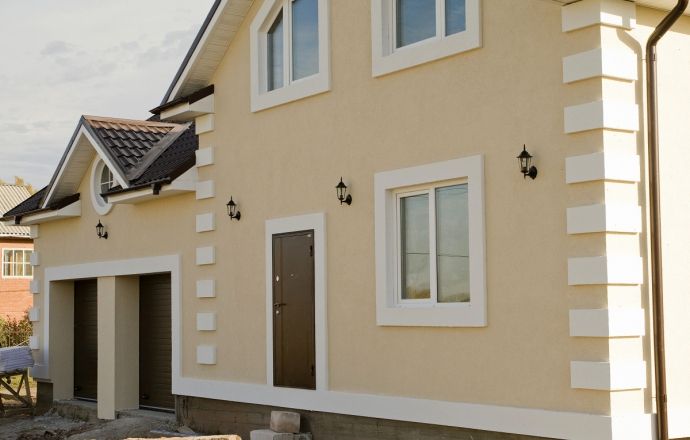
- Insulation of facades Ceresit provides an attractive aesthetic appearance of the external walls of the building. At the same time, the external appearance of the building is updated without affecting its architectural features.
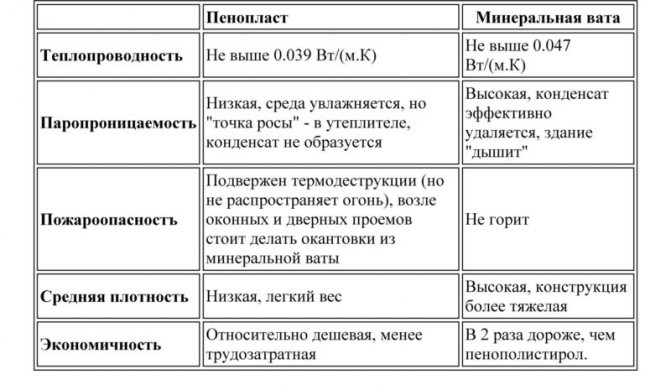
- The Ceresit insulation system has excellent thermal efficiency with a low weight of the structure.
- The technology allows you to shift the dew point outside the room, thereby eliminating the possibility of excess moisture in the walls of the building.
- Due to the peculiarities of the Ceresit wet facade system, there are no “cold bridges” and the possibility of freezing through the walls.
- Insulation of facades "Cerezi" provides good additional sound insulation of the walls.
- Thermal insulation boards are easily adapted to the architectural features of the house.
What types of Ceresit plaster exist
Facade plaster from Ceresit ct is divided into different types depending on the composition.
- Silicone. They are most often used for finishing walls. The composition does not allow the appearance of fungus over time, helps to eliminate small cracks. Refers to the category of expensive material.
- Acrylic. They allow you to remove defects on the surface of the walls. They do not have a sufficient vapor permeability index, they are distinguished by a smooth texture and strength.
- Cement. Due to the content of a sufficiently large amount of cement in the composition of the material, they turn out to be very durable, they pass air well. They are very easy to apply. Cement mixtures are very flexible, which greatly simplifies the processing of walls and the time spent on repairs.
- Silicate. The main substance in the composition of the material is silicate resin. Ready mixes are very elastic and durable. In most cases, such plaster is used to treat walls indoors. Can be used in rooms with high humidity. Less commonly, silicate Ceresite is used for outdoor work if a wet facade is present.
- Mineral. It is customary to use it exclusively for external coating of building facades.
Variety of options
Also on sale are compositions intended for further staining and coating without staining. The Ceresit company offers mixtures with which you can work at low temperatures - "winter" and at high - "summer".
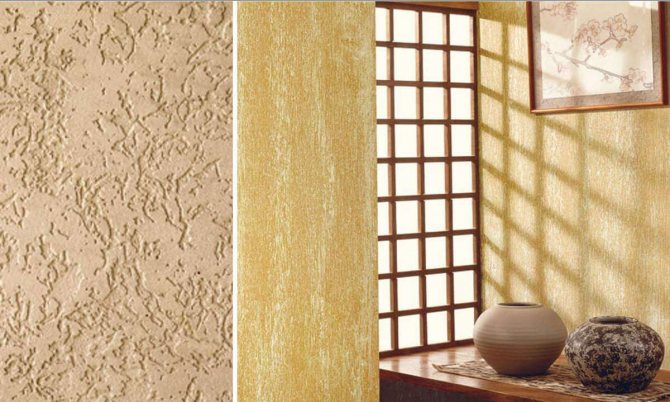
Ceresit plaster texture
Mixes of this type have only two textured patterns. A certain texture can be obtained if there are special granules in the ceresit mixture and by using a special application - "bark beetle". This texture is applied in an extremely thin layer. The plaster contains many small grains that allow you to get an interesting pattern. It can be used for both interior and exterior work.
The second type of texture is a "lamb". It allows you to hide defects on the wall surface, irregularities. The surface becomes more beautiful and original.
Each of the textures is provided in different colors. If necessary, you can paint it yourself. It is best to use paints from the same manufacturer for this. It is worth noting that components such as acrylic, silicone or silicate may be present in Ceresit paints.
Decorative plasters
On the leveled base, instead of wallpaper or paintwork materials, you can apply a thin-layer decorative plaster. The cheapest way is to use dry cement-based mineral mixtures, some modifications of which make it possible to work in winter conditions.
Name of dry mixes of Ceresit decorative plasters
| Brand name | Mixing water volume, l | Solution viability, min | Mixture consumption per sq. m., kg | Approximate price / packing |
| Dekor Plus | 5-5,5 | 60 | Grain 1 - 1.8 Grain 2.5 - 3 | 340 RUB / 25 kg |
| ST 35 and ST 35 "Winter" | Grain 2.5 - 2 Grain 3.5 - 3 | 560-660 rub. / 25 kg | ||
| ST 137 and ST 137 "Winter" | Grain 1 - 1.8 Grain 2.5 - 3 | RUB 700-900 / 25 kg |
General technologies, requirements and recommendations:
- To obtain an even surface of the base, it is recommended to use mortars from mixtures CT 24 or CT 29, depending on the nature of the base. After their application, at least 3 days should pass. To increase the adhesion of Ceresit decorative plaster, it makes sense to additionally apply a primer composition CT 16. Application to a concrete surface should provide for a minimum age of the material from 3 months, a coating of any other leveling plasters - at least 1 month. Often, decorative plaster is used on mounted drywall, chipboard, wall, leveled with gypsum mortar. In this case, to improve the quality of adhesion of materials, the base is additionally impregnated first with CT 17 soil, after 6 hours - CT 16.
- The solution is prepared using pure water with a temperature of 15-20 ° C, the mixture is fed into a container with water, after which it is mixed with a mixer. For full-fledged mixing, the plaster solution is kept for 5 minutes, after which it is mixed again.
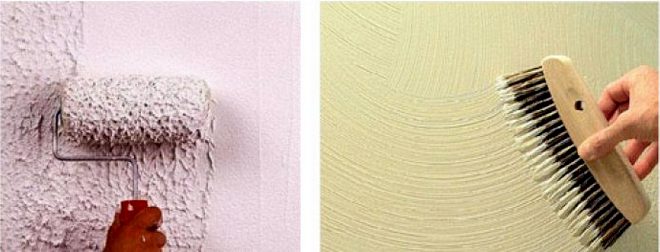
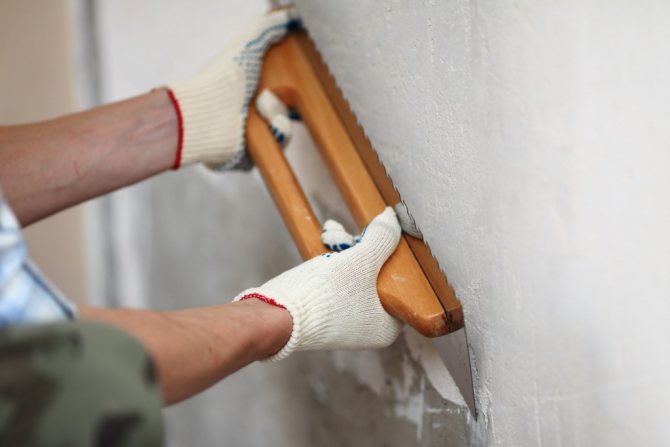
- The application of the finished mixture is carried out with a wide spatula or trowel, the solution is distributed over the surface to be finished by the thickness of the grain (not on the sdir). They begin to directly create a textured coating only when the mixture partially seizes - it will not stick to a spatula or trowel. Using the plasters below, it is easy to create the following textures: "bark beetle", "pebble" and "fur coat". Furrows of different nature with the decorative effect "bark beetle" are obtained due to sliding, without pressure, movements of the trowel over the applied layer of solution (for more details about this decorative effect, see a separate article). When creating a "pebble" coating, the work is carried out in the same order, but only circular movements are used. To give the surface a decorative "fur coat" effect, after applying the solution, it is immediately passed over it with a roller with a short nap. Such a coating is ready for painting with silicate compounds in 3 days, silicone in a week.
Dekor Plus
Ceresit Dekor Plus dry cement mixture is a ready-to-mix plaster mortar that can be used to create a decorative finish on any surface. Suitable for indoor and outdoor use, the resulting layer is characterized by high impact resistance.
ST 35
Dry cement mixture for the preparation of plaster mortar number 35 is supplied in several versions: with different fractions (2.5 and 3.5 mm) and for different conditions of use (normal and at temperatures from 0 ° C and above). Suitable for application on all types of substrates, including insulation boards, providing a grooved texture of the coating. The peculiarity of the application of the modification ST 35 "Winter" is that at low temperatures (less than 5 ° C) it is not recommended to pre-prime the base with the composition ST 16. Such a mixture is mixed with water at a temperature of 20-30 ° C, and the applied layer of solution within three days must not be exposed to temperatures below -5 ° C.
A short video about this plaster from Ceresit. You will learn about the features of the mixture, the consistency of the mortar, the external video of the finished wall.
ST 137
The CT 137 mixture is also available in the "Winter" modification with all the requirements specified for the CT 35 "Winter". Unlike the previous composition, this product from Ceresit has a fraction of 1 or 2.5 mm, and is used to create coatings with a grainy texture.
The process of applying a solution based on a dry mixture of Ceresit 137 and the result of the work are presented in the video below.
Acrylic, silicate, silicone, etc. plasters are delivered ready-made. They are ideal for creating "pebble" and other wear-resistant textures.
Characteristics and prices of ready-made decorative Ceresit plasters
| ST + No. | Decorative effect | Approximate consumption per sq. m., kg | Approximate price / packing |
| 60 | Acrylic stone 1.5 / 2.5 mm | Grain 1.5 mm - 2.7 Grain 2.5 mm - 3.9 | RUB 1500-2000 / 25 kg |
| 63 | Acrylic bark beetle 3 mm | 3,7 | 1400-1900 rub. / 25 kg |
| 64 | Acrylic bark beetle 2 mm | 2,7 | RUB 1500-2000 / 25 kg |
| 72 | Silicate pebble 1.5 / 2.5 mm | Grain 1.5 mm - 2.3 Grain 2.5 mm - 3.9 | RUB 3300-4000 / 25 kg |
| 73 | Silicate bark beetle 2 mm | 2,6 | RUB 3600-4100 / 25 kg |
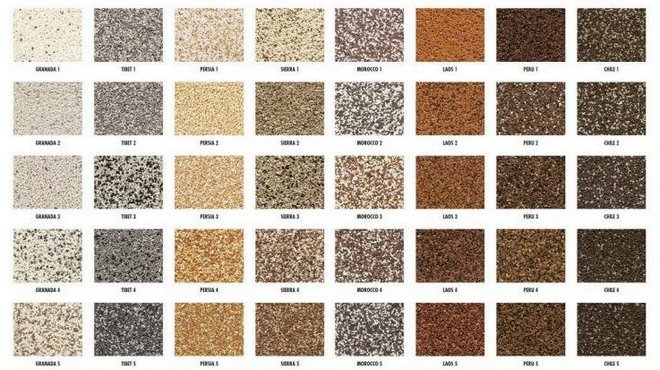
| 77 | Acrylic Mosaic | Fraction 0.8-1.2 mm - 3 Fraction 1-1.6 mm - 4 Fraction 1.4-2 mm - 4.5 Fraction 1.5-2 mm - 5.2 | RUB 2700-3500 / 25 kg |
| 174 | Silicate-silicone pebble 1.5 / 2.0 mm | Grain 1.5 mm - 2.5 Grain 2 mm - 3.6 | RUB 2200-2600 / 25 kg |
| 175 | Silicate-silicone bark beetle 2.0 mm | 2,7 | RUB 2200-2500 / 25 kg |
ST 60
This solution allows in a short time to form a so-called "pebble" texture on a leveled surface. Ready-to-use mixtures are supplied in different fractions: 1.5 and 2.5 mm - which makes it possible to correct the decorative effect.
The video shows the process of finishing the facade of the house with "pebble" decorative plaster Ceresit ST 60. When the work is organized correctly, it does not take much time.
Here and below, we are talking about ready-to-use solutions, as well as tinting with water-dispersive tinting compositions. Mortars with numbers 60, 63, 64 are suitable for application on all types of substrates for facade or interior decoration, forming a thin-layer decorative coating. These are acrylic plasters, therefore they are characterized by low hygroscopicity, which makes them possible to use them in a wide variety of operating conditions. The dried layer can be painted with CT 48 silicone paint or CT 42 and CT 44 acrylics. When pre-priming with Ceresit CT 16, the primer is selected with a shade as close as possible to the color of the decorative plaster.
ST 63
Another acrylic composition, but to create a different decorative effect. The video below clearly shows the process of creating the texture "bark beetle". The work used the above grade of Ceresit plaster with a grain of 3 mm.
ST 64
If you want to get a less noticeable furrowed texture, then it is better to rely on the CT 64 solution. It includes a fraction of 2 mm in size, which allows you to achieve the desired effect. For all other indicators, the composition is similar to the products listed above.
ST 72
The following two compositions belong to the group of ready-to-use silicate decorative plasters that can be used for external and internal use. The products are the basis for subsequent tinting. The applied layer, after drying, is resistant to mold, is distinguished by significant durability, which makes it relevant to use these compounds in difficult conditions with high humidity: basements, outdoors, etc.
Such Ceresit plaster is available in two versions, differing in grain size - 1.5 and 2.5 mm. The main purpose is to create a "pebble" decorative effect. The composition is easy to use, and the technology of its use is available for beginners to master.
ST 73
This option is suitable for those who want to give the leveled base a "bark beetle" texture. To do this with thin-layer plaster is as easy as shelling pears! The size of the fraction is 2 mm.
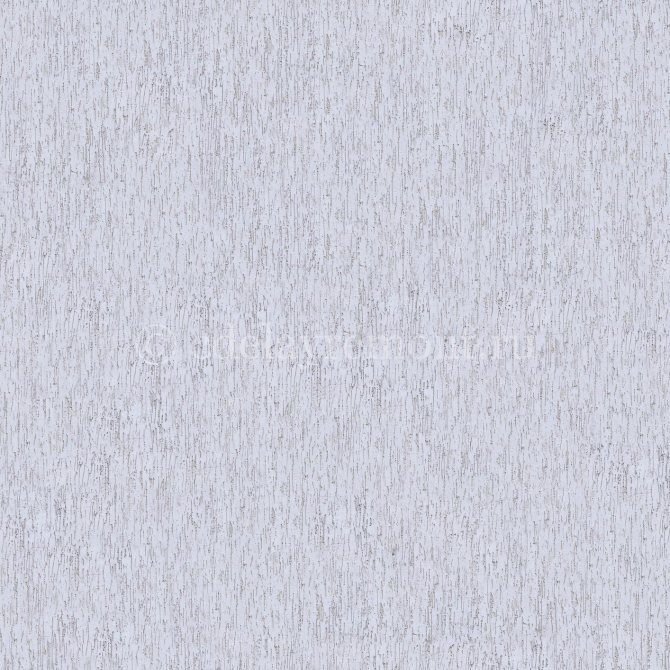
The texture of the "bark beetle" can seriously differ depending on the grain size of the plaster and the technique used.
ST 77
This plaster is available in 12 colors and 4 sizes of fractions: 0.8-1, 1-1.6, 1.4-2 and 1.5-2 mm. Allows to form the so-called "mosaic" texture of the coating. It is made on an acrylic binder.
If, when opening non-expired products, you find that its viscosity is lower than the required values, then about 150 ml of pure water can be added to 25 kg of the mixture. But before doing this, stir the mixture thoroughly to make sure that dilution is necessary - excess liquid can spoil the solution.
ST 174
ST 174 - silicate-silicone plaster from Ceresit, with the help of which any novice finisher can give the walls a "pebble" texture. Available in two grain sizes: 1.5 and 2 mm. The appearance of the coating, the thickness of the layer and the consumption of the solution depend on this characteristic.
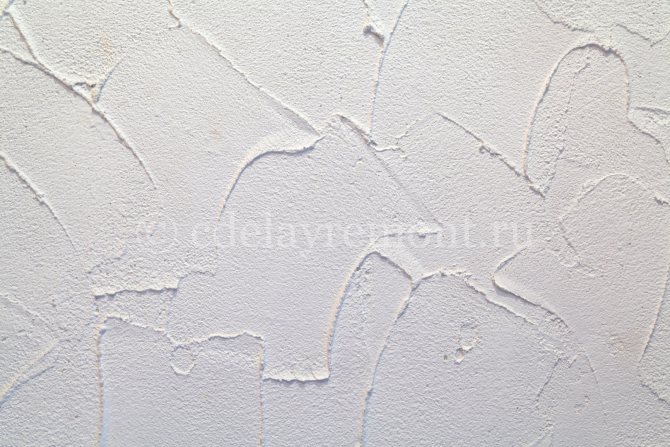
Techniques can always be varied, giving the coating the desired texture - it all depends on your desires and skill
Acrylic-silicone compounds are resistant to ultraviolet rays, resistant to external factors, and can be used for external and internal finishing of all types of surfaces.
ST 175
The last of our list - a composition on a silicate-silicone base with a fraction of 2 mm allows you to form a high-quality texture "bark beetle". Like all ready-made solutions, this product from Ceresit can be tinted at the request of the customer.
How to properly prepare the mixture
In order to properly prepare the mixture, you need to take a container, for example, a bucket. It is worth noting that it is best to use a stainless product. The plaster is mixed using a special construction mixer or in a concrete mixer.
The almost finished mixture is left for a few minutes to allow the granules to dissolve. Next, you need to thoroughly mix the solution again. Finished decorative plaster should be used within three hours. After that, it will begin to dry out gradually and will no longer be suitable for repair.
Facade plaster for outdoor use Ceresit CT 24 (Ceresit): properties and applications.
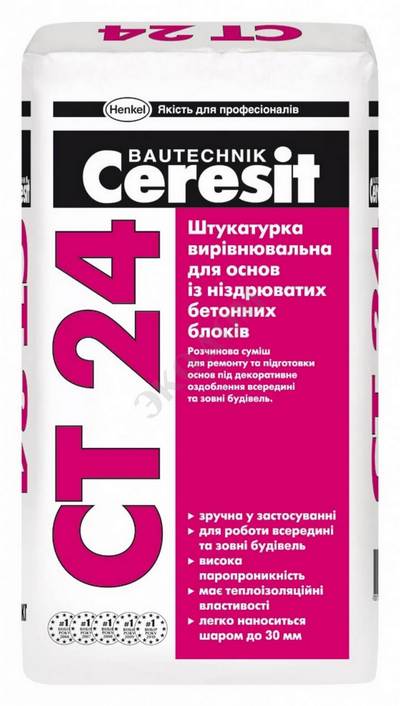
Dry mix Ceresit CT 24 is intended for application on aerated concrete and bases close to them in structure: aerated concrete, foam concrete, plaster on bricks, expanded clay concrete, old cement-sand plaster (provided that it does not lag behind).
The mixture contains cement and additives that improve viscosity, due to which the material adheres well to the base, and the surface is even and smooth.
The composition is used for external and internal finishing work in order to eliminate irregularities, seal cracks, depressions and other visible defects. It is recommended to use it at normal air humidity.
Mode of application.
5-6 liters of cold clean water are poured into the container, 25 kg (1 bag) of dry plaster mixture is poured there, stirring strongly with a drill with a nozzle, an electric mixer or a concrete mixer. Leave for 3 minutes and mix again. The resulting solution must be worked out in 3 hours.
Plaster technology
In order for the material to be applied correctly, a special technology must be followed, which all professionals adhere to.
Before applying the finishing material, it is imperative to first prepare the base. The surface is cleaned of all present coatings, dirt and debris. If necessary, then the walls are aligned in accordance with the base.
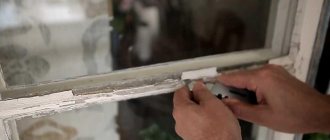
If the material is used for external covering, then the border that is located between the facade and the foundation must be covered with a special basement profile.
Be sure to apply a reinforcing layer, the thickness of which is 2-3 mm. The reinforcing mesh is laid in such a way that it is completely buried in the mixture. Then another reinforcing layer is applied to the mesh. The surface is left to dry for a while.
For finishing with ceresit bark beetle plaster, you should follow these steps.
- The prepared surface is treated with a primer so that the plaster adheres better to the wall.
- To work with the Ceresit material, it is advisable to use a primer paint from the same company. It should be the same color as the topcoat.
- Decorative plaster is applied to the primer layer. The layer should be thin enough and not exceed the thickness of the grain used in the composition.
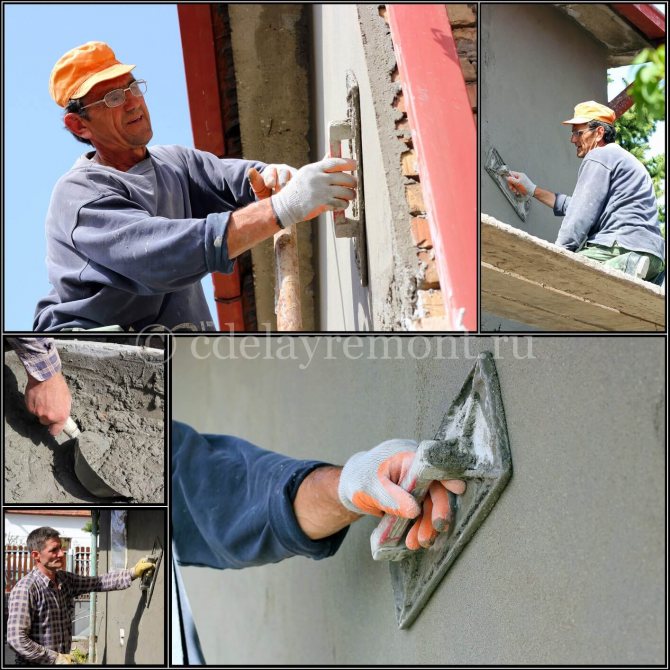
- You need to apply the plaster in small areas, each of which is carefully leveled.
- After the layer of decorative coating stops sticking, using a special polyurethane float, you can make the desired texture and pattern.
How to create a texture
You can rub the decorative coating in different ways, depending on what kind of pattern you want to get in the end result. For example, horizontal or vertical movements, circular. A polyurethane or plastic float is used to create the texture.
We create the texture
Decorative plaster Ceresit allows you to make a building or premises more attractive in appearance. Due to the huge number of features and advantages, the material of this manufacturer is considered to be one of the best in the modern construction market.

Installation of the Ceresit wet facade system
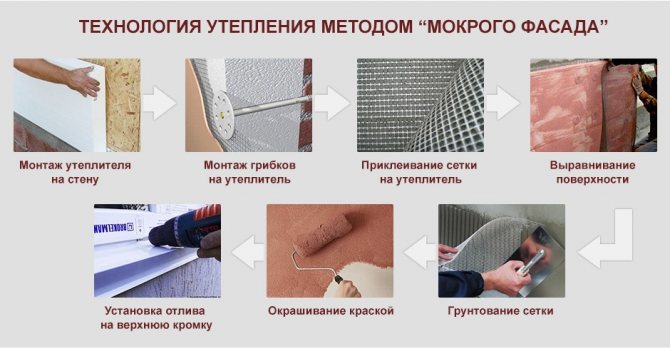
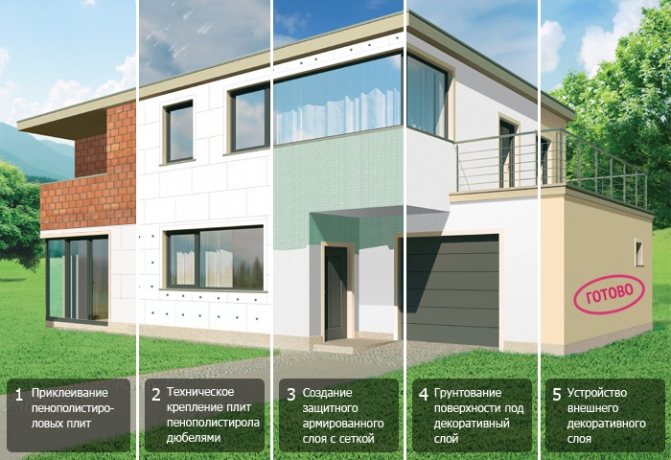
Installation of a wet facade of ceresite is carried out in several stages, which include:
- preparatory work;
- installation of insulation;
- fixing the reinforcing mesh;
- applying a plaster layer;
- surface painting.
High-quality performance of work at each stage is important for all subsequent ones and affects the final result.

Ceresit plastering system - the sequence of the device
Wall surface preparation
Work on the installation of the facade system begins with an inspection of the surface of the walls on which the materials to be mounted will be fixed. At the same time, the outer surface is thoroughly cleaned of any dirt and carefully examined. Defects in the form of cracks, irregularities, potholes are detected and, if necessary, are eliminated.
In some cases, to improve the bearing capacity of the walls, they are covered with a rough layer of plaster. After that, the entire bearing surface is primed.
Preparing the wall for the facade requires special attention - the surface must be flat
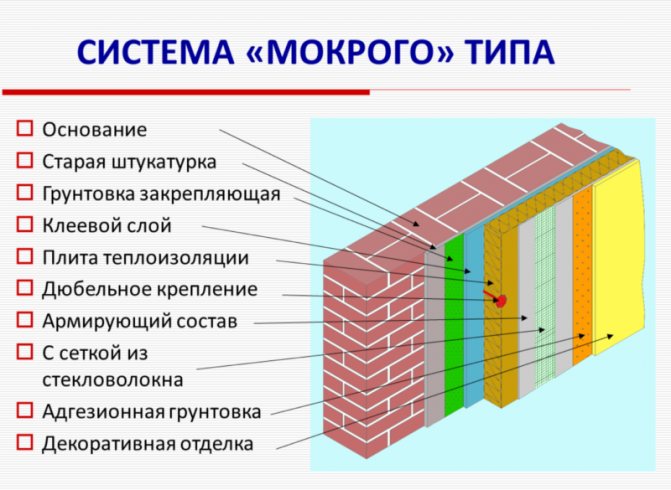
To reliably ensure the stability of the system, a U-shaped metal profile is fixed at the bottom of the wall, which plays the role of a support bar. This element is installed around the entire perimeter of the building, as well as over windows and doors. It protects the bottom edge of the structure from moisture and allows the weight of the entire sandwich structure to be properly distributed.
The support profile is installed at a height of 30-40 cm from the ground level or installed on a protruding plinth. A gap of 3-4 mm is left between the individual strips to compensate for possible thermal expansions. For fastening, plastic dowels and self-tapping screws are used, which are hammered in every 15-20 cm.
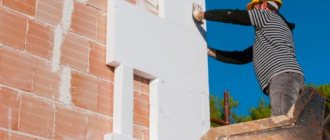
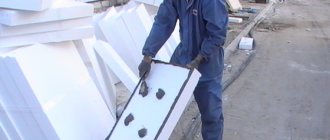
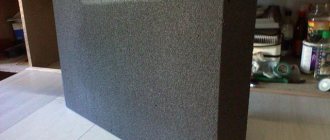
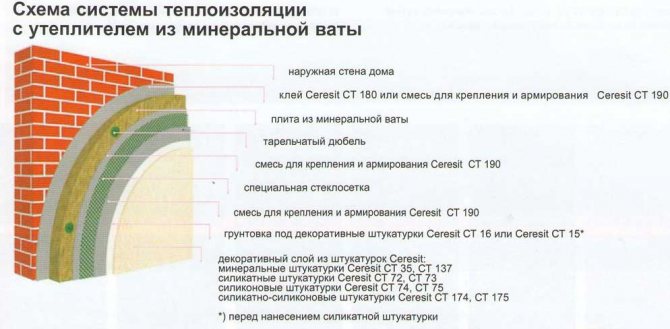
Insulation installation
Insulation installation is not a complicated process, but a responsible one
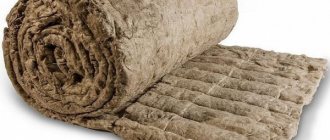
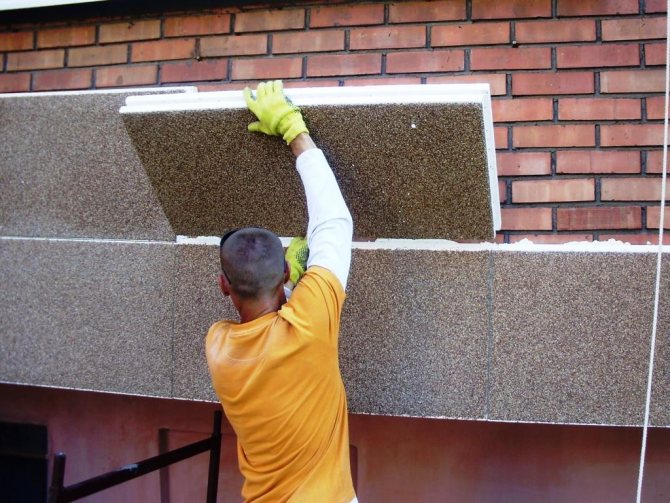
After completing the preparatory work, they begin to install the insulation. First, mineral wool slabs or polystyrene are glued to the prepared surface using Ceresit CM-15 or CM-11 wet facade glue. The adhesive is applied with a notched trowel in a wide strip along the entire perimeter of the slab and in a dotted area in the center. This allows you to ensure reliable fastening of the material with an economical use of the adhesive. For correct execution, it is enough to cover 40% of the surface of each board with glue.
Installation of slabs is carried out from the bottom up, starting from the bottom row, which is immediately installed along the entire perimeter. Installation of each row starts from the corner. Wherein:
- vertical joints between slabs in adjacent rows should not coincide;
- adjacent slabs are tightly pressed against each other to minimize the thickness of the seams;
- excess glue protruding from the seams is immediately removed.
Insulation fixing scheme with a disc dowel
Three days later, after the glue has completely dried, fixing plastic dowels are installed, the design of which provides for the presence of a wide plate-shaped head, a plastic nail and a bursting hammered nail.
The length of the dowels used depends on the thickness of the insulation and the material of the walls. The immersion of a nail into a wall of porous materials should be at least 9 cm, and for solid at least 5 cm. 6-10 pieces are hammered into each plate.
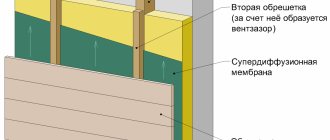
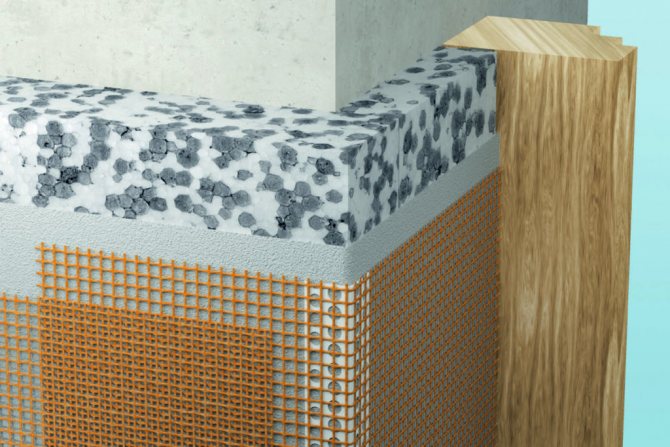
Installation of a reinforcing layer
Reinforcement begins no earlier than a day after the installation of the insulation. As a material for the reinforcing layer, a facade construction mesh made of fiberglass, which has a special alkali-resistant coating, is used. Adjacent strips of the mesh should overlap each other by 5-8 cm. If necessary, reinforcement of individual sections of the mesh should be applied in two layers. At the corners, in doorways, windows and on lintels, a special corner with an edge mesh is installed.
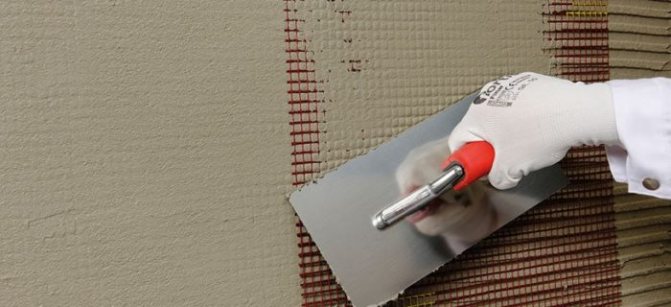
The reinforcing layer is applied to the insulation in a layer of plaster
The reinforcing material is covered with a layer of adhesive composition 2-3 mm thick, and the total layer thickness can be up to 5 mm.
Finishing the facade
The final stage of the Ceresit wet façade installation is finishing. It provides for the application of a plaster layer to the surface and its subsequent painting. You can start this work only after the reinforcing layer has completely dried, which lasts 3-5 days.

Finishing the facade
The material for the plaster layer must have a high vapor permeability, good resistance to adverse weather conditions and high mechanical strength. For this, special dry facade mixtures Ceresit are used. Plastering work can be carried out in dry weather at an outside air temperature of + 5 ° C to + 30 ° C, while direct sunlight is not allowed on the fresh plaster layer.
The surface is painted with a roller or through a spray gun with Ceresit acrylic, silicate or silicone paints.