What it is?
Today the assortment of various finishing materials is so great that one can simply get confused in its wealth. So, one of the most popular coatings with many positive qualities is extruded polystyrene.
This product is a special synthetic material that was first seen in the United States in 1941. Currently, polystyrene is used for a variety of purposes. It is to this raw material that they turn to when insulating structures such as foundations and roofs. In addition, extruded polystyrene makes good contact with facade plaster.
Features of production
Paying attention to the name of this popular material, we can conclude that it is one of the forms of deeper processing of foamed polymer raw materials, which is obtained due to the condensation of styrene under the action of catalysts in organic solvents.
The performance characteristics as well as the advantages and disadvantages of this material are due to the process and its manufacture.
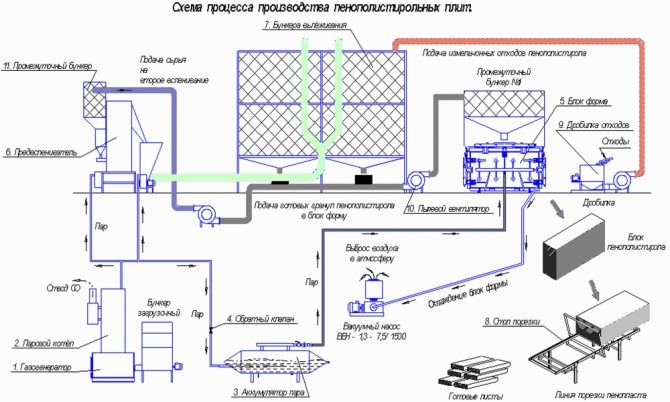
- First, the feedstock is taken, represented by small particles placed in the reactor. There, under conditions of high temperatures and pressures, these components are saturated with a special gaseous component.
- After the pressure is released, the mass begins to expand rapidly, like foam. At the same time, it gradually cools down and acquires all the properties necessary for a solid.
- The hot and viscous mass is passed through extruders. Thanks to these actions, the polystyrene becomes denser and similar to multilayer plastic.
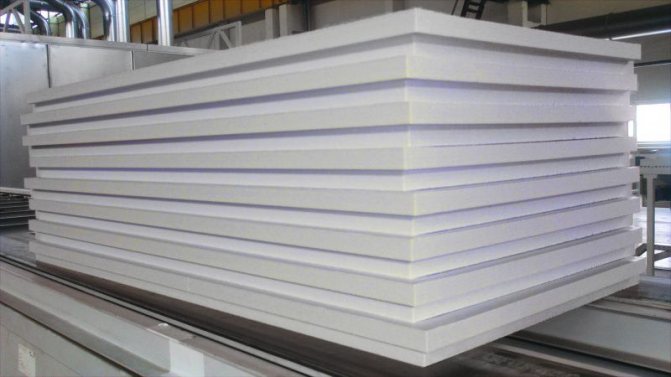
As a result of these stages of work, a special extruded material is obtained. In its immediate structure, polystyrene occupies only 1–2%. The remaining components are air purified from water vapor, which has a characteristic minimum thermal conductivity.
The main feature of extruded polystyrene (EPS) is its zero moisture and gas transmission. This modern and high-tech material does not allow water vapor to pass through its structure, like, for example, the well-known mineral wool.
Over time, polystyrene does not fill with water and does not lose its thermal insulation characteristics. You will not have to face such problems even if the installation of the material was not entirely correct, and the dew point fell on the surface of the insulation.
Why plaster styrofoam?
To understand the need to protect the surface of the insulation, it is necessary to know about its physical properties.
So, expanded polystyrene is a material made from polystyrene and its derivatives. It is made by filling styrene granules with gas. As a result, the granules increase in size. The air contained inside the pellets acts as a heat insulator.
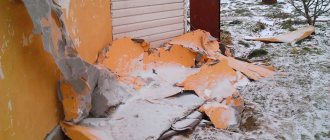
With all its positive qualities, polystyrene foam, for a number of reasons associated with the technology of its production, has low strength and is susceptible to external atmospheric factors. That is, moisture, sun, etc. All this leads to the fact that the bonds between the expanded polystyrene granules weaken and it begins to collapse.
That is why walls insulated with expanded polystyrene need protection. And this protection can be provided by a plaster coating.
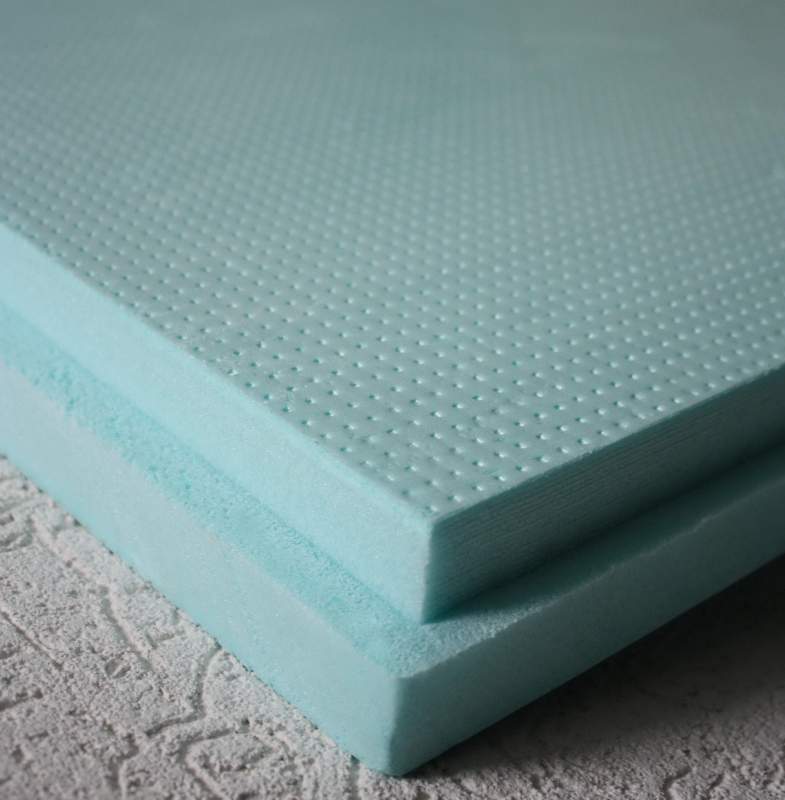
In addition to expanded polystyrene, such a material has also found application in the construction industry - extruded polystyrene, sometimes it is called penoplex (trade mark).Its key difference from foam is that it does not consist of individual granules, but has a closed-cell structure and high density. There are no pores on its surface through which water or steam can enter the material. This fact makes the use of extruded polystyrene foam more preferable.
Properties and characteristics
Currently, extruded material is produced by many large and well-known manufacturers. Typically, the performance and properties of different products are almost the same. This also applies to their dimensional parameters.
- So, the thickness of expanded polystyrene plates most often ranges from 20 to 150 mm.
- The standard dimensions of expanded polystyrene plates are 600 x 1200 mm, 600 x 1250 mm, 600 x 2400 mm.
- Their level of thermal conductivity can range from 0.03 to 0.032 W / mS.
- As for the index of density in compression, then at 10% linear deformation, it is 150 x 1000 kPa.
- The percentage of moisture absorption is usually 0.2–0.4%.
- Flammability class from G3 to G4.
- The level of vapor permeability is 0.013 Mg.
- Density - 26–45 kg / cubic meter. m.
Manufacturers and sizes
Modern manufacturers produce extruded polystyrene foam with various technical characteristics. Currently, there are three leading brands, whose products are considered the most popular and widespread:
- Penoplex;
- Technoplex;
- Ursa.
Let us consider in detail what characteristics and properties the EPS of these manufacturers have.
Evgeny Filimonov
Ask a Question
Expanded polystyrene "Penoplex" is a popular domestic product that is found in many stores and is in great demand. Such materials are used for both civil and industrial construction.
Let's get acquainted with the main characteristics of polystyrene foam of this company.
- The thickness of EPS "Penopless" can be - 2, 3, 4, 5, 6, 7, 8, 10, 12, 15 cm.
- The dimensions of the sheet are - 60 x 120 cm, 60 x 240 cm.
- The level of thermal conductivity is 0.03-0.032 W / m C.
- Compressive strength is 0.2–0.5 MPa.
- The level of water absorption does not exceed 0.4%.
- The flammability class of the material is G4.
Ursa is a large international company with representative offices in Russia. At the moment, this manufacturer produces three types of extruded polystyrene foam. Ursa materials have the following technical characteristics.
- The thickness of the materials is 3, 4, 5, 6, 8 and 10 cm.
- The length and width of all EPS sheets is the same and is 60 x 125 cm (there are also other dimensions on sale, for example, 50 x 600 x 1250 mm).
- The level of thermal conductivity of EPSP sheets is - 0.032-0.034 W / m C.
- Compressive strength ranges from 0.25 to 0.5 MPa.
- The material absorbs moisture by 0.5%.
- Flammability class G4.
Technoplex produces expanded polystyrene sheets with the following parameters.
- Their thickness can be 3, 4, 5, 10 cm.
- All sheets have standard dimensions - 60 x 120 or 58 x 118 cm.
- They are characterized by a high coefficient of thermal conductivity.
- Materials from Technoplex absorb moisture worse by 0.2% than raw materials from Penoplex.
The products of these brands are in great demand in our country and comply with all GOST standards. High-quality expanded polystyrene of these companies is in demand due to its excellent performance characteristics, long service life and easy installation.
Of course, these are not all large manufacturers whose products are popular today. For example, today products such as Ecotherm, Onda LLC, TechnoNikol (popular product - XPS) and many others are no less in demand.
If you want to buy really high-quality polystyrene foam, then you should contact a trusted brand store. Don't look for too cheap materials - EPS is already an affordable thermal insulator.
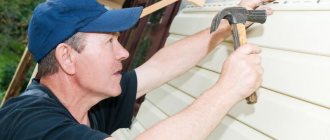
Technique for installing foam blocks
Before starting the installation of the foam, it is worth cleaning the surface of any structures that will interfere with the work in the future. After that, a visual assessment of the surface is carried out in order to identify the presence of destructive processes on the wall.
If cracks, chips, drops have been identified, then it is worth first carrying out restoration operations aimed at correcting these shortcomings. Then, the wall is treated with a deep permeability composition, which will increase the adhesion of the surface and destroy the growth of microorganisms, mold and fungus. The solutions can be applied by means of mechanical painting or by spraying. The next step is to draw up a plan for installing sheets of thermal insulation on the surface. This step will allow you to develop a clear structure for installing the sheets and the number of cuts to fit the foam to the area.
This will reduce the amount of damaged material, which will help save not only the foam for subsequent work, but also reduce the amount of financial losses. It is better to arrange the layout of the panels on the wall so that the blocks of material are applied in a checkerboard pattern. The subsequent installation process is almost identical to the process for installing extruded polystyrene foam. However, for the installation of this type of thermal insulation, both adhesive solutions and mechanical fastening of sheets are most often used.
Be careful when handling regular styrofoam as it can be easily destroyed by careless handling.
Ivan Publishers
Providing heat is a major requirement for any building, and expanded polystyrene has many excellent qualities.
This material provides comfort to homes where it is used and also reduces energy consumption, both during cold and warm weather. Great attention is paid to heating. Conventional systems are not enough to retain heat.
Additional insulation is required. Installation of expanded polystyrene on the walls is very effective. It is frost-resistant, does not burn, and has a long service life.
Where is it applied?
Extruded polystyrene foam is used in various fields due to its positive qualities and performance characteristics.
- This material is very useful for private construction. With its help, both internal and external insulation of the floors of houses is produced. In addition, they can insulate roofs, communication lines and even basements. Often this material is consulted in the course of waterproofing work.
- EPPS is a popular material in state industrial construction. It is ideal for high-quality thermal insulation of various buildings, underground rooms, as well as various trunk lines.
- Expanded polystyrene is also useful when laying highways or large runways.
- It is used by EPS for the production of refrigerators and refrigerators.
- Extruded polystyrene foam is a wonderful material that is often used in the construction of economic buildings. These include large vegetable stores, farms, greenhouses of various sizes, and greenhouses.
Whatever this popular material is used for, its main focus will remain the insulation of wall ceilings, foundations and roofs.
On the ground
EPPS is quite often laid on the ground floor located on the first floor, when it is planned to install laminate, parquet, ceramics or linoleum on top of such a base. Expanded polystyrene is perfect for the future arrangement of a spectacular self-leveling floor.
To insulate such a floor, you need to thoroughly prepare the base. It must be strong enough.
In addition, the floor should not shrink in the future. For this, the ground level must be 50-60 cm below the design level of the surface of the future floor covering. It should also be taken into account that the base must be absolutely dry and tamped down.
When the base is prepared, the first layer of dry gravel is laid on it (instead of gravel, you can take gravel).The height of such a coating should be approximately 30–40 cm. This layer also needs to be properly leveled and tamped.
Then on the rubble you need to lay out a layer of granite screening or Mediterranean sand. The height of this layer should not exceed 10 cm. It must be leveled from above. To control the process, you should use the building level.
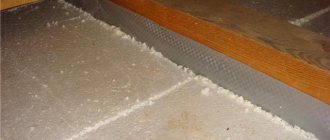
In rooms where there will be no high mechanical loads, polystyrene foam plates can be laid directly on a sand base. In this case, it is recommended to buy materials that have docking grooves at the edges. As for the joints of the plates, it is recommended to pre-glue them with a special metallized tape.
The thickness of EPS sheets can be from 3 to 10 cm - it all depends on the living conditions and the level of insulation of the foundation of the house.
When you lay the insulating underlay on the floor, its surface should be covered with a waterproofing material. Next, you need to make a reinforced cement-sand screed along it. Always check the flatness of the surfaces. You can proceed to laying the floor slab only after the screed is completely dry.
If the laying of expanded polystyrene is planned in a room where the floor will be exposed to serious mechanical stress, then before installing the insulation boards, it is necessary to install a concrete screed (on a sand and gravel cushion and waterproofing). EPSP boards can be laid on the base only after it is completely dry.
On concrete
If you are going to insulate a concrete floor, then you need to make sure that its surface is flat - without drops. Any crevices and cracks should also be removed.
If the concrete base is an overlap of a basement or basement, then the insulation is recommended to be laid on top of the waterproofing film. Although expanded polystyrene is not afraid of dampness and moisture, these components can penetrate into the joints of the plates, so excess waterproofing in this case will definitely not be superfluous.
If there are irregularities on the concrete base, then first you need to get rid of them, and also fill up all the cracks and cracks. Make a leveling cement-sand screed. When the latter dries up, it is necessary to lay EPPS on it, and already on this layer - waterproofing. Insulation boards are recommended to be laid on a special adhesive designed for ceramic tiles. On top of the waterproofing, a screed is further made.
Insulation with expanded polystyrene can be used for floors in an apartment on a balcony or on a loggia. All work should be performed according to the same principle as above. However, it should be borne in mind that it is possible to start such a floor arrangement in an unglazed area only if the temperature there is at least 5 degrees. As for the glazed area, you can start work on it even if the temperature in this place is below 5 degrees. However, then it is necessary to additionally insulate the repaired area so that the screed dries to the end and it could be laid on it with expanded polystyrene plates.

How to plaster on expanded polystyrene - a step by step scheme
Step 1: make calculations
Usually, gluing a reinforcing net and leveling the surface takes from 4 to 6 kg of material per square meter. If you are doing plastering work for the first time, your consumption may be higher, so buy material with a margin. If you buy plaster in a good store, where you will be given a check, you can return the unopened packs within two weeks after purchasing the material, so you can safely take with a margin.
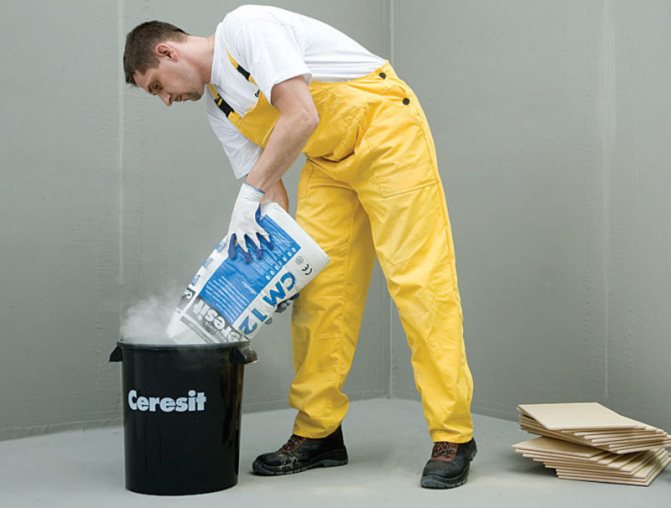
Step 2: Preparing the plaster mix
Of course, first of all, read the instructions on the package - it describes in detail the subtleties of preparing the solution and the required number of components. True, as practice shows, the finished consistency of the mixture should be a little less often than the recommended one.You can mix with the same spatula in a plastic bucket, but you can use a drill or mixer equipped with a special nozzle. Stir at speeds from 400 to 800 per minute. After stirring, pause for five minutes and then stir again.
Step 3: Bonding the plaster mesh
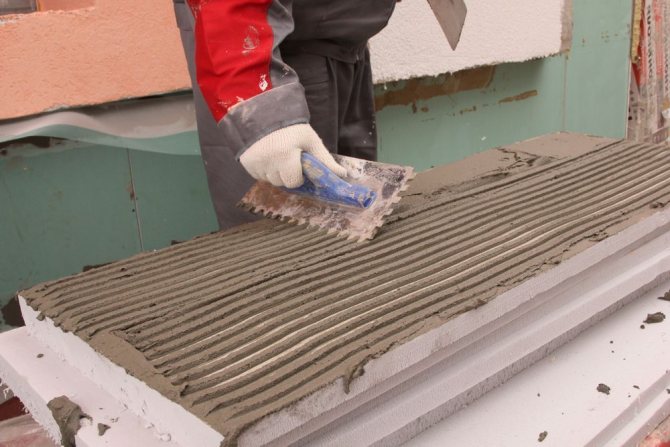
Reinforcing mesh for expanded polystyrene is made of glass yarns impregnated with certain compounds and woven together. Such nets are easy to use, lightweight, do not rust or burn, and tolerate frost well. Before gluing, apply a layer of the mixture no more than 3 mm to the surface and roll the mesh onto this layer, be sure to leave at least 10 cm along the edges, which will be useful when fixing the joints. With our hands, lightly press the mesh into the plaster so that it firmly stays in it. Then we smooth out the mesh with a trowel so that each cell is firmly included in the composition. At the corners and slopes, the mesh is glued in advance, in separate strips, and overlapped with metal corners with perforations.
Step 4: grout the mesh
Before plastering the extruded polystyrene foam with the last layer, you need to give time to dry the previous one - at least a day. After waiting for the right time, start grouting the mesh - the process is a light sanding of the surface with an emery cloth attached to the grater.
Step 5: flatten the surface
Apply a finishing layer of plaster to the rubbed surface. For convenience, you will need a wide spatula, with which the plaster is applied in smooth movements from top to bottom. The maximum layer thickness should not exceed 3 mm. As with the previous layer, we give the plaster a day to dry. A maximum of 4 days should pass before the next stage. The more time passes, the more difficult it will be to overwrite the layer.
Step 6: grout the second layer
We grout the layer with a plaster mesh until the maximum possible flat surface is obtained.
Step 7: priming
You should not neglect the primer - the finish may suffer from its absence. If you plan to apply decorative plaster, then apply a primer with quartz grains, if you only plan to paint the surface, then the primer should be without grains. A short-haired roller is best suited for applying primer - it does not leave streaks.
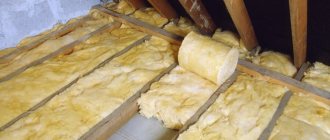
Roofs
High-quality thermal insulation is necessary not only for the floor, but also for the roof. In this case, it is also permissible to use extruded polystyrene foam. In this case, its slabs must be correctly laid out under the roofing material.
Consider what should be the order of arrangement of all the constituent elements (we look from the inside - out):
- first comes the decorative coating (the roof itself);
- then comes the inner crate, designed to support the insulation and ventilation material;
- vapor barrier film;
- insulation;
- waterproofing film;
- external lathing required for additional ventilation and installation of roofing;
- roof covering.
Evgeny Filimonov
Ask a Question
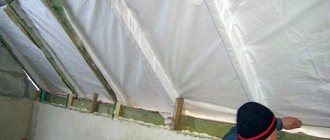
At the same time, many home craftsmen neglect the installation of steam and waterproofing films. This is a big mistake, since these components will protect not only the insulating layer from moisture and moisture, but also roof structures made of wood.
Also, EPS roof insulation can be done on the finished structure.
Consider what you need to do for this:
- install waterproofing material on the rafter;
- then fix the insulation on special suspensions;
- cover the insulation with a vapor barrier;
- nail the grating to the rafters (this frame structure will hold all the insulation, and also play the role of a ventilation area);
- Finally, install the finishing material.
In this case, you need to take into account one drawback - when installing polystyrene foam on an already finished roof, you will hide a certain amount of usable area. In the event of leaks, such a design will have to be changed to a new one.
How is the installation of extruded polystyrene foam
When choosing a heat-insulating material, it is worth preferring extruded polystyrene foam, despite its higher price with analogues.
Sheets of this material can be made in different ways using:
- Adhesive mortar Cement mortar Special mastic Mounting accessories
When carrying out thermal insulation from the outside of the house, attention should be paid not only to the installation of thermal insulation sheets, but also to their protection with any non-combustible materials: brick, plaster, ceramic tiles, steel or aluminum profiles. Building codes state that there should always be a ventilation gap between the trim and the insulation boards, which will ensure that the insulation is always dry and does not lose its thermal insulation properties.
To prevent the ingress of moisture from the inside of the room, vapor barrier materials are used, for example, plastic wrap. The modern construction industry offers a wide selection of all types of materials.
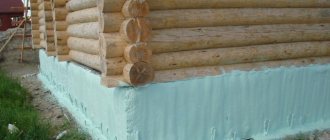
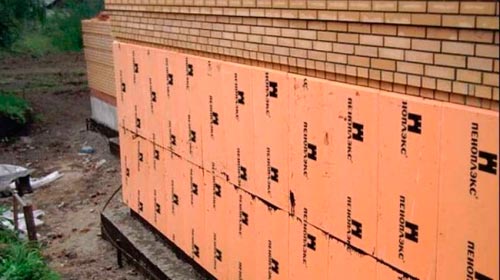
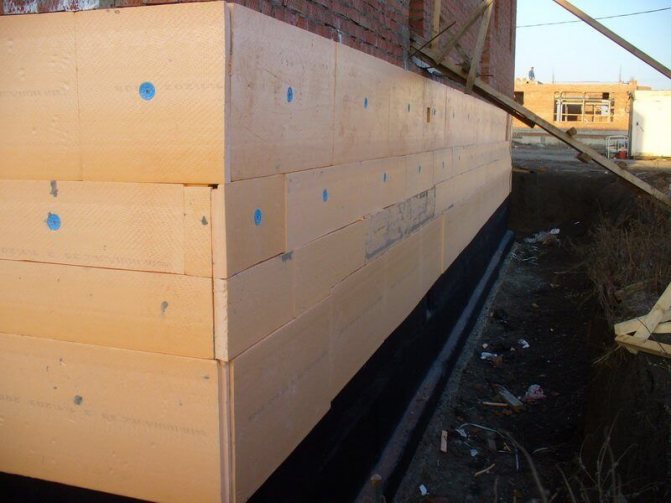
Of the foundation
With the help of expanded polystyrene, you can also insulate the foundation. To do this, you should also adhere to a certain technology. Let's get acquainted with all the necessary stages of such work.
- First you need to competently prepare the foundation. It is possible to insulate such structures both for those under construction and for finished buildings. Make sure that the foundation is completely excavated and free of dust, grease, construction waste and other defects.
- If there are remnants of the previous waterproofing on the foundation, then you also need to get rid of them.
- Keep in mind that such a base can be insulated both from the outside and from the inside, however, external insulation is considered more effective.
- Find the right styrofoam. For the foundation, it is recommended to buy materials with a density of 35 kg / cu. m. The flammability class in this case is not so important.
- Get your foundation waterproofed. Thus, you can prevent materials from getting wet during the appearance of groundwater.
- Waterproofing can be installed under the insulation in any way. The only exception is the isolation of the base with the help of a special bitumen filling - EPS in contact with solvents can be severely damaged and even destroyed.
- Next, you will need to attach polystyrene to the foundation (its underground component). At the same time, insulating plates are attached to a special glue designed specifically for expanded polystyrene.
- The adhesive mixture must be applied around the perimeter of the board and in its center in several strips. Then you need to wait about 1 minute and press the polystyrene foam to the base. Wait a couple of minutes and proceed to the installation of the next part.
- It is recommended to fasten the plates using a level so that there are no distortions at the joints.
- If you need a thicker insulation, then polystyrene foam is allowed to be installed not in one, but in two layers. In this case, the plates must be glued in such a way that the second layer necessarily covers the joints remaining between the tiles of the first layer. If, after installation, the gaps remain on the material, they must be closed with ordinary polyurethane foam.
- Next, you need to protect the insulation itself. To protect expanded polystyrene from mechanical damage and attack by rodents, it is recommended to supplement this material from above with a reinforcing mesh or special shields. These components must be fastened along the perimeter of the foundation using dowel nails.
On top of the mesh, the foundation can be covered with a cement mixture with the addition of special waterproofing ingredients.
- If the house is located on damp ground, it needs to be provided with good drainage.It is installed around the entire perimeter of the foundation and taken out into the lowland or a special well.
- Next, you need to insulate the basement. This part of the foundation also needs additional insulation. Now the prepared surface, protected from the penetration of moisture and moisture, is ready for the installation of EPS materials. They should be attached to the same adhesive.
- After a couple of days, it is recommended to additionally fix the expanded polystyrene plates on the plinth with special fasteners (for this, dowel-nails with wide heads are suitable).
- After these works, you can proceed directly to soil insulation (this process is described above).
Wall insulation outside
Insulating your favorite walls as if from the outside would be a reliable and correct solution. This will save you from freezing in winter and sweltering heat in summer. Installation of polystyrene foam on the wall is carried out in three different options:
- Adhesive for this material. On fasteners called fungi. Frame.
As for the glue, there are two types. The first is a dry mix, like tile adhesive.
It is prepared according to the instructions, by adding water and stirring. After that, you just need to apply to the wall and glue the expanded polystyrene. The second option is foam, which is applied on flat surfaces with a pistol.
Since this material is very fragile, you need to work with it carefully so as not to break. If the plans include plastering the walls, then the insulation of the walls with expanded polystyrene should be carried out with the application of glue to the entire large surface of the sheet. Necessarily so, and not with small flip flops and stripes.
Fungi are very similar to ordinary dowels, but with a cap to hold the sheets of insulation.
They must be plastic. Because they do not undergo corrosive processes and to exclude a cold bridge passing through the nail. With their help, the installation of insulation on a large wall of the house is very easy and absolutely reliable.
It is necessary to make an entrance of the same size as such a fungus itself, then attach expanded polystyrene, insert a plastic fungal part, hammer in a nail from the kit.
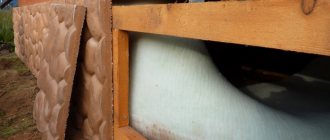
Very rarely, insulating the walls with their own hands, they make a frame of wood. It is attached to the wall. It looks like a lattice or stripes; expanded polystyrene is installed inside it.
But this option is not reasonable. With the equal width of the beams and foam, parts of the wood let in a lot of cold, since a bridge of cold is formed where the slats are attached. This option is well suited when the finishing material for the facade is subsequently attached to the slats.
Walls inside
Insulation of walls with expanded polystyrene from the inside presupposes compliance with a certain technology. Let's consider what stages such work consists of.
- First you need to prepare the bases. It is necessary to thoroughly clean the surface of the floors. Be sure to remove the old coating, especially if it is paint and varnish materials. Otherwise, the solvents in their composition will destroy the structure of the insulation.
- Next, you need to level the surface of the walls. If the floors are made of bricks, then they need to be plastered, and if they are made of concrete, then you can do without plaster. For fine leveling of substrates, first apply an acrylic primer with a paint roller.
- After that, the layer will dry for 12-14 hours. Eliminate all defects on the walls with a putty. Then apply another layer of soil. This will complete the preparation of the wall slabs.
- Now you can start installing polystyrene foam plates. For this, you can use a special adhesive. It can be dry or ready-made.
- It is permissible to apply the glue with a brush, or you can also use a roller, passing it along the surface of the walls.
- In this case, it is recommended to start installing the plates from the bottom. To begin with, they need to be cut out to size - for this they can be applied to the still dry floors.It is better to cut styrofoam with a hot string or a toothed hacksaw.
- The first row of slabs should be installed along the entire wall. After that, you can start installing the next row.
In this case, the slabs must be displaced relative to the lower elements in such a way that the joint between the first-row sheets falls on the middle part of the upper slab.
Let the adhesive dry thoroughly. This can take 34–42 hours.
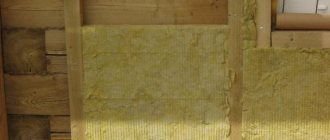
- It is recommended to additionally fix the installed insulation with dowels. In this case, the walls must be drilled directly through the EPS. Then you need to drive dowels into the resulting holes. The thermal insulation material should be attached with self-tapping screws. Large sheets can be installed in 6 locations.
- Now you should proceed to the sealing of the seams. If their dimensions exceed 30 mm, then the remaining scraps of expanded polystyrene can be glued into them.
- At the end of all work, the joints must be treated with polyurethane foam. Make sure that it does not contain toluene - this component corrodes plastic.
Evgeny Filimonov
Ask a Question
Excess mortar must be quickly removed with a knife, after which the seams must be treated with glue solution.
- Now you need to apply a reinforcing layer (for example, a fiberglass mesh).
- Place on top protective coatings, as well as vapor and waterproofing.
- Finally, cover the walls with a finishing coat such as plaster.
Adhesive or foam for expanded polystyrene
When insulating with polystyrene foam with your own hands, the question arises of how to fix the material to the wall. Glue or foam is not suitable for tiles, since it does not guarantee the proper attachment of the insulation to concrete or brick for a sufficiently long time. Professionals recommend that in order to glue the PPP and the wall, use only a special adhesive, such as glue or foam for expanded polystyrene.
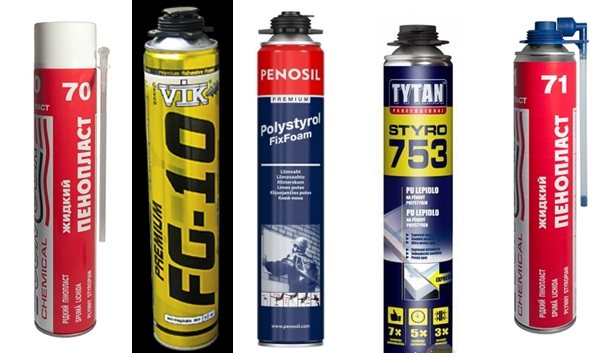
Typically, the glue or foam for attaching the PPP and sticking it to the wall is a dry mix. Before use, this mixture is diluted in warm water at room temperature in accordance with the instructions and kneaded to a uniform consistency.
Glue or foam for extruded polystyrene foam have their own specificity of use, which significantly distinguishes them from adhesives for other materials. So glue or foam for expanded polystyrene is not applied directly when you need to attach the material, but in advance. Approximately an hour before it is necessary to fix the PPP, glue or foam is applied to the wall surface in an even layer. Also, glue or foam is applied to pre-prepared sheets of extruded polystyrene foam.
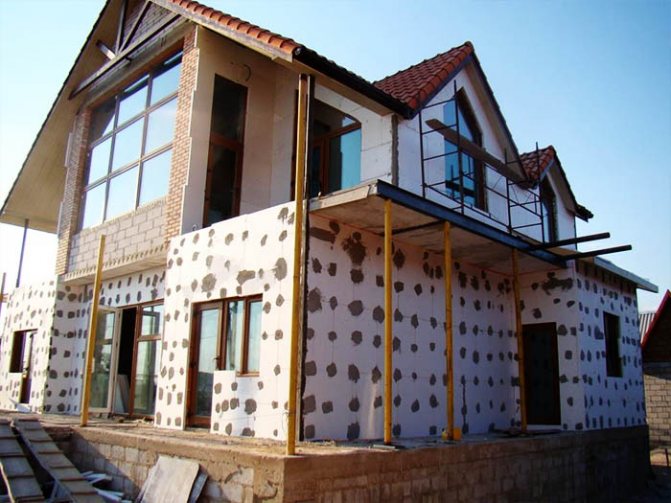
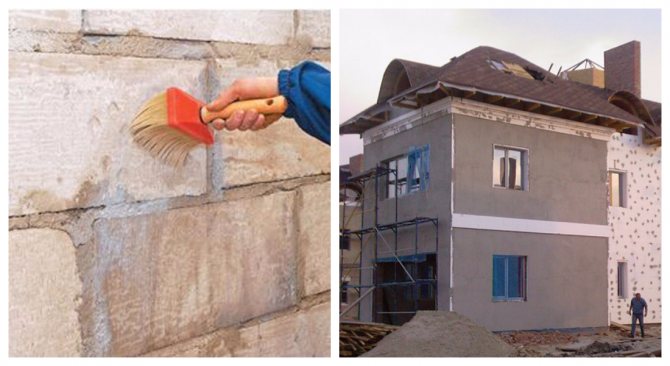
Facade
Many people turn to EPS insulation for house facades. This work should be done as follows.
- First, the outside walls are scrupulously cleaned of all excess, as well as old finishing materials, especially if it is paint.
- If the overlaps have irregularities, then you must definitely get rid of them. This also applies to various damages, such as cracks or crevices.
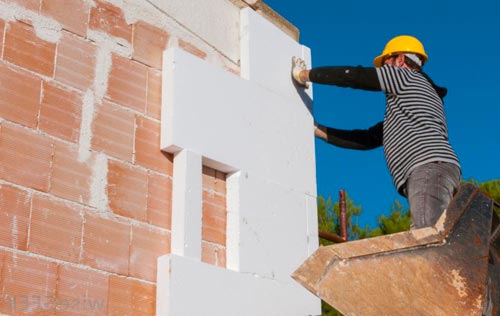
- Now you need to spread glue on the polystyrene boards (no need to apply too thick a layer), and then these parts must be pressed tightly to the bases and additionally attached with dowels.
- Attach EPS boards to all façade surfaces.
- After that, the sheathed bases need to be properly sanded.
- Install a reinforcing mesh over the entire area of the installed insulation. Soak it in the sticky solution.
- Next, be sure to wait until the surface covered with plaster is completely dry. Until then, no work can be started.
- After complete drying, the base must be covered with a high-quality primer.
- Only now is it permissible to go directly to the decorative design of the facade. For such bases, it is recommended to purchase only high-quality and high-strength coatings that are not afraid of temperature changes and atmospheric precipitation.
It is recommended to insulate the facade only in the warm season. During such periods, the humidity of the air is significantly reduced, therefore, adhesive and cement compositions adhere much better, and dry out very quickly.
Based on materials from the site: stroy-podskazka.ru
Preparing the facade for insulation
Before insulating facades with expanded polystyrene begins, all protruding elements are removed from the surface to be finished. Gutters are removed from it, from window and door openings - platbands, ebb, etc. The wall must be cleaned of dust, dirt, old paint, loose plaster and flaking fragments. All this will interfere with reliable contact of polystyrene with the surface. In addition, the wall should be flat so that the insulation plates adhere more tightly to it. Condensation will accumulate in the voids remaining under the polystyrene foam, and the bumps will interfere with the reliable fixation of the sheets.
Before insulation, it is necessary to achieve the plane of the building.
Nevertheless, it is not necessary to achieve the ideal plane of the facade: it is enough to cut down significant protrusions from it and seal deep depressions with plaster mortar. Small irregularities are not a problem, since deviations from the plane are leveled with glue. In addition, the edge of the plate in contact with the wall at the place of the protrusion can be machined with an abrasive tool.
The condition for high-quality surface preparation for insulation is its thorough repair. Cracks in the wall, brickwork joints, etc., are plastered. Before sealing, the edges of the cracks should be cut so that the solution does not cover them up, but gets inside. It is better to clean the seams to a depth of at least 1–2 cm.
Before plastering, the edges are primed with a deep penetration compound. It will strengthen them and improve the adhesion properties of the surface. For the same purpose, the entire plane of the facade to be insulated is treated with a primer. However, before priming, it is advisable to impregnate the wall with an antiseptic, which will protect it from fungus.
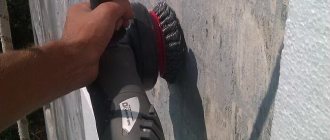
Sheets of extruded polystyrene foam also need a little revision. Thermal insulation will not be securely fixed if its contact side is too smooth (this is different, for example, "Penoplex"). You can turn it into a more porous one if you make small notches on the verge with a construction knife, pierce it with a needle roller or rub it with sandpaper.