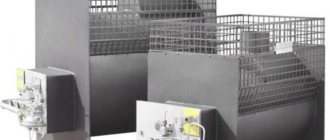
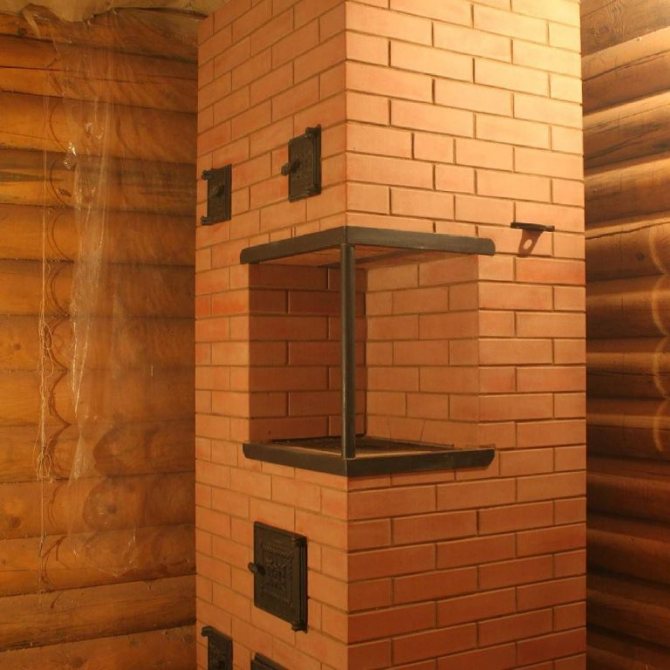
Double-deck ovens are the most economical solution for heating large living spaces. Outwardly, they differ from conventional models, but the internal arrangement of the chimneys is the same. Efficiency lies in fuel consumption: if a certain amount of firewood is required for heating with a simple stove, then for 2 floors, it needs half as much.
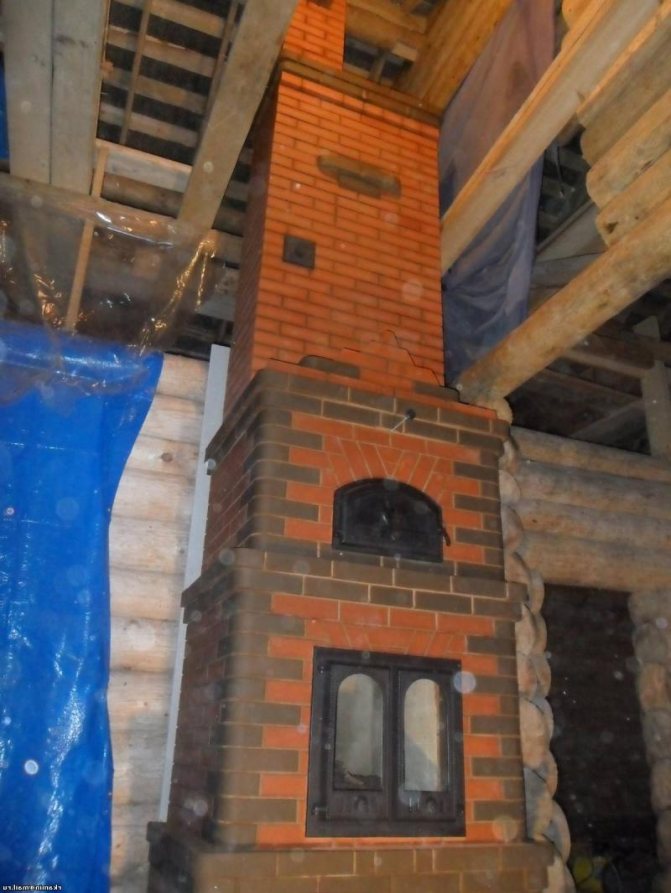
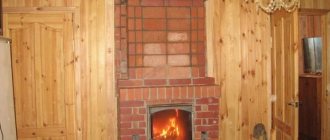
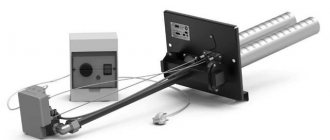
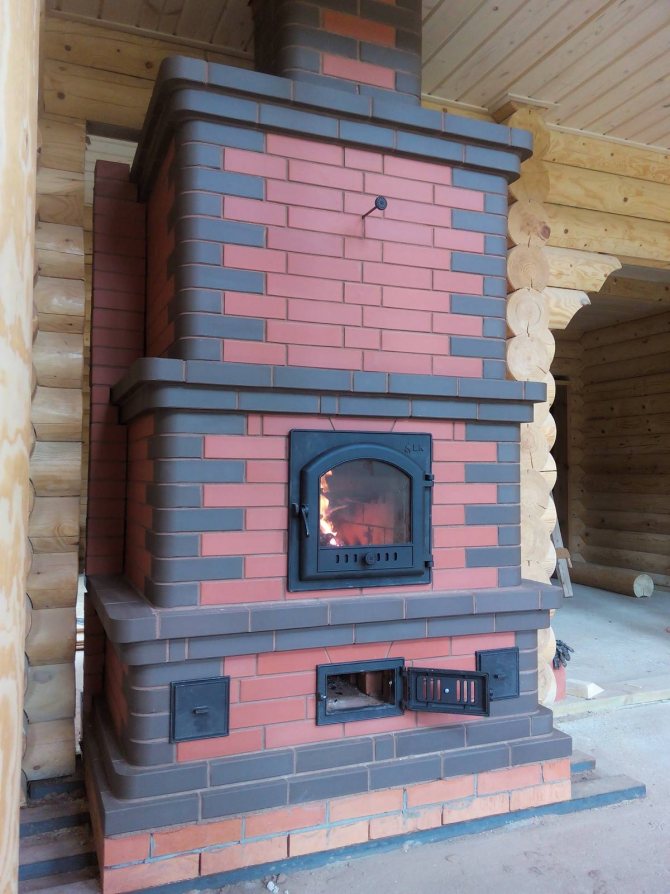
Two-story stove model with two fireboxes
Advantages and disadvantages of stove heating
The double deck oven has the following advantages:
- The two-storey construction heats rooms with large areas.
- It has very good heat dissipation: 2-3 hours are enough for heating to ensure uniform heating and retention of heat throughout the day.
- Despite the bulky design and large dimensions, the stove for a private two-story house makes the rooms more comfortable.
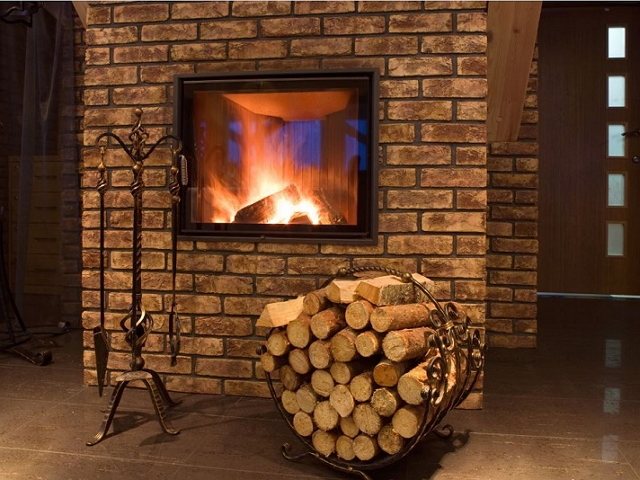
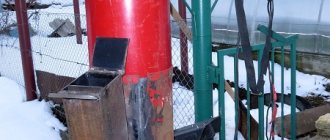
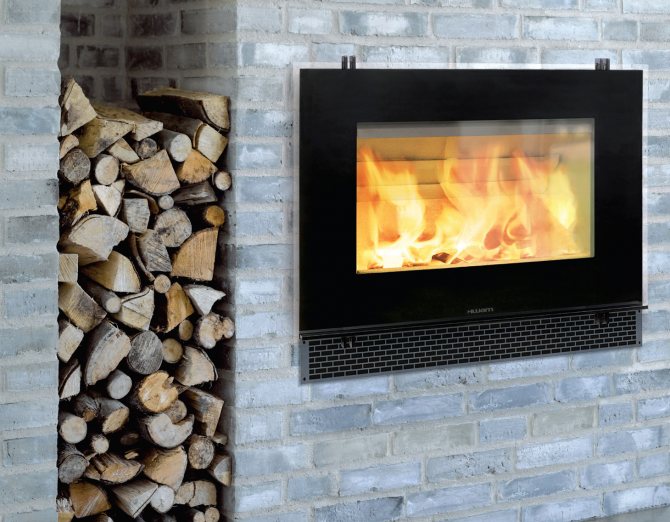
Stock of firewood
Among the disadvantages is the need for a fuel supply. It is necessary to think over a place for storing firewood so that they do not clutter up the space.
The structure has large dimensions, and therefore the room where it will be built must be spacious.
A very important criterion is the skill level of the stove maker. The operation of the finished structure depends on the correctness of the masonry. If the technological process is disturbed, then cracks may appear in the masonry, through which smoke will penetrate into the room, and condensation forms in the chimneys.
If you wish, you can try to do it yourself by studying the relevant literature on working with brickwork and arranging chimneys.
Stoves on two floors
The main task of the stove-maker when erecting a two-story stove is to distribute heat in such a way that, taking into account the characteristics of the room, it will not be too hot on the first floor, and not too cold on the second. When calculating the stove, you need to remember that warm air rises, which means less heat is needed to heat the second floor than for the first. Based on this, on the first floor, you should not get carried away with the large length of the canals, but it is better to save them for the second floor. If the room on the second floor is not large, then a hood that accumulates heat after passing through the channels of the first floor will be quite enough for heating.
Double-deck ovens should not be equipped with horizontal channels, as this significantly slows down the speed of gas movement, and therefore contributes to increased soot formation. With an excessive length of the flue channels, the temperature of the gases at the outlet of the chimney may drop below 100 нижеC, which will inevitably lead to the formation of condensation.
The stove of the second floor must fully rely on the stove of the first floor, it is strictly forbidden to place the stove of the second floor on the beams of wooden floors, since the wooden house eventually sits down and will tear the masonry at the junction of the stoves. Two-storey brick ovens must be equipped with a forward stroke valve to facilitate ignition after a long break between furnaces. In the event that the design does not allow making a forward stroke valve, you can pre-ignite the stove through the last cleaning door.
Is stove heating possible in an apartment building? Yes, furnace designs allow even large buildings to be heated if they are no more than two storeys high. There are several options for arranging heating for two-story buildings, and, despite new, emerging types of equipment, stove heating does not give up its positions.The stove can be used both as a hob, as a fireplace, and as a conventional solid fuel boiler, if equipped with an additional water circuit.
Types of bunk ovens
Brick structures can be of two types:
- With one firebox.
- With two fireboxes.
The main firebox is on the ground floor. If you plan to add additional elements (a cooking stove and a stove bench), then all this is located on the lower floor.
On the second floor, you can equip a fireplace, making the room a place of relaxation. Some of the owners attach a false fireplace, but in any case, whatever the design may be, it accelerates the heating of the room.
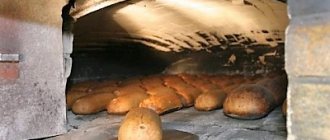
Bread chamber planning
At first, you might think that it is impossible to fit a bread chamber into such a building. The first cap is fully occupied here. There will be a place if you only remove the stove, but you do not want to do this at all. The second hood is free, but it has a low temperature. The bread chamber, in theory, is made in the first bell, after heating, they wait 1.5-2 hours and can be used. It is imperative to seal the door. It can be placed at the lifting channel, so that the cooled smoke will fall down and be eliminated into the second hood. In the bread chamber, there will be a more gentle temperature at the time of heating, after heating, it can be compared with the first option. Two red brick walls will serve as insulation, the base will be glued to mastic, warmed up for fixing, and will be laid on basalt cardboard. The overlap can also be glued in advance. There is an option to make it a dome.
All the fittings were purchased for the oven, even the door to the baking chamber with transparent glass - it will be nice to look at the brown pies. A wide fireplace damper was also found.
Brick chamfers will be removed with an angle-polishing machine - the speed in it is adjustable from 1 to 3 thousand revolutions. The only thing: you need to grind the bushing into a seat of 20 mm and a thickness of 20 mm. After that, you can put an emery disc with a diameter of 100-120.
For the stove you will need: 1100 pieces of red bricks, chamotte - 100 pieces, of which 20 - you need to cut with a ladder. It is necessary to add another 150 red bricks, since the outlet pipe will be made of cold rolled iron.
With one firebox
A special feature of the double-deck oven is its high heat capacity. She has good heat dissipation. It reaches 5.5 thousand kcal / hour. At the same time, for constant heat, the stove can be heated once a day for 2-2.5 hours, while the bricks heat up well and the air in the room will be warm for a long time. Firewood consumption is no more than 60 kg.
Firewood for one furnace
Description of construction and materials
The design of a single-furnace stove is thought out in such a way that its operating period is much shorter than that of stoves with two fireboxes.
The internal structure consists of chimney ducts. On the second floor, the chimney is laid out vertically. To separate the interfloor heating system, metal dampers are installed. They prevent the free passage of combustion products in the form of gases.
Lingering, the gases begin to cool down, forming condensation on the inner walls of the chimney. As a result of exposure to moisture, the masonry begins to collapse. Two-furnace models are better because they provide quick heating of the furnace, and condensation does not form.
Description of a single-deck structure:
- There is one main firebox on the ground floor.
- In terms of dimensions, the building has the following dimensions: 89x115 cm.
- Height - 715 cm.
- Heating panel on the ground floor 77x102.
- The second floor is supplied with a panel with a smaller size - 77x95.
In order to start laying the stove, you need to stock up on the following tools and building materials:
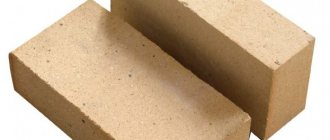
- You will need red ceramic bricks for lining the stove.
- The inner part is laid out of refractory fireclay bricks.
- Red clay is useful for working with facing material.
- Use refractory clay to lay out the interior of the furnace structure.
- When mixing clay mortar, you cannot do without sand.
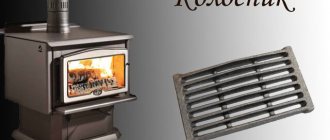
- Grizzly grate for the equipment of the furnace (laying firewood in the stove).
- To prevent accidentally flying out coals from falling to the floor and spoiling the coating, a steel sheet is spread in front of the firebox.
- Firebox door.
- A blower door for regulating the air supply, which is necessary for good combustion of the flame.
- Cleaning doors for installation in the chimney in order to have access to the ducts (the number depends on the length of the chimney and the design features).
- Chimney valves to regulate the outlet of warm gases.
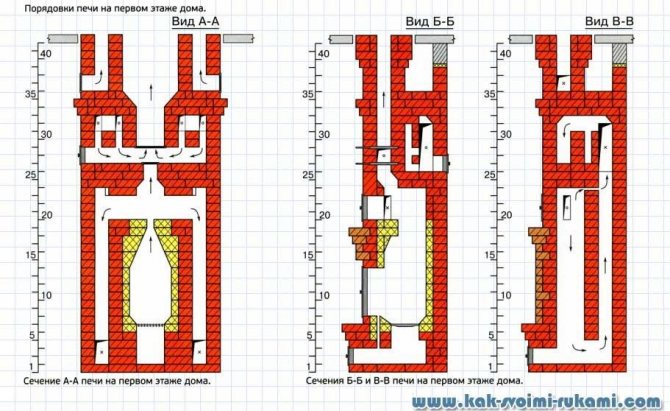
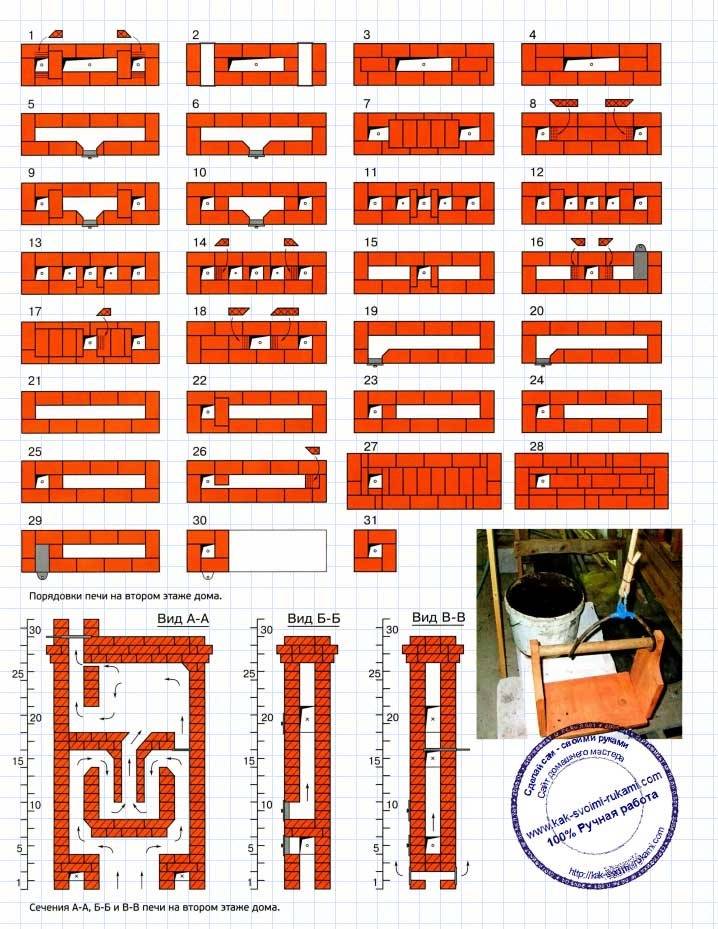
Construction sections and masonry scheme
Having carefully examined the drawing of a two-story oven in section, you can see the device of the flue ducts and how the gases should move along them.

Internal organization
In the section, it is easy to distinguish between refractory bricks and facing bricks - they differ in color from each other.
It is unacceptable to use ceramic bricks for bonding with a refractory row. The same applies to the binding of the facing row with refractory bricks.
The structure is completed by a packing tube, which is erected above the furnace.
If you use the presented diagram, then the structure shown in the drawing is erected with ceilings with a height of 3 m 40 cm. If necessary, the height of the furnace structure can be easily changed. To do this, you need to make the appropriate adjustments during construction in rows 26 to 46, as well as from 60 to 82.
Attention! Changing the data that was entered into the project will entail a deterioration in the operation of the finished furnace.
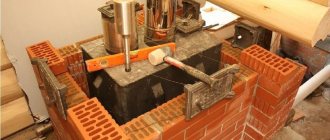
Erection of the foundation
A two-story structure weighs much more than a brick oven for a one-story house. For this reason, the base on which the structure will be erected must be more massive, capable of withstanding significant loads.
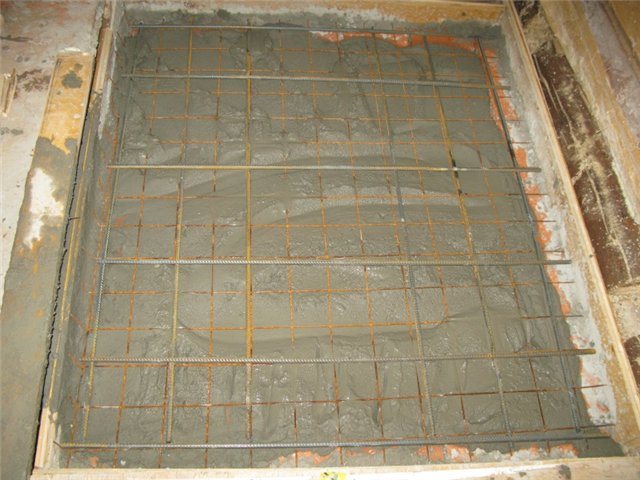
Stove foundation
In size, such a foundation exceeds the base of the stove. For example, if the base is 1000x1000, then the pillow will be 1100x1100 mm.
Before pouring the foundation, you need to prepare the following building materials:
- For concrete mortar, sand, cement and crushed stone.
- Before the concrete is poured, the formwork is built. To do this, you will need boards (old, but necessarily strong, capable of withstanding the load from concrete expansion will do).
- The bond is reinforced with reinforcement or mesh reinforcement.
- To protect the concrete from moisture, waterproofing is laid on the surface of the soil. It can be roofing material.
The foundation area can be higher than the base of the floor or at the same level with it. To do this, you need to follow these steps:
- Cover up with a sand pillow.
- Assemble the formwork from solid planks.
- Reinforce the site.
- Fill with concrete.
The foundation must be dried. The drying period lasts at least a month. Then several sheets of roofing material are laid on the base for reliable waterproofing. The construction of the stove begins on them. The base must be level, without slopes.
Furnace erection
The construction of the stove is impossible without additional elements such as grates, doors and other details. The most important thing is to prepare a high-quality clay solution. The quality of the entire structure depends on this.
Due to the violation of the proportions of clay, sand and cement, the stove will crack, carbon monoxide gases will penetrate into the room, and this is dangerous to human health.
The number of components in the solution depends on the fat content of the clay: the kneading is done either 1: 1 or 1: 2, but there is a very oily clay, which requires a 1: 3 ratio.
To test, you need to make several different solutions and roll them into balls, leaving them to dry. After drying, the material is selected, the balls from which did not crack.
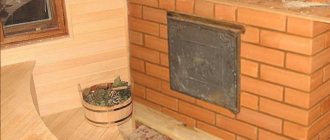
External finishing
The outer side of the object can be laid out with refractory bricks and, after plastering, painted or other refractory finishes can be applied.
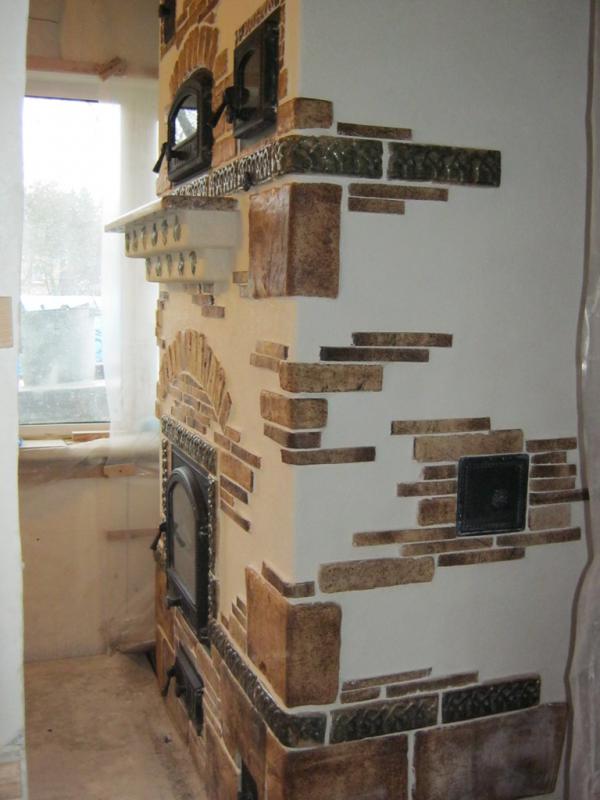
Finishing option
Some people prefer simple ceramic brick cladding. There are several color options for this finishing method.
You can recommend ceramic tiles, but a stove of this size will require a lot of this material.
More information about laying the stove on two floors can be found in this video:
During construction
Regarding the long and deep firebox of this stove, we can say that there are both disadvantages and advantages. Of the minuses - you need a long poker, it will be inconvenient to rake out the coals. From the pros - any firewood will fit in and you will not need to saw it. In any case, if a long firebox causes inconvenience, then it can always be reduced, even after the construction of the furnace. The calculation of the stove relative to the firebox is done on the basis of the power of the stove and the need to burn fuel per hour, taking into account the tension of the furnace volume. If you put only one tab in the oven, then the firewood saving is 20%. It is uneconomical to make subsequent bookmarks in the furnace, since when the door is opened, the walls of the firebox - up to 400 degrees, and the chimney will also cool excessively - hence the excess soot, and soot on the walls is most often a heat insulator.
Regarding the firebox, there should be a measure in everything. If, for example, the surface area of the heat perception is insufficient, then the heat output of the furnace will not reach the initially set value, and the walls of the chimney will collapse from excessive heating. If the surface area of the chimneys is too developed, then the temperature of the flue gases can drop very much - condensate will fall out of the combustion products. And the draft will become poor - smoke will enter the room and the strength of the brickwork may decrease from moisture.
The firebox, according to the rules, must intervene with all the fill laid down for the given stove. If this cannot be done, then the bookmark is divided into two, with the calculation of the bookmark for the first fire - 2/3.
In this case, a heating and cooking stove is planned: in the first place is the heating one, and the cooking functions will be secondary: you can, for example, put the stove on, or you can remove it. Previously, additional extensions were made to the stoves in the villages - only for cooking and additional heating or heating of the house. Later, stoves with underflooding began to appear - only for summer cooking.
In this oven, the second bookmark may not be needed - the firebox is long.
Furnace wire is used to reinforce the furnace. It is imperative to drill in the corners. First, you need to bend the ends of the wire by 20-25 mm, insert it into the tightness in the drilled holes. It can be reinforced with a mesh, but there is a big drawback here: transverse wires create small channels with air, and if the clay-sand mixture at the edges does not withstand, then it will turn out badly. Unannealed wire is stronger, does not stretch and can gradually shatter brick if bent.
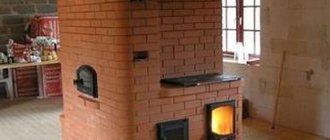
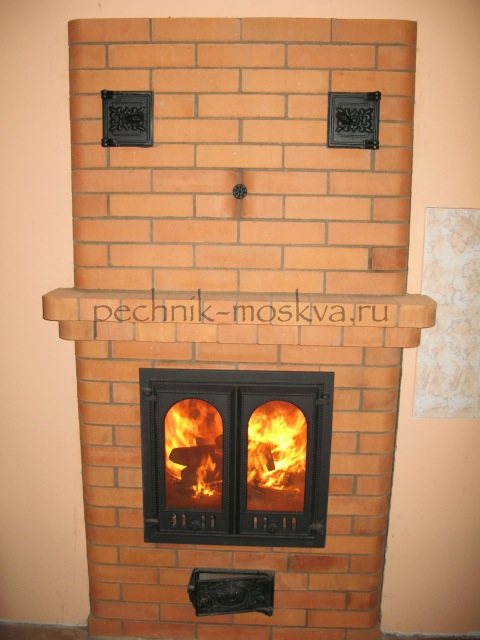
Two-story stove with hob and fireplace
A structure with one firebox is equipped with a fireplace insert on the second floor; it can also be equipped on the first floor.
The design is supplied with a hob, which is indispensable in the kitchen.
Oven with hob
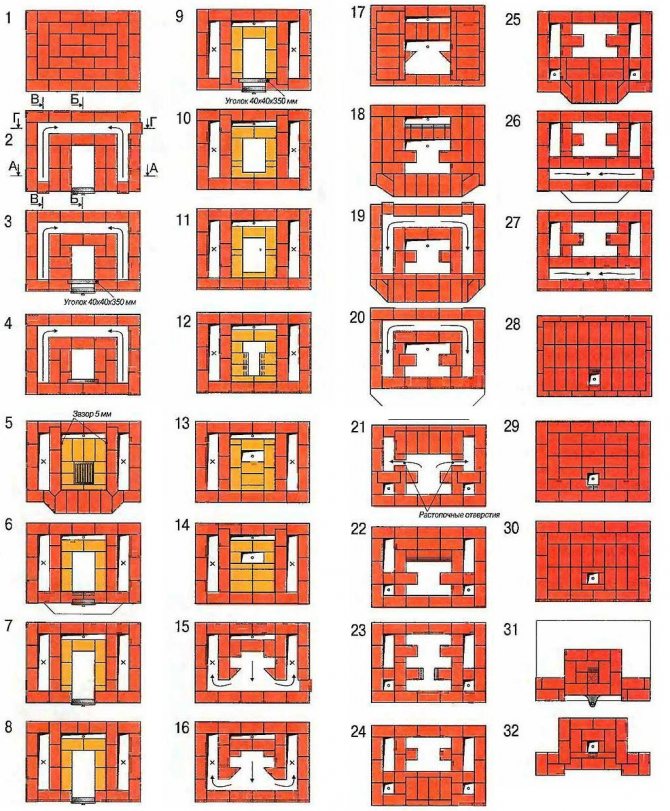
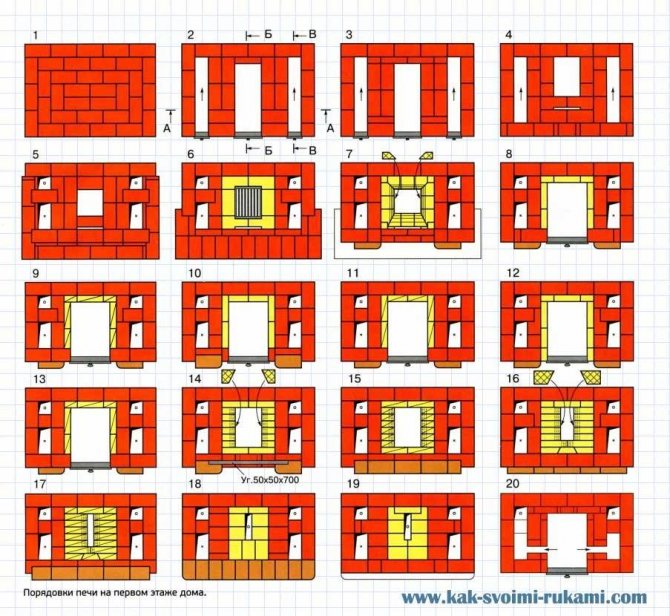
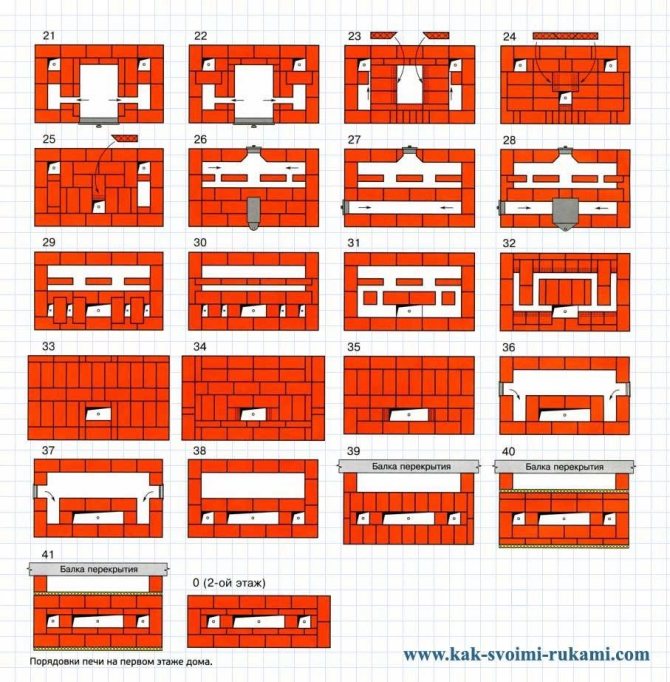
Ordering
Laying ordering requires knowledge and experience. Here it is necessary to take into account the peculiarities of the masonry of each row with all its nuances.
With such masonry, the operation of the equipment is greatly simplified. In the building, red and fireclay bricks are used in approximately equal quantities.
Important points related to the installation of solid fuel heating systems
The place for the oven should be chosen with special care. It is desirable that it be erected against the load-bearing wall. This will optimize the performance of this equipment.
When it is necessary to create stove heating of a building consisting of several floors, it is worth paying close attention to the design of the dwelling. Installation of equipment for heating the premises can only be carried out taking into account the peculiarities of the cottage
If the house is built of bricks, then the role of the foundation for the furnace can be played by metal beams, which are embedded in the masonry. This is done with concrete mortar.
Perhaps you decide to do everything yourself. I would like to warn you against such a step. The fact is that the construction of the furnace must be carried out by professionals. An unskilled approach can seriously affect its properties. In order not to overpay, it is better to immediately use the services of a specialist in this field.
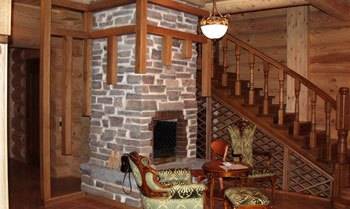
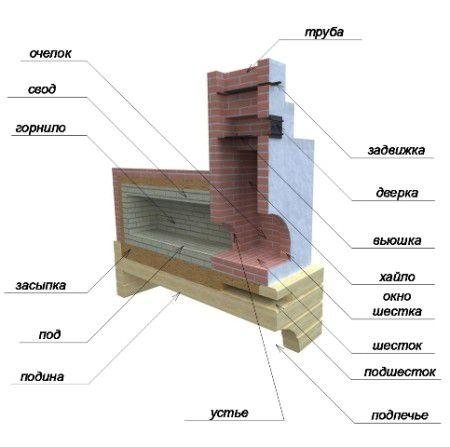
The design of the Russian stove with a stove bench
Dimensions of a classic oven: width of about one and a half meters (two arshins); length - just over two meters (three arshins); the stove bench was placed at a height of approximately human height - approximately 180 centimeters (or two and a half arshins), the height of the hearth was approximately 45 cm, the height of the hearth was taken equal to the height of the table.
The stove was erected on a foundation of small fragments of bricks, stones, less often on a log foundation (oak, pine and other species). The structure was erected at the same time as the house, but their foundations are by no means built in one piece, isolation is imperative. The kiln itself was erected either from baked bricks or from raw bricks (in those families where income did not allow the use of red bricks for construction). The first "chimneys" (chimneys) were made of wood, then, due to the fire hazard of the material, the wood was replaced with stone and brick.
Furnace design: crucible - furnace, the place where the fuel is burned; a six and a base - an auxiliary table for dishes and a niche under it; under - the bottom of the firebox; hailo - a hole for the release of smoke into the hut; baking - space for storing firewood; mouth - a hole for laying firewood, closed by a flap.
Construction techniques
Guardianship
A wooden ward can hold a stove weighing up to 1,600 lbs. small or medium without heat. It is carried out in the form of a log house in two belts, with backfilling with quarry and flooring from beams. The flooring is covered with felt, properly soaked in a liquid solution of fatty clay, and over it - with roofing iron.
Wooden guardianship is fire hazardous and is now prohibited. Now Russian stoves are placed on a foundation made of bricks or concrete blocks, or simply on a concrete floor. If the stove is on a foundation and it is supposed to be lined, the foundation around the perimeter must be additionally let out on a half-brick-brick, taking into account the layer of mortar.
Arches and vaults
Arches and vaults are laid out from an ODD number of bricks on formwork on wooden templates - circles. First, a full-size drawing of the arch in a section is made, then the castle bricks are hung on the wedge along it. You don't have to try to lay out a vault with a direct lock or a lockless one for a home-builder, not every experienced bricklayer can do this.
Next, a circle is prepared, taking into account the thickness of the formwork boards, and a vault without a lock is laid on them. Then you need to thickly grease the grooves of the locks with a solution and put the locks into the groove. The next stage - the locks in turn and in several passes are gradually hammered into the groove to the place. You can't do with a mallet, you have to wield a log. But you can't beat what is foolishness; it is necessary to use the inertia of a heavy log, and not the force of a sharp blow.
They control the quality of the closure of the vault by squeezing the grout sausages out of the seams: it should be more or less uniform over the entire surface. The thick solution flows slowly, so you need to take breaks between aisles.The result is a pre-stressed structure; only such a vault will last for many decades.
Material consumption
The classic Russian stove described above, depending on the size, requires approximately the same amount of materials:
- Small - 1500 bricks and 0.8 cubic meters. m solution.
- Average - 2100 bricks and 1.1 cubic meters. m solution.
- Large - 2500 bricks and 1.35 cubic meters m solution.
Note: "about" means that some of the material in inexperienced hands will go into battle. Most likely, the vaults will first have to be rearranged.
Possible difficulties
With self-construction and lack of experience, it is easy to make some mistakes:
- The use of low-quality materials - cheap bricks often have defects or crack when heated to high temperatures.
- If the brick is not soaked before building, it will draw moisture out of the solution, which will lead to uneven drying and deterioration of the strength and tightness of the masonry.
- The joints between the bricks are filled unevenly and not tightly enough - in the future, this leads to a violation of the sealing.
To avoid these and other mistakes, it is better to consult an experienced specialist before starting work.
Fireclay brick - different size
It should be borne in mind that when laying a fireclay core on an edge, the height of one row of it (the width of the fireclay brick is -12.3 cm) will differ in height from two rows of red brickwork on a plate (the thickness of the red brick is 6.5 cm).
This moment must be foreseen when leveling the hearth of the HK with the level of the red brick masonry, on which the door of the baking chamber will be installed. An air chamber is provided between the oven on the first floor and the flap of the second. This element of the stove may not be arranged if it is not necessary.
The main types of brick ovens
So, depending on the functions performed, brick ovens in country houses are divided into the following main types:
- Heating stoves. As you can see, such a device is intended solely for heating indoor air. It can heat one room or the whole house if it is built into a wall.
- Cooking ovens - created for purely utilitarian purposes for cooking. In addition, mushrooms, berries and fruits can be dried on a brick oven. These ovens are often installed in summer kitchens.
- Cooking and heating ovens. A classic structure that can not only heat a room or the whole house, but also be used to prepare food. A multifunctional multicooker with a solid history.
The technology of building brick ovens, proven over the centuries, allows you to create a highly efficient device that quickly heats up the room, is safe to use and becomes the center of attraction for the whole house.
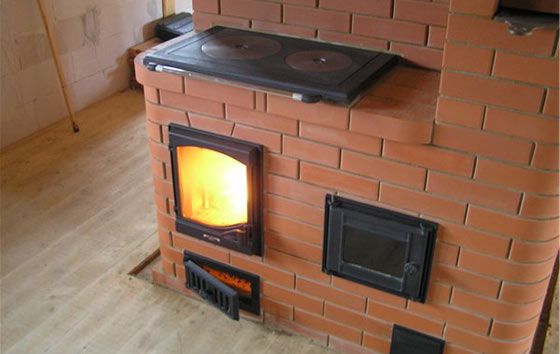
heating and cooking stove