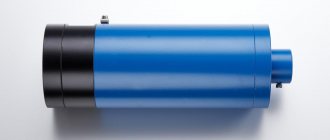
The main malfunctions of hydraulic tanks
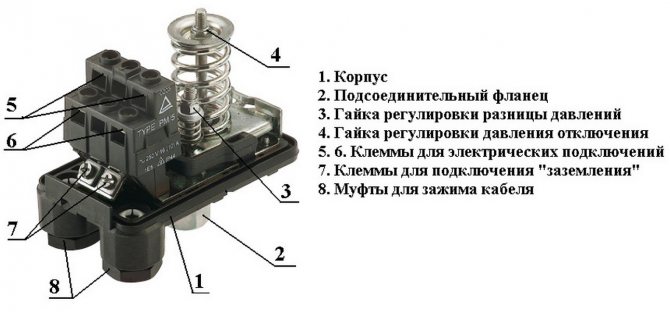
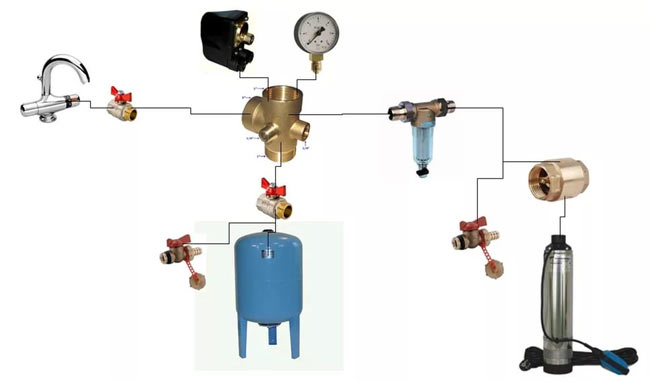
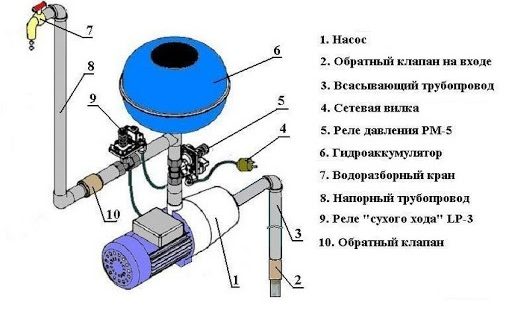
In fact, the device of the hydraulic accumulator is not particularly complex. It consists of:
- main tank;
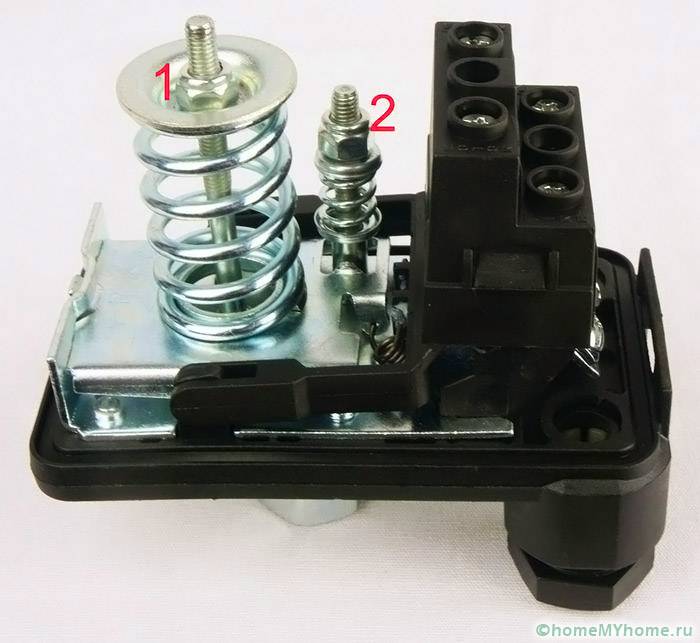
- membrane or rubber container for water storage;
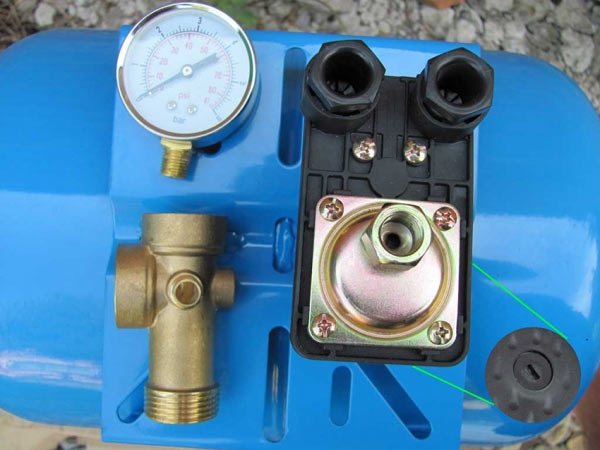
- pressure switch, pressure gauge and other fittings.
However, despite their simplicity, these devices can break. The main malfunctions of the accumulator for private water supply systems:
- too frequent switching on and off of the pump. This can be due to various reasons. The most common are a decrease in air pressure in the tank, damage to the membrane and damage to the tank body. In addition, the pressure switch may be incorrectly set;
- air pressure below normal - most likely, the nipple is damaged, which does not hold pressure;
- water leaks from the air valve - this indicates membrane damage;
- the required water pressure is not accumulated - there is not enough air in the tank.
Of course, the best option is to call a specialist or send the hydraulic tank to a service center for repair. However, if you wish, you can make repairs with your own hands.
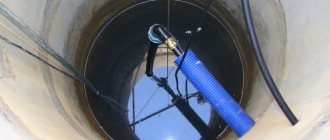
Replacing the membrane
Quite often, you have to change the membrane in the accumulator. However, before disassembling the tank, you should make sure that the reason is in the membrane. After all, the matter may be in the wrong setting of the pressure switch, or in a small volume of air in the hydraulic tank.
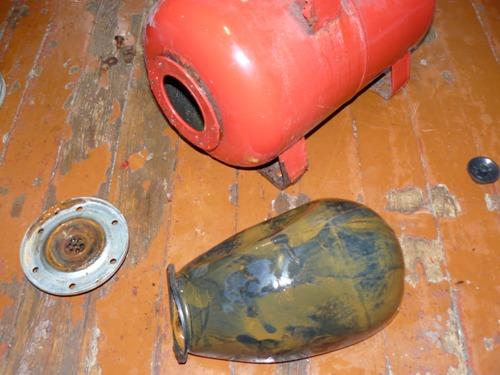
One of the most common problems is membrane breakage.
The main signs by which you can determine the damage to the membrane:
- too frequent switching on of the pump;
- water flows from the nipple and air valve.
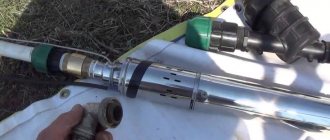
In this case, the membrane is repaired in the following sequence:
- first of all, you need to purchase a new pear and prepare a set of keys;
- after that, the accumulator is disconnected from the water supply system;
- water is drained from it and air is lowered;
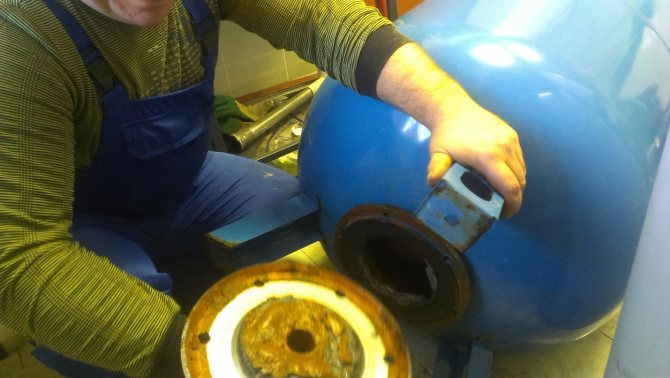
- now you need to unscrew the flange and take out the old pear;
- further, it is advisable to carefully examine the inside of the tank - if there is dirt or rust, then you need to clean it;
- after that, the new membrane is expanded and installed in the seat;
- then, it is pressed against the flange.
Now, it is required to pump its operating pressure into the accumulator, usually 1.5-2 atmospheres. And then do a test run. At the same time, water must be supplied to a new pear under low pressure - this will eliminate the likelihood of its damage. You can read more about the nuances of repair in the article "How to replace a membrane in a hydraulic accumulator".
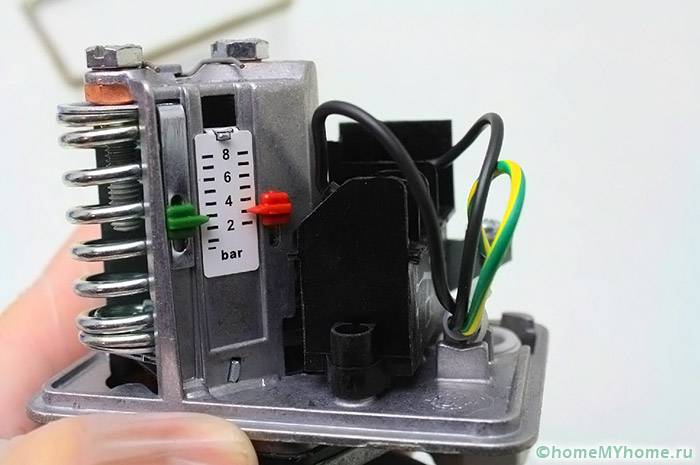
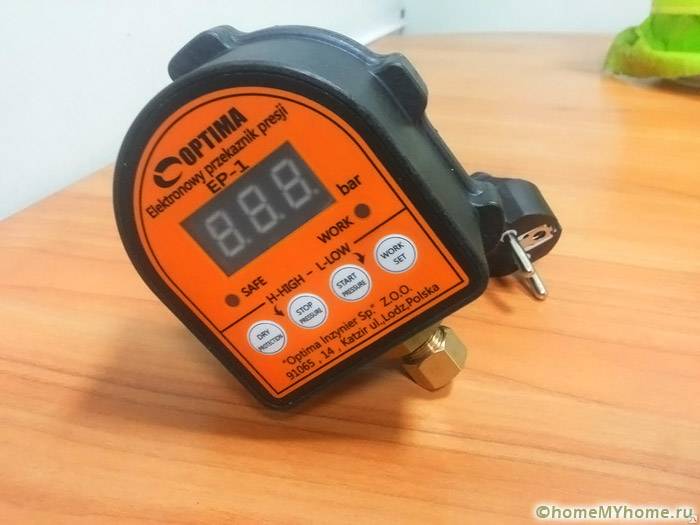
What is a pressure switch for?
Pumping equipment in water supply systems does not work constantly, but it turns on periodically, as the contents of the storage tank are consumed. It is required to constantly monitor the parameters of the system and promptly turn on and off the pump so as not to leave consumers without water and not create excessively high pressure that can damage the pipeline and valves. It is impossible to do this manually. The simplest process automation scheme, the main element of which is a pressure switch, can cope with the task.
Interesting! The pressure switch is an automatic remote switch that opens the pump supply circuit at a given maximum value of the parameter in the system. When the minimum value is reached, the circuit is automatically closed, turning on the pump to fill the system with water.
Pressure problems
This problem can be caused by a number of reasons:
- damage to the nipple - air escapes through it;
- incorrect setting of the pressure switch;
- damage to the tank body.
Sequence of actions for repair:
- first, it is worth checking the integrity of the body itself - if it is rotten, then the accumulator may need to be replaced;
- if everything is in order with the case, it is worth checking the operation of the pressure switch. It is possible that his settings are out of order;
- for this, it is worth trying different operating modes for the hydraulic tank - if the relay is active, then you need to look for the cause elsewhere;
- now you need to check the nipple - it can bleed air, if so, then the repair will be reduced to replacing it.
The pressure gauge may show incorrect values
Another reason is a malfunction of the pressure gauge. Those. it may show incorrect numbers. This point is also worth considering.
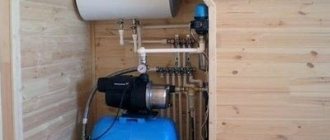
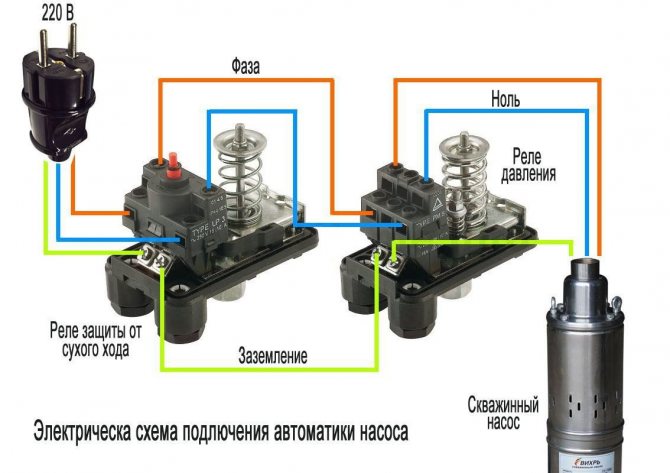
Relay connection diagram for hydraulic accumulator
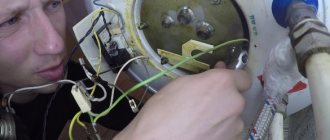
If you purchased the assembled pump, then, most likely, the relay is already installed and adjusted on it, so there is no need to connect and configure. If you are assembling the system on site, then you will have to install and configure the relay yourself.
The purchased device must be connected to the pipeline, power supply, pumping device.
The simplest connection method involves integration into a circuit with a pump, a hydro accumulator.
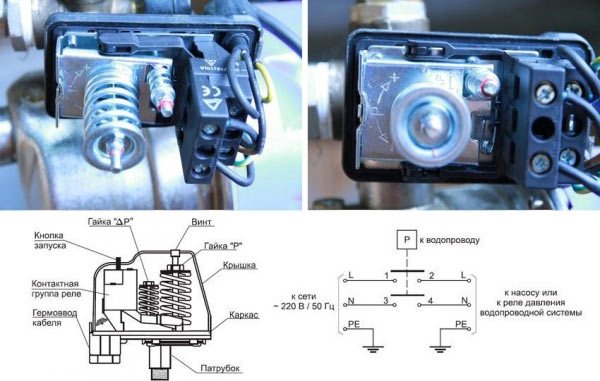
The connection is carried out in a strict order: water supply, pump, power supply. A preliminary calculation of the water supply is carried out: the average level of the pressure of the water flow, provided by the action of the accumulator, is determined. To make the measurements more accurate, the installation of the measuring device (manometer), control devices (relay) is carried out at the maximum possible distance from the hydro accumulator. Most often they are attached to the storage device branch pipe using specially designed five outlet fittings. Connection to the nozzle holes is carried out according to the following scheme:
- Water supply pipes are connected to two of the outputs: to the first - a pipe directed to the consumer; to the second - a pipe directed to the pumping equipment.
- 1 of the outputs docks with a hydraulic pump.
- Devices are connected to a pair of small holes: a relay, a pressure gauge.
The pressure switch for the accumulator has a dedicated 1/4-inch diameter hole. It is threaded and designed to be connected to the pipeline, so it should be screwed onto the fitting. Consider in advance the need for waterproofing. There must be a sufficient gap between the fitting and the threaded part to accommodate the waterproofing component. The tightness of the connection is ensured in various ways, for example, using the FUM tape.
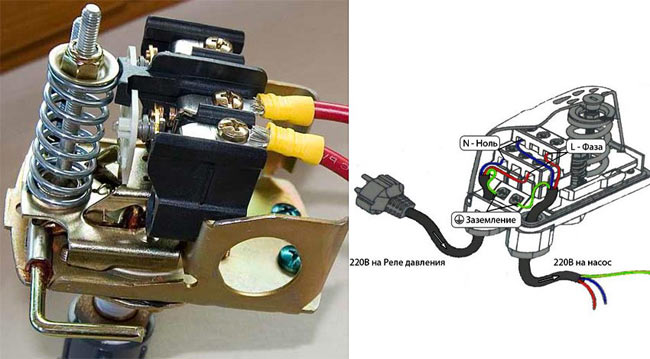
You should also carefully connect the electrical cables by feeding them into the special cable openings available in the relay. The first wire is for supplying electricity to the outlet, the second to the pump. After the cables are passed through the openings, you will need to remove the device cases and connect the contacts to the terminals, taking into account the polarity, grounding. The wires are connected according to the following scheme:
- The wire going to the power source is pulled into a special hole in the case.
- Further, it is divided into phase, neutral, on some wires there may be a grounding conductor.
- The ends of the conductors are stripped of insulating material, connected to the terminals.
In a similar way, the wire leading to the pump is connected.
After the connection is successful, you can start configuring the device.
Too frequent pump starts
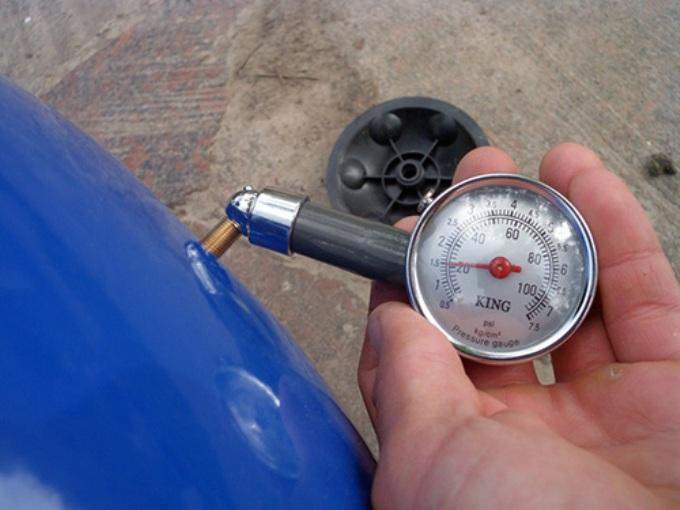
This phenomenon indicates a lack of air pressure in the tank for water supply systems. Therefore, the very first thing to do is to check the readings of the pressure gauge.
Here you need to take into account the fact that this device may show incorrect values.Therefore, you can simply bleed the air completely from the system through the air injection valve and pump it up again. If the pressure gauge is out of order, you need to replace it.
Another possible reason is that the pressure control relay is out of order. In this case, you need to adjust it. It is possible that the malfunction will be rectified.

A breakdown of the pressure switch is also one of the possible malfunctions.
You also need to inspect the accumulator itself - if the integrity of the case is violated, the air will be vented. Depending on the size of the damage, you will need to either seal it or buy a new one.
Another common reason is the air nipple is out of order. If so, then you just need to change it. To do this, disconnect the hydraulic accumulator from the water supply system and bleed air from it. After that, you need to unscrew the old nipple and insert a new one in place.
Then air is pumped into the tank to 1.5 atmospheres, and then water is drawn into the membrane.
How to choose a relay
Consider the criteria for choosing the automation of the water supply system control.
RD for work with submersible and borehole pumps
Such units require the installation of a dry-running protection relay with a minimum delay (within 30 s). The working life of the blower will increase with a soft start. The automatic restart function will not be superfluous at all, especially when taking water from a marginal well.
Surface pumps
For them, protection against dry running with a longer pause when triggered (within 180 s) is selected. The configurable pause auto-restart feature is welcome. It will not be superfluous to measure the differential pressure "Delta", which is possessed only by RDE-M (Master).
Pumping stations with accumulators
When working with a hydraulic accumulator, it is better to be able to control the filling time. Only the IDE-M is endowed with this opportunity. Adjusting the parameters of the dry-running protection will not be superfluous, just like the adjustable automatic restart of the equipment. Automatic control of the presence of air in the accumulator is encouraged. The control system with the leakage control function, implemented only in RDE-M, is very useful, as well as the ability to control the pipeline rupture.
When choosing between a pointer and an electronic relay, be guided by your own perception, i.e. see which option is most convenient for you. It is easier to read the readings from the LCD display, but perhaps it is more convenient for someone to look at the readings of the pressure gauge.
What to look for
- It is not worth buying a taxiway for the pumping station. It is already equipped with an automatic system for maintaining pressure in automatic mode.
- Factory settings, as a rule, satisfy the parameters of individual water supply systems: shutdown of equipment when the pressure in the system reaches 2.5 bar, turning on - at 1.5 bar, activation of protection against dry start - 0.5 bar.
- When buying, you should pay attention to such a characteristic of the device as the estimated number of switching on of the device. The higher this number is, the longer the product will last.
- The larger the capacity of the accumulator, the less often the pump will start, therefore, its working resource increases.
Water comes out from under the flange
Sometimes such a breakdown happens. However, it is easy to treat - usually it is enough to just tighten the nuts on the flange. If this does not help, then you will have to drain the water from the tank and release the air pressure, and then remove the flange.
Then you can try to make an additional rubber pad and conduct a test run of the system. The fact is that the accumulator is under constant pressure and from this, microcracks may appear in the rubber.
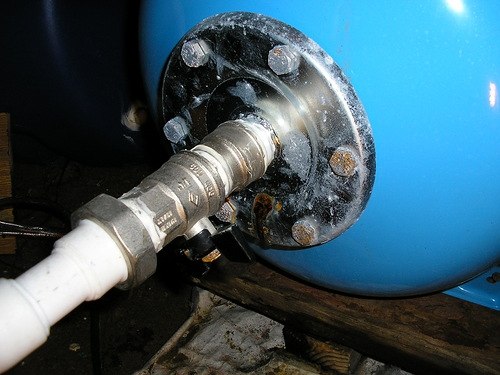
Water can flow through the flange
If the additional gasket did not help, you will have to buy a new flange.At the same time, you need to inspect the seat - there should be no mechanical damage, burrs and rust on it. If there are any defects, they must be eliminated. they can cause leakage.
Battery Prevention
In general, these devices do not break so often, yet their design is quite simple. However, in order to avoid or diagnose a malfunction in time, it is necessary to periodically service the accumulator. Moreover, there is nothing complicated in this, and such a procedure does not take much time.
Service is carried out according to the following schedule:
- a simple visual inspection of the device is done every 1-2 months. The accumulator is checked for leaks, in addition, on some models, excess pressure must be relieved;
- the next inspection is done every six months. The tank is also checked visually, but in addition it is necessary to check the condition of the air pressure and, if necessary, pump it up. Also, it is worth checking the serviceability of the pressure switch - and, if necessary, adjust the settings.
If the hydraulic accumulator has worked for more than three years, it is advisable to carry out comprehensive prophylaxis. For this, the device is disconnected from the water supply system and the pear is replaced. Flange and nipple replacement may also be required.
Perform prophylaxis every 3 years
You can do it yourself without any problems. However, when replacing parts, it is advisable to buy original products. This is especially true for the membrane.