We are accustomed to solving the issue of window opening insulation by simply installing a plastic window, which automatically removes any questions about the opening's thermal insulation. Nevertheless, if this option is not possible for certain reasons, the issue of thermal insulation will have to be approached in other ways.
Moreover, all parts of the window opening, including the window sill, will be involved in the work to preserve heat in the room.
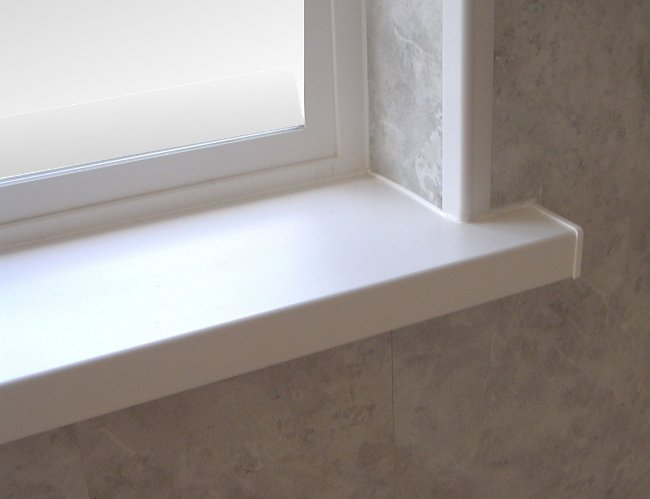
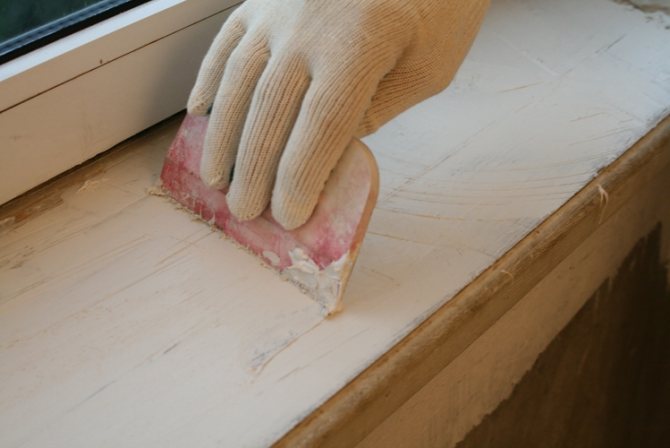
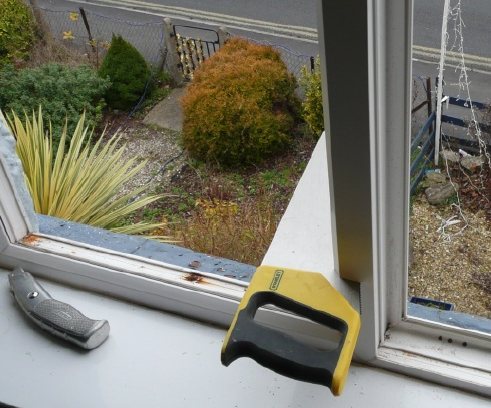
Insulated windowsill
In the article, we will consider all sorts of options for how you can carry out the insulation of a window sill with your own hands, and do it really well.
Let's start, however, with the causes and consequences of the blowing problem.
Thermal insulation of window sills
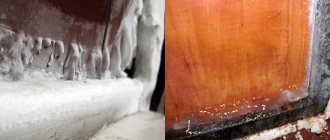
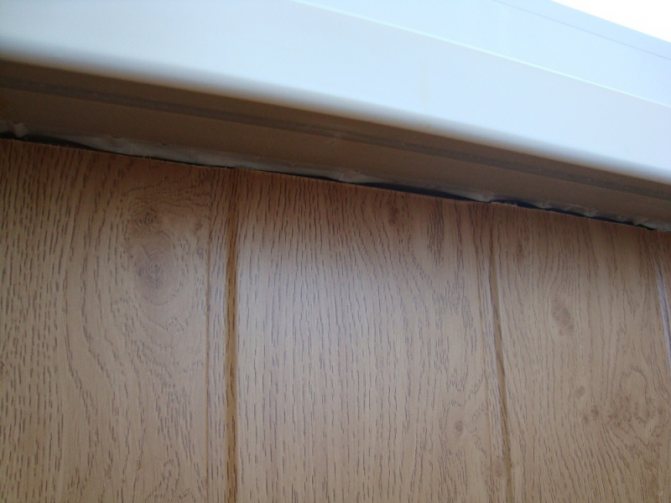
The source of heat loss in the room is the cracks between the wall and the window sill. Before starting thermal insulation work, they determine the vulnerable spot of the window sill - the point from where the cold penetrates. Heat leakage can occur between the plastic frame parts and the window sill, for example. To eliminate the source of the draft, a sealing compound is used.
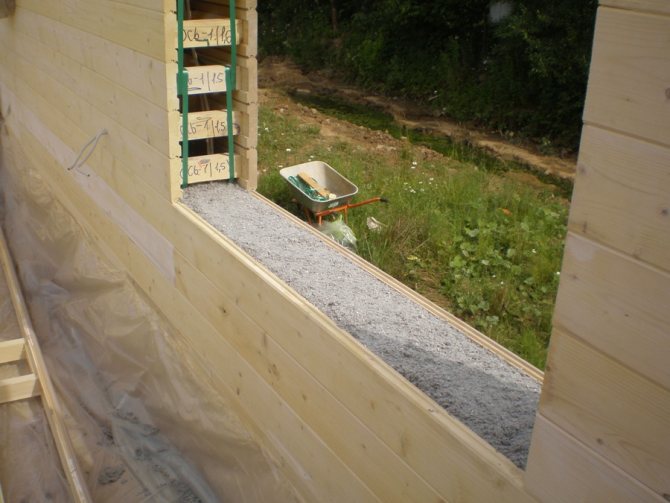
Blowing is also possible between the wall and the window sill. Thermal insulation is carried out before the installation of the window sill slab, laying the insulation, followed by foaming the gaps between the window sill and the brickwork or concrete wall.
Instrument preparation

To carry out work on the thermal insulation of window sills of plastic window systems, you will need a set of tools:
- Building level.
- Perforator.
- A hammer.
- Putty knife.
- Chisel.
- Fine-toothed hacksaw.
- Knife.
Expert opinion
Konstantin Alexandrovich
During installation and dismantling, you will need a brush with stiff bristles or a broom, a vacuum cleaner for cleaning the rooms.
Materials for thermal insulation
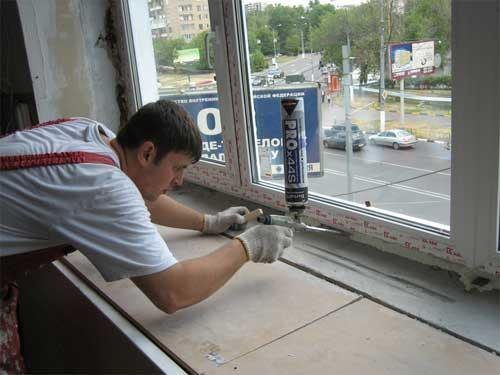
When the cause of the drafts becomes known, insulation work can begin. It is necessary to purchase thermal insulation materials. An excellent option for eliminating sources of blowing through the window sill is polyurethane foam. It covers the entire perimeter of the PVC window sill. The foam is applied in the center with two crossing lines to facilitate the attachment of the window sill to the base of the window. The next step is to mount the structure to the base of the opening in the window.
Reference. The polyurethane foam tends to expand within a day after application. The window sill must be securely fixed for 24 hours to prevent movement.
Acrylic sealant can be used as an alternative to foam. It is a non-toxic polymer suitable for indoor and outdoor use.

Dismantling the window sill with your own hands
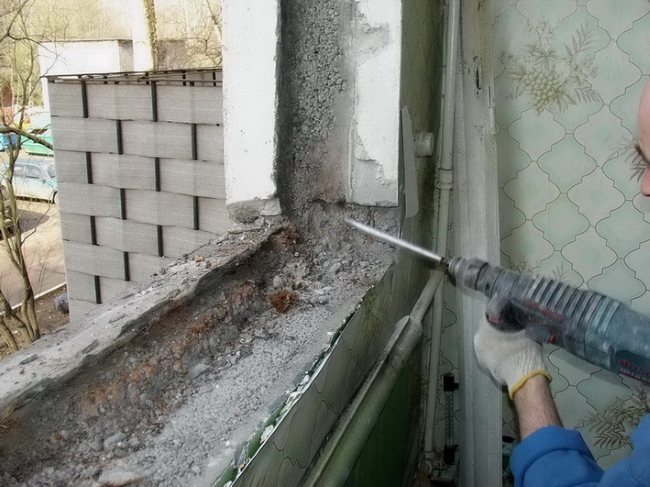
The space under the window is insulated immediately when installing a new window block. These places can be blown out if the work is performed poorly due to the negligent attitude of the builders. Drafts also occur during the long-term operation of the window structure. To eliminate them, it is better to dismantle the window sill yourself.
- If there is wallpaper on the wall, they are moistened with water and carefully removed.
- Carefully beat off the plaster layer under the windowsill to the polyurethane foam.
- Remove the plaster on the window slope at the point of contact with the building wall. Free access to the base for easy dismantling. It is also possible to detect cracks in the wall and gaps in the thermal insulation material.
- With a long knife, the layer of foam applied during the installation of the window system is cut off under the windowsill.
- The window sill is carefully removed when it is free around the perimeter.
- Slowly pull the window sill towards you and down.They act carefully, but with effort, making sure that the canvas is not damaged during dismantling.
There is another way to dismantle the window sill. You will need a hacksaw with a blade. Algorithm:
- The knife blade is installed under the window sill plate in polyurethane foam and heat-insulating material. Sawed along the entire length of the window block.
- The sealant is cut along the slopes, which serves as an additional fastening to the structure.
- Carefully take out the window sill (pull it towards you) after removing unnecessary structural elements.
After dismantling, the window sill is cleaned of the remaining foam and dirt using a brush with stiff metal bristles. All problem areas on the base of the opening and the wall, where drafts were formed, will become noticeable. Carefully examine the joints between the window frame and the wall. There may be microcracks that serve as a source of cold air penetration into the room.
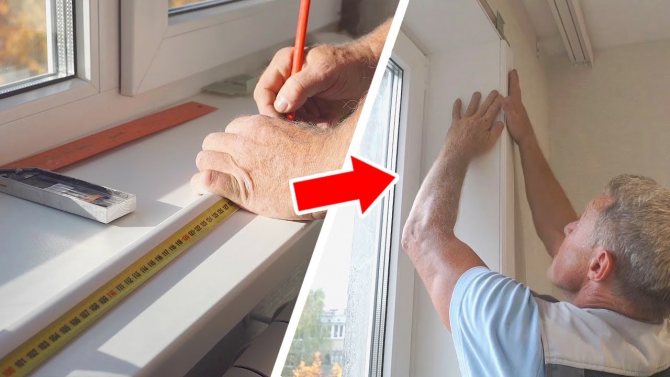
How to install a plastic window sill?
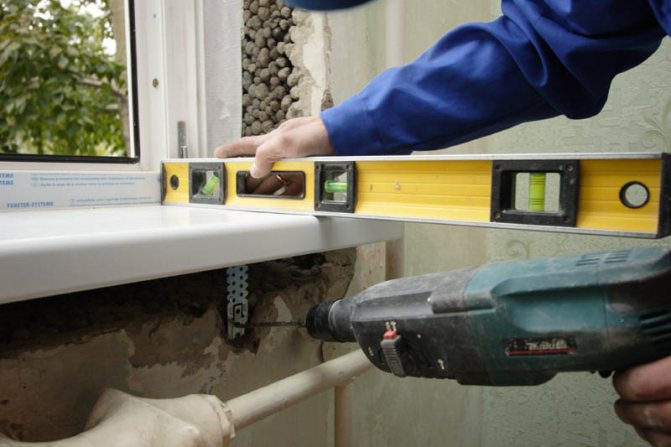
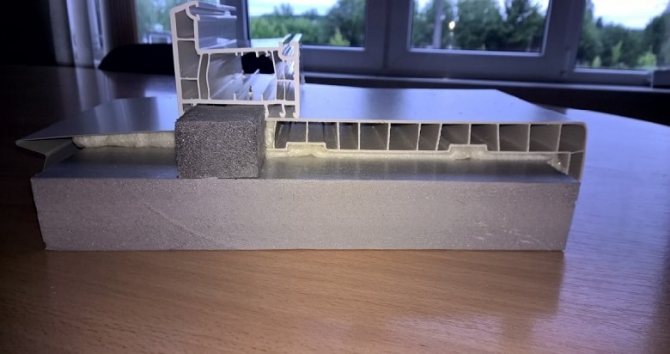
The installation of the window sill begins after the preparation of the frame surface. The portable window sill is applied to the base of the window structure. Wooden supports are prepared, which will provide the calculated stiffness of the slab during operation. To do this, make internal and external measurements of the actual distance from the base to the bottom of the window sill using a tape measure. When the window sill lies at the base, use an acrylic sealant or polyurethane foam. Close the joint of the inner surface of the plastic window sill and the installation profile to prevent the formation of "cold bridges".
To securely fix the wooden supports, use foam. The final stage is foaming the installed window sill slab and the external wall joint.
No. 4. Replacing the seal
Ideally, a rubber seal can last long enough, but certain conditions must be met for this. According to the rules for the operation of plastic windows, the sealant must be regularly lubricated with special substances, but which of us does this? So it turns out that after 5 years, the rubber dries up and starts to let the cold breeze from the street.
Procedure for replacing the glass gasket:
- removing the glazing bead;
- dismantling the lining and glass unit;
- dismantling a worn seal;
- installation of a new seal through the groove. It is better to cut off the tape, which is 3-5 cm longer than the required length, in advance. The new seal is put in place, while acting as carefully as possible and not pulling the material. Surplus is carefully cut off. If desired and for guarantee, the seal can be additionally fixed with an adhesive;
- installation of double-glazed windows, linings and glazing beads. Glazing beads are a fragile part, so they must be removed and installed with extreme care so as not to break. Otherwise, you will have to buy new ones.
The seal, which is located along the contour of the sash, may also need to be replaced. In this case, it is better to remove the sash. First, the decorative overlays are dismantled from the hinges, and then using a mounting handle or a screwdriver, the pin is pulled out of the hinge. It remains to carefully remove the sash, and only then it is very easy to remove the old seal from it.
It is better to start installing a new seal from the top of the sash, gently pressing it, but not stretching it. It is better to secure the beginning and end of the sealing tape with glue. Everything! All that remains is to hang the sash back: the pin can be installed with bare hands, and then the decorative strip can be replaced. The video shows and describes everything very well.
Seam processing
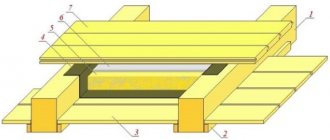
Fig. 9. Finishing the slope in the "cut"
In order to give the insulated window sill a finished look, plastering of the slopes is carried out. To do this, you can use both a cement mortar and an ordinary dry mixture that can be applied with a spatula.After the mixture has dried, the slope is finished. To give the slope a complete look, the finish coat is rubbed with sandpaper.
Broken slopes are treated with base and finishing putty. First, the base mixture is placed on the slope, carefully leveled with a spatula. Allow to dry. The finishing mixture is applied. After the slopes have dried, they take fine sandpaper and process the surface until smooth. Plasterboard, paint or plaster are suitable as a topcoat.
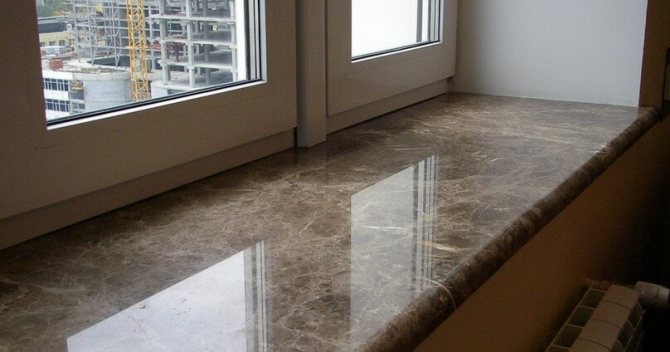
The insulated window sill stands guard over the warmth of the house and does not allow the cold to penetrate into the house. This is a great place for flowers, growing seedlings, and pets like to spend time there. In a room with insulated windows, the temperature regime is stabilized and an ideal environment for human life is created.
How to properly foam a plastic window. Foaming instructions and video
The end of the warm season is the time to think about protecting the apartment from cold air and drafts.
One of the ways to do this is to insulate windowsills. This job is not the easiest and cleanest one. It involves the dismantling of the window sill and slopes, the installation of an insulating layer, the installation of previously removed elements, and the sealing of the seams.

This is one of those times when it is better to contact the builders.
The insulation under the windowsill wears out over time, sags and begins to let cool air into the room.
The following facts indicate the need to insulate the windowsill:
- On cool days, the air temperature in the apartment (house) becomes uncomfortable;
- There is a slight draft from the window opening;
- In autumn and spring, the glass becomes covered with condensation;
- In winter, frosty patterns appear on the glass.
Finding "bridges" of drafts is easy. It is necessary to smoothly move the lighted match (lighter) along the seams connecting the window sill to the frame. The fire will instantly react to the presence of "bridges" by oscillating the flame. Or you can just wet your fingers and run them along the seams. Where there are "bridges", the fingers will feel the cold.
Foam and sealant partially lose their properties in frost. Therefore, the openings are insulated in the warm season.
How can you insulate

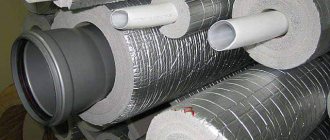
Window sill insulation is carried out using polyurethane foam, silicone sealant, mineral wool, foam insulation, polyurethane foam, polystyrene foam, and some other materials.
The foam fills all accessible cavities and cracks, providing thermal insulation and soundproofing of the window. But under the influence of ultraviolet light, it gradually cracks and collapses.
A sealant is used to neutralize small gaps. The material pleases with its low cost, good water-repellent properties.
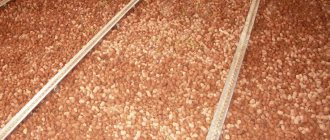
Mineral wool keeps the room warm, does not let the cold outside, even in the most severe frosts. Excellent soundproofing windows.
Penoizol retains its characteristics for 30 years. After pouring, the material does not expand, but solidifies. It is difficult to work with him, it is better to call the builders.
Polyurethane foam is a porous artificial filler with excellent technical characteristics. Manufactured in a high pressure washer from polyol and polyisocyanate. Due to the complexity of its preparation, it is used only by professionals.
Polyfoam is a lightweight, economical material with good thermal insulation properties. The opening is glued to them, and a layer of putty is applied on top.
Dismantling the window sill is carried out with the following tools and materials:
- Spray bottle with clean water;
- A hammer;
- Sharpened knife;
- Chisel.
A strip of wallpaper under a window 15 cm high is sprayed with clean water, allowed to soak, carefully peeled off. With a hammer and a chisel, they knock down the plaster under the opening to the very base of the wall; knock down the plaster and on the slopes, in the places of their contact with the windowsill. The old foam is cut off. Press on the canvas and slowly remove it from the niche.
There is an alternative dismantling method. Use a hacksaw with a long, hard blade to remove the foam under the windowsill. Cut the sealant at the point of attachment to the slopes and carefully remove the canvas from the opening.
If cold air comes from the gap under the window sill, then it is not necessary to dismantle it. It is enough to cut off the old foam with a sharp knife or hacksaw, and then foam the gap again. If the siphon comes from the gap between the frame and the window sill, or from other parts, then dismantling is inevitable.
Before proceeding to the next stage of window insulation, you need to thoroughly clean the lower part of the opening from debris and dust from a stiff brush.
For insulation, the following materials are needed:
- Construction foam;
- Sealant;
- Primer;
- Putty knife;
- Assembly knife.
The base of the opening is leveled with a thin layer of putty. Leveling beacons allow you to align the base precisely and evenly. Wait for the putty to dry.
Foam runs along the perimeter of the base and crosswise connect the opposite vertices of the resulting rectangle. Install a window sill. Thoroughly coat all the joints with the wall and slopes with sealant.
The following materials and tools will be required:
- Polyurethane foam;
- 3 large glass jars;
- 9 liters of water.
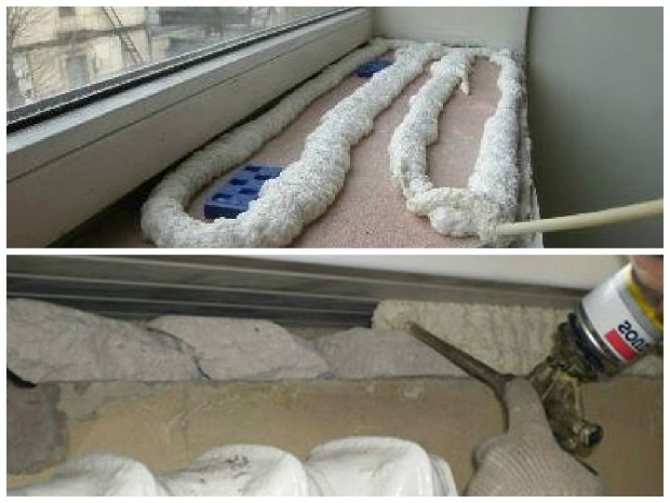
The foam is applied to the opening. The prepared canvas is carefully laid on the foam. By lightly pressing on the plastic, the canvas is set in level, achieving its good adhesion to the opening.
Several 3-liter jars of water are placed on top of the windowsill: one in the center and two along the edges. In the process of foam expansion, "oppression" will not allow it to move the window sill. After a day, when the foam completely hardens, the jars are removed.
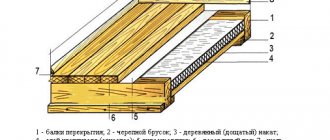
Insulation of slopes
Slopes are freed from plaster, dust is removed, an antiseptic primer is applied.
Plates of polystyrene or polystyrene foam are cut with a knife. The cut out parts are coated with polyurethane glue, the excess is removed with a notched trowel. The entire perimeter of the window is sheathed with pieces of foam plastic, pressing them with the glued side to the wall.
The outer layer of insulation is coated with polyurethane glue, on which a fiberglass mesh is planted. The surface is leveled, plastered. Platbands are attached on top.
Seam processing
At the last stage, the seams are treated with a sealant around the perimeter of the window sill. The surplus is passed with a spatula and a rag.
Broken slopes are treated with base and finishing putty. First, the base mixture is placed on the slope, carefully leveled with a spatula. Allow to dry.
The finishing mixture is applied. After the slopes have dried, they take fine sandpaper and process the surface until smooth.
Plasterboard, paint or plaster are suitable as a topcoat.
Sealing a plastic window using polyurethane foam is considered a responsible window installation process, therefore it must be carried out through a clear sequence of certain actions.
Construction foam has its own characteristics, and its correct use during window installation provides the necessary thermal insulation, protection from noise and weather conditions. Poor sealing reduces the service life of a plastic window due to possible distortions and sagging.
In some European countries, it is considered inappropriate to use polyurethane insulation to foam window slopes, therefore they prefer silicone or mortars.
In fact, silicone cannot withstand severe frosts, which leads to freezing of plastic windows and the formation of mold on the openings, while polyurethane foam is able to provide better thermal protection.
And the use of mineral wool and tow during the installation of windows is generally inapplicable.
We offer you to familiarize yourself with Tomato undersized yielding
Thus, foaming a PVC window using polyurethane foam insulation in countries with very cold winters is an ideal option.
It is a mistake to consider the main reason for the freezing of a plastic window is the foaming of large gaps between the opening and the window with assembly sealant, thus hiding the meter's errors. In fact, the thermal conductivity of the foam is several times lower than that of plastic windows, which increases thermal insulation by the same times if the window is properly foamed.
The combination of a number of reasons affects the quality of a polyurethane seam, which can sometimes lead to negative consequences.
This includes the quality of the polyurethane foam and thorough shaking of the can before use, the volume of foam squeezed out, the level of humidity in the window opening and air, and the temperature of the can. The window opening must be completely foamed, without through holes.
The seam on the cut is homogeneous, finely porous, without voids. When pressed, the surface of the foam should be flattened, not crumbling or crunching.
An important feature is the high-quality adhesion of the foam to the contacting surface, which allows the foam to withstand temperature loads in all weather conditions.
Installation seam diagram
The composition of the container of polyurethane sealant consists mainly of polyurethane, a foaming agent - diisocyanate and other components that do not mix with each other for better preservation. The top layer of the cylinder is gas, which forces these components outward. Therefore, it is very important that the components of the cylinder are constantly thoroughly mixed with each other.
The process of action of polyurethane insulation is as follows.
Household or professional foam, when squeezed out by gas, comes out in a foamed form, after which polyurethane, entering into a chemical reaction with diisocyanates, repeatedly expands several times if it is household foam. At the same time, a soft crust that forms on the surface of the foam prevents it from spreading.
With the onset of cold weather, you can see that cold air is slightly blowing from the slots of the newly installed plastic window.
The ideal solution in this case would be the installation of flashing strips, read about their varieties and applications in our article.
In winter, the issue of ventilation also arises, the solution can be either the installation of a window limiter, or the installation of a supply valve, for example, Aereko.
It may take two days for the polyurethane insulation to completely solidify, and it is accompanied by sealant shrinkage by 50% when using household foam and up to 7% when using professional foam squeezed out through a dispenser gun.
The appropriate foam is used for each season of the year. Summer polyurethane sealant is designed for use at temperatures from 5 degrees, and winter - down to -10 ° C. All season polyurethane foam works over a wider temperature range, anywhere from -10 ° C to 40 ° C.
Air humidity is of great importance during the foam polymerization process. This affects the correct reaction between its components, improves adhesion, eliminates foam sagging. In addition, humidification promotes the formation of a finely porous foam base without voids.
Before foaming, the walls of the opening must be moistened with a simple water spray bottle.
The spray is applied to the required area, leaving dry slopes for the vapor barrier tape to adhere to. The main thing is not to overdo it with moisture.
Thin walls of finely porous foam cannot withstand the pressure of the propellant gas. It evaporates quickly, the foam settles, and as a result, voids appear.