Do-it-yourself whitewashing of the oven
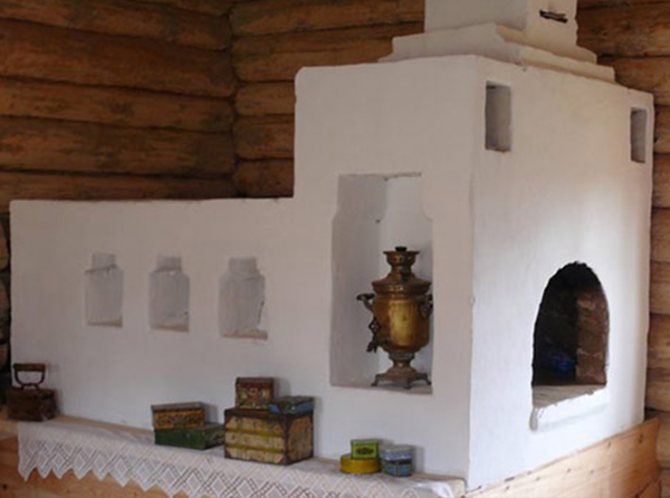
Today, much is dictated by fashion and customs, a "house in the village" appears more and more in the trend, and few people think about building boyar mansions according to fashionable projects, what meaning did our ancestors put into one or another detail of the interior, in particular, to whitewash the stove with their own hands. The Russian stove, which from ancient times was only white, today is painted in any color of the rainbow, up to the avant-garde paintings. Almost no future owner of a house with a Russian stove thinks that its white color symbolized the purity of the owners' thoughts and peace and tranquility in the house. Only a few take into account this historical moment and carefully study the chronicles and historical documents in an attempt to understand how to whitewash the stove so that it fully complies with traditions and does not strike the eye like a knight in full armor in a modern disco.
Furnace decorative finish
In order to give a newly built stove a pleasant appearance, there are many ways, it does not make much sense to describe each of them, therefore, we become on the most popular and widespread. (See also: Simple DIY oven)
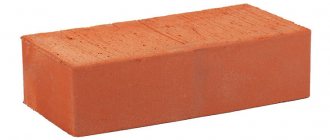
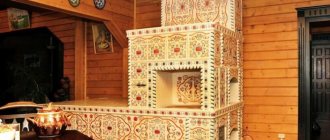
Facing the stove with tiles. Perhaps the most versatile way to decorate stoves, due to the widespread use of ceramic tiles, this method is gaining more and more popularity among people who do not strive for the historical correspondence of the stove and who love simplicity. But this finish has several drawbacks, one of which is that, under the influence of temperature, the tile heats up unevenly due to which small deformations occur and the tile "loosens" its fastening. After several heating cycles, such decor may begin to fall off and will have to be reinstalled in place.
The use of tiles for decorating the stove increases its beauty and reliability of the coating several times. These specially made ceramic tiles require specific skills for their installation, and their price itself is quite significantly different from ordinary tiles in the direction of increase.
The simplest and most affordable way to give the structure a "commercial" look is to whitewash the furnace with chalk, which allows you to get an attractive and inexpensive coating without resorting to significant costs. The downside of this decor is the need for periodic updates.
(See also: DIY oven painting)
Another way that the owner of the stove will not particularly bother is painting it with ordinary floor paint. The method, it would seem, is simple and reliable, but after 2-3 months, the entire gloss of the coating begins to fade and climb, and at least once a year it will have to be completely renewed.
Oven whitewashing options
Let's consider the simplest way to give the stove a neat look, which was used by our grandfathers and great-grandfathers. But even in this case, there may be several options for whitewashing.
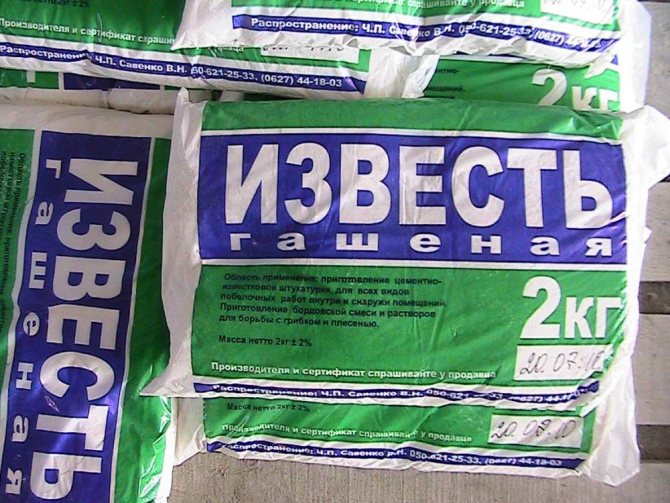
Whitewashing the kiln with lime is one of the common ways to decorate the kiln. The lime mixture is quenched with milk or a solution of sodium chloride in water. Salt solution is made in a proportion of 100 parts of lime to 4 parts of salt per liter of water. Lime is poured with the resulting composition and a thick, viscous mass is prepared.
(See also: How to decorate a stove with your own hands)
The advantage of using lime as a finishing material is its high availability and reliable contact with brick or clay. Has a lime mixture and bactericidal properties.
The disadvantage of using lime can be that even in the "slaked" state, it remains quite active and caustic, which can lead to burns, especially in people with sensitive skin.
There is an option that we inherited from our ancestors - whitewashing the stove with a stove bench with chalk with the preparation of a mixture in skim milk. After milking, milk is placed in a warm place for several hours, as a result, the cream rises and is removed with a spoon, the return remaining in the jar is used for mixing with chalk. You can also use ordinary water for mixing with chalk, but in this case it is necessary to add a little water-based glue to the resulting mixture - busylate, paste, etc.
(See also: DIY Russian stove repair)
The advantage of using a chalk mixture as a decorative finishing of the stove is its high availability and environmental friendliness. When working with it, it can only cause inconvenience in a person with respiratory diseases, for the rest the mixture is safe.
The disadvantage of using chalk is that it is well washed off and this can lead to the need to periodically renew the color, and in an important environment it is better to refuse chalk altogether.
A recipe that appeared relatively recently and the main component in it is tooth powder.
Proven recipes for whitewash solutions
Traditionally, lime or chalk mortar is used to whitewash the oven. In the old recipes of stove-makers, there are options based on milk and egg whites. Modern craftsmen do not neglect the products of the new generation. There are plenty to choose from!
Mortar
Lime is a material available in all respects. Lime solutions have bactericidal properties, and after drying they are absolutely harmless and do not irritate the mucous membranes. A properly prepared lime mortar adheres well to plaster, stone and brick, is not afraid of temperature extremes and can be used outdoors and in damp rooms, including baths.
To prepare the solution, it is better to buy slaked lime in the form of a dry powder. For whitewashing oven equipment, it is recommended to use a 10% salt solution instead of water. Salt makes the coating tough and prevents cracking.
Whitewashing the oven. How and what to whiten the oven
To prepare the mixture, you need the tooth powder itself, 2-3 eggs and milk of 1.5-3 percent fat.
(See also: DIY Russian stove masonry)
The advantages of the mixture do not differ much from that of chalk, but due to the fact that the powder has a finer grinding, the mixture prepared on its basis practically does not need additional cleaning and sieving procedures before whitening the oven.
The disadvantages are, in principle, the same as those of the chalk mixture, but the difficulty of acquiring tooth powder in sufficient quantities is added to them.
Of all the proposed methods of decorative whitewashing, the most reliable and affordable is lime mortar. Therefore, in what follows we will consider just it.
How to dilute lime to whitewash a cellar
The decision to whitewash basements and basements with lime is not only the most economical, but also truly practical. This method allows you to achieve an appropriate level of disinfection while providing the interior space with a neat appearance.
Extinguished
To obtain a solution, dry lime mass (approximately 2.5-3 kg) must be diluted with 10 liters of water. Next, the most important component is added - copper sulfate (100 g), which can also be replaced with iron (30 g). The resulting mixture shows high efficiency in the fight against fungus, as well as harmful insects that got into the cellar with the harvest.
Along with this method, lime milk is also used to whitewash basement areas. It is prepared in slightly different proportions: 2 kg of freshly quenched product are mixed with 10 liters of water, after which 200 g of copper sulfate is added.
Quicklime
This type of lime must be slaked before use. Recommendations for safety measures, methods, ingredients, terms, consistencies and other parameters are absolutely the same here as for whitewashing walls in living quarters.
An important nuance: if there is brickwork in the basement, then much more lime will be consumed than on a smooth surface. When calculating the volume of the required substance, this moment must be taken into account.
Whitewashing the oven with lime mortar
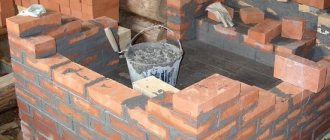
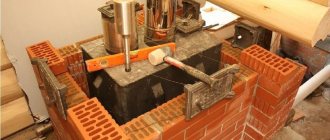
The first thing to start with the procedure for treating the oven with a lime solution is to prepare the oven surface itself. We will not consider the procedure for puttingtying and priming a new oven for this, there are separate topics, but we will proceed directly to preparation for whitewashing.
The oven is inspected for soot spots. If they are, then they must first be completely cleaned or washed, otherwise after whitewashing in these places blackness will appear. The wash is used if the soot has not yet had time to well eat into the clay. If the oven has been in operation for several years, then the best way to clean it from soot is to use a metal brush. It is only necessary to try not to cause excessively deep damage to the plaster.
Master's secrets: how to properly prepare the oven for whitewashing
A new stove should be plastered or coated with clay before decorative finishing. If the old plaster does not adhere well, is cracked or falls off, you will have to completely remove it and apply a new layer. For plaster use special heat-resistant mixtures or self-prepared solutions. The plastered oven is left to dry for at least two days. After that, the stove is heated three times, but in the first firebox the walls are allowed to warm up only slightly.
If there is no need for new plaster, you can limit yourself to cleaning the surface from soot and removing the old whitewash. It is convenient to remove a layer of lime and soot stains with a metal washcloth or a metal brush. Work should be done carefully, otherwise grooves and scratches will appear. You can not remove the old whitewash only if it is clean and well-kept, and the task of the repair is to give the hearth a fresh look.
A 2% soda ash solution is used to remove greasy stains from the kitchen stove. Rust can be removed with a solution of copper sulfate prepared from 100 grams of powder and a liter of boiled water.
Minor cracks formed during operation or after cleaning must be covered with putty. It is recommended to apply the putty not only with a spatula, but also with a brush, carefully eliminating irregularities.
Options for whitewashing the Russian oven
To prepare a solution, you need 2 liters of milk and 1 kg of chalk. That is, the proportion of the composition is 2: 1. Crush the chalk into dust, use a mortar. Sift through a fine sieve: the material should be free of stones and coarse fractions. Pour in milk and immediately start whitewashing.
Advice: at a high wall temperature, the composition may turn yellow. To avoid this, add 50 ml of blue to the prepared solution. This is about a quarter of a glass.
Protein-milk structure. To whiten the oven in this way, you will need 100 ml of milk, two chicken egg whites and 2 boxes of tooth powder. Mix the components, you should get a mass similar in consistency to sour cream. Do not use large amounts of the product: the protein curls up quickly.
Lime-salt structure. Everything is simple here: you need 1 kg of lime and 40 g of salt (two tablespoons with a slide). Prepare the solution as for a regular whitewash, dissolve the salt.After finishing work, light up the stove. When heated, the salt melts, covers the surface with a transparent and even layer.
The modern way is spakryl... If there is a hardware store nearby, buy a jar of plaster. Dilute with water in a 1: 2 ratio and start whitewashing. Experienced craftsmen claim that such wall surface treatment is durable, does not stain clothes and does not fade.
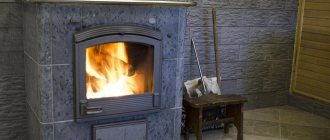
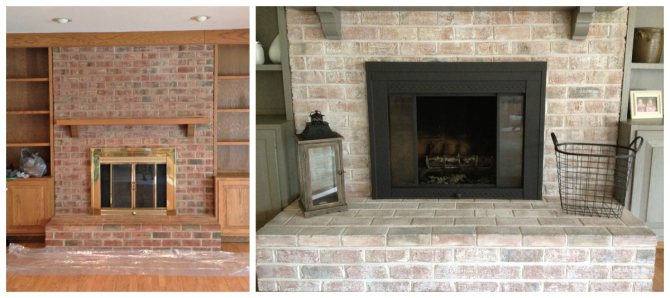
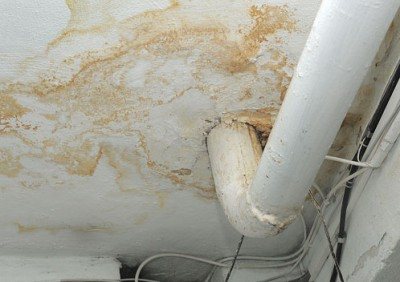
The stove is so indispensable in a private house for its practicality of use, autonomy from gas and electricity, but it still has its drawbacks. We will not list all of them, but according to the thematic feature of our article, one of them is the exit of exhaust gases through fittings, slots, etc., which, as a result, leads to the settling of soot on its walls. At the same time, you can get dirty on the stove, the stove also loses its attractive appearance, knocking out of the interior of the house. The solution to this problem is to whitewash the oven.
In fact, whitewashing a stove is not such a difficult procedure, it is similar to whitewashing a ceiling. The difference is that it is usually even more convenient to whitewash the stove, but with the peculiarity of applying a thicker layer of whitewashing to certain parts of the stove.
The first step is to remove the part of the surface layer where most of the soot has settled. If we do not remove the soot and start whitening, then it will begin to show through, it will not work to whiten this place to the original whiteness. The top layer is best removed with a metal washcloth or metal brush, but the brush needs to be done more carefully, as it is harder and can lead to deep scratches on the stove.
Next, you need to wet the oven with water. It will be difficult to apply whitewash on a dry oven surface, as the whitewash will roll into balls and poorly absorb. The stove can be soaked in water in parts, in accordance with the whitewashing speed and the places planned for whitewashing. When doing this, try to rinse off any remaining soot if possible.
Dilute lime to whitewash trees
Protecting tree trunks from pests and sunlight is one of the most important tasks for any gardener. To complete it, you need to dilute the slaked lime to whitewash the trees in the correct ratio, and then process the bark of the trunk from ground level.
Extinguished
Depending on the scope of the proposed work, you can mix the working fluid in a plastic bucket or other suitable garden container.
The basic proportions are as follows: 2.5 kg of lime per 10 liters of water. Next, 500 grams of copper sulfate is added, as well as 200 grams of casein or wood glue.
For a similar purpose, you can prepare a milk solution at the rate of 2-3 kg of freshly slaked lime, 10 liters of water, 500 grams of copper sulfate and 2 liters of skim milk.
Quicklime
You can also use quicklime to whitewash trees. However, before using it, it must be repaid without fail using the same methods that have already been described above.
Depending on the ratio of lime and water at the outlet, one of three products can be obtained: milk, dough or fluff. The latter is the most suitable for further preparation of the working substance.
How and how to whitewash the oven to please the eye
You can apply lime or spacryl which we mentioned earlier. Spakryl is diluted with 1 part of the spacril and 2 parts of water. Stir the whitewash until smooth, so that there are no solid inclusions in the liquid.
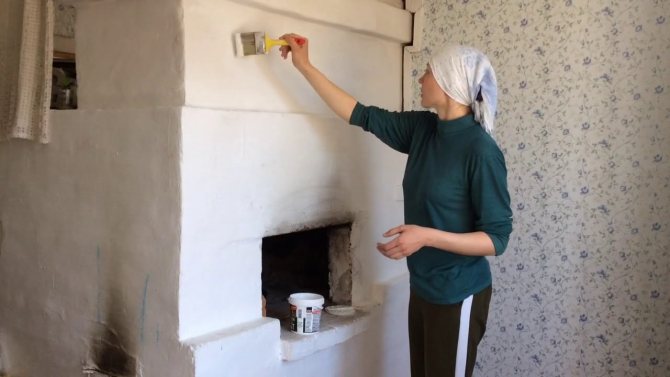
Apply whitewash to the damp oven surface with a brush or foam sponge. If, after drying, the oven does not break through (dark spots appear), re-whitewash these areas.
We are waiting for the drying of the whitewash of the oven. Now the stove has a completely different look.
Few can afford to overlay the stove with decorative tiles or artificial stone even at home, not to mention a summer cottage. Because of this, whitewashing of the oven is still popular.Its composition must be selected with great care, so that during the operation of the stove it does not get dirty and does not worry that when heated, cracks and chips will go through it.
Chalk based whitewash
Chalk is an inexpensive natural material that is easy not only to apply, but also to wash off. With chalk, you can get a rich white color, but every time you touch the stove, white marks will remain on your clothes. For whitewashing, chalk is used in the form of a powder, which is sold in hardware and hardware stores. When spreading chalk, do not be afraid of the gray shade of the solution - after drying, the stove will become crystal white!
The chalk solution may have a gray tint, but the dried oven will turn out to be snow white.
To prepare the solution, 800 grams of dry chalk is taken per liter of water, but stove-makers advise using skim milk instead of water, and add natural laundry soap and wood glue for strength.
First, one and a half kilograms of sifted chalk are diluted in 3 liters of milk, after which the mixture is heated and a piece of grated soap and 100 grams of wood glue are added, continuing heating until the ingredients are completely dissolved. It is important to prevent the liquid from boiling! Before whitewashing the oven, the solution is filtered through cheesecloth and applied to the surface in a warm form.
How to whiten?
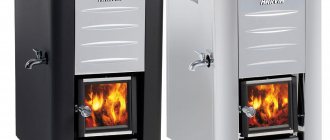
In stores you can find modern compositions for whitewashing the oven, they are made by different manufacturers, but they go under the same name - shpakril. Before use, such a purchased composition must be diluted with water in a ratio of 1 to 2.
After processing the stove with it, its walls will have a well-groomed appearance for a long time and will not fade. Among the popular manufacturers, it is worth highlighting those whose products are available at an affordable price and with a high quality composition.
| Brand | Volume, kg | Description | Price, in rubles |
| Master | 1 | The surface of the oven must be prepared for this product so that it is dry and free of dust. They can seal small cracks and whitewash walls, ceilings and stoves. |
30
115
The better to whitewash the stove in the house, everyone decides for himself, from the given means you can choose the right one.
Tooth powder solution
This recipe cannot be called the cheapest, but it has many admirers who claim that the finish does not get dirty and retains its original appearance for a long time, and you can heat the stove on the very first day after staining.
To prepare the solution, take 4 packages of tooth powder, 4 egg whites, a glass of milk. All ingredients are mixed and allowed to brew for 10-15 minutes. The consistency of the composition should be similar to oil paint. This mixture is applied to a heated oven so that milk and eggs "grab" and gain strength. As the product is consumed, a new portion is prepared.
How to prepare the whitewash yourself?
There are three common methods for preparing a solution for whitewashing the oven, each of which has been used for more than a dozen years.
Mortar
Whitewashing the kiln with lime has been known for a long time, if you dilute 1 liter of the composition from it, then it is enough for 2 m 2. The preparation of such a composition is as follows: take 40 grams of salt and dissolve it in water, then add 1 kg of lime to it.
Salt acts as a fixative; after applying such a whitewash, the oven must be heated so that a smooth transparent layer forms on its surface. It is better to dilute such a remedy with low-fat milk instead of water.
Chalk based whitewash
The chalk should be prepared: finely crush and sift, you need to take about 1 kg of this component, then pour 2 liters of milk and 50 ml of blue into it.
Some neglect such a scrupulous preparation and get a solution with different inclusions at the exit, after being applied to the oven, under the constant influence of high temperatures, it begins to change color from white to yellow.
It is the blue that prevents such a transformation in the color of the oven.The prepared milk-chalk mixture must be used immediately so that it does not freeze.
Tooth powder solution
This unusual tool will give the stove a pure white tint and keep it for a long time. To prepare the composition, you need to take 2 boxes of tooth powder, half a glass of milk, 2 eggs. Any dairy product can be used boiled or unboiled.
Only proteins are taken from the eggs, which are mixed with milk and powder, after holding for 10 minutes, the mixture can be used. In its consistency, it should resemble paint. After staining, the oven can be used on the same day, only it should be noted that the smell of tooth powder will disturb you during the day.
How to dilute lime to whitewash walls
It should be noted that in recent years, limestone has not been used very often for such purposes. This is due to the abundance of alternative options that the modern market of finishing materials offers.
At the same time, in some cases, knowledge of how quicklime or slaked lime is bred to whitewash walls can be of practical use. For example, when you need to make repairs in the apartment of elderly parents who do not recognize other options, or in a school class.
Extinguished
This is the easiest, fastest and most secure option. There are many ways to prepare a working substance. Moreover, each of which is good in its own way.
The most popular and recommended are the following proportions: 2 tablespoons of drying oil, 100 grams of table salt, as well as painting blue are added to the diluted lime (for 10 liters of water it usually requires about 2-3 kg).
The last two components, which give additional whiteness, must first be diluted in hot water. If we talk about the function of drying oil, then it improves adhesion to the surface and provides the necessary strength of the coating.
Depending on the method of application, it is allowed to prepare a solution with different saturation. If a brush is used, the consistency becomes thicker. In the case of using a spray, a more liquid mixture is prepared, which should be filtered through several layers of gauze.
Quicklime
Such a product must first be extinguished with water. Since this reaction generates a large amount of heat, steam is formed and there is a high probability of splashing the substance from the container, safety measures must be taken to avoid burns. In particular, use rubber gloves, tight clothing that covers all areas of the skin, and safety goggles.
After the extinguishing procedure, it is required to wait at least two weeks. After this period, the product is ready for use. To obtain the desired working consistency, water and other components mentioned above are again added to it.
How to whitewash the stove with your own hands?
First, you need to carry out a visual inspection of the stove, if there are deep cracks and chips on it, then they must first be covered in the old fashioned way with clay or a specially purchased putty. It is impossible to whitewash the stove beautifully without preparatory work, you need to carefully eliminate all defects so that the efforts are not wasted.
Tools for the job
Before whitewashing the oven, clean its surfaces with a broom or a brush; for old exhibits, you can use a metal brush, but most importantly, do not damage the plastered surface with it. Then you need to determine how to apply whitewashing, for this you can use:
- Brush - it is chosen by those who have painted any surfaces more than once, and I am sure that they will do everything smoothly and without streaks. Before painting, it is advisable to soak the brush in water so that when whitewashing, no hairs remain on the surface of the oven.
- A sponge is an alternative technique, it does not give a clearly even coloration, it is used only for small ovens, since it will take a long time to obtain the desired thickness of painting.
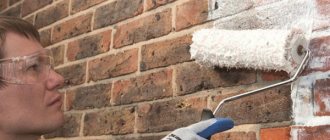
- Roller - suitable for both beginners and professionals, it captures a larger area with one stroke than with a regular brush. Application of the selected composition with a roller is very simple, the main thing is to move along the surface in the direction of the window in order to create uniform stripes.
- Spray Gun - This is used for large ovens. It is easier to cope with it together, one person will maintain the required pressure in the device, and the second will monitor the uniformity of the application of the composition filled into it. Before using it, you need to check the spray gun, and then constantly hold the spray gun at a right angle to the oven wall, while maintaining an optimal distance of 30 cm from it.
Why it is necessary to whitewash the oven
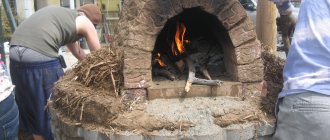
According to the traditions in Russia, the oven in the villages was whitewashed from the evil eye and misfortune. It is a great sin if the stove is dirty or has any drawings on it. That is why people painted white. In addition, it was possible to carry out the plan only on certain days and on the growing moon.
Nowadays, of course, they no longer pay attention to such features and can paint the stove in any color or draw attractive images. However, they still continue to adhere to traditional rules and use whitewash for the oven.
The advantages of this method are as follows:
- quality factor of the material;
- ease of application;
- attractiveness of the coating;
- low material cost.
The only drawback is constant renewal. As a rule, it is carried out 1-2 times a year as needed.
How can you whiten the oven
Knowing how to whitewash the stove, you can avoid further troubles, such as premature shedding of the material or its unsuitability for such work.
Lime
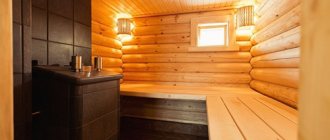
Lime is formed as a result of annealing of mountain limestone in mines. By adding water to the resulting solution, a white color is obtained, which is used for construction purposes. Especially often this method of whitewashing is used in the bath.
The advantages of this method are as follows:
- inexpensive cost of materials;
- the solution has antimicrobial and moisture resistant properties;
- can be applied to the old layer.
Important! Lime is alkaline, therefore precautions should be taken when using it.
Spacril
Spakryl is a paste for interior work. The disadvantages include only the high cost of the material. Moreover, it has a lot of advantages:
- moisture resistant material;
- sold ready-made, all that remains is to add water;
- characterized by increased whiteness;
- the surface will not get dirty;
- small cracks are smeared.
Chalk is a natural material that can be easily applied to the surface and easily washed off. With the help of the product, a nice bright white color is obtained. The only drawback of chalk is its ability to leave marks, that is, every time you touch the stove, a white spot remains on your clothes.
Dental solution
Tooth powder is an expensive option than whitening the stove in the house. At the same time, this method has a large number of adherents, since it has the following advantages:
- does not get dirty and does not leave marks on clothes;
- retains an attractive appearance for a long time;
- the surface of the stove does not crack for a long time;
- you can heat on the first day after the procedure.
other methods
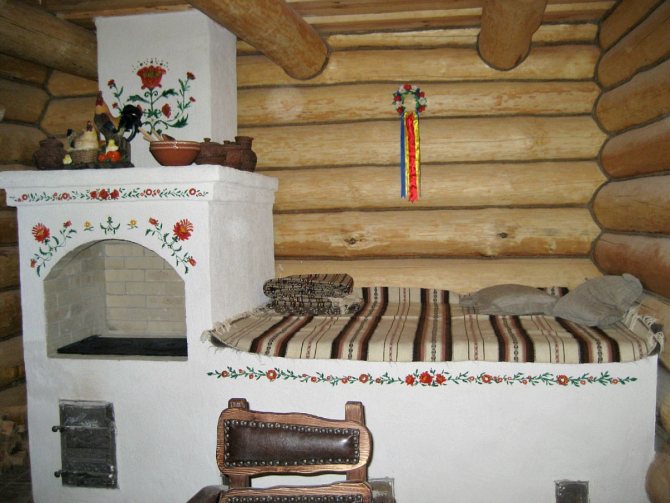
Alternatively, instead of the classic white color, you can use art painting. If you have the ability, then you should draw the selected drawing yourself, otherwise stencils will come to the rescue. You can make them yourself or purchase them from the store. The template is glued to the surface and a contour is drawn, which is then painted with the necessary colors.
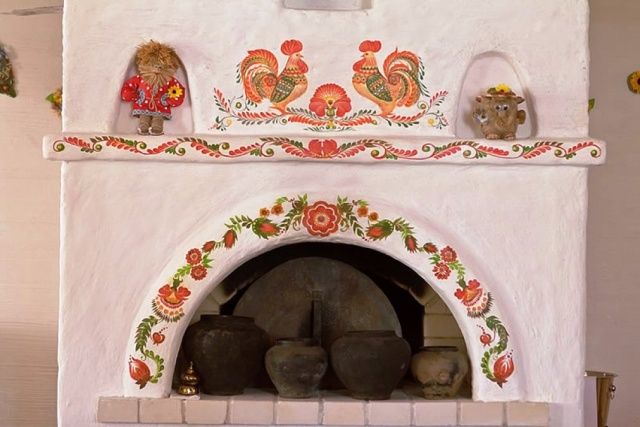
As a basis, the same whitewash is taken with the addition of paints, for example, gouache, acrylic or water-dispersion. They tend not to crack at high temperatures and do not emit harmful substances. The image itself is applied with paint brushes. For large patterns, paint cans or a spray gun are used. After drawing a picture, it is not recommended to heat the stove for 2 days.
The main steps to be followed in order to dilute the lime for whitewashing
In order to remove rust from walls and ceilings, it must be rinsed with water and treated with copper sulfate.
At the first stage, you will need to determine the approximate amount of lime that you will need to complete the task. In order for the walls and ceiling to be whitewashed, they should initially be free of oil and rust stains. Rust can be removed by rinsing with water and treating with copper sulfate. Removal of greasy stains is possible using a 2% solution of soda ash. After the wall or ceiling has been treated with this or that composition, they must be carefully and thoroughly rinsed with plain water. But cleanliness alone is not enough, lime does not fit well on uneven surfaces. Therefore, both the ceiling and the walls must be leveled. To do this, you need to use putty or plaster. You can make this mixture yourself using dry mixes sold in stores, or purchase a diluted solution. The putty must be primed on top. After the primer has dried, you can start to dilute the whitewash.
For whitewashing a small room, one package of lime is enough.
So, the next stage begins with the preparation of the components and tools. To do this, you will need:
- 1 pack of lime (about 3 kg);
- half a liter of solvent;
- 100 g of salt;
- water.
First, all this is gently stirred. In this case, first of all, you need to soak the lime powder in a solvent, after which you already knead salt into this composition. The resulting mixture is gradually diluted with water.As a result, you will have to get a solution of no more than 10 liters. The resulting solution will take on a shade that resembles something between blue and ultramarine.
The whitewash should dry gradually, therefore, drafts or excessive overheating should not be allowed in the treated room due to a gas or electric heater turned on at full power or due to direct sunlight on the wall or ceiling.
Therefore, it is necessary to tightly close the windows and doors, darken the windows in order for your work to be effective.
If the surface was previously treated with white lime or chalk, it is not recommended to apply additional lime on this surface a second time. As this can lead to the formation of unsightly stains.