
Today it is already difficult to imagine how the craftsmen managed to do without polyurethane foam. This material made a real revolution in its time.
With its remarkable insulating properties, unusual structure and ease of use, polyurethane foam has become one of the most popular materials, which is widely used today in construction and renovation work.
Scope of application of polyurethane foam
The material has proven itself well both as an excellent sealant and as a means for sealing joints between structural elements. In particular, it is convenient to seal up interpanel seams of floors, seams of facade systems, joints between beams, etc. with polyurethane foam.
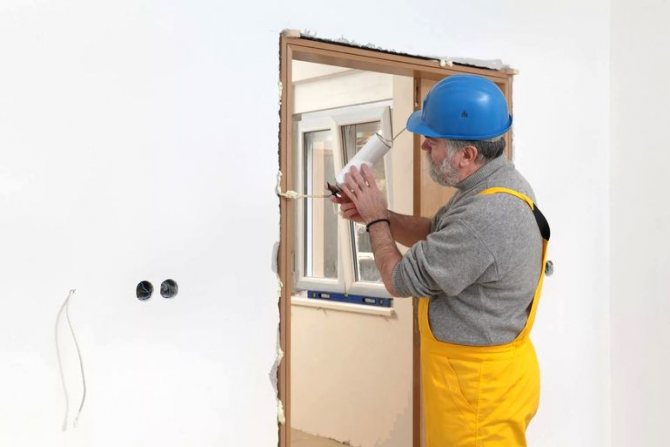
In addition, polyurethane foam is used to fill voids and cracks in concrete, brick walls, etc. A means for installing windows and doors is used.
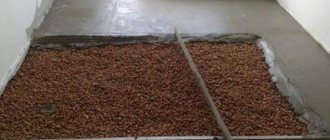
Of the non-standard methods of application, we can note the insulation of wooden floors on logs with polyurethane foam, when it "blows out" the space between the base of the floor and the floorboards. At the same time, the floor stops creaking and becomes really warm. The advantage here is that to insulate and strengthen the wooden floor, it does not need to be disassembled, because it is easy to pump the foam into the floor through a gap or a specially made small hole in an inconspicuous place.


Reasons why wood floors squeak
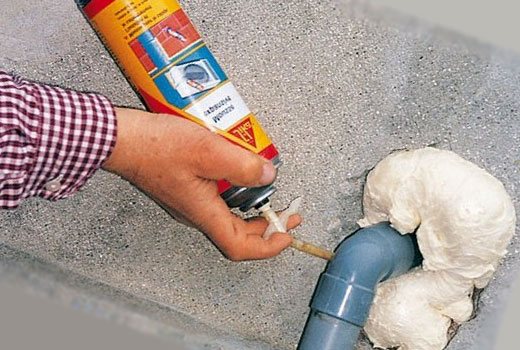
Floor repair with glue and a syringe.
The first sign indicating that not everything is in order with the floor is the creak that appears in it. Many owners frivolously do not pay enough attention to it, believing that they are dealing with the natural aging process of wood.
They are partly right. There may be several reasons for the squeak that appears, but they all indicate structural malfunctions of the floor. Among the most likely causes of squeak, the most common are: drying of boards or lag (as a result of which they decrease in size); loose nails; insufficient compensation gap between the floorboards and the wall or lack of it.
The floor will creak even when, during its construction, a too large step was taken between the logs or boards of insufficient thickness were laid. In both cases, the boards will bend, making an unpleasant squeaky sound. Also, fluctuations in air humidity in the room and gross violations of the rules for operating the floor can cause a squeak.
You can eliminate the squeak by pouring polyurethane foam under the floor.
It is very important to correctly determine the cause of the floor squeak, since it depends on how to repair it. After all, the creak is the creak of the strife. The creak from the friction of the board against the protruding nail for an experienced person is noticeably different from the creak of the boards against the logs or against each other.
In most cases, squeak occurs from poor-quality or weakened fastening of boards to logs. At the same time, the boards begin to rub against lags or against each other, making an unpleasant creak.
If lags become the cause of the squeak, then in order to eliminate the cause, they must at least be trimmed, and if their condition is too bad, then completely change. In both of these cases, you cannot do without opening the floor. But if the logs are in order and the floor creak is caused by other reasons, then you can try to eliminate it without dismantling the boards. There are several ways to do this.
There are several reasons why floors become noisy. What is the matter in your case, of course, you will have to find out for yourself. Here's what you should pay attention to.
- The first of the possible reasons is a poor-quality base under the floor joists.Wooden floors are usually installed on logs - transverse lintels connecting all the boards into one surface. These elements are also made of wood, which means that they also deform from loads. If the base under them is uneven, or deviated from the level, then this can cause squeaks.

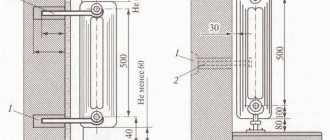
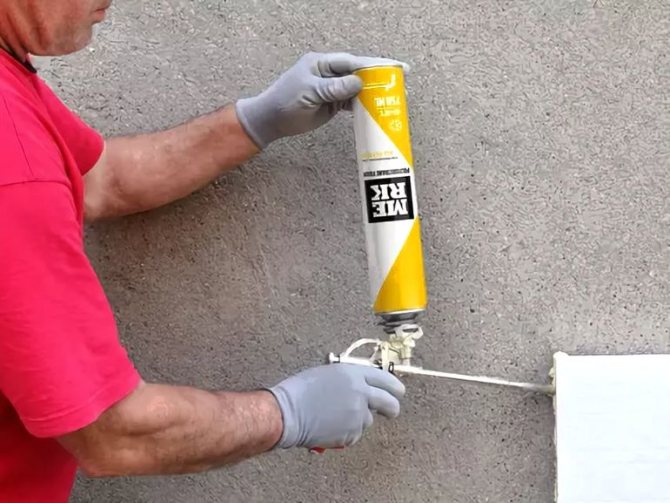
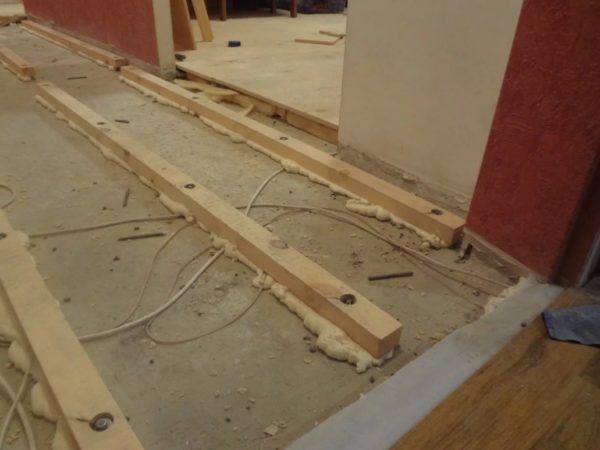
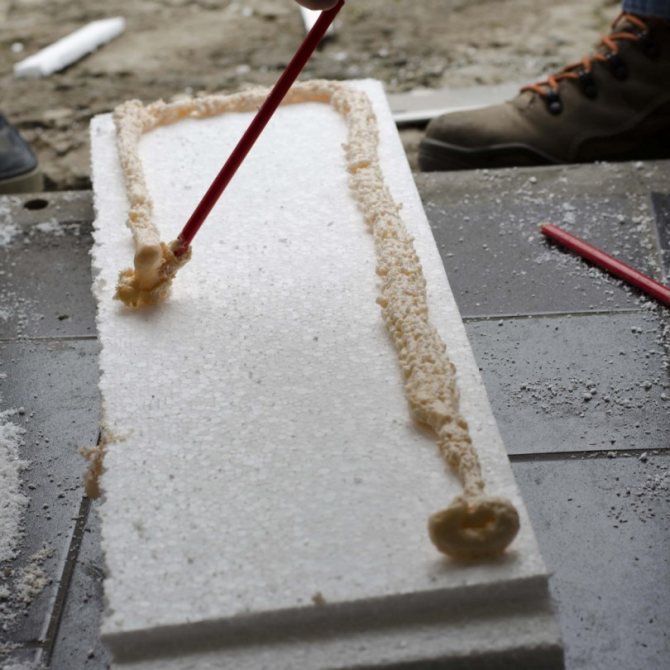
Rigid lag fixation by means of polyurethane foam
- The second reason is also related to this node. When the floor needs to be raised, the logs are installed not only on the base, but also on the pads. Many craftsmen, especially before, when there were no alternatives, made them from pieces of timber. Over time, such small props can dry out or even crack, which will inevitably lead to a dip, large deformation of the floor and a creak.
- The distance between the lags is also of great importance. It is set by the wizard during installation and is usually 50 cm. If more is done, or too thin boards are used, the coating will also bend strongly with all the ensuing consequences.
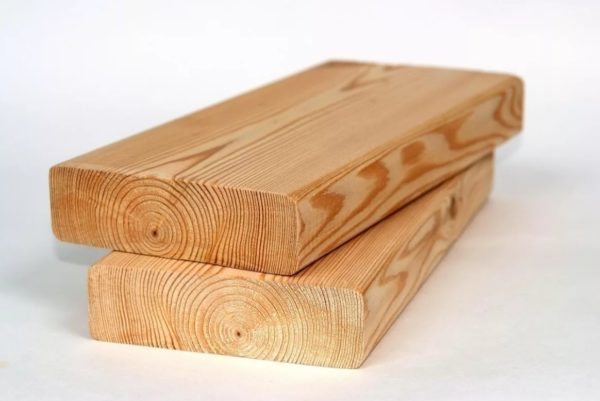
- The wood used for both the floor and the logs is also of great importance. Low-quality material wears out and damages faster during construction and operation. If the material was initially poorly dried, then while it dries, it will strongly warp - the appearance of squeaks is inevitable. The density of the wood also affects, the lower it is, the faster the fasteners will loosen, especially if it is nails.
Quality lumber - If moisture accumulates under the floor, then from the inside the wood will definitely be affected by fungi. Under their influence and load, the logs begin to weaken and sag. In order to prevent such a lag before installation, it is imperative to treat it with an antiseptic.
- An even more serious problem is when woodworm insects find their home in wood. These small bugs in the shortest possible time can render the lag system unusable, because of which they can not only cause a creak, but also cause serious floor failures. To prevent this, impregnations are also used - biocidal compositions.
- Incorrect installation - here we mean insufficiently reliable fastening of the boards to the joists, non-observance of the technological gap in the places where the floor joins the walls, poor fixation of the plinth, and so on. In Soviet times, craftsmen did not nail each board to the log. In order to save time and material, each 2 or 3 boards were attached, and the rest were simply clamped between them. As you understand, when the material dries up, the loose boards simply begin to dangle.
- The last reason is the consequences of exploitation. The wooden floor wears out, the space between the planks grows and becomes clogged with dirt, the fixings weaken. By the way, it is easiest to eliminate squeaks from aging of the coating, but this will be discussed further.
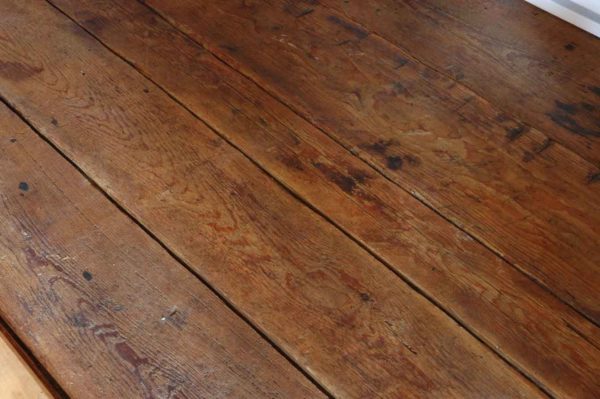
Old but still solid wood floor
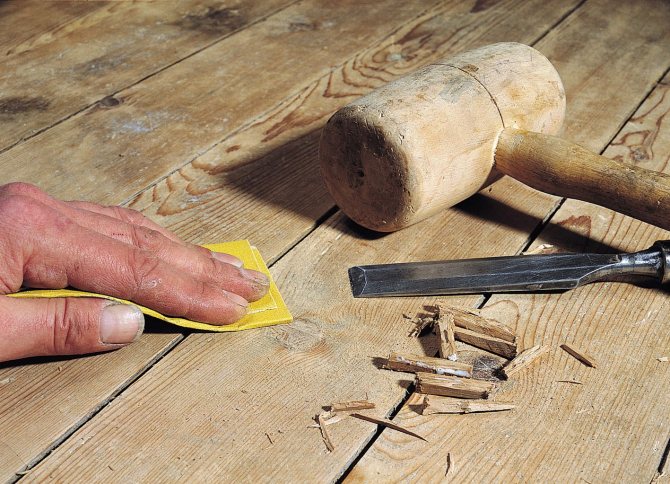
How to determine the exact reason why your floor began to creak? First, carefully examine the problem area. Press on it and look through the eyes of the assistant from the side, whether it flexes strongly. If so, try screwing a self-tapping screw into the log and try again. Nothing changed? Then everything is much more serious. We'll have to partially disassemble the flooring and check the condition of the floor from the inside for all the points listed above.
We offer you to familiarize yourself with: Ruff for cleaning the chimney with your own hands: what and how to make
Polyurethane foam properties
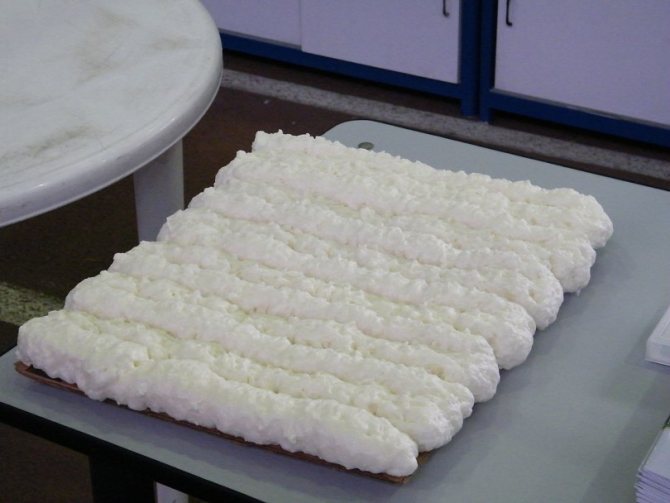
The wide scope of application of polyurethane foam is explained by its unique properties that no other material possesses. Initially, it is (as it is not difficult to guess from the name) a foam-like liquid mass. Foam is packed into relatively large cylinders under high pressure. After the foam enters the open air, a reaction occurs, the foam increases significantly in size and quickly solidifies.The result is a porous, very warm and reliable material that simultaneously performs several important functions. The surface of the polyurethane foam turns into a tough, dense and waterproof film.
The following properties of polyurethane foam can be distinguished:
- high heat and sound insulation characteristics;
- moisture resistance;
- fire resistance;
- safety and environmental friendliness;
- low electrical conductivity;
- the ability to fill even hard-to-reach voids;
- the ability to reliably glue together a variety of materials;
- ease of use.
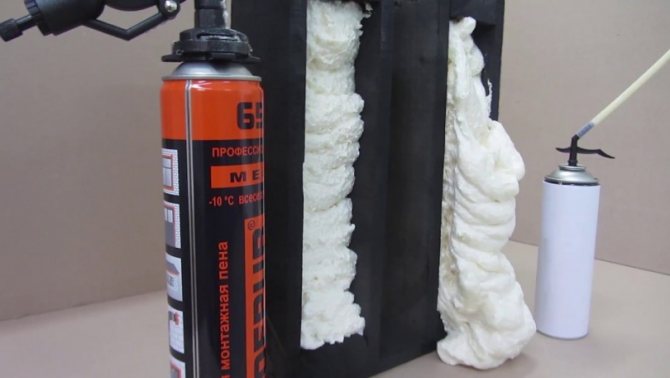


Professional and household polyurethane foam
All varieties of this material fall into two large groups: professional and household polyurethane foam.
To use professional foam, it is imperative to use the appropriate tool - a foam gun. It is very convenient to work with such a tool, it allows the master to accurately measure the amount of material, increase its useful output and the period of trouble-free service.
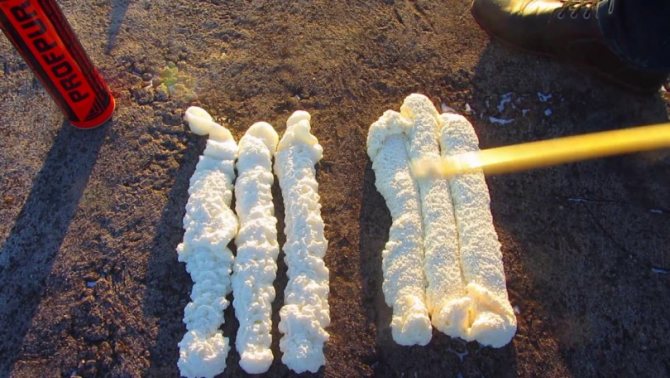
Professional polyurethane foam practically does not shrink, is suitable for all types of work and, most importantly, has a predictable increase in volume. The master who uses such foam always knows exactly how much it will increase. This allows you to accurately dose the material in each specific case, which has a positive effect on the quality of the work carried out and on the savings in expenditure.
As for household polyurethane foam, it is used without a special foam gun. Instead, a special adapter tube is used, which has a lever at the top for feeding and dispensing foam.
Household foam differs from professional foam in several ways. First of all, it has a lower density, as a result of which it can sag quite strongly (shrinks). In addition, household polyurethane foam is intended for single use. Even if the bottle is only half-used, it will still have to be discarded. Also, in practice, household foam often does not come out of the cylinder completely, which leads to additional expenses.
In general, household polyurethane foam is a wonderful material. Especially when it comes to not too responsible objects and works. For example, it copes better than any other material at sealing joints between building and finishing materials, filling deep cracks, installing door frames, etc.
Polyurethane foam in winter and summer
Polyurethane foam can be used in a wide temperature range, which makes it possible to carry out repair and construction work regardless of the season. In particular, if we take the extreme points, then the use of polyurethane foam is allowed in the range from -100 to +350 degrees Celsius. These are quite serious indicators that not every material used today on construction sites can boast of.
On sale, polyurethane foam is divided into three groups:
- Summer polyurethane foam;
- Winter polyurethane foam;
- Off-season polyurethane foam.
At first glance, it seems strange that manufacturers decided to produce polyurethane foam for different working conditions. Why not just release all-season polyurethane foam to keep developers and DIYers alike from the confusion? The bottom line is that all-season polyurethane foam is more expensive than winter, and winter is more expensive than summer. The difference in price is due to the fact that they contain expensive supplements. It makes no sense to use more expensive material in the summer, when "winter" additives will not bring any practical benefit and you can save a certain amount.

Laying plywood or chipboard
Thick plywood sheets are laid on top of a wooden covering to eliminate squeak.
A good remedy to eliminate squeaks due to insufficient thickness of the boards or wide spacing of the logs is to floor over the wood sheathing of plywood or fibreboard. It can only be used if the floor surface is flat. Sheets of plywood must be taken at least 12 mm thick, since a thinner sheet will bend and press on the base of the boards when walking, thus the problem of squeaking will not be eliminated.
To perform this method of floor repair you will need:
- saw-hacksaw;
- drill;
- screwdriver or screwdriver.
Plywood or chipboard are laid on top of wooden boards and attached to them with self-tapping screws with a pitch of 15-20 cm. In this case, it is better to lay sheets of plywood or chipboard at an angle to the already laid boards. If all technological operations are performed correctly, then you can forget about the problems with squeak for a long time.
Multi- and one-component polyurethane foam
Manufacturers offer two types of foam: one-component and multi-component. It must be said right away that in fact the amount of all components in the polyurethane foam is the same. The difference is that in one-component polyurethane foam, all the ingredients have already been mixed together in production conditions, and multi-component polyurethane foam has to be prepared for work independently, adding hardeners and various additives that are included in the kit to the material.
Of course, it is more convenient to use one-component polyurethane foam. All you need to do is shake the can, screw the adapter tube onto it, and the foam is ready to use. In most cases, especially for home use, it is recommended to purchase just such a polyurethane foam.
It makes sense to purchase multicomponent foam only for particularly demanding types of work and facilities where it is required to achieve maximum quality and reliability. The fact is that when mixing all the ingredients of the foam, despite the fact that it is hermetically sealed in cylinders, a number of chemical reactions still occur between the individual ingredients, which reduces the performance and negatively affects the characteristics of the material. If you mix the ingredients just before using the foam, you can achieve better results. However, in most cases, as already mentioned, it makes no sense to achieve a safety margin, since it will be excessive.
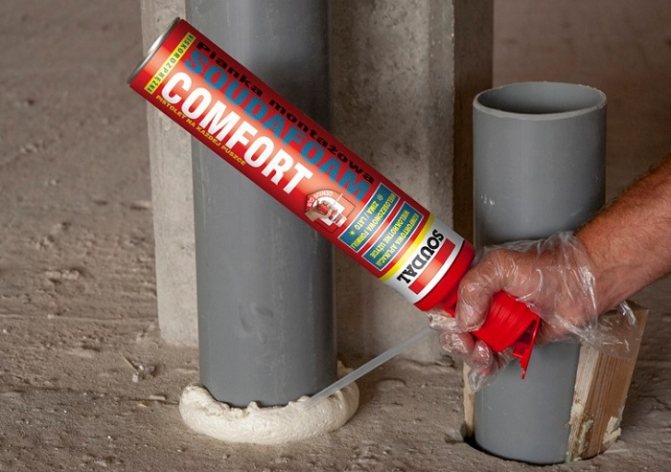
How to use polyurethane foam
From advertising materials, you can find out that polyurethane foam is extremely easy to use. Before using the foam, the balloon is brought to ambient temperature. Then it is shaken for 1 minute. As a result, the foam will become homogeneous, which will have a positive effect on its properties.
After that, the adapter tube is screwed to the cylinder. It should be screwed on tightly and securely so that the foam during operation does not leak between the cylinder and the tube, but completely comes out of the tube.
During use, a container with polyurethane foam is kept upside down. This achieves a uniform exit of material from the tube, as well as its full use. Otherwise, if you hold the cylinder with foam incorrectly, the foam will come out in jerks, and some of the material will remain inside the cylinder and will not come out, since the air that is pumped into the cylinder to provide pressure will be consumed much faster than the foam itself has time to run out.
When the foam comes out, it immediately begins to increase in size and then hardens. During this time, it is forbidden to touch the foam with your hands or any objects, as this may interfere with the process. When the foam hardens, its excess is cut off with a knife, and the surface is putty, painted or simply covered, for example, with a plinth or platbands.
Prophylaxis
In the process of laying the flooring, you can do the preventive removal of the future squeak from the wooden floor, because it is easy to do with your own hands:
- noise insulation without disassembling the flooring. Work is performed on lags. To prevent possible causes of squeak, the upper part of the bar is pasted over with soundproofing materials. A backing made of rubber, foamed polyethylene is placed on the log;
- installation of adjustable floors. To understand how to eliminate the creak of a wooden floor in an apartment, you will need to mount the logs on special studs. The fasteners are passed through the bars, and then they are threaded horizontally. The thread protrusions are cut off with a grinder.
We suggest that you familiarize yourself with: Correct ceiling in a Russian bath
Preventive maintenance improves room acoustics and provides natural ventilation. A minimum of moisture penetrates the surface of the lumber, and in the absence of rigid fixation of the coating, it is easier to carry out local repairs of defective areas.
How to use a foam gun
The foam gun is the simplest device. Shake the can with foam, remove the cap at the top. The can is then inverted and screwed directly into the gun. Moreover, you need to screw in the cylinder very tightly so that there are no gaps or cracks. Further, the foam is used for its intended purpose. The foam outlet is regulated by a pistol using a specially designed handle.
If the cylinder runs out of foam, but work needs to be continued further, the empty cylinder is unscrewed, after which the gun is immediately rinsed from the remaining foam with a special solvent for the foam. Such a solvent is sold along with the foam itself in any hardware store, so finding it on sale is not a problem. Only after the gun has been flushed with solvent, the next cylinder is screwed to it, etc.
If the cylinder did not have time to be used up, and the work has already ended, the cylinder is not unscrewed and left with the pistol. But at the same time, the outlet of the pistol is necessarily washed with a solvent.
Search for a place, detection of foci of squeak
Before you get rid of unpleasant sounds, you need to find the site and find out why they appeared. You will need to walk on the surface and determine where the noise is heard the most. Areas where floors creak are marked with chalk or a marker.
To find the cause, you need to listen to the type of sound and clarify the type of deformation:
- if the apartment or house has an old wooden floor, the boards will bend, wobble horizontally, and the head and part of the nail will appear outside. The reasons for the squeak are the loosening of the fasteners;
- wooden floorboards are sagging. Lags are deformed or the base has subsided;
- the coating bends if walked on. The reason for the sound is a large distance between the logs or thin lumber;
- the baseboards and floors near the wall were cracked. Cracks are the source of creaking floors.
If it was not possible to find out the source of the appearance of unpleasant sounds visually and by ear, you need to remove several floorboards and examine the logs.
How to wash polyurethane foam
If polyurethane foam gets on your skin, clothing, interior items or appliances, it must be removed as soon as possible. First, mechanically remove as much foam (which has not yet had time to harden), as possible. Moreover, it must be removed from the edges to the center, and not vice versa, so that the stain does not become even larger than at the beginning.
After that, take a rag, moisten it with a foam solvent and wipe the material, trying not to rub it in, but gently clean it off the surface. To remove polyurethane foam, you can also use the popular solvent 646, acetone, gasoline. Here in detail about how you can clean off the foam.