Home / Other
Back to
Published: 03/19/2020
Reading time: 24 min
0
3
- 1 Coefficient of thermal conductivity.
- 2 Product Features for Insulation 2.1 Floor Ceiling
- 2.2 Suspended ceilings
- 2.3 Panel ceiling
Coefficient of thermal conductivity.
If you want to insulate yourself as much as possible, choose a heater with the lowest thermal conductivity coefficient. The lower the number, the warmer the material. However, insulation, even with the lowest thermal conductivity coefficient, may be useless if it does not stick to the structure. Therefore, it goes one step with thermal conductivity. Do you want to heat only the house, not the street? And to insulate the house no more than once every 50 years? And save time and money when insulating walls? Then pay special attention to this property. ISOVER quartz-based materials are manufactured using Formostability technology. As a result, the insulation stays securely in the structure for at least 50 years (proven by the Scientific Research Institute of Building Physics). To do this, you just need to install it in the frame with a small allowance. Mineral wool ISOVER based on quartz is highly resilient, so you don't need any fasteners or additional beams. And most importantly, due to the shape stability and elasticity, there are no cold bridges, respectively, the heat will not leave the house and you can forget about the freezing of the walls once and for all.

Features of insulation products
Not all products are used for insulation. Plastic products will deform from high temperatures. If you use plywood or fiberboard, then from the hot air they will begin to expand and change their shape, accumulate moisture. These products will definitely not work. The best way is to finish with several layers:
- The first thing to do is to use an insulating material that prevents water from entering.
- Lay a second layer of insulation (for example, mineral wool).
- The third level is aluminum foil.
Such "layering" keeps heat well and does not allow steam to escape for a long time, therefore heat losses are reduced.
Heaters can be divided into the following types:
- fibers;
- plates;
- blocks;
- wall slabs;
- backfill.
And depending on the composition, they are distinguished:
- Organic, such as ecowool.
- Inorganic - mineral wool.
- Expanded polystyrene.
- Other heaters such as technovent and technoblock.

A quality insulation material should be:
- heat-resistant so that no fire occurs;
- environmentally friendly (should not emit harmful vapors);
- "Breathe" so that water does not collect and condensation does not accumulate;
- resistant to moisture.
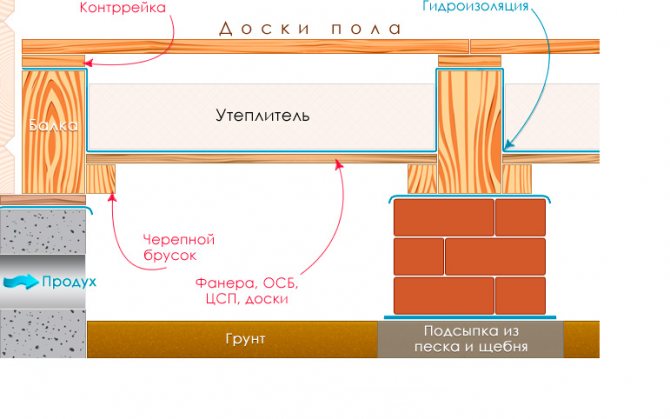
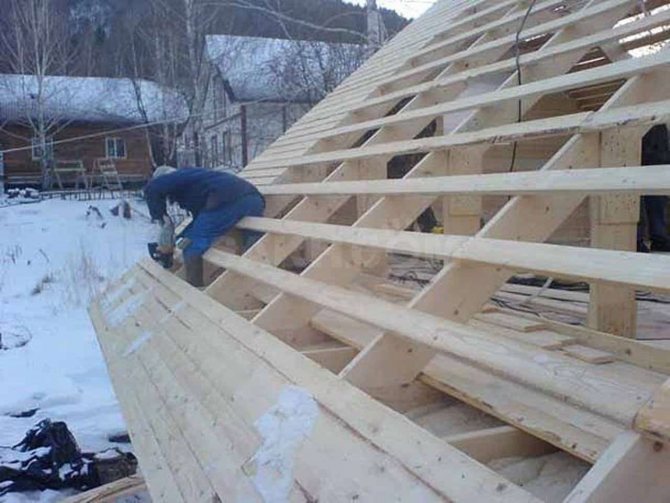
First you need to find out what kind of roof you have - with and without an attic. Structurally, the options for buildings from logs and from panels are similar. They have:
- isolation from steam;
- insulation;
- filing from boards;
- beams
- sheathing.
There is a vapor barrier on the wall and ceiling, then a timber, then a heater. You can use basalt wool in the form of mats, then again a layer of vapor barrier, then a bar and fixing the lining. As an option, respectively, a beam of 40 mm and a heater of 40 mm. You don't need too much insulation. Overruns of materials in this case are inappropriate.
On the ceiling, the structure must be made with a slope in order to collect condensation. As a result, there is a space under the lining that allows the bath to dry out. The power of a modern stove is enough to warm up a bath well. Ideally, the steam room is dried by ventilation and a fuel-processing oven.
If there is no attic, then you need to perform additional steps:
- smear the entire lining with a layer of clay up to two centimeters to reduce heat loss;
- sprinkle the coating with a mixture of cement and wood chips (you can use slag up to 15 cm - this measure helps to eliminate condensation).
If you want to make a properly working steam room, then you first need to take care of the vapor barrier (not waterproofing with vapor permeability) of the ceiling to create a vapor pocket to the level of the upper edge of the door to retain steam and create humidity in the region of 60%.
The vapor barrier of floor beams and the entire ceiling pie is already a consequence, not a cause. Ceiling insulation without foil is completely irrelevant, since the steam room will not perform the functions that are assigned to it. If you need a steam bath, and not a sauna, you will have to open the casing and deal with the vapor barrier of the ceiling. If this is not done on time, then after a season or two you will have to replace the damp insulation and rotten beams.
To protect wall structures, regardless of what they are made of, it is necessary to insulate the outside to prevent moisture from entering in the form of condensation at the dew point inside the material. For the Russian type of bath, wall insulation from the inside is not necessary, since it is possible to create a regime of 60 ° and 60% even with leaky walls, but with a well-waterproofed ceiling and a volumetric brick oven with a powerful thermal core inside.
We suggest that you familiarize yourself with What is better a frame house or from a bar
Deck ceiling
You may not see him as often as before. The use of hewn round timber is widespread. This method was previously considered the most profitable - people only had to go into the forest and chop up everything they needed for construction themselves. This is the most expensive option now.
There are several installation options.
- Along the crowns of a log house, if the area of the room is small (length is not more than 2.5 m). As an overlap, boards of small thickness (50 mm) are used, an even more economical way is edged tongue-and-groove options (25 mm).
- There is an interesting option for overlapping with unedged sanded boards. They are placed in 2 levels. Gaps and irregularities of the first level are covered by the second level.
- On the floor beams. With this option, the area of the room can be larger. The accent on the beams will add flavor and look great.
- On the supporting frame made of strips. Suitable for small rooms and is used less often. Make it easier. But if the room has an attic, then it cannot be used. The roof may not be able to handle heavy loads.
The process takes place in several steps.
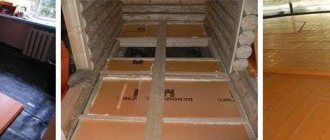
- In the attic, a vapor barrier film (PIP) is lined with an overlap of 10-15 cm (the foil surface is down).
- Mineral wool is placed on top of it (instead of it, you can fill the surface with expanded clay or cover with a mixture of sawdust and clay).
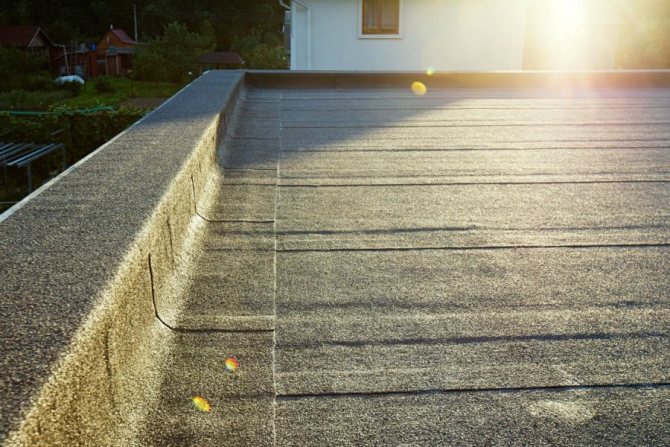
- The work ends with the laying of a waterproofing film (HIP) - roofing material or polyethylene.
Sewn ceilings
They have a load-bearing capacity, they are often used as an attic, and their installation will cost you much less.
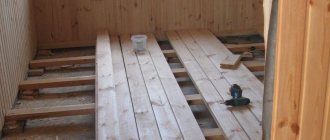
To make this coating, you need to install the beams in advance. Then boards or shields of grooved boards are evenly laid on them. Such a structure is insulated with a fibrous material. The installation process will take place in stages:
- The HIP is taken and placed on the beams from the roof side. This is done with an overlap.
- Boards or plywood sheets are placed on the waterproofing.
- Mineral wool is laid between the beams. Its thickness varies from 150 to 250 mm (depending on the local climate). All joints must be closed with the next sheet.
- We attach a vapor barrier from the bottom of the beams.
- Then we attach wood slats.
- At the last stage, the lining is attached.
After completing all the work, you will receive additional storage space - an attic or attic.
Panel ceiling
It is difficult to do it yourself. To begin with, a special structure is made from panels. Then it must be fixed on top of the cross beams or on the top of the wall. How is the installation:
- Planks are placed close to the supports (perpendicularly).
- Then we attach narrow boards to the inner side of the PP, they will be bumpers.
- The next step is to lay the PIP.
- We put ecowool (or any other) in the resulting space of the panels.
- Then you need to put a film of polyethylene or roofing material.
- The final stage will be the installation of boards, they will be the future floor.
Our production
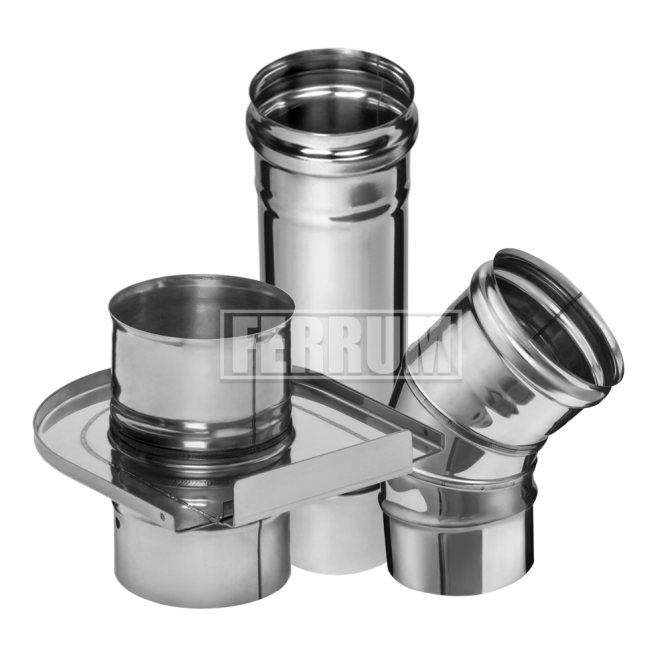
Single wall chimneys

Double-walled chimneys
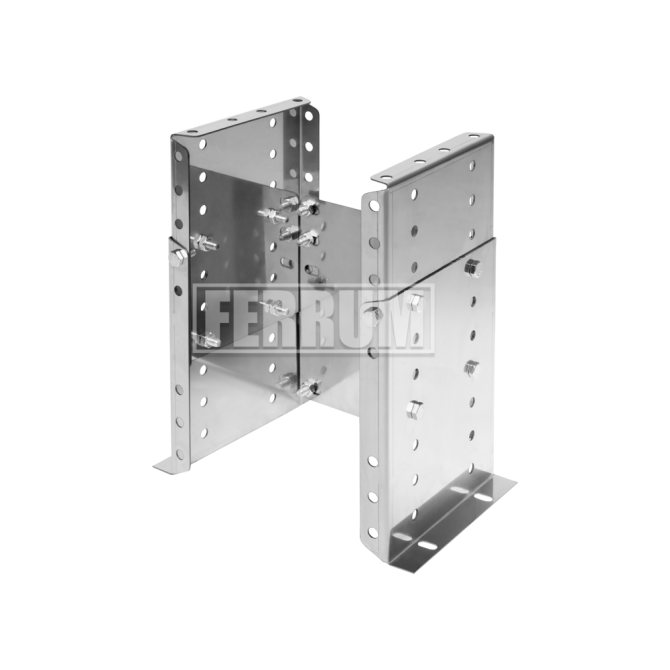
Mounting elements
It used to be the custom to use natural raw materials such as moss, clay, sawdust, straw or earth.
Now people are using the most effective coatings. They make all the work easier, even if you are a non-professional builder. For example, it is widely used:
- basalt wool;
- expanded clay;
- penoizol;
- ecowool and others.
You can also use foam and glass wool. But when heated, the first exudes harmful gases and can ignite. And for working with fiberglass, a good protective suit is shown.
The question is whether or not to insulate the entire building only inside or on both sides. There are many opinions on this, but the truth is in the middle. There are many additional factors to be aware of:
- this is a Russian bath or sauna;
- what material is the bathhouse built of,
- what kind of stove is worth.
To keep the steam inside and not escape outside, you need to achieve the "thermos" effect. Insulation should be both inside and outside the building. To achieve this effect, you will need insulation for the ceiling in the bath. There are different options:
- waterproofing film;
- expanded clay;
- mineral wool or others.
Manufacturers offer a variety of membrane films that protect materials from high humidity. Experienced builders recommend purchasing vapor barrier upholstery with a reflective foil layer that prevents heat from escaping. The following types with a foil layer are distinguished:
- polypropylene;
- kraft paper;
- roofing material;
- membrane;
- foil;
- coating.
This film is mounted with a large overlap (10-15 cm), and the joints are glued with foil tape for construction work.
A wide range of waterproofing products are available in specialized store areas - foil-coated kraft paper, construction membrane and other products. Although you can save money and purchase ordinary plastic wrap or roofing felt.
To achieve the main task - the accumulation and "saving" of steam, you need to make 2 layers of PIP and another 1 additional layer for thermal insulation. Such a measure will make the room warmer and more comfortable.
We invite you to familiarize yourself with the Tobacco smoke bomb hefest instruction
Experts advise placing layers perpendicularly. This arrangement will increase the strength of the entire structure and help avoid severe deformation. If you use mineral wool and clay, then the process will take place in several steps:
- an unedged board (5 cm) is taken and attached to the bottom of the beams;
- to support the filing, we fix the flooring along all the bases;
- grooved aspen slats are attached to them (taking into account the gap for ventilation);
- we lay a vapor barrier material outside the roof;
- on top of the laid mixture, distribute mineral wool 15 cm wide;
- then we lay the polypropylene film;
- we put boards on top of the resulting structure, this is the future floor of the attic.
If done correctly, you should end up with a great steam room. All the steam will stay inside for a long time, and the steam room will not cool down for a long time.

How to care for your fleece?
When you have a fleece item, it's time to find out - how to take care of it correctly in order to extend its service life and not spoil it?
- Fleece is easy to clean. It requires gentle washing modes, at low speed, at a water temperature not exceeding 30 ºС, without the use of chlorine-containing bleaches and fabric softeners.
- Some manufacturers recommend turning the garment inside out before washing.
- Better to use liquid detergents.
- After washing, the fleece garments should be thoroughly rinsed in clean water to remove any residual detergent.
- The fleece dries quickly so it doesn't need to be wrung out.
- Ironing the fleece is not recommended, as well as drying it on a battery, this will only reduce its service life and ruin the thing.
If the garment contains materials or membranes other than fleece, follow the manufacturer's instructions or follow the general requirements for washing outdoor garments. In general, before washing, pay attention to the manufacturer's advice, there may be specific points specifically for this type of fleece.
Having gained new knowledge, and having decided on the choice of fleece for your activities, it's time to go shopping.
The Kant store offers a wide selection of fleece clothing for every taste.
outdoor models:
-50%
Fleece Ski Maier 2019-20 kaija
1 995 3 990
Buy
-50%
Fleece Ski Descente 2019-20 mary super white
6 245 12 490
Buy
-50%
Ski Sweatshirt Maier 2019-20 cerkno black / orange
3 495 6 990
Buy
for everyday life:
-50%
Jacket Tourist Jack Wolfskin 2019-20 midnight moon men dark moss
3 495 6 990
Buy
-30%
The North Face Outdoor Fleece 2020 b glacier full zip h shady blue stripe
2 926 4 180
Buy
-30%
The North Face Outdoor Jacket 2019 tech mezzaluna hd spiced coral wh
4 333 6 190
Buy
Geometric dimensions and packaging of material ISOVER Warm Walls
| Parameter | ISOVER Warm Walls 50 mm. | ISOVER Warm Walls 100 mm. |
| Mineral wool thickness, mm | 50 | 100 |
| Mineral wool width, mm | 610 | 610 |
| Mineral wool length, mm | 1170 | 1170 |
| Package qty, m2 | 10 | 5 |
| Packing quantity, m3 | 0,5 | 0,5 |
| Qty in a package, pcs | 14 | 7 |
| Thermal conductivity at a temperature of (10 ± 2) 0С, λ10, no more (W / (m • K), GOST R 31924 | 0,036 | 0,036 |
| Flammability group, GOST 30244-94 | NG | NG |
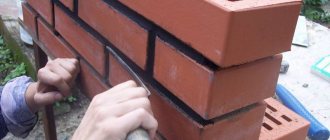
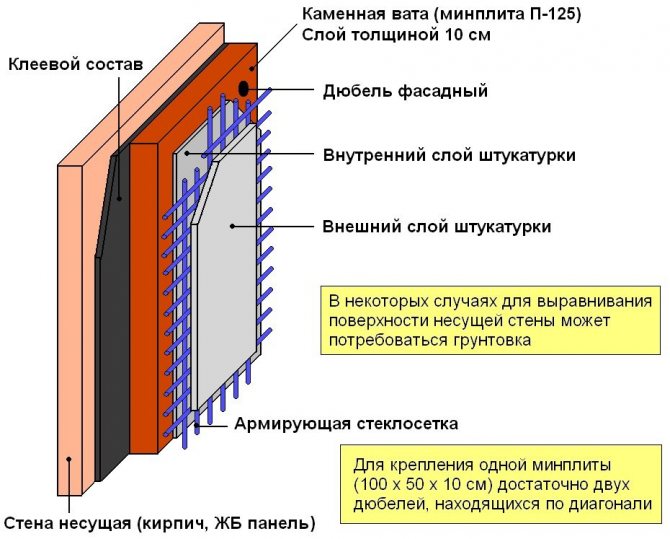
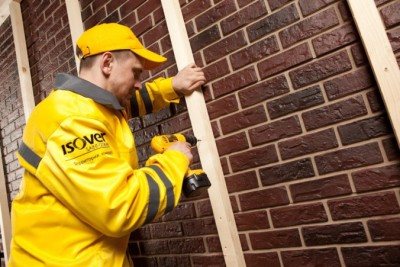
When the distance between the bars "in the light" is 600 mm, the ISOVER Warm Walls 610 mm wide are installed with a snap without additional fasteners, tightly adhering to the wall and the frame. Thanks to the long and strong fibers of mineral wool based on quartz, ISOVER materials are resilient and form-stable, therefore they do not break during installation, do not slip or crumble over the years.
If a non-standard pitch was selected when installing the frame, the material is cut with a knife to the desired width. It is important to leave 10–20 mm allowances around the edges. To completely exclude "cold bridges" - areas of increased heat leakage, will allow insulation in two layers with the obligatory separation of the seams.
If you use additional insulation, on top of the vertical bars and the first layer of thermal insulation, fix the horizontal lathing and install mineral wool in this lathing. We recommend keeping the distance between the bars 600 mm “in the light”.
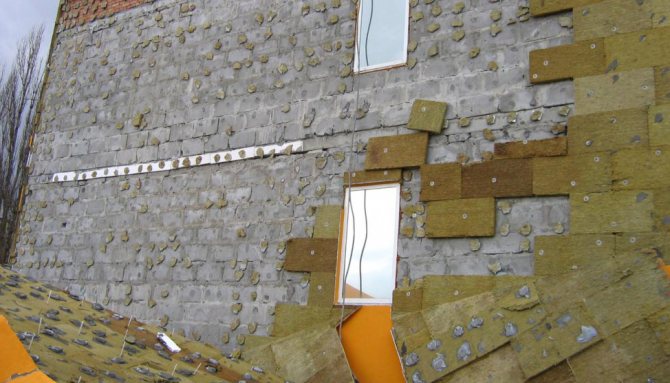
There are some nuances here, so we will study in more detail how to properly insulate the wall from the inside. As thermal insulation, consider mineral wool - one of the most common materials for simultaneous protection from cold and noise.
It must be remembered that when insulating a house or apartment from the inside, it is important to provide a vapor barrier between the insulation and the interior decoration of the room. This will preserve the structure for many years, as it will prevent the penetration of water vapor from the room into the heat-insulating layer. With this method of insulation, the level of humidity in the house depends on the type of vapor barrier membrane. If membranes with variable vapor permeability are used, then the humidity in the house will be regulated depending on the weather conditions and the air temperature outside. When choosing a simple membrane, organized supply and exhaust ventilation will help to cope with humidity.
How to warm a parrot if it's cold at home
If the parrot is frozen, you need to act immediately. The owner's task at such a moment is to raise the air temperature to a comfortable one (+ 19 ... + 22 ° С). This can be done in very simple but effective ways.
Measures for heating the room are carried out using:
- incandescent lamps;
- luminescent illumination;
- bottles or pans of hot liquid;
- "Dry" heat and other actions.
Find out in more detail what should be a cage for a budgerigar.
Incandescent lamp
The quickest and easiest way to keep your bird warm is to place a table lamp near the cage. It is necessary to position the light source in such a way that the rays cover the maximum space in the pet's dwelling. In the future, you can get, just in case, special incandescent lamps on clothespins, which can be attached to the bars of the cage. In terms of power, 40-60 watts will be enough. It is better to prefer a green or blue heat radiation source so that the light does not blind the pet.
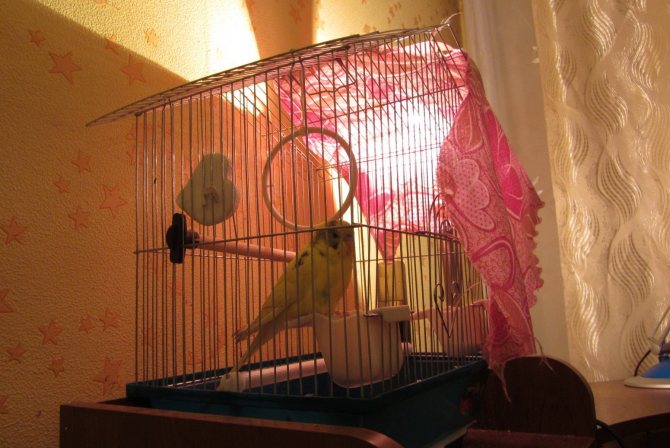
When placing an incandescent lamp next to it to heat the parrot, be sure to cover some part of the cage with a cloth to create shade. The bird will be able to move there if suddenly you overdo it with an increase in temperature.
Fluorescent Lamp
If you have a fluorescent lamp at home, then this is ideal. It can be used to equip the pet's place of residence and turn it on as needed. Such a lamp will not only serve as a source of heat, but will also help replace the sun's rays on cloudy winter days. The fact is that parrots suffer very much from a lack of light. They start having health problems.
Read on to learn how to make a budgerigar nesting house.
Hot water bottle or saucepan
If there are no lamps at hand, then you can use a plastic bottle or saucepan. First you need to boil the water. If you use a plastic bottle, then you should not pour boiling water into it, since the vessel is deformed, and if it is also of poor quality, then it may even leak. Place full containers around the cage and wait until the bird starts to be active again, meaning that it has warmed up.
When a pot is used, it is placed next to the cage. The container should be covered with a lid, which is periodically removed, releasing a small amount of steam into the environment.
Video: what to do if the parrot is cold
Heating with dry heat
"Dry" heat refers to hot sand or salt. Place one of the ingredients in a pan or baking sheet. Then it is calcined well, and poured into small linen bags, which are placed in socks. The heating agent is placed in the cage next to the frozen bird.
A Few Simple Additional Heating Measures
If the house is cold and electricity and hot water are not available, there are other ways to keep your pet warm. Don't forget about warm blankets. You need to take a blanket and wrap the cage with it, leaving a small hole for air circulation. The birds' insulated dwelling is immediately placed on the highest point in the house, for example, on a closet or suspended from the ceiling.
Did you know? Parrots are among the smartest birds on our planet and can imitate human speech, electrical appliances and animals. The most amazing thing is that they do this only with the help of the mouth, since they do not have vocal cords.
The pet can also be placed in a woolen sock. And in the cage, build a nest for him out of an old hat and cotton wool, hay. In the end, you can take the bird in your hands and warm your own with warmth. You should also invite the parrot to drink warm water. This will start the rewarming process much faster.
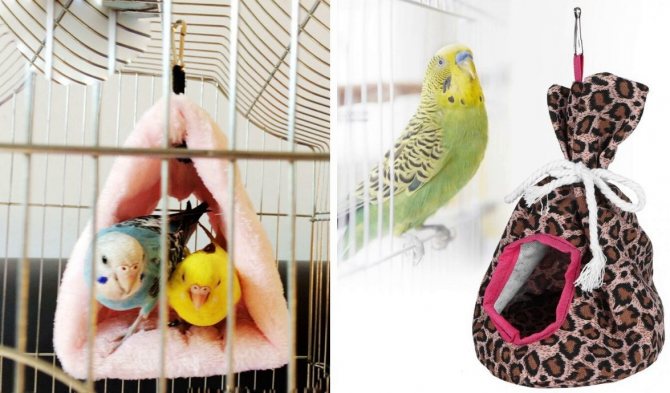
You can also purchase or sew special hammocks for your parrots.
Geometric dimensions and packaging of material ISOVER Warm Walls
| Parameter | ISOVER Warm Walls 50 mm. | ISOVER Warm Walls 100 mm. |
| Mineral wool thickness, mm | 50 | 100 |
| Mineral wool width, mm | 610 | 610 |
| Mineral wool length, mm | 1170 | 1170 |
| Package qty, m2 | 10 | 5 |
| Packing quantity, m3 | 0,5 | 0,5 |
| Qty in a package, pcs | 14 | 7 |
| Thermal conductivity at a temperature of (10 ± 2) 0С, λ10, no more (W / (m • K), GOST R 31924 | 0,036 | 0,036 |
| Flammability group, GOST 30244-94 | NG | NG |
We suggest that you familiarize yourself with Dracaena: how to transplant at home (after purchase and regular transplant)
When the distance between the bars "in the light" is 600 mm, the ISOVER Warm Walls 610 mm wide are installed with a snap without additional fasteners, tightly adhering to the wall and the frame.
Recommended material for wall insulation - ISOVER Warm Walls
Specialists Sosnin Yu.P. and Bukharkin E.N. in their book they suggest the following method:
- we take grooved boards (25 mm) and fasten them to the beams, then we process them with linseed oil twice so that they become moisture resistant;
- we sheathe them, observing the moisture gap - 3 cm;
- spread the film on top (polyethylene, roofing felt, or better, a foil coating with reinforcement);
- the next layer can be sand or slag (20 cm thick).
If you properly insulate the ceiling in the bath, following the recommendations and following the technological process, then:
- heat losses will significantly decrease (up to 35%);
- there will be no fungi and pathogenic bacteria on the surfaces of the steam room;
- less firewood will be required;
- the steam room will serve you longer.
In addition to these positive aspects, there are others:
- you can do this work with your own hands without large investments;
- you will select all the materials that suit you in terms of price and quality.
And the best part is that you and your loved ones will be able to spend time pleasantly and comfortably in your renovated sauna.
1. Fasten the horizontal battens
2. Install mineral wool in the crate
- Step 3. Installing a waterproof and windproof membrane
To protect the structure and insulation from moisture outside the room, install a hydro-windproof membrane on the outside of the crate close to the thermal insulation. Produce and secure the membrane to the rafters with a construction stapler. mounting tape or construction tape.
1. Secure the membrane to the rafters with a construction stapler.
2. Glue all joints with mounting tape or construction tape.
- Step 4. Ventilated gap arrangement
Place a row of 20-50 mm thick blocks vertically on top of the hydro-windproof membrane. They additionally secure the membrane, and a
Ventilated gap device
- Step 5. Installation of external cladding
Install the outer cladding according to the manufacturer's recommendations.
Installation of external cladding
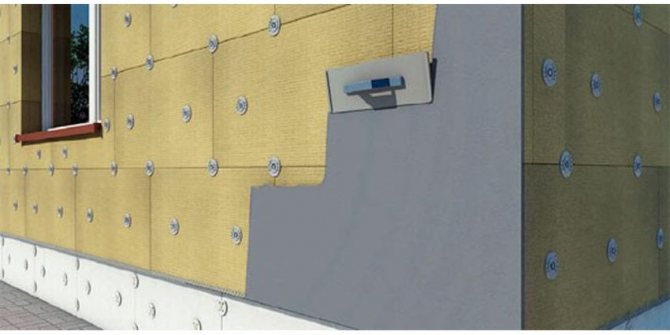
You can insulate the wall from the inside with your own hands with both slab and roll material. The ISOVER line for wall insulation has specially designed solutions: in slabs - ISOVER Warm Walls and ISOVER Warm and Quiet WALL PLUS, in rolls - ISOVER Warm and Quiet WALL. Mineral wool has excellent heat-saving properties and can be easily mounted into the frame without additional fasteners.
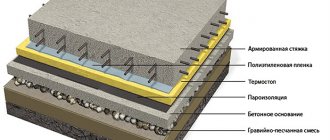
Step-by-step instructions for insulating the blind area
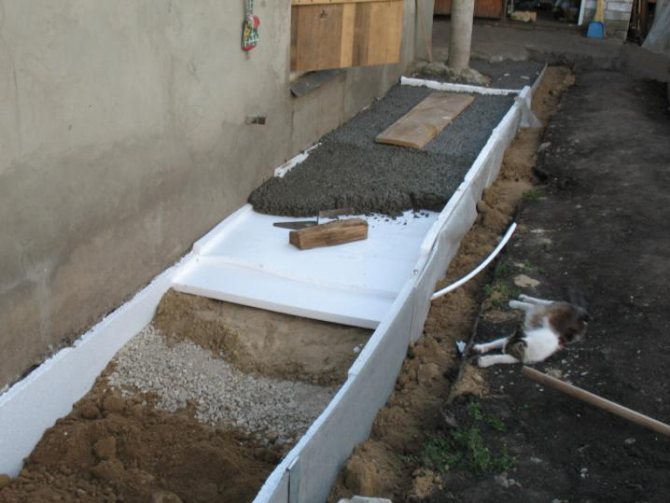
Layer-by-layer stacking of materials using foam
The arrangement of the base of the house should be carried out in the warm season, when the earth has dried well and settled after the winter heaving. You should check the weather forecast for the week, as it will take several days to work. It is inconvenient to perform it through mud, and precipitation will adversely affect the quality of the masonry.
Step-by-step instructions for insulating the blind area around the house:
- If the house was built a long time ago, dig a pit around it with the design parameters of width and depth. Remove stones from it, if trees grow near the house, chop off and burn the roots to prevent their further growth.
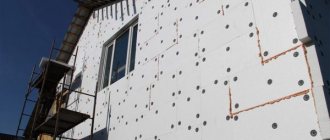
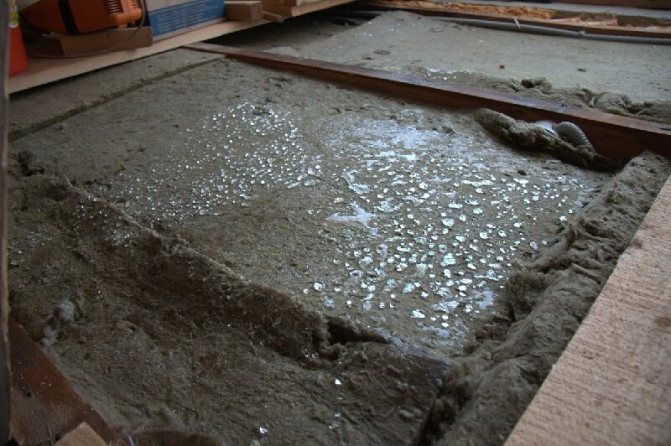
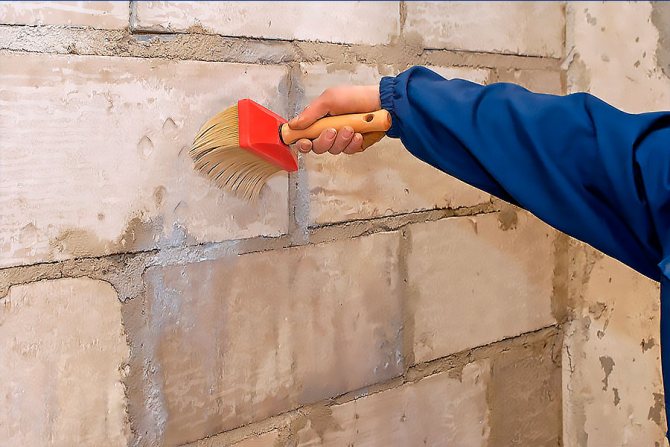
- Insulate the basement and basement from the outside. First, the concrete must be cleaned of dirt and dust, then treated with an antiseptic and strengthening impregnation. After that, you need to cover the base with a layer of waterproofing. For this, mastics or molten bitumen are used. In conclusion, insulation is applied. Foam, extruded polystyrene foam or foam plates are used. Since the material will be underground, additional processing is not required for it.
- Fastening a waterproofing film to the wall of the trench. It is better to use dense cellophane.The width must be taken such as to ensure a bend from the bottom and top by 30-40 cm. This technique will prevent the lateral flow of moisture into the insulation when the soil is very wet.
- Laying a soft profiled membrane. Better to use the brand Planter produced by TechnoNIKOL. The fabric is strong and durable. The membrane will provide moisture drainage and prevent plant germination.
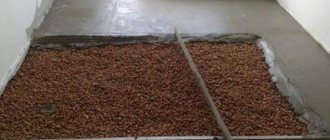
- Manufacturing of an amortization cushion. It is made of crushed stone and sand, which are alternately poured in layers at least 30 cm thick. The sand is compacted and leveled. It must first be moistened and then processed with a manual or mechanical rammer.
- Applying a layer of insulation. It is advisable to take plates of 10 cm foam or 5 cm foam. If foam is chosen, it is applied in 3 layers, each of 3 cm. Spraying the next level is carried out only after the previous one has solidified. Expanded clay is filled up, leveled, but not pressed down.
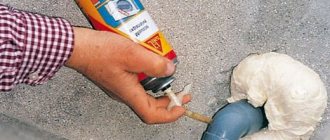
- The cracks in the slabs are blown out with foam, membrane fabric is laid on top of the expanded clay.
- If concrete is selected for the top layer, a removable plank formwork is made. Wooden crossbars are installed every 200 cm for thermal expansion of the blind area.
- A reinforcing cage is being made. Plastic or stone stops 2-3 cm high are placed under it.
- A damper tape is glued around the perimeter of the basement level. It will ensure the tightness of the joint.
- Mixing and pouring of concrete is carried out. To achieve the required strength, a layer of at least 10 cm is made. The blind area is given a slope of 2-3º.
The finished structure can be used after 14 days. To give the concrete a presentable look, it is painted or polished.