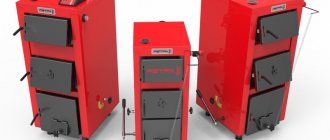
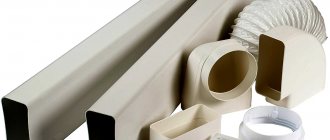
Increasingly, underfloor heating is being installed in private and multi-storey buildings. The power of such a system is regulated by oneself. The most popular is the concrete heating system. This is due to some reasons, including cheap installation, no need for additional materials, high-quality result.

It is very easy to learn how to use such a system. To install a heating element, you should know a few subtleties of using materials. You can turn to any construction company for help. For the amount set in the price list, the pros will carry out high-quality work on the installation of a structure for heating.
Varieties of underfloor heating
Water
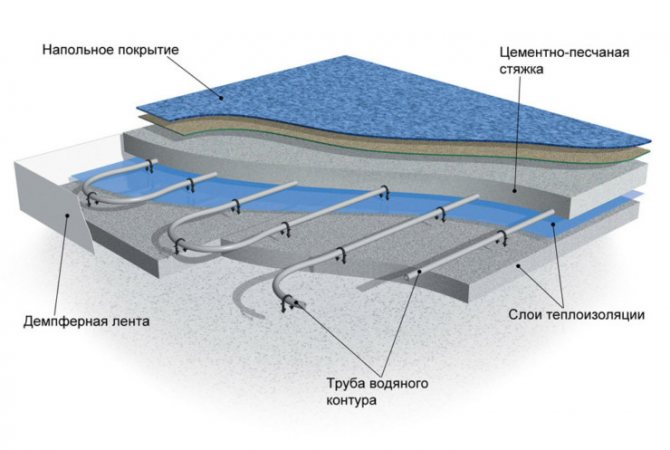
The heat source of such a system is hot water. How does a water floor work? A heating pipe (part of the mechanism) is installed on it, hot water circulates in it for heating. A pipeline is connected to the central heating system or to the purchased gas boiler. This is how the floor heats up.
Advice: connect the piping to the boiler so that the heating is not dependent on seasonal heat supply, temperature drops or pressure.
Benefits:
- cost-effectiveness (you pay only for the equipment, installation does not require significant cash costs);
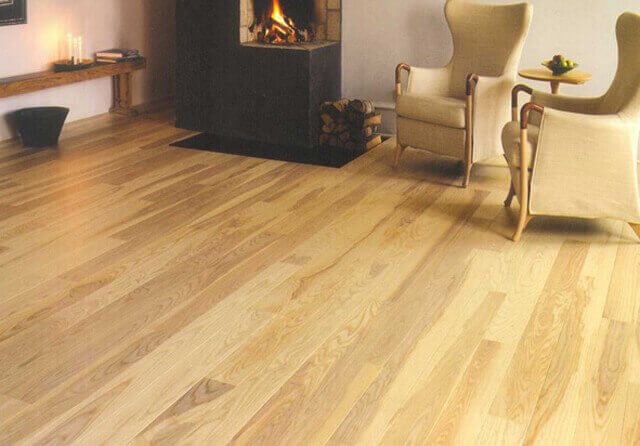
- the system of such a floor can be combined with other types of bases (carpet, tiles, laminate, linoleum);
- autonomous use;
- saving heat and energy;
- alternative to the central heating system;
- the floor temperature does not depend on electricity (in stand-alone mode).
Disadvantages:
- this type of heating is not possible in multi-storey buildings. Suitable only for private premises;
- it is impossible to regulate heating;
- the house / apartment can be flooded if no crack is found in the pipeline.
Back to the table of contents
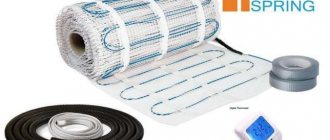
Electric
This heating system is carried out using special wires (consume electricity), which heat up themselves and, accordingly, heat the floor. The concrete with which the surface is poured is made from special mixtures to increase the level of thermal conductivity. The mechanism can be installed in apartments with central heating.
Benefits:
- can be connected to the central network;
- no additional materials for installation;
- used for 40-50 years;
- provides comfort;
- local repairs can be carried out.
Disadvantages:
- you should choose a special coating with the desired marking;
- the risk of varicose veins, leg diseases, varicose veins;
- the room warms up for 3-4 hours;
- it is recommended to put wooden furniture in a room with a warm electric floor;
- it is required to take permission to install such a floor from the controlling services.
Back to the table of contents
Premises preparation, installation of the heating circuit
The concrete floor must be even: protrusions, irregularities cannot exceed 10 mm. In the same place where the thermal circuit will be laid, the irregularities should remain within 5 mm. In addition, the degree of readiness of the premises implies that:
- plastering work (hammer, walls) is completely finished: no debris, dust;
- doors, windows are installed;
- the floor is marked at the level of the "clean" coating;
- sewerage, water, electricity connections are removed;
- niches for distribution cabinets prepared;
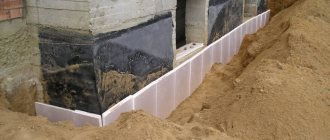
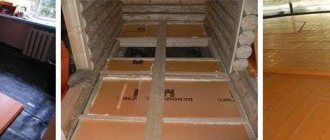
- floors located in rooms in contact with the ground have good waterproofing.
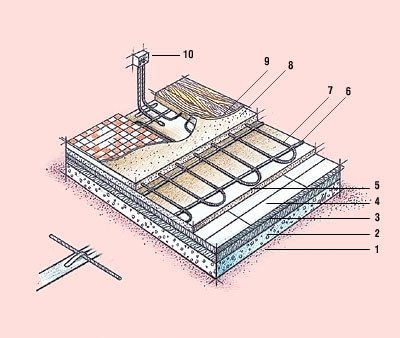
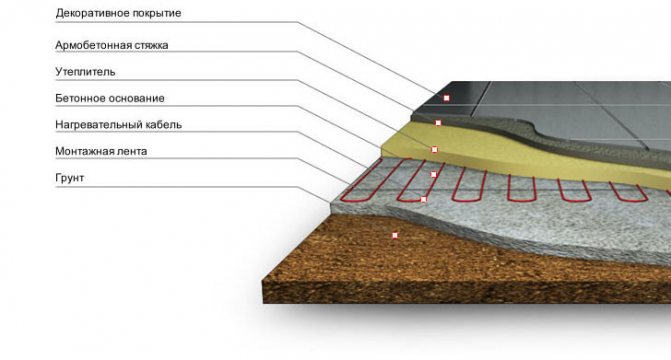
Diagram of the main underfloor heating device: 1. Soil. 2. Compacted gravel. 3. Thermal insulation. 4. Plastic film. five.Reinforced concrete slab. 6. Mounting plate. 7. Heating cable. 8. Leveling concrete. 9. Surface material. 10. Thermostat.
First of all, you will need to lay a vapor barrier. For this, polyethylene 0.2 mm thick is usually used. The film will protect the polystyrene from moisture, which degrades its properties. The source of unnecessary moisture is usually the concrete floor (floor slab), where air condensation occurs. The material is laid with an overlap of 10 cm; in this case, the joints must be glued with adhesive tape. You can do without a film if you use a different, more modern insulation. On such products, a vapor barrier made of polystyrene or lavsan is already provided in advance.
Underfloor heating screed
Back to the table of contents
Preparation of materials / tools
Both water and electric floors are poured with concrete, but with one difference: in the case of an electric floor, special substances for thermal conductivity are mixed into the concrete. All materials and tools that will be used for floors should be carefully prepared before starting work. Concrete should be poured, and then the surfaces should be treated with putty. Then they put the necessary material for the surface (parquet, linoleum, etc.).
Tools to be used during installation:
- building level;
- spatulas;
- solution bucket;
- puncher;
- concrete mix;
- reinforcement net;
- tester (to check the connection);
- roll foil.
Install the heating system using concrete pouring and the above tools. Use the attached instructions. For a fee, you can hire a team of builders who will quickly and efficiently install your heating system.
Back to the table of contents
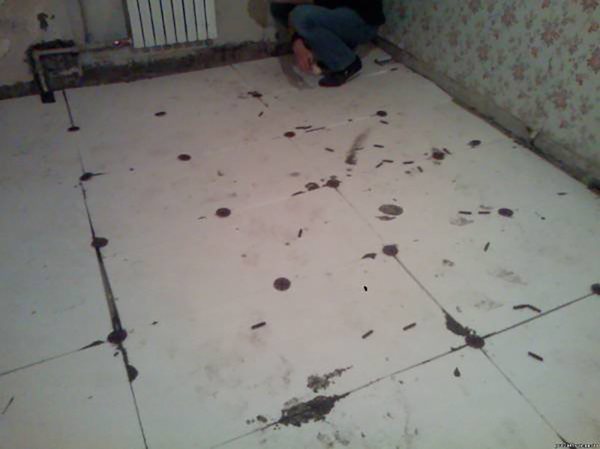
Installation of beacons
After the first step, proceed with the installation of the concrete floor. The first priority is to install beacons. Use metal profiles for lighthouses:
- Install the mesh reinforcement.
- Spread the grout in lumps across the room (50 mm high).
- Place the battens on the clumps (use a level for accuracy).
- Mount the beacons on the floor (on opposite walls).
Back to the table of contents
Preparation of the solution
The next step is concrete mortar, the so-called screeds. Do not use clean concrete for the screed (it has low thermal conductivity). This applies to both water and electric floors. Purchase a dry screed mix from a specialty store.
Cooking consists of only 2 stages:
- sift concrete (fractions should be 5-7mm);
- fill in the plasticizer (for thermal conductivity and plasticity of the screed).
Back to the table of contents
Fill
After the water or electric concrete floor system is assembled and the mortar (screed) is mixed, pouring can begin. Floors must be installed at a temperature of 5 ° C (or higher). If the temperature is lower, the screed may begin to crumble and crumble. For underfloor heating, a special thermal element should be selected. He must be constantly under pressure. If the pressure weakens, the pipes begin to deform, during deformation they heat up and begin to harm the floor, destroying the composition.
The room is left for 28 days so that the necessary processes take place in a warm field. The concrete will become strong and stable during this period, the mortar will harden, and only after that the heating system should be started. If you do not have the time and desire to wait, you can use a special drying. The surface will reach the desired parameters after 10 days. There is no fundamental difference between floors (water and electric) in further care. The temperature should be raised gradually until the performance is achieved. Adjust the system temperature manually.
Back to the table of contents
Materials for thermal insulation
How to equip the room, what material to choose? First of all, they pay attention to the following indicators:
- Density, structure - the more porous the hollow material, the lower its density;
- Thermal conductivity - the higher the indicator, the worse the hollow insulation retains heat;
- Moisture permeability - is the hollow insulation capable of absorbing moisture from other coatings, the environment. To keep the room warm, it is desirable that the coefficient be as low as possible;
- Strength - determines whether a hollow insulation is capable of withstanding loads and deformation. To keep the concrete floor warm, it is worth choosing a high-strength material;
- Durability is an indicator by which it is determined whether a hollow insulation is capable of maintaining its qualities during long-term operation;
- Moisture resistance - it is desirable that it be as high as possible;
- Environmental friendliness is an important indicator that ensures the comfort of living. Hollow material should not be poisonous, release toxins when burned.
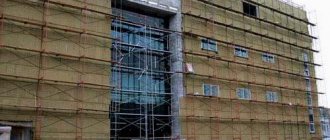
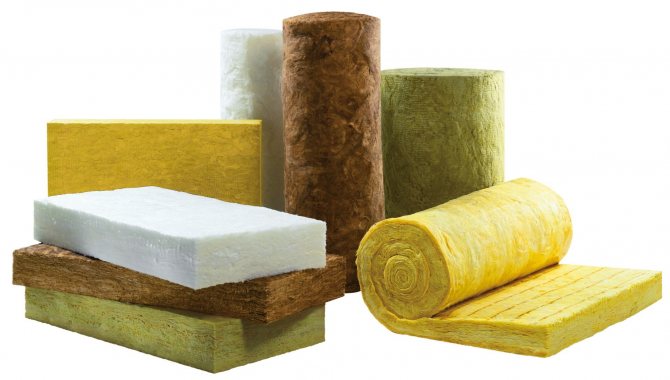
Mineral, basalt or fiberglass wool
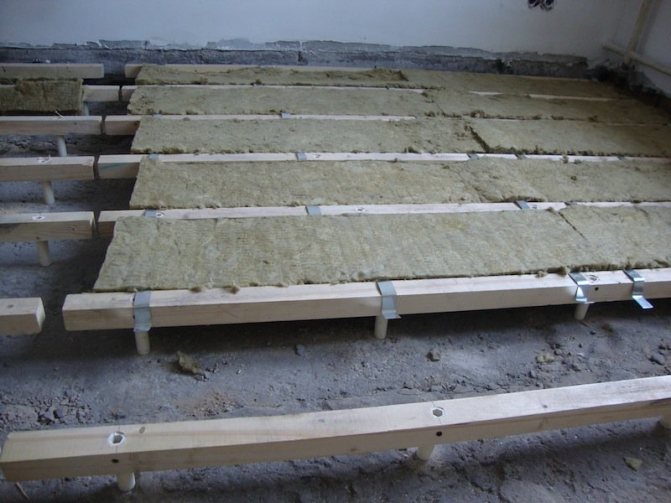
Mineral wool is a popular hollow insulation material, cheap and heat-intensive. It is produced in rolls and mats, and can be of organic and inorganic origin.
Minvata happens:
- Slag, with the addition of blast furnace slag. Possesses high thermal conductivity, but is unstable to vibration, moisture, decomposes with acid release;
- Basalt - hollow insulation with the addition of dolomite, limestone, produced in different densities. It is resistant to moisture, noise, vibration, high temperatures. Now on sale there is cotton wool on a substrate of foil, glass threads, stitched with fiberglass or wire. It is characterized by increased strength, withstands strong pressure, compression;
- Fiber glass wool is a cheap hollow material with low thermal conductivity. It possesses high noise and vibration isolation, compresses well, but deforms under load and pressure.
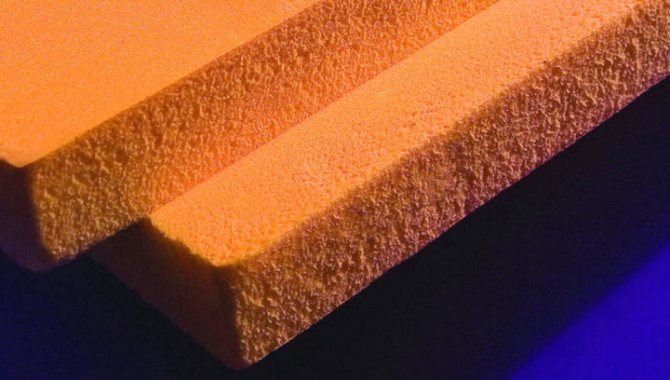
Plates of polystyrene, polystyrene
Polyfoam is a hollow material that retains heat well, durable, and affordable. This is a popular moisture-resistant insulation that is commonly used for flooring. Hollow material is used to insulate basements, it is easy to equip with it a reliable, durable concrete flooring with heating.
A type of foam is extruded polystyrene, in fact, an analogue of foam, but with improved properties. Hollow material is more dense in structure and has high resistance to deformation.
Polyurethane foam, penoizol
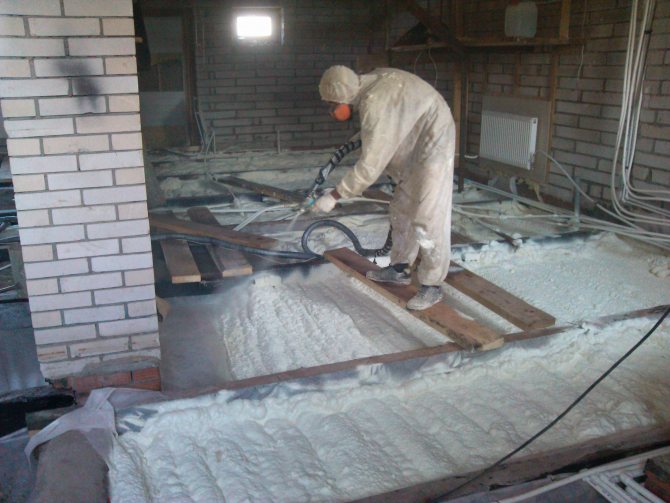
Polyurethane foam is a new generation sprayed insulation. He and its hollow analogue penoizol are resistant to moisture, temperature extremes, mechanical damage. Hollow porous material is economical, safe for health, easily sprayed with a special installation up to 10 cm thick. It is easily applied to a standard concrete floor, other surfaces, forming a smooth plane without joints, irregularities.
The only drawback of polyurethane foam, penoizol is the high cost of the technology, because spraying requires special equipment.
Pipe arrangement options
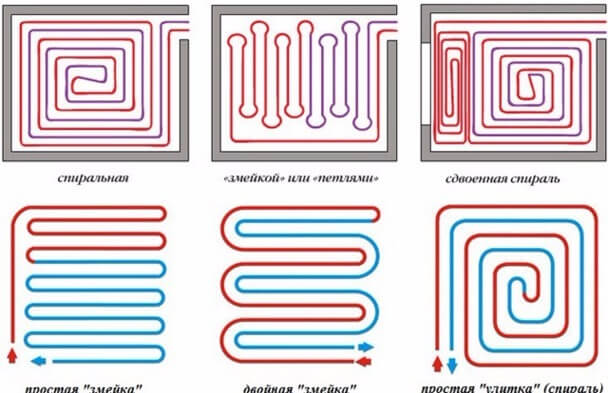
Pipe arrangement options.
There are 3 types of pipe dislocation that use warm surface systems:
- spiral;
- serpentine;
- winding.
In the first case, the pipes are installed in a spiral, the heat in the concrete will begin to be distributed evenly, since the pipeline is directed directly to the center of the room. Heat spreads from the source to the middle of the room, and from the middle begins to be directed over the entire surface of the room. There are no sharp bends and straight lines. Smooth lines maintain stability thanks to special fasteners.
The serpentine method of location provides a point of distribution and release of heat from different sides of the room. The water will cool down as it reaches the edges of the room.Thus, the distal part of the pipe will always be hotter than the proximal part. The total length of the pipes used in the serpentine system is 70 m.
The looping type is very similar to the serpentine type. The only difference is that the spiral will not be single, but double. Accordingly, you will have to use a little more material. With this method, the pipes and the floor will be heated evenly.
Back to the table of contents
Reinforcement mesh
On top of the layers of hydro and thermal insulation, you need to lay a reinforcing mesh made of steel bar with a thickness of 4-5 mm with a pitch of 15 × 15 cm.It is necessary, firstly, to protect the heat insulator from power loads, and secondly, in order to strengthen the base of concrete underfloor heating screeds.
The reinforcement will protect the concrete screed from deformation and increase its fracture strength. Thirdly, it is convenient to attach the pipe of the heating system to the grid. The pipe is fastened to the mesh with plastic clamps.
We suggest you familiarize yourself with: Do-it-yourself bath floor: wooden and concrete, insulated, cold, leaking, sealed, warm
The mesh itself is attached to the floor through the expanded polystyrene plate to the floor slab. For fastening, dowel-nails of a certain length are used (depending on the thickness of the heat insulator), which are connected to the mesh through a metal mounting tape.
Types of floors in the apartment and features of their insulation
If the decision to insulate the floor is made, first of all, you should decide on how exactly the floors are arranged in a particular house. The method of thermal insulation and the choice of insulation depend on their design.
There are the following types of floors:
- reinforced concrete slabs, prefabricated or monolithic;
- overlapping on wooden beams;
- floors on the ground (first floor).
The last two categories are, of course, not as common as reinforced concrete, but in old houses this is not at all a rare case. Wooden beams are perhaps the most problematic option. As a rule, houses with this type of flooring are quite old and the condition of the floor structures is not very good. Many units have to be completely changed, a new floor has to be laid on wooden joists.
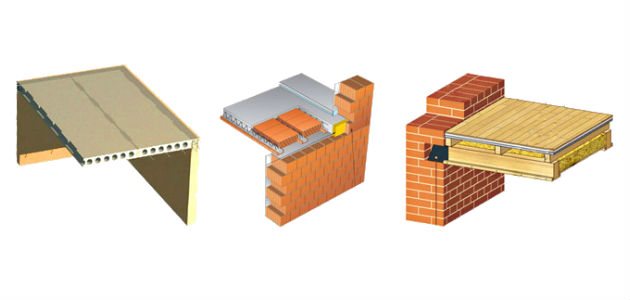
Reinforced concrete floors are the easiest and cheapest to insulate. There are a lot of constructive options for insulation.
Laying linoleum
Installation of linoleum on a concrete surface can be carried out using one of two technologies. The first involves the use of mastic, the second - a special glue. Mastic is used most often, as it is moisture resistant, durable and allows waterproofing.
If you purchased linoleum on a fabric basis, then you should use a bituminous synthetic or dispersion adhesive mastic. Application is carried out in a layer up to 0.5 mm. If the topcoat has a heat-insulating base, then for gluing it is necessary to stock up on dispersion glue, the thickness of which should be 0.7 mm during application.
If you are faced with the question of how to properly lay linoleum on a concrete floor, then you can also use special adhesives for this decorative material. They are elastic and exclude flaking under stress. After choosing the adhesive composition, it must be evenly distributed over the surface with a notched trowel. Linoleum is spread sequentially, it must be pressed to the floor surface with a roller or brush. Drying times may vary.
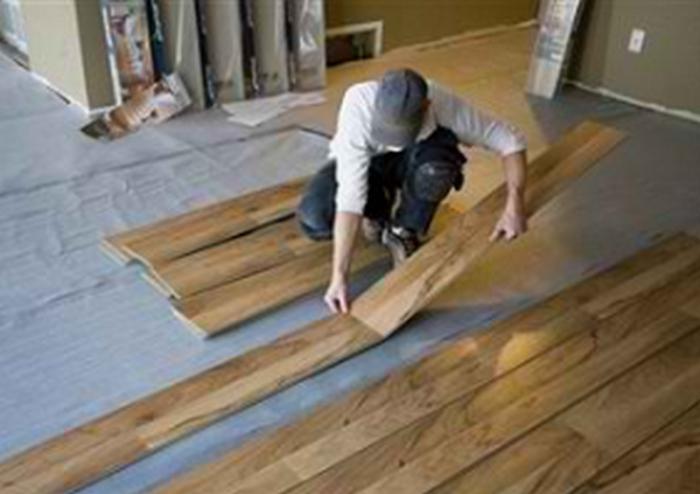
How to make a wooden floor on a concrete base - a simple and straightforward installation guide
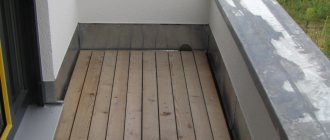
The popularity of wood flooring has not diminished for centuries. Despite the emergence of the latest technologies, self-leveling polymer floors are not able to compete with them. You can do the flooring of a wooden floor with your own hands, if you take into account all the nuances of the work.
The demand for the wooden coating shown in the photo is explained by the properties of natural wood - this is environmental friendliness, the absence of chemicals, a feeling of warmth coming from natural wood.
What should be the lag section
The strength of this part of the floor depends on the material of manufacture and the accuracy of the load calculations. When choosing the size of the timber, the maximum permissible floor load is taken as a basis. For living rooms, this figure is - 300 kg per 1 m2. For non-residential premises, it is individual in each case, therefore, before purchasing the material, you need to calculate this indicator.
We suggest that you familiarize yourself with: Which Frame is Better to Mount the Lining: Making a Choice
Basically, a beam with a profile aspect ratio of 1.5 x 2 is laid under the floorboard.
It is necessary to select the height of the beams taking into account the thickness of the insulation. If iron and concrete elements are installed, then their cross section may be smaller. This is due to the fact that these materials are able to withstand high loads for a long time.
Using glue
The wooden floor can be laid on top of the glue mixture. In the presence of loose and cracked concrete, reinforcing soils should be used. Alternatively, the surface is covered with a release liner. When a massive wide board is to be laid, a modified one-component elastic polyurethane compound is used for gluing the boards. When using blocks of engineering or solid boards, the work is carried out using polyurethane two-component glue.
If you are faced with the question of how to lay the floors on a concrete floor, then you must follow a certain algorithm. The room is measured and the boards are cut according to these parameters. It is necessary to start manipulations from the wall opposite the entrance. An adhesive is applied to the surface of the base, which is spread with a notched trowel. The layer thickness should be 3 mm.
A board is laid on the surface and pressed over the entire area. With this technology, it is necessary to lay about three rows of boards. Docking should be done sideways and lengthways, for this you can use tie wedges or straps. As soon as the polymerization of the glue has been completed, you can proceed to the installation of the remaining boards, the elements of the last row are cut to the width. Leave a 15 mm gap between the covering and the walls.
Tips for choosing insulation
- If the floor of the apartment made of planksthat you don't want to change is a great option. insulation with mineral wool. This way you can get the job done quickly and save some money. To avoid confusion with boards that will need to be dismantled and then placed in the same order, mark them with chalk.
- In the case of replacing floors after they have been insulated, use one of the types as a heat insulator foam.
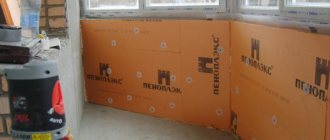
- When the floors in the apartment are made of ceramic tiles, laid on a concrete screed, or covered with linoleum, see if there is additional space to put insulation in it and create an additional screed. If there is such space, insulate floors with expanded polystyrene.
- If it is not possible to put a denser layer of insulation, use materials that are suitable in size for your room. It can be soft fiberboard panels or drywall.
- Regardless of the material chosen, before insulation pay attention to the concrete base. It must be airtight. If there are gaps, they must be sealed with polyurethane foam.