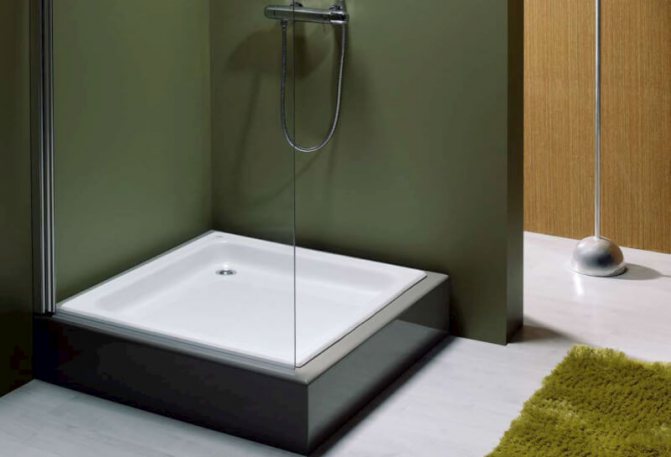
Dismantling a bathtub and replacing it with a shower cabin is a very common solution today, allowing you to give a small bathroom a more or less decent look.
This work is not difficult and to cope with it, you do not need to be a hereditary plumber. In this article, you will learn how to install a shower tray.
What are pallets
In the network of large construction supermarkets, specialized stores and warehouses, pallet models are presented for different tastes and capabilities of the buyer's wallet. These are samples of both domestic and leading foreign brands:
- Ravak;
- Kolo;
- Timo;
- Cersanit;
- Apollo.
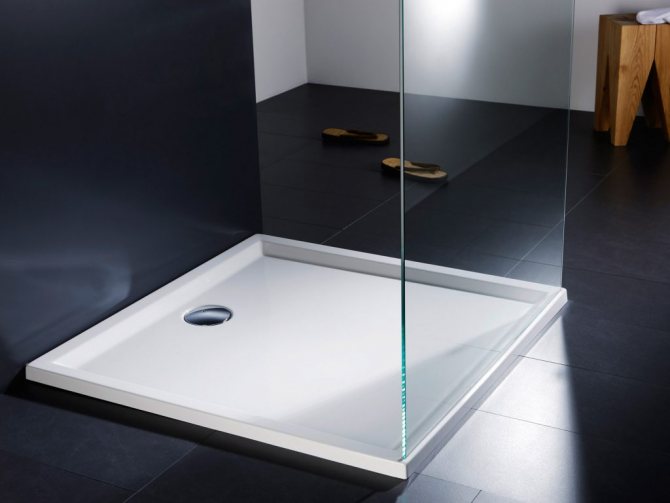
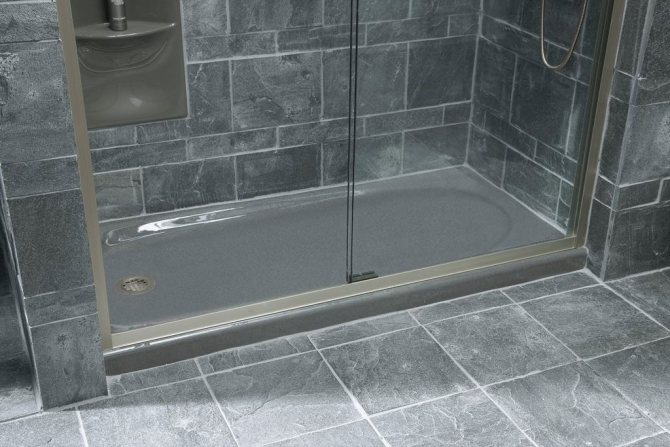
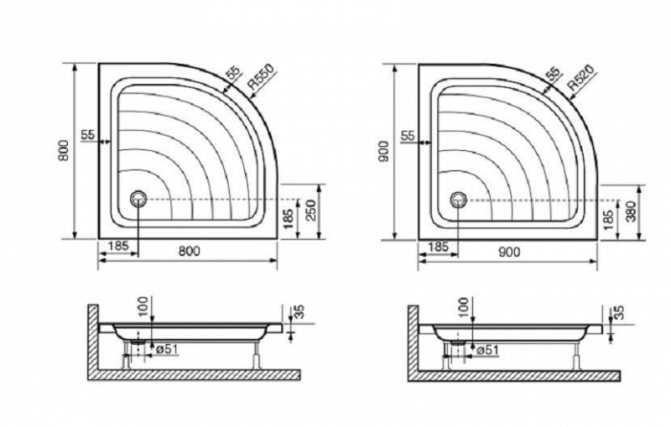
Shower trays are classified according to shape, height and materials of manufacture. Structurally, they are divided into:
- Super flat with a height of 6 to 10 centimeters;
- Flat from 10 to 18 centimeters;
- Deep from 25 to 35 centimeters.
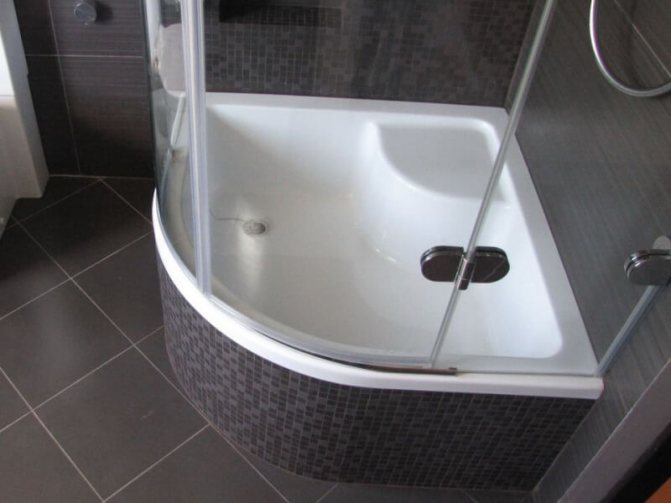
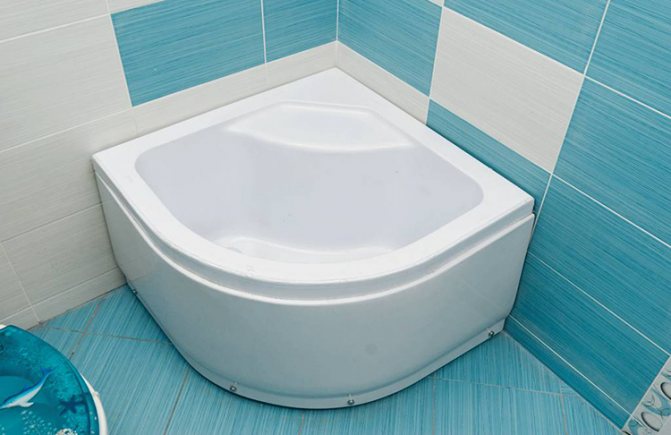
Among them you can find models of round, rectangular or free form. The most popular in the assortment are round and quarter-circle models. The latter option is very convenient for installing a shower enclosure.
For the manufacture of these plumbing fixtures used:
- Marble;
- Cast iron;
- Steel;
- Ceramics;
- Acrylic;
- Kvaril.
The most expensive and durable are, of course, marble pallets. After them, on the next step are cast iron and steel. Since they also have a fairly high strength reserve. Ceramic products are more vulnerable to mechanical stress, although they are highly decorative.
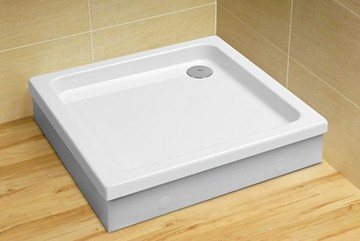
The most common, convenient and budget option is acrylic. Such pallets have an impressive weight, are equipped with special brackets, adjustable legs and a fastening system. However, with all its positive advantages, the installation of an acrylic shower tray has its own characteristics.
Materials (edit)
Pallets are made from different materials. Let's get acquainted with their features.
Metallic
Pallets made of carbon steel of different grades are called steel. The susceptibility to corrosion directly depends on the steel grade. If there are chips of enamel on such a pallet, rusty spots are observed in the place of defects and around them. With prolonged use of a damaged product, corrosion can lead to a through hole through which water will seep into the foundation and gradually destroy it.
We suggest that you familiarize yourself with the difference between a visor toilet bowl and other varieties and how to choose and install it correctly
Steel pallets are made by stamping, so the material is in a stressed state, which causes deformations and destruction of the integrity of the enamelled coating. Cast iron is more preferable when choosing a metal tray, it is an alloy of iron with carbon. A feature of the manufacture of cast iron products is the fact that they are produced only by casting with subsequent heat treatment. Such a product turns out to be heavier, stronger and more durable.
Acrylic
These are some of the most affordable types of shower trays. A beautiful appearance of a glossy surface, lightness, a wide variety of shapes and colors - all this attracts when choosing a shower tray or cabin. The disadvantage of this material can be considered its possible yellowing and dullness with improper care or the use of low quality acrylic by the manufacturer.
Ceramic
With no less aesthetic appearance than their acrylic counterparts, ceramic products last much longer. It is easier to look after them.A high price and a lot of weight can be taken as a disadvantage. But this pays off in their long service life.
These products are made by casting from polymer materials. Visually, these products resemble natural marble or granite. Easy maintenance, lack of habitat for fungi and bacteria, beautiful appearance, immunity to temperature changes, lack of deformation - this is what brings buyers to them. The only drawback of such products is their rather high price.
A natural stone
This option is suitable only for those who do not feel sorry for anything they love. They are the most expensive and luxurious. Polished marble or granite is usually used for their manufacture. The downside is the careful selection of cleaning agents that should not contain alkali. When exposed to alkali on natural stone, it can change color.
Materials and tools for installation work
After choosing a shower tray and determining the place of its installation, it is necessary to clearly indicate the method of separating the shower area. It can be a shower stall or a curtain with a bar. To solve the question of how to install a shower tray and further work with your own hands, you must definitely have a certain set of consumables in the form:
- Sewer pipes;
- Plastic dowels;
- Plugs;
- Self-tapping screws;
- Penoplex;
- Cement;
- Silicone sealant;
- Sand.
Of the tools you will need:
- Screwdriver Set;
- Marker;
- Perforator;
- Building level;
- Screwdriver;
- Construction trowel.

Assembly and installation
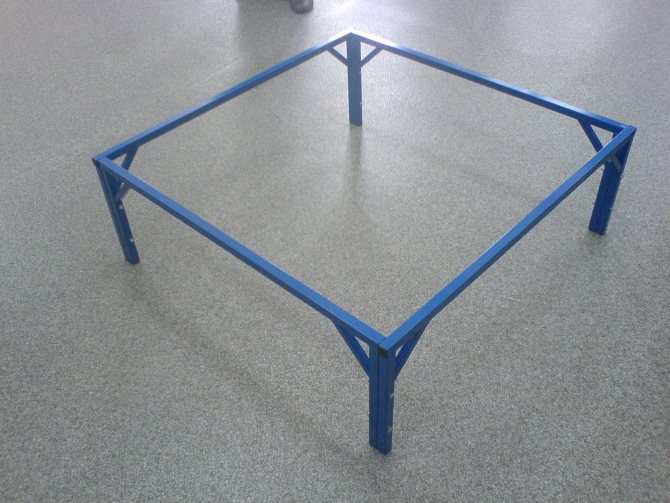
1. Attach the legs to the bottom of the pallet as shown in the photo. Measure the panel height in advance and set the required leg length so that the panel fits under the pallet. Do not remove the protective layer from the pallet to avoid scratching it.
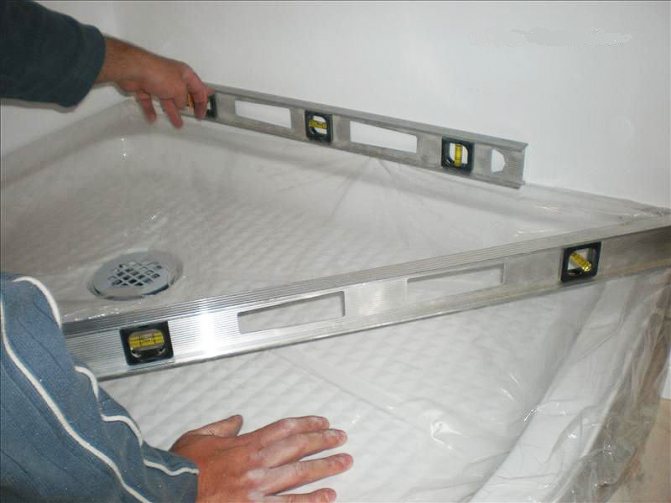
2. After installing the legs, check the horizontal plane with a building level. Apply the bubble level from different sides - along the sides of the pallet, and diagonally.
3. Screw on the side panel brackets.
4. Place the drip tray in the corner of the bathroom, and check again if it is level. Adjust the feet again if necessary. Try on if the side panel fits, do a trial installation of the panel, and then remove it.
5. Use a pencil to mark the drain on the floor. At this point, you will install a siphon.
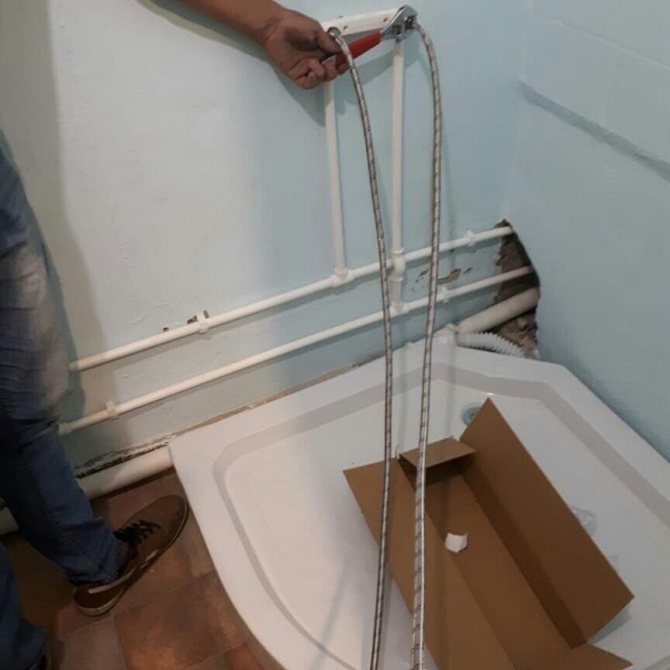
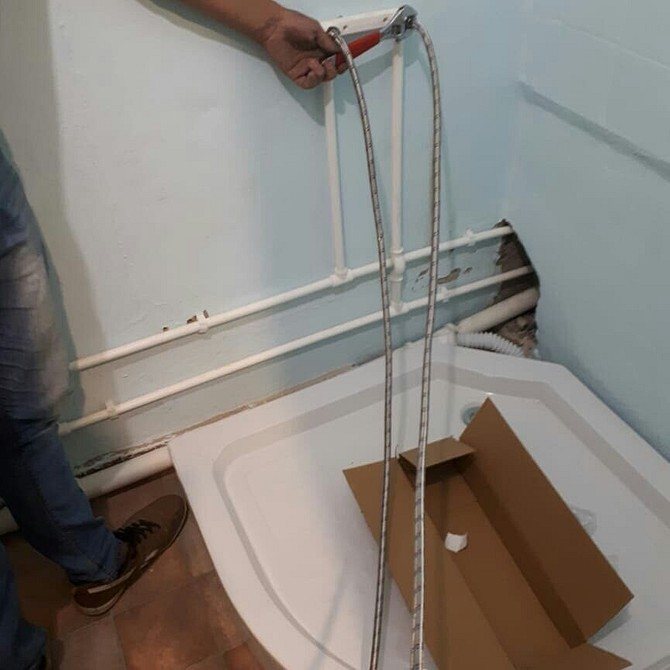
6. Connect the lower part of the siphon with a flexible pipe to the sewer drain. Typically, the drain in the sewer pipe has a diameter of 50 mm, the same diameter is the pipe. Remember to observe the slope towards the drain.
7. If the tube is too long, cut off the end with a metal saw. Smooth the edges after cutting with a knife or sandpaper. To facilitate connection, grease the ends of the sewer pipes and gaskets with dishwashing liquid.
8. Carefully place the gasket on the bottom of the siphon.
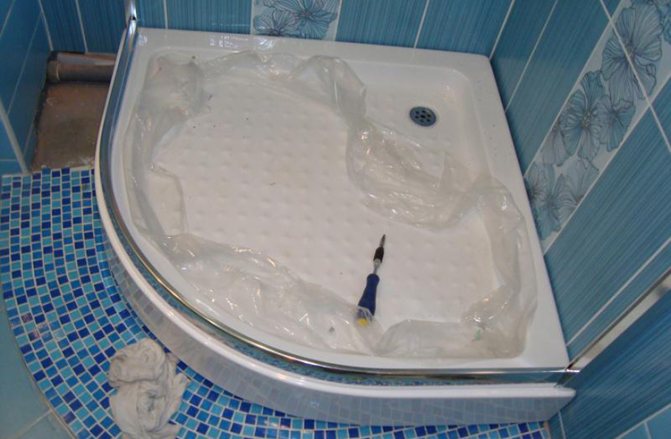
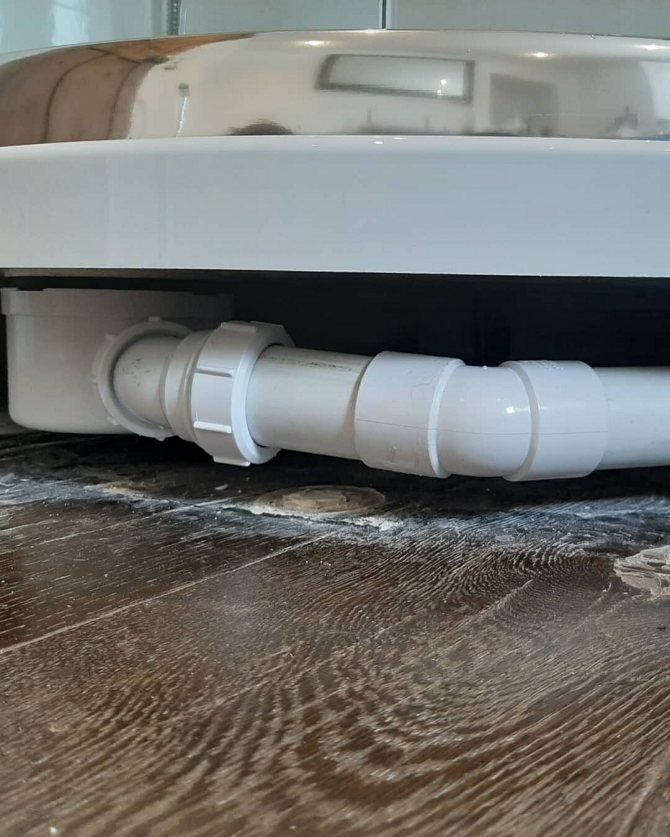
9. Install the pallet in the desired location as shown in the photo. You can apply silicone or assembly glue and thus glue the pallet to the wall. Some models may have mounting brackets, which must be screwed to the wall with dowels.
10. Insert the upper part of the siphon into the drain hole and connect it to the lower part previously connected to the sewer. Remember to install the gaskets in the correct order (this depends on the type of siphon). Be careful not to damage the gaskets. Insert the rest of the siphon and the top cover. You can now remove the protective film from the pallet.
11. Fill the siphon with water and check if water is sucked well into the drain. If the floor remains dry, installation can be continued.
12. Glue the feet to the floor to keep the pallet from moving during use. Apply silicone with a gun around the legs and rub with your finger.
13. Press the side panel latches.
fourteen.Wipe dry and tape securely to the edges against the walls and the edges of the side panel against the walls and the floor.
15. Fill the gap with silicone. Squeeze the silicone out of the gun along the entire length of the crack, then smooth out the seam with a rubber trowel or finger.
16. Peel off the molar tape immediately while the silicone is still wet.
17. Do not use the shower tray within 24 hours until the silicone is dry. Then you can mount the cab.
Preparatory stage before installation
Before installing the shower tray, the bathroom needs to be completely renovated. The scope of work performed should relate to:
- Wall decoration;
- Installation of water pipes;
- Electrical wiring gaskets;
- Sewer pipe system installations.
It is important here that the hidden electrical wiring, which is needed to equip the shower stall, does not have twists, and is protected from dampness. Couplings, water pipes, sewer pipes, adapters must be reliable and have high quality characteristics. Before starting installation work, all outlets of water and sewer pipes must be closed or plugged so that construction debris does not get into them.
DIY shower tray - step by step diagram
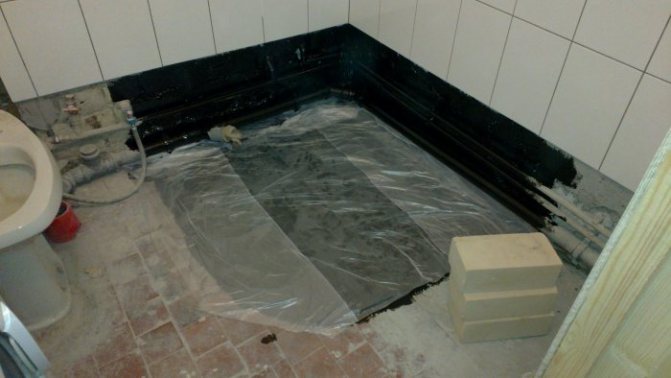
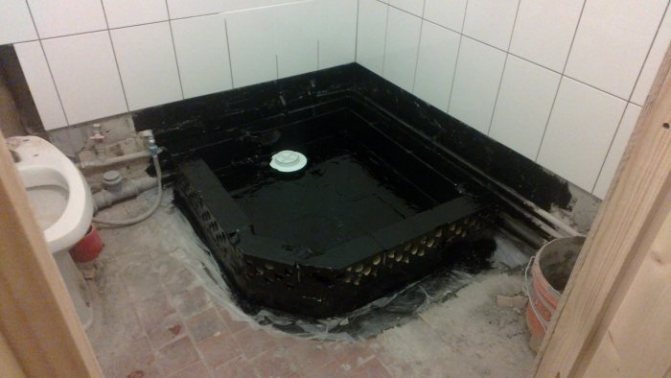
Step 1: waterproofing and sewerage
The location of the home-made cab must be waterproofed to a height of about 30 cm. For this, a sealant, fiber rubber or other compounds, the choice of which is more than wide, is used. The sewer pipe is brought out to the very center of a homemade pallet, so it is easier to drain. All elements of the sewage system must be carefully glued and checked for leaks before installation. The outlet sewer pipe should protrude 12-15 cm above the base level of the floor. Do not forget to carefully seal the pipe so that debris or other foreign objects do not get inside.
Related article: Combined laminate. The right approach and scope
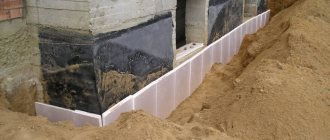
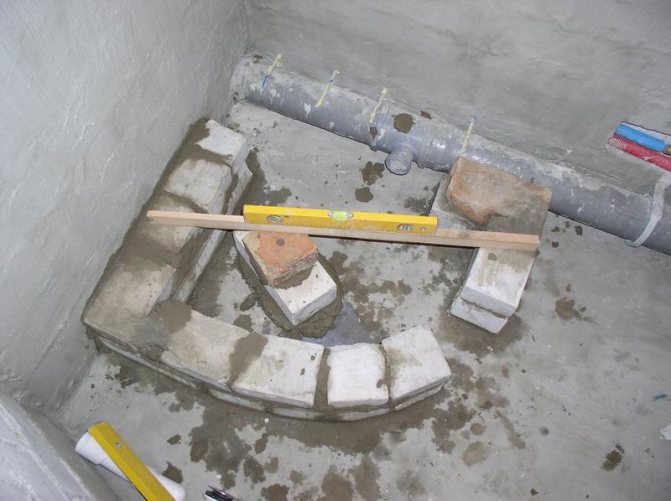
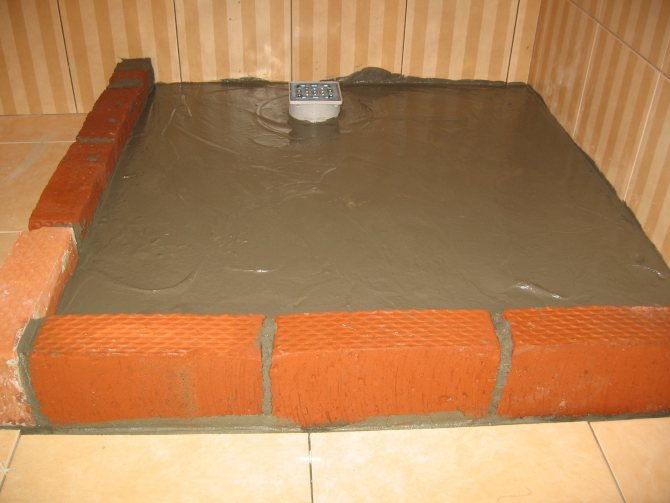
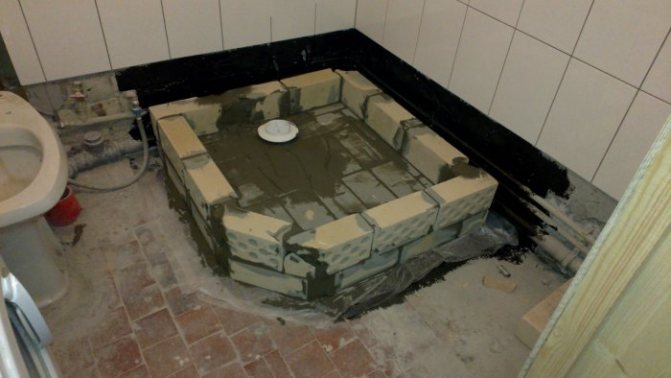
Step 2: lay out the barrier
Having installed the shower tray with our own hands, we lay out a barrier of bricks around its perimeter. The barrier line should correspond to the walls of the future car. The height of the brick perimeter is at least 5 cm higher than the level of the drainage pipe. Sharp brick corners are unacceptable, so you will have to work with the mortar and smooth them carefully. The mortar is prepared to be moisture resistant and durable, it can be kneaded in a medium-sized container with a trowel and spatulas without involving shovels - large volumes of cementing are not planned. When mixing the solution, the ratio of cement and sand is maintained at 1: 1, with the obligatory addition of liquid glass for water-repellent qualities.
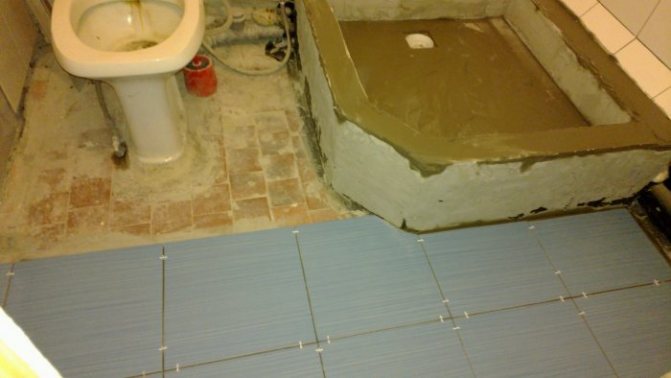
Step 3: fill the floor
Pouring the floor under a homemade pallet is performed in three stages. First, using a self-leveling cement mixture, a basic fill is made - even, from wall to wall, with a thickness of about 5-8 cm.After it dries, the entire surface is treated with waterproofing - Fiberpool, Decoprof, etc., in two layers.
When the waterproofing layer has dried, a mortar of tile adhesive and cement mortar is mixed. It is applied in concentric circles, gradually raising the level from the drain hole. This work is painstaking. It is necessary to maintain the same radius of curvature, a rough transition cannot be hidden under the finish. The cement surface must be carefully wiped clean, getting rid of roughness and miniature steps.
Features of installing acrylic appliances
All pallets for installation are equipped with adjustable feet. Particular attention must be paid to strengthening the foundation of any such product. Most acrylic shower structures have a weak point in the center, as there is very little external support.Therefore, if improperly arranged, this part can crack and cause a lot of trouble.
There are times when the frame mount is based on the two outer legs. Then additional supports must be made independently. They can be made with your own hands from a rectangular steel pipe or brick. For the direct installation of the trough of this plumbing product, such a foundation must be covered on top with a thick rubber gasket to ensure soft contact between acrylic and brick.
Assembly
The pallet itself must be assembled upside down. At the same time, observing the following sequence:
- Studs are screwed into the seats of the trough, onto which nuts and washers are screwed;
- A cruciform support is put on the studs;
- A foam cushion is placed between the base and the support for cushioning;
- The central leg is fixed in a short support;
- The entire support system is attached with self-tapping screws screwed into wooden blocks.
The assembly technique, connection of the drain and the wastewater drainage system is detailed in the instructions from the manufacturer.
Installation
The main thing in the installation of the entire system is to provide additional structural strength, which will be provided by brickwork on cement mortar. It is necessary to install acrylic sanitary ware with your own hands on a flat horizontal surface. To provide access to the sewerage system, it is necessary to leave an assembly gap between the floor and the "ceiling" of the pallet.
It is necessary to set the pallet with your own hands strictly according to the level. Since only perfect installation will provide a reliable drain, and water will not accumulate in the corners of the pallet.

"Pie" of 8 layers
I leveled the surface of the slab at the base of the future shower tray by filling it with a self-leveling mixture for the floor, after which I fixed sheets of insulation - extruded polystyrene foam on it with tile glue. I selected the thickness of all layers in accordance with the design of the drain: its grate should eventually be 1–2 mm below the surface of the pallet.
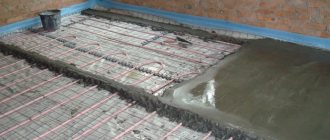
Finally, I set the drain of the shower tray to the level and laid a plaster mesh over the insulation, securing it with self-tapping screws. I installed beacons and filled in a cement screed (photo 2). After gaining strength with cement (after 3 days at a temperature of 20 ° C), I once again missed all the corners and joints of the planes with fiber rubber for additional waterproofing, and after it dries, I putty with tile glue.
Photo by the author
To make the shower really comfortable, and the splashes of water dry out faster, I decided to make a heated tray. To do this, on top of its surface and over the entire area of the bathroom, I laid (photo 3) the electric cable of the heated floor according to the scheme (its total power turned out to be about 1.5 kW) and filled it with a coarse self-leveling mixture (3). It is better to use a special leveler for heated floors - it has a higher heat capacity and is less susceptible to thermal expansion.
Photo by the author
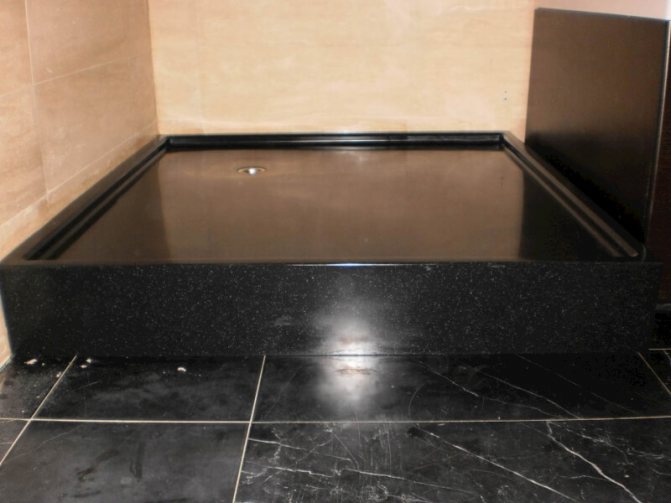
Installation of other types of shower trays
Marble, ceramic and cast iron shower trays are used much less often and are mainly made according to individual orders. However, the steel plumbing fixture is quite popular. Since its final installation is limited to the protective shutter and the installation of the rod for it.
Steel products are also laid on bricks or plastic supports. Sometimes, to deepen them, additional work is required to equip the pit. To insulate the trough, polyurethane foam is sometimes blown into the space under it.
Giving a bias
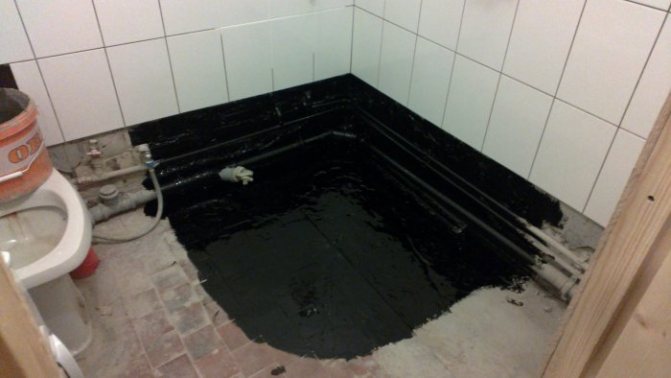
After the first stages were over, I started the final shaping of the pallet bed. I primed the concrete surface of the screed with acrylic primer, and after it dries out, I began to form a slope of the surface of the pallet towards the center of the shower stall.To do this, using a laser level, I marked the upper line on the walls and laid out from a thick coarse leveling mixture and tile glue a small funnel with very sloping edges and a drop to the center for a natural outflow of water. I made the angular barrier of the shower tray rounded, harmless using a template from a half of the ventilation pipe.
The base for the shower tray was ready. For insurance, I covered it with two more layers of waterproofing, each 2-3 mm thick (photo 4).
Photo by the author
We make the shower area ourselves
To equip a shower corner, you do not need to purchase a branded pallet, but make it yourself. Of course, it will take a little more time and labor, but the result will satisfy all the desired ideas. Such work can be performed not only in a private house, but also in the bathroom of an ordinary apartment.
Consider the main stages of self-arrangement of a shower tray:
- First you need to decide on the installation location.
- Next, carefully prepare its base, which must be treated with a waterproofing layer.
- To keep the floor warm, an electric underfloor heating can be laid under the final screed.
- After the waterproofing layer has dried, the contour of the brick pallet is formed, which is attached using special mixtures or cement-sand mortar.
- Then the place of discharge is determined, a water drainage system is installed.
- Subsequently, a rough screed is poured, which, at the end of drying, is again covered with a layer of waterproofing.
- Next, a self-leveling mixture is applied to a dry surface, and a smooth depression is made around the drain.
- After the self-leveling mixture has dried, a layer of waterproofing is again applied to it.
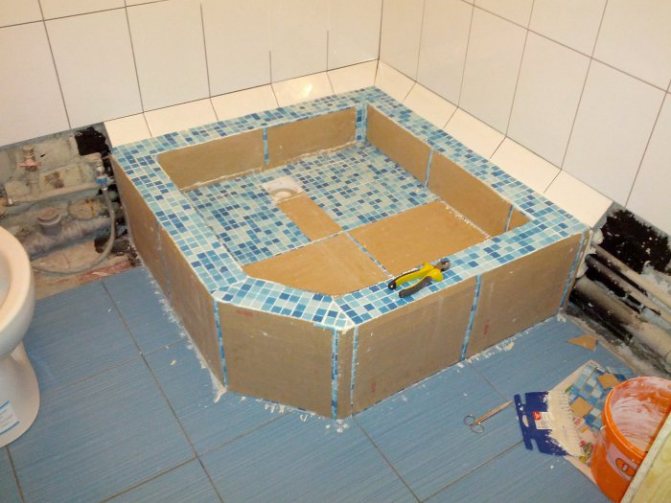
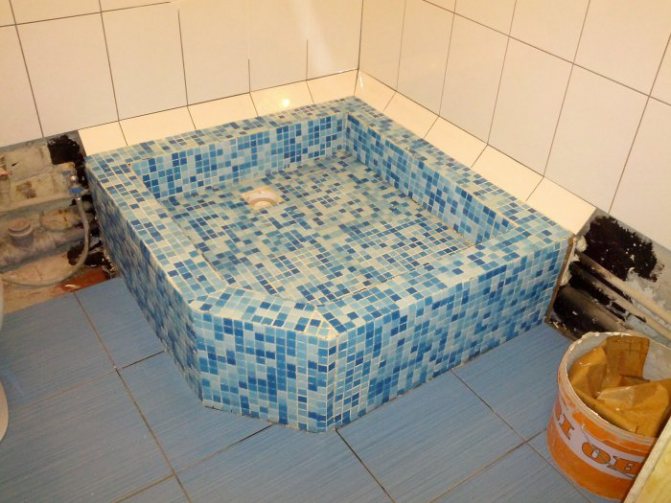
- The final stage will be the facing of this area of the corner with ceramic tiles or mosaics.
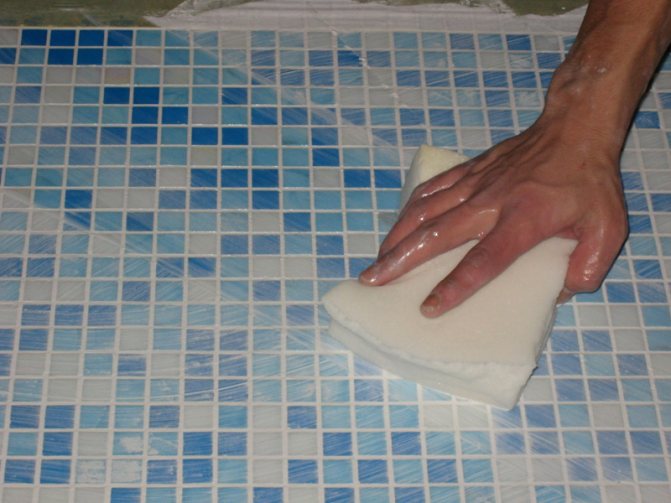
After grouting the tile shower tray, it will be finally ready for use.

Site preparation - We process with waterproofing
The second step of installation - we put additional insulation
Third step - start laying the edges of the pallet using bricks or similar materials

The fourth step - we process the masonry with waterproofing
The final stage, when we plaster the pallet and finish it with tiles


Initial data
The room for the shower cabin was allocated between the outer wall of the house and the inner partition - the wall of the sauna. Water from it will be discharged into the septic tank through a sewer pipe with a diameter of 110 mm, which was installed in advance during the installation of the foundation and floor (the latter is from a concrete slab).
On the aerated concrete walls of the shower stall, covered with moisture-resistant cement plaster and then with a layer of fiber-rubber waterproofing (in several passes), we glued ceramic tiles (we used moisture-resistant, frost-resistant tile adhesive). The level of the lower tiles has been calculated so that there is a gap for the sandwich pallet structure.
Photo by the author