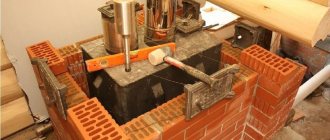
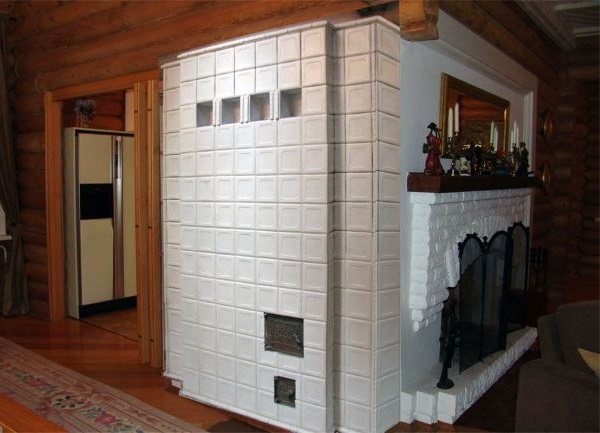
Many private houses, mini-hotels, small cafes and restaurants still use solid fuel fireplaces and stoves to heat and comfort the interior.
Ensure efficient combustion of wood or coal, exclude the ingress of gas products into the room by covering the surface with facing material, which is most often used as a tile.
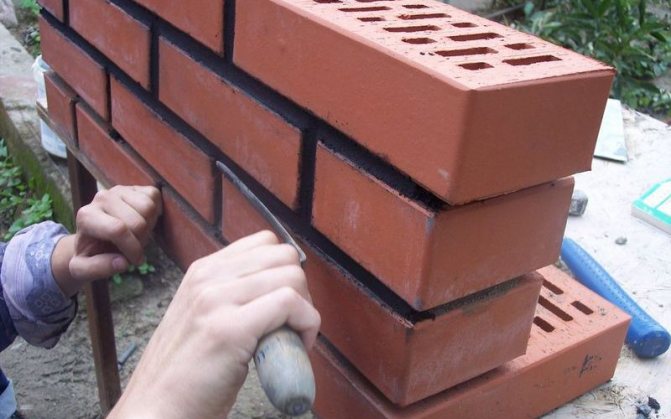
After laying tiles of any type, the space remaining between them needs to be repaired, as the builders say - to grout. To do this, you will need a heat-resistant grout that can withstand heat without losing its integrity and appearance.
What is grout for?
This building material is used in the last stage of working with tiles. When all the details are laid out and the glue is dry, you can proceed to the aesthetic design of the joints between the tiles.
Grout serves as a kind of barrier against moisture and dust. By sealing the seams with this material, you guarantee the safety of the tiled surface.
If in the process of work the seams turned out to be sloppy or have different widths, you can easily fix this defect with the help of a rubbing compound. It is enough to choose a tone as close as possible to the color of the tile and imperfections will not be conspicuous.
And if you are thinking of making an unusual design, grout will also help with this one. You need to choose a shade of the product that will differ significantly from the color of the tile. Thus, you can achieve an unusual design in the interior.
Stoves part 3.
How much clay solution is required for laying a stove? On average, when laying stoves, 3 buckets of mortar are required for 100 bricks.
How to determine the quality of the clay? The quality of the clay can be tested in three ways. First method 0.5 kg of clay should be mixed with a small amount of water, knead the clay with your hands until it stops sticking to your palms. After that, you need to roll two balls with a diameter of 4-5 cm and make a cake with a diameter of 10 cm from one of them. The cake and the ball should be dried at room temperature for 2-3 days. If, after drying, no cracks appear on them, and the ball does not crack when dropped from a height of 1 m, the clay is considered suitable for preparing a solution. Second method 2-3 kg of clay should be poured with water and mixed thoroughly with a wooden stick. If the clay completely envelops the stick, it means that it is greasy and needs to be mixed with sand. If only individual particles of clay remain on the stick, the latter is considered normal, and a solution can be made from it without adding sand. If the stick is covered with a thin layer of clay, then it is skinny and should be mixed with greasy clay. The third method 0.5 kg of clay must be mixed with water until a thick dough is thickened, kneaded thoroughly with your hands, and then a ball with a diameter of 4-5 cm should be rolled up.The ball should be placed between two smooth boards and pressed on the top until it appears on the clay cracks. Even with weak pressure, a ball of skinny clay will crumble or crack when compressed at Y4 of its diameter. If the clay is normal, during compression, cracks are formed at Y3 of the diameter of the ball, the earth is oily, - by 1/2 of the diameter.
After checking the balls for strength from the same clay solution, you need to roll out with your hands flagella 1-1.5 cm thick and 15-20 cm long, bend them into a ring around a round and smooth wooden stick 4-5 cm in diameter. thin out smoothly and gradually, and the ends in the place of its breaks will be sharp. When bent, such a flagellum does not form cracks. A flagellum made of normal clay will stretch smoothly and break off when its thickness at the point of rupture becomes 15-20% less than its thickness.When bent, small cracks are formed on such a flagellum. A skinny clay flagellum will not stretch well, the edges of the gap will be uneven, and when bent, many cracks will form on the clay.
How to prepare a clay mortar? Clay mortar can be prepared in three ways. Method 1 1. Soak the clay for 2-3 days in a large wooden box upholstered in tin. 2. Put on rubber boots and, gradually adding sand, tread the mixture until the lumps disappear. 3. Stir the solution with your hands, crushing the remaining clay lumps. 4. Apply the mortar on the brick with a layer of 3-4 mm, put a second brick on top, press it down, and after 5-7 minutes raise it: if the brick does not come off, the mortar is prepared correctly. The second method 1. Make a boardwalk or board 1.5 x 1.5 m in size, sprinkle clay on it, wetting each layer with water. 2. When the clay softens, shovel it, collect it in a heap in the form of a narrow bed 30-35 cm high. 3. Use the edge of a wooden shovel to strike the bed, as if cutting off the plates from it. 4. Shovel the clay again, collect it in a garden bed and, striking with a shovel, stir again. 5. Repeat this operation until all the lumps are broken. 6. Strain the solution.
Third method 1. Pour clay into the box, wetting each layer with water. 2. Pour water on top and leave the solution for several hours. 3. Thoroughly mix the clay and strain through a 3 × 3 mm sieve. If the solution is too thick, add water.
What tools do you need for oven work?
| Instruments | Using |
| Folding meter | Taking various measurements |
| Roulette | Measuring irregular parts and uneven surfaces |
| Gon | Checking machined parts at right angles |
| Spirit level | Checking the level and verticality of the surface |
| Flexible level | Checking, transferring and fixing horizontal marks |
| Plumb line | Installation and testing of vertical beacons |
| The rule | Measuring and checking the correctness of the masonry |
| Trowel | Brick and stone laying and plastering work |
| Pick hammer | Chipping and stripping bricks during preparation for laying |
| Embroidery | Sealing and careful processing of seams, that is, giving them a certain shape |
| Mortar shovel | Preparing, stirring, serving and leveling the mortar |
| Poluterok | Compaction and leveling of mortar on the surface |
| Grater | Grouting and smoothing irregularities on the treated surface |
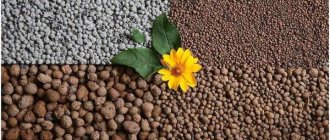
How to prepare refractory concrete? Heat-resistant concrete has the following composition: - cement grade 400-600 - 1 part; - crushed stone obtained from red brick - 2 parts; , - quartz sand - 2 parts; - fireclay sand - 0.3 parts. For the production of blocks used for laying fireboxes, the composition of heat-resistant concrete is different: - cement grade 400-600 - 1 part; - crushed stone from refractory bricks - 2 parts; - sand - 2 parts; - fireclay sand - 0.3 parts.
How to make a lime mortar? To prepare such a solution, the milk of lime must be filtered, combined with sifted sand, mixed and poured in water until the desired consistency is obtained. For 2-3 parts of sand, 1 part of the lime dough is required. To increase the strength, cement is introduced into the solution, and to reduce the setting time when performing plastering work, gypsum.
Where to place the oven? As a rule, heating stoves are located closer to the front door, near the main wall. This is necessary for the chimney device. If it is planned that the stove will heat one room, it is located at some distance from the wall, increasing the number of heating sides, which consumes less fuel. In this case, the distance between the walls of the furnace and the house should be no more than 2m - the length of the crossover sleeves to the smoke channel cannot exceed this distance. In a house with several rooms, the stove is positioned so that it evenly warms up all the rooms.In a house with two adjacent rooms, the stove is arranged in an internal partition. This facilitates the construction of the chimney. This arrangement of the stove is also suitable for heating three and four adjacent rooms.
Does the oven need a foundation? Stoves weighing up to 750 kg can be placed directly on the floor, which must be solid. Heavier furnaces are erected on a foundation, which, depending on the type of soil, is placed 0.5-1 m below the soil level. The top layer of soil 10-15 cm thick is preliminarily removed.
How to complete the foundation? First, they plan the location of the stove, its reversal relative to the walls of the room, the possibility of bringing the pipe through the ceiling and roof without disturbing the ceiling beams or rafters. Since the foundation is laid inside the building, the depth of its laying should be less than the depth of the foundation of the walls of the house. It is desirable that it is located at a distance of 5 cm from the foundation of the walls. Sand is poured into this gap. The dimensions of the foundation are 5 cm larger than the dimensions of the furnace in all directions. They dig a pit 5-10 cm deep more than the height of the foundation. Its sole is leveled. If a very solid foundation is needed, it is made of rubble stone, brick or concrete. In wet soil, masonry is carried out on a cement mortar, in dry soil - on a mixed one. A solution is poured onto the bottom of the pit and, after it seizes, the outer rows of stones are laid out with bandaging of vertical seams. The top is leveled with brickwork flat in two rows. The last row is made of burnt bricks and covered with cement mortar. It should be noted that the top of the foundation should not reach the floor level for 3 rows of masonry. The walls of the foundation are reinforced with concrete or wooden beams, after which they must be waterproofed. When constructing a foundation, it is not recommended to: - tie the foundation of the furnace to the wall of the house; - leave a large gap between the foundation of the stove and the walls of the house.
What are the faces of a brick called? The brick has the following edges:
- beds - the widest surfaces (top and bottom);
- spoon edges - two large side edges;
- butt faces - two small end faces;
- Usenki - sharp edges.
How are the masonry rows indicated? Depending on the faces on which the brick is laid, the rows are called butt or spoon rows.
What is suture dressing? The laying will be reliable if the bricks of the upper row are correctly placed relative to the lower one. This displacement is called suture dressing. It is recommended to move the masonry by half a brick. To perform the dressing, both a whole brick and its parts are used: ¾, ½, ¼.
What is the difference between laying stoves and building walls at home? The difference is that horizontal and vertical joints, even those intended for plastering, must be filled with mortar. Otherwise, flue gases will enter the room through the slots. The mortar is spread by hand, and the trowel is used in the construction of the lower part of the furnace to the level of the hearth of the firebox and the bottom of the smoke channels.
How thick should the seams be? For refractory bricks, the recommended joint thickness is 3 mm, for ceramic - 5 mm.
What seams are used when laying stoves? In the construction of furnaces, the same types of seams are used as in the construction of buildings. The desired shape is given to them with the help of joining. So, to obtain convex seams, concave joining is used, for concave ones - round. Joining is performed before the mortar starts to set.
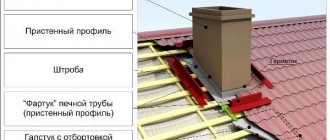
How to fold the oven? First, check the correct placement of the oven. The bricks of the first row are laid out dry and determine where the front wall of the stove will be located. On the same row, the location of the chimney (with a packed pipe) or an outlet duct (with wall or root pipes) is marked.
If the chimney is mounted on, the first row laid on the foundation is taken for the last one, bricks are laid out on it, intended for one row of the chimney, according to the order. After that, plumb lines are lowered from the ceiling on a long cord to the corners indicating the chimney and the place where the pipe will pass through the ceiling is determined, a hole is made in the attic or interfloor ceiling so that there is room for a fire-fighting device (at least 12 cm in all side). It should be noted that the pipe, passing through the roof, must be at a distance of at least 10 cm from the rafters. Next, check the parallelism of the oven to the walls of the room and the evenness of the corners of the first row of masonry. If a T-shaped oven is being built, it will have 8 corners. In this case, the oven is divided into two quadrangles and each is checked. After that, the corner bricks are laid. The masonry of the corners is carried out strictly vertically and is checked using plumb lines. Next, lay out the walls, which can have different thicknesses. Laying bricks in U2 is optimal. To obtain such a thickness, a quarter brick is laid on the edge and shifted so that the seams in the rows of masonry do not coincide. Walls 1 brick thick are made by alternating bonded and spoon rows. A wall of 3/4 bricks is made in 1/2 and U4 bricks, laying them on the edge. To obtain thin walls, use U2 bricks or put a brick on the edge. When performing masonry, you need to bandage the seams. Each row is covered with a whole brick with a slight approach to the sides along U2 of the brick.
Views
By the nature of the components, building mixtures are divided into:
- cement. The main component of such mixtures is Portland cement. There are ready-made diluted grout, or you can choose a dry composition, which should be diluted with water or latex before work.
- epoxy. The composition of such grouts includes epoxy resin and a special component, which then becomes hard and ensures the strength of the joints made. They look much aesthetic, but their cost is more than cement ones. Such compositions require a special application technique, they are not easy to work with.
Joints + sanding
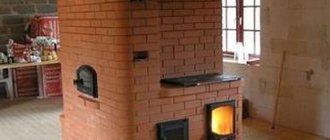
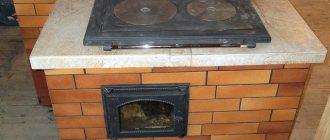
The most effective and reliable way of finishing the stove is, nevertheless, high-quality good brickwork. Just build your stove soundly and no additional cladding is required. Here is such a saving! And in order to lay out the stove soundly, you just need to follow a number of rules:
select bricks without cracks and chips, with smooth edges, the same shades and colors, as well as the same sizes. At the same time, in order for the masonry to be more expressive, it is necessary to remove chamfers on the edges of the brick. Next, we move on to the masonry itself. Here it is necessary to strictly adhere to the straightness and horizontalness of the seams. The seams can also be colored - add mineral dyes of the desired colors to the solution. After laying, the surface of the stove is washed with a cotton rag or foam sponge, and the seams are carefully filled with mortar.
Further, after 2 weeks, when the stove is completely dry, we begin grinding the masonry. Thus, we will eliminate all small defects in the oven masonry and level the rough surfaces of the bricks. After all, as you know (according to the technology), when laying the stove, the smooth front side of the brick turns into the inside of the smoke channels, and the uneven one - to the outside of the stove. Grinding is done either by hand with a coarse-grained emery cloth or with an electric belt sander.
Do NOT use brick fragments or abrasive stones for grinding! You can break the brick surface!
After grinding, the crumbling seams are again filled with mortar, moistened with a brush and embroidered. That's all - the brick oven cladding is ready! You can do nothing else, such a stove will always look cozy and outlandish.
Choosing a grout for the oven
You can buy ready-made grouting mix at any hardware store. Before purchasing it, read the basic requirements for such funds.
Criterias of choice
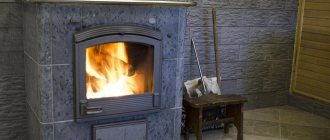
- Heat resistance. This is the main condition when choosing a grout for the oven. After all, the composition, along with the entire surface, will be exposed to high temperatures.
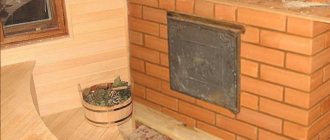
- Resistant to moisture. If the stove is located in a bath, this criterion is required. But even in an ordinary room, moisture resistance is necessary, because the oven coating will be cleaned of dust or stains with a damp sponge.
- Resistant to fading and discoloration.
- The nature of the composition. You can choose a coarse grout, which will give you a roughened effect. Or you can take a fine-grained one, which, when mixed with water, will give a smooth glossy finish.
- Color palette. Match the grout color closer to the darkest or lightest shade on your stove. Or make the ego bright: white grout looks very nice on a black background, or vice versa.
Top brands and their characteristics
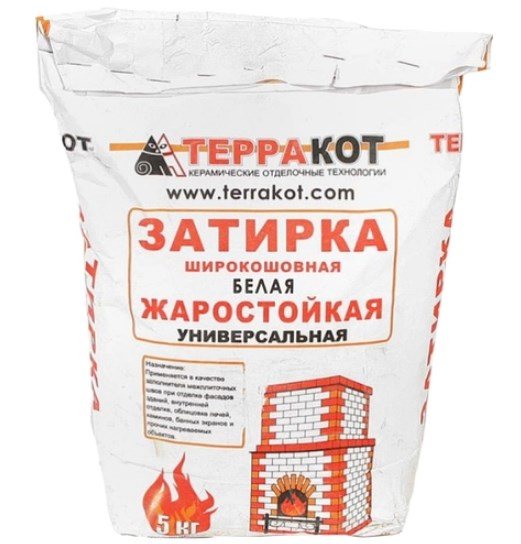
- "Terracotta". White heat-resistant grout for ovens. It is the most suitable and common remedy. The package is 20 kg. Moisture resistant, does not crack. Withstands temperatures up to 400 degrees. You can change the color using color schemes. Price - 900 rubles.

- Isomat Multifill Smalto. Weight - 2 kg. Heat-resistant, frost-resistant, water-repellent. Possesses plasticity, because of this, it is convenient to use. The recommended joint width is up to eight millimeters. You can choose a suitable shade. Cost - 350 rubles.
- PLITONIT Superfireplace ThermoRepair. Weight - 5 kg. The mixture can be used when working with joints on stoves and fireplaces. Heat resistant, moisture resistant, easy to use. Does not crack after drying and during use. Price - 350 rubles.
- Mixonit Fuga KL. For various types of tiles: clinker, mosaics, etc. Heat-resistant, has a water-repellent surface. A construction gun is used for work. Price (depending on color) 600 - 700 rubles.
Purpose of grout
The joint compound (fugue) will eliminate the gaps between the tiles, make the surface even, smooth, neat. Heat-resistant oven grout provides additional sealing of the working space.
Combustion products after incorporation in no way can get into the inner space of the room. This will ensure the safety of residents, eliminate the likelihood of carbon monoxide poisoning.
The internal cavity of the stoves is also treated with a refractory grout for strengthening and sealing. The only requirement for the quality of mixtures for internal embedding is that it must have high heat-resistant properties. The appearance of the inner space of the stove is not visible to anyone and cannot be appreciated.
How to make a grout for the oven with your own hands?
You can also make a suitable mixture at home. To do this, you will need plaster of Paris, a waterproofing fluid (available at your hardware store), and a dye. All components are mixed until creamy.
You can make a grout with clay and cement. To do this, take five parts of clay, one part of cement and dilute them with water.
Very often, the mashing mixture is made from Portland cement and sand, but the durability of such a composition when heated can be significantly reduced.
Recommendations for choosing the right joint
Fugue for tiles has two main purposes, these are protective functions and giving the surface to be tiled an attractive and finished look, corresponding to the general design of the room. When choosing a suitable mixture, you need to study the characteristics of various compositions and at the same time be guided by the following criteria and factors:
- surface operating conditions;
- the type and quality of the material used for the cladding;
- type and condition of the surface (horizontal or vertical);
- depth and width of the processed seam.
Grouting methods
The following methods of applying grouting material to the joints between tiles can be distinguished:
Semi-dry method
When grouting using this method, the composition of the mixture is diluted with a small amount of water. The result is a consistency that resembles wet sand. With the help of special jointing, the mixture must be placed in the seam.
The advantages of this application method:
- low product cost;
- among the components there are no substances that provide plasticity.
Cons of this grout:
- a seam that is less than 5 mm cannot be repaired;
- the color palette is limited only to gray and beige colors;
- The installer must have experience in sealing seams in this way, otherwise the structure will be of poor quality or unaesthetic.
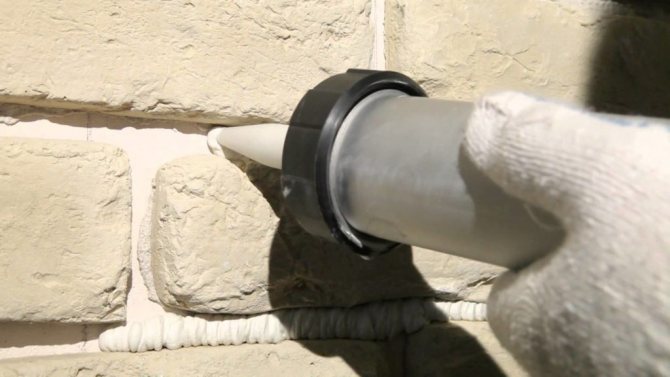
Using a construction gun
The grout is diluted with water and poured into a special construction tool - a pistol. All seams are smeared with a thin tip, and excess funds are removed. For a more dense filling of the seam, you can process the line by pressing the grout with your finger or some kind of tool.
The advantages of the method:
- simplicity and ease of applying the composition;
- you can select the desired grout color.
Disadvantages:
- high price of the composition;
- a special tool is required;
- among the components are plasticizers.
Application of the composition over the entire area of the cladding
The creamy mixture is applied over the entire surface of the tile, then cleaned off with a rubber spatula, and the composition remains in the seams. The oven grout is removed from the tiles with a damp sponge.
Pros:
- long-term operation;
- any kind of tile can be used.
Minuses:
- high price;
- small palette of colors.

How to grind brickwork seams
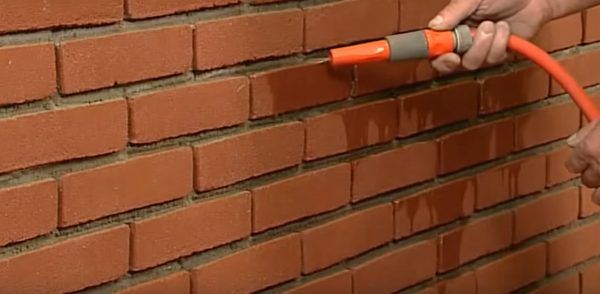
Washing the seams
Grouting can be done not only on fresh masonry. Using this method, you can improve the appearance of an old brick building. This is especially true if the solution in the gaps has already begun to collapse, due to which the thermal insulation of the entire structure deteriorates.
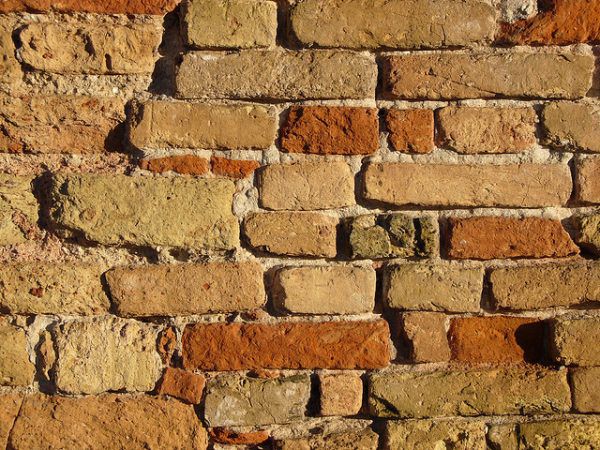
Old brickwork
If grouting is carried out on old brickwork, then you must first remove part of the old mortar (about 1-2 cm). This is done with a chisel and hammer. You can also wash the remnants of the old solution using a special apparatus that acts on the masonry with a powerful jet of water (for example, a mini-high pressure washer).

High pressure cleaner Skil F0150760AA
High pressure washer
The mortar prepared as described above is applied in the usual way inside the gaps. It is important to ensure that during the work, the solution does not fall on the vertical surface of the brick - stains may remain.
Which cladding is not recommended?
The plaster of the stove is NOT DESIRABLE. Clay does not conduct heat well and, accordingly, reduces the heat transfer of the hearth. Moreover, clay is not practical. It cracks and falls off, regardless of the composition of the solution and the experience of the master. For fireplaces, plaster is also not the best option.
It is NOT DESIRABLE to cover ovens with ceramic tiles (tiles) of any kind. The fact is that brick and ceramic tiles have different coefficients. thermal expansion, from which the tile does not stick to the stove, falls off after some hour. Modern heat-resistant compounds for facing hearths (mastics) do not even save. They are very sticky, but when the oven heats up strongly, the tiles still crack and all the fragments fall to the floor. It turns out the same result! Ceramic tiles and heat-resistant compounds can be used only when the surface of the hearth is heated to no more than 80-90 degrees.
There are other methods of lining the furnace with various materials. But when buying this or that material, be sure to ask the supplier for their facing features.
Share on social media networks
0
Tweet
What is used for grouting
What do you need to grout the joints between bricks? Not as much as it might seem.First, you need the grouting solution itself, which we will talk about the creation of a little later. Secondly, we need tools with which all the work will be done.
We suggest you familiarize yourself with the Step-down transformer for the bath
For grouting you will need:
- spatula (trowel);
- "Turntable" for a hammer drill or construction mixer;
- the perforator itself directly for working with the "turntable";
- fine sieve for sifting sand;
- container for mixing the solution;
- the jointing of such a size that its width is equal to the width of the joint between the two bricks. If vertical and horizontal seams have different widths, then two types of this device will be needed.
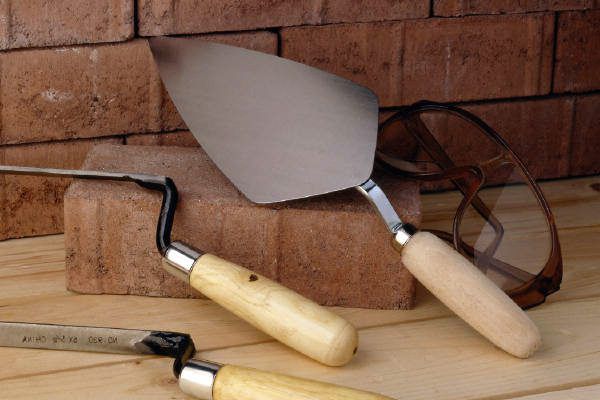
Tool for grouting masonry joints
Construction mixer
Note that the main tools that may be used are listed here. But in some cases, they may not be useful at all. For example, if you do not plan to make a curly gap, then you can simply remove fresh excess cement during laying with a trowel.
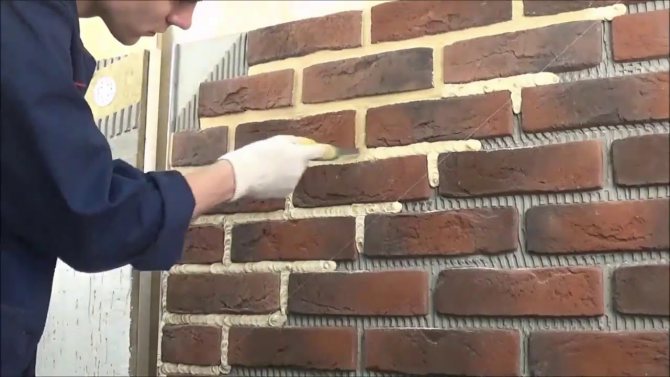
Glazed brick
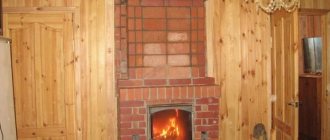
In fact, this is the facing of the stove with tiles. Only here not just a tile is used, but a tile-brick. That is, a brick whose front sides are covered with a beautiful glassy glaze. Such material began to be produced not so long ago, at ceramic factories. It looks very nice.
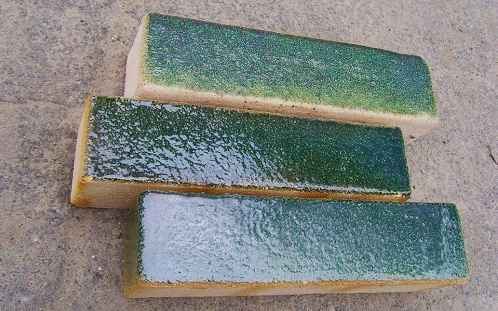
Such a stove, as it were, plunges us into the ancient hours, into the warm Russian huts of our ancestors. At the same time, this finish is ideal for stoves. It does not require a lot of work: just lay out the front sides of the hearth with a tile brick with jointing and that's it. The stove is ready!
Of course, tiles can also be used. But then the facing of the stove with tiles is carried out together with the laying of the hearth. In this case, there will be more work.
Preparing the oven for tiling
High-quality installation and long life of the oven cladding is possible only when tiles are laid on a prepared base.
The need for cladding can be caused by two reasons, and the scope of work for each will be different. However, the overall goal is the same - to give the stove the correct geometric shapes, in which all surfaces are even, and the angles correspond to 90 °.
Note. In addition to the fact that leveling increases the speed of work, it allows you to reduce the consumption of expensive adhesive for laying tiles on the stove.
Option 1: cladding a new (freshly built) oven
Even a structure erected in accordance with all building codes will need preparation. In this case, it boils down to the fact that the surface of the base is cleaned of dust, primed, equipped with a grid and markings. These types of work will be discussed in more detail below.
Note. It is possible to start facing a new furnace only after a month of operation. During this time, it will shrink and show hidden defects.
Option 2: cladding of an old (operated) furnace
This option is much more complicated than the previous one, since it involves more rough work. Therefore, let's consider the sequence in more detail.
5.1 Dismantling the old coating
Stoves installed in the house usually already have some kind of cladding. Often this is plastering followed by whitewashing or tiling. Therefore, before proceeding with the installation of a new coating, you need to remove the old one.
Related article: Arrangement of a plastic balcony door
Dismantling (removal) of plaster from the surface of the furnace
Plaster does not last long on a hot oven. From the high temperature, cracks appear on it or the surface layer moves away from the base. In any case, before proceeding with the cladding, you need to get rid of the decorative coating (remove, clean).
How to remove old plaster from a stove
In practice, there are two methods of removing plaster from the surface:
Forceful method
... It is used if most of the plaster adheres well to the walls of the stove. Its use involves knocking down the plaster using the impact nozzle of a perforator.This method is quick, but as a result, a lot of dust is created and there is a possibility of damage to the brickwork.
The use of a grinder can simplify the work. With the help of a diamond disc, cuts are made on the surface of the furnace. Their depth should be equal to the thickness of the plaster layer. There is nothing critical if the disc goes 10-15 mm into the thickness of the masonry. Further, the removal of the plaster continues with a perforator, hammer or chisel. If removal is still difficult, the craftsmen advise to heat the area with a construction hairdryer and continue working.
Note. Periodically wetting the surface with water will prevent the appearance of dust or reduce its amount.
Gradual cleaning
... The method is slower and involves impregnating the plaster with water and then scraping it off with a spatula.
It is worth noting that some masters recommend leaving the plaster on the stove, provided that it adheres perfectly over the entire area.
Dismantling (stripping) paint from the furnace surface
Applying paint to your stove is an easy, inexpensive way to decorate your stove. But, the painted surface will peel under the influence of temperature and can harm human health (release of harmful substances).
How to remove old paint from a brick oven
Removing paint from a brick surface is not easy. A thin layer is removed with a metal brush. A good help for cleaning paint will be the use of a building hair dryer. A thicker layer in places leaves by itself, and where this has not happened and the adhesion to the surface is strong, notches should be made, for example, with a hatchet.
Note. Special solutions for removing paint have a pungent odor that takes a long time to disappear, and also have a high cost, so users are not advised to use them.
Dismantling (removal) of old tiles from the stove
When the tiles are peeling or wanting to update the oven lining, it becomes necessary to knock the tiles off the oven.
How to remove old tiles from the stove surface
It is recommended to carry out dismantling work from top to bottom. After removing the extreme row, go down to the next one. The tile is removed using a chisel that engages the edge of the tile. In this way, the tiles can be removed without damage. If such a maneuver fails, the tiles must be broken. Split tiles are easier to remove.
Don't be surprised if brick breaks off when you remove a tile. In any case, cleaning a fireplace or stove does not end with removing the old cover.
Attention! Removing the old tiles is carried out strictly in protective glasses, because in the process of work, a large number of sharp fragments are scattered.
5.2 Cleaning the oven wall surface
After removing the topcoat, the entire surface of the stove must be thoroughly cleaned of the smallest residues of the solution. Perfect cleaning of brick walls is accomplished by using a metal brush.
5.3 Deepening joints between bricks
In order for the subsequent layers of mortar to better adhere to the base, you need to take care of removing the mortar and increasing the depth of the seams in the brickwork. To do this, using a chisel, grinder or spatula, the solution is removed from the inter-seam intervals. The depth of cleaning is 5-10 mm.
Upon completion of the work, the surface is once again cleaned of dust and mortar residues with a brush.
5.4 Aligning the oven walls to match the tiles
To prevent the tiles from separating from the base, a metal mesh should be installed on the surface of the stove.
For work, you will need a mounting mesh with cells of 50x50 mm and a wire diameter of up to 1 mm. To fix the mesh, you can use a ceiling dowel with a head (bierbach).
Or you can simply put washers or galvanized pieces on the nails. The main thing is that the hat holds the net securely. The hardware is installed only in the seams. In this case, the nail is hammered, and a hole must be drilled under the self-tapping screw. The mesh fixing step is 500 mm.
The mesh on the surface is installed with tension.Further, the surface of the walls is leveled with plaster. To do this, you can use glue on which the facing tiles will be mounted or a special solution (clay, cement, sand) in a ratio of 3: 1: 0.2 parts.
Recommendation. Users are advised to add PVA glue or any other glue with a low coefficient of expansion to this solution.
If the surface that needs to be leveled has depressions of up to 10 mm, then the solution must be applied in two approaches. The maximum permissible layer thickness is indicated by the manufacturer. In practice, it is better not to make the layer thicker than 5 mm, this increases the time and reduces the uniformity of its solidification. In this case, the second layer is applied only after the first one has completely dried.
Advice. Getting started leveling the walls, the craftsmen advise to heat the stove. The solution should be applied at a surface temperature of 30-35 ° C.
An alternative to the wall alignment grid:
- installation of hardware with hats and pulling ordinary wire between them;
- the use of stretched burlap, previously aged in clay solution. When stacking burlap, it is important to avoid creases and air pockets.
Note. If the surface of the stove is flat, you can exclude the plastering stage, and lay the tiles directly on top of the metal mesh.
5.5 Priming the oven walls
A heat-resistant primer applied with a brush will improve the adhesion of the mortar to the surface. When choosing a primer for stoves and fireplaces, it is better to give preference to deep-penetrating compounds. When the primer is completely dry, you can pre-mark the surface.
Advice. It is possible to reduce the consumption of the primer without changing the quality of the application if you first walk along the surface of the wall with a slightly damp sponge.
5.6 Pre-marking before laying tiles
The surface on which the markings are applied is considered fully prepared for cladding. It involves the installation of beacons that allow you to navigate when performing cladding work.
The markings are applied using a plumb line and level. It is convenient to mark the horizontal line using a cord. A more technological approach is the use of a laser level.
You should be aware that even a perfectly prepared surface may not save the oven from cracking. Cracks can be caused by:
- excessive overheating;
- incorrectly executed bunch of bricks during the construction of the furnace;
- different thickness of the inter-brick seam.
High-quality preparation of the base of the furnace surface will avoid its deformation and will firmly hold the correctly laid facing tiles.
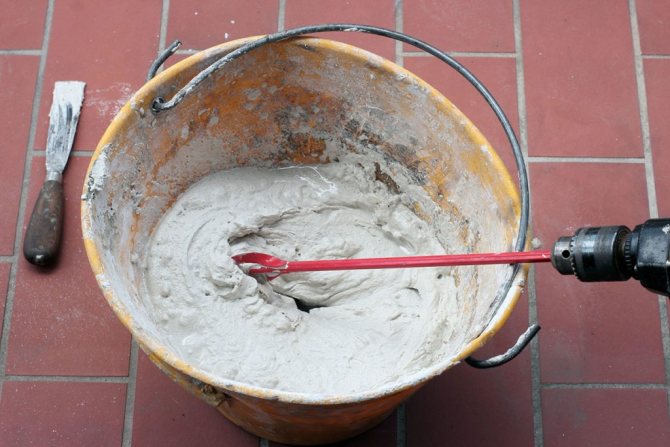
5.7 Preparing the adhesive
A solution for laying tiles is prepared in small portions for 10-15 minutes. before starting work. Moreover, the master stove makers do not use any devices for mixing, the work is done by hand.
Related article: Fuel-free generators or how they deceive us